
DIY Ducky and Bunny Costume

This post may contain affiliate links.
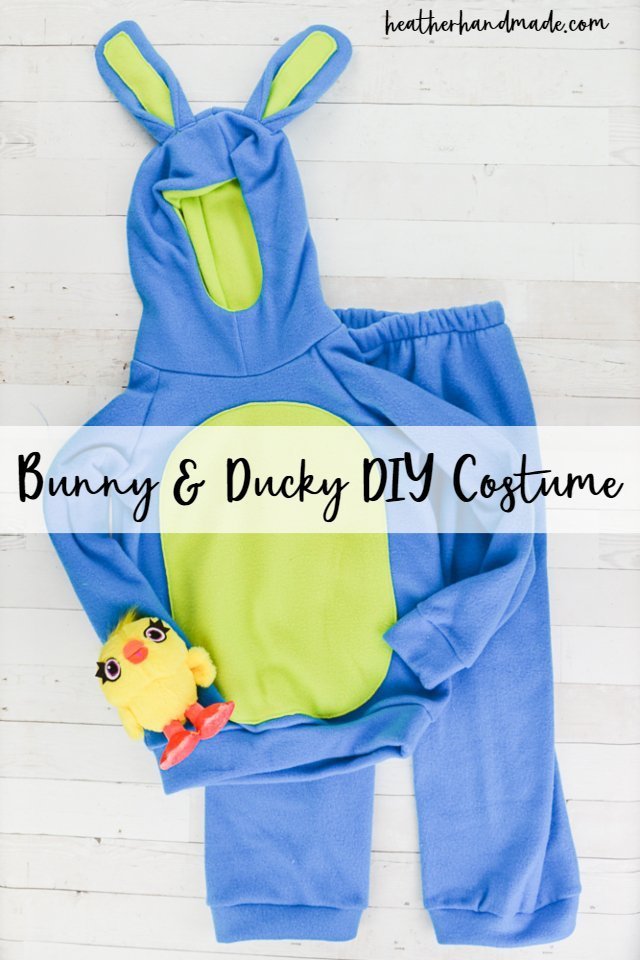
Make a DIY Bunny and Ducky Costume from Disney’s Toy Story 4 that is warm for Halloween night. Make the bunny part of the costume and add ducky to the sleeve.
Some of the great characters of the latest toy movie is Bunny and Ducky. They are so funny, and I love that they are stuck together. I thought it would be the perfect warm costume for a boy who wants to be funny for Halloween.
I love making costumes every year so don’t miss all the other ideas I’ve done!
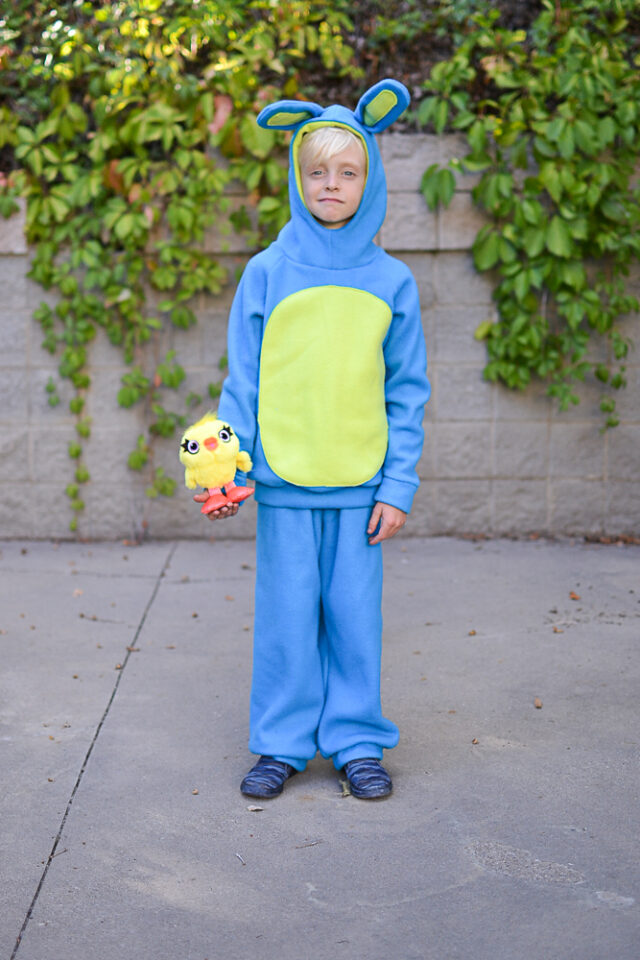
I used free sewing patterns for both the sweatshirt and the pants which helped keep the cost down of this costume. Then I added the ears, the tummy, and the duck. The style of the hood is great to stay right by my son’s face.
I used the free raglan sweatshirt pattern and graded it up to a size 8. Then I made free sweatpants patterns* in size 8. Another great pattern that would work is the Upcycled Pants Pattern. I love using free patterns to make stuff for my kids. Here’s a list of free costume patterns for kids!
I love fleece in the winter because it’s so warm. You can make these fleece slippers with your fabric scraps!
This costume could be made by adding details to a sweatshirt and sweatpants, but I wanted the ears to match the fabric of the sweatshirt. I also wanted all my green fabric to match.
I made a bunch of other costumes from the movie. I loved all the new characters! I made a Bo Peep costume, a Gabby Gabby costume, and a Duke Caboom costume.

DIY Bunny and Ducky Costume
supplies
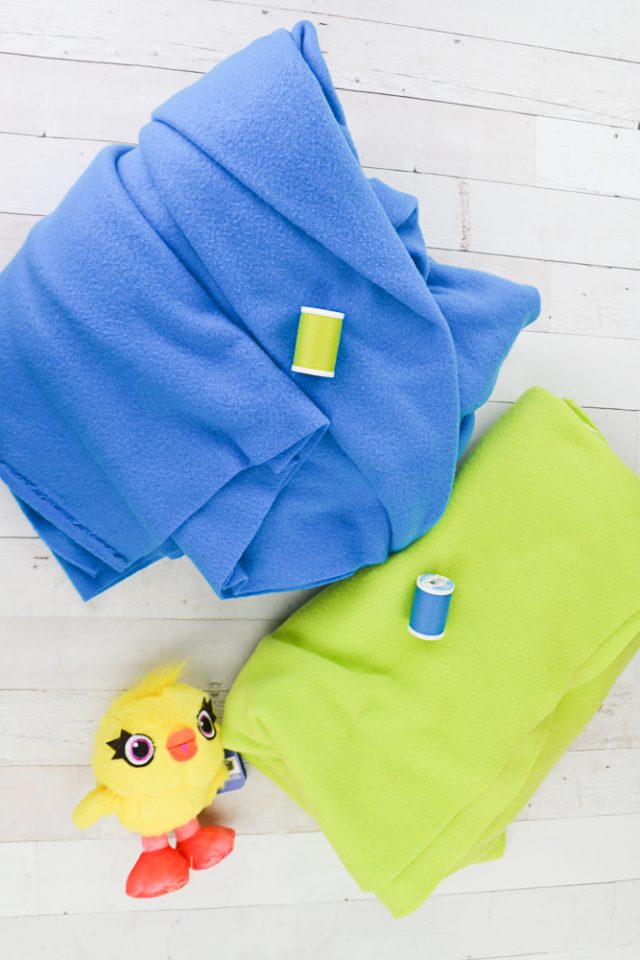
- Bright blue fleece*
- Lime green fleece*
- bright blue thread
- lime green thread
- heavyweight interfacing
- sewing tools
- Ducky stuffed animal*
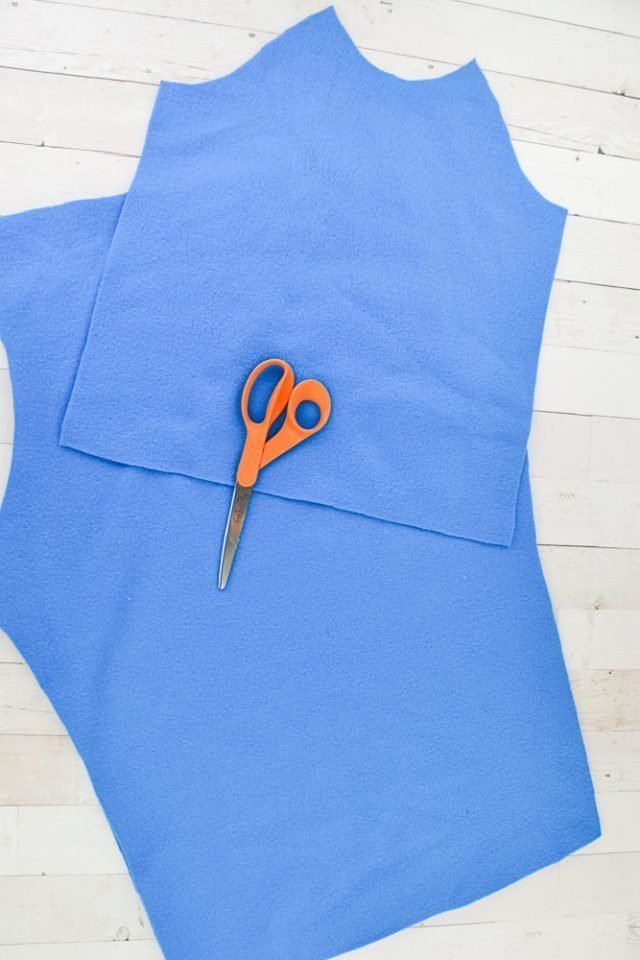
Cut the pants pieces out of blue fleece. Cut the sweatshirt pieces out of blue fleece except for the lining of the hood. (Cut out the tummy and bunny ears later.)
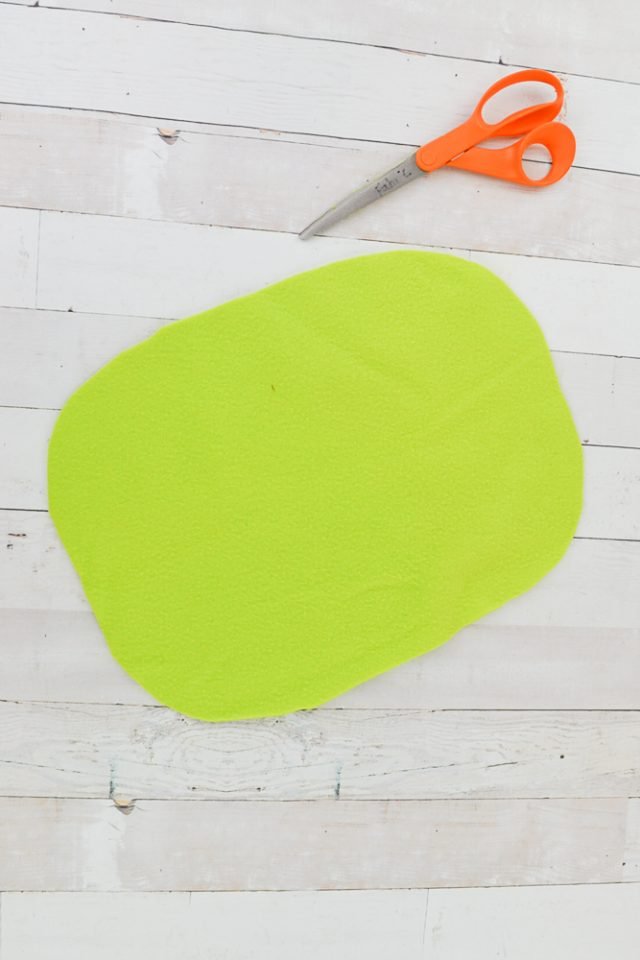
Using the front sweatshirt piece as a guide, cut a large green oval.
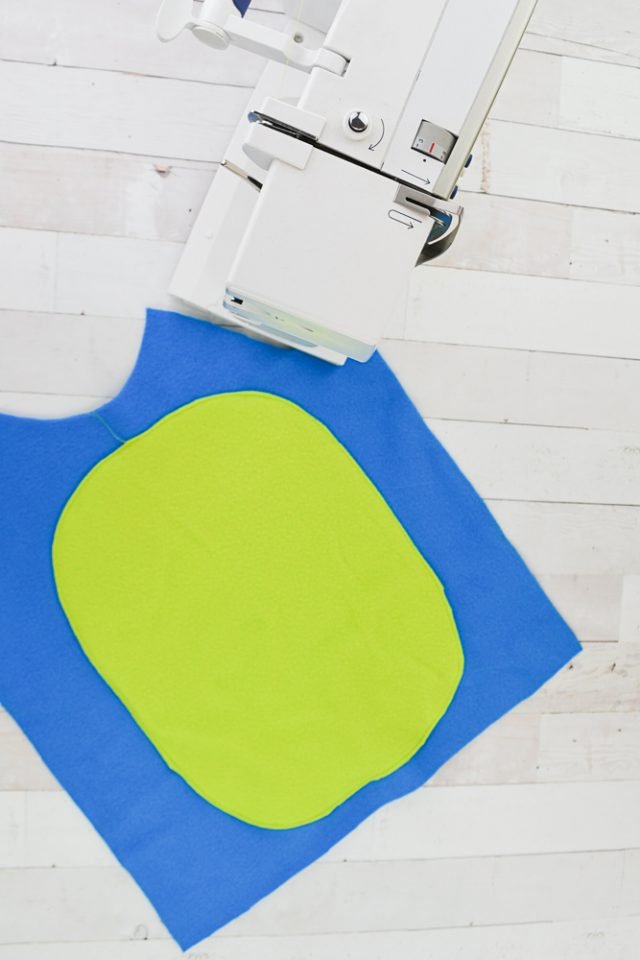
Sew the oval onto the front of the sweatshirt.
Sew up the pants and the sweatshirt using a zigzag stitch or a serger. Don’t attach the hood lining or the hood yet.

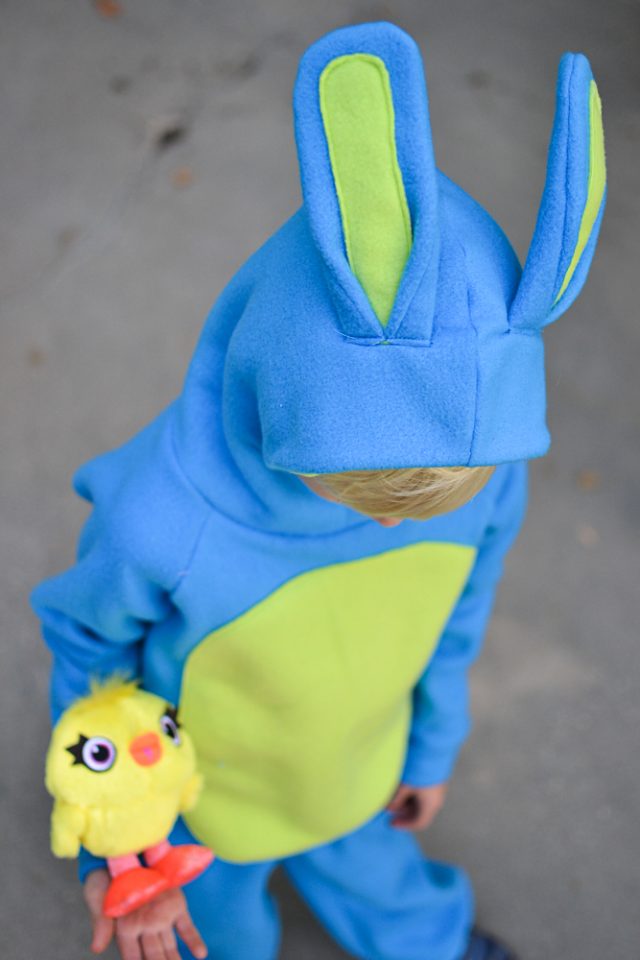
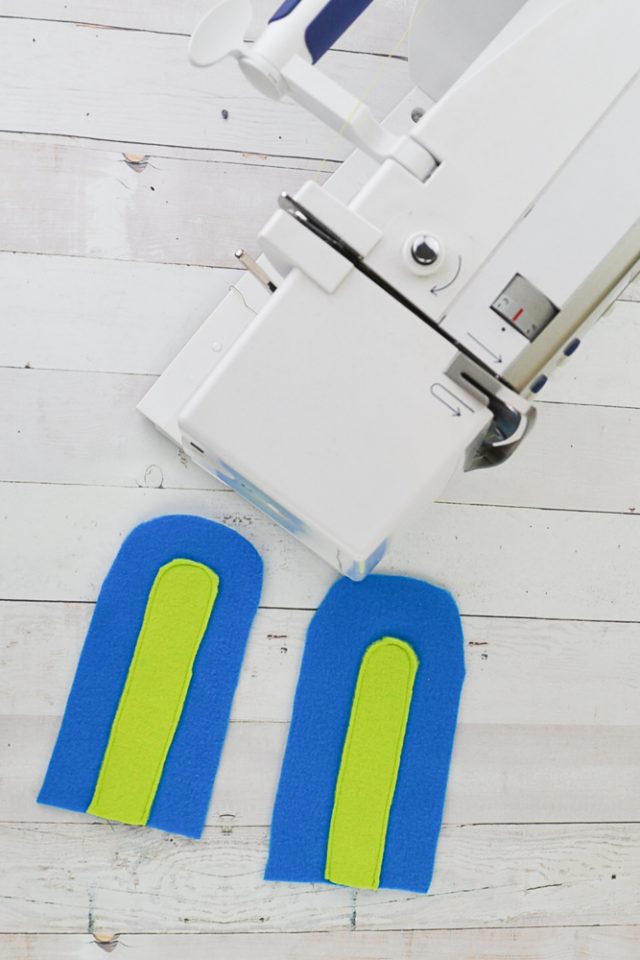
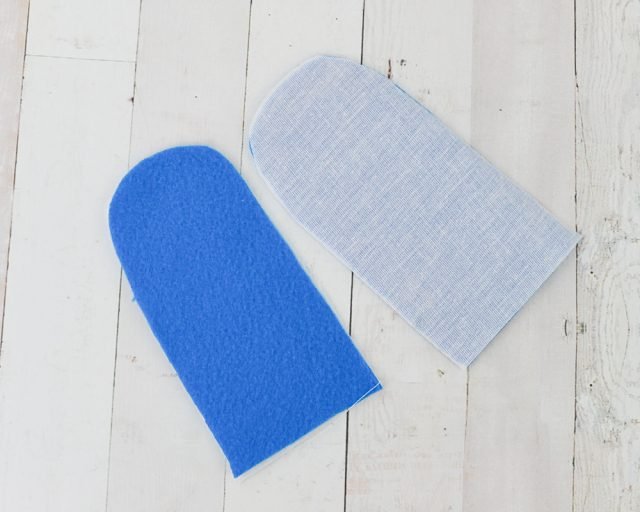
Cut out four blue bunny ears and two green inner bunny ears. The size of the ears depends on the size of the costume you are making.

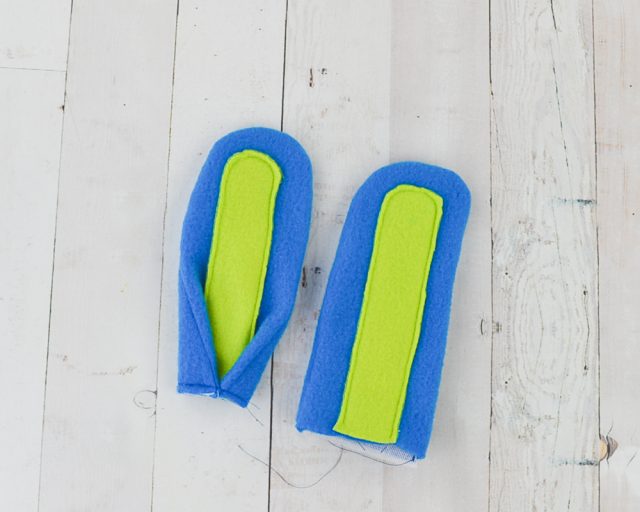
Sew each of the green inner ears to the center of one side of the blue ear.
Cut out the stiff interfacing the size of the ears. Cut two pieces. Apply the interfacing to the back of the blue ears.
With the blue ears right sides together sew around the curve of the ear with a 1/4 inch seam allowance. Trim and notch the curves.
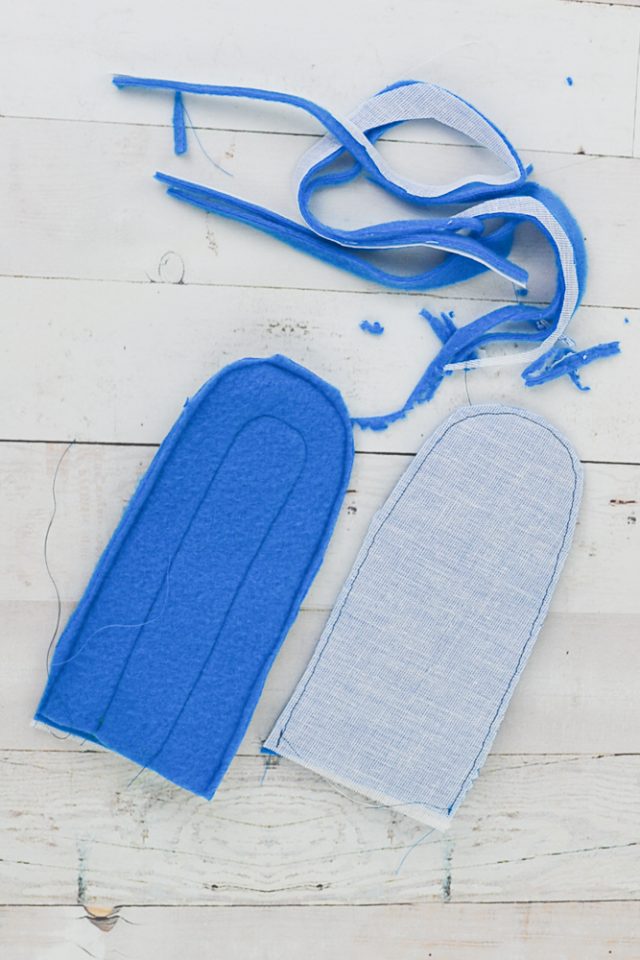
Bring the bottom edges of the ears in to meet in the middle and sew in place. Trim any excess so that it’s a straight edge.
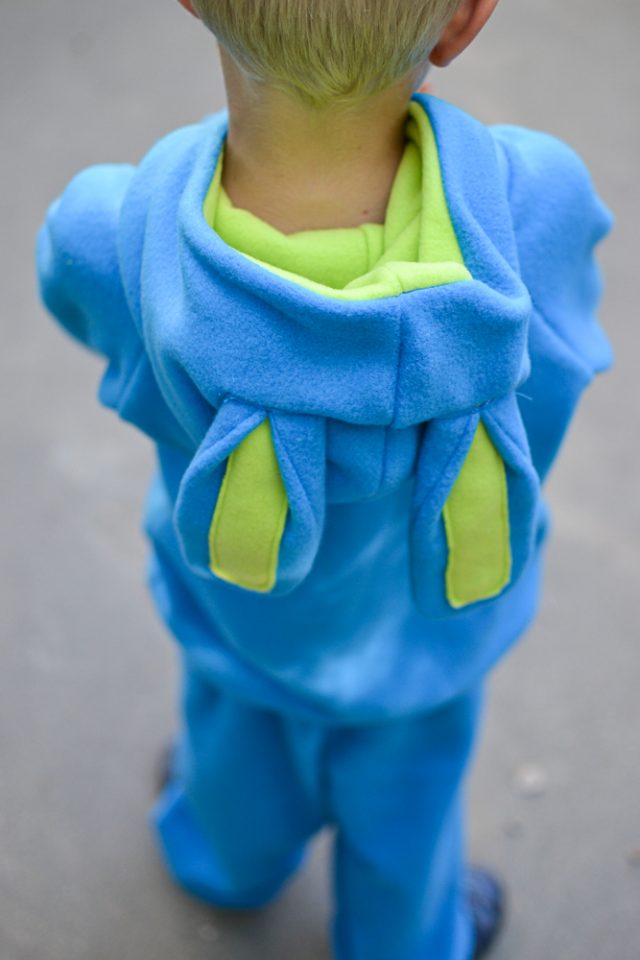
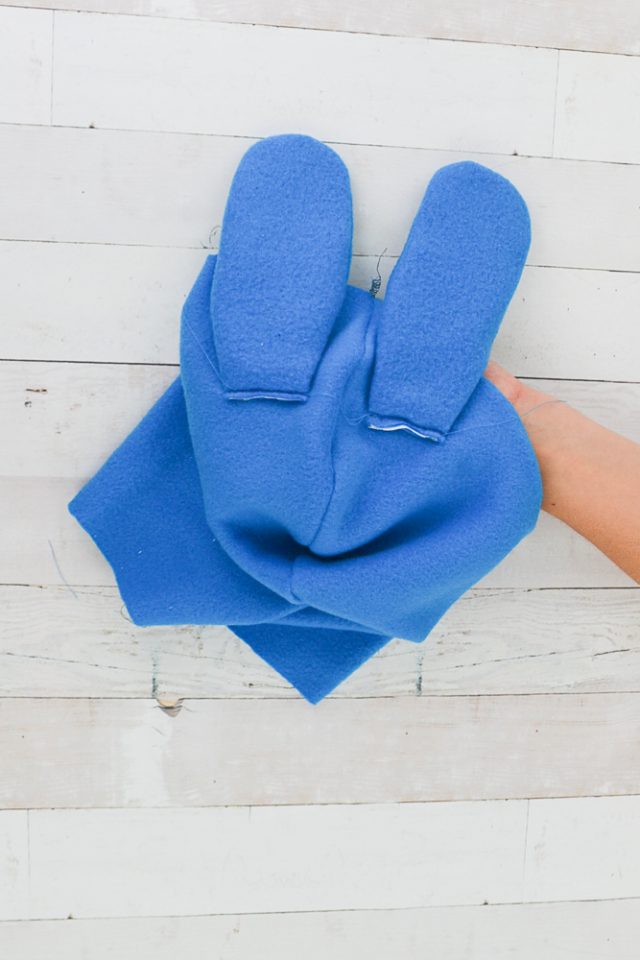
Pin the ears face down on the hood of the sweatshirt. The ears should be facing the front of the hood. Sew the ears in place.
Then flip the ears towards the back of the sweatshirt (the green part should be facing up). Sew them in place again.
Finish sewing the hood and attach it to the sweatshirt.
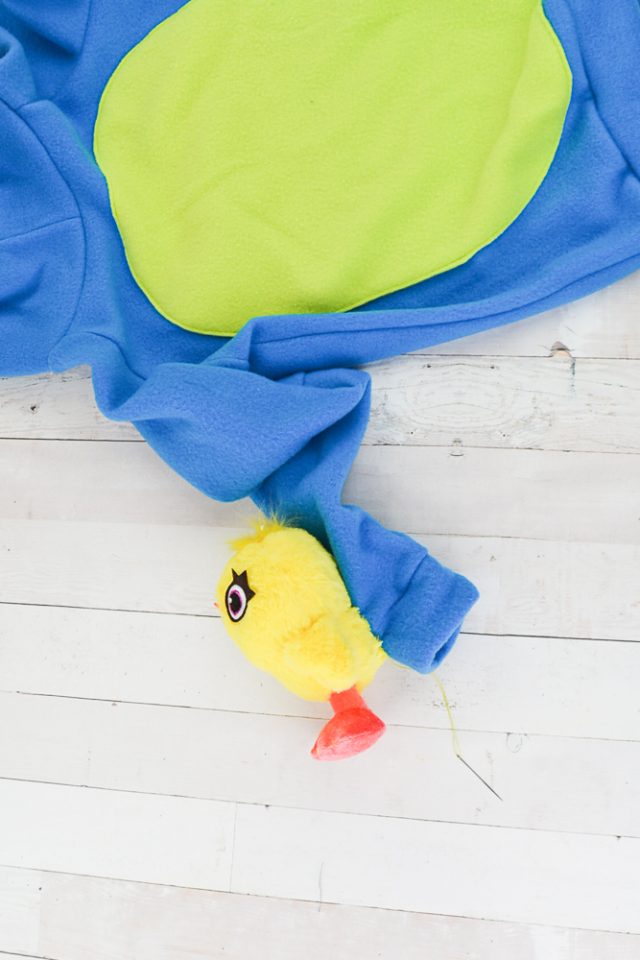
Hand sew the ducky onto the right sleeve of the sweatshirt. I just did a couple of large “X’s” to keep it in place.
Add blue shoes and a black make-up nose to finish off the costume.

If you make something using this sewing project, I’d love to see! Please share it on social media with the hashtag #heatherhandmade and tag me!

I believe small sewing moments can create great joy. Find your own “right” way to sew. -Heather