
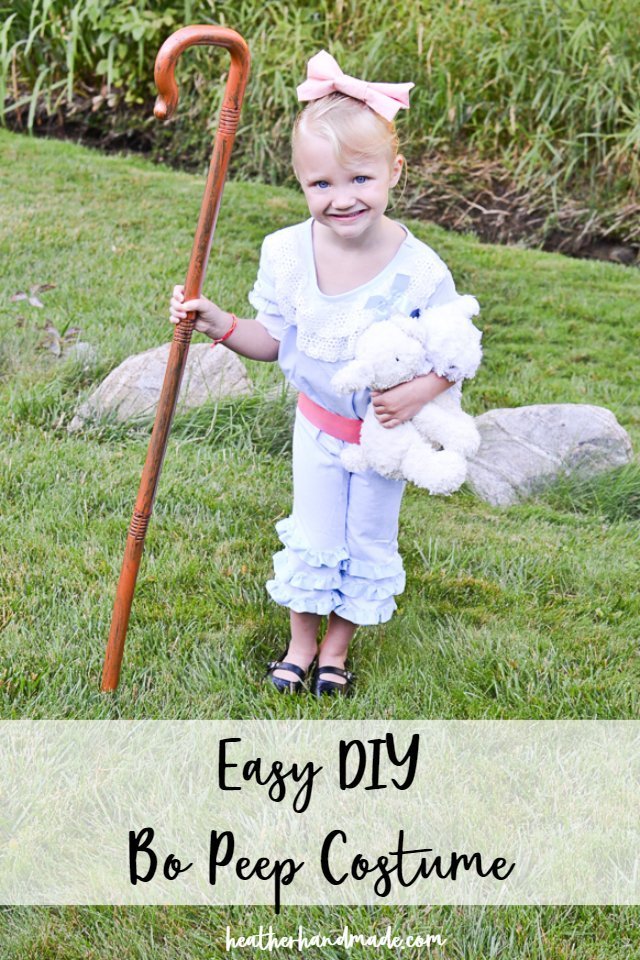
DIY Bo Peep Costume inspired by Toy Story

This post may contain affiliate links.
Make this easy DIY Bo Peep costume from Disney’s Toy Story 4! It’s cute and easy, and can be made for children or women. It’s great for a Halloween costume or even dressing up for Easter.
My daughter has blonde hair so when I saw Bo Peep I knew it would be a great costume for her. I didn’t want to make the whole costume from scratch because costumes are only worn a couple of times. Luckily, I have an easy DIY so you can make a Bo Peep costume too!
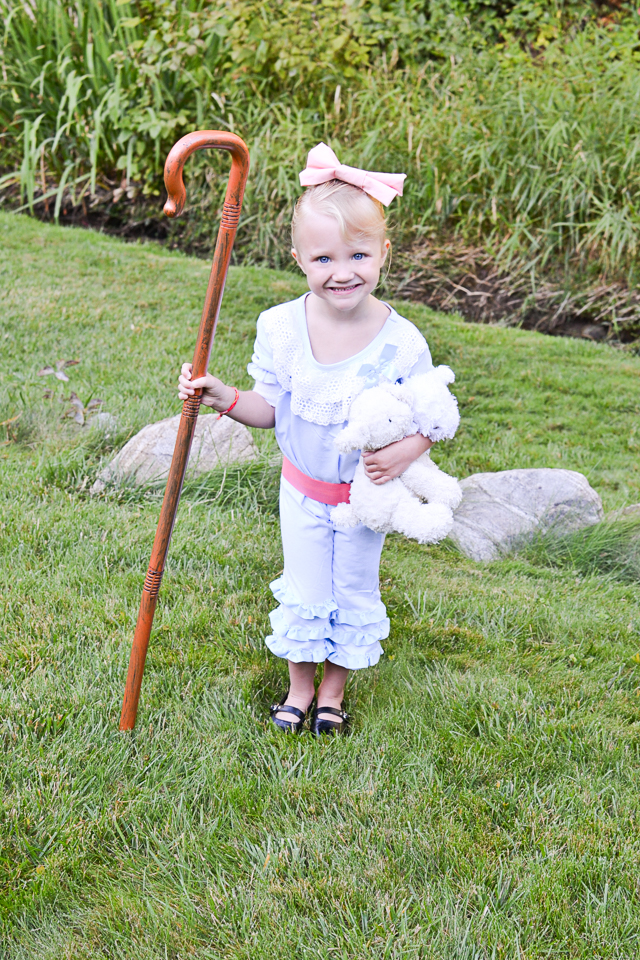
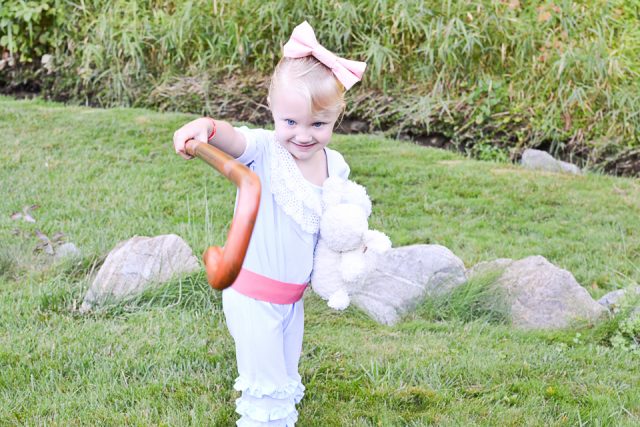
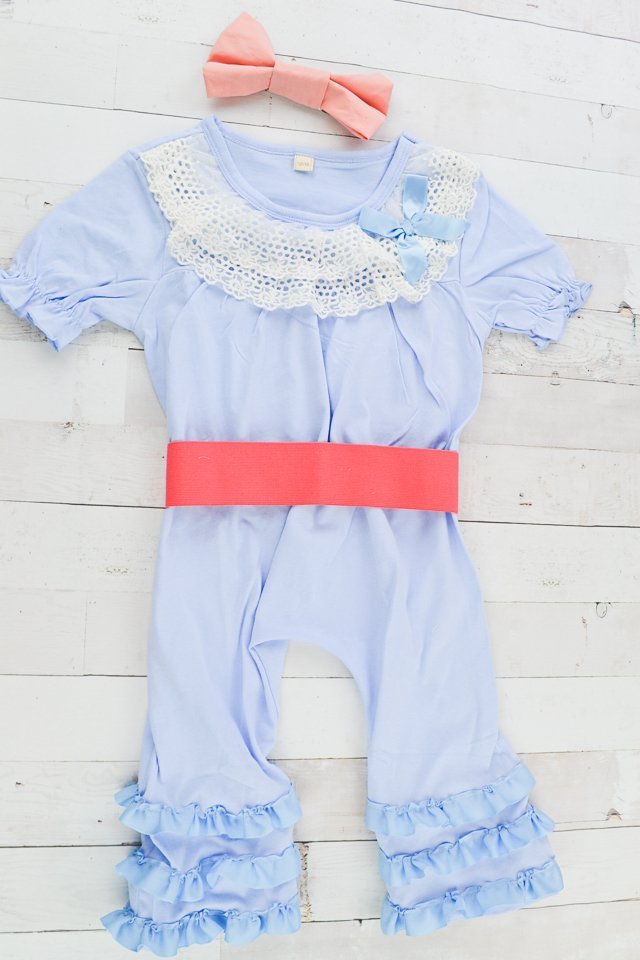
Bo Peep from the fourth movie is essentially wearing the same thing as the first movie, she just doesn’t wear the skirt as a skirt anymore. She has the same black shoes, the shepherd’s crook, pants with ruffles, and her sheep. The new Bo Peep has a pink bow instead of a bonnet and a pink belt.
The villain in this movie is sort of Gabby Gabby which is a costume I made for my other daughter! I also made a Ducky and Bunny costume and a Duke Caboom costume. I love the new characters.
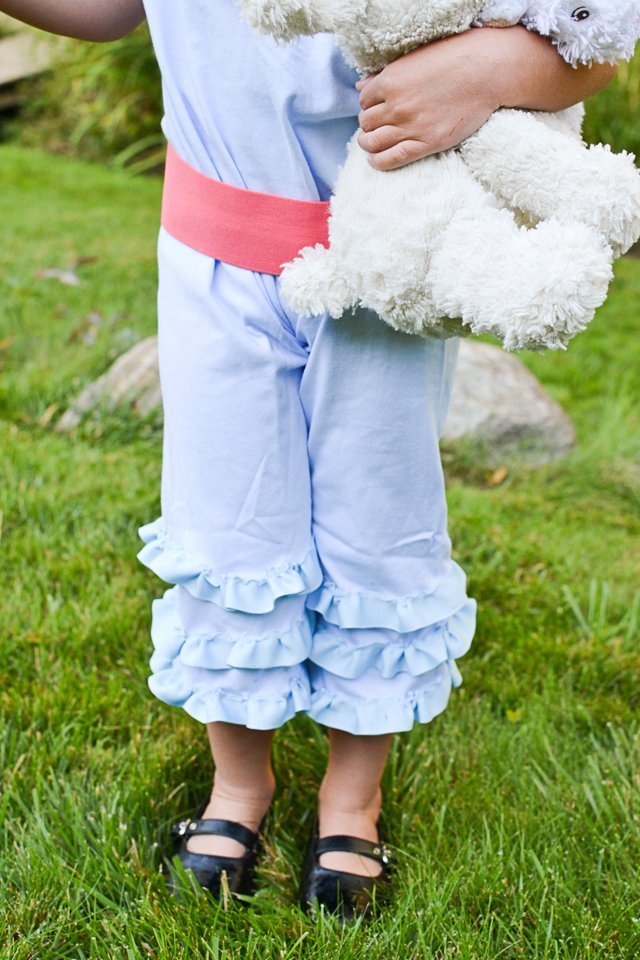
I think the romper with the ruffled legs is my very favorite part. I love the little detail and how it looks when she runs around. We also have two stuffed lambs which we added to the costume for the perfect accessory!
I’m so excited for Halloween costumes this year. It’s so fun when a movie comes out with a bunch of new characters, and I get to create those Halloween costumes in a really easy way so you can make them too.
Easy DIY Bo Peep Costume
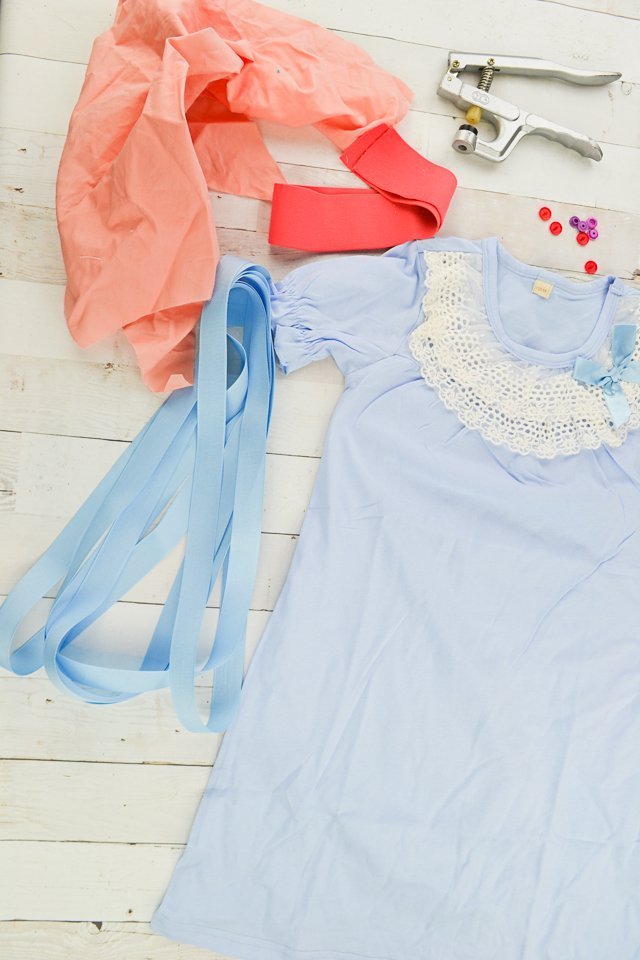
Supplies
- Blue maxi dress (dress 1*, dress 2*, dress 3*) – Almost any light blue dress will work
- 2 inch wide pink elastic*
- Fat quarter of pink fabric
- Light blue grosgain ribbon*
- Shepherd’s crook*
- Black mary jane shoes – I thrifted mine
- Alligator clip
- Kam snaps and snap pliers
- Sewing supplies
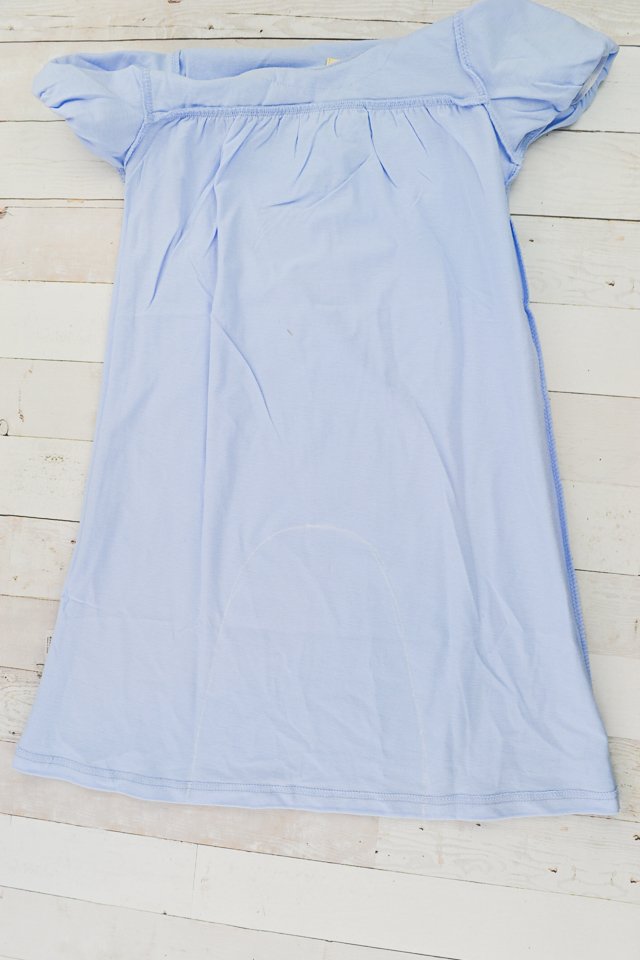
Make sure that the neckline of the dress is stretchy enough to be pulled from the feet up past the shoulders.
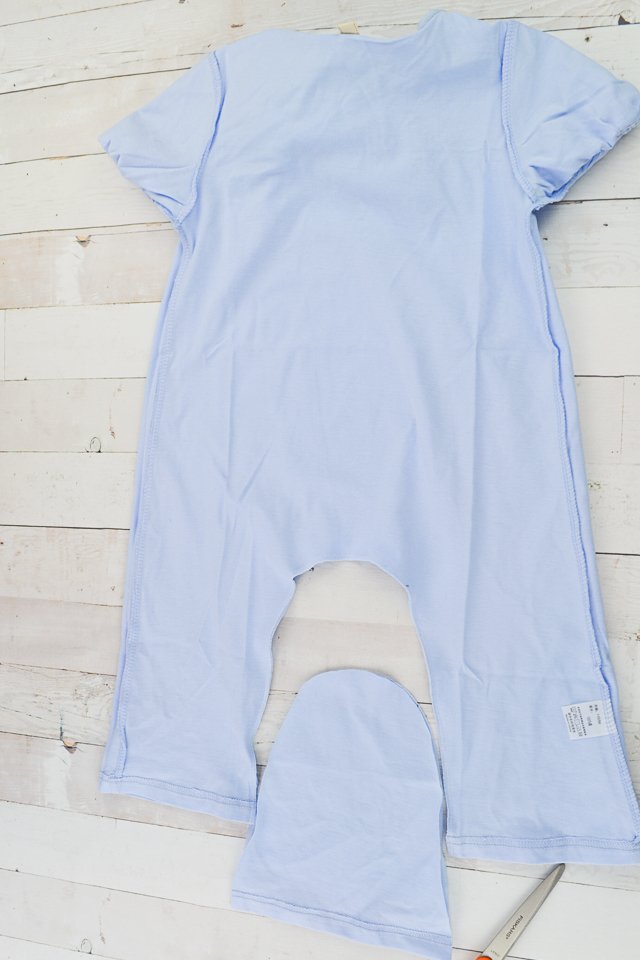
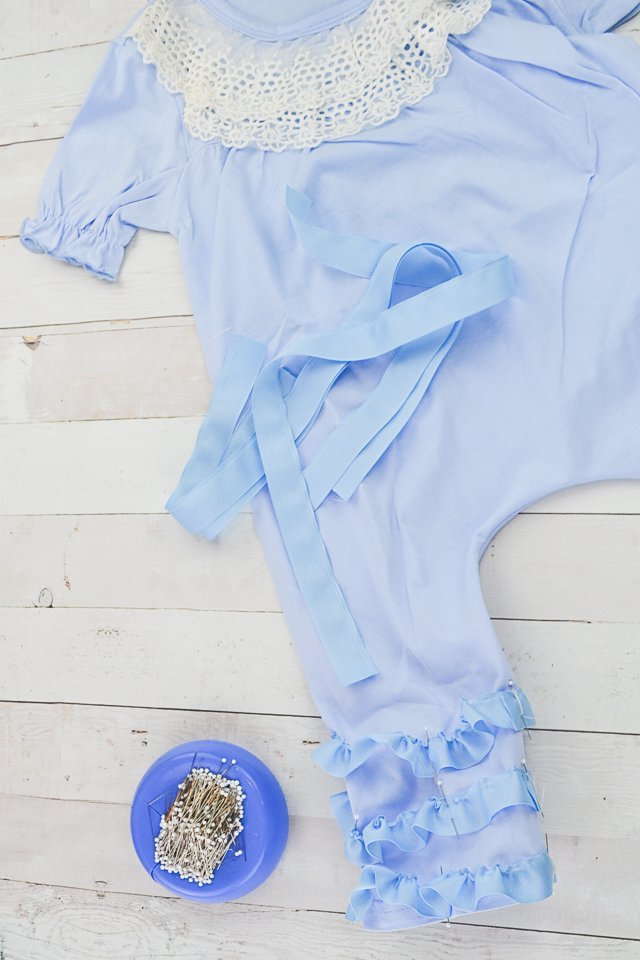
Draw a curved inseam on the inside of the dress There needs to be enough space for the legs, so don’t make it too tight.
Sew along the line with a zigzag stitch. Trim the inner fabric out to create the romper.
Cut 6 pieces of ribbon that are twice the circumference of the leg.
Sew a basting stitch along one side of each ribbon piece.
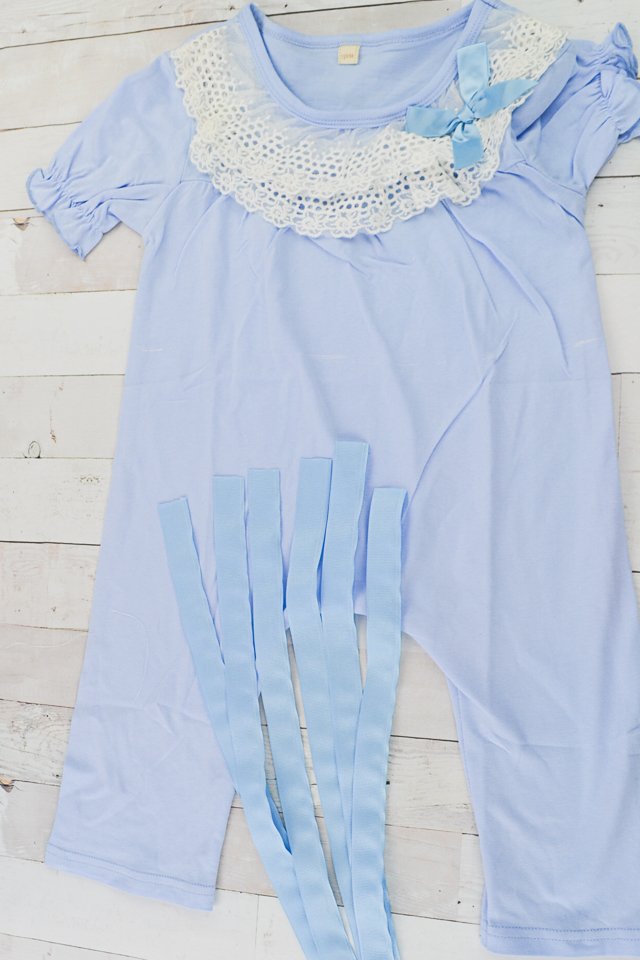
Pull the threads to gather the ribbon. Gather each ribbon until its the same circumference of the romper leg.
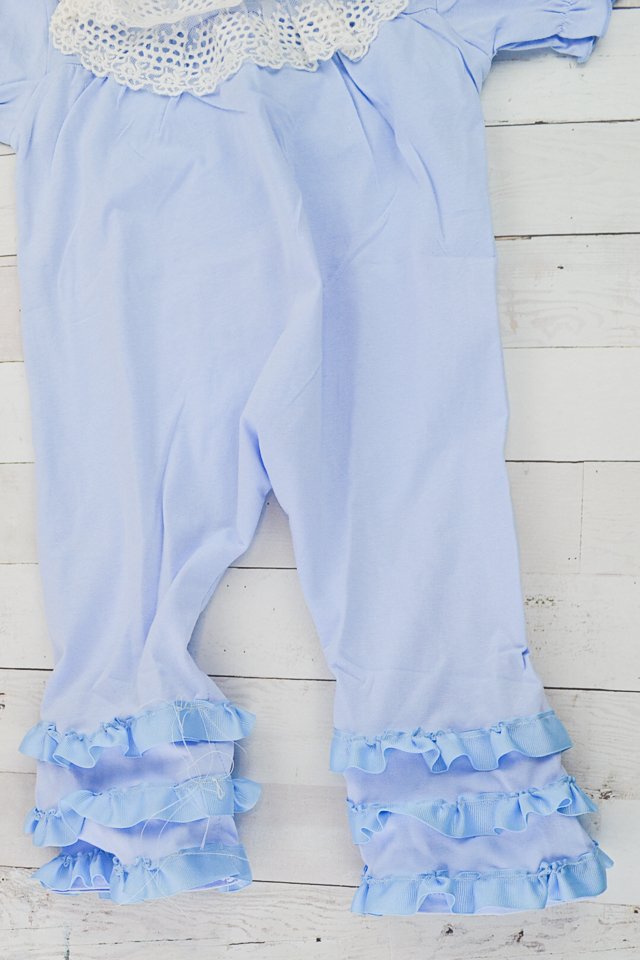
Pin three gathered ribbons to each leg. I left 1 inch in between each ribbon.
Sew the gathered ribbon to each leg. Use a straight stitch and be careful to keep the gathers even.
Trim all the threads.
Measure the waist for the elastic. Fold one short side over 1/2 inch over and pin. Fold the other short side over 1/2 inch, but it should go the opposite side than the first.
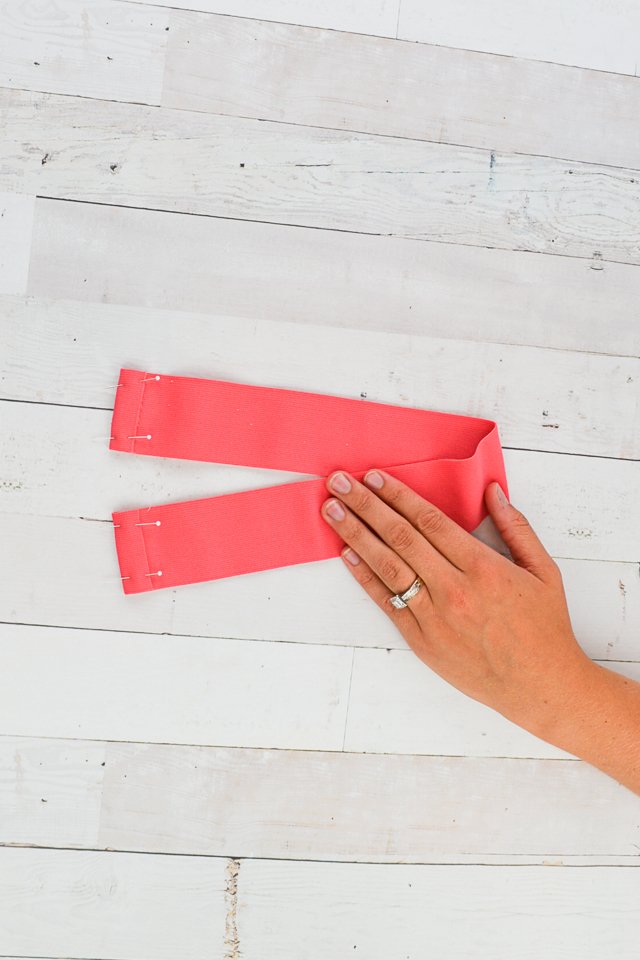
Sew a rectangle on each folded edge to keep it in place.
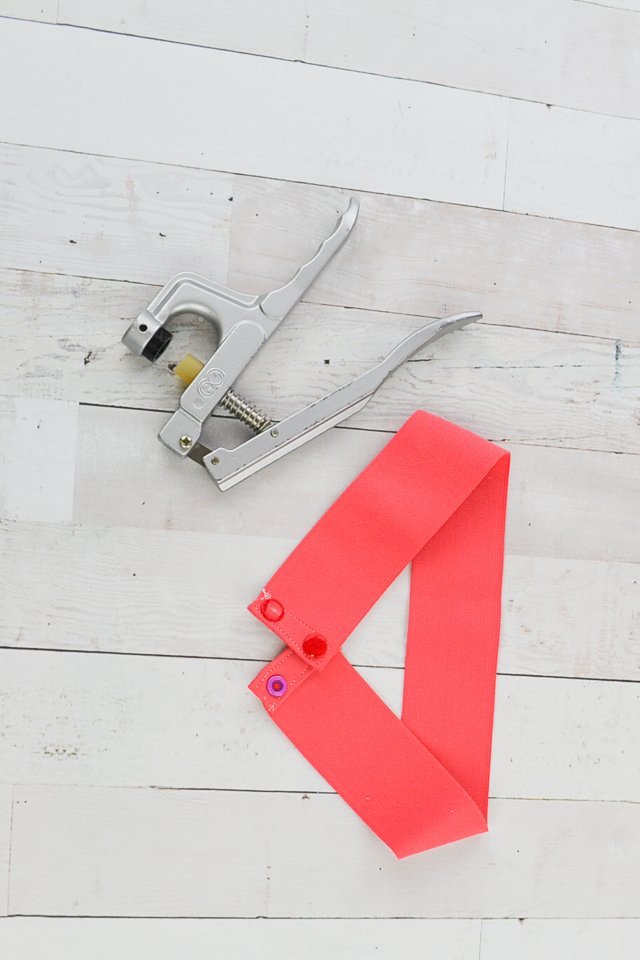
Install two plastic snaps on each side of the belt.
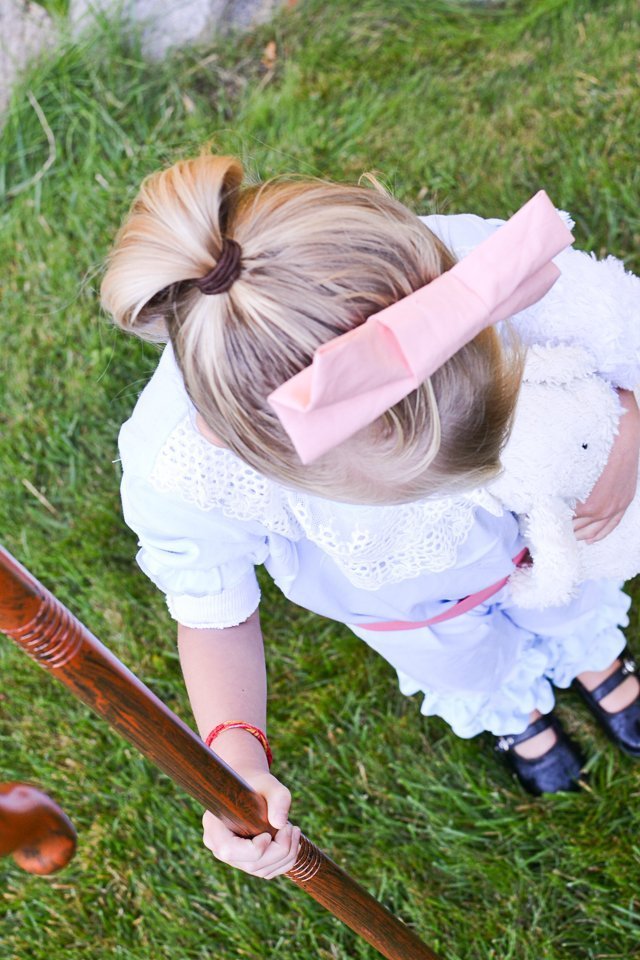
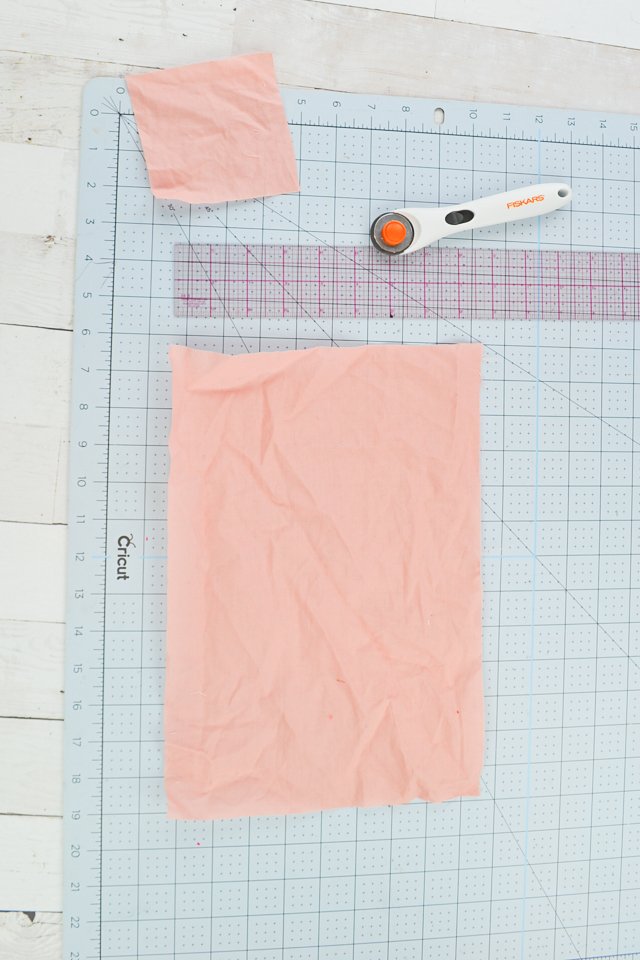
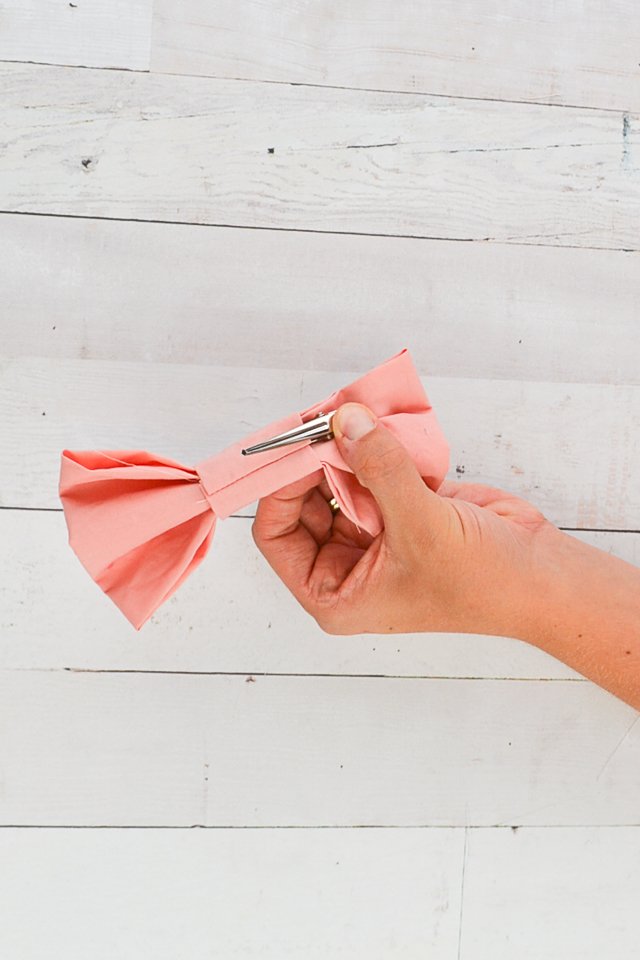
Cut two pieces of fabric for the large bow: a large rectangle 13 inches by 9 inches and a square 4 inches by 4 inches.
With right sides together sew the long edges of the large rectangle together. With right sides together sew two of the opposite edges of the square together. Turn both of them right side out.
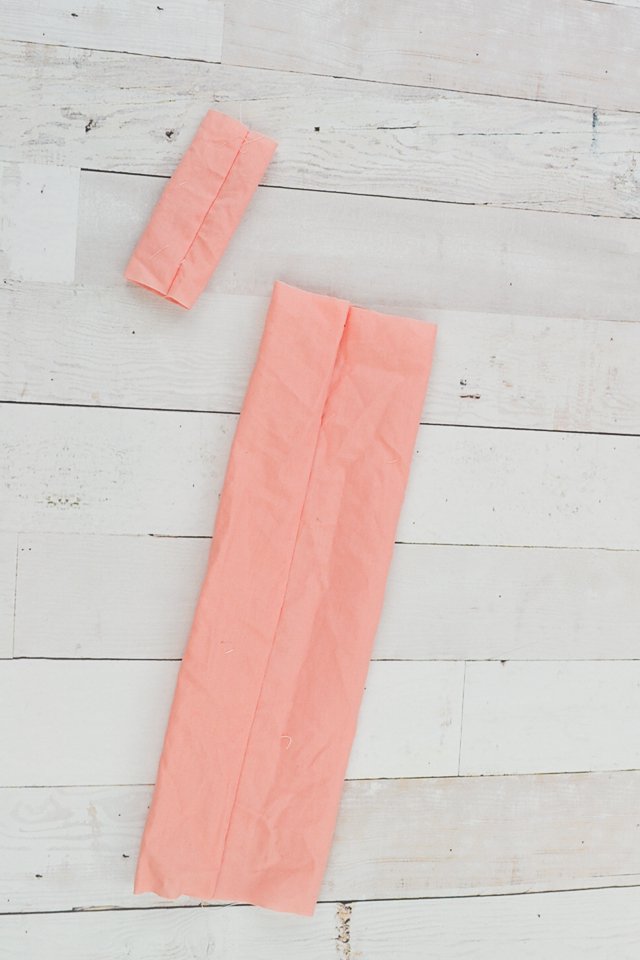
Fold the short edges together of the large rectangle matching right sides together. Do the same to the square.
Sew the short edges together of each.
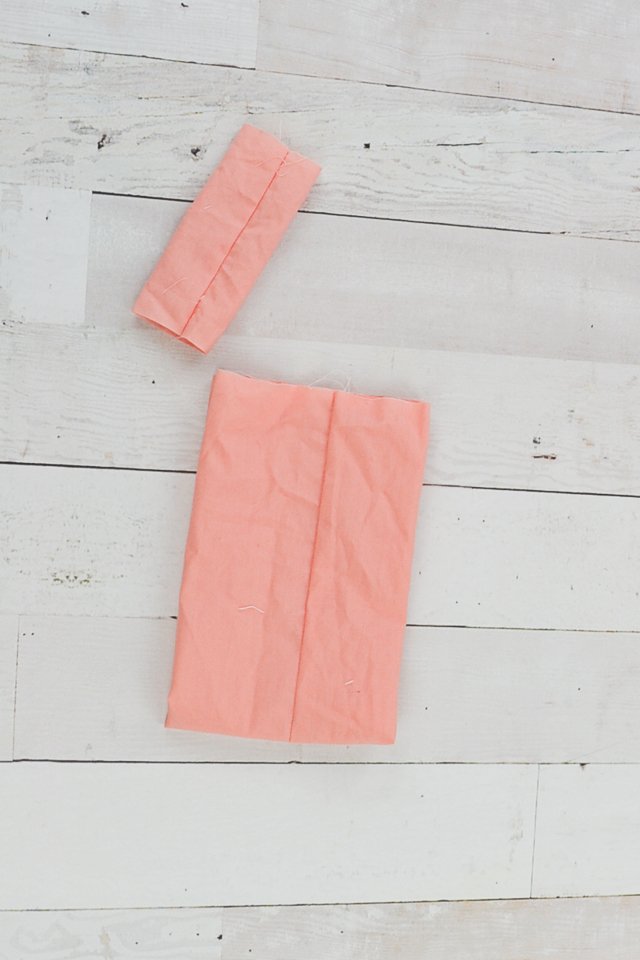
Turn the tubes right side out. Pleat the large rectangle into a nice looking bow.
Slide the small tube over the large tube. Adjust all the seams to the back of the bow.
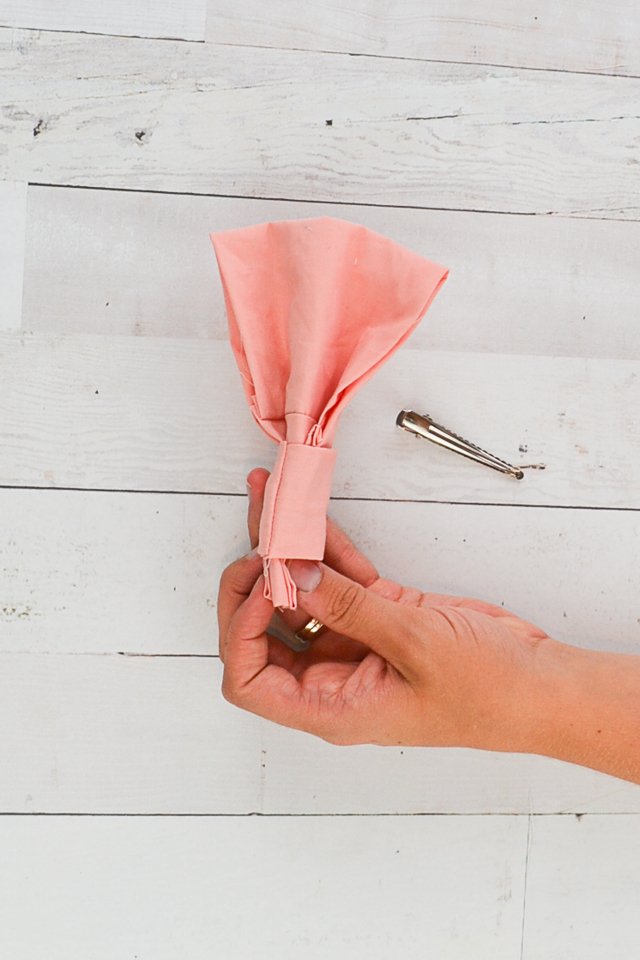
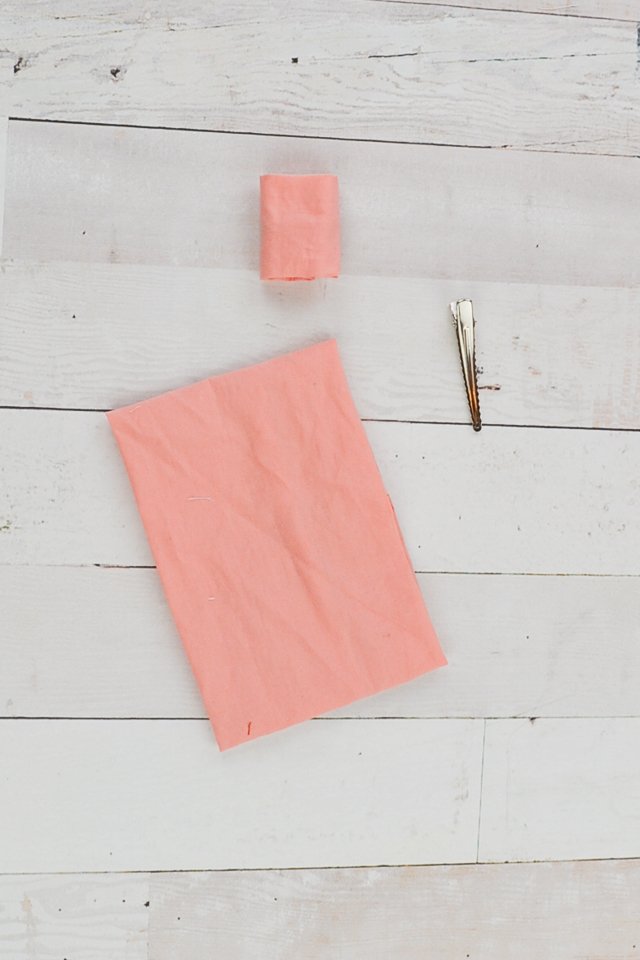
Slide an alligator clip into the back of the bow.
To assemble the costume put the romper on, add the belt, put the bow in the hair, add black shoes and a shepherd’s crook.
If you make something using this sewing project, I’d love to see! Please share it on social media with the hashtag #heatherhandmade and tag me!

I believe small sewing moments can create great joy. Find your own “right” way to sew. -Heather