How to Sew Curves: Clipping vs Notching

This post may contain affiliate links.
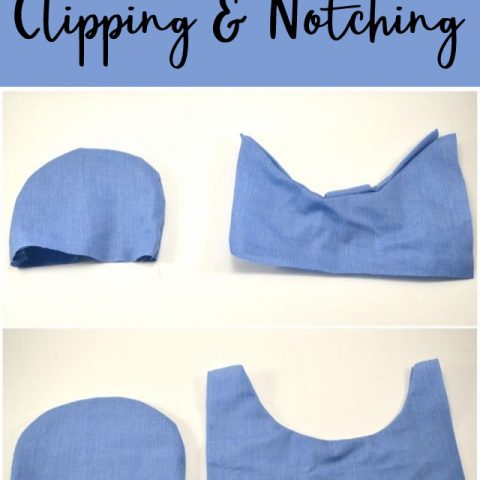
Learn how to sew curves to make them look good and why clipping and notching are important on the inside of the fabric and garment.
When I started sewing I didn’t know how to make curves look nice. I didn’t realize the difference between clipping and notching. Now that I’ve sewn lots of insides curves and lots of outside curves, and over time I’ve learned how to make those curves look good.
I’ve made plenty of sewing projects where I didn’t notch or clip enough so my curve doesn’t lay flat. Once you learn how to clip and how to notch sewing curves will be a breeze and will always look professional! It’s not hard to learn how to sew curves!
Learning how to sew? These posts can help:
- Sewing 101 for beginners
- Basic sewing stitches
- Sewing books for beginners
- Beginner sewing projects
- Best sewing machines for beginners
Learn how to sew curves and circles
I remember learning about how to sew curves in one of my first sewing college sewing classes. Up until then I had never learned how to make a sewn curve lie flat or look smooth.
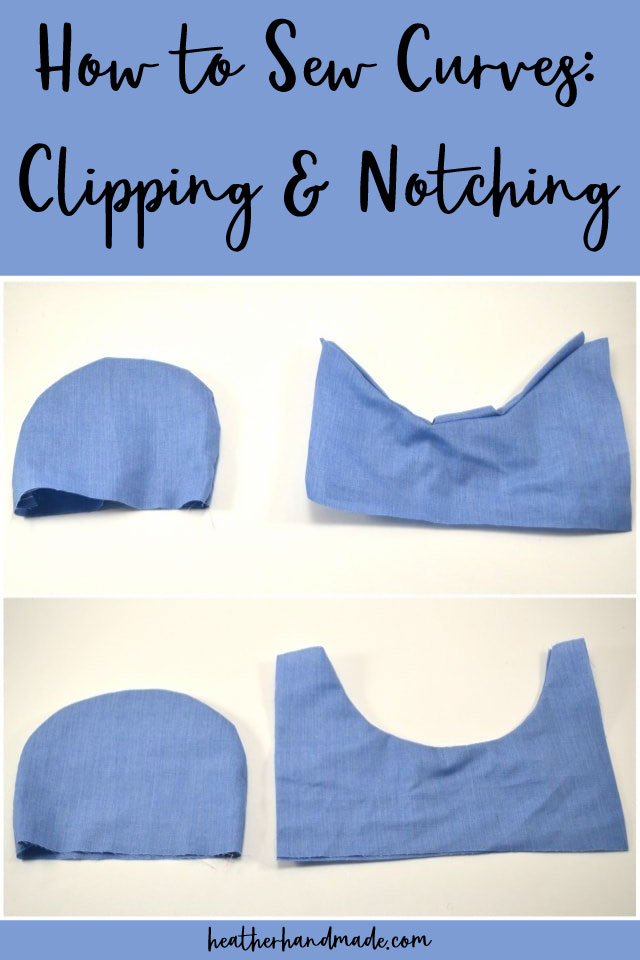
Since I didn’t understand the difference between an outside curve and an inside curve I definitely didn’t understand where I needed to clip and where I needed to notch.
The best tip for sewing curves is to sew slowly. Also, shorten the stitch length to make it easier to slowly change the direction as you sew.
How to Notch
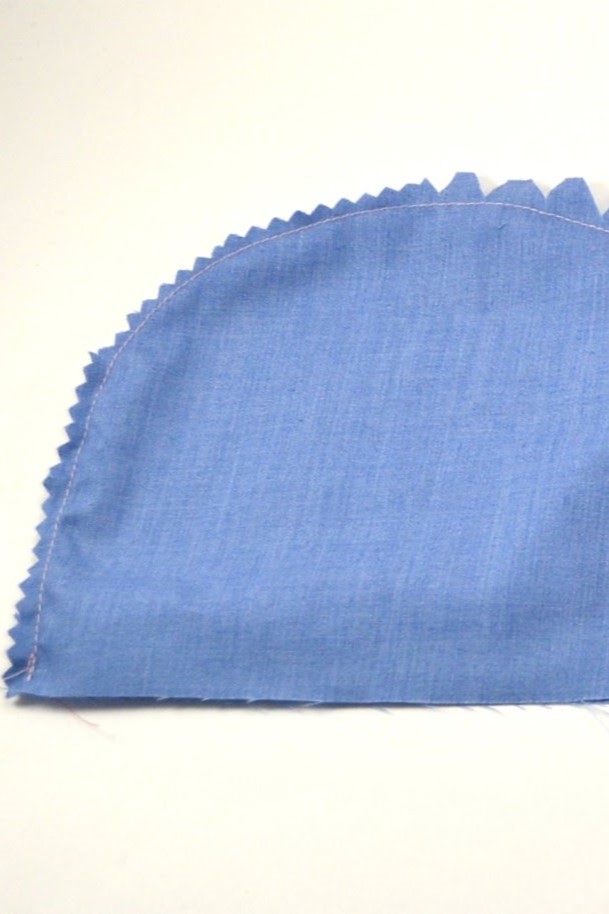
There’s actually two ways to notch and I’m going to show you both ways. Both have a place in the sewing world so you can choose where to use them.
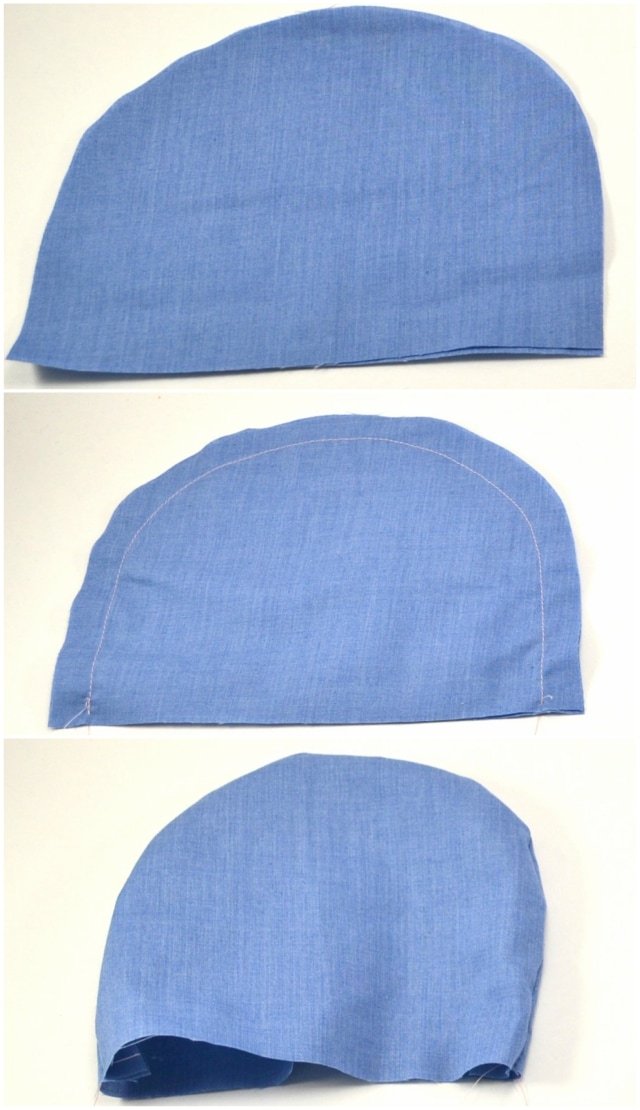
- When you have an outside curve, meaning the curve goes out and away from the main area of the fabric, you will need to notch.
- First you cut out your project and sew the seam allowance. I chose a light colored thread so you would be able to see my stitching.
- If you turn your project right side out there will be extra seam allowance bunched up inside which will make your curve poke out. It’s really hard to make the curve smooth even if you press.
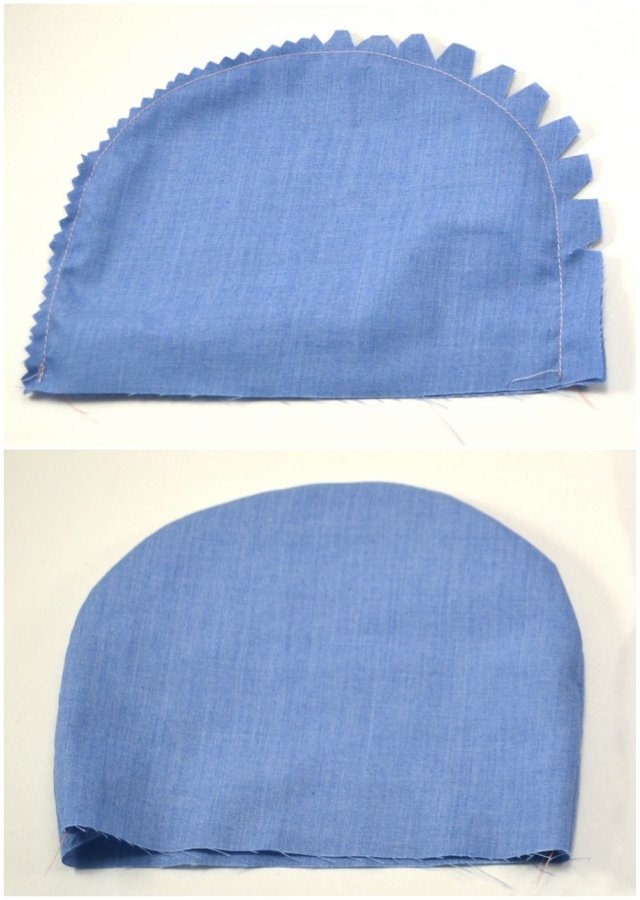
- Looking at the inside of your outside curve again, you can notch with scissors or notch with pinking shears.
- Pinking shears work best on lighter weight fabrics that don’t fray a lot and don’t have a lot of layers.
- Using scissors to cut little triangles out of the fabric works better on lots of layers, thicker fabrics, and heavier fabrics.
- Once your finish notching and turn it right side out the curve looks smooth and can easily be pressed flat.
How to Clip
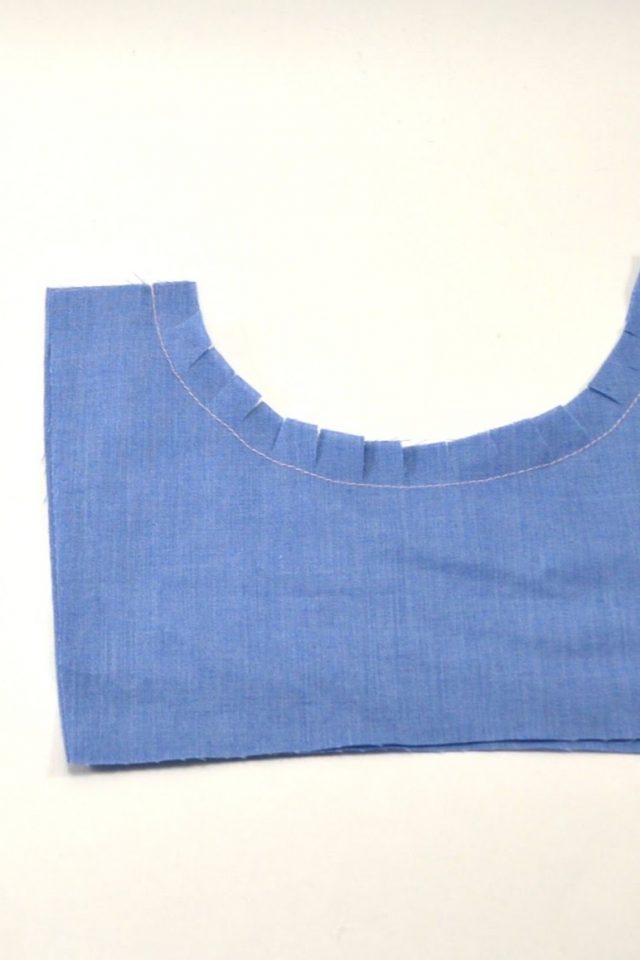
Clipping is one of the most satisfying parts of sewing. I love clipping and seeing the transformation on an inside curve. Clipping is most often used on necklines to make them lie flat. (I clipped the neckline of this tencel woven tee.)
- When you have an inside curve, meaning the curve goes into the main area of the fabric, you will need to clip.
- First you cut out your project and sew the seam allowance. I chose a light colored thread so you would be able to see my stitching.
- If you turn your project right side out the seam allowance will me shorter in length than the main area it is sitting inside. It will pull back and will never look good or lie flat.
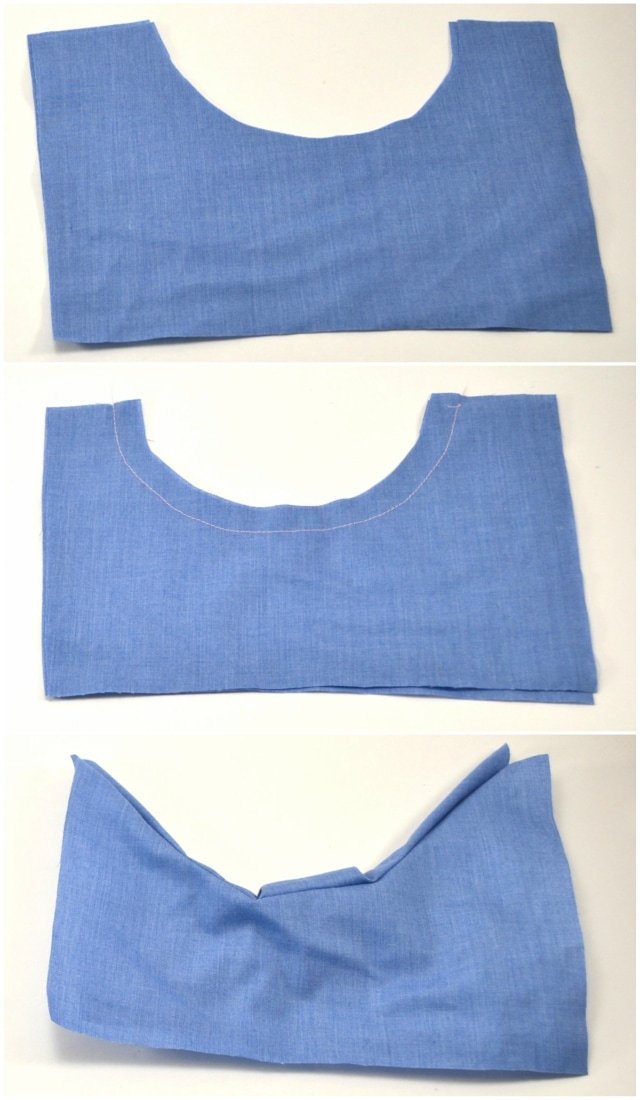
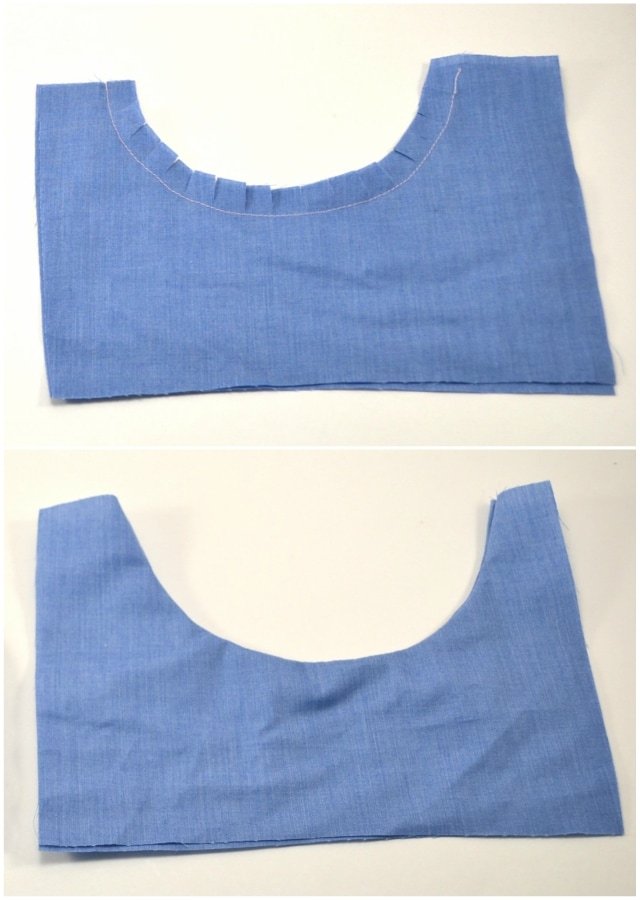
- Looking at the inside of your inside curve again, you clip with scissors little slits all along the curve.
- This creates space between the fabric when turned right side out. It makes it so the seam allowance can expand with the main area of the fabric.
- Once your finish clipping and turn it right side out the curve lays flat and can easily be pressed smooth.
Clipping vs Notching
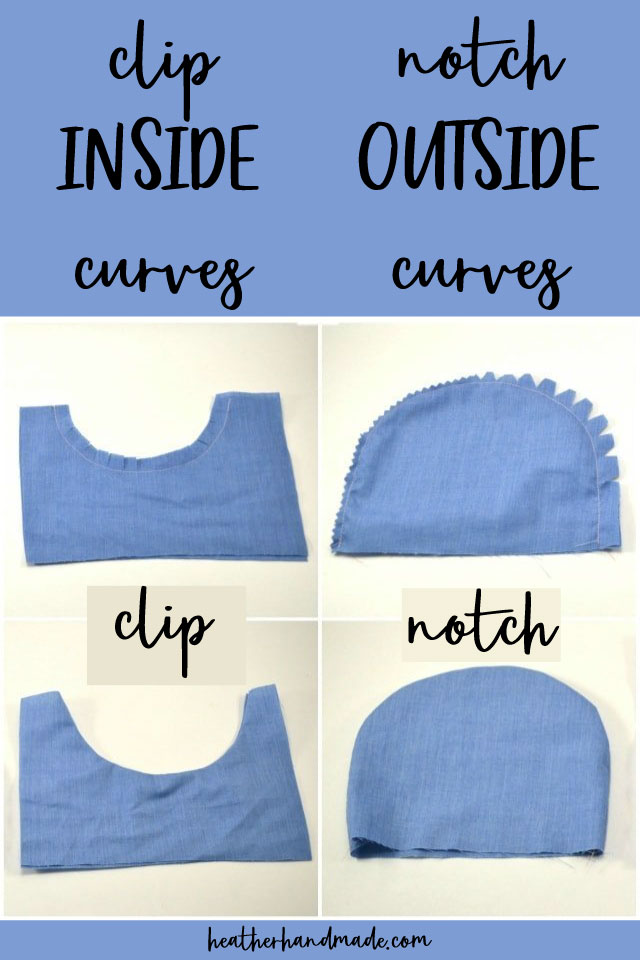
When do I clip and when do I notch? The best way to remember is to clip the inside curves and notch the outside curves.
How to Sew Curves
Learn how to sew curves to make them look good and why clipping and notching are important on the inside of the fabric and garment.
Materials
- Fabric
- Matching thread
Tools
- Sewing tools
- Sewing machine
Instructions
- The best tip for sewing curves is to sew slowly. Also, shorten the stitch length to make it easier to slowly change the direction as you sew.
How to Notch
- There's actually two ways to notch and I'm going to show you both ways. Both have a place in the sewing world so you can choose where to use them.
- When you have an outside curve, meaning the curve goes out and away from the main area of the fabric, you will need to notch.
- First you cut out your project and sew the seam allowance. I chose a light colored thread so you would be able to see my stitching.
- If you turn your project right side out there will be extra seam allowance bunched up inside which will make your curve poke out. It's really hard to make the curve smooth even if you press.
- Looking at the inside of your outside curve again, you can notch with scissors or notch with pinking shears.
- Pinking shears work best on lighter weight fabrics that don't fray a lot and don't have a lot of layers.
- Using scissors to cut little triangles out of the fabric works better on lots of layers, thicker fabrics, and heavier fabrics.
- Once your finish notching and turn it right side out the curve looks smooth and can easily be pressed flat.
How to Clip
- Clipping is one of the most satisfying parts of sewing. I love clipping and seeing the transformation on an inside curve. Clipping is most often used on necklines to make them lie flat. (I clipped the neckline of this tencel woven tee.)
- When you have an inside curve, meaning the curve goes into the main area of the fabric, you will need to clip.
- First you cut out your project and sew the seam allowance. I chose a light colored thread so you would be able to see my stitching.
- If you turn your project right side out the seam allowance will me shorter in length than the main area it is sitting inside. It will pull back and will never look good or lie flat.
- Looking at the inside of your inside curve again, you clip with scissors little slits all along the curve.
- This creates space between the fabric when turned right side out. It makes it so the seam allowance can expand with the main area of the fabric.
- Once your finish clipping and turn it right side out the curve lays flat and can easily be pressed smooth.
Clipping vs Notching
When do I clip and when do I notch? The best way to remember is to clip the inside curves and notch the outside curves.
Recommended Products
As an Amazon Associate and member of other affiliate programs, I earn from qualifying purchases.
If you make something using this sewing project, I’d love to see! Please share it on social media with the hashtag #heatherhandmade and tag me!

I believe small sewing moments can create great joy. Find your own “right” way to sew. -Heather

[…] problem. (I already have another one cut out and ready to sew, if I ever get to it.) I used these tips for sewing curves for the […]