
How to Upcycle Jeans Into a Tote Bag

This post may contain affiliate links.
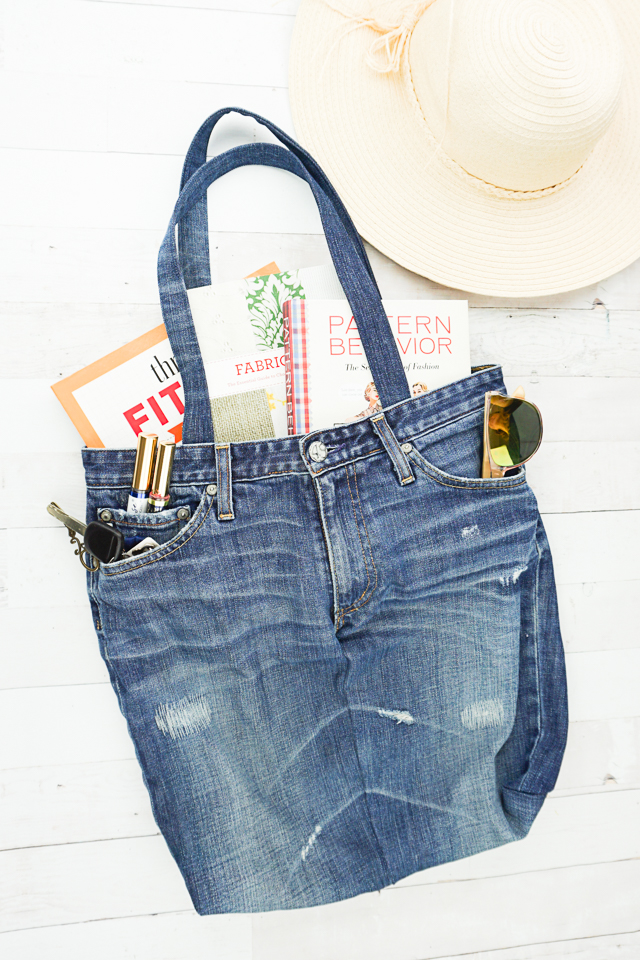
Learn how to upcycle jeans into a tote bag. This beginner sewing project is a quick and easy bag to sew, and it already has pockets!
I love making use out of something that doesn’t fit me anymore. I had these jeans that I’ve worn a lot over the last couple of years. I had altered them to fit me better, and they got a lot of use.
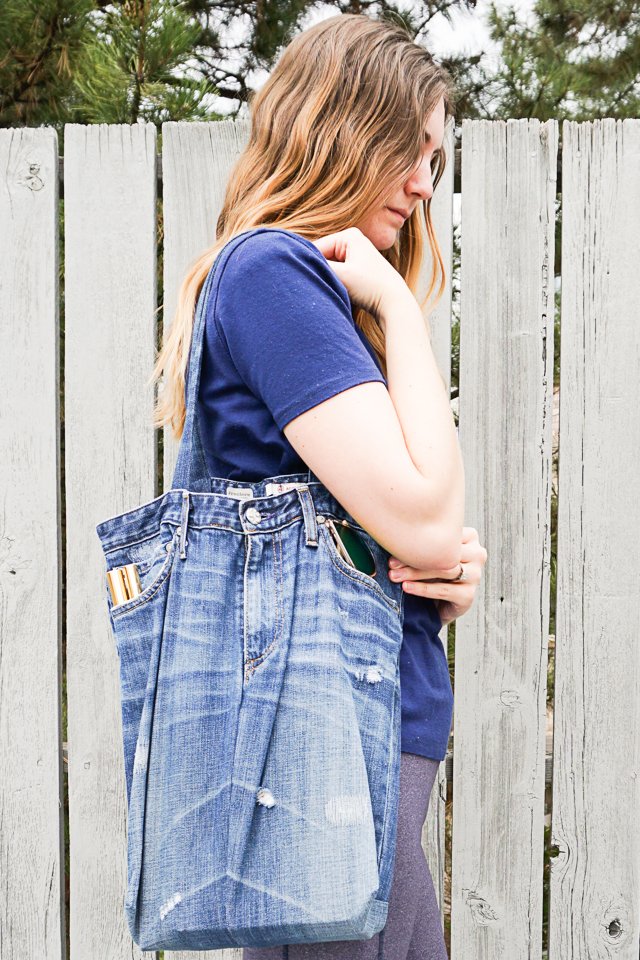
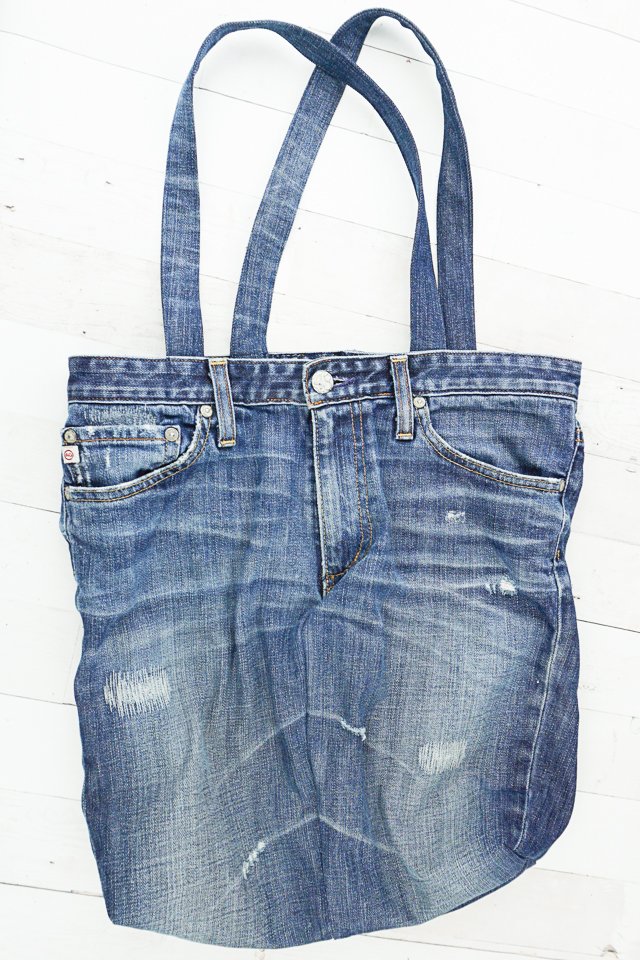
Well I’ve changed sizes and these jeans don’t fit me anymore so instead of being sad over the loss, I turned these jeans into a really fun tote bag that will get a lot of use.
I used to think the tote bags were a waste to make, and then I made two tote bags with leather handles and tote bags with fold up pockets. I use them all the time! Here’s a great list of DIY tote bags you can make!
We took them to the park and to the library and to church and on picnics. I love carrying a fiction book about sewing to read while my kids play. I realized that I could always use another tote bag.
You might not be going out and using them much right now, but it’s great to prepare for the future by using jeans that aren’t being worn at all. Here are some other great Ideas to upcycle jeans.
Do you enjoy making tote bags? I love making bags, but I still have a lot to learn. I love this tutorial and tote bag because there was hardly any sewing!
Once you make a tote bag with the top of the jeans you can make upcycled jeans fabric baskets from the hems!
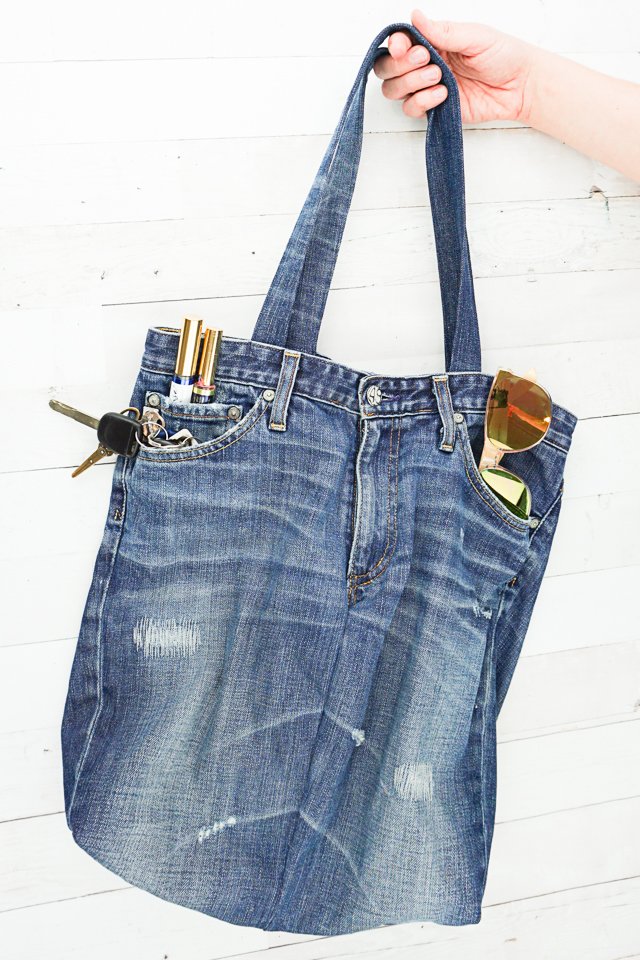
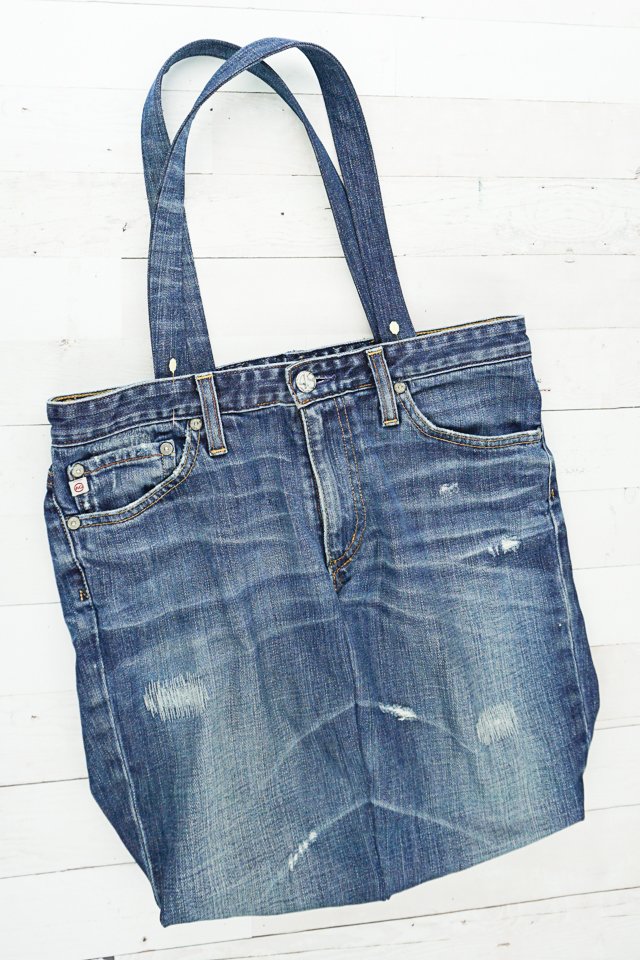
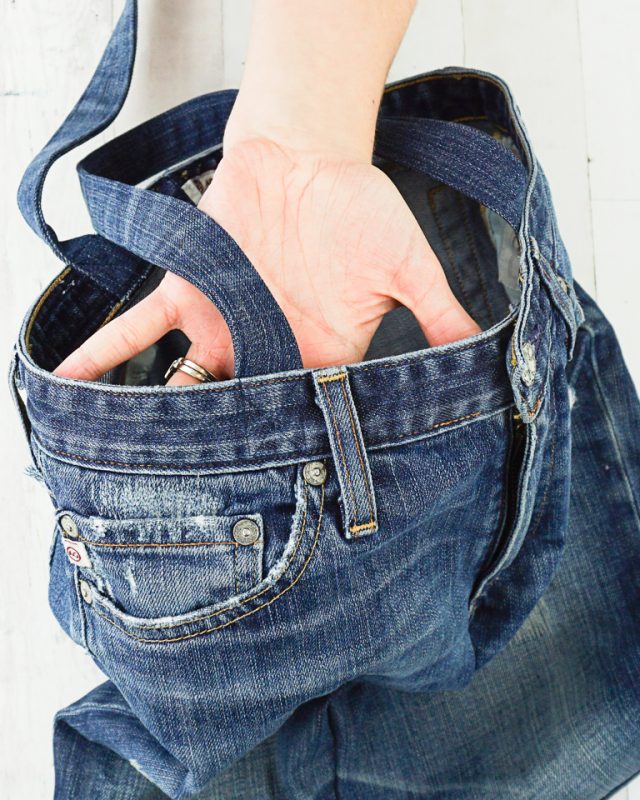
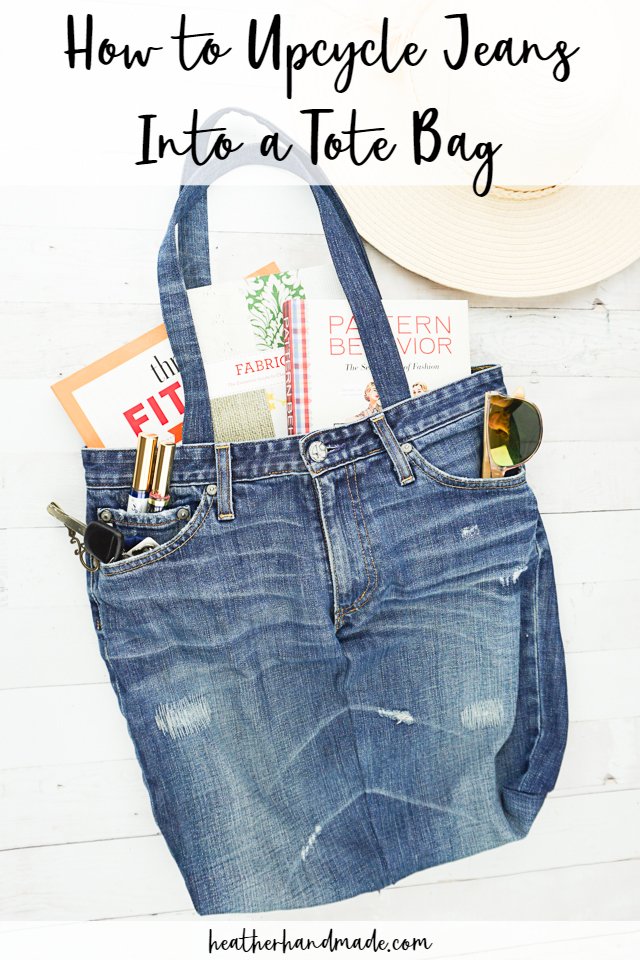
All the details were already there. I didn’t add a lining or interfacing, but there are four pockets that fit all the little things. This is such a great beginner sewing project!
What kind of jeans will work for this project?
The best kind of jeans to use for this project is a sturdy pair of denim jeans that don’t have any stretch. The fabric needs to be strong enough to hold lots of weight without stretching.
What is Upcycling?
Upcycling is to reuse material to create something better than the original. I usually use this to describe when I’m sewing adult clothing into clothing for children or I’m sewing clothing into an accessory or house item.
Upcycling saves time, saves money, saves the environment, and saves memories.
Save time by reusing details from the original shirt. Save money by using something you already have.
Save the environment by keeping t-shirts out of the landfill. Save memories by reusing a favorite adult t-shirt for your toddler or child.

How to Upcycle Jeans into a Tote Bag
Supplies
- Jeans that can be cut and upcycled
- Tips for sewing jeans
- Sewing tools
- Sewing machine
First, cut through the inseam to open up the jeans and make them easier to work with.
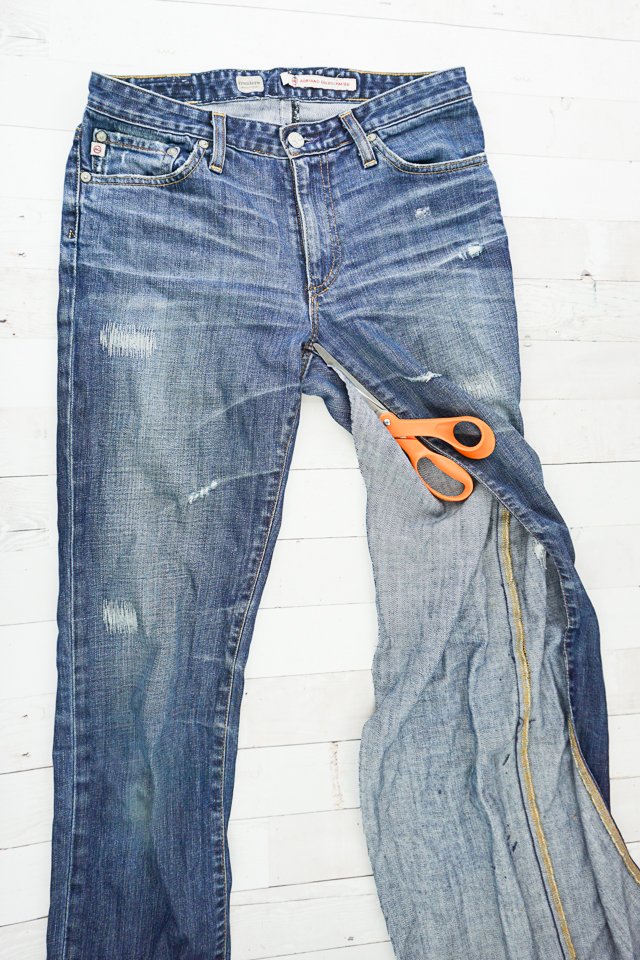
Open the jeans with the fold on the center front and the center back.
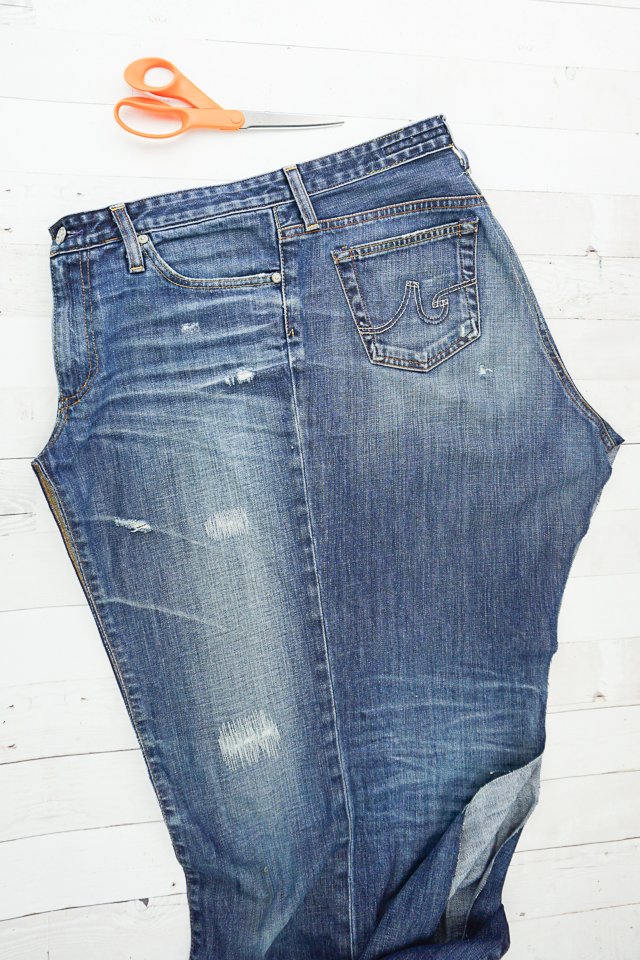
Measure 16 inches down from the waistband all the way across the leg. Cut through all the layers on this line. My jeans were longer in the back so my line curves a little bit.

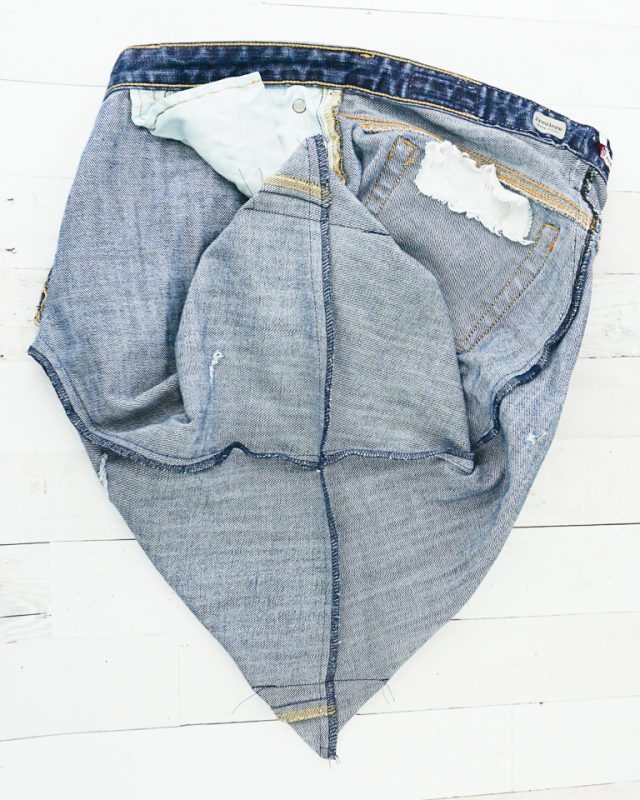
Flip the jeans right side in and lay flat with the folds on the center front and the center back. Draw a straight line from the bottom up the center front and the center back to get rid of the crotch curves.
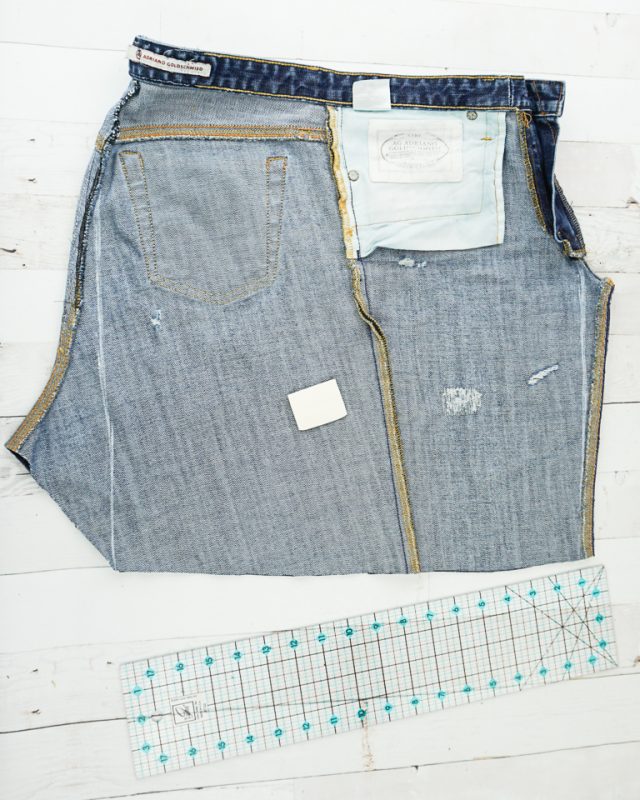
Sew along the lines you drew. To blend into the seam just fold the flat felled seam the way naturally falls and then stop partway up. Like sewing a dart that takes a wedge out of the center front and the center back.
Cut off the excess and finish the seam.
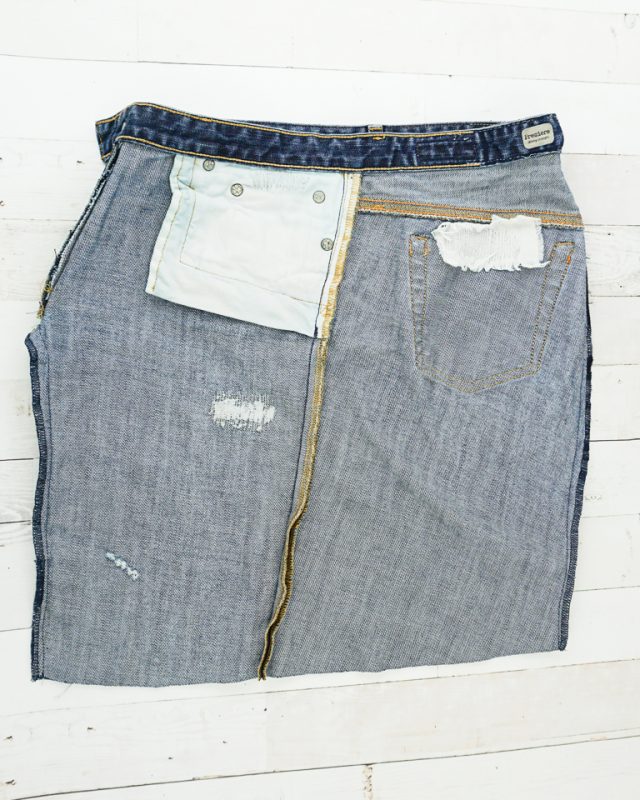
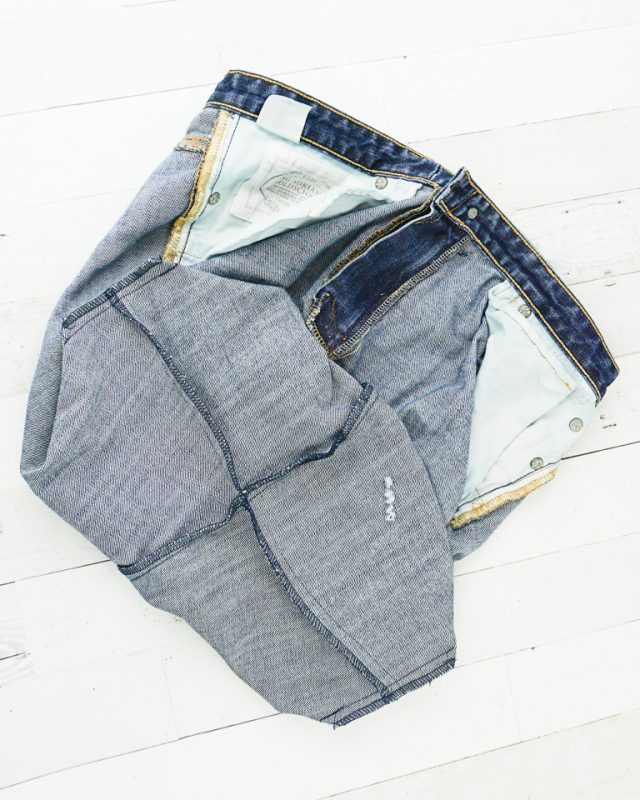
Lay the jeans down with the side seams on each side. My side seams start curving towards the front. Line up the bottom edges and sew. Finish the seam.
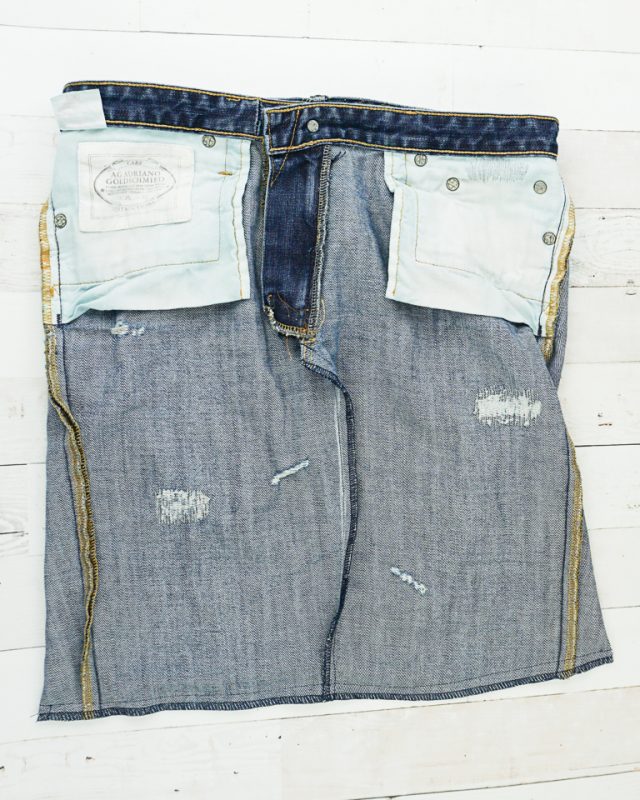
Fold the bag so that the bottom seam matches up with the side of the bag (most likely not the side seam). You will be creating a point at each side of the bottom of the bag.
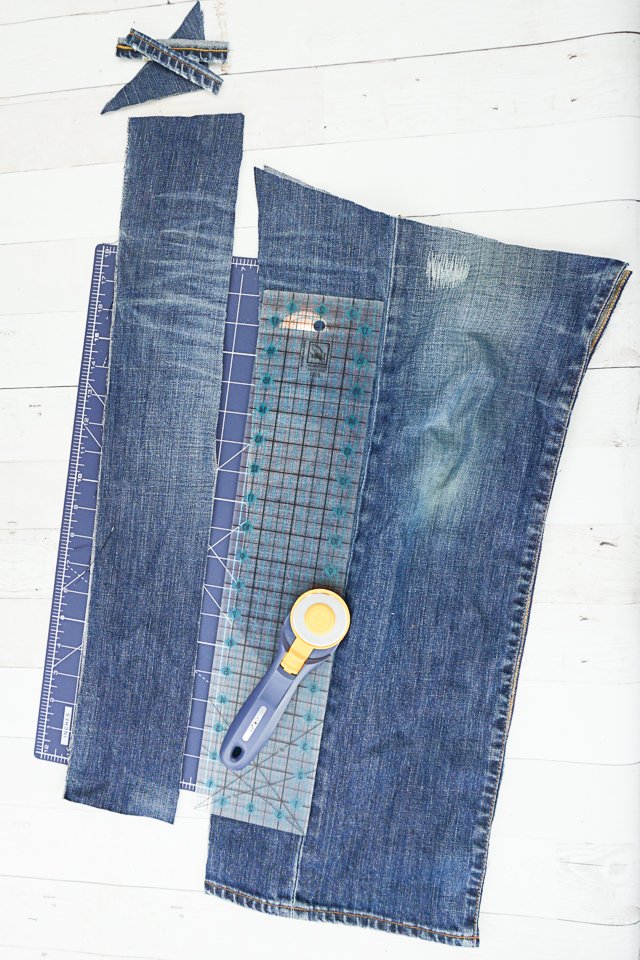
Sew across the bottom of the bag perpendicular to the bottom seam 2 inches from the tip of the point. This creates space in the bag to hold stuff.
Trim off the excess triangle and finish the edge.
Turn the bag right side out and poke out the corners.

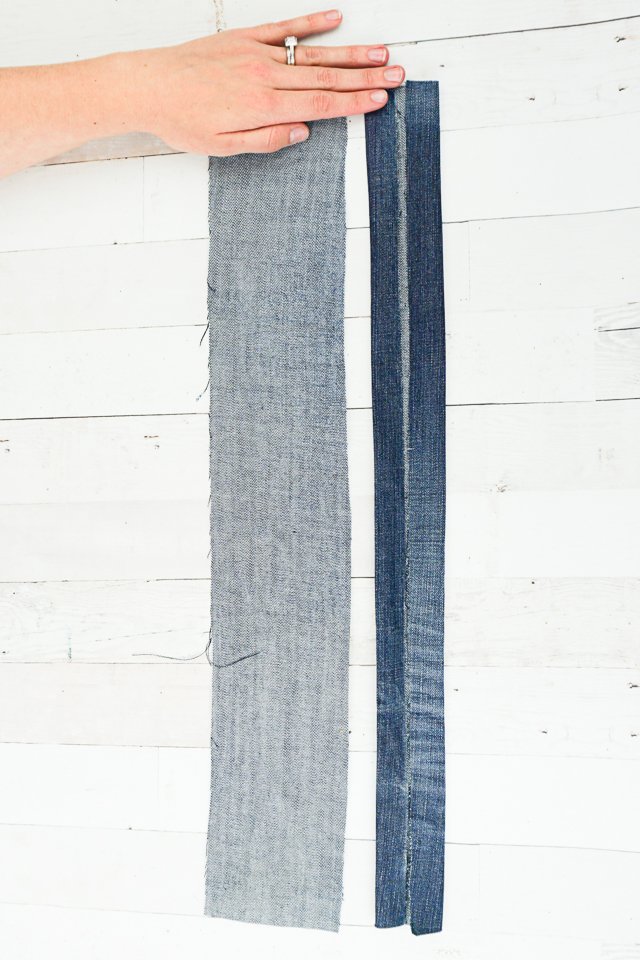
Cut two pieces of denim that is 4 inches wide and 18 inches tall to become the straps.
Press the straps in half lengthwise. Bring each raw edge to meet at the center fold and press in place. When all folds are folded the raw edges are enclosed inside the strap, and they are really strong and durable.
Sew along both sides of the strap 1/8 inch from the edge.
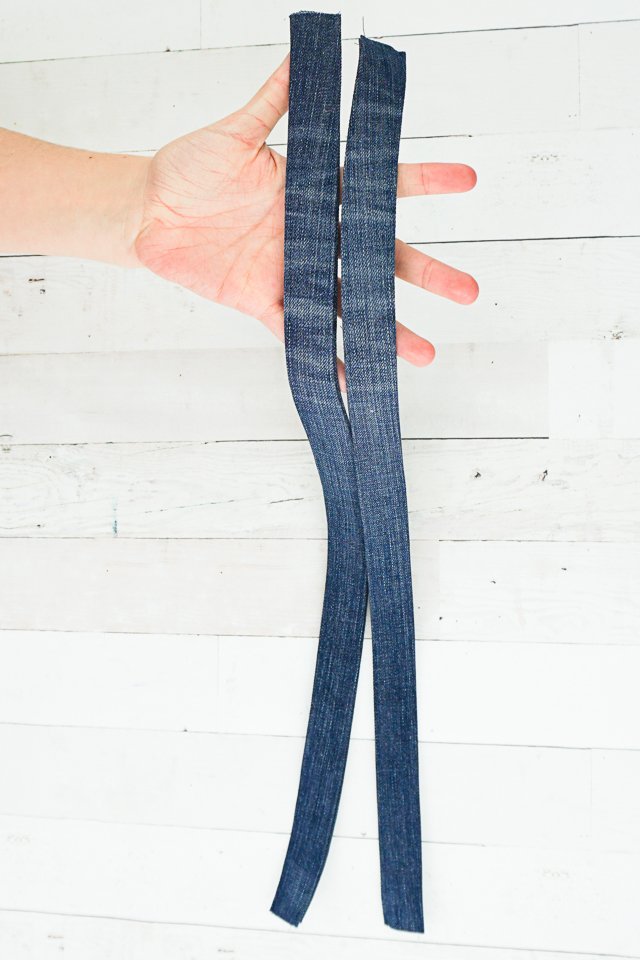
Finish the short edges of the straps.
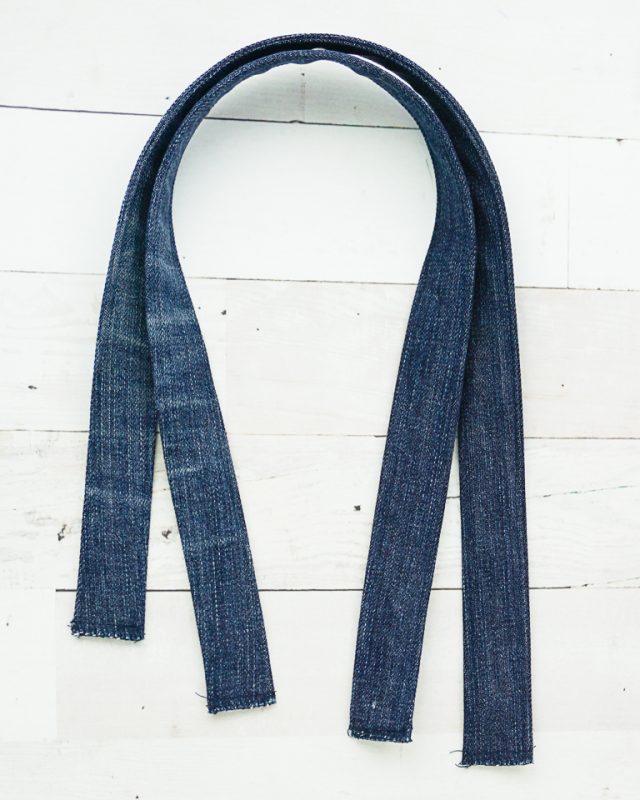
Pin the straps onto the waistband of the bag. I like my straps to be about 6 inches apart, but you might have to adjust them slightly for the belt loops and leather patch. The straps should overlap with the waistband at least 1 inch.
Sew a square around the strap and then an “X”. This is a strong way to secure the straps to the bag.
You finished and now you can stuff it full of books and snacks!
If you make something using this sewing project, I’d love to see! Please share it on social media with the hashtag #heatherhandmade and tag me!

I believe small sewing moments can create great joy. Find your own “right” way to sew. -Heather
Very nice idea
Now I’m going to be scouring the closets to look for a pair of no longer used Jeans!
Awesome!
Great! Thank you ver much!