
DIY Elsa Frozen 2 Jacket Dress: Upcycled

This post may contain affiliate links.
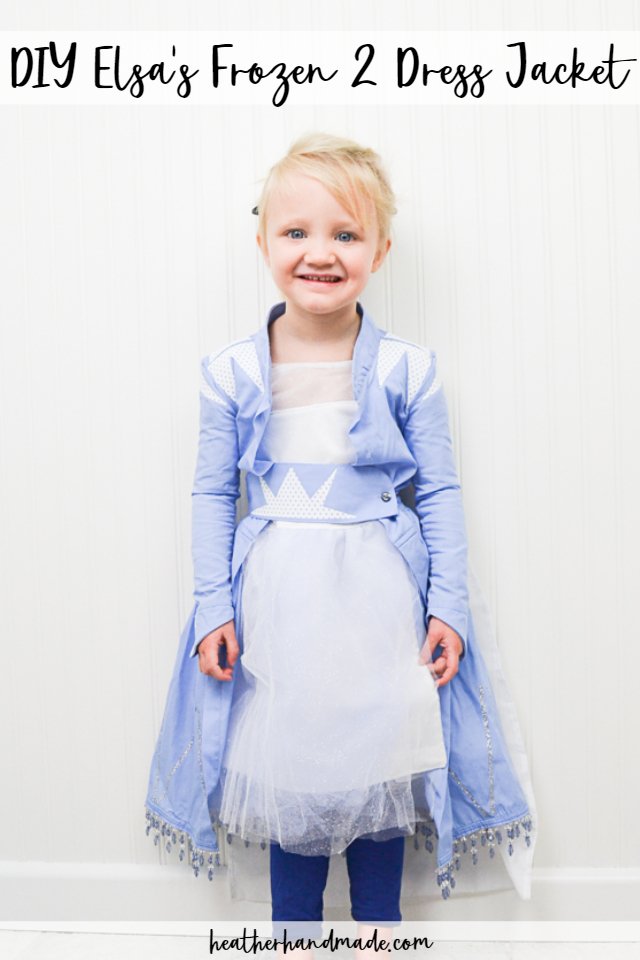
Make a DIY Elsa Jacket that goes over her dress that she wears to travel to the Enchanted Forest. Upcycle a button up shirt to reuse some of the details.
We saw Disney’s Frozen 2 movie when it first came out, and I was fascinated by the animation of the fabric. I’ve never seen animation of fabric so good and so accurate to sewing the fabric.
I immediately wanted to go home and make every single costume, but there were so many to choose from. I started with the jacket that Elsa wears over her dress when she travels to the Enchanted Forest.
You can also make the Elsa dress that she wears underneath.
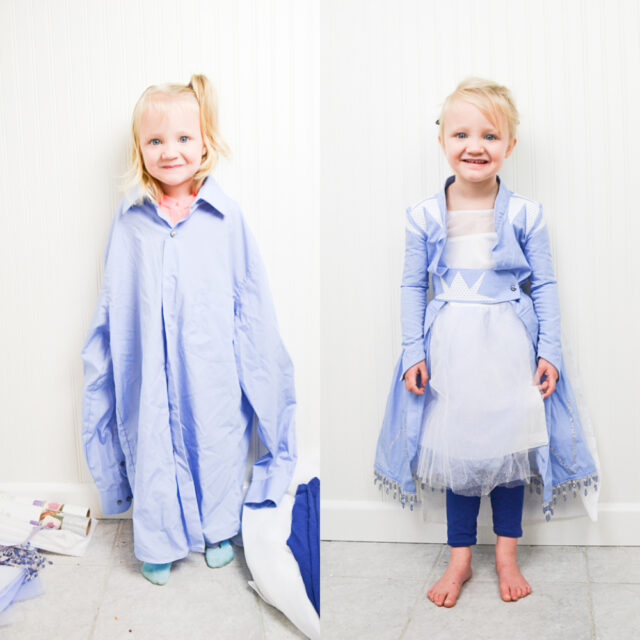
I love seeing my girls dress up, imagine, and play. What I don’t love is when the dress up is so cheap it starts falling apart after one wear and wash.
When I started planning and making this DIY Elsa jacket I wanted it to be strong and hold up to their play. I wanted it to be easy to make and on the less expensive side. I also made Anna’s dress and cloak with strong fabric.
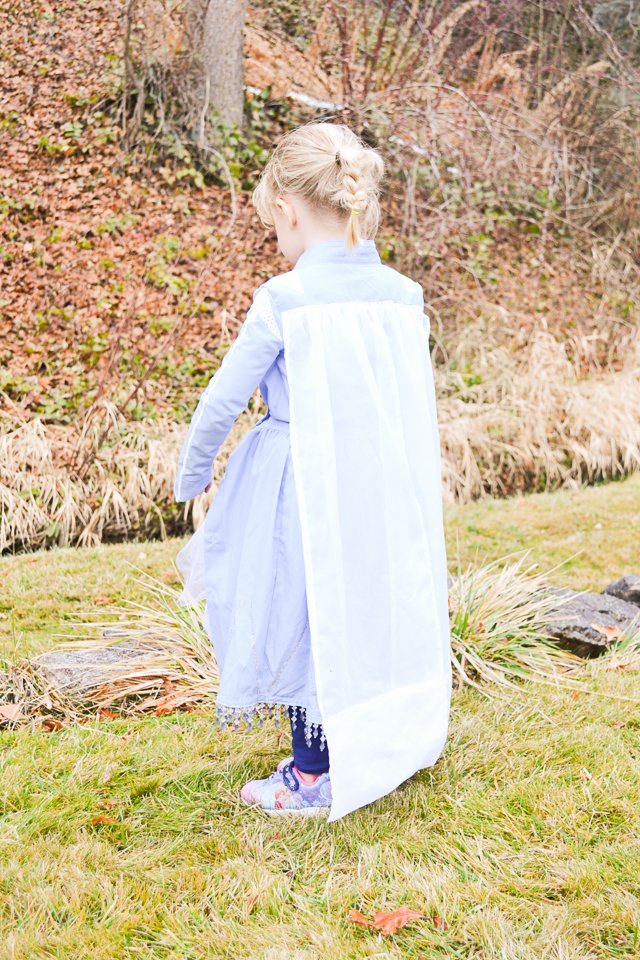
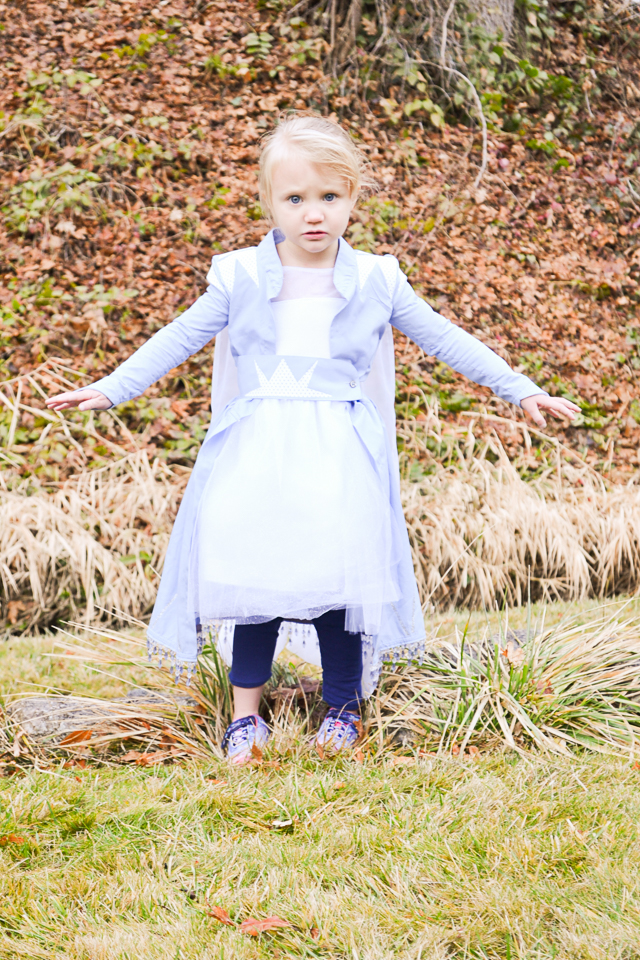
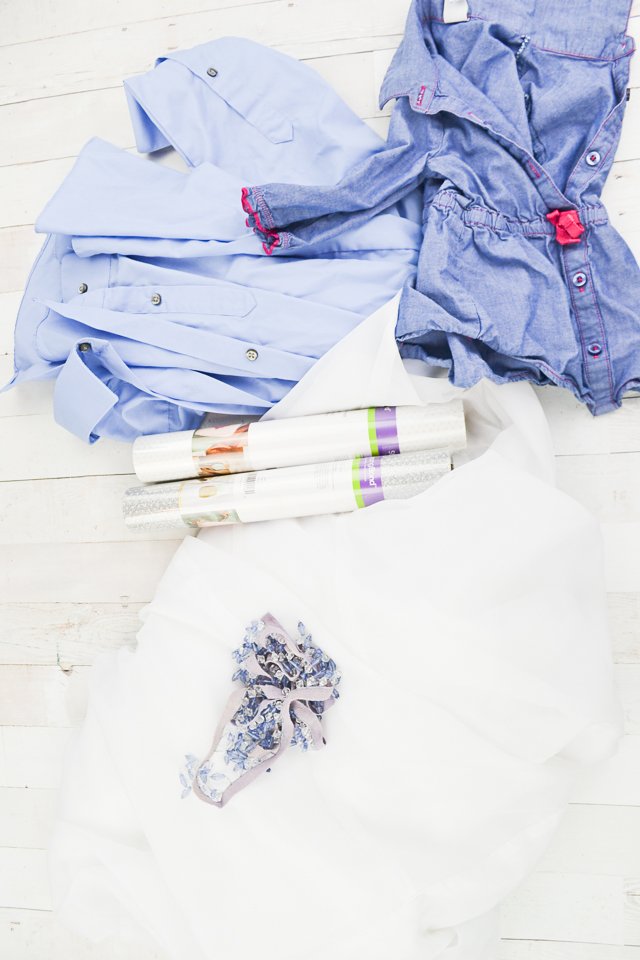
I chose to upcycle a button up shirt and a curtain panel for all the of fabric in the jacket. Then I added some beaded trim and iron-on vinyl.
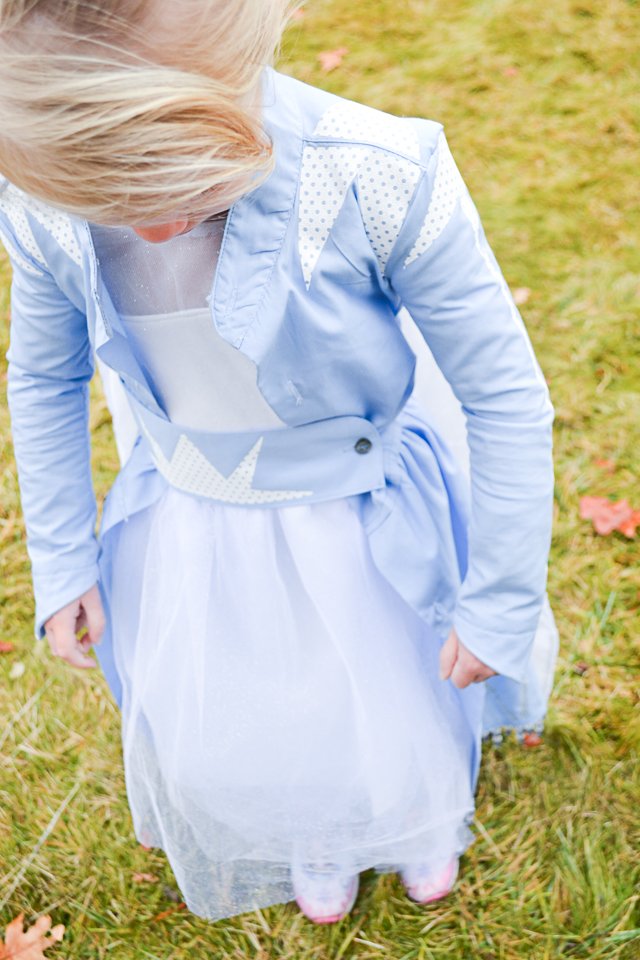
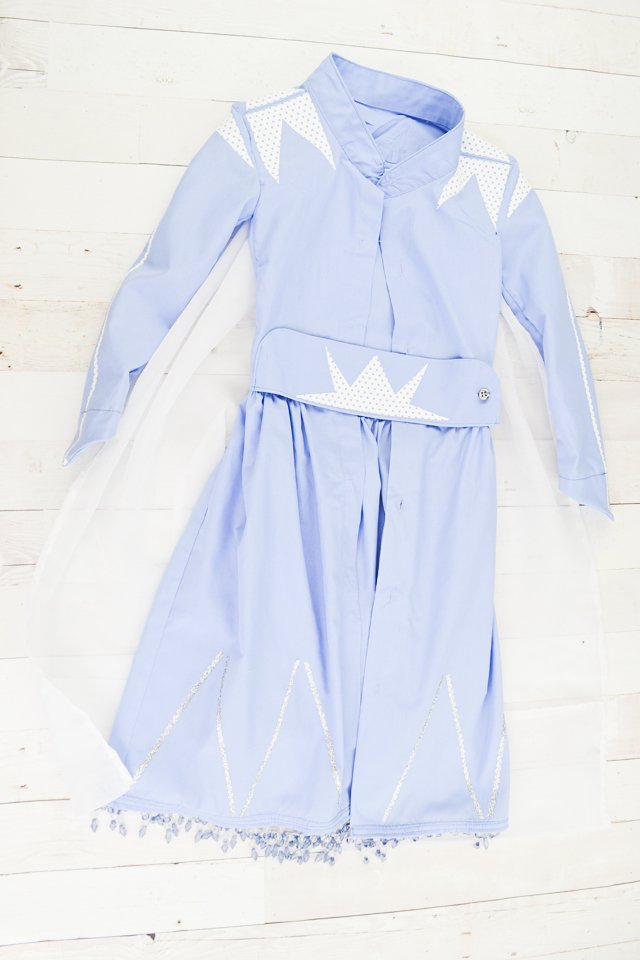
I didn’t have to sew the belt, collar, front placket, or cape hem because I reused details from the button up shirt.
Elsa has lots of beading along her shoulder, sleeves, and hem that I wanted to add to this jacket, but I didn’t want to actually do any beading or hand sewing.
To make it easy I use glitter mesh iron-on vinyl in both white and silver. The mesh gives it a textured look like beading, and the glitter reflects the light like beads.
I even cut all of the shapes by hand to fit in the shoulder and sleeve the way I wanted it to.

This tutorial seems really long, but it’s actually not that hard of a project. I just wanted to take a picture of every step to helpl you make it too!
If you are looking for any easier DIY Elsa dress don’t miss this t-shirt dress version!
I really, really enjoy making costumes for my kids. It’s never completely accurate, but it’s easy and often cheap. See all the DIY costumes I’ve made for my kids! It’s fun when my daughter looks like Elsa and Bo Peep!
DIY Elsa Jacket
supplies
- Light blue button up shirt* (I thrifted mine)
- Sheer white curtain panel*
- Glitter mesh iron-on vinyl* in white and silver
- Beaded trim* (This is not the exact trim I used. I couldn’t find the one I used online.)
- Easypress 2
- Sewing tools
- Sewing machine
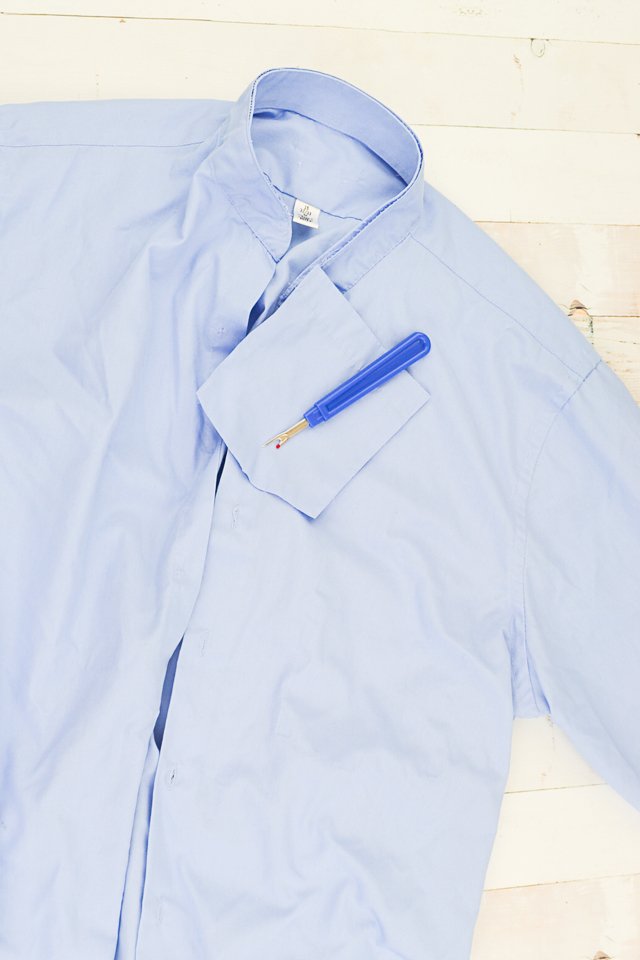
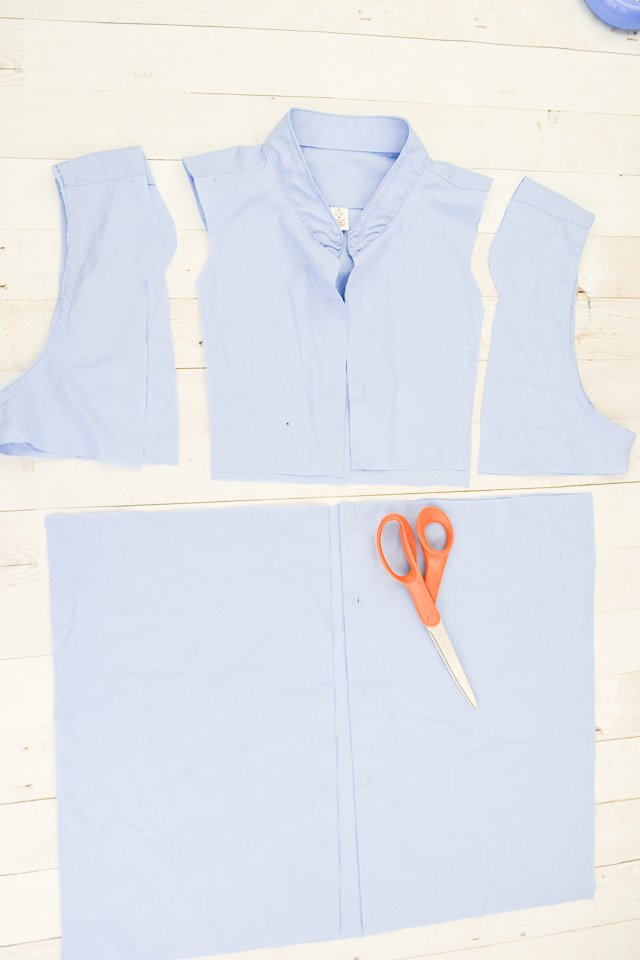
Use a seam ripper to open the collar stand and remove the collar. Remove any tags that might be itchy.
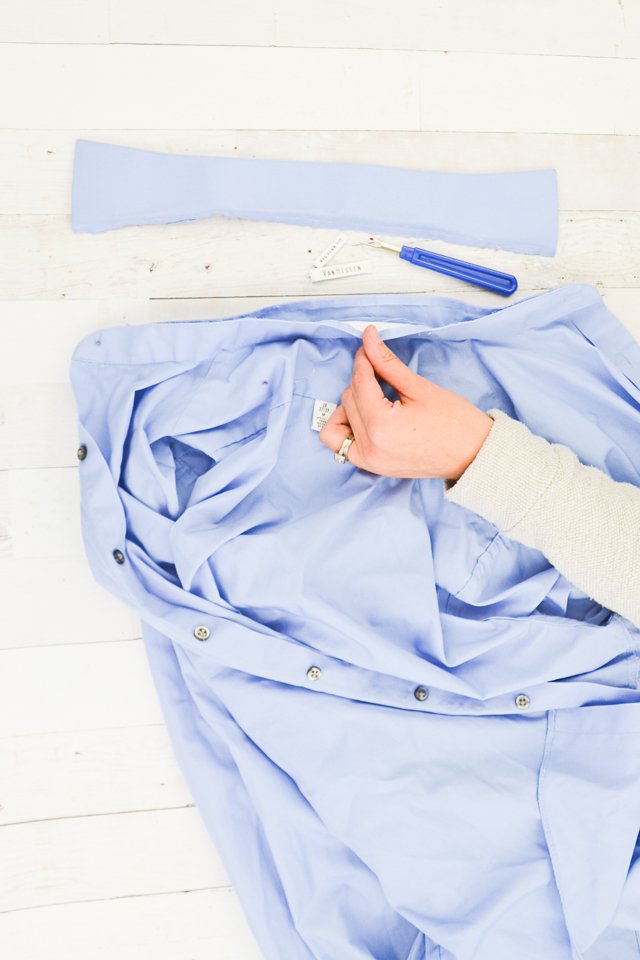
Remove all the buttons from the front of the button placket.
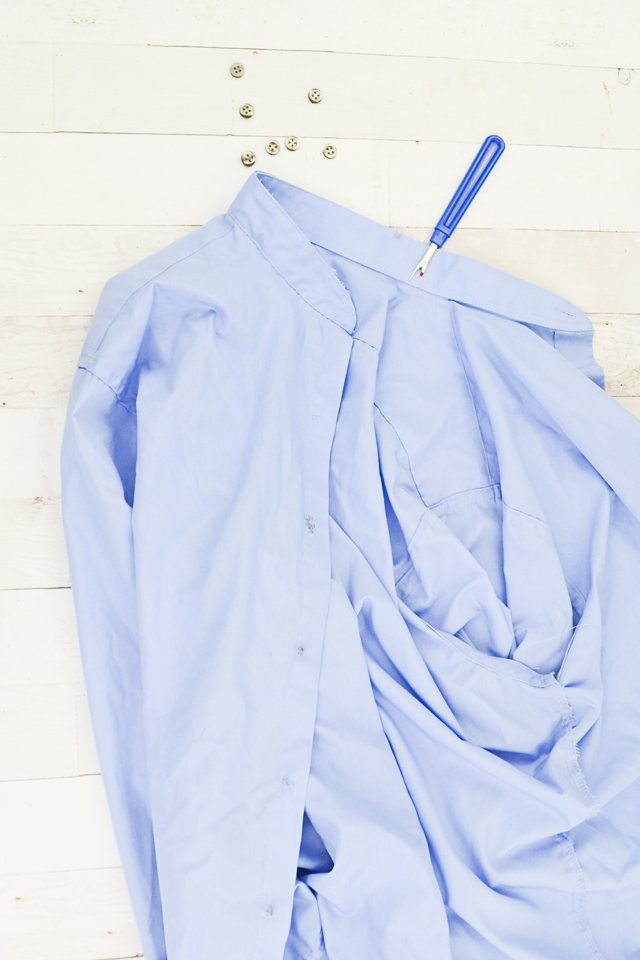
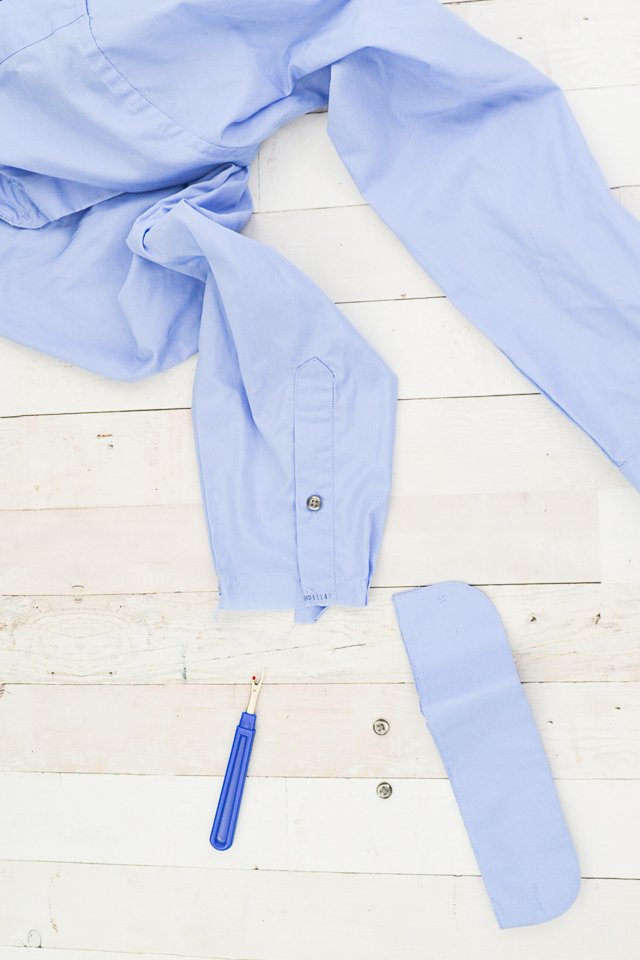
Using a seam ripper remove the cuffs from both sleeves.
Remove the front pocket.
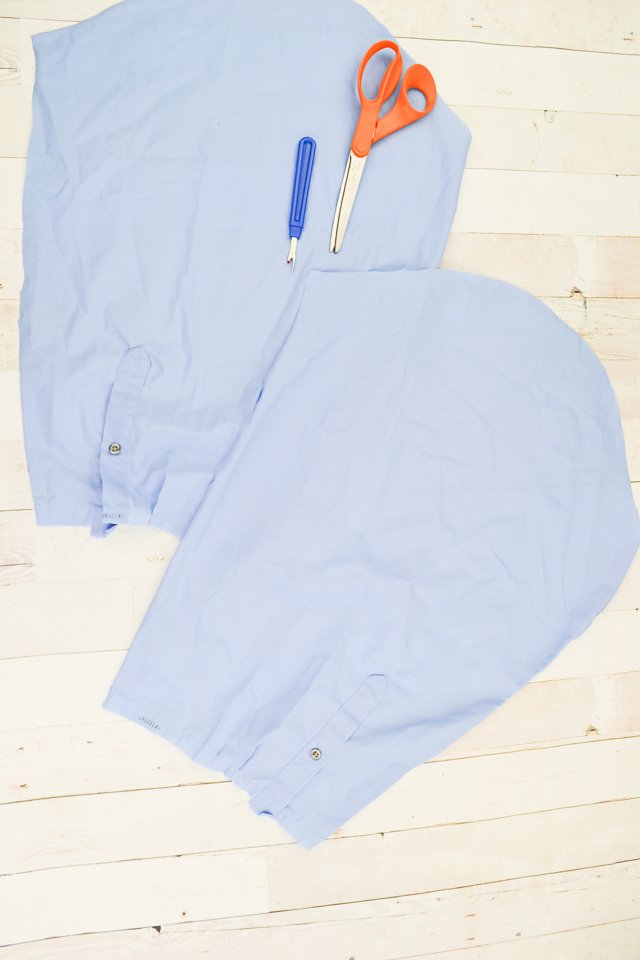
Cut off the sleeves and cut open the seam allowance so that they can be opened out flat.
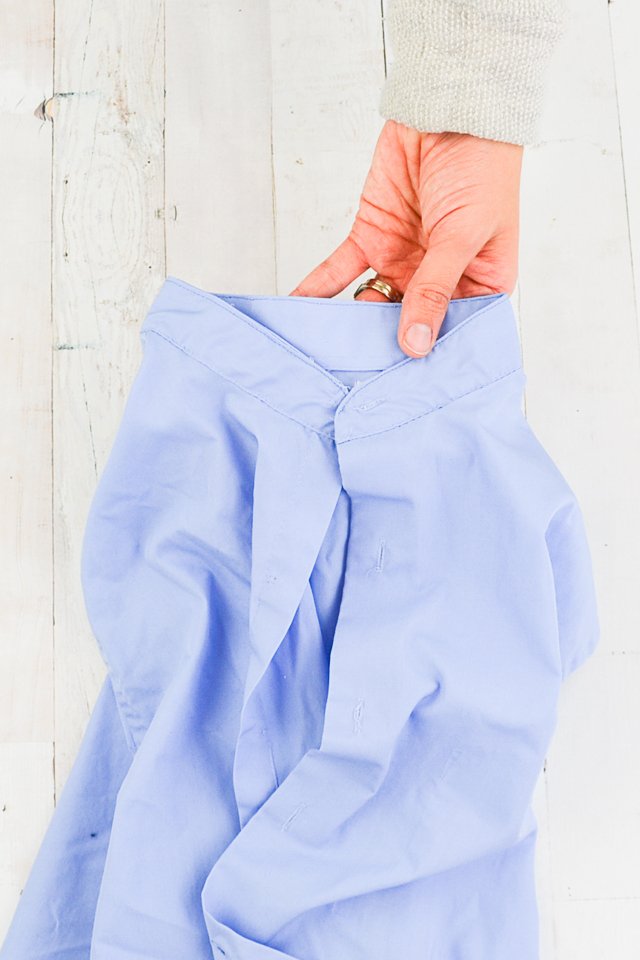
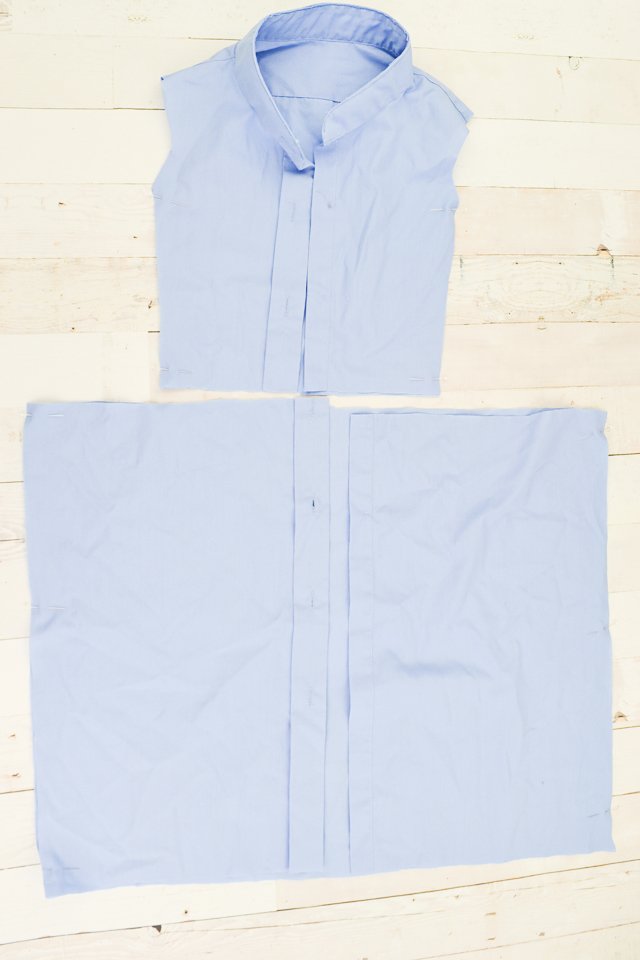
Topstitch the collar stand closed.
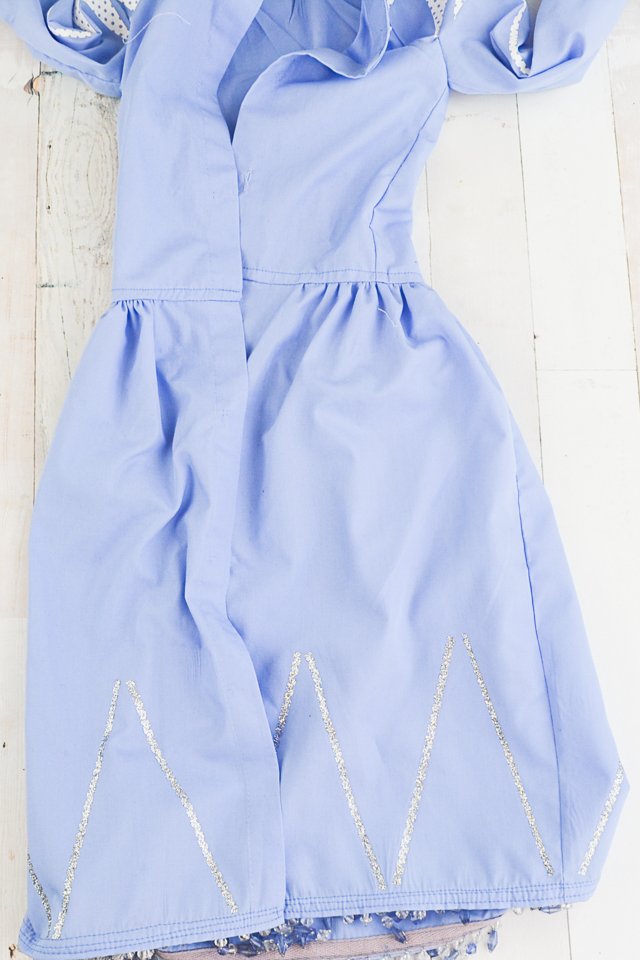
Cut the curved hem off of the bottom of the shirt.
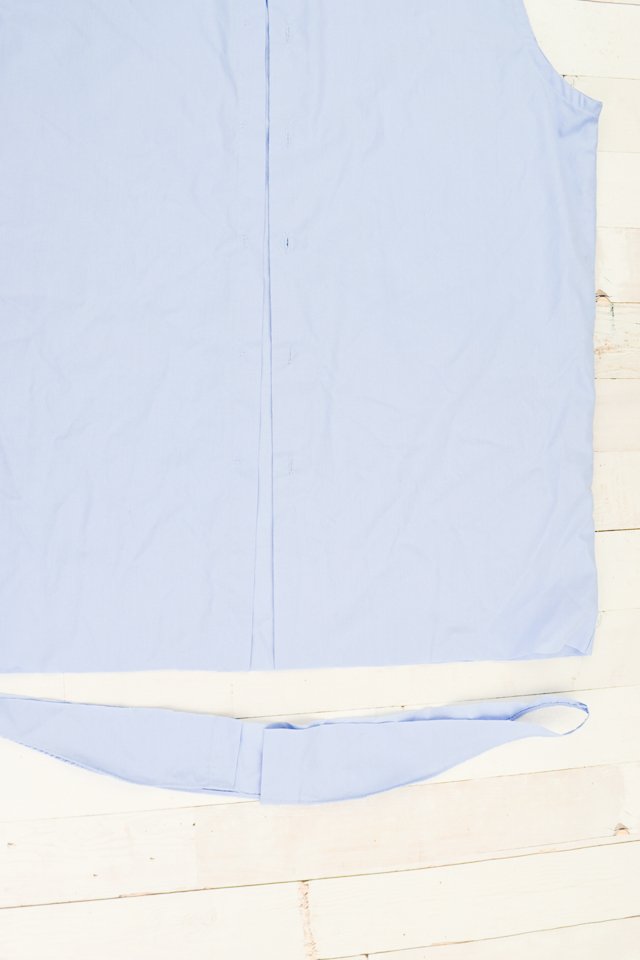
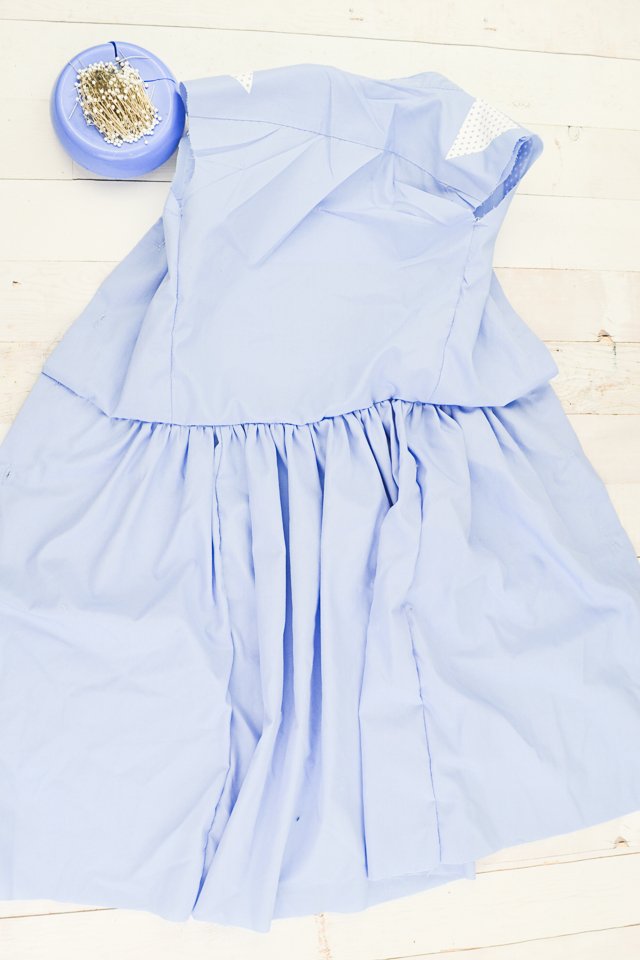
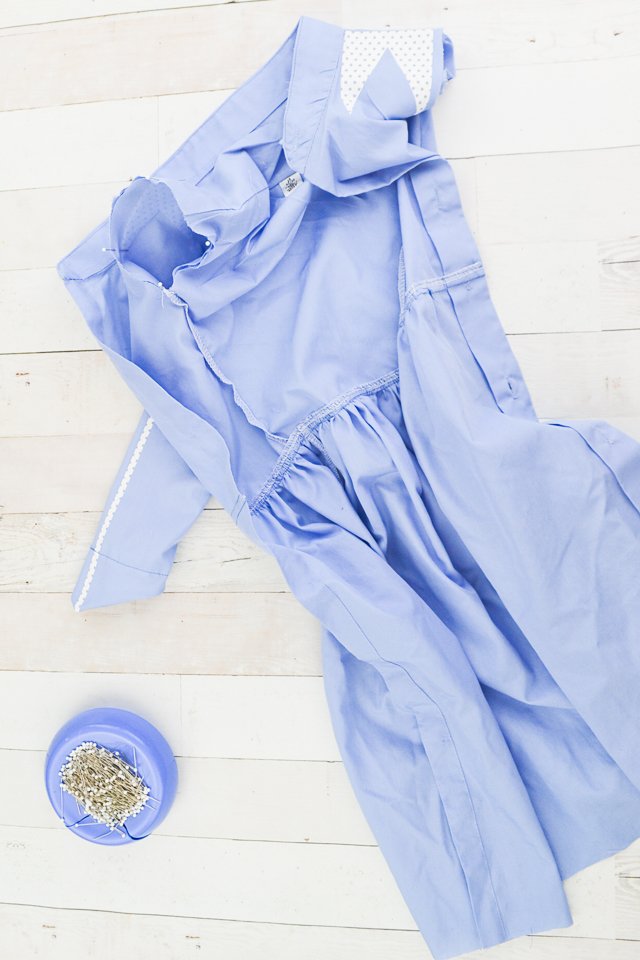
Cut out a skirt and bodice from the main shirt piece. Use either a paper pattern or a woven shirt to get the pattern shape.
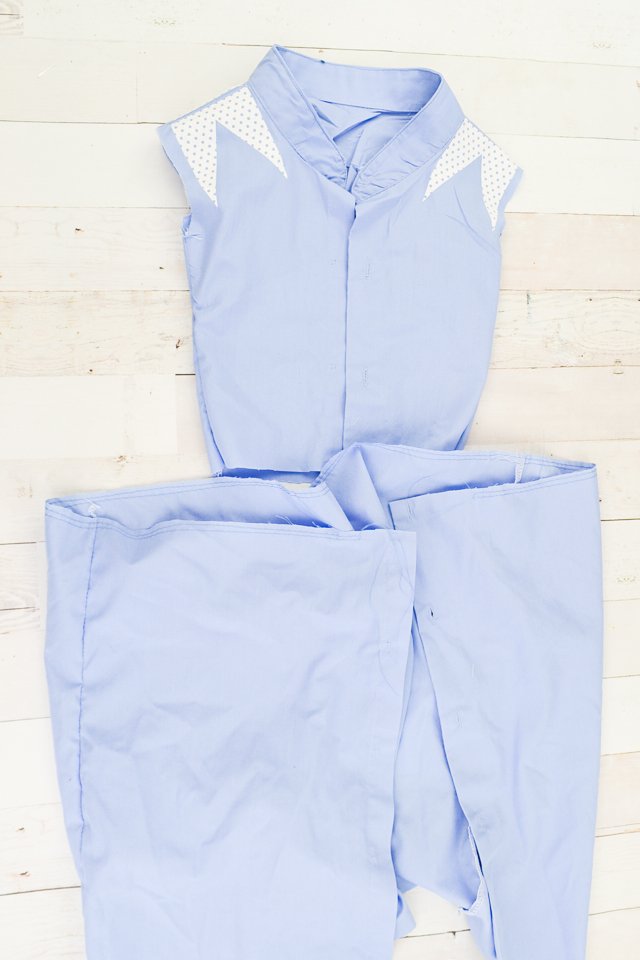
With right sides together sew the side seams of the bodice and the side seams of the skirt.
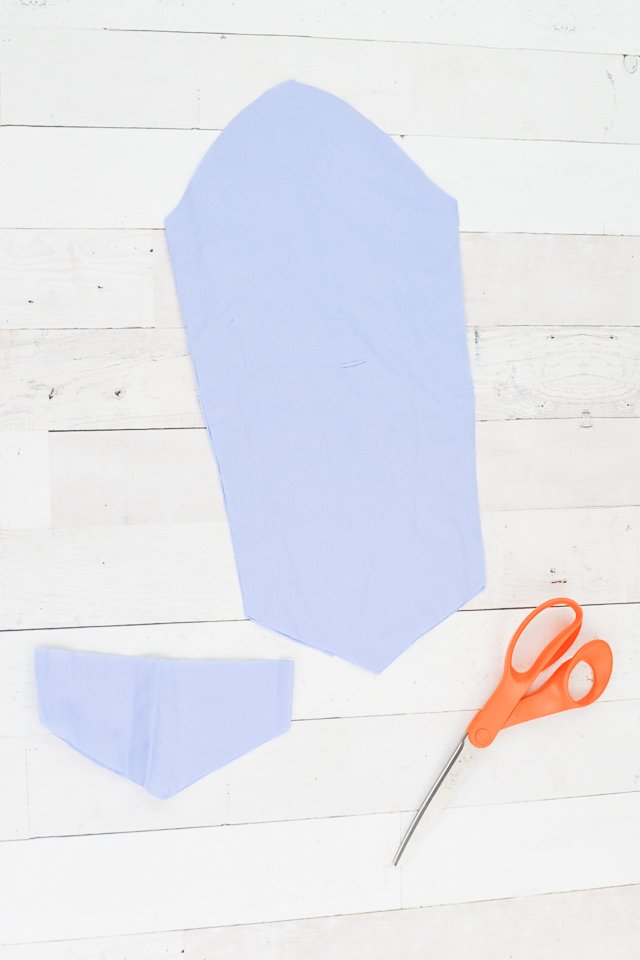
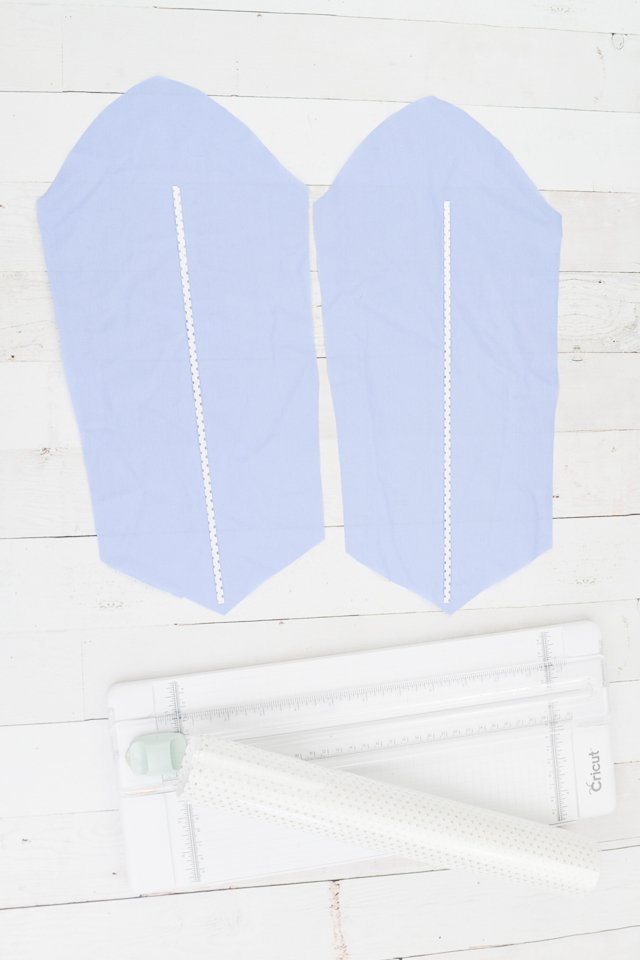
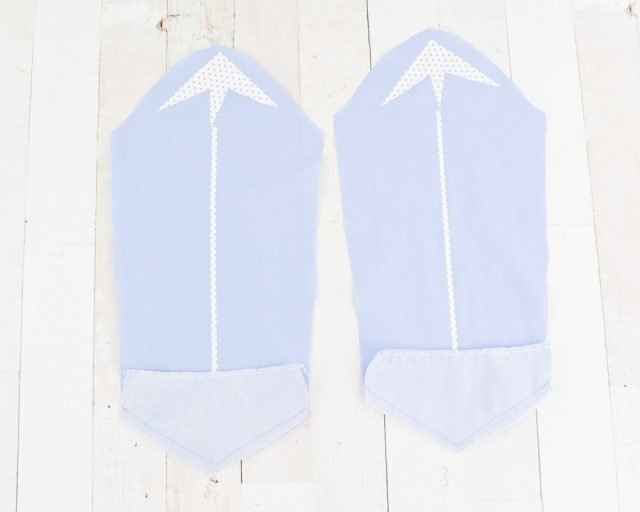
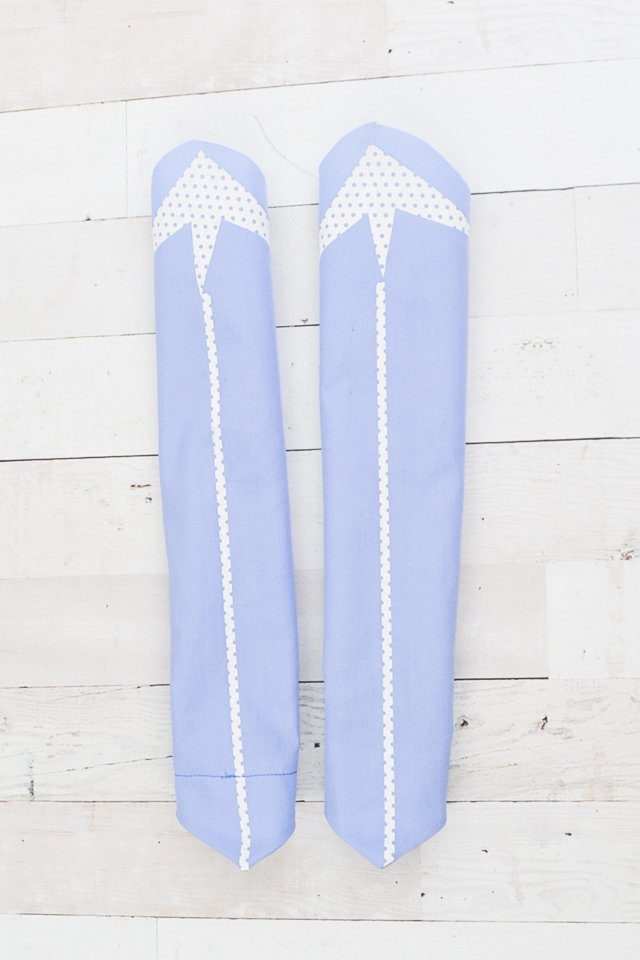
Cut out sleeves from the shirt sleeves and make a pointed hem.
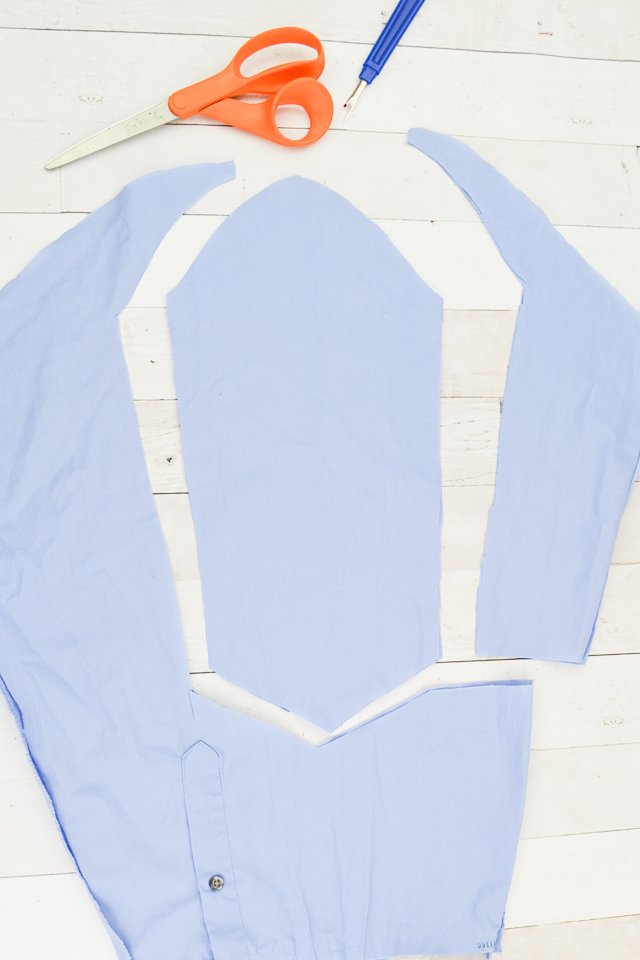
Cut out a hem facing for the shirt sleeve.
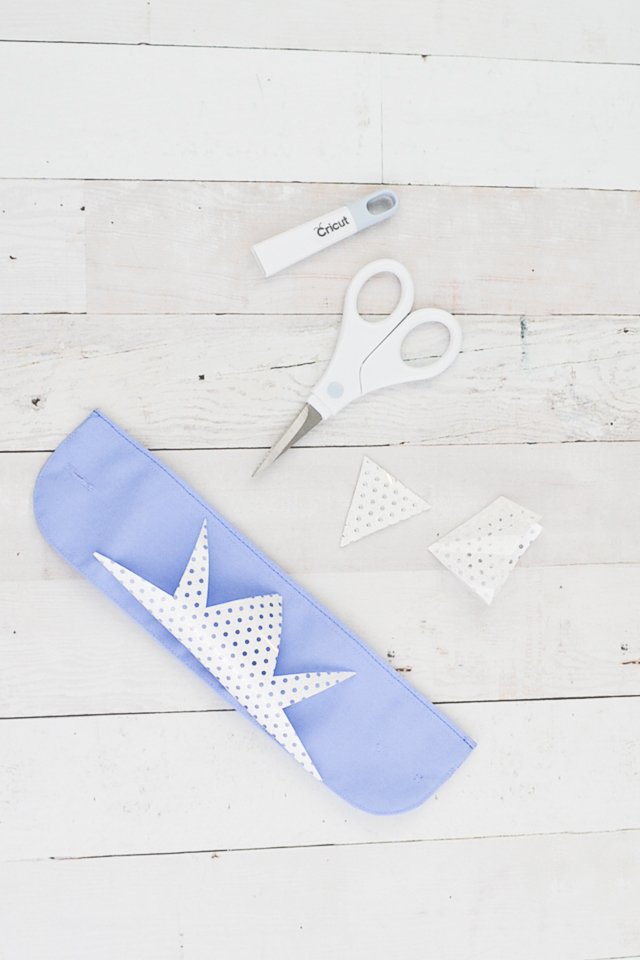
Instead of using a cutting machine for all of the iron-on vinyl, I cut it all by hand. Cut a 1/4 inch strip of iron-on vinyl for the stripe on the sleeves.
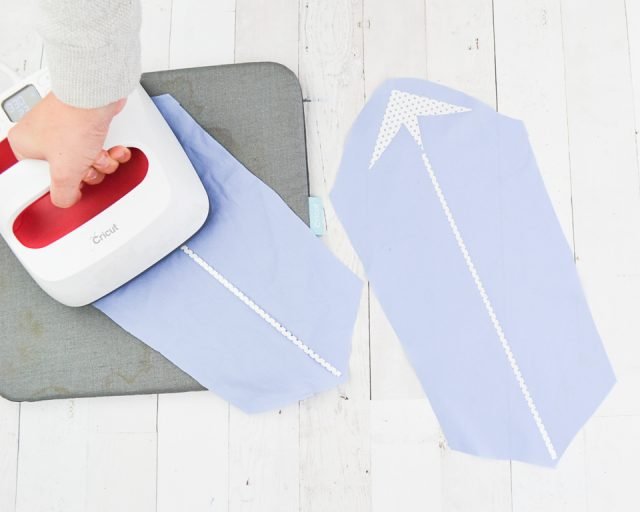
Cut a sharp geometric shape for the top of the sleeves.
Use an Easypress 2 to apply the iron-on vinyl to the sleeves.
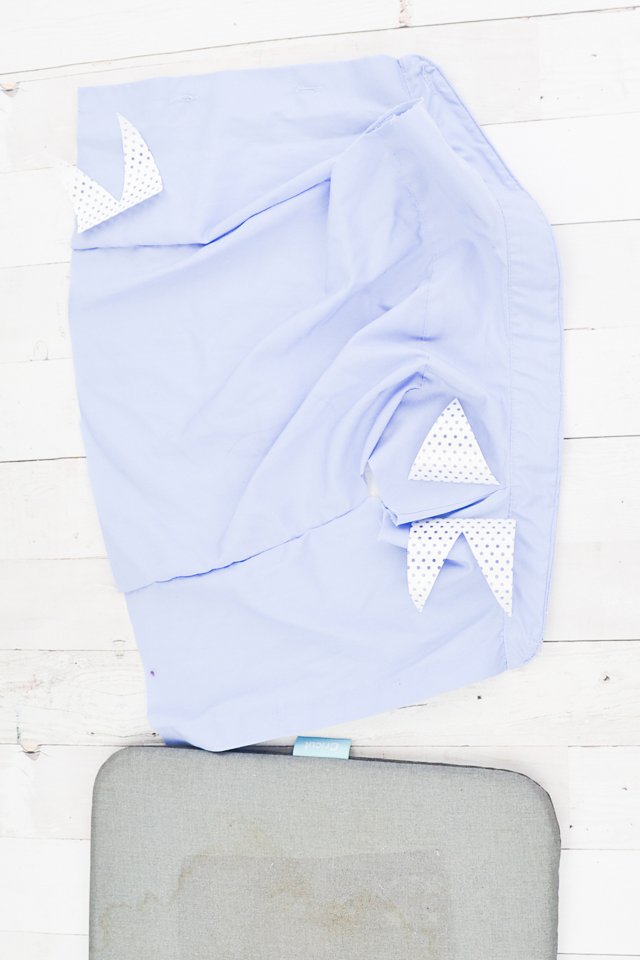
Cut more sharp geometric shapes for the front and back shoulder pieces.
Sew two basting stitches around the top of the skirt.
Gather the skirt and pin it to the bodice with right sides together.
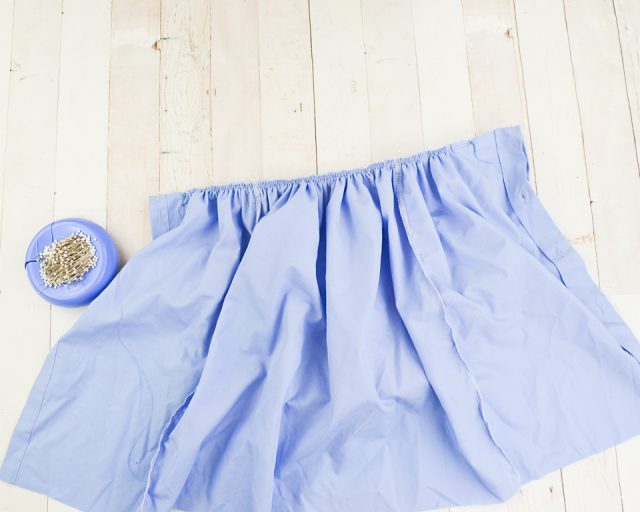
Sew the seam and finish the edge.
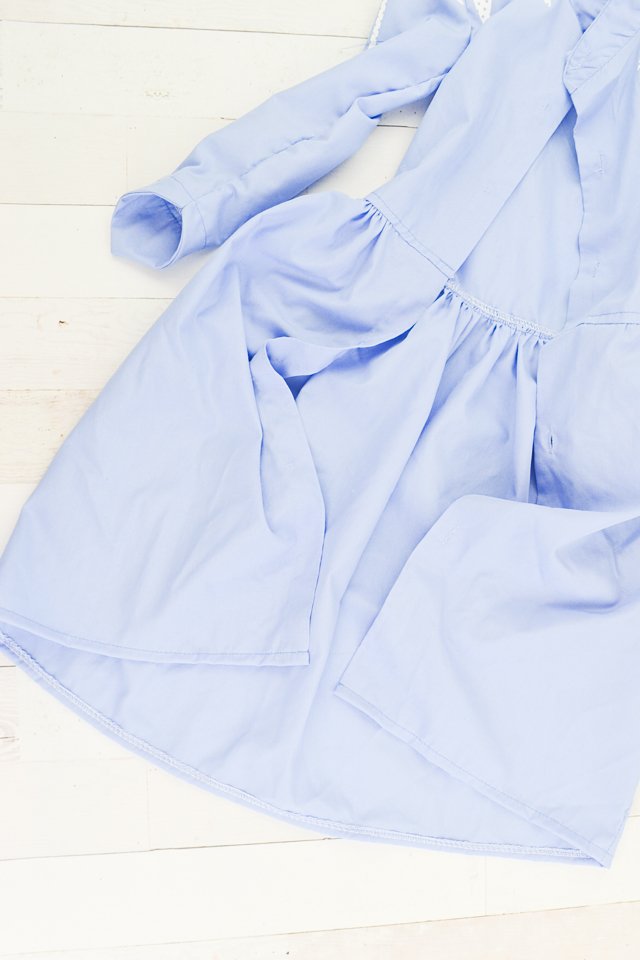
Sew the sleeve facing onto the bottom.
Trim and grade the seam allowance and the point.
Sew the seam of the sleeve with right sides together.
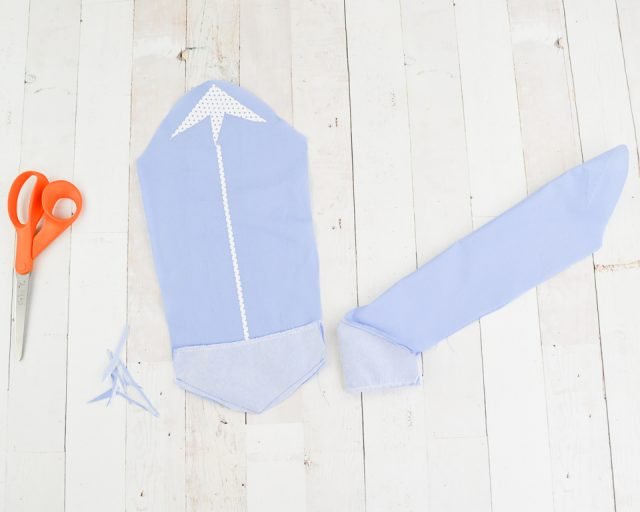
To keep the sleeve facing from flipping out, I sew a topstitch around the edge of the facing.
Pin the sleeves into the armhole with right sides together and sew in place.
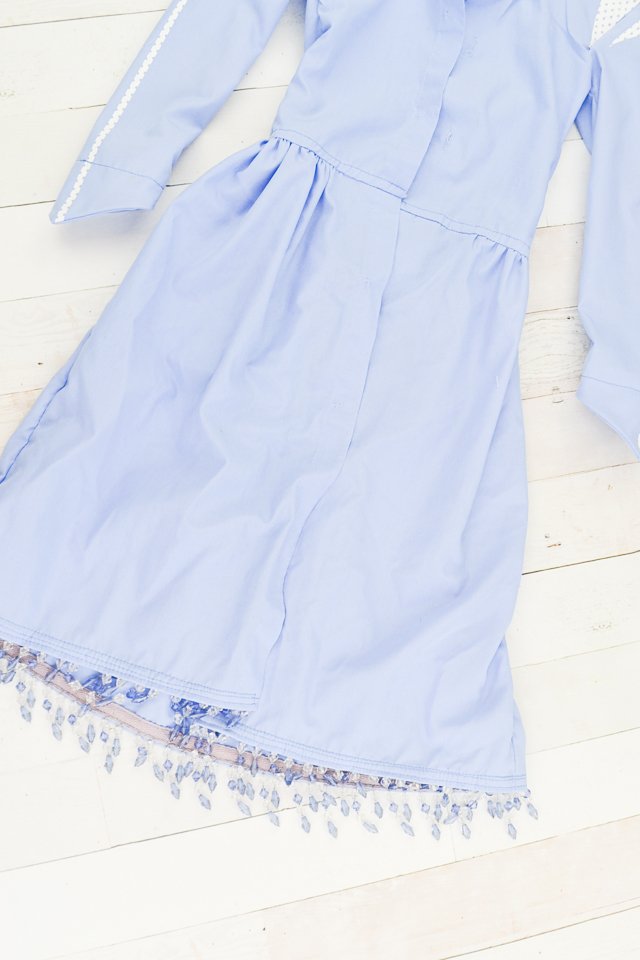
Hem the bottom of the skirt with a 1/4 inch double fold hem.
Sew the beaded trim onto the hem of the skirt.
Sew the open side of the cuff closed with a topstitch.
Cut a sharp geometric shape out of iron-on vinyl for the cuff that will become the belt of the jacket.
Add strips of glitter iron-on vinyl in triangle shapes along the hem of the skirt.
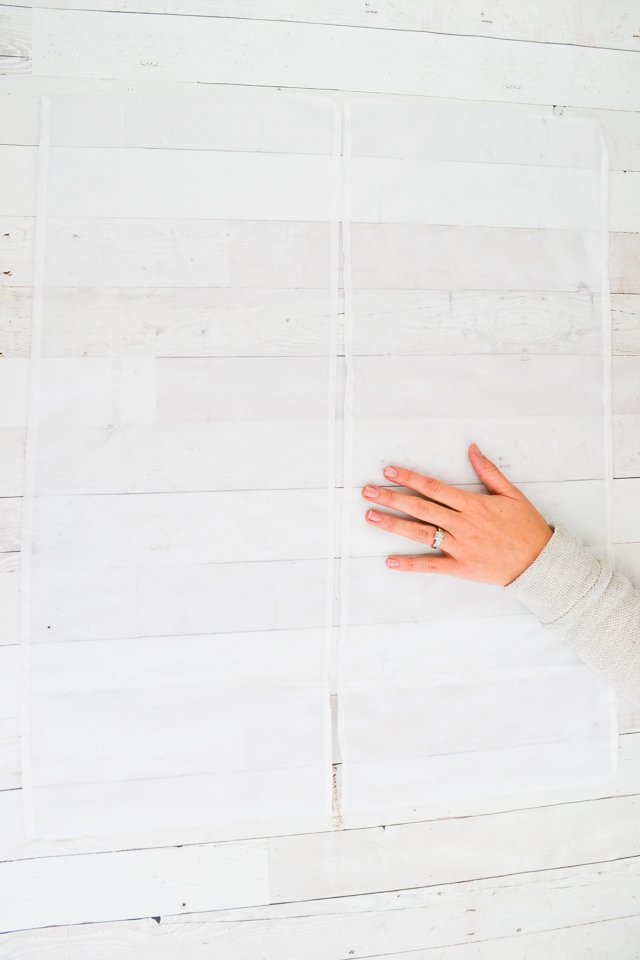
Cut the curtain into the length of the dress. Finish any raw edges except for the top.
To sew the cape onto the jacket, first sew two basting stitches along the top edges of the curtains.
Pin the curtains with raw edges pointing toward the hem and the curtain going up towards the hem. Sew with a 1/4 inch seam allowance.
Flip the curtains down towards the hem and topstitch it in place. The raw edge should be containged in the topstitching.

Sew the cuff/belt to one side of the waist of the dress. Sew a button to the other side where the buttonhole is. The button will be how the dress can be attached and unattached.
If you make an Elsa jacket using this tutorial, I’d love to see! Please share it on social media with the hashtag #heatherhandmade and tag me!

I believe small sewing moments can create great joy. Find your own “right” way to sew. -Heather