
DIY Anna Frozen 2 Dress

This post may contain affiliate links.
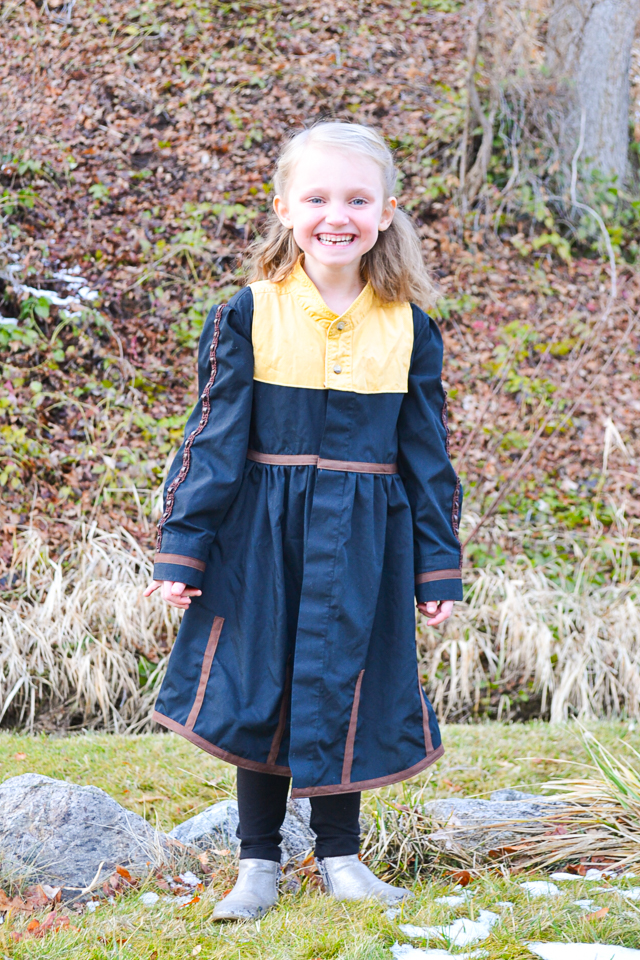
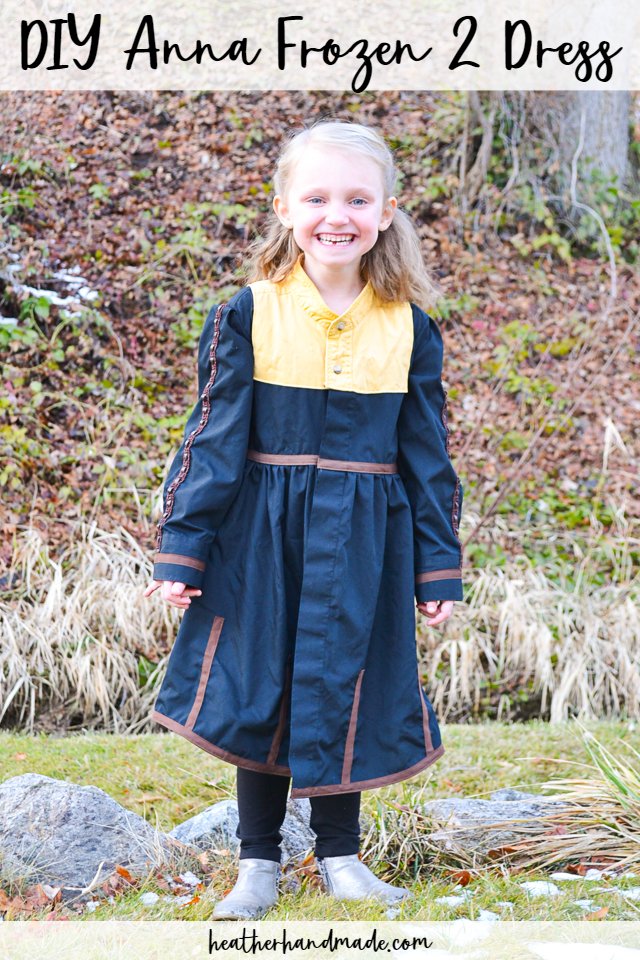
Make a DIY Anna Dress out of two men’s button up shirts and some trim. Sew and upcycle the dress that she wears to travel to the Enchanted forest.
Since I made Elsa’s dress and jacket for my youngest daughter, I just had to make Anna’s dress and cloak for my other daughter. She patiently waited, but she asked every single day day if it was done yet. This dress is upcycled and inspired by Anna’s dress in Disney’s Frozen 2.
Usually my daughters want to both be Elsa when they play, and they fight over who gets to be her. I’m hoping this DIY Anna dress and cloak will give them more options when they play.
It’s so fun that my daughters have blonde and brunette hair, and they can look so similar to the movie. It’s a little different since my older daughter is the brunette, so Anna looks older than Elsa. Luckily, they can still play an imagine themselves in any part of the first or second movie.
If you are looking for any easier DIY Elsa dress don’t miss this t-shirt dress version!

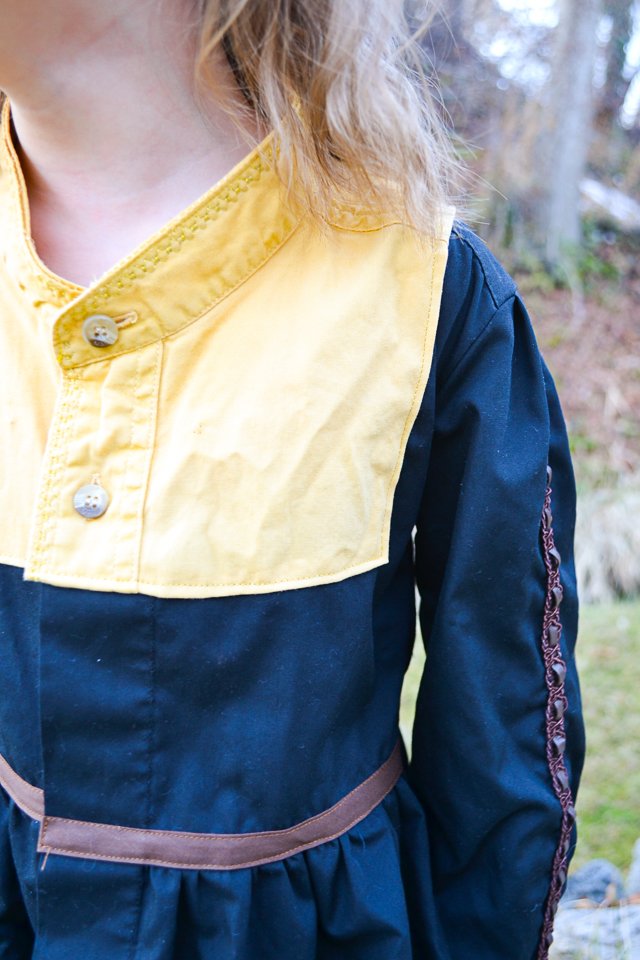
I didn’t want the square part of the neckline to be hard to sew, so I totally made up a different method. It’s not the cleanest from the inside, but it still looks great on the outside.
I upcycled two button up shirts to make the process easier to sew, and I always love reusing details.
I think the metallic decorative stitching around the neckline is a tiny detail that no one will see except me, but I love the extra look it brings.
Instead of cutting into the hem and making the squared scallops, I chose to just sew brown trim flat onto the dress. It gives the same look, but it’s so much easier to sew.
I also skipped the separate brown belt at the waist and sewing the brown trim right onto the waist. My daughters often loose the accessories when playing, so this makes life easier for them and me.

DIY Anna Dress
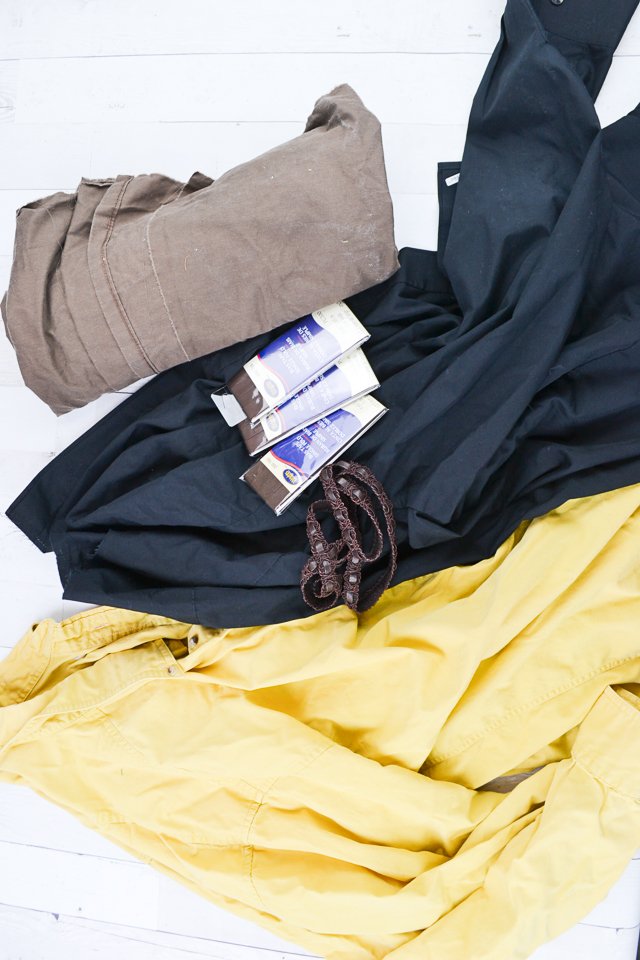
supplies
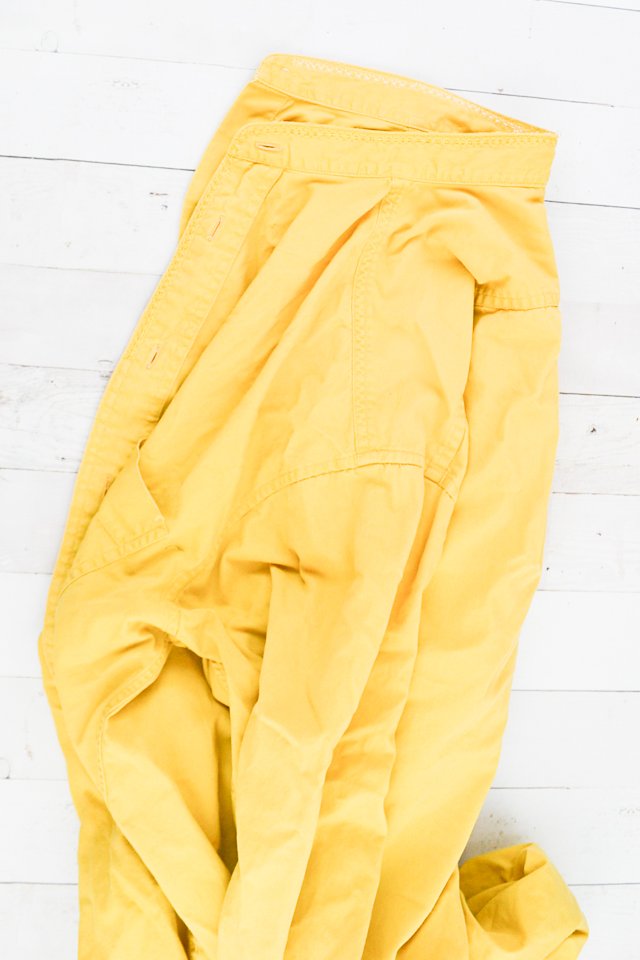
- Yellow button up shirt – mine was thrifted
- Black button up shirt – mine was thrifted
- Brown assorted trim* (not exact)
- Brown 1/2 inch single fold bias binding* (Learn how to make and use bias tape.)
- Gold metallic stitching*
- Sewing machine
- Sewing tools
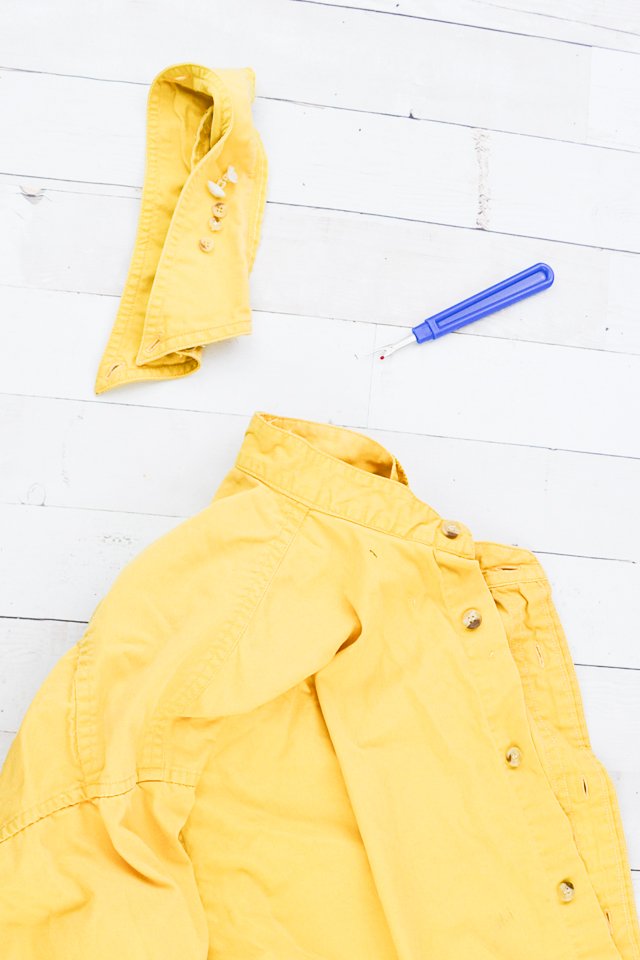
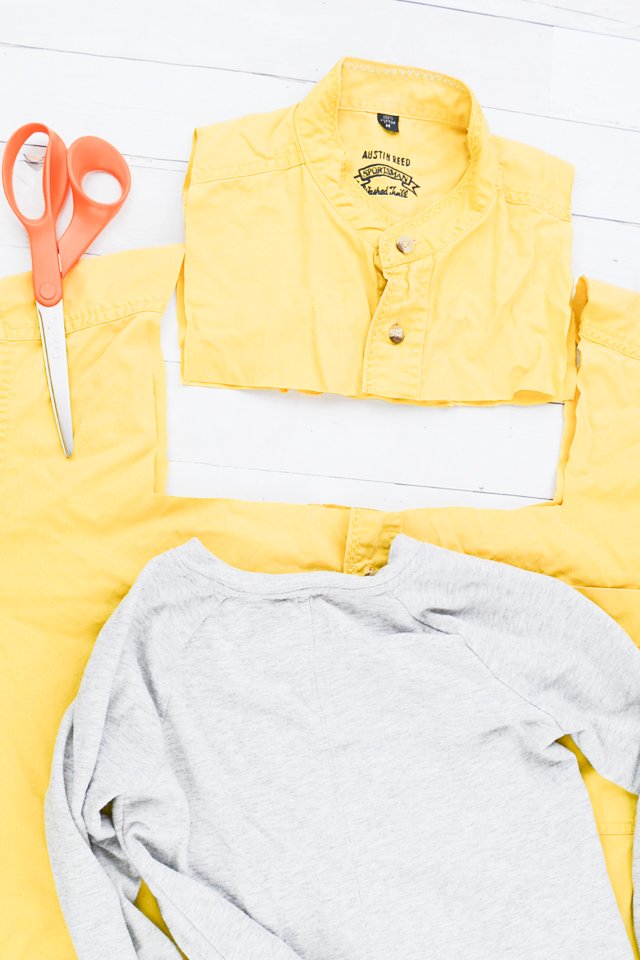
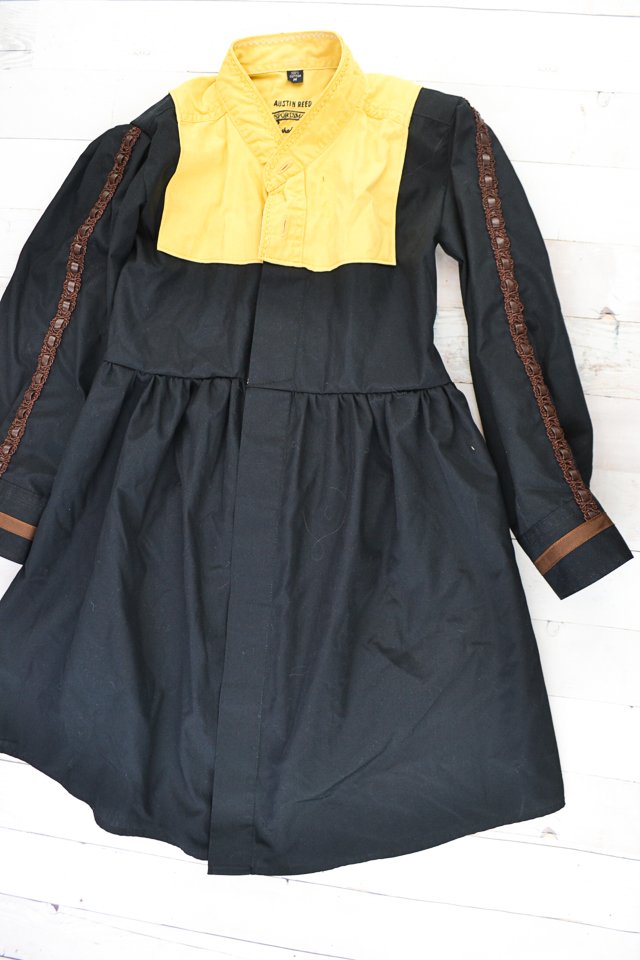
Remove the collar from the yellow shirt. Remove any collar buttons. Leave the collar stand and topstitch it closed.
Optional: add metallic decorative stitching along the top of the front and the collar stand. I used a triangular stitching that my machine can do, but a zigzag stitch would also work.
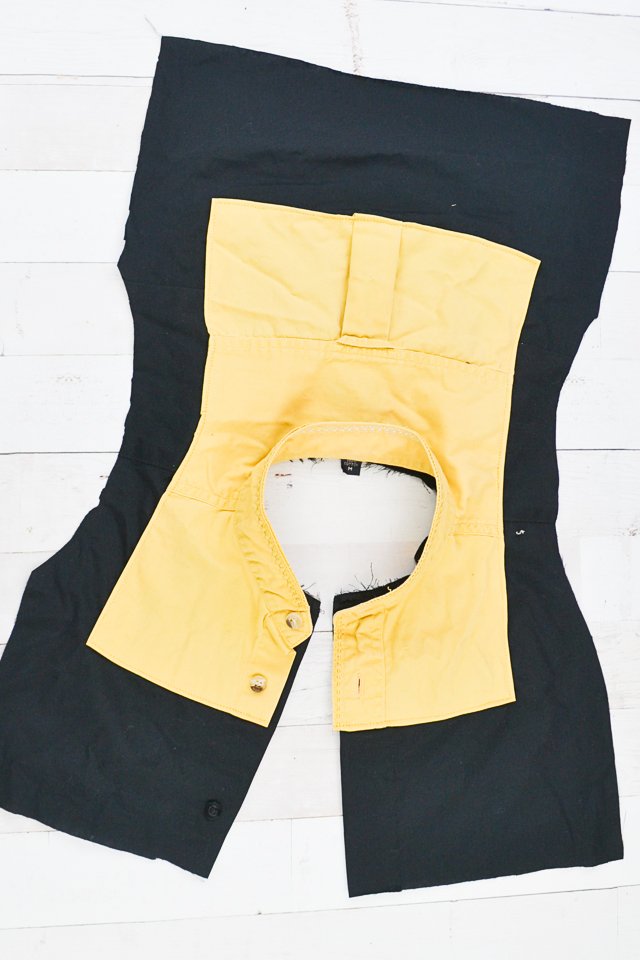
Cut a square around the neckline of the yellow shirt. I used one of my daughter’s shirts as a guide. Make sure you cut through a section in between buttons.
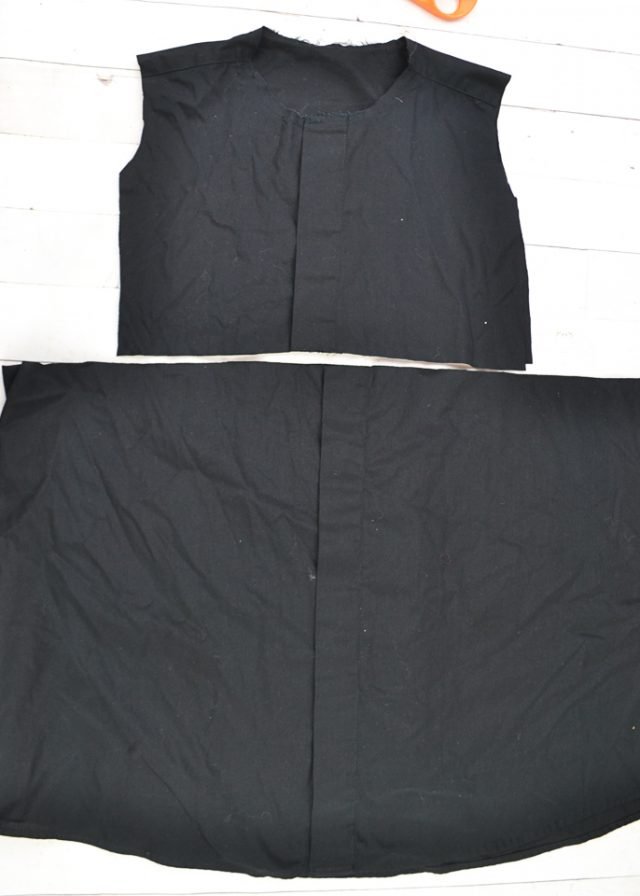
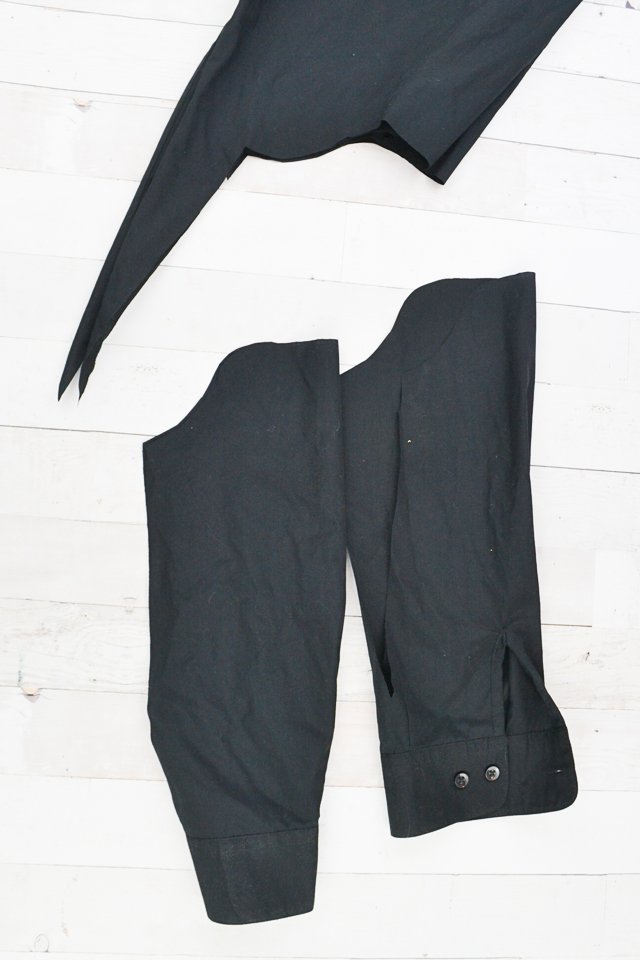
Cut the dress bodice out of the black shirt reusing the button placket. (The collar is already removed because I used it for Anna’s cloak.)
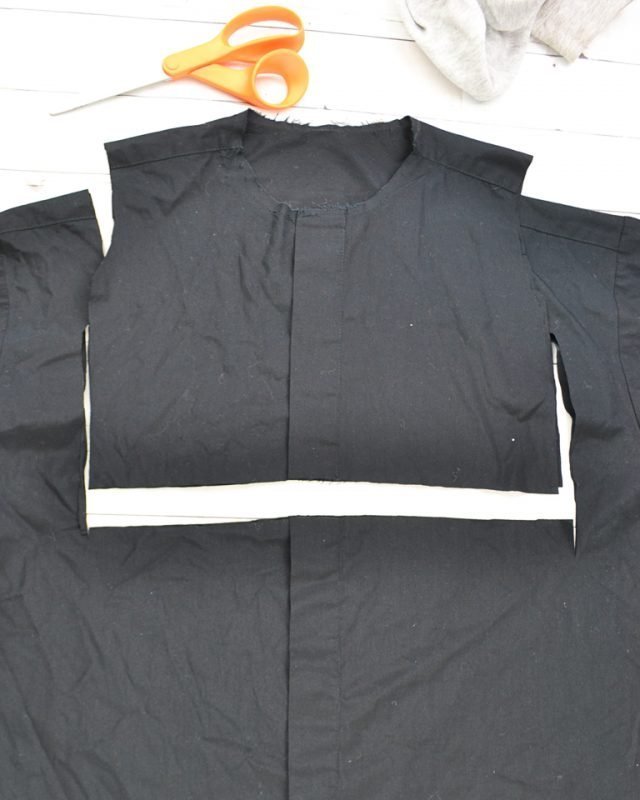
Cut the dress skirt out of the black shirt reusing the button placket and the hem.
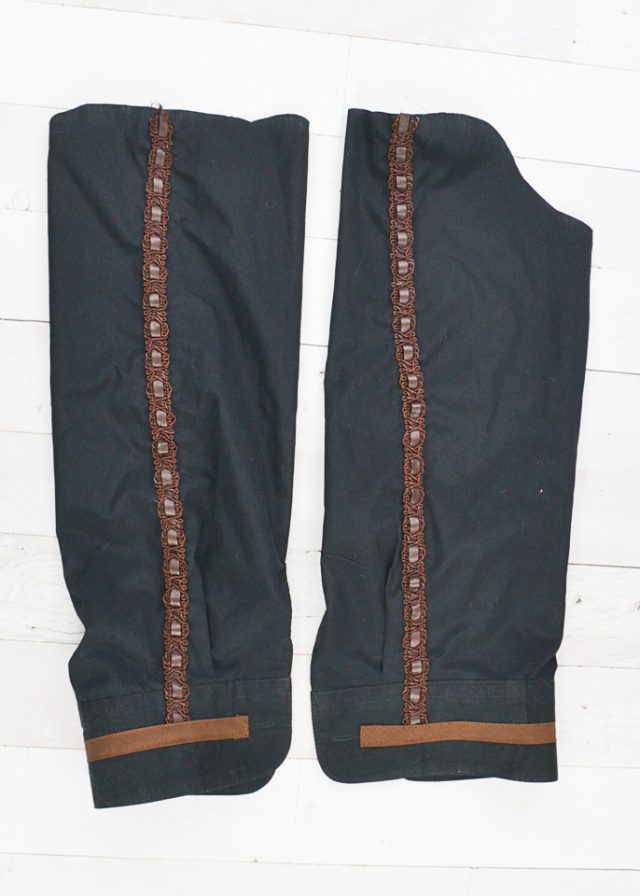
Cut out sleeves from the black shirt sleeves. I button the cuff closed and then cut the sleeve on the fold. I wanted to reuse the cuff so I cut the sleeve seam and ended a couple of inches from the cuff.
Pin the yellow neckline onto the dress bodice lining up the necklines. Tuck each edge under 1/2 inch.
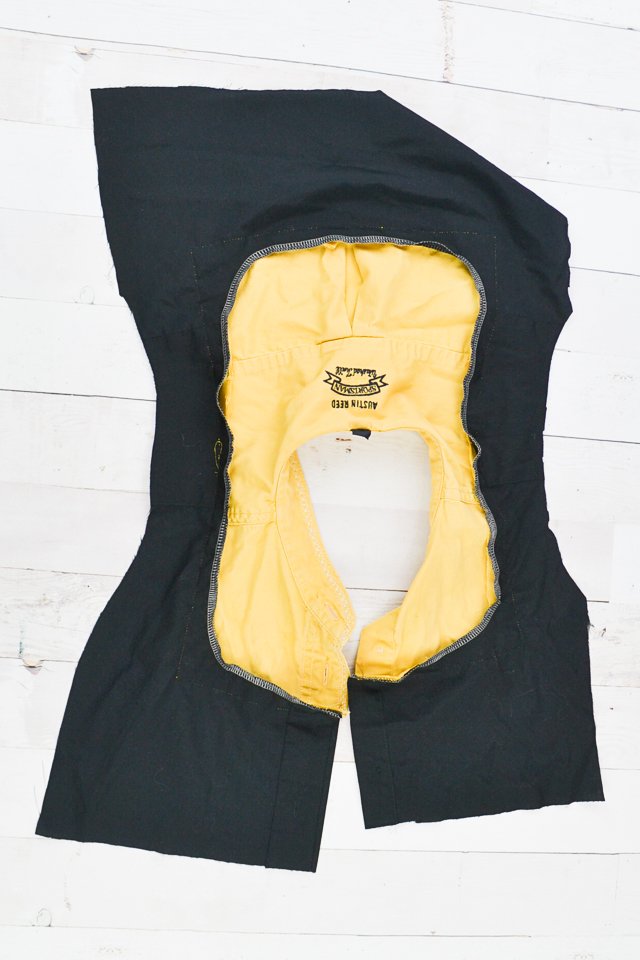
Topstitch around each edge to hold it in place.

After I pinned it on I realized that I want the button placket to be functional so I adjusted the pins.
I sewed the yellow neckline on with the same metallic thread I used before.
Cut out the black neckline from inside and finish the edges. The raw edges of the yellow fabric will be sandwiched in between.
Add the brown decorative trim to the sleeve. I pinned them of from the shoulder to halfway through the cuff. Sew the trim on. Don’t worry about the raw edges since they will get covered later.
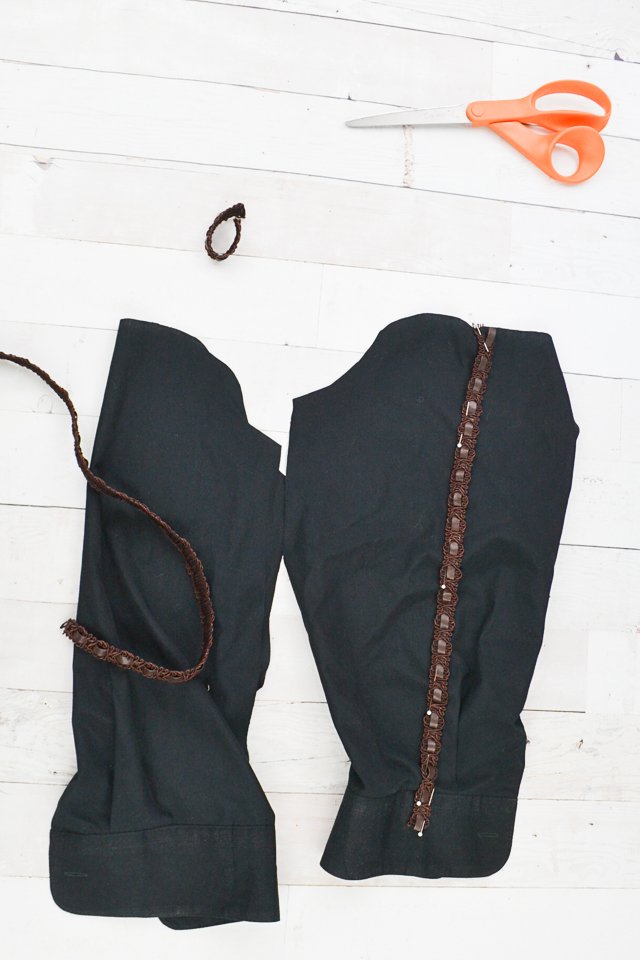
Sew the single fold bias tape to the cuff between the button and buttonhole. Make sure that it covers the raw edge of the bottom of the trim. Fold the raw edges under to prevent fraying.
With right sides together sew the side seams of the bodice and finish the edges.
With right sides together sew the sleeves into the bodice armscye. If you sleeve is bigger you can add a couple of pleats along the top of the sleeve. Finish the edges.

Sew two rows of basting stitches along the top of the skirt. I did one 1/4 inch from the edge and another 3/8 inch from the edge.
Gather the skirt until it’s the same width as the bodice. Pin the skirt to the bodice with right sides together and match up the front button plackets and the side seams.
Sew the skirt and the bodice together with a 1/2 inch seam allowance.

Press your seam. Check to see if your buttons and buttonholes are all still functional. Tack the seam allowance at the waist up.
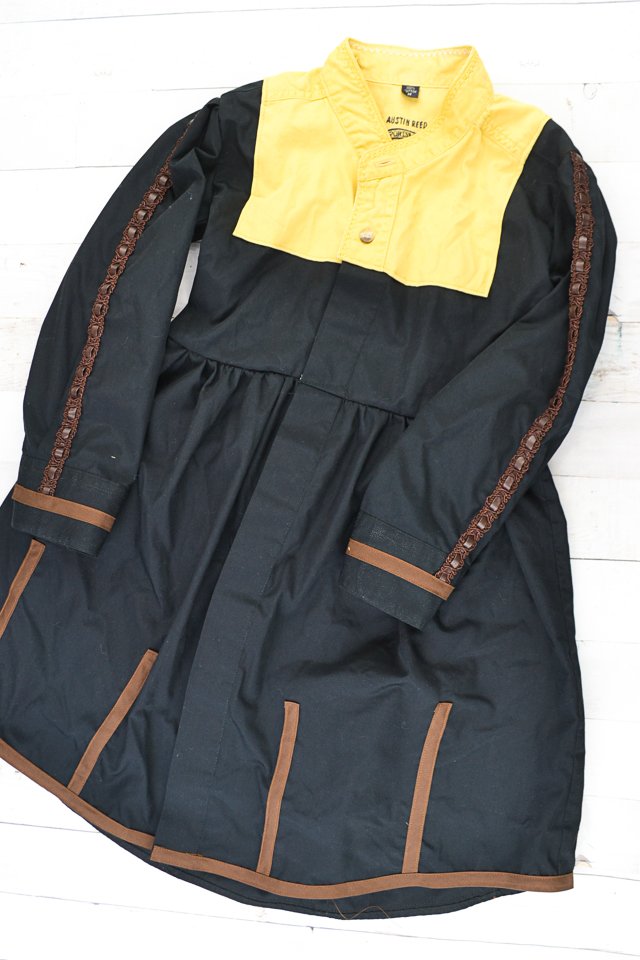
Cut 8 pieces of single fold bias tape about 6 inches long. Sew them onto the hem of the dress vertically and evenly spaced. I did 4 in the front and 4 in the back.
The bottom edge can be left raw, but the top edge should be folded under to prevent fraying.
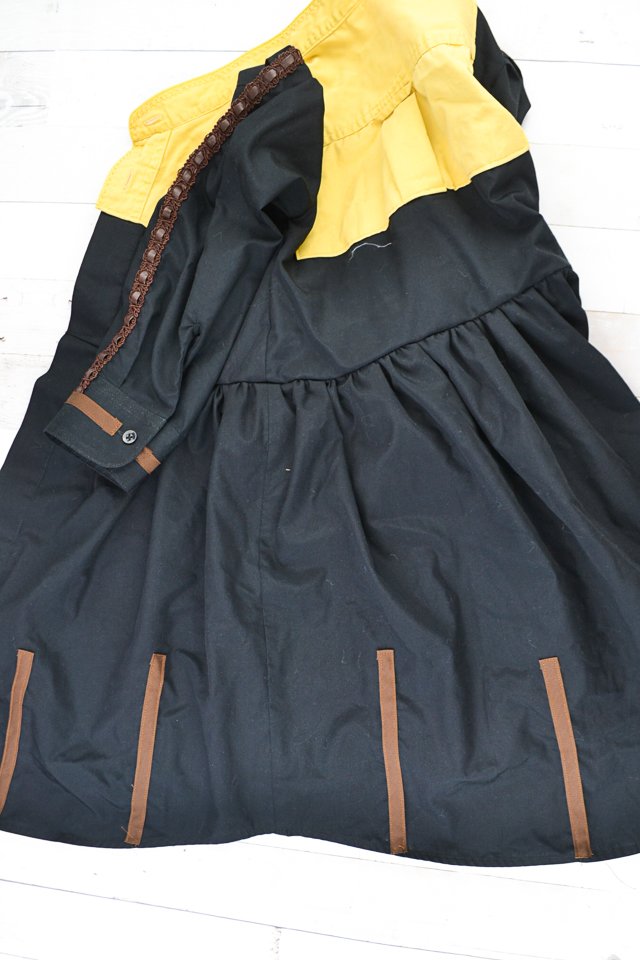
Sew the single fold bias tape along the hem to cover the raw edges of the vertical pieces and to give the look of the dress in the movie.
Make a belt to go around the waist. I decided to make it easy on myself and sew the single fold bias tape onto the dress at the waist to look like a belt.
If you make a DIY Anna Dress using this tutorial, I’d love to see! Please share it on social media with the hashtag #heatherhandmade and tag me!

I believe small sewing moments can create great joy. Find your own “right” way to sew. -Heather
Love it!!! So creative😁. Great recycling ideas. Have sewn several every day princess dresses for my granddaughter,but nothing from frozen. Guess I need to get busy lol. Stay safe and take care of your beautiful children turning this time of quarantine.
SOOO good!! I love it so much! Are you going to do a cape tutorial also?
Yes! It’s coming out tomorrow!