
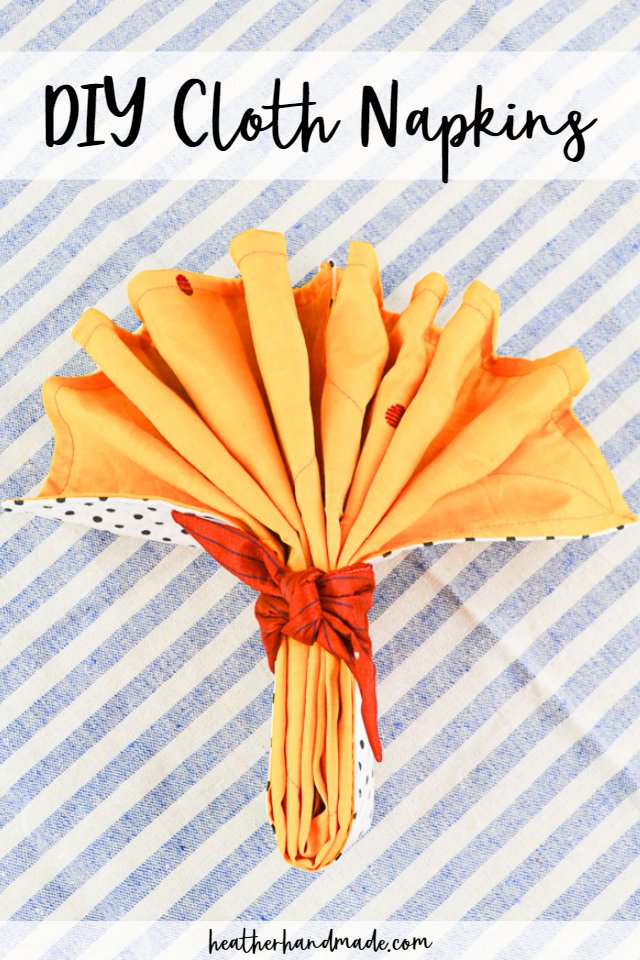
DIY Cloth Napkins for Pretty Tables

This post may contain affiliate links.
Learn how to make DIY cloth napkins with silk and cotton fabric. This beginner sewing project is reusable and washable for the table.
I love hosting for dinner, but I don’t actually love putting a lot of work into the decorating. It’s all about simple decor and a simple table setting. For real luxury and sustainability we use DIY cloth napkins. This is such a great beginner sewing project!
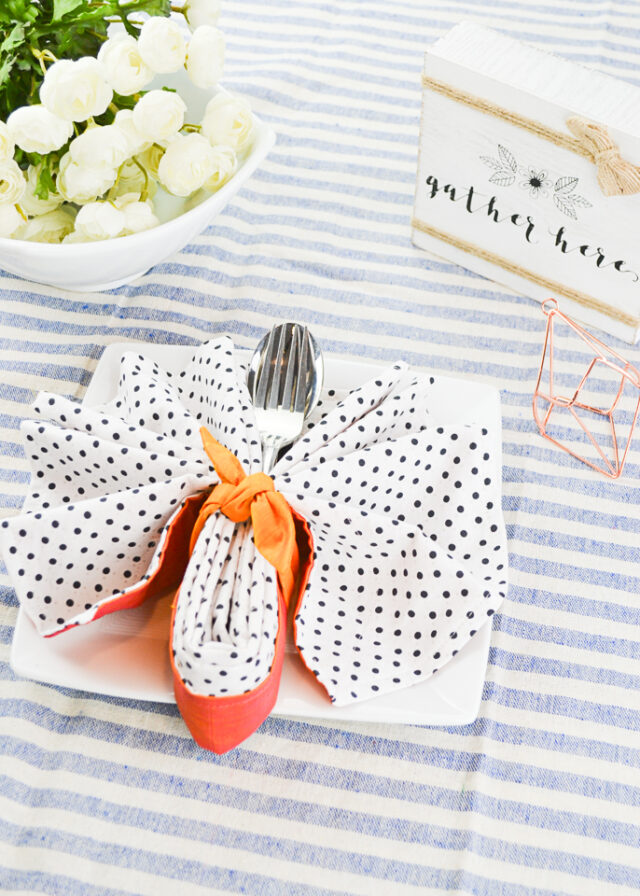
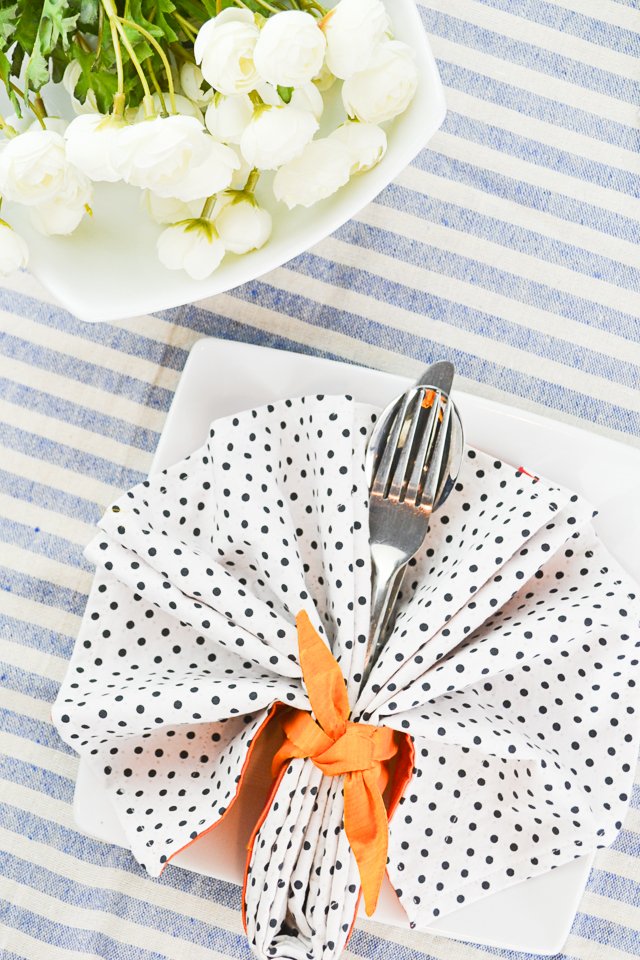
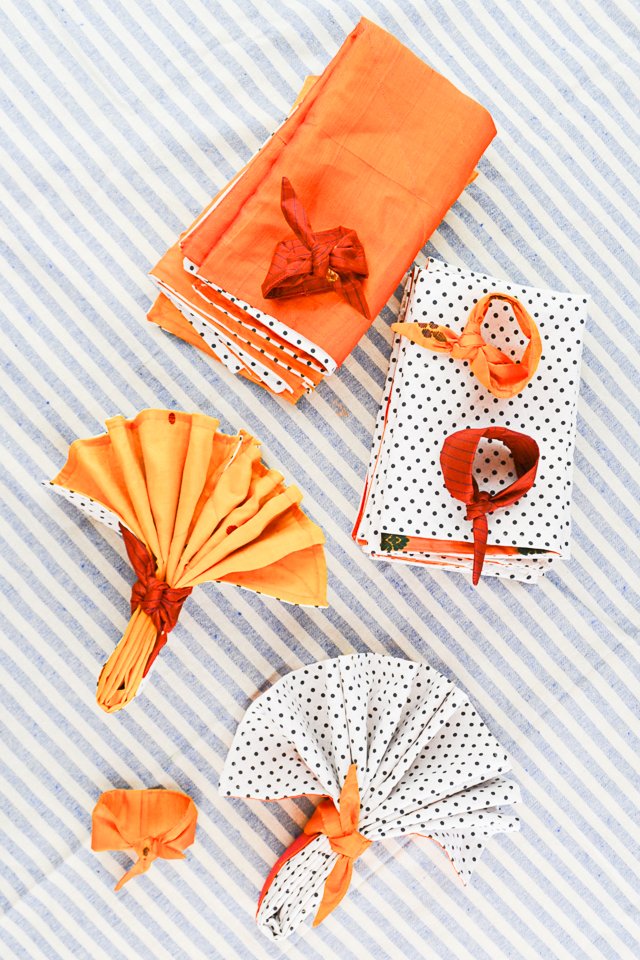
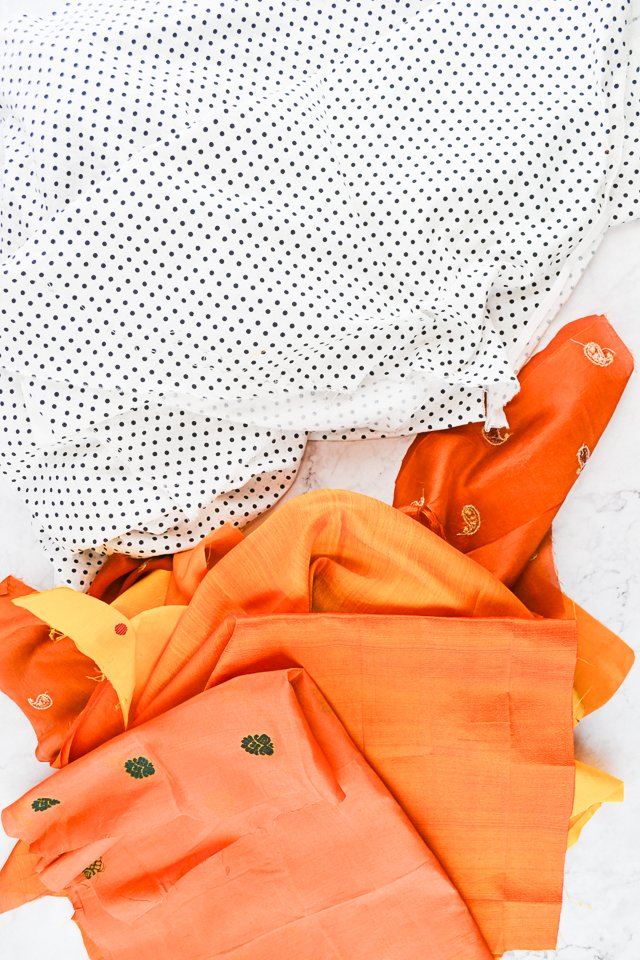
The silk makes the napkin strong and luxurious. The cotton makes the napkins absorbant and durable. There’s even a tutorial to make bow napkin rings with scraps of silk fabric in the video! These match perfectly with my fall placemats!
We have been using fabric napkins and fabric wipes for a couple of years now. We are not perfect at it, but we are trying.
I don’t mind the extra laundry because I think my kids learn better manners and the fabric always cleans up better than paper napkins or paper towels.
These silk and cotton cloth napkins are a step up from what we had before. Those were small scraps that I serged the edges of. The newest cloth napkins have two layers and finished edges. Now I need to learn how to fold napkins in a cool way!
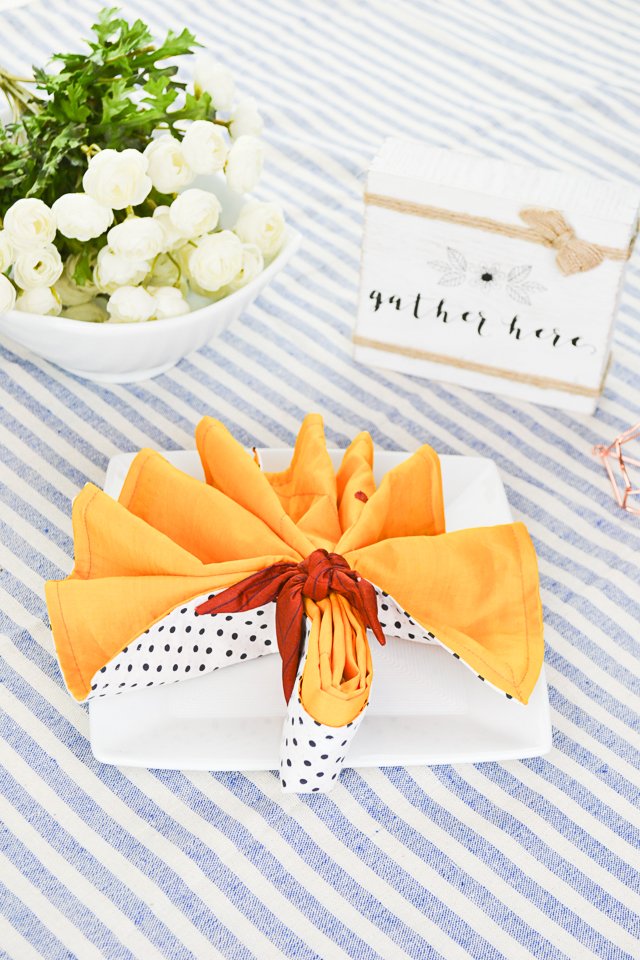
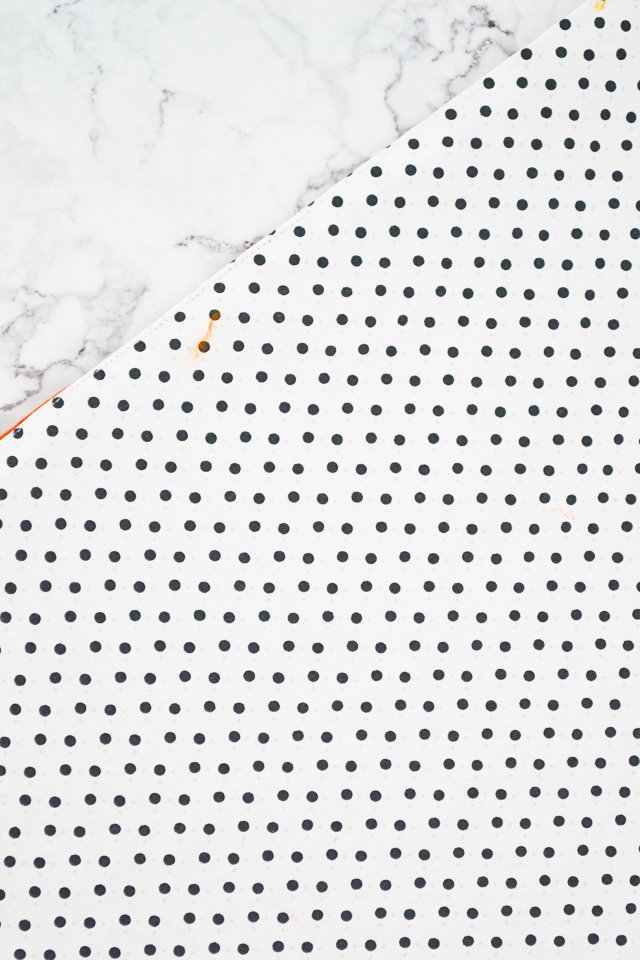
I love the white polka dotted fabric against the orange fabric. The orange is great for fall holidays like Fall and Thanksgiving. The polka dotted fabric is perfect for any other holiday throughout the year. These would be the perfect easy handmade gift for someone who has everything!
Do you love to sew? Check out some of these sewing projects:
- Easy beginner sewing projects
- Scrap fabric projects
- Easy gifts to make
- Make fall placemats
- Make Linen napkins
- Easter sewing projects
- Fat quarter sewing projects
- eco friendly sewing projects
- How to sew a placemat
Best Fabric for DIY Cloth Napkins
- Quilting Cotton: most accessible fabric, many prints and colors, durable, strong, absorbant, easy to sew, can be washed, can look expensive or cheap
- Woven Silk: harder to find, luxurious, mostly solids, medium absorbant, strong, can be washed but the sheen will be removed
- Cotton Flannel: most absorbant, strong, durable, easy to find, many prints and colors but leans towards baby or plaid, easy to sew, can be washed, less expensive looking
- Woven Polyester: medium to find, mostly solids, not very absorabant, strong, can be washed, can be hard to sew, frays easily
DIY Cloth Napkins
Supplies
- Silk fat quarters*
- Quilting cotton fat quarters*
- Lightweight interfacing
- Matching thread
- Sewing machine
- Sewing tools
Press the fat quarters well so that there are no more wrinkles.
Place a cotton fat quarter right sides together with a silk fat quarter. Pin all around the edges. I found the silk fat quarters to vary a lot in size, and I sometimes had to trim them down.
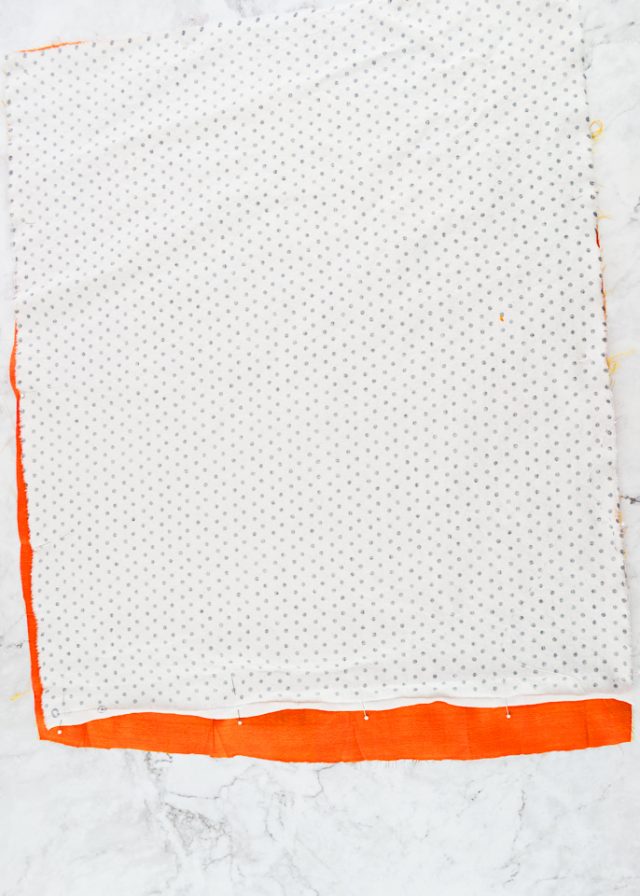
Leave a 4 inch hole on one side of the napkin. Backstitch on each side.

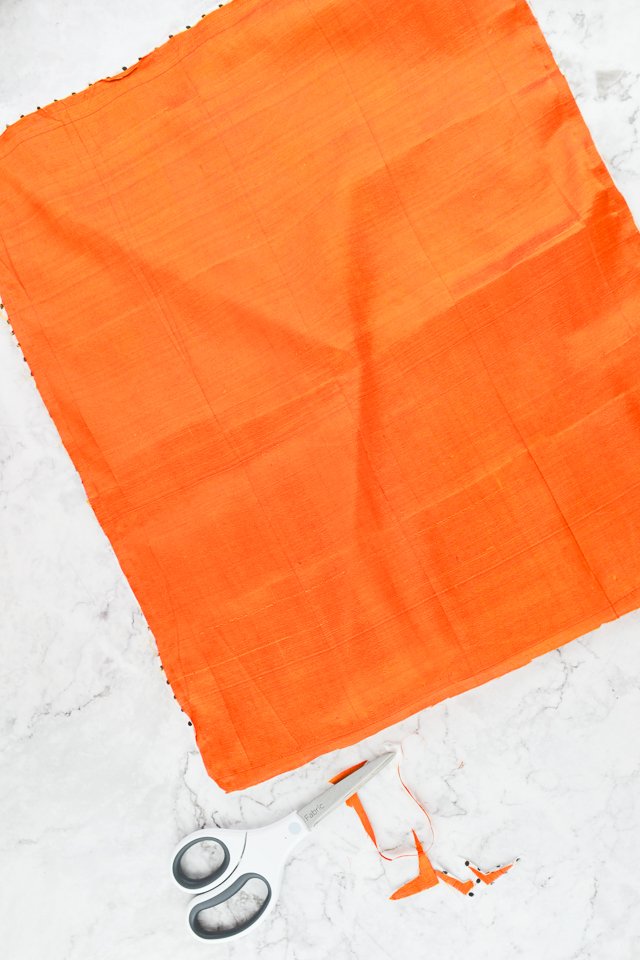
Trim the corners to reduce the bulk. I usually cut two triangles off at each corner.
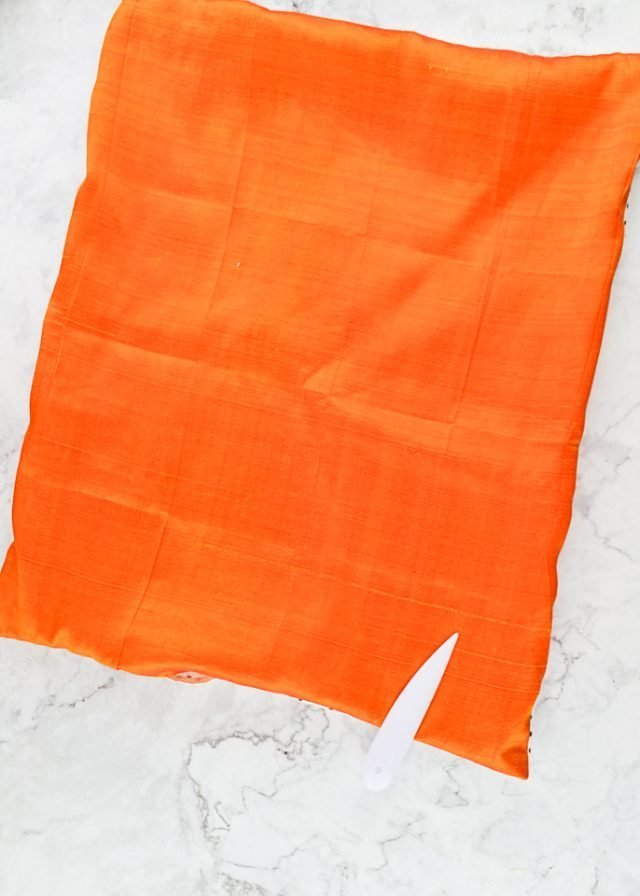
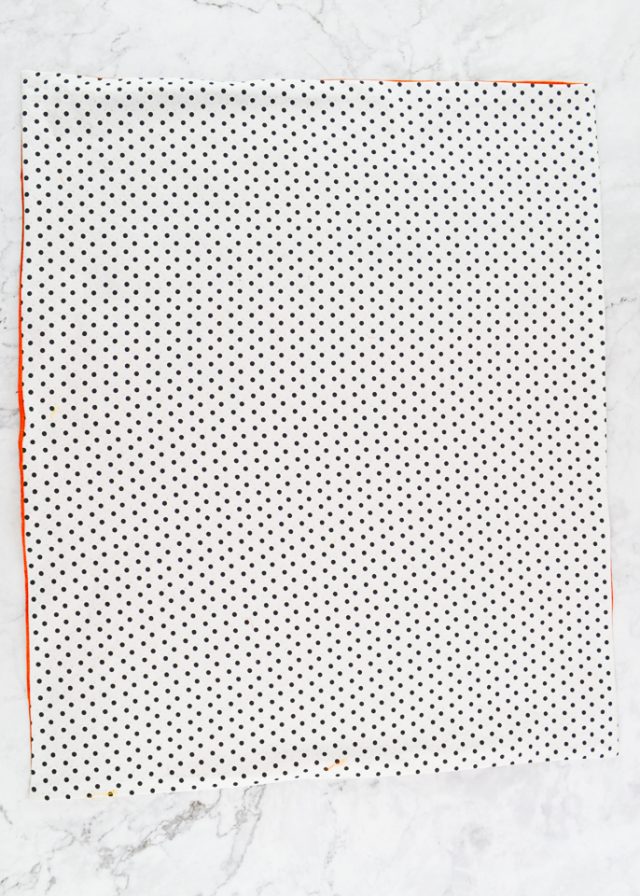
Carefully turn the cloth napkin right side out. Poke out the corners so they will be nice and crisp.
Press all the edges to get a nice crisp fold.
Edgestitch the hole closed. Edgestitch all the way around the napkin 1/8″ from the edge.
Then start sewing at one corner and sew across through the middle to the opposite corner. Do the same to the other two corners. This will prevent the middle of the napkin from separating and strengthen it.
If you make DIY cloth napkins using this tutorial, I’d love to see! Please share it on social media with the hashtag #heatherhandmade and tag me!

I believe small sewing moments can create great joy. Find your own “right” way to sew. -Heather
Holly and Elise,
I have a suggestion. Go to your local fabric store and asked them where to find beginner sewing classes. You might also try a sewing machine store and ask, they will want to sell you a machine but you can look at pawn shops, salvation army or good will. I have been sewing since I was 7 and finally learned how at 14 in 4-h. remember hand sewing works as well. Best of luck.
Yes, learn to sew! It’s a worthwhile skill! I am 82 years old and still find joy and relaxation while sewing. My 11 year old granddaughter is learning to sew and feels such pride when she completes a project whether large or small!
DO IT!
These turned out so cute! I’ve got to learn to sew!
Oh how fun! I love the polka dots – and now I’m really wishing I knew how to sew!
Lots of beginner tutorials on YouTube! You can teach yourself!