
DIY One Seam Wrap Skirt + Free Sewing Pattern

This post may contain affiliate links.
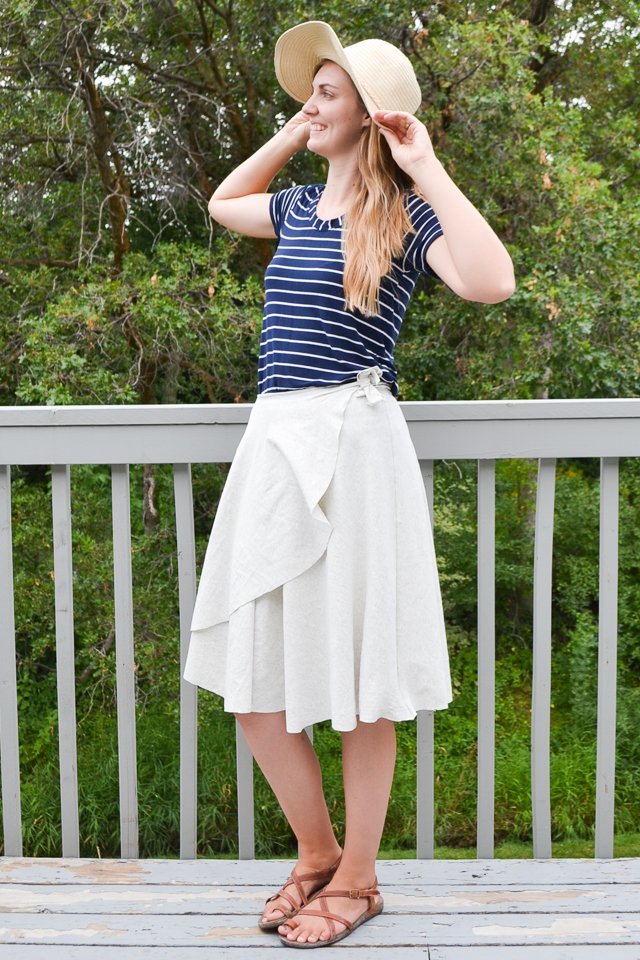
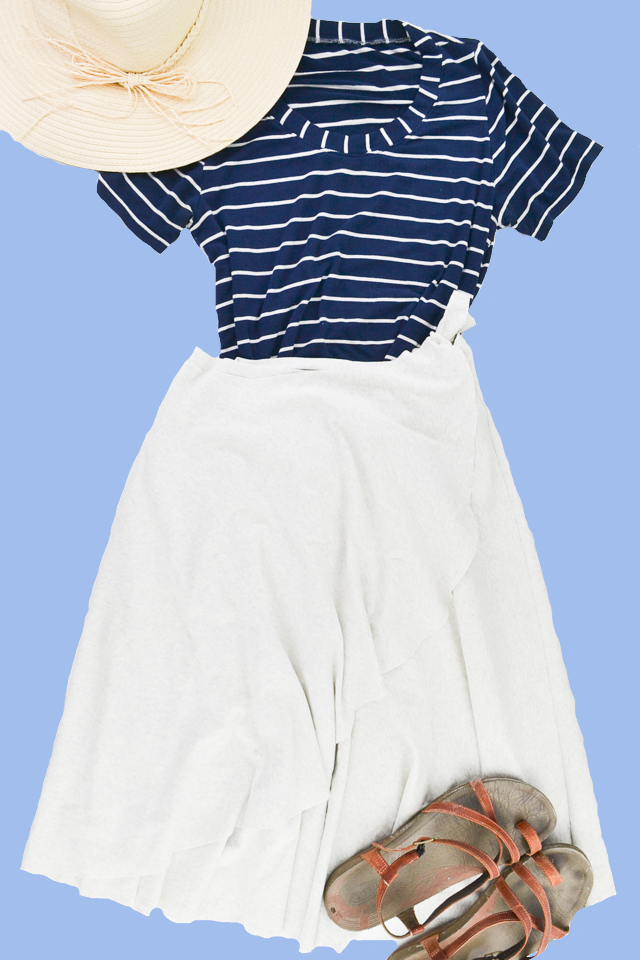
Learn how to make a DIY one seam wrap skirt with a free sewing pattern. This easy sewing project is a great adjustable handmade gift.
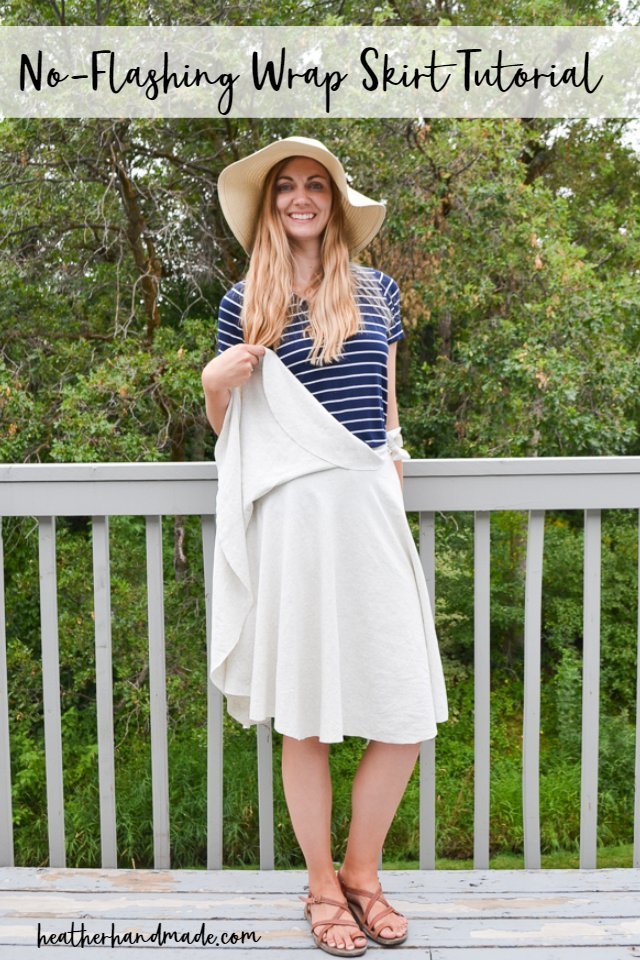
This skirt is so adjustable that it can fit lots of sizes, and you can still fit in it if you’re changing sizes! It’s really quick because there is only ONE SEAM to sew, and there are no hems or edge finishes!
If you lift up the overlap there’s a layer underneath so you’ll never flash anyone. Enjoy this one seam wrap skirt tutorial perfect for any size and lifestyle!
Don’t miss the free printable PDF guide at the end! Download the instructions so you can make it again and again!
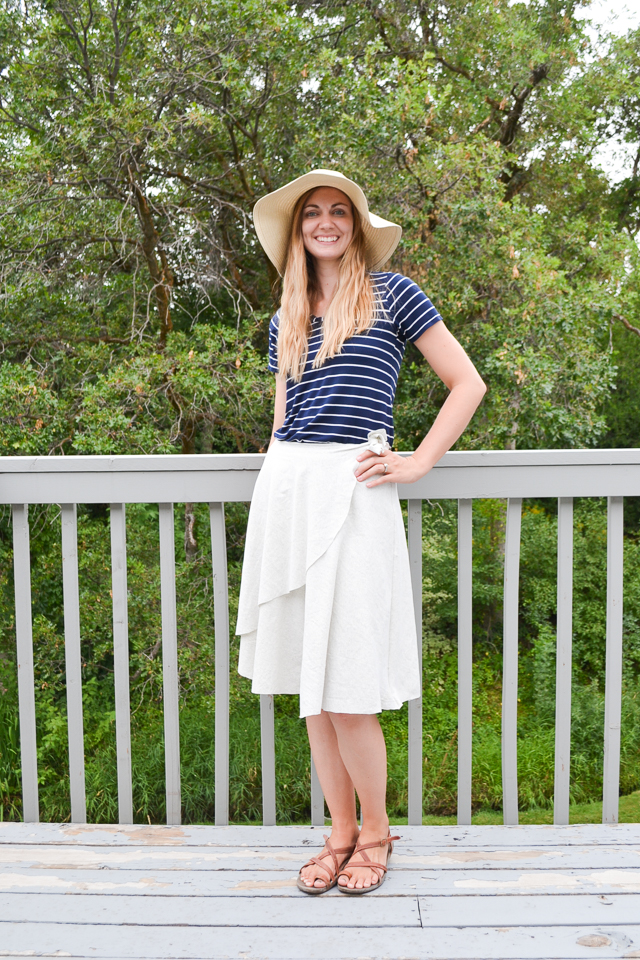
I’ve had an idea for a circle wrap skirt developing in my head for awhile. I wanted to make a skirt that was easy to make, adjustable for changing sizes, and mom-friendly.
I was able to make a wrap skirt tutorial that is all of these things!
Even when I lift the part the overlap, nothing is flashed from underneath!
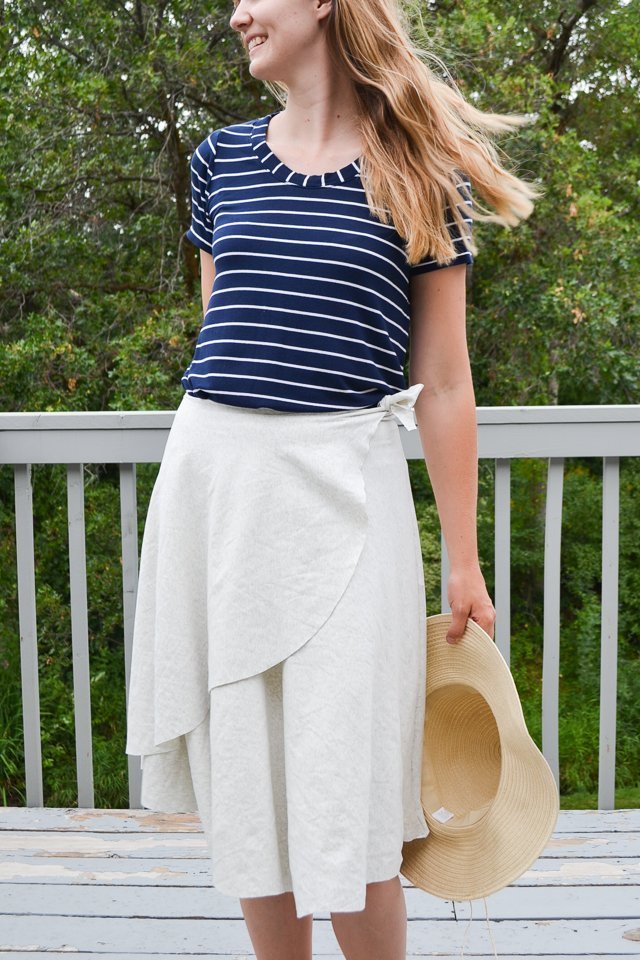
I wore this style of wrap skirt all throughout my pregnancy when I was changing weight constantly, and I even wore it during postpartum when I was also changing weight constantly.
What fabric works best for this skirt?
A double knit fabric like interlock, ponte, scuba or liverpool will work best. These fabrics don’t roll up at the hem, but they have enough body to hang nicely.
Should I prewash the fabric?
Yes, you should prewash the fabric. Treat the fabric the same way you’ll wash and dry the skirt once it’s finished. Remove any shrinkage before you cut and sew.
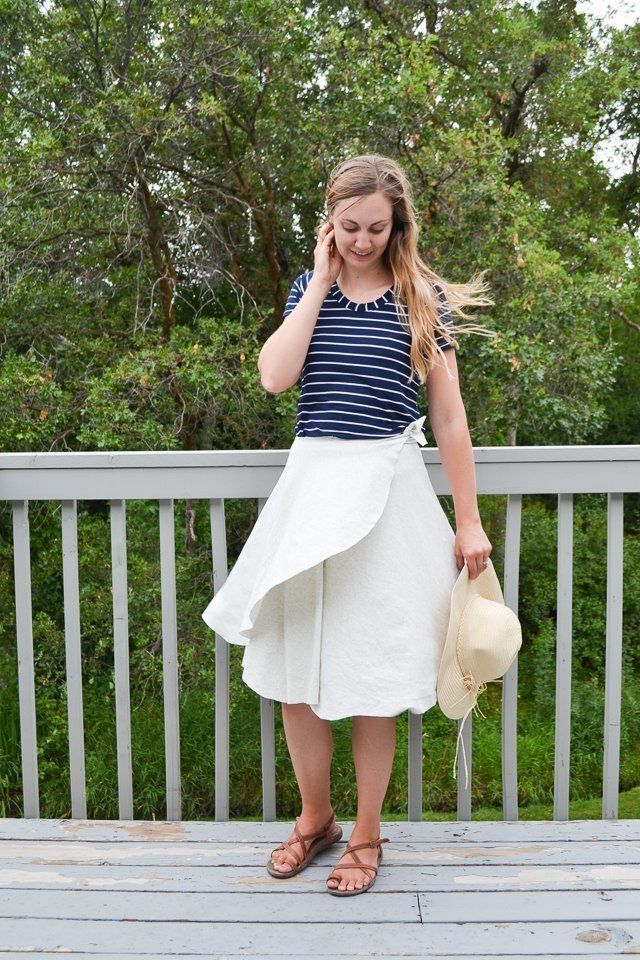
My SIL and I wore the same wrap skirt that I wore even though I was pregnant and she was not. Our waist measurements were not even close, but we were able to wear the same skirt. It’s a magical adjustable skirt! You can play with the length for different looks.
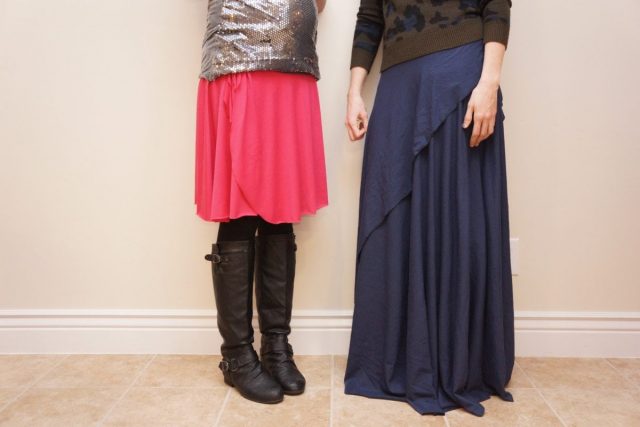
The easiest ones to make are the mini and knee length skirt because they are shorter. The problem with the longer skirts is that it uses a LOT of fabric.
This skirt is very comfortable and works throughout and after a pregnancy. You’ll get lots of compliments, and you don’t even have to tell them how easy it was for you to make!
If you prefer using wovens instead of knit fabric you can make this DIY wrap skirt! Here’s a giant list of free skirt patterns so that you can make something you’ll love!
Do you like to sew skirts? Try one of these sewing projects:
- Free skirt patterns and tutorials
- DIY one seam wrap skirt + free pattern
- DIY half circle skirt + free pattern
- DIY wrap skirt + free pattern
- Easy flat front skirt + free pattern
- DIY easy circle skirt + free pattern
- Free pencil skirt pattern
- Jersey knit sewing projects
DIY One Seam Wrap Skirt
Supplies
- Sewing template – get it at the end of the post
- Sewing tools
- 3-5 yards of Knit Fabric –
- lightweight to mediumweight knit fabric with a soft hand
- choose a spandex blends for the best recovery
- jersey knit will roll on the cut edges
- interlock or a rib knit will not roll but don’t often have spandex
- Sewing machine
- Measuring tape and marking tool
- Tips for sewing knit fabrics
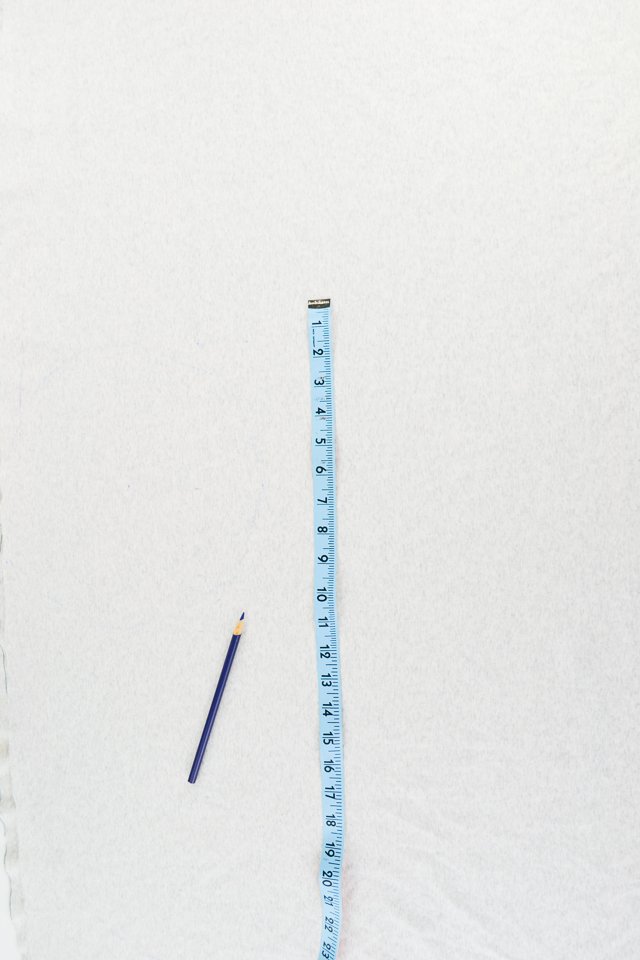
Find Your Measurements
- Place a measuring tape at your center back waist and let it hang down. Decide how long you want your skirt to be, and have someone check what the measurement is. This is your skirt height measurement.
- Measure your waist or where you want your skirt to sit. Wrap the measuring tape around your waist and make sure it’s horizontal with the ground. This is your waist measurement.
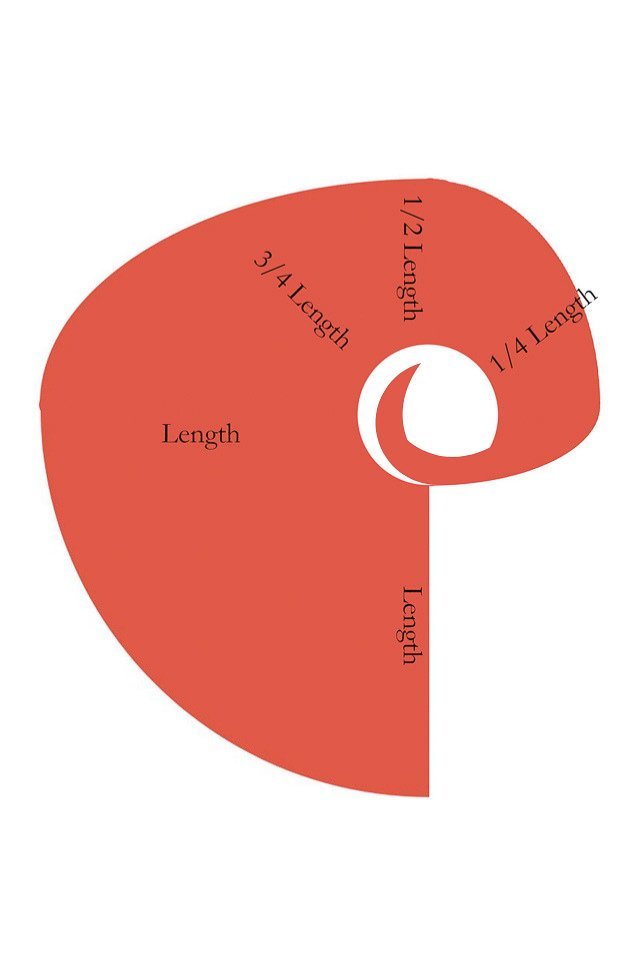
- Find your radius for the inner waist circle by using the chart below.
Here is a simple chart for quick radius measurements. Pick something in between or the next measurement down since the knit fabric will stretch.
| Waist or Hip Circumference | Radius for ½ Circle Skirt |
| 20″ | 6 ⅜” |
| 25″ | 7 ⅞” |
| 30″ | 9 ½” |
| 35″ | 11 ⅛” |
| 40″ | 12 ¾” |
| 45″ | 14 ¼” |
| 50″ | 15 ⅞” |
Cutting Instructions
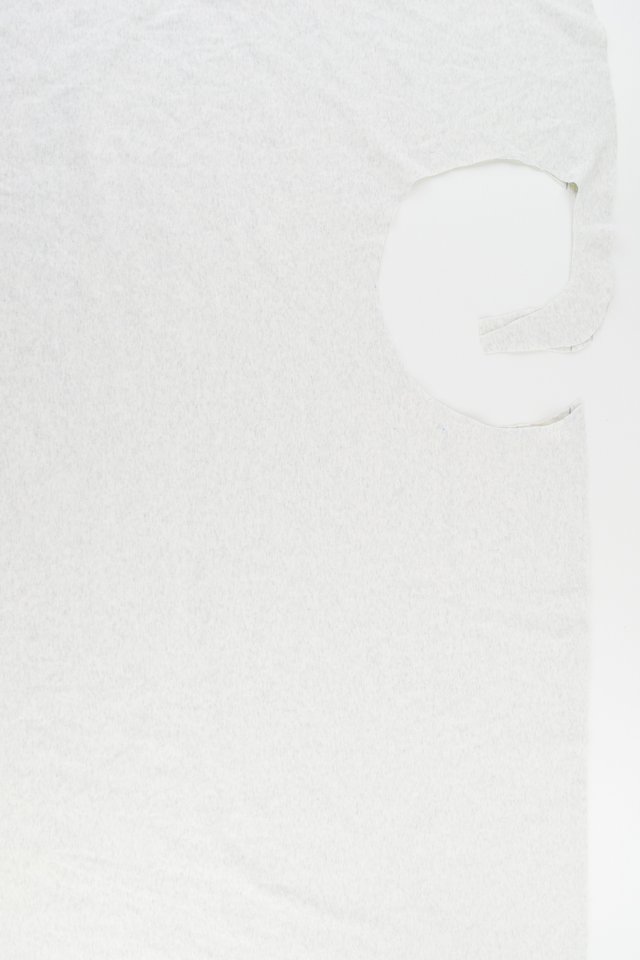
Use this pattern piece to draw out your skirt pattern. You will need two cut two of one diagram, but make sure they are opposite of each other. Use the measurements you found to get a custom made skirt that fits your body!
*When you are cutting from 1/4 height to the center waist circle, cut a short tail from the inside circle for the tie.*
Sewing Instructions
Using diagram cut out two pieces of the custom wrap skirt pattern piece. Make sure they are opposite of each other when you cut them out.
Sew the one long seam with a zigzag and right sides together.
Serge or zigzag the raw edges of the seam allowance.
Press the seam allowance to one side.
Use a straight stitch to tack the seam allowance to one side at the waist and the hem.
Don’t finish any of the hems. Knit fabric does not fray, but it might roll.
To put on your skirt:
Find the seam and put it on one side of your waist and hold it there.
Grab the side that will go across your front and wrap it all the way around until it meets with the seam. Hold the seam and one wrapped side with one hand on one side of your waist.
Grab the other side and wrap it around your back to the front until it meets with the seam.
Your two ends that tie will meet over your seam. Tie them in a bow or knot.

Get the Free Sewing Pattern here!
If you make something using this sewing project, I’d love to see! Please share it on social media with the hashtag #heatherhandmade and tag me!

I believe small sewing moments can create great joy. Find your own “right” way to sew. -Heather
I have tried multiple times to find the pdf of this pattern. Please help.
Enter your email here: https://www.heatherhandmade.com/adjustable-one-seam-no-flashing-wrap/#get-the-free-sewing-pattern-here
So I’m confused, I made the skirt but the waist was too small. So if it is a 35 inch waist, and the half radius is 11 1/8 inch, is the diameter of the circle for your waist 22 1/4 inches? I only used 11 1/8 inch for the diameter, and it doesn’t over lap close very good. I’m not sure what to do now that is done.
Yes, the diameter would be 22 inches. Can you add some curved trapezoid pieces to the center back or sides to add more width?
Thank you for responding. I am going to see if I can add some more fabric to the back, after I take the seam out, because I have extra fabric. No one will know but me. I bought more material and so I’m going to make another one, or more, with the right measurements.
I’m glad you can make it work!
So I am an experienced sewer and your pattern is confusing. Your picture has the seam side not in line with the inner circle, but your instructions say that the seam is in line with the inner circle.
If I understand your question, the center back seam looks a little off with the inner circle when you cut it out. When you put both pieces together and sew that sew, it will create the circle in the middle and the seam will be in the center back. Does that make sense and answer your question?
Love all of your posts and free patterns….so very helpful.
This is a beautiful skirt! I love the style ( and the fact it’s sewn shut!). I would like to try making this skirt, but I can’t find the free pattern it’s supposed to have. Am I missing the link?
Click on the heading near the bottom of the post
could you just place the long edge on the fold, and cut and have no seam??
You could as long as your fabric is wide enough
This adjustable skirt looks so cute on you and I love how easy it is to make. I am going fabric shopping so I can try this DIY skirt in lots of colors!
I have tried to figure out this pattern to no avail…. Can you help me.. Would love to be able to make it…..Thank you……
I would love to help. What part is confusing? The pattern piece?
This is perfect. I’m in the “losing the baby weight” phase and need something adjustable. I will be trying this out this week. Thank you!
Great! I’m hoping to make a video of this tutorial in the next month!
Could you do the two layers in different colours? So when you wrap it, the bottom layer is one colour and then the other part that wraps around it at the front will be another colour? Where is the seam that you sew? Is it hidden on the side opposite to the ties or can you possibly see the seam (and subsequently the abrupt change in colour)?
The seam is in the center back so it would abruptly change colors. You could just wear a different color underneath though!
Please clarify the tie portion of the instructions. I don’t see two “ends that tie”. The instructions say to “waist circle, cut a short tail from the inside circle for the tie.* ”, but what about the other side, is there a tail to cut there too?
When you are cutting a short tail from the inside of the circle you are cutting two layers of fabric. You will be cutting two ends that tie at the same time. Does that make sense?
Boy these are adorable.
I just wish there was a video tutorial, because I have no idea how to make them.
I am a little confused about some of these instructions.
You put "You will need two of each for one skirt." yet there is only one seam you need to sew.
Do you mean one of each circle design for one skirt or two of one circle design for one skirt?
Would love a video tutorial 🙂
Would love a video tutorial 🙂
Cuteness!
Love it, and it's going straight to my really have to do list!