
How to Add a Faux Button Placket to a Skirt

This post may contain affiliate links.
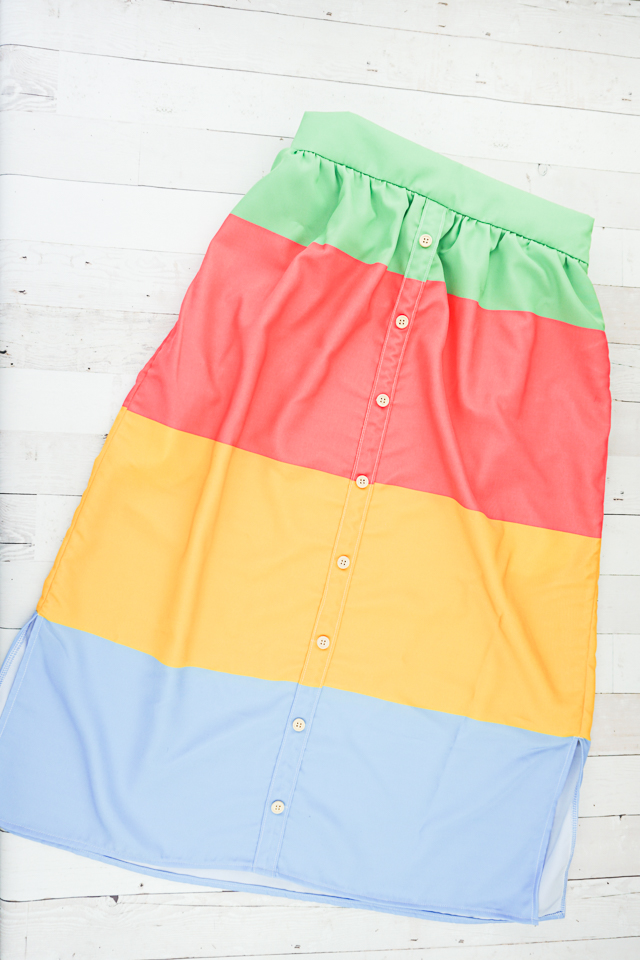
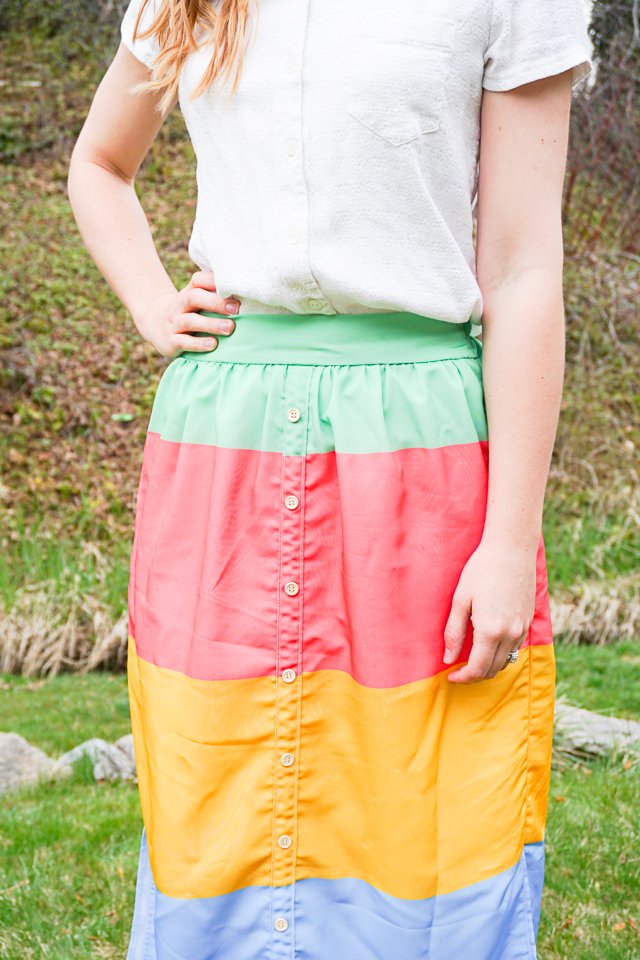
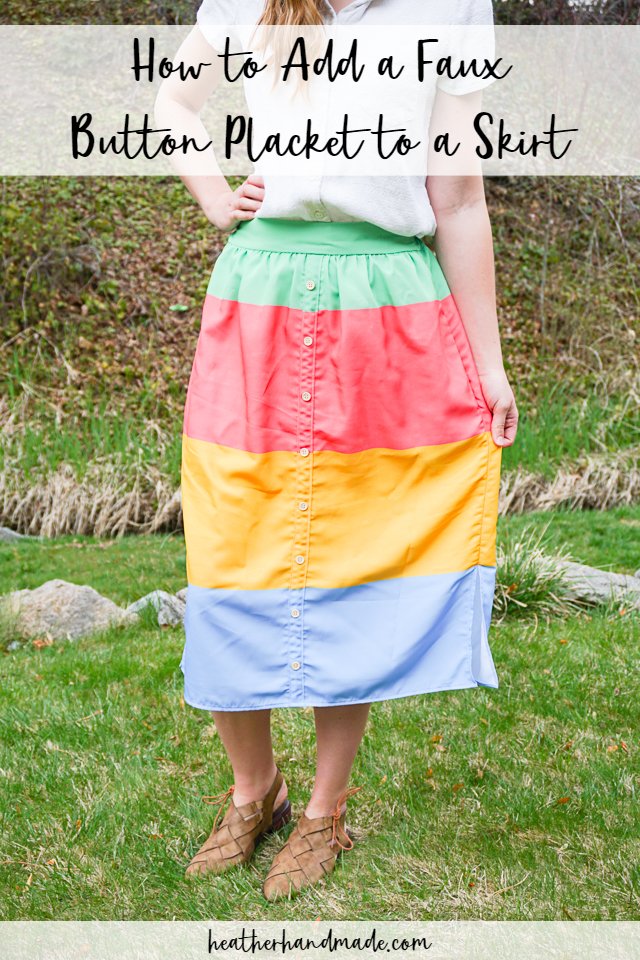
To make your skirts special and unique, learn how to add a faux button placket to any skirt pattern! It’s only decorative so the placket will never pop open!
I bought this fabric back in January when I was testing some new fabric designs. I had no idea how much I would need this bright fabric this spring back when I bought it.
I usually stick to neutrals for my closet, but this skirt is bringing me all sorts of happiness and sunshine right now. I used one of my free skirt patterns to make this skirt, but I added a faux button placket for an extra special detail.
I have several free skirt patterns and tutorials that use your measurements to get a perfect, custom fit. This also means it works for both women, girls, and babies.
The faux button placket adds such a fun look to the front of the skirt, but it’s not as hard to sew as a real button placket and it will never accidentally pop open when you move and sit.

The comfort of an elastic waist back skirt paired with a sophisticated flat front skirt is the perfect combination. It’s so comfortable and can stretch as my waist changes, but it still looks good.
I also added side seam pockets with a free pattern and will be sharing a tutorial for those later this week!
This was the first time I used a polyester fabric for the skirt pattern. I think it presses and drapes better with a natural fiber like cotton or linen, but this skirt is going to travel really well since it doesn’t wrinkle.
How to Add a Faux Button Placket to a Skirt
supplies
- Free elastic back skirt pattern
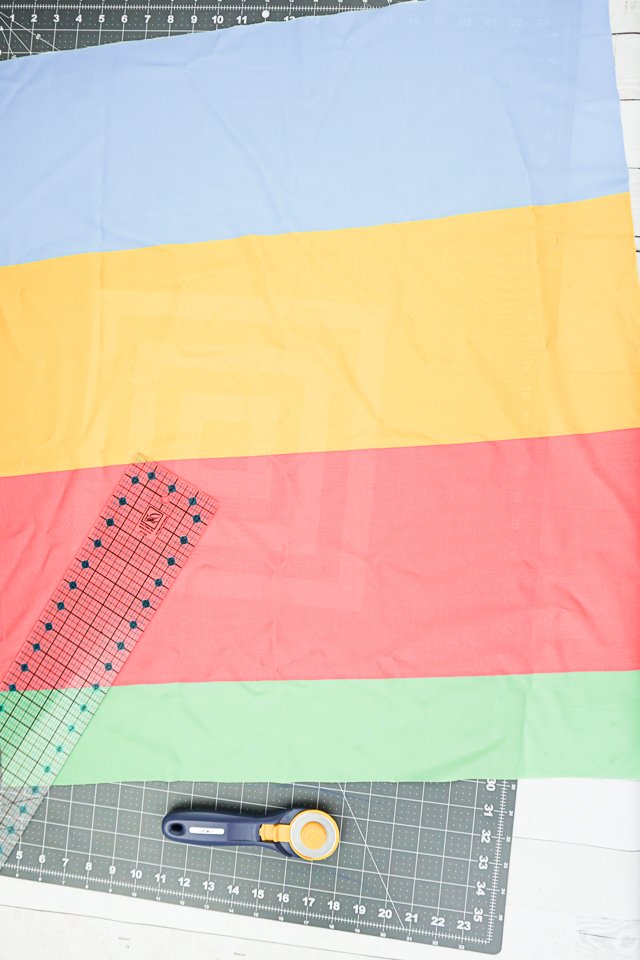
- Skirt fabric – this is my fabric design because I wanted BIG colorful stripes
- About 8 buttons – I used wood because I like natural
- Sewing tools
- Sewing machine
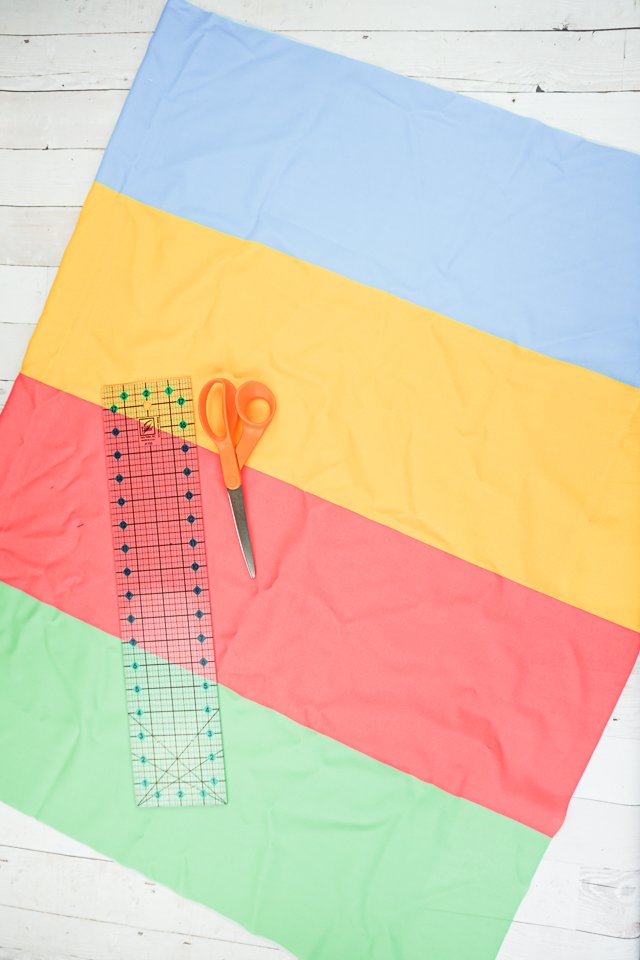
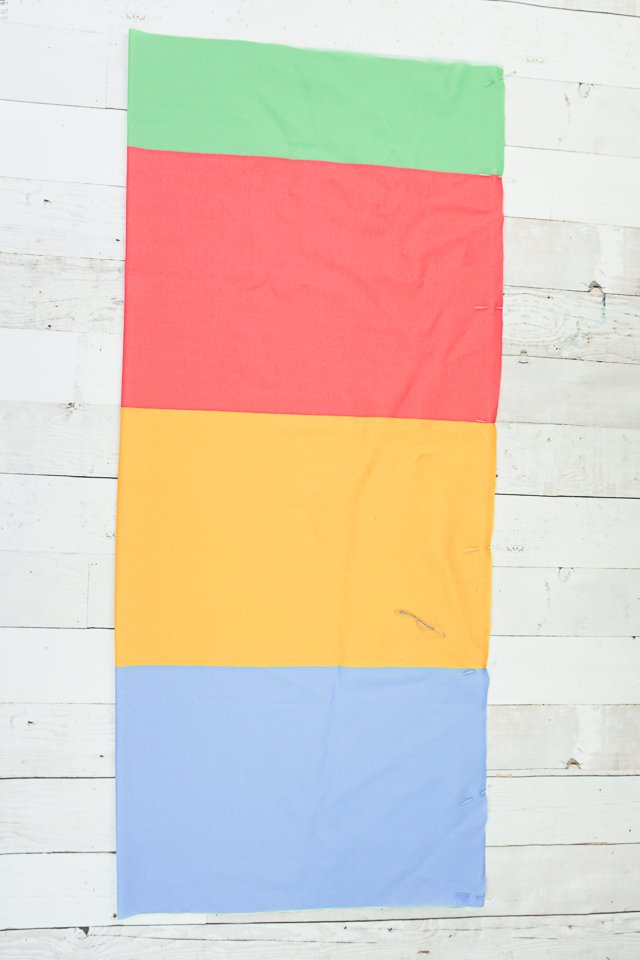
Figure out your skirt pattern pieces using the free flat front skirt pattern. Add 1 extra inch to the skirt front piece.
Cut out the front skirt piece.
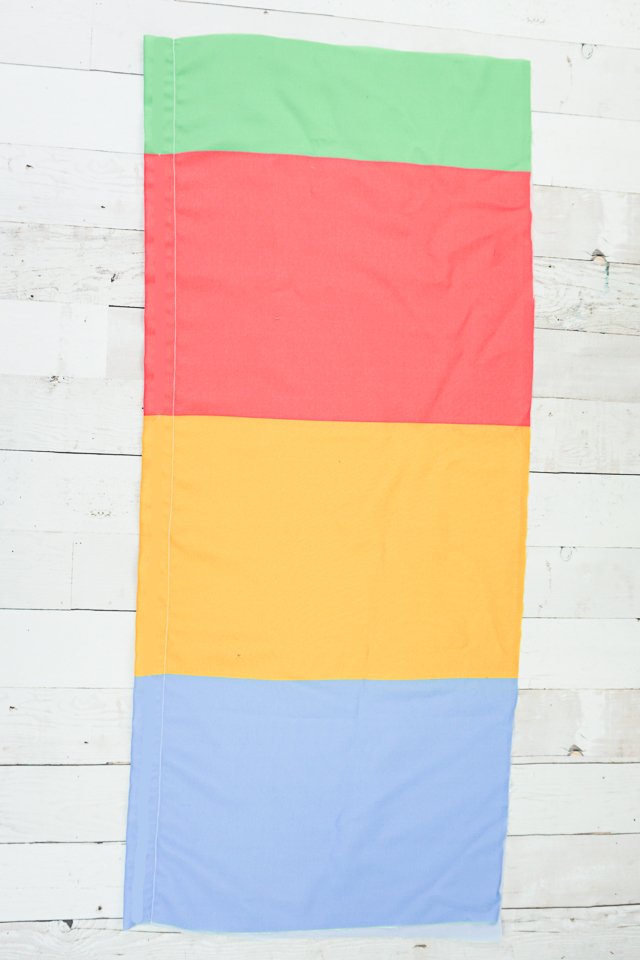
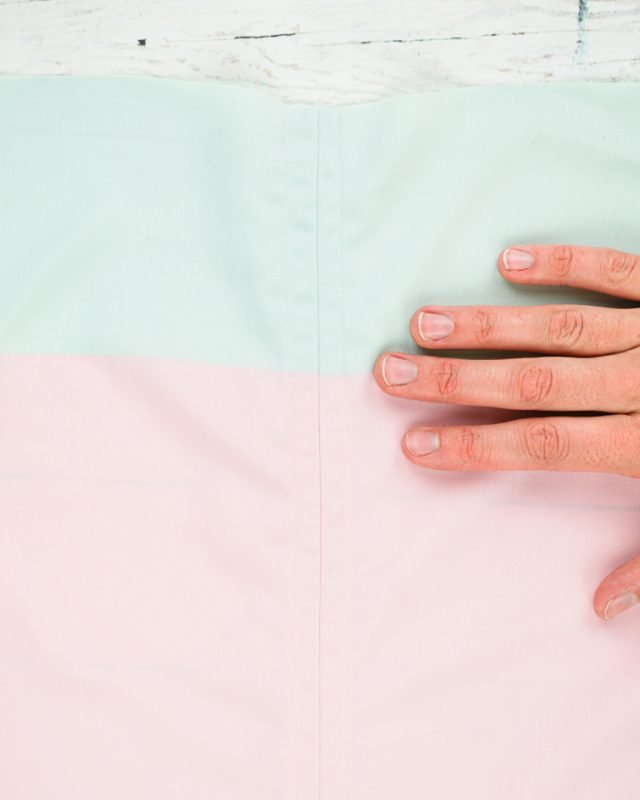
Fold the skirt along the center front and pin along the side seams. Press the fold along the center front.
Sew 1 inch from the fold along the center front.
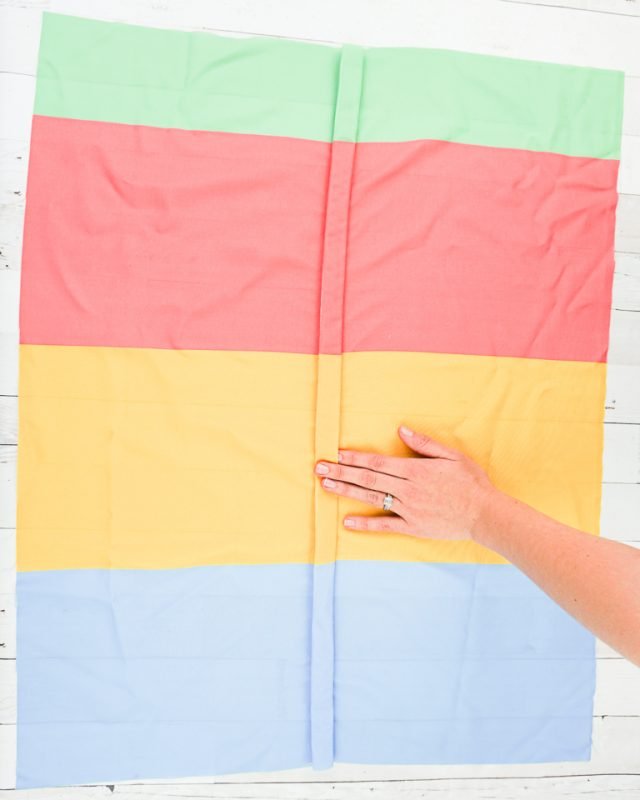
Open the front piece and lie flat. Press and flatten the front fold matching the center fold with the seam beneath.
You are creating something that almost looks like a pleat along the whole front, but it will become the faux button placket.
Topstitch along each side of the faux button placket 1/8 inch from each side. This will secure it to the skirt.
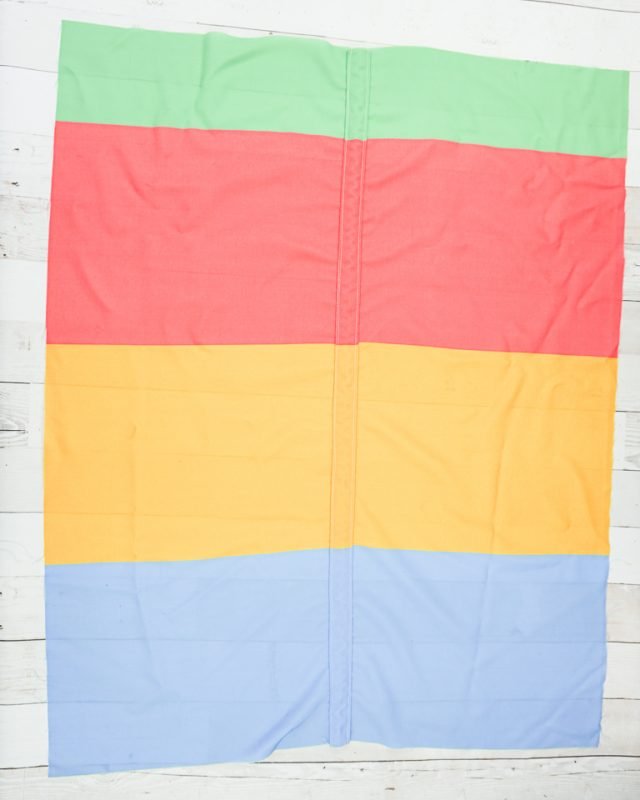
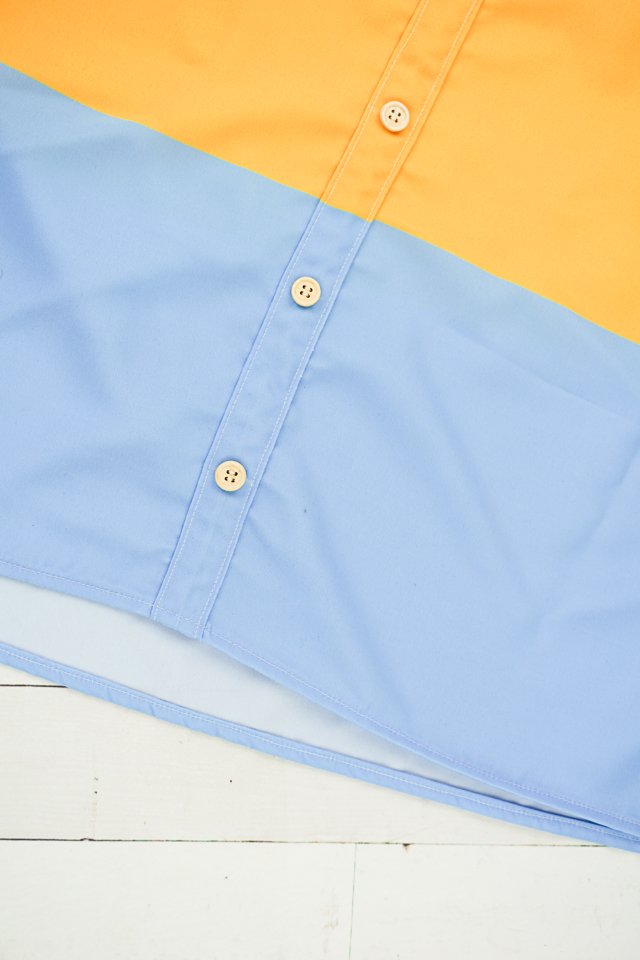
This is what the back of the placket looks like. There will be a seam in the middle with a row of stitches on each side.
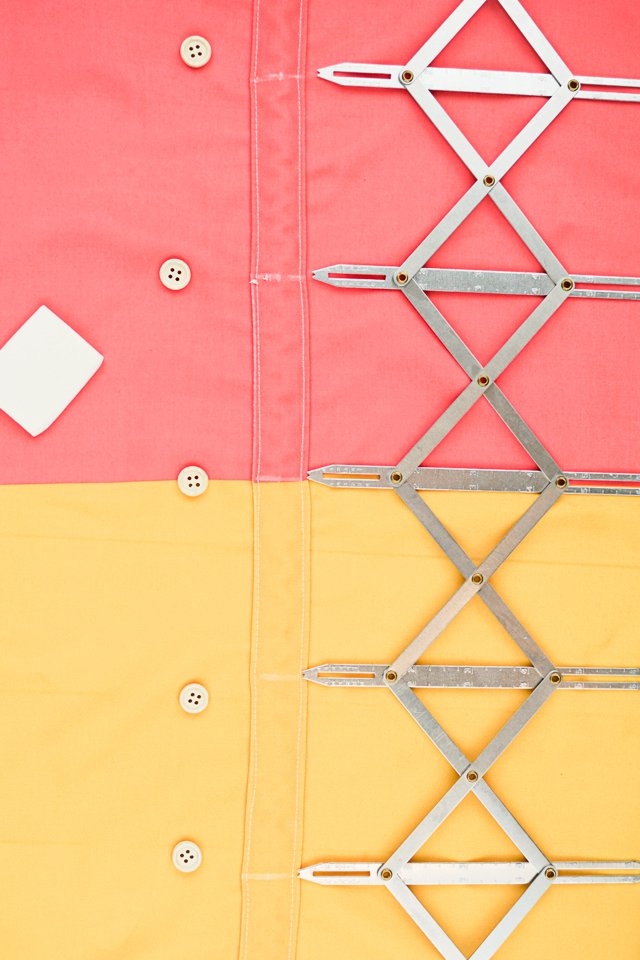
Divide the front into 9 equal sections to add 8 buttons. Alternatively, you can use a sewing guage* to help you.
I chose to add 8 wooden buttons because I like the natural look. You could also add heavy duty snaps instead.
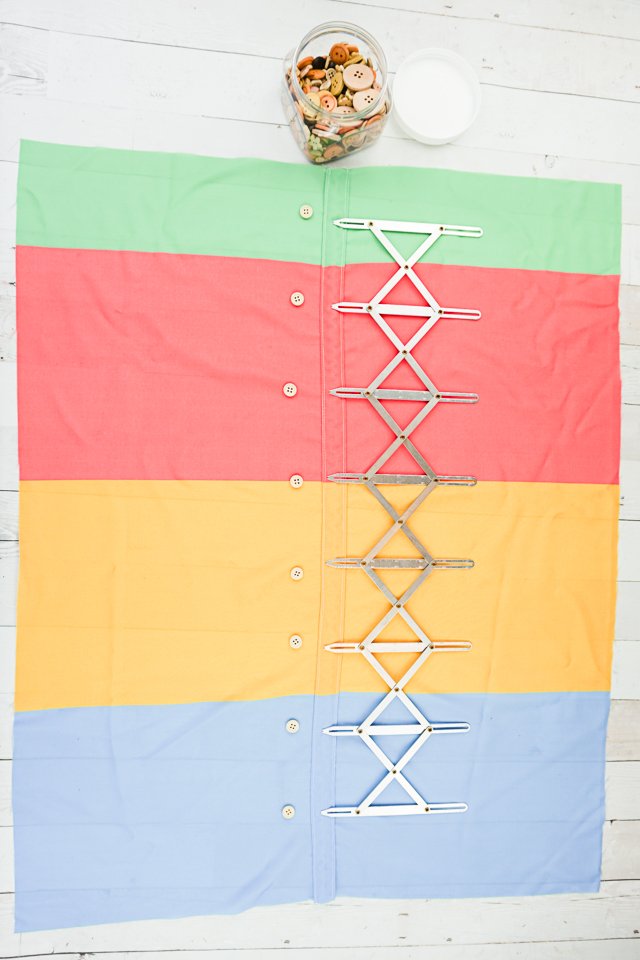
Mark each place with a marking tool where you will add a button.
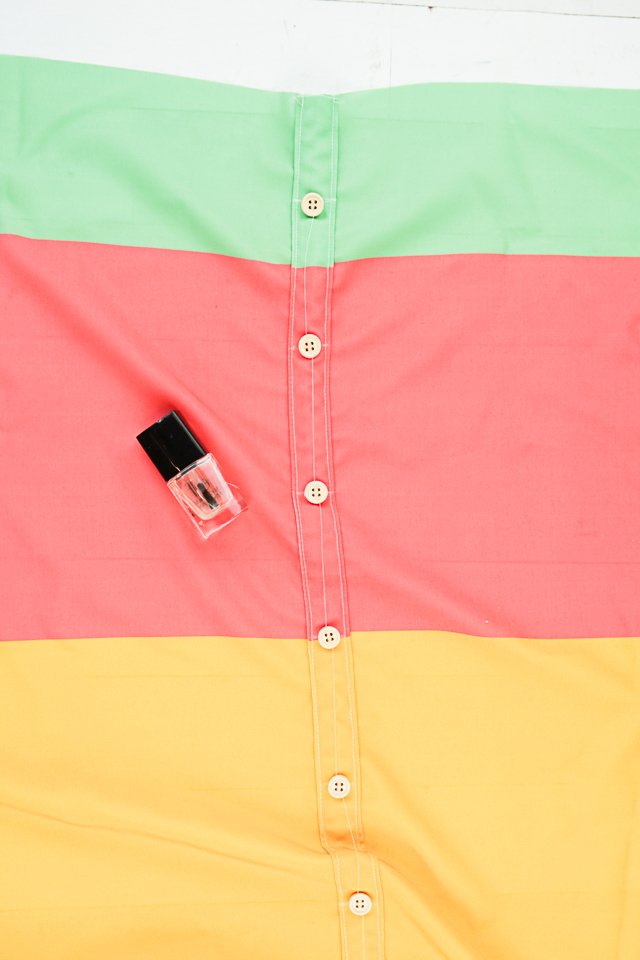
Sew the buttons on by hand or with a sewing machine. Trim all the threads.
Whenever I sew buttons on with my sewing machine I add clear nail polish to the top and bottom threads to prevent them from coming out.
Finish the skirt using the instructions from the free flat front skirt pattern.
Hem the bottom of the skirt as instructed by the pattern. Just fold the faux button placket twice like the other parts of the skirt.
If you make something using this sewing project, I’d love to see! Please share it on social media with the hashtag #heatherhandmade and tag me!

I believe small sewing moments can create great joy. Find your own “right” way to sew. -Heather