
Hudson’s Bay Wool Coat Refashion

This post may contain affiliate links.
Learn ideas for and updating and fixing a wool coat with this wool coat refashion.
My grandmother is not able to use her wool coats anymore, so my aunt gave them to me to rework. I love the idea of taking something a relative wore and updating it into something that can keep being worn.

I have already done a refashioned coat with one of her wool coats using a sewing pattern. That refashion is more about deconstructing and reconstructing when today’s coat refashion is more about adding and updating the details. Don’t miss these other stunning coat refashions!
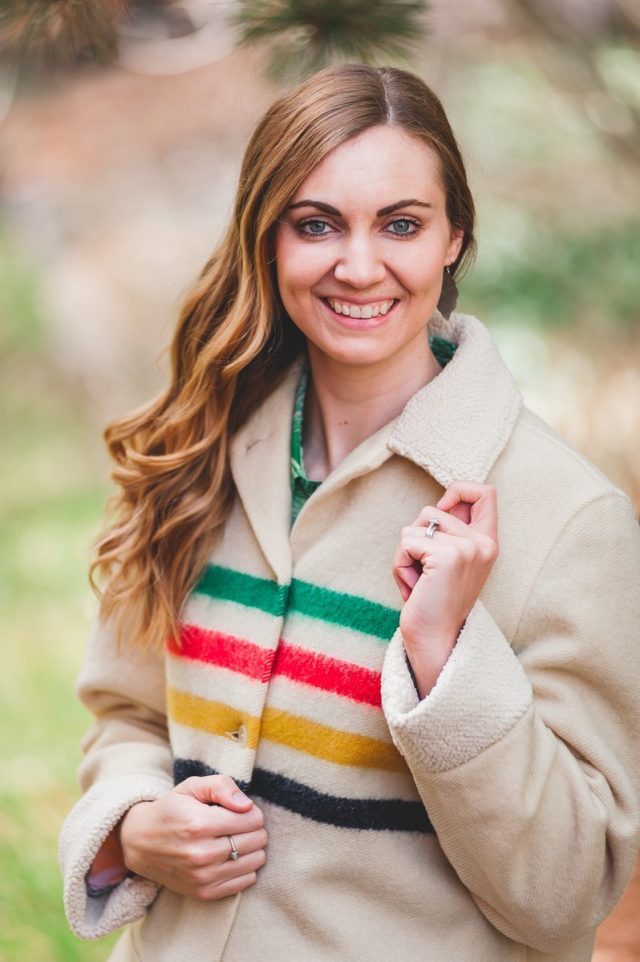
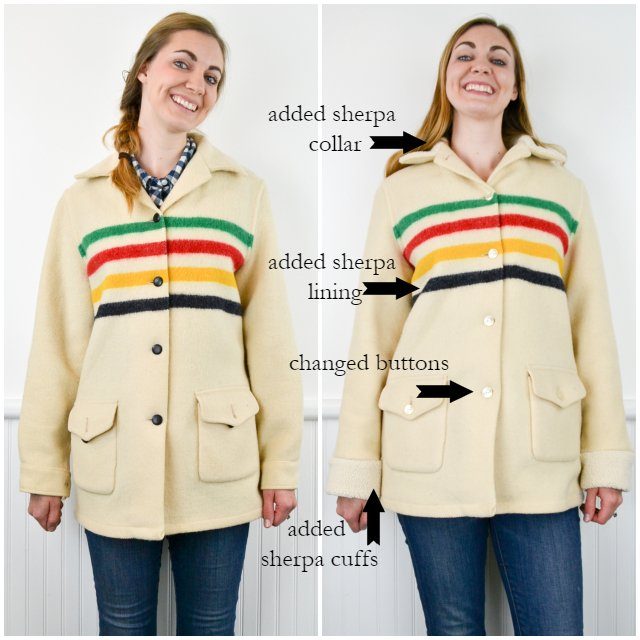
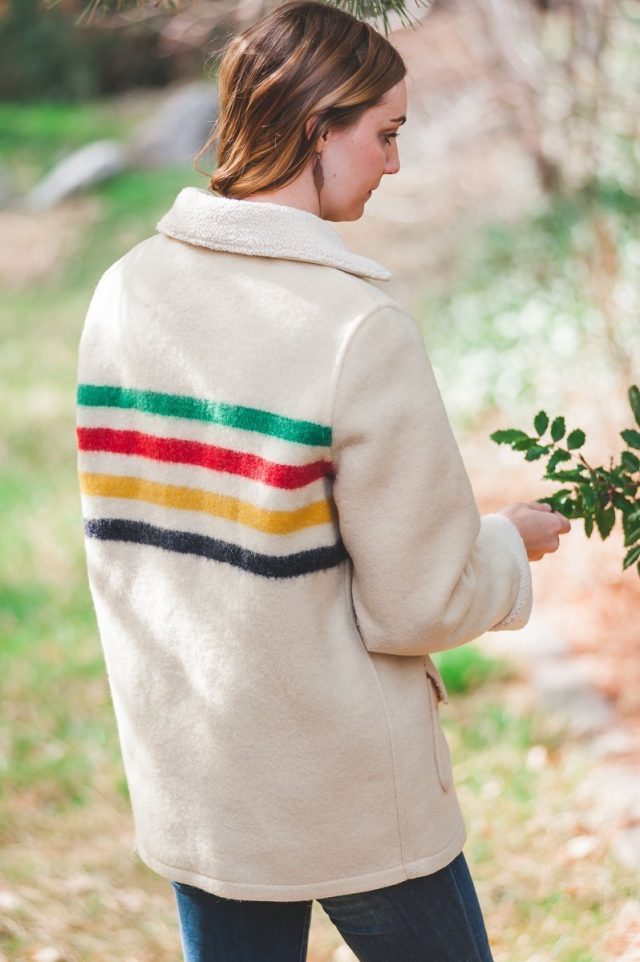
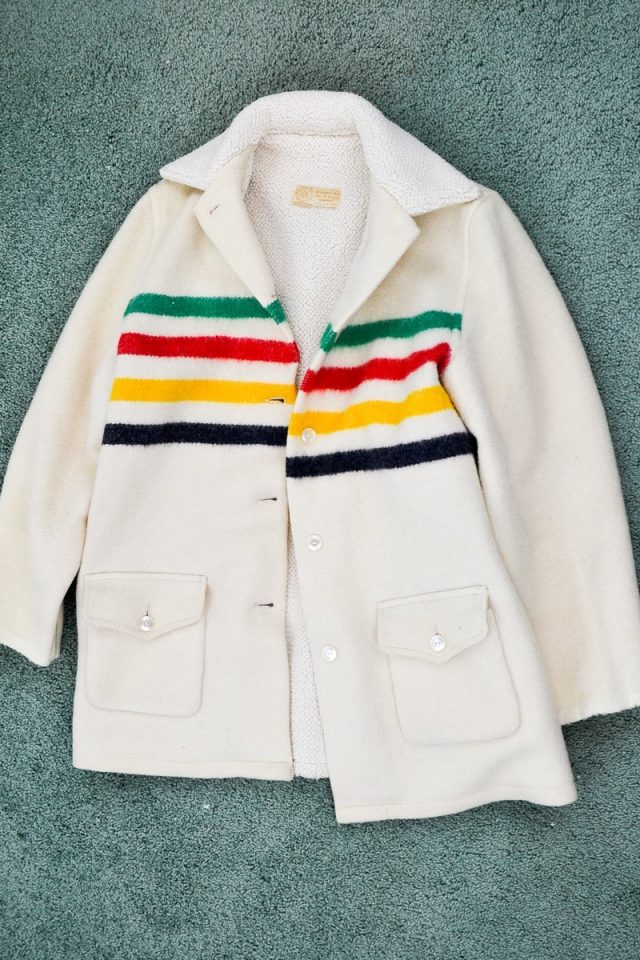
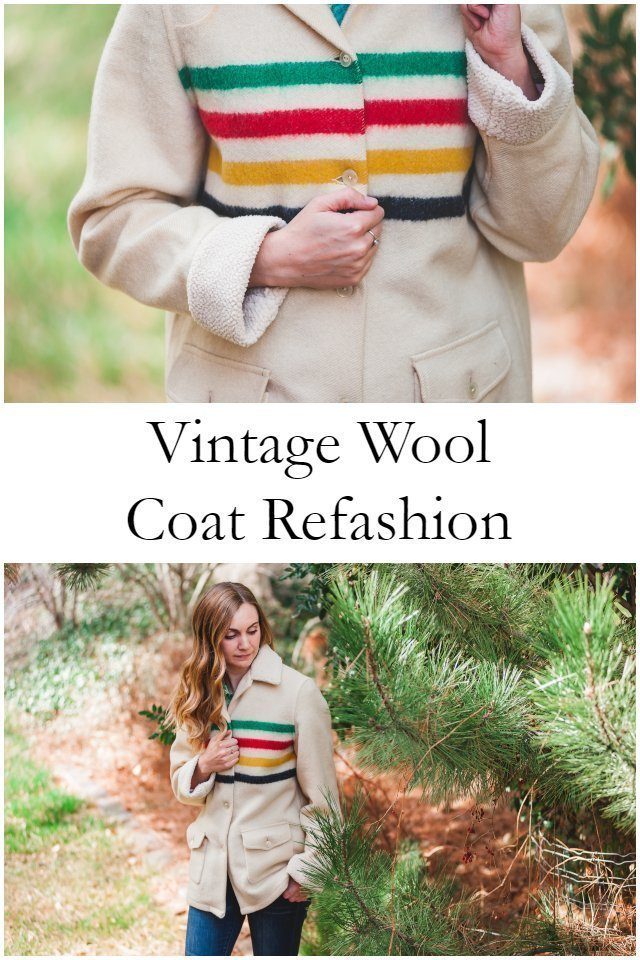
Isn’t it amazing how well the Sherpa fabric matches the wool fabric? I took the coat to Joann Fabrics and held it up to all the Sherpa fabrics, and this one matched the best. It’s really important to me to make a refashion look as “natural” or “original” as possible.
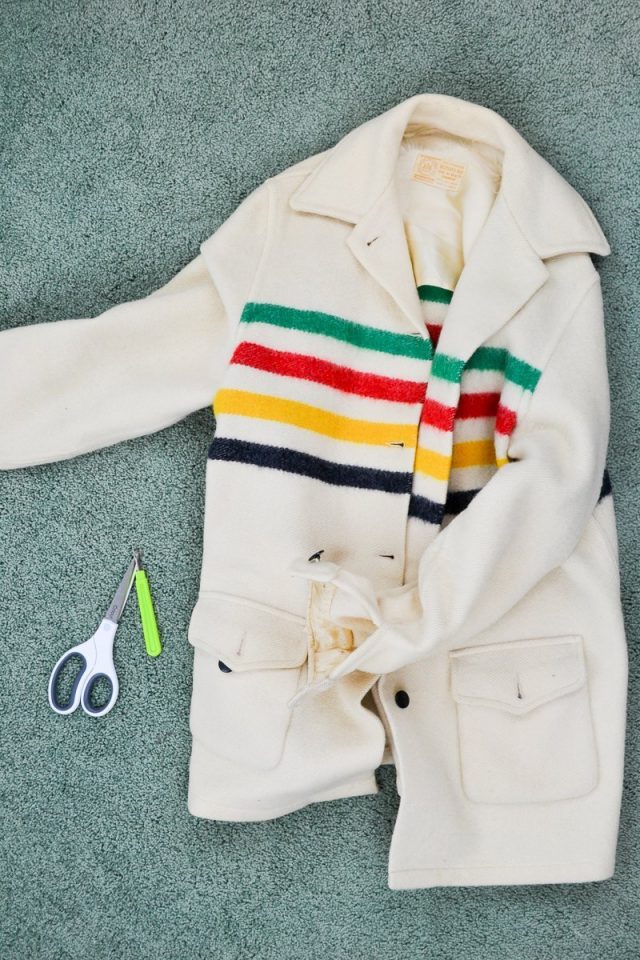
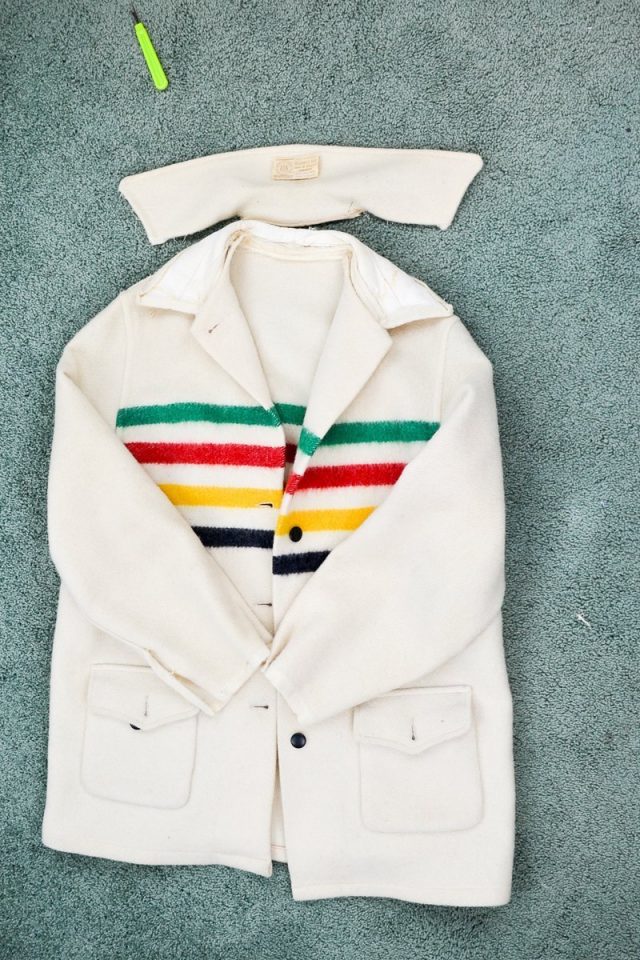
The coat was worn out on all the hems and folds and edges. The lining in the cuff and the half lining of the body was ripped and falling apart. It also had a classic large 1970’s pointed collar.
What I decided to do was to remove the top collar and replace it with Sherpa. I also changed the shape of the point slightly. The coat wasn’t warm enough because I’m always cold so I added Sherpa lining to the body and slippery lining fabric to the sleeves. I chose a pale pink because my grandma’s favorite color was pink.
The black buttons had to go so I removed them and added matching cream vintage buttons from my stash. I also removed the cuffs and closed the sleeve plackets. Then I added Sherpa cuffs to make the sleeves long enough and warm.
I really love working with a little bit of history. It’s so special to take something my grandmother wore regularly and instead of hiding it away in a closet or throwing it away, I can refashion it a little bit. I add more love to a well-loved garment so that I can keep wearing it and loving it because that’s what clothes are for.
supplies
- Wool coat with worn out cuffs and collar
- Sewing tools
- Scissors and Seam ripper
- Sherpa fabric (by the yard)
- Slippery lining fabric (by the yard)
Hudson Bay Wool Coat Refashion
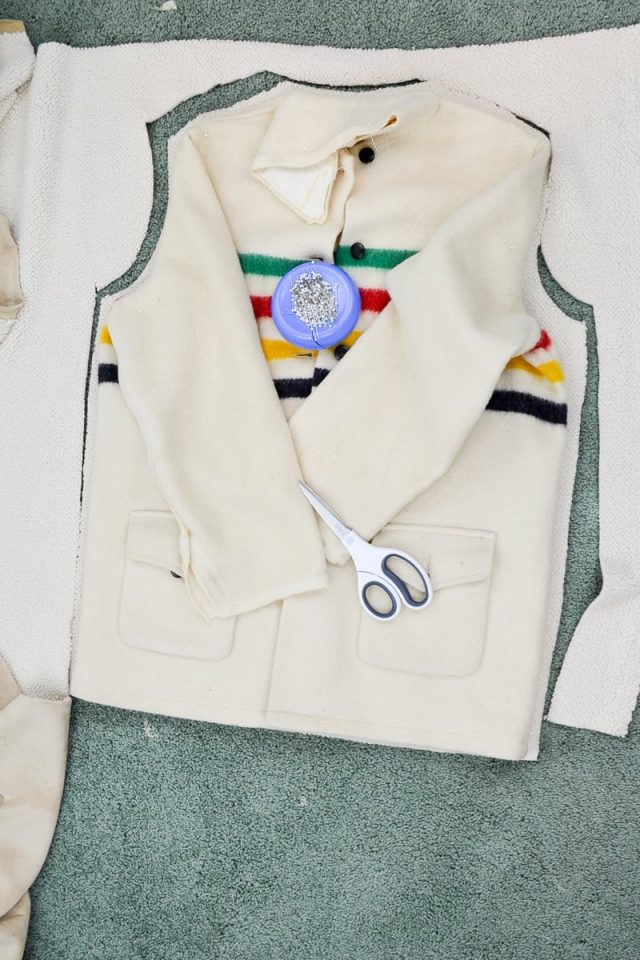
With a seam ripper remove the top collar (leave the bottom), the tag, and the cuffs. Here’s how to use a seam ripper. Remove the lining if there is one. Mine was ripped so I took it completely out. (Save the wool scraps to make wool felt balls!)
I also unpicked the placket at the bottom of the sleeves so I could sew it closed.
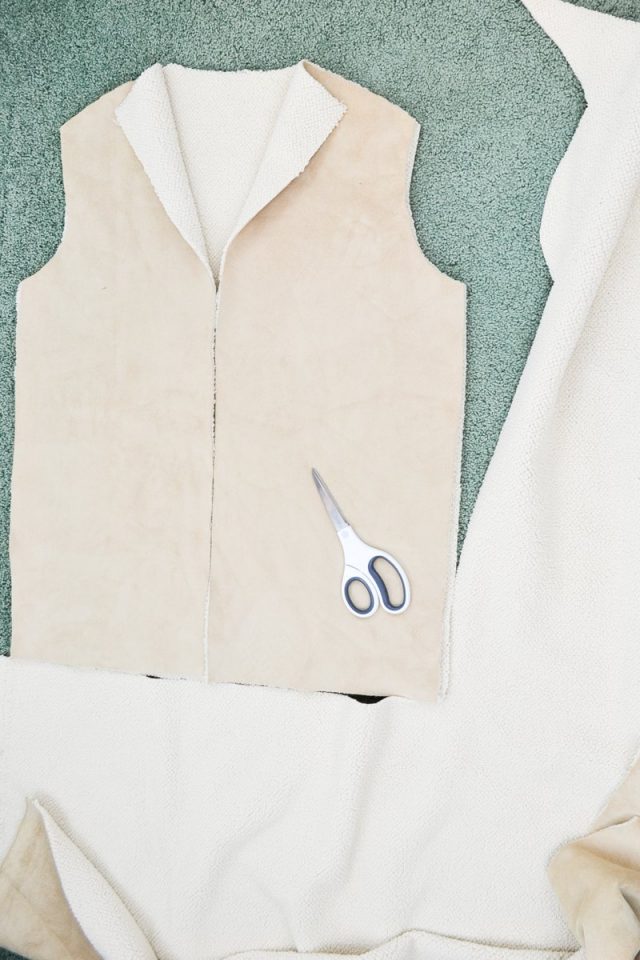
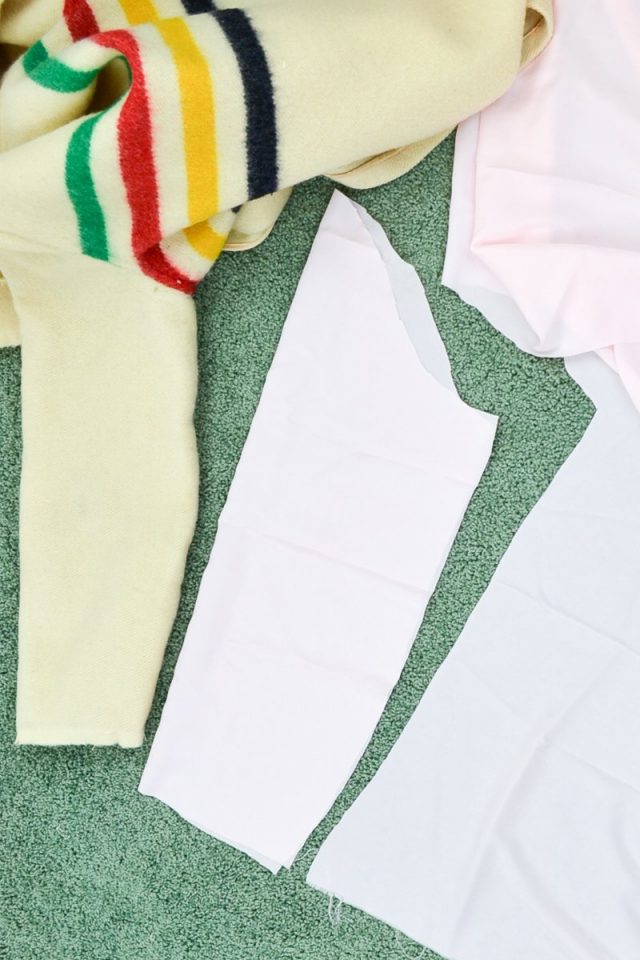
Carefully cut out a new body from the Sherpa doing your best to cut out the same shape. Don’t forget to add seam allowance.
Cut out a front piece and a back piece. Cut the front in half along center front.
Use the collar piece you removed to cut a collar piece from the Sherpa fabric.
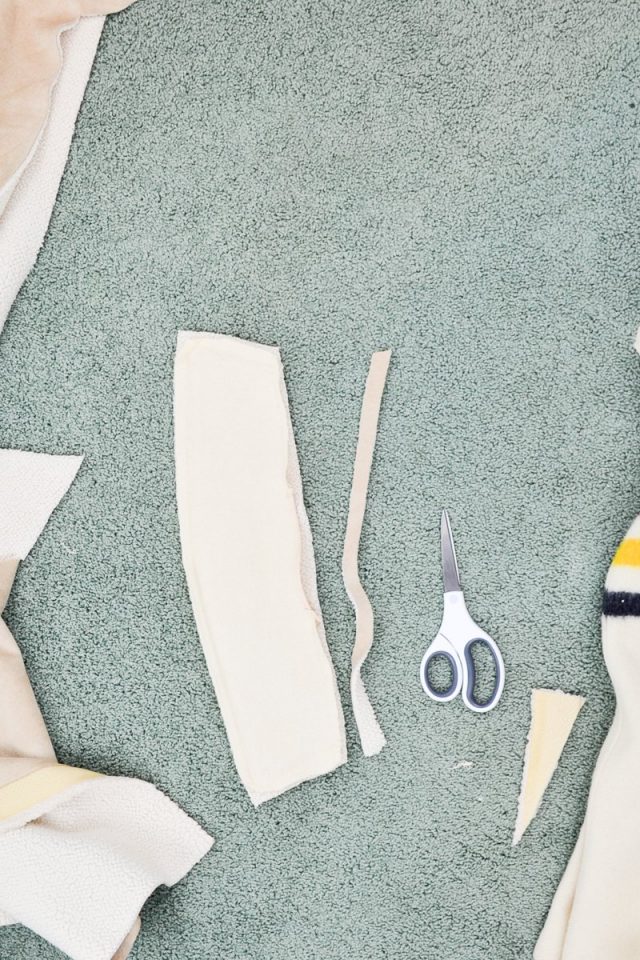
Cut out two sleeves from the slippery fabric.
Sew the new Sherpa collar into the the jacket. I did this by pinning the new collar right sides together with the collar still attached to the jacket. I sewed around the edges, trimmed the corners, and flipped it right side out. Then I sewed it into the facing that was already there.
I didn’t add any interfacing to the collar because the bottom collar piece already had interfacing.

Construct the new lining by sewing the shoulder seams, the side seams, and adding the sleeves. I also sewed the tag onto the lining to save it.
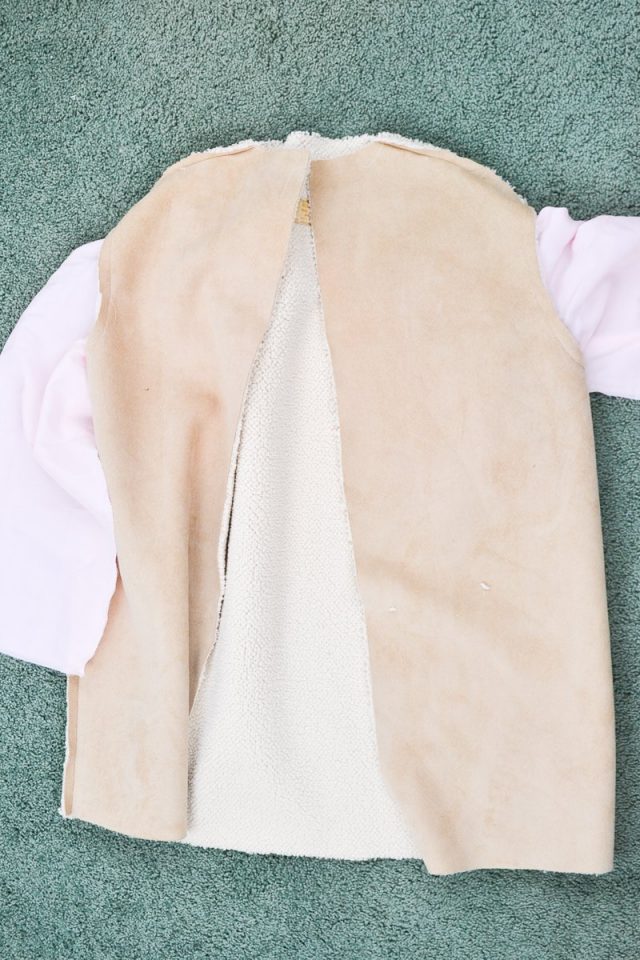
Put the lining into the coat with wrong sides together. Pin the lining to the coat around the facing and the hem.
I pinned the lining to the front facings and sewed it to the facings. Then I pinned it to the hem and and sewed it onto the hem. It’s easier to do it separately.
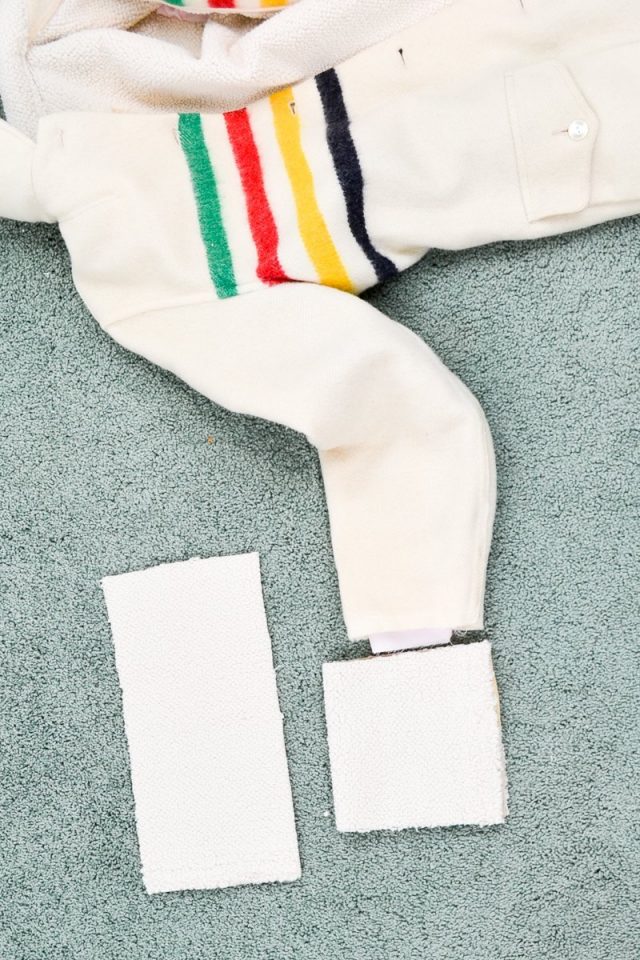
Cut out new cuffs that fit the hem of the sleeve and lining. Sew the cuffs onto the sleeves.
I thought about altering the shoulders to get a tighter fit, but I decided to leave it so I could wear bulky sweaters underneath.
If you make something using this sewing project, I’d love to see! Please share it on social media with the hashtag #heatherhandmade and tag me!

I believe small sewing moments can create great joy. Find your own “right” way to sew. -Heather
I have this same coat! I got it at a huge antiques fair in Brimfield Massachusetts in the 1980s. A few years ago I had a professional taylor alter it to look more 21st century, but it isn’t warm enough. Now I’m going to line it like you did! Thanks.
That’s so great! I want to see it once you line it!