
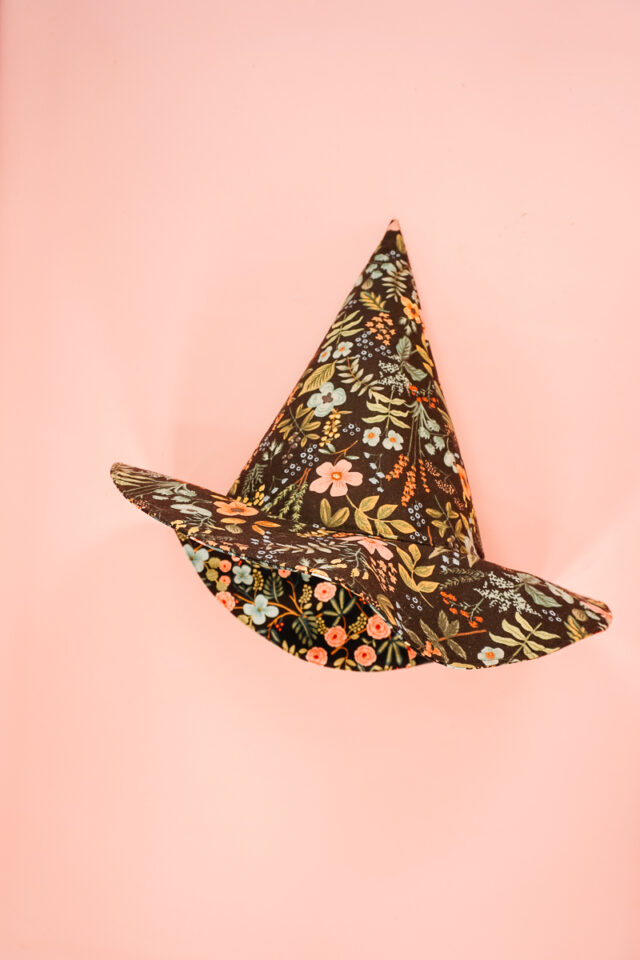
Free Witch Hat Sewing Pattern

This post may contain affiliate links.
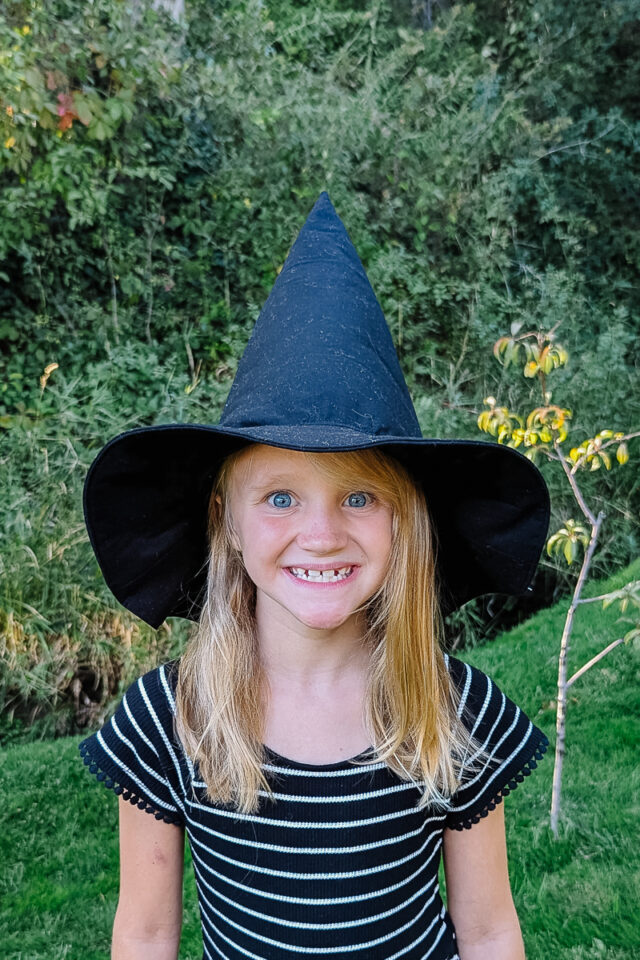
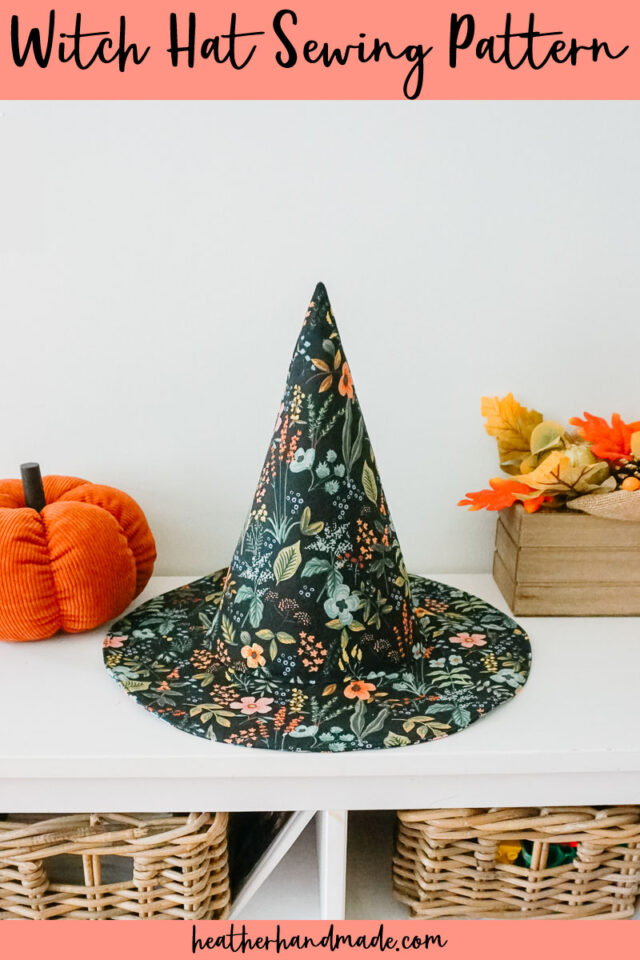
Learn how to make a witch hat with a free sewing pattern. This Halloween sewing project is great for DIY costumes like a witch or a wizard.
When my kids were little I had a witch hat for them to play with that I had when I was a kid. Eventually it got ripped, and I had to throw it away.
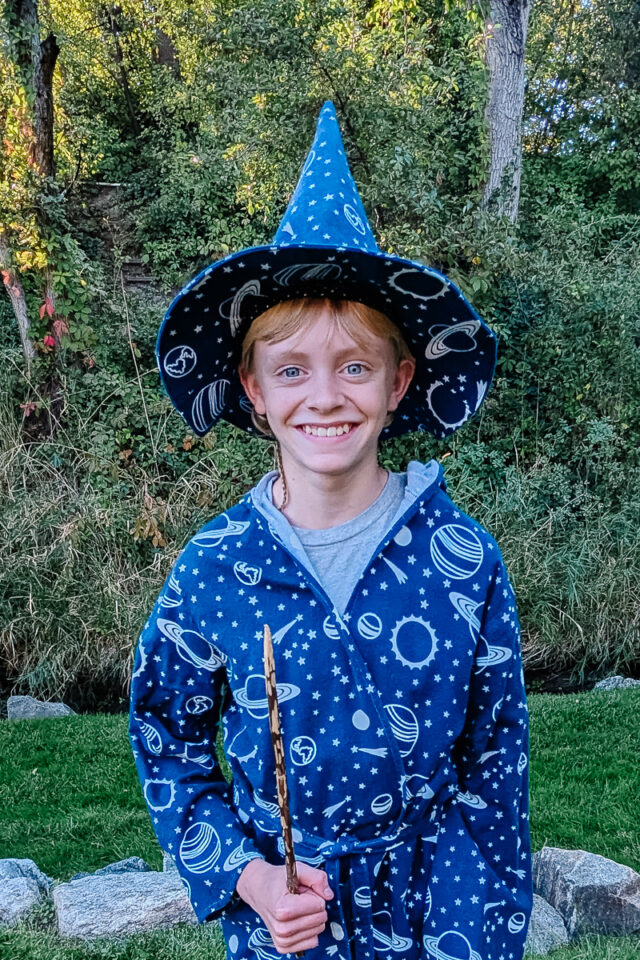
A witch hat is something classic and great to have on hand, because it’s easy to throw together a costume with clothes from your closet when you can just throw on a witch hat. Luckily, I have wanted to make and design a witch hat sewing pattern for a long time and this is finally the year!
Get the free witch hat sewing pattern by signing up in the form near the end of the post!
What fabric should I use to make a witch hat?
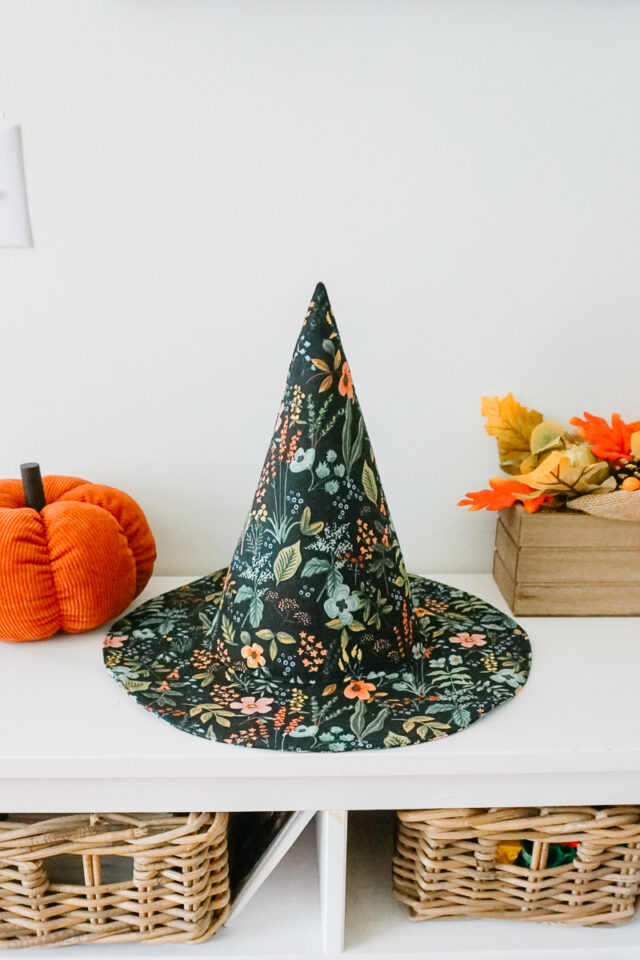
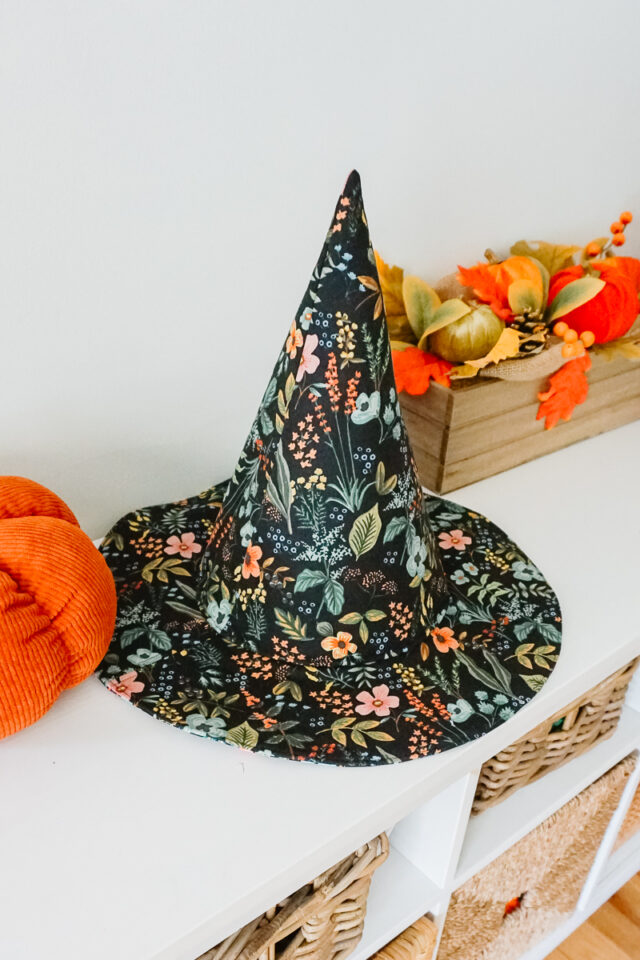
The fabric that works best for a witch hat is cotton canvas, cotton flannel, or quilting cotton. I used three different types of fabric and canvas was my favorite. It made the best stiff witch hat. The quilting cotton also works, but the brim is a little floppy. You can choose the fabric to work with the style of witch hat you are going for.
Canvas, flannel, and cotton are easy to find and easy to sew, and they come in every print and color imaginable. You’ll also need a fat quarter of quilting cotton for the lining.
What interfacing should I use to make a witch hat?
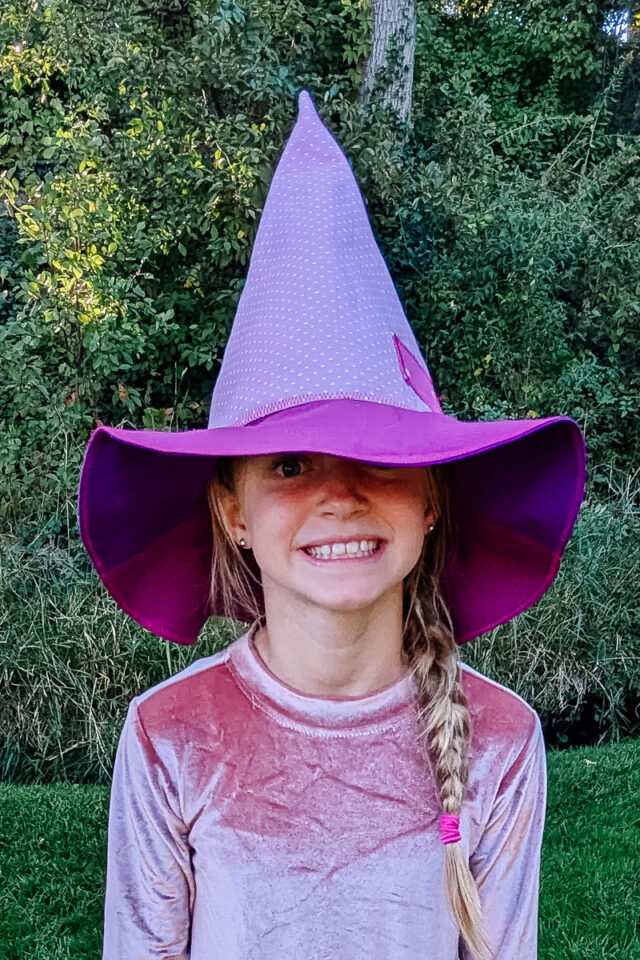
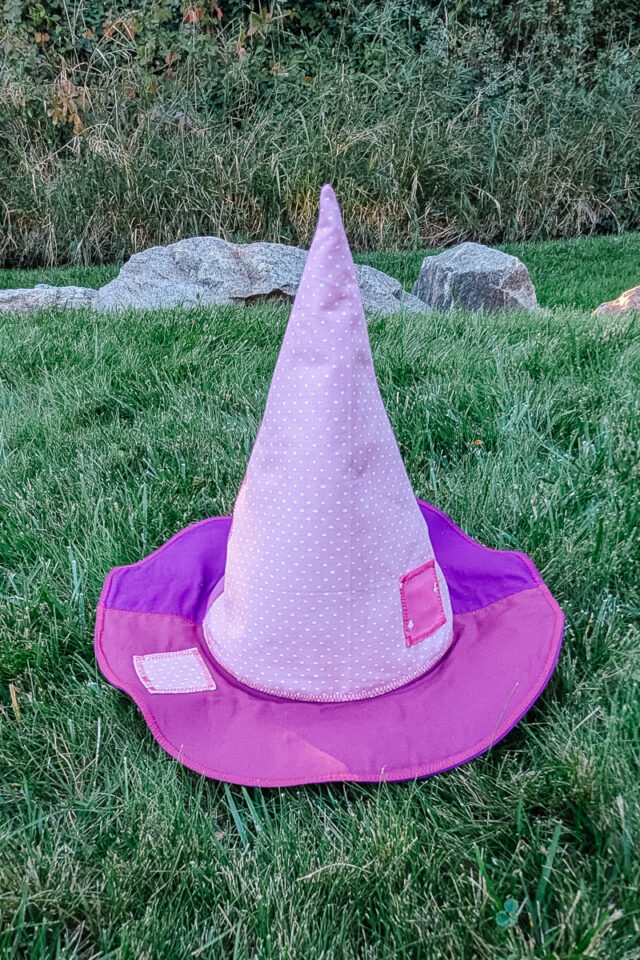
I tried used two layers of lightweight interfacing with two layers of quilting cotton and it wasn’t stiff enough. (purple scrappy hat)
I also used a layer of lightweight interfacing and a layer of fusible fleece with two layers of quilting cotton and it was pretty good. (black hat)
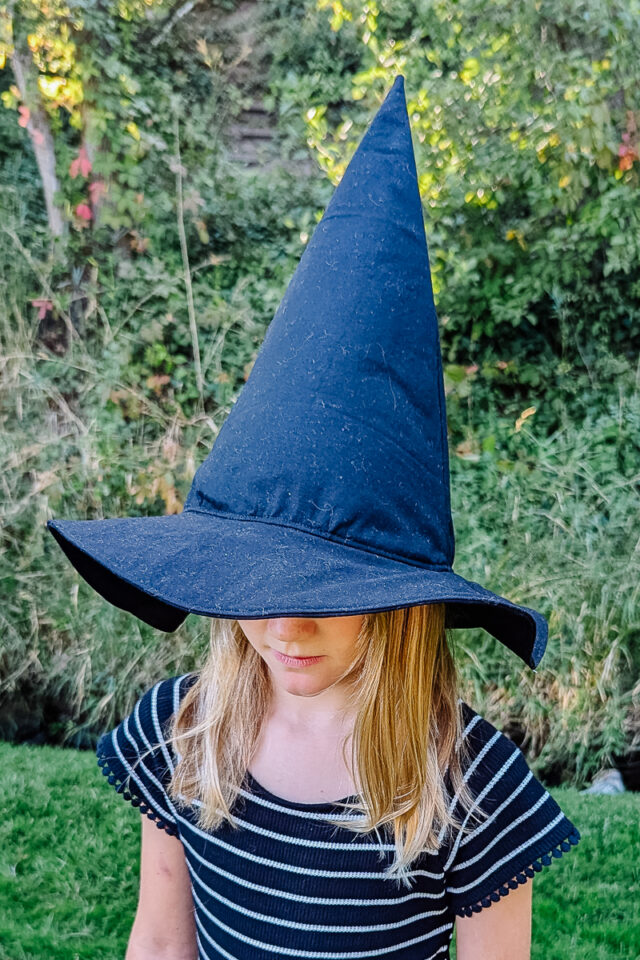
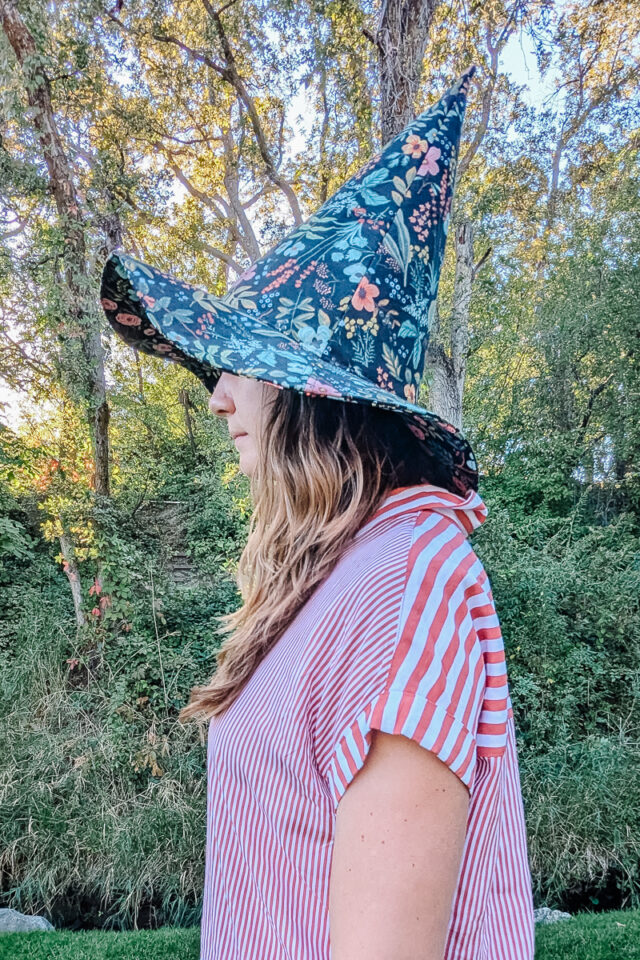
The best was when I use a layer of lightweight interfacing and a layer of fusible fleece with two layers of cotton canvas (floral hat) or cotton flannel (star hat). The hat turned out nice and stiff without being too hard to sew.
You can even make a kids robe with a matching hat for the perfect wizard outfit!
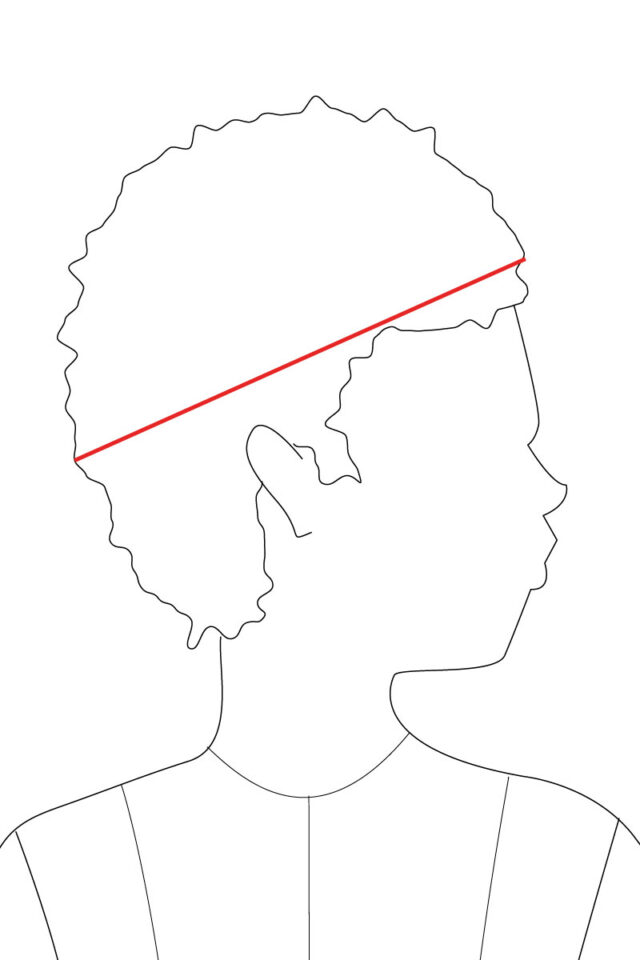
How to Measure Your Head
To measure the circumference of your head correctly, the tape measure needs to be over the middle of your forehead, go around above your ears and then sit in the middle at the back of your head at the widest part. Do not pull the tape too tight unless you want your hat to be that tight when you wear it.
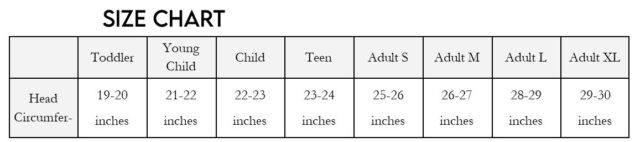
What sizes are included in the witch hat pattern?
The pattern comes in sizes toddler, young child, child, teen, and four adult sizes. Use the measurement chart below to find the right size to make.
When you measure your head, make sure you are measuring around the widest part of your head so that you make the right size.
What is a PDF sewing pattern?
A PDF pattern is a sewing pattern designed on the computer and organized so that it can be printed on several letter or A4 size pieces of paper.
I love using PDF sewing patterns because if the pattern gets ruined or if my children or I changed sizes, I can always print it again. It’ll never be destroyed since I have a digital version!
How do you use a PDF sewing pattern?
Open the PDF on a computer and click print. When printing make sure that the scaling is set to 100% or no scaling so that the pattern prints at the correct size.
Once the pattern is printed it can be taped together to get the full size. Then the pattern can be cut for each pattern piece size or individual sizes can be traced so that the pattern can be used again and again. Learn how to use PDF sewing patterns.
Love to sew? Try these fun sewing projects:
- Free costume sewing patterns for kids
- Free Halloween sewing patterns
- Halloween sewing projects
- DIY costume ideas
How to Make a Witch Hat
Supplies
- Free Witch Hat Sewing Pattern – get it at the end of the post
- 1/2 yard quilting cotton or cotton canvas (for the main part of the hat)
- 1 fat quarter of quilting cotton (for the lining of the hat)
- 1/2 yard fusible interfacing
- 1/2 yard fusible fleece
- Matching thread
- Sewing tools
- Sewing machine
Do you just want the pattern and tutorial as a PDF? Get the pattern and tutorial for just $8. You won’t need to access the internet every time you want to make it. Or get the Pattern Bundle with ALL the PDF tutorials!
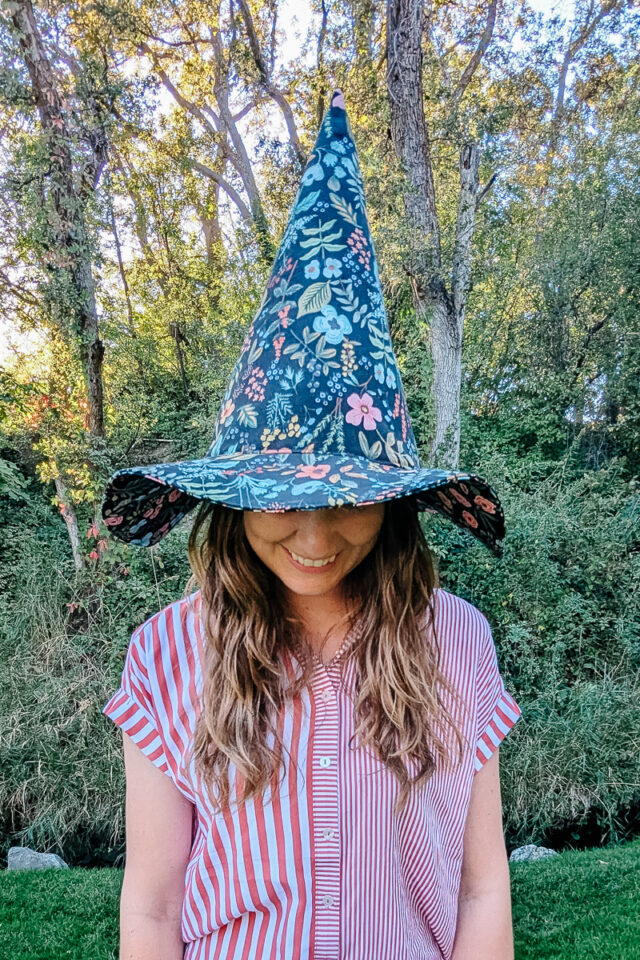
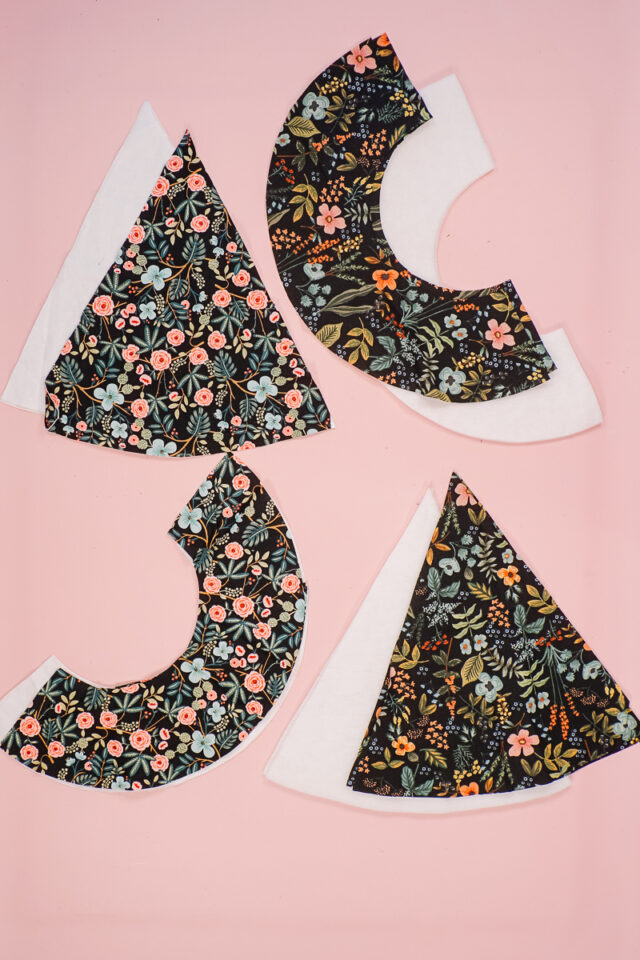
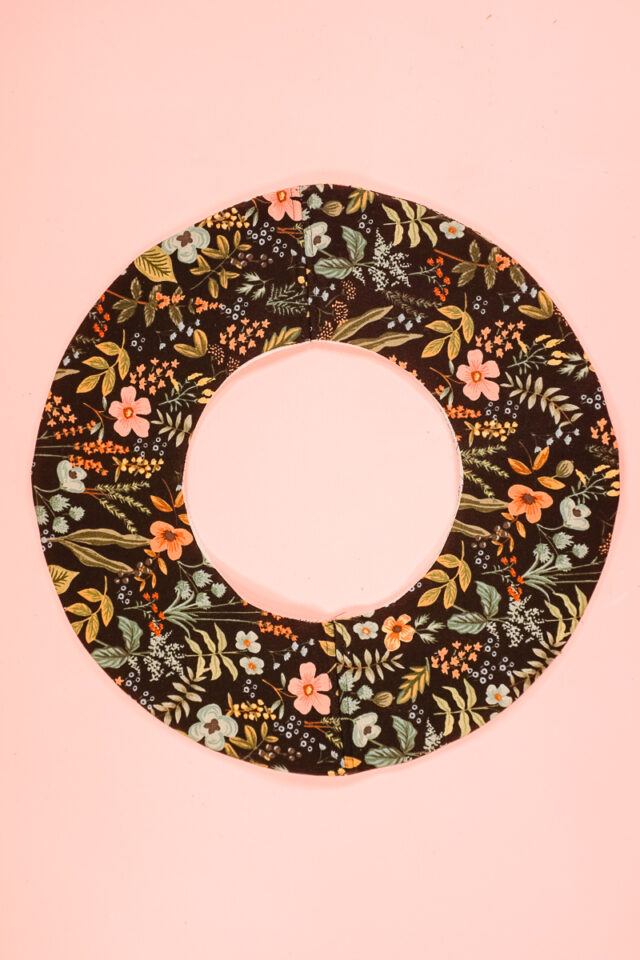
I used two floral pieces of fabric for my hat so I could show the different between the inside and the outside of the hat. The muted floral is the outer pieces, the brighter floral is the inner/lining pieces.
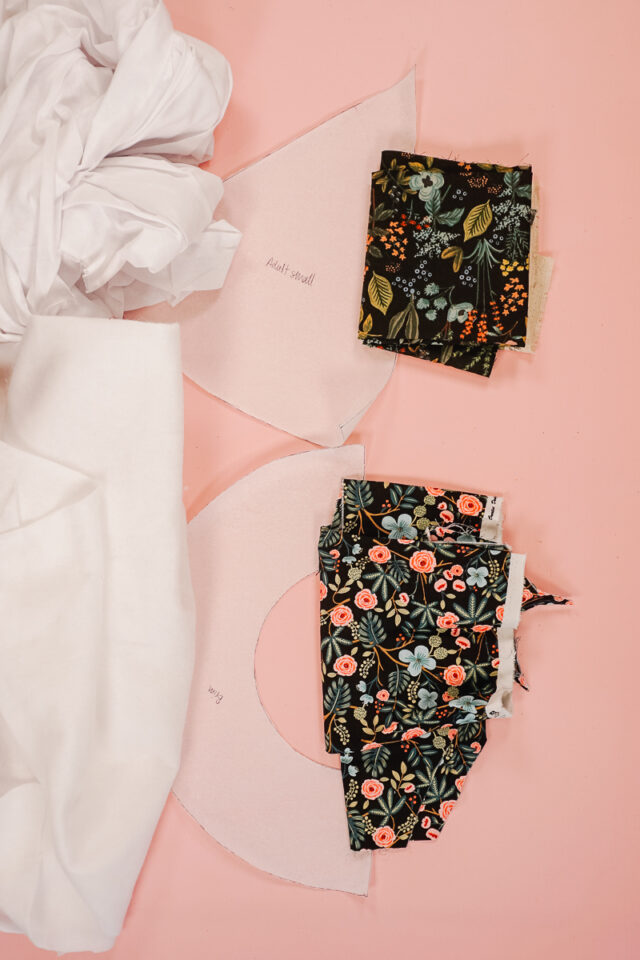
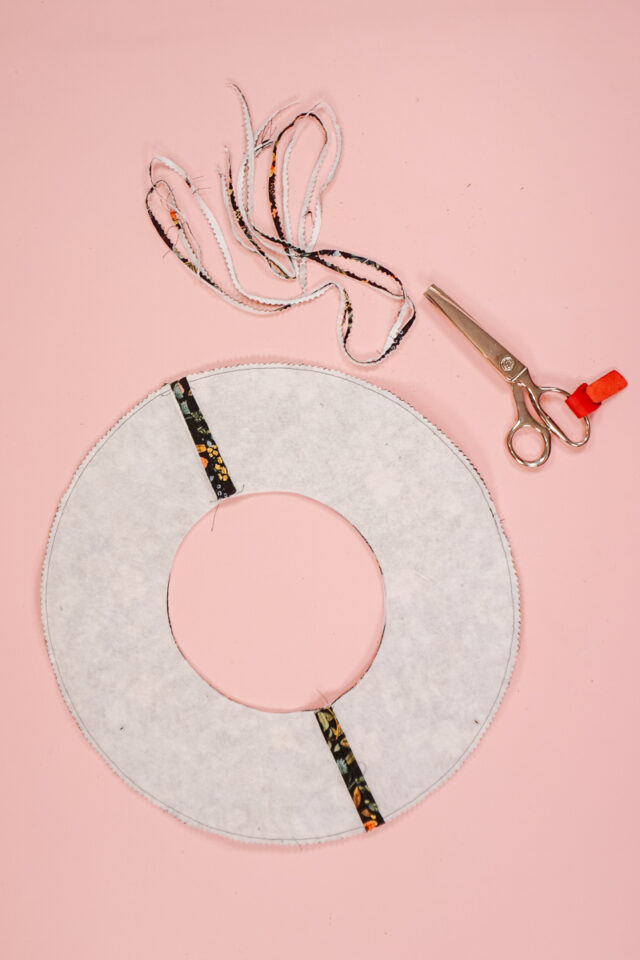
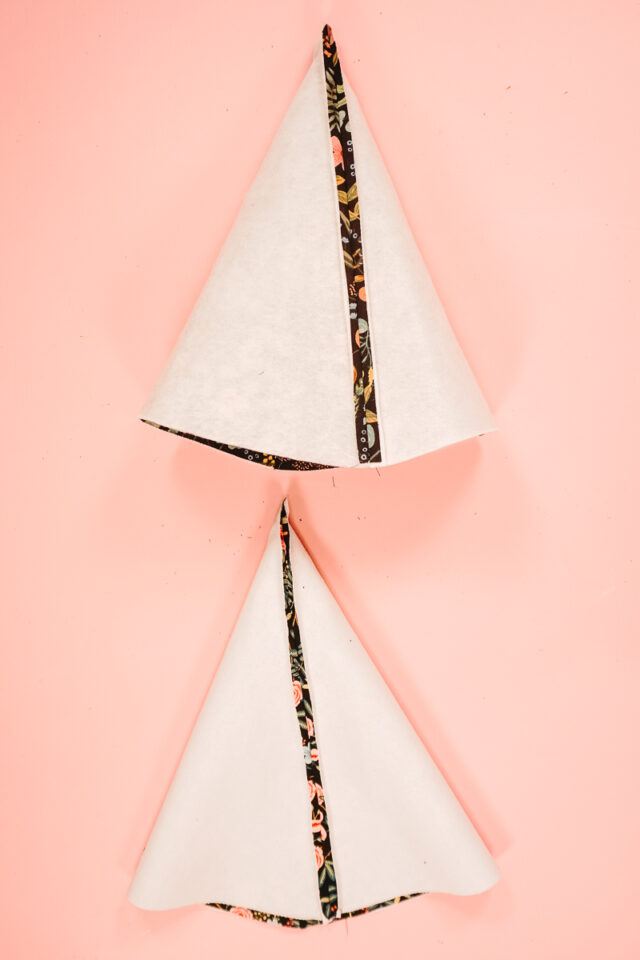
- From the outer fabric: cut four brims and two upper pieces (I cut two brims from my muted floral and two brims from my brighter floral to show you the difference, but you’ll want them to be the same fabric.)
- From the inner/lining fabric: cut two upper pieces
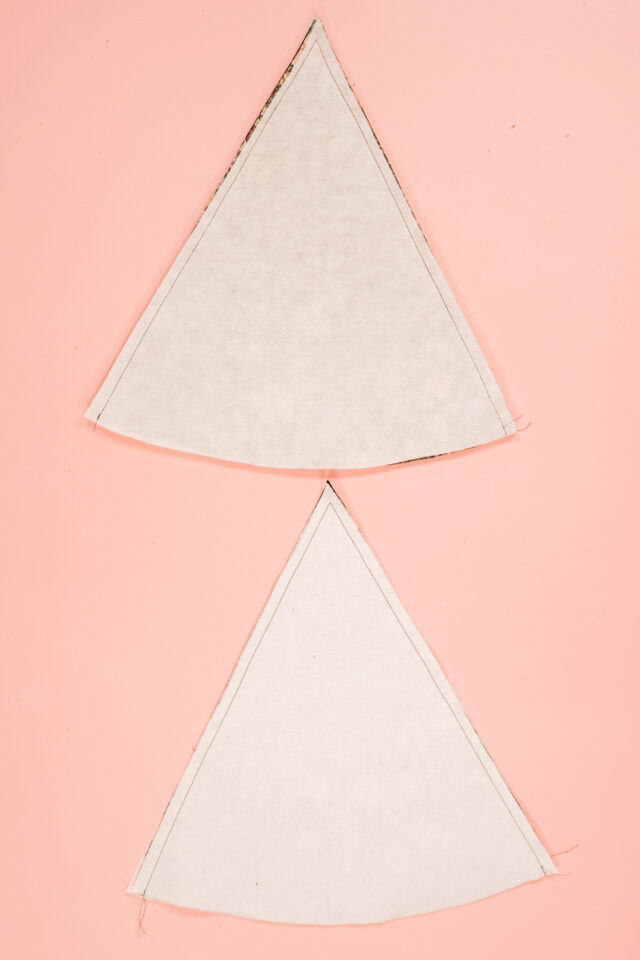
- From the interfacing: cut two brims and two upper pieces
- From the fusible fleece: cut two brims and two upper pieces
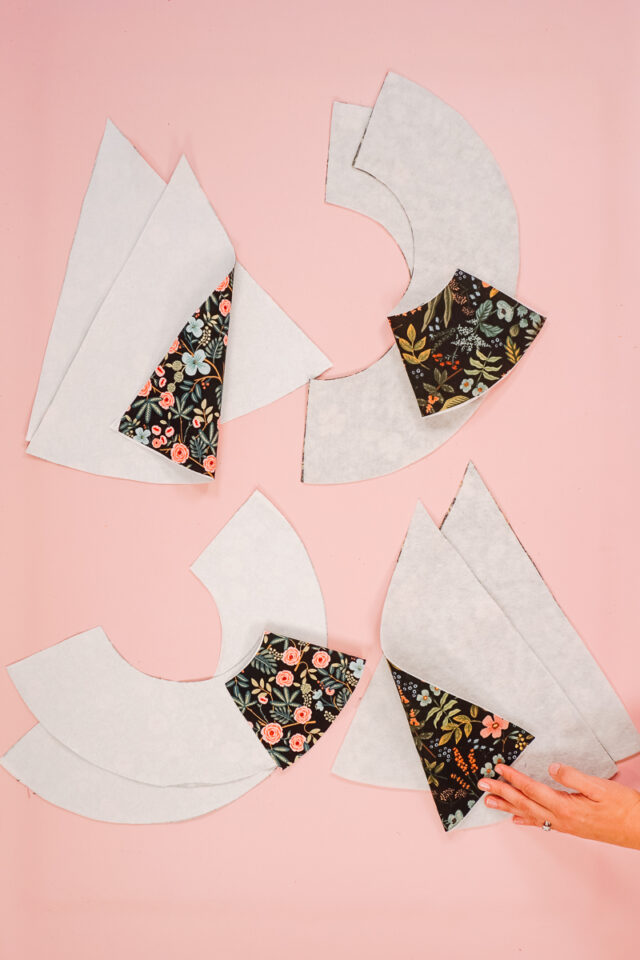
Apply the fusible fleece to the outer fabric pieces. Apply the interfacing to the inner fabric pieces.
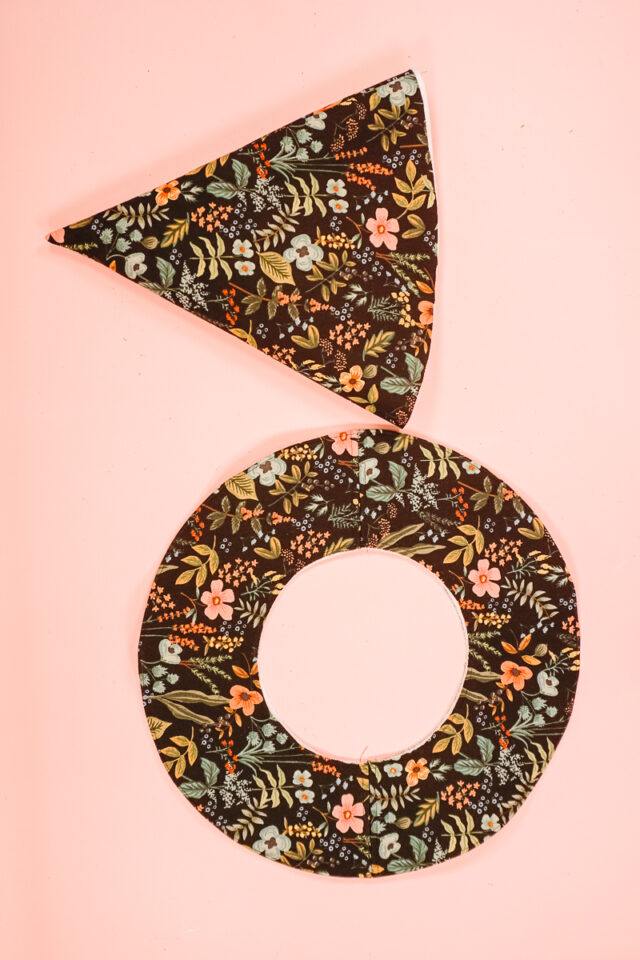
Take the brim pieces and line them up right sides together. Sew the short sides with a 3/8 inch seam allowance.
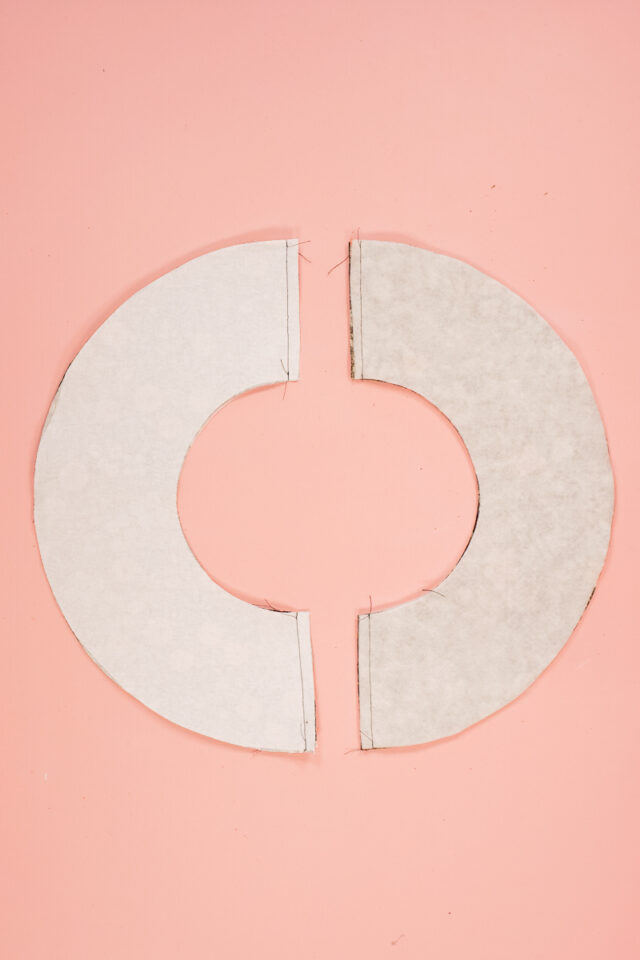
Press the seams open. Topstitch the seam allowance open.

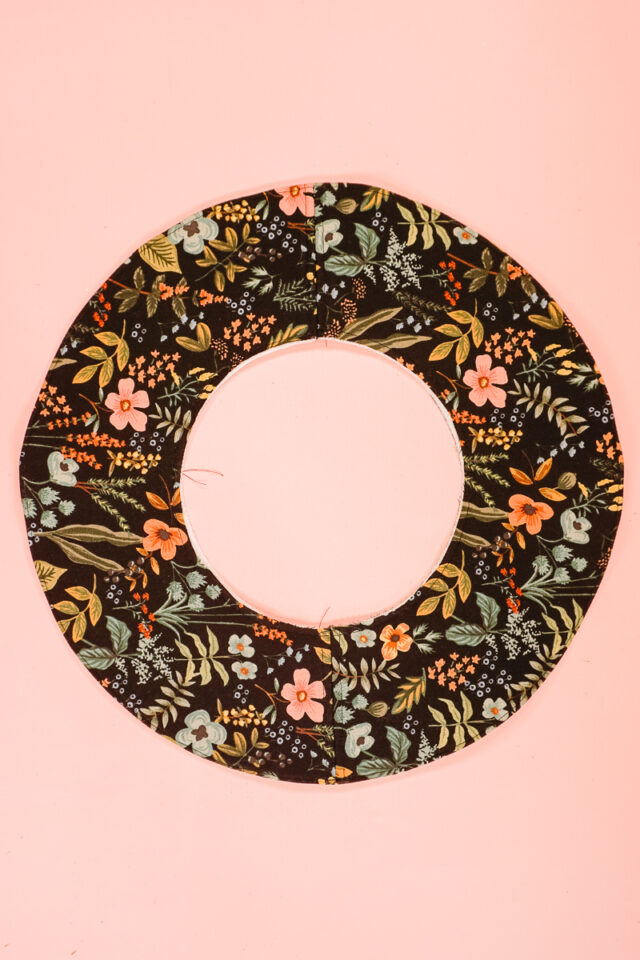
Place the brims right sides together and pin. Sew the outer circle 3/8 inch from the edge all the way around.
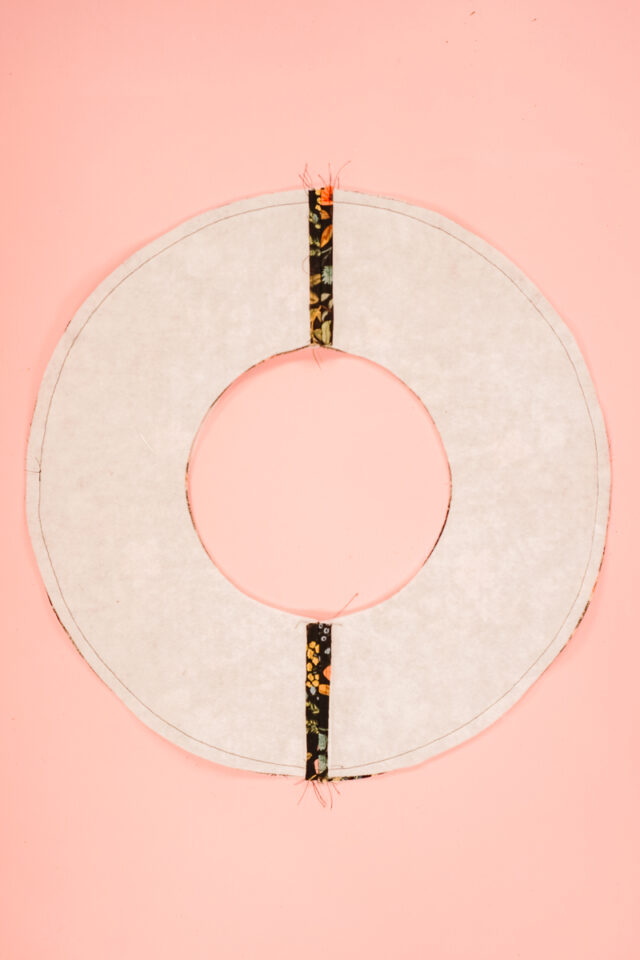
Notch the seam allowance or cut with pinking shears to reduce the bulk.
Turn the brim right side out. Roll out the edges and press.
Edgestitch around the edge to keep the edge crisp.
Baste the two layers of the inner circle together 1/4 inch from the inner edge.
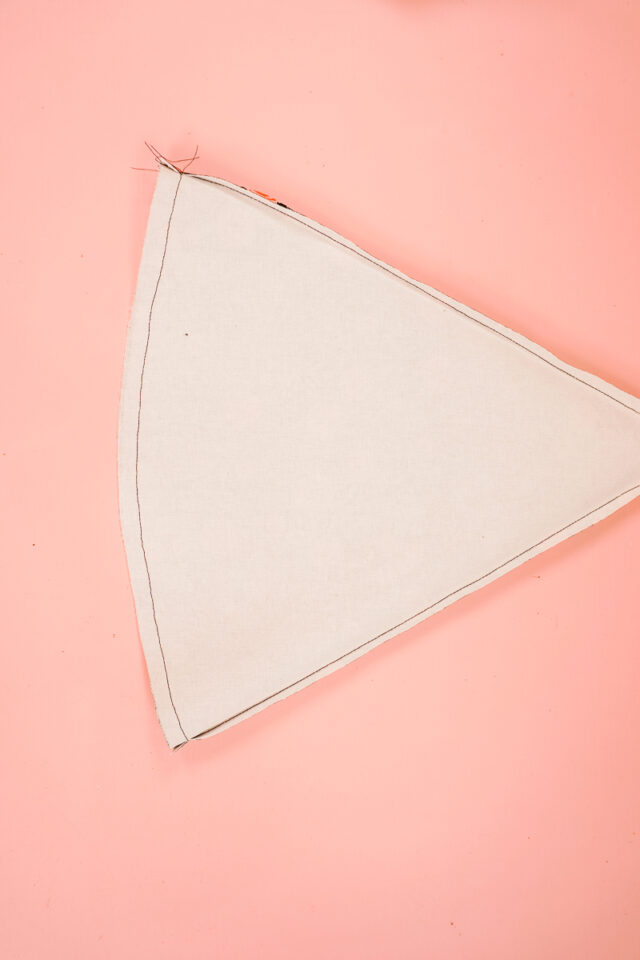
Pin the top pieces right sides together matching the outer pieces and the lining pieces. Sew the sides with a 3/8 inch seam allowance. Pivot at the top.
Trim the points of each seam allowance. Trim the seam allowance of the lining down to 1/4 inch.
Press the seam allowances open.
Turn the outer top piece right side out. Carefully poke out the top point.
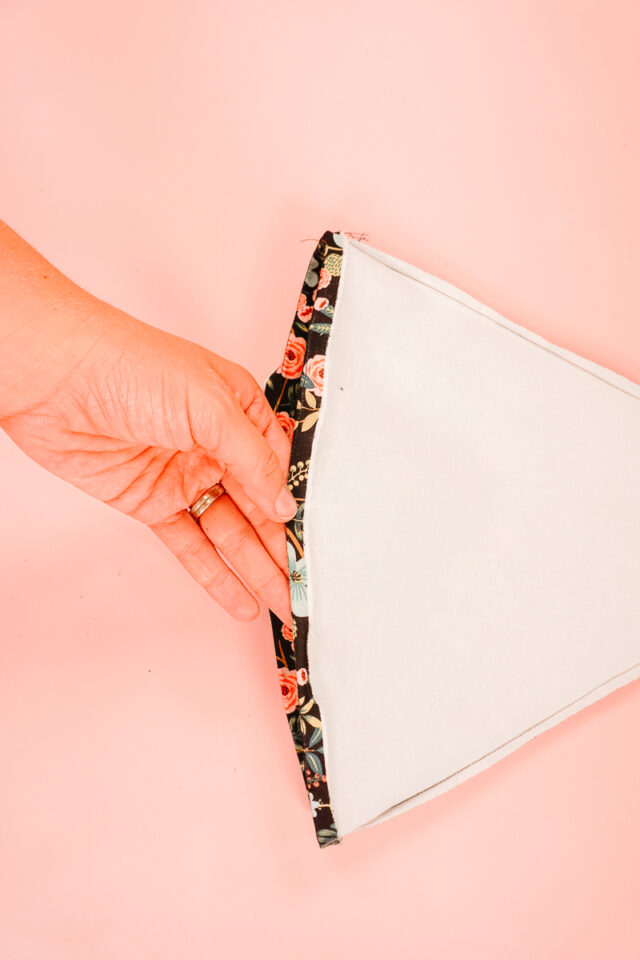
Take the brim and the outer top piece. You are going to match the inner circle with the opening of the top right sides together.
Pin the inner circle of the brim with the opening of the outer top. Match up the side seams of the brim with the side seams of the top. Sew the layers together with a 3/8 inch seam allowance. Trim the seam allowances down from 1/4 inch.
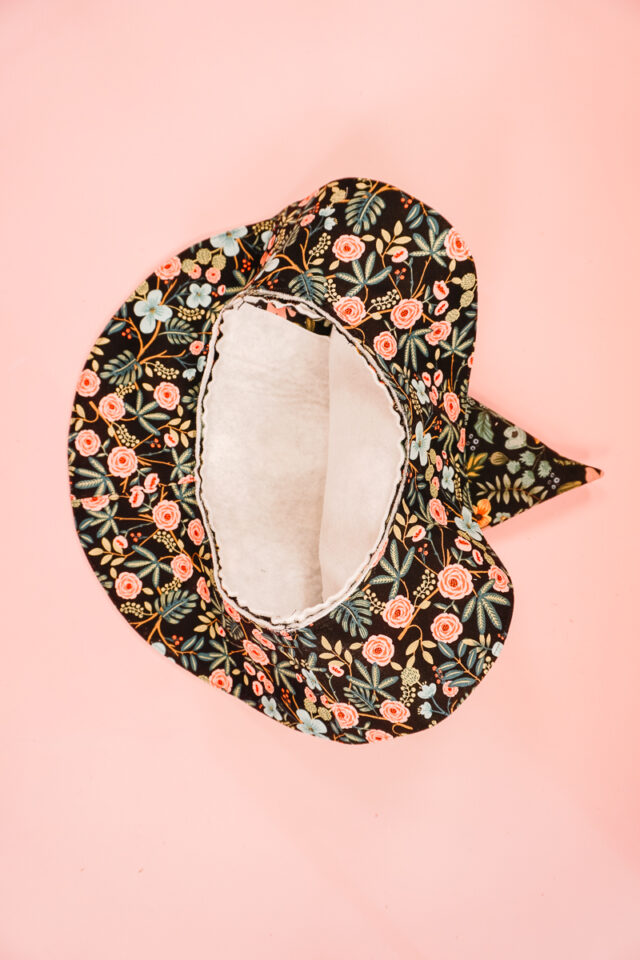
Sew a line of stitching 3/8 inch from the edge around the lining.
Fold the lining up along the stitching line and press.
Slide the lining inside the hat. Match up the side seams of the outer top and the lining.
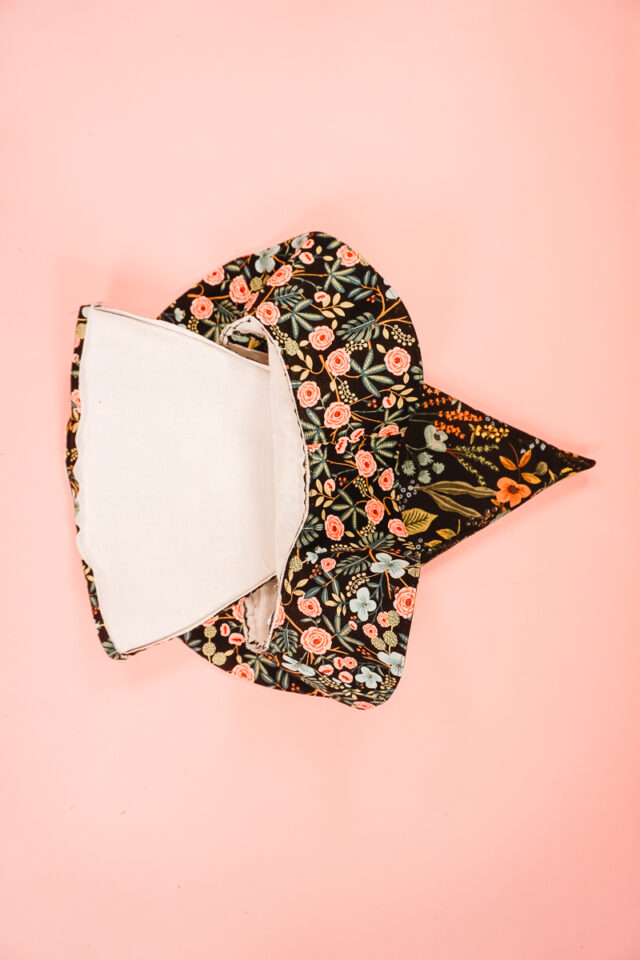
Pin the folded edge of the lining over the stitching line between the brim and the top of the hat. Match up the side seams.
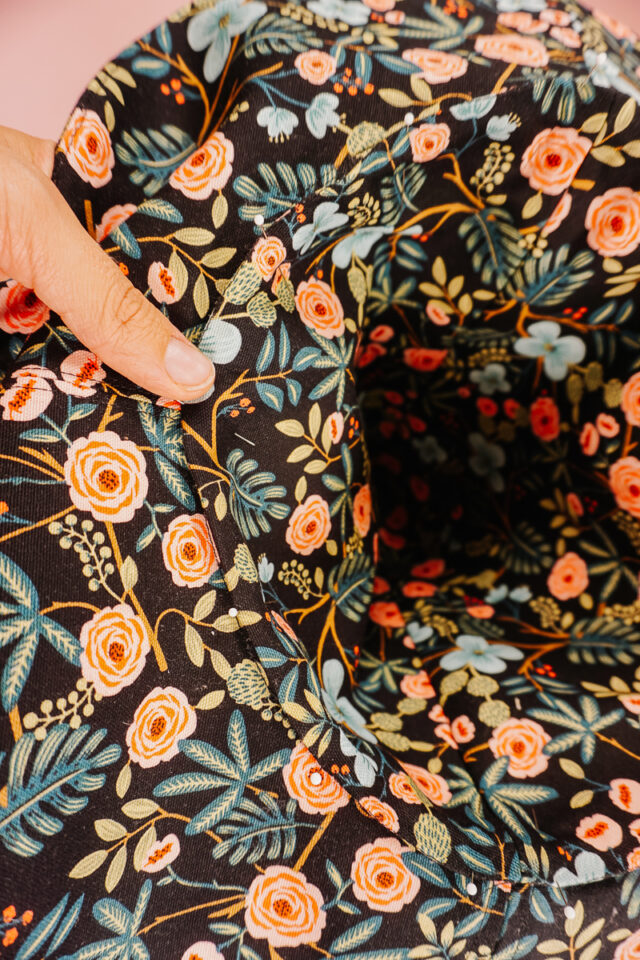
Stitch in the ditch from the outside to secure the lining inside. Sometimes I add another row of stitching 1/8 inch above the seam to really secure the lining. You finished!
Get the Free Sewing Pattern here!
If you make something using this sewing project, I’d love to see! Please share it on social media with the hashtag #heatherhandmade and tag me!

I believe small sewing moments can create great joy. Find your own “right” way to sew. -Heather
Hey I’d love to get your free pattern. It’s not giving me a form to fill out and I also tried subscribing but it’s throwing an error message when I enter my email. Could you perhaps send the pattern to my included email?
https://www.heatherhandmade.com/free-witch-hat-sewing-pattern/#get-the-free-sewing-pattern-here
Hi Heather,
Working on my first switch hat. So I’ve got the brim pieces and put them together but together they are not round, they are football shape.
Have I done something wrong?
What seam allowance did you use for the brim pieces? Or did you cut the brim pieces on the fold?
I did not cut them on the fold although the pattern sits kind of like a rainbow
I made this hat for my Halloween costume. I wanted to only use what I had already instead of buying anything and I didn’t have interfacing or the special batting, so I used corduroy for the exterior, a layer of batting held down by glue stick, and a cotton for the lining. The brim is a little floppy, but worked well for my cozy witch outfit.
I also adjusted the construction a little. I sewed the outer brim to outer cone and lining brim to lining cone, then with right sides together I sewed around the brim leaving a gap to turn it right side out. Then top stitch around the brim to add firmness and close the gap.
A note about sizing, in case someone is curious, I made the teen/sm adult size and it was just slightly big on my head. The sizes do tend bigger than I would have thought, but if you stick to the measurement to size in the table, it will work out.
I made this for my daughter’s birthday hat (she was born on Halloween) using Liberty fabric and it turned out adorable, thank you! I will say I ended up adjusting the pattern slightly and following the assembly instructions from a Riley Black witch hat pattern video – it was much simpler construction using just one piece for the top and one piece for the bottom.
Yay! So glad it worked out for you!
I’m confused about how to measure the head. The diagram shows measuring from the top of the forehead, including the ears within the measurement, and to the bottom of the back of the head. The words say to measure from the middle of the forehead, above the ears, and to the middle of the back of the head (occipital bone?). Which one is correct?
Measure at the widest part of the head.
Looks great — just right for the grandchildren!
Can’t wait to make this for my grandaughter
Does the pattern include the 3/8 seam allowance or do I need to add it? Thanks!
It is included!
The witches hat looks good. Can’t wait to make some
Thanks!
Looking for Witch Hat’s PDF pattern! Thanks!
Enter your email here: https://www.heatherhandmade.com/free-witch-hat-sewing-pattern/#get-the-free-sewing-pattern-here
I entered my email, and no pattern. I got an email that takes me to the website, I searched for the pattern and all I found was another link to add my email for the pattern. Why is it taking me in circles instead of just sending the pdf pattern to my email? and just taking me to the website that the free pattern pdf is not listed.
This email you used is not subscribed to my email list. Make sure you enter your email here: https://www.heatherhandmade.com/free-witch-hat-sewing-pattern/#get-the-free-sewing-pattern-here and then confirm in your email that you want to recieve emails from me. Then the pattern will be emailed right to you!
Was looking on Kimberbells site tonight and she talked about your witches hat, and I thought it might be a good one to try, thanks
Great!
Thank you so much for the pattern and tutorial! I’m a little confused by the sizes. I’ve measured my nine year old’s head and it’s 20” no matter how I wrap the tape. Mine is 22.5” …. so we are a toddler and a child size? That doesn’t seem right so should I go with child and small adult or with the measurements?
It’s up to you. You could make a mock up of the cone part of the hat to measure. Just know when you add in the interfacing, layers of fabric, and fusible fleece it shrinks it down. It could be that my hat pattern runs large, but I don’t have complaints about the sizing of this hat.
Hi, could you please let me know which fusable fleece you use- low, medium or high loft? Would like to make sure I purchase the right thickness for the hat. Many thanks Emma 😁
Great question! I always get low loft. I’m not looking for loft as much as I’m looking for a little bit of cushion and stability. You are welcome to choose a different loft if you want! The higher the loft, the smaller it’ll make the circumference around the head.
I cannot see the size chart in numbers….can you resend that section please?
I just fixed that. Sorry! You can see all the sizes now!