
Free Circle Drawstring Bag Pattern

This post may contain affiliate links.
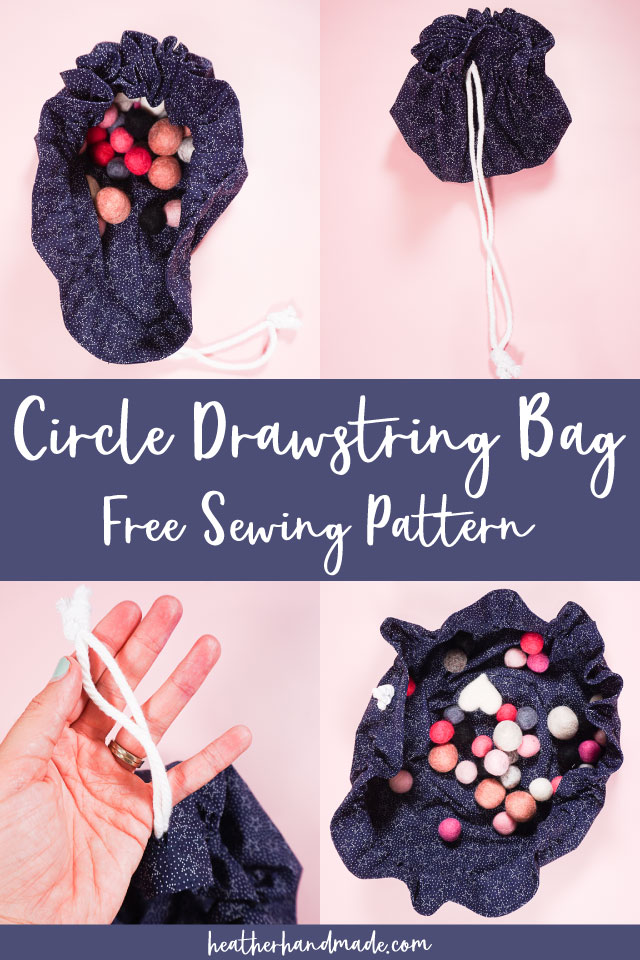
Learn how to make a circle drawstring bag with a free sewing pattern. This beginner sewing project is great for organizing toys or makeup!
I love to make drawstring bags and pouches to organize all the little things, but sometimes I find it hard to reach in and get things out. Sometimes I want it to open all the way up so that I can see what is inside.
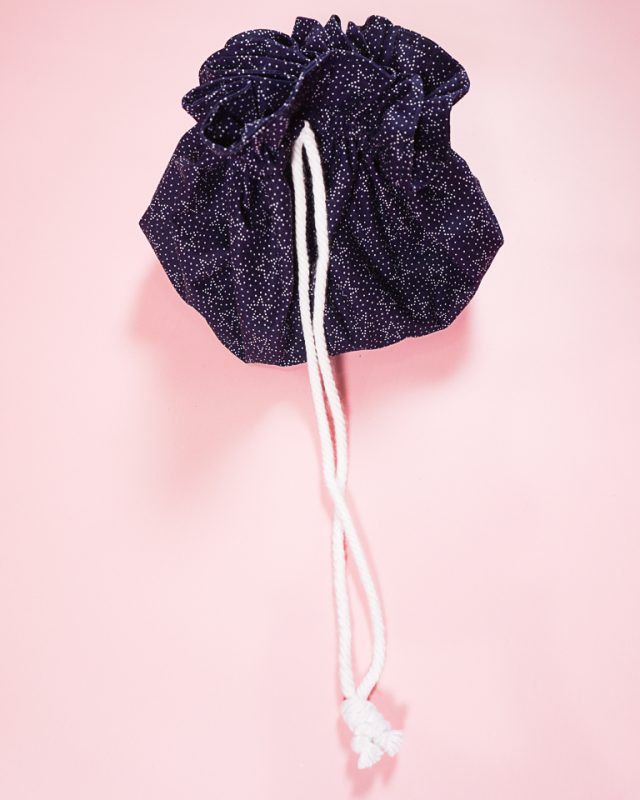
Today I’m going to share a circle drawstring bag with you that can be closed up tight and opened all the way up. It can organize toys or makeup, or anything else you want. Use any pretty cotton fabric with the free sewing pattern to make a fun gift!
To get the free sewing pattern, scroll to the end of the tutorial. Put your email address in the form under “Get the Free Sewing Pattern Here.” Once you confirm that you want to receive emails from Heather Handmade, the free pattern will be sent to your email address. Check your spam and promotions for the email.

I started off filling this bag with wool felt balls to see how much could fit, and I was surprised at how roomy the bag was! You could fit a lot of toys, buttons, or yarn into one of these bags.
Then I put my makeup in, and I loved that I could see everything. It would be great to use for traveling or even just storing and organizing my makeup day to day.
I used a simple star fabric that I had on hand and I did the same fabric inside and outside, but you could choose some bright and colorful fabric for an eye catching bag. You can also do two different fabrics for a different look.

What kind of fabric works for a circle drawstring bag?
The best fabric to use for a circle drawstring bag is quilting cotton. If the cotton is too stiff the bag doesn’t gather as well so it should be on the lightweight side instead of the medium weight side.
Reader Circle Drawstring Bags
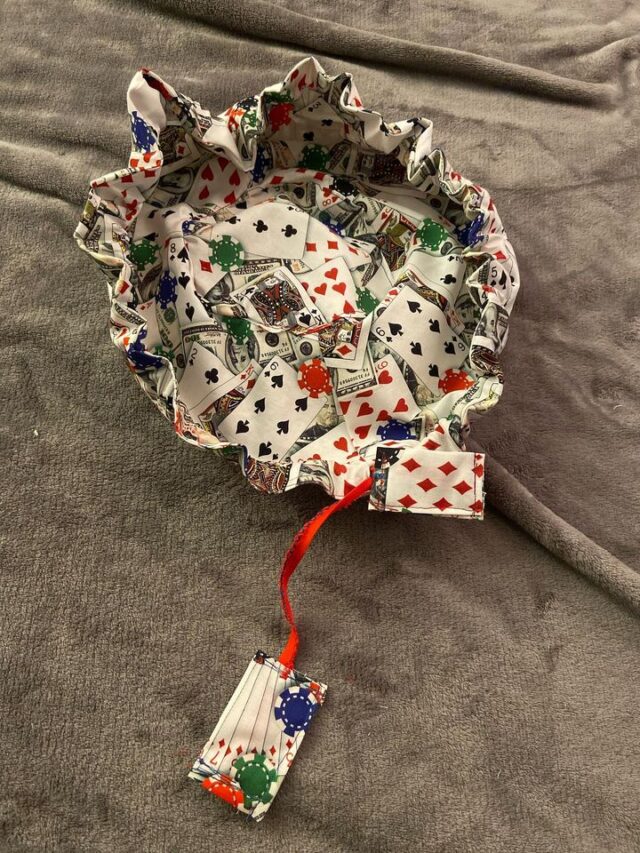
Maggie made this super fun bag for her dad. I love the fabric print, and the fabric on the ends of the drawstring so that it doesn’t get pulled out!
What is a PDF sewing pattern?
A PDF pattern is a sewing pattern designed on the computer and organized so that it can be printed on several letter or A4 size pieces of paper.
I love using PDF sewing patterns because if the pattern gets ruined or if my children or I changed sizes, I can always print it again. It’ll never be destroyed since I have a digital version!
How do you use a PDF sewing pattern?
Open the PDF on a computer and click print. When printing make sure that the scaling is set to 100% or no scaling so that the pattern prints at the correct size.
Once the pattern is printed it can be taped together to get the full size. Then the pattern can be cut for each pattern piece size or individual sizes can be traced so that the pattern can be used again and again. Learn how to use PDF sewing patterns.

Do you love to sew? Try one of these sewing projects:
- How to make a drawstring bag
- How to make a lined drawstring bag
- Dice bag sewing pattern
- Beginner sewing projects
- 30 min sewing projects
- Gifts ideas to sew
- Free PDF patterns
- One yard sewing projects
- Travel sewing projects
- Sewing projects for teens
Free Circle Drawstring Bag Pattern
Supplies
- Free circle drawstring bag sewing pattern – get it at the end of the post
- 1/2 yard quilting cotton or two fat quarters
- 1 yard drawstring, ribbon, or cording
- Sewing tools
- Sewing machine
Do you just want the pattern and tutorial as a PDF? Get the pattern and tutorial for just $5. You won’t need to access the internet every time you want to make it. Or get the Pattern Bundle with ALL the PDF tutorials!
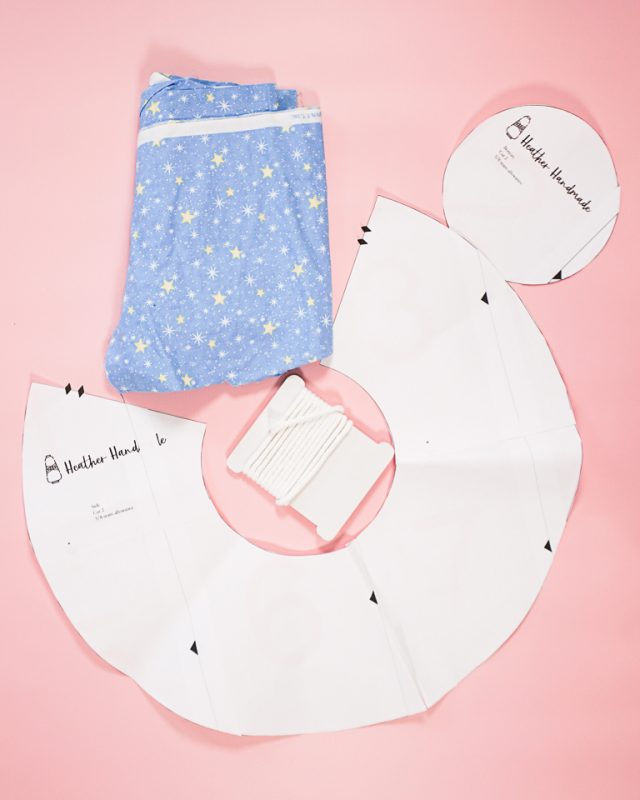
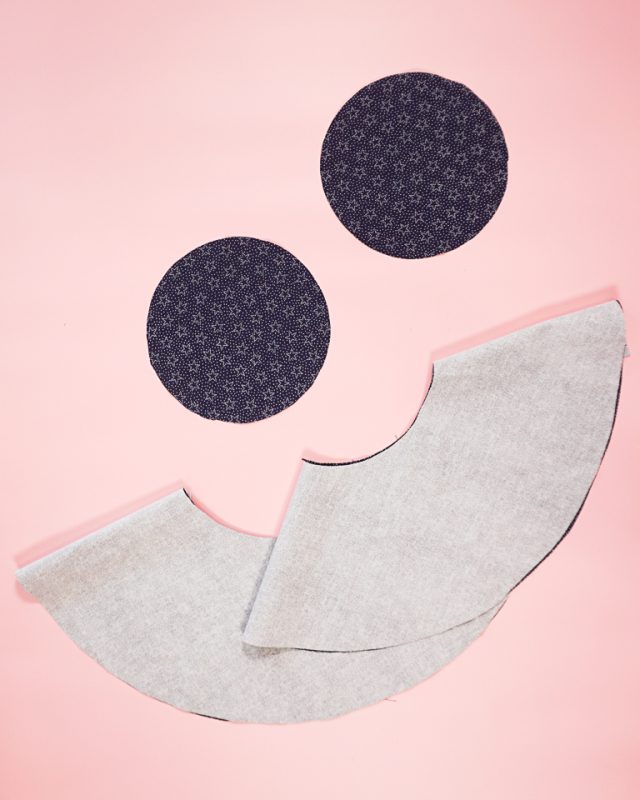
Cut out two side pattern pieces and two bottom pattern pieces. You can use the same fabric so that it’ll look the same inside and outside, or you can use two different fabrics for a bag with lining look.
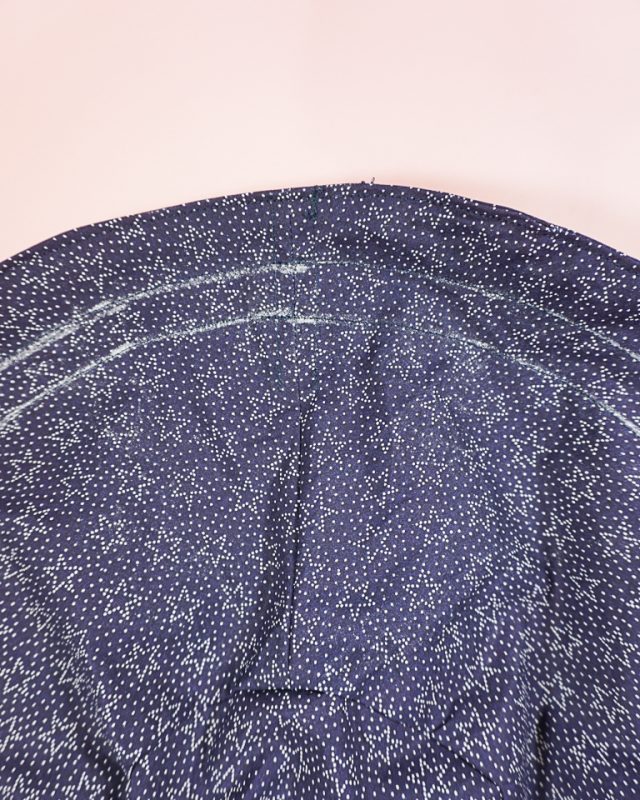
The two triangles on the side seams mark where the casing will go. They are 2 inches and 1 3/8 inches from the outer edge. Draw the lines all the way around on one side piece.

With right sides together sew the side seams of the sides. When you get to the marks stop sewing, leave a hole, and then start again at the next hole. Make sure you backstitch when you start and when you stop.
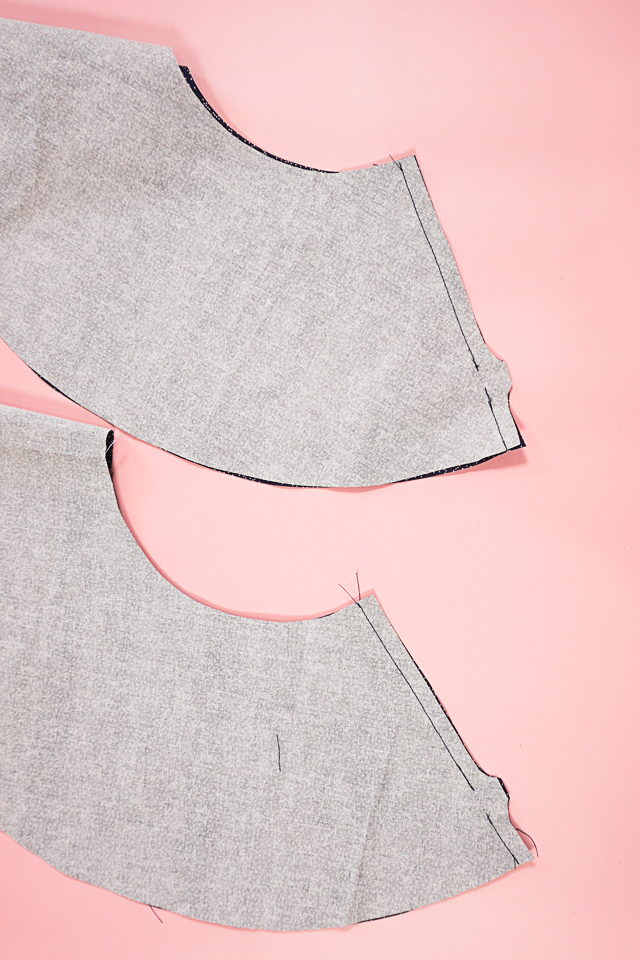
Stitch the seams open and flat so they don’t get in the way of the casing and drawstring. You don’t need to sew all the way down.
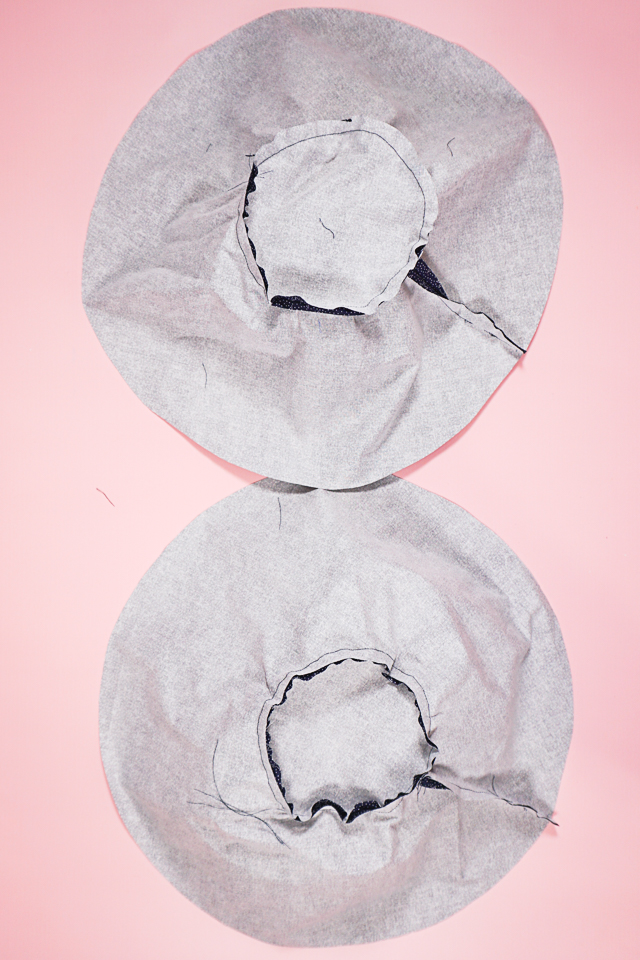
Divide the bottom into four sections. Divide the lower edge of the sides into four sections. Match up each section of the side with a section of the bottom.
With right sides together sew the bottom circle into the lower edge of the sides. You will be sewing two opposing curves together so it seems tricky. Just sew slowly and adjust your fabric a lot.
Place the two pieces right sides together and sew around the outer edge. Leave a 3 inch hole for turning right side out. Backstitch when you start and when you stop.

Turn the bag right side out through the hole. Press the outer edges flat.
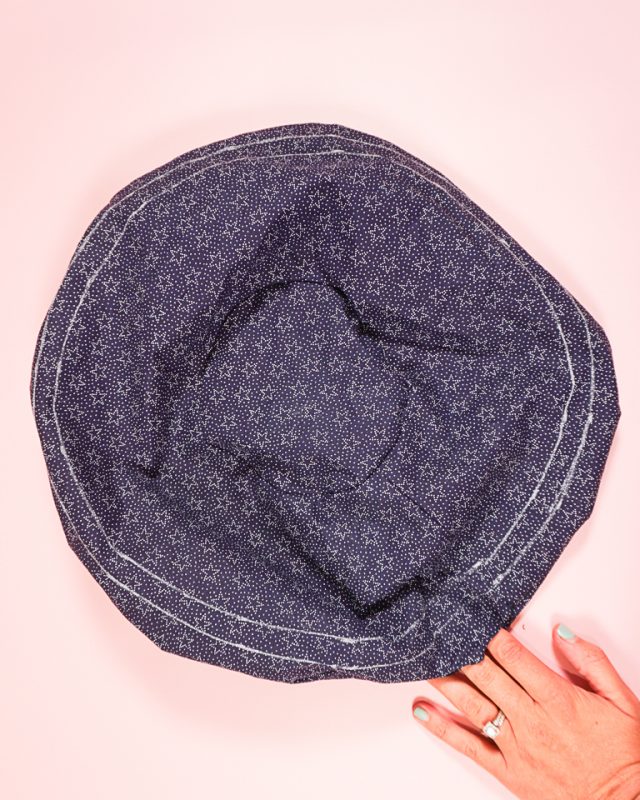
Edgestitch the outer edge 1/8 inch from the edge to create a nice edge and to close the hole. Sew through each marked line to create the casing.
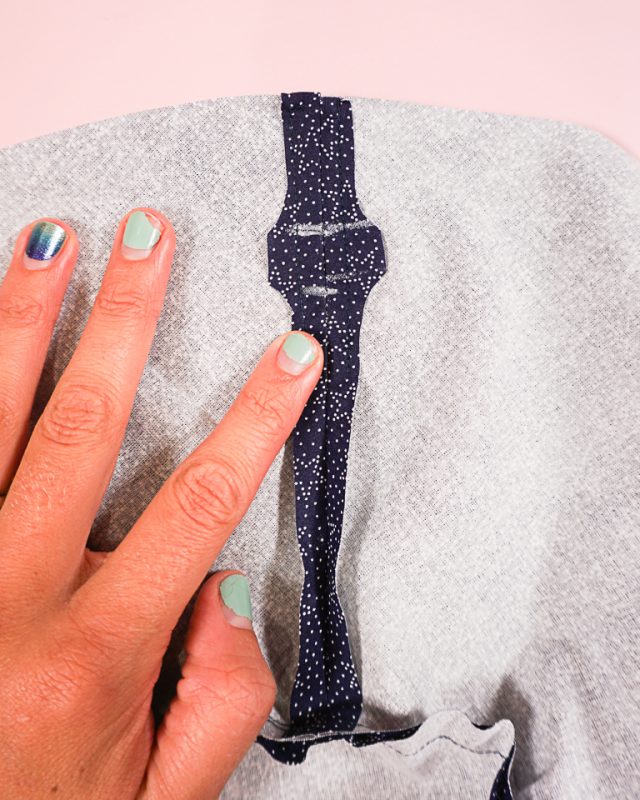
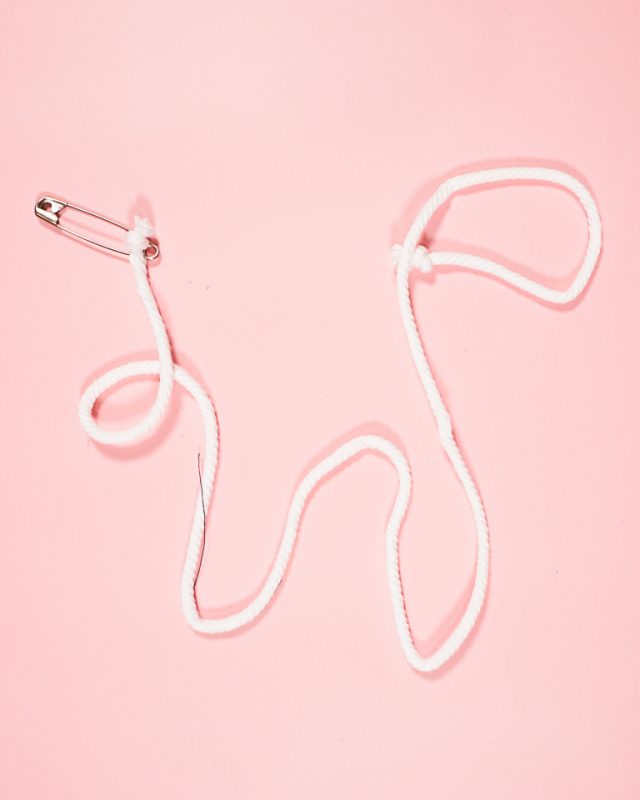
Take your drawstring and tie small knots on each side. It is a little hard to get the drawstring through with a knot on the side being pulled through, but I found that the drawstring came unraveled when being pulled by a satefy pin.
Attach a large safety pin to one side.
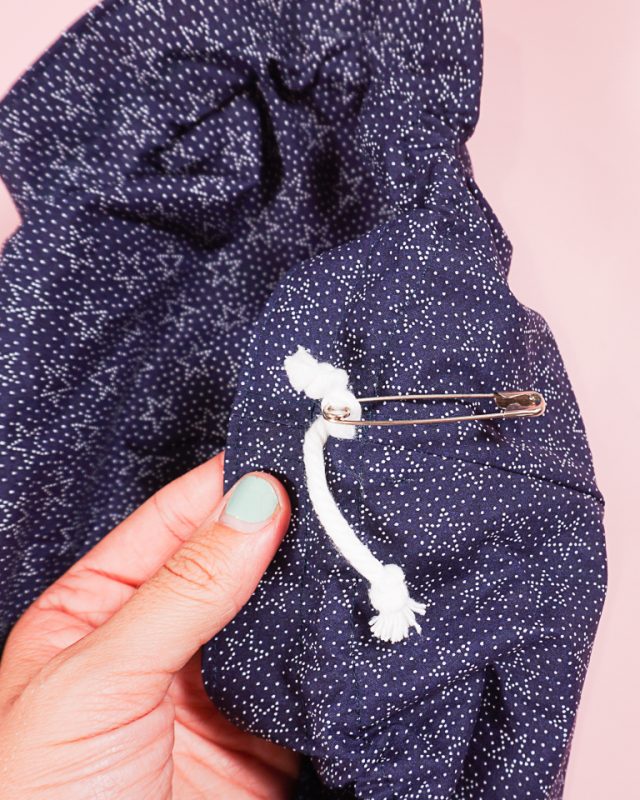
Use the safety pin to pull the drawstring through the casing until both ends are pulled out on one side.
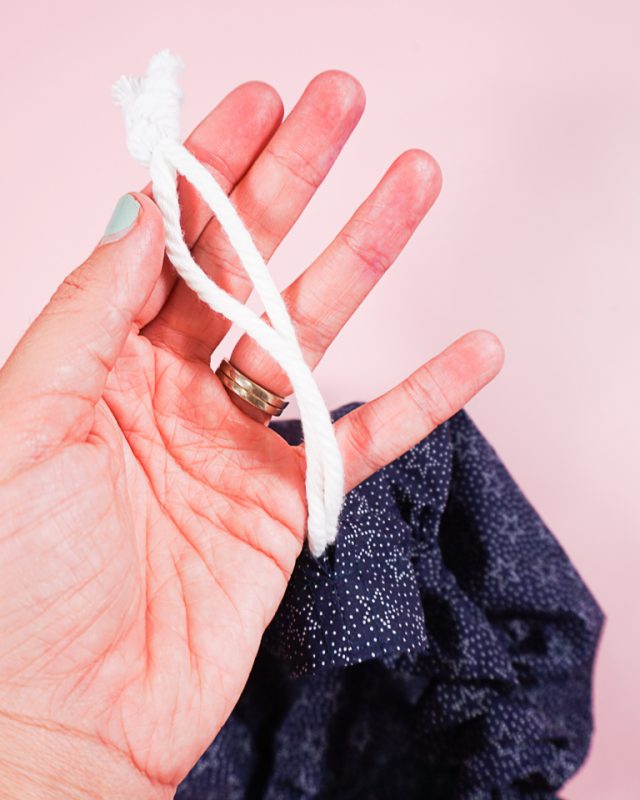
Take the two ends and tie them in a knot so that the drawstring cannot be pulled out of the casing.
Fill the bag and pull the drawstring tight. You finished!
Get the Free Sewing Pattern here!
If you make something using this sewing project, I’d love to see! Please share it on social media with the hashtag #heatherhandmade and tag me!

I believe small sewing moments can create great joy. Find your own “right” way to sew. -Heather
Hi – I have completed the pattern but when I pull the cord it doesn’t gather properly and bunches up. Grateful for any suggestions about what I could do to fix this problem. The cord has plenty of room in the casing to move and is long. Thanks
I have printed and cut out the pattern, cut out the fabric and it is not symectrical should it be?
the print of the fabric? The sides of the bag are a kind of 3/4 circle so it doesn’t lay all the way flat when sewn. It’s okay if it’s not symmetrical.
Hi and thank you for the reply, it is the pattern that doesn’t seem to match up I may have made an error in cutting it out. I have tried to download it again with no success could you assist please?
Can you send me a picture? I’m not sure what the problem is from the explanation.
I signed up to get the FREE Circle bag pattern but I am at the end of the post but I can’t find where to get the Free Circle Bag Pattern
https://www.heatherhandmade.com/free-circle-drawstring-bag-pattern/#get-the-free-sewing-pattern-here