
DIY Border Print with the Cricut Maker

This post may contain affiliate links.
Make a custom DIY border print design with the Cricut Maker! Create the custom design, cut the fabric with the Cricut Maker, and sew it to a skirt.
This is a sponsored conversation written by me on behalf of Cricut. The opinions and text are all mine.
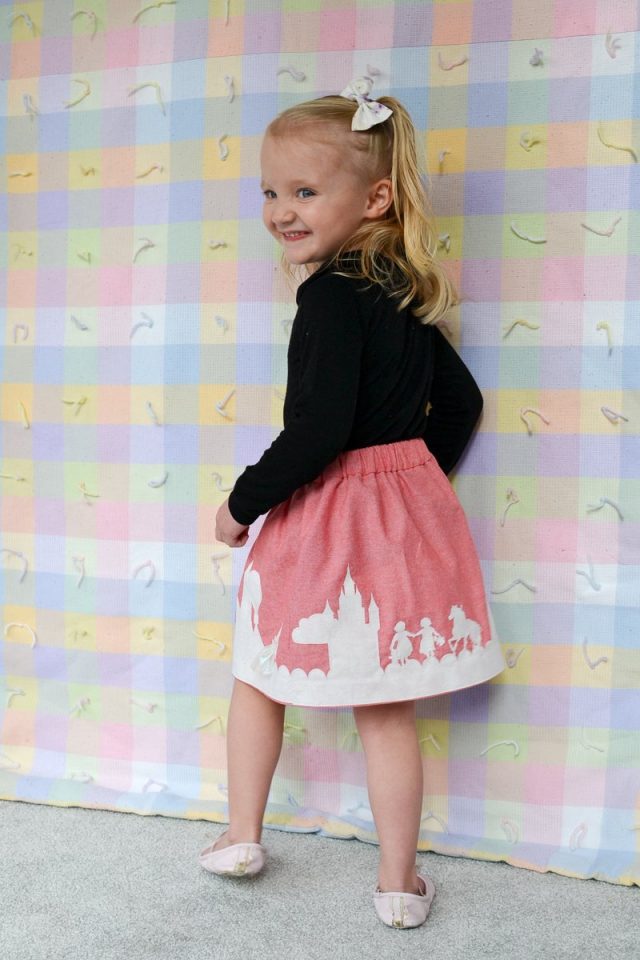
Make a custom DIY border print design with the Cricut Maker! Create the custom design based on you or your girl’s favorite things, cut the fusible fabric with the Cricut Maker, and fuse and sew it to the skirt. You can even customize it more with unique details!
This border print design would be fun to add to a refashioned skirt or a fat quarter skirt for girls. Use this list of free skirt patterns for a place to start!
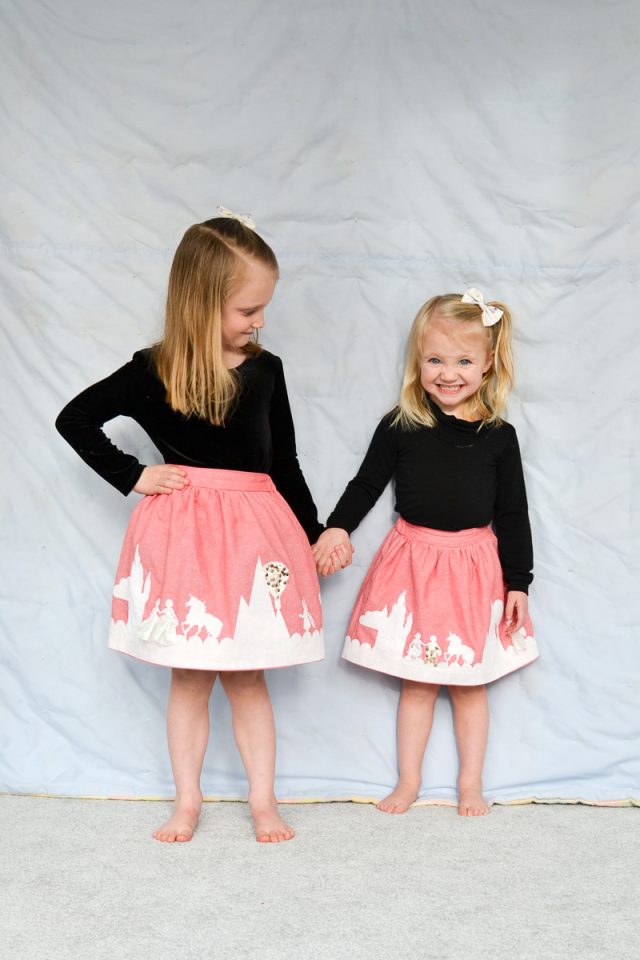
My little girls are wonderful friends and love imaging together. They are always creating little games and stories to play together.
I love to see where their imagination takes them so I decided to make them custom border print skirts to inspire their creativity.
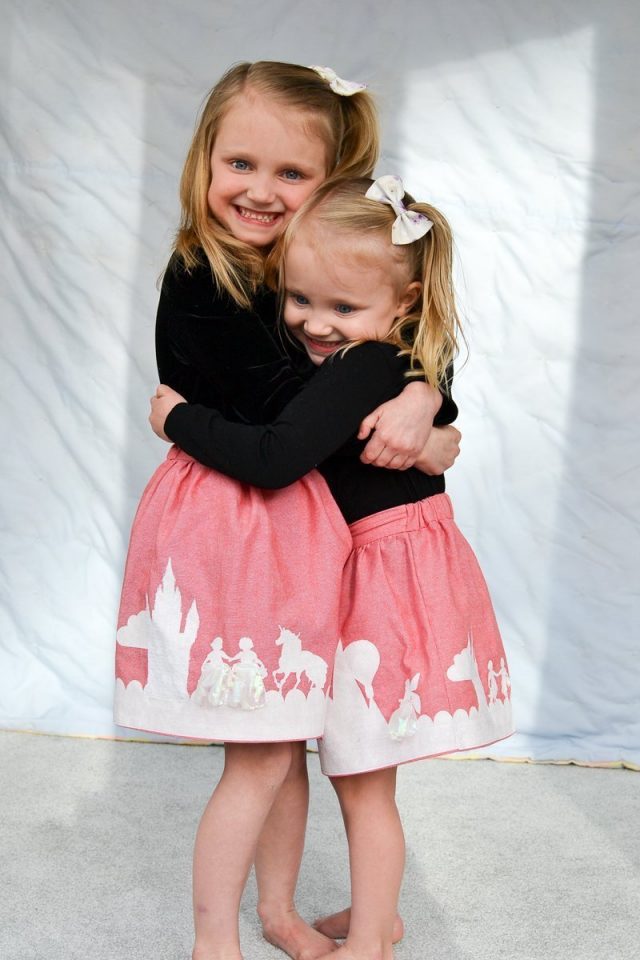
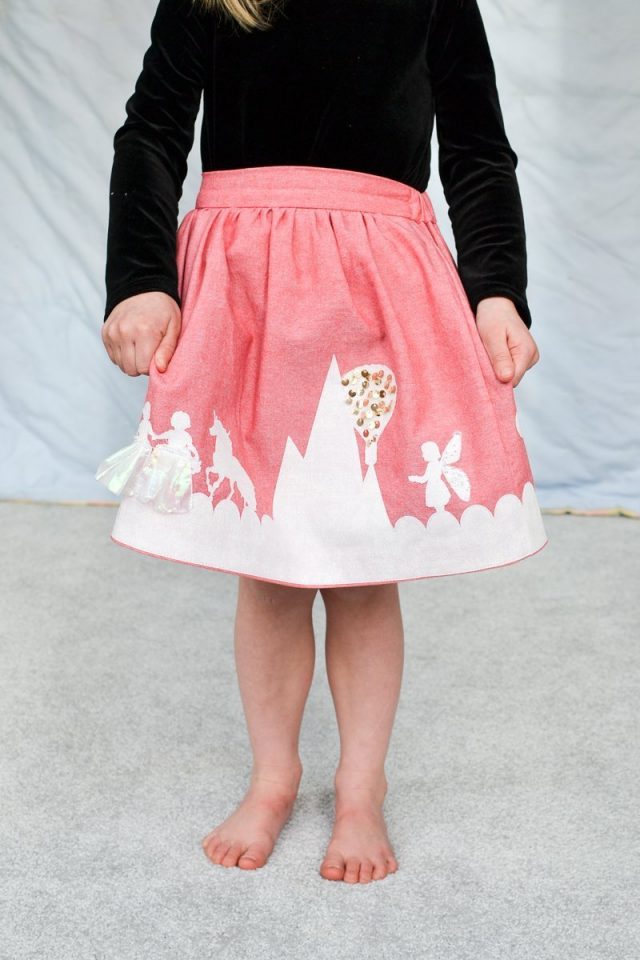
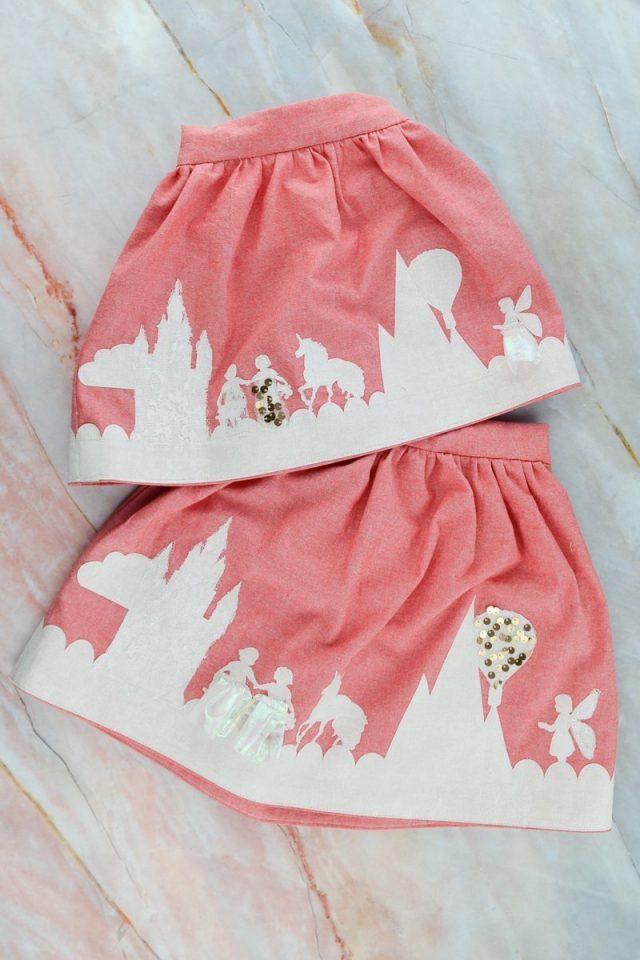
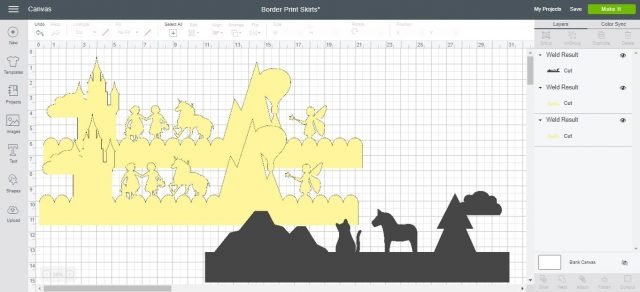
I added some sisters playing together, a castle, a mountain, a unicorn, a hot air balloon, and a fairy. These are characters and places that are often in their pretend play.
While making a border print in Design Slace I recommend using very simple shapes. I used very find details and I lost some like the star wand and the unicorn’s horn.
Plan on choosing simple shapes, or making the border print I designed much larger.
They often play with their cat purses I made with the Cricut Maker while they are imagining in their skirts. I love a fun and easy Cricut Maker sewing project!
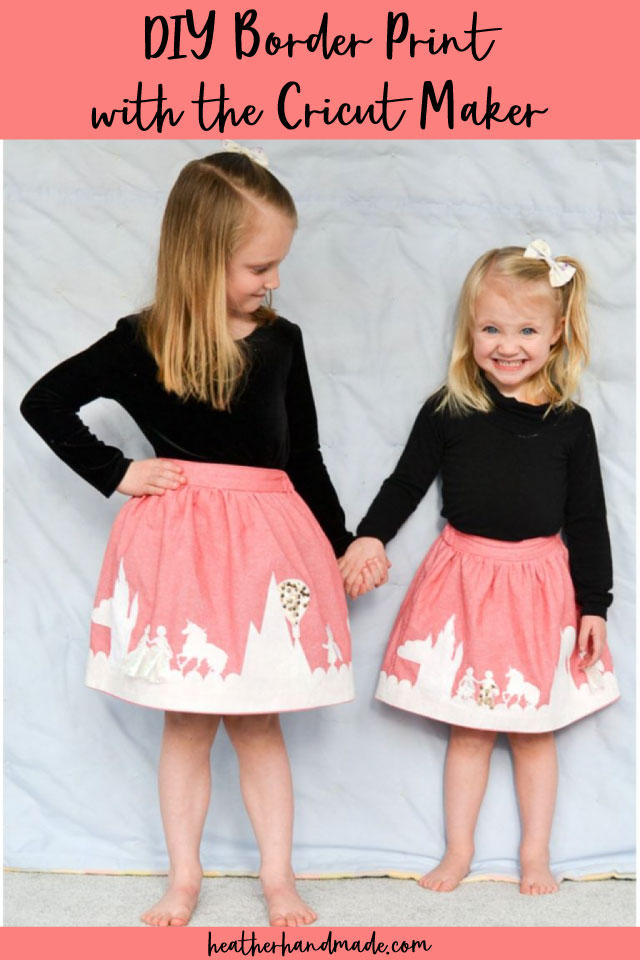
I made both border prints the same just one is smaller than the other. I also did different fabric details to make each skirt unique. I really just love the Cricut Maker and everything it does for my handmade clothing!
DIY Border Print Skirt with the Cricut Maker
Design your border in Design Space. Choose simple shapes and arrange them on a border. Click weld to weld them into one item. Make sure it’s less than 11.5″ x 23.5″ so that it’ll fit on a mat.
Roll the fusible fabric onto a fabric grip mat with a brayer.
With the rotary cutter in the Cricut Maker cut two of the border designs from your fabric.
Weed the design and carefully peel the fabric design off the mat.
Place the border design along the hem of a woven skirt or dress. Use the Easypress 2 to fuse the fabric to the edge. Do the same to the back border design. Trim any part of the design that is too long or overlap it to the other side.
Once the design is completely fused sew the design onto the skirt or dress. Use your regular sewing machine foot when sewing straight edges and use a quilting foot when going around curves or details.
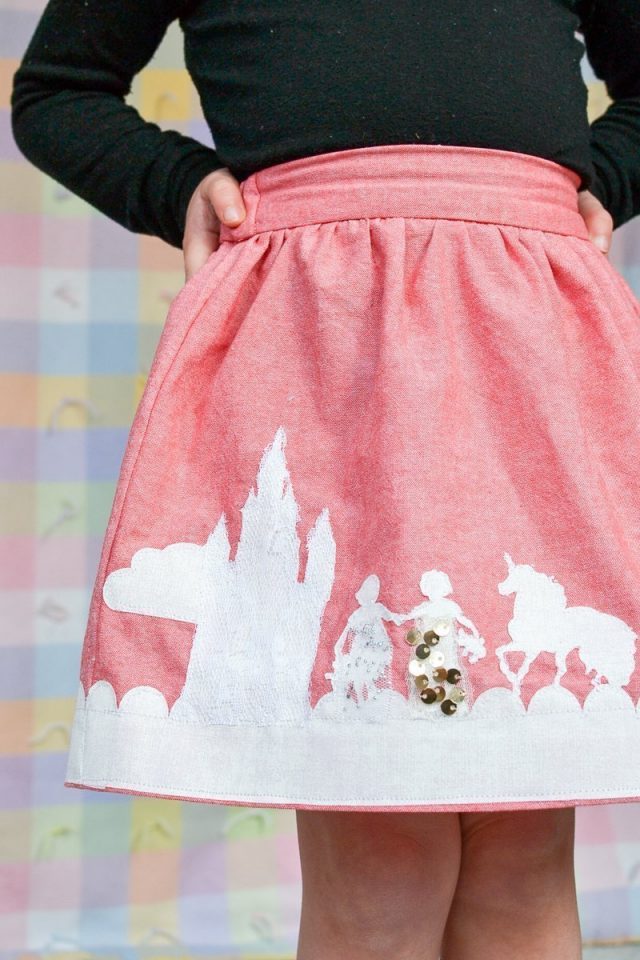
Add special fabric like lace, sequins, or glitter to the border print to make the details pop.
If you make something using this sewing project, I’d love to see! Please share it on social media with the hashtag #heatherhandmade and tag me!
I even love using the Cricut Maker to make gifts!

I believe small sewing moments can create great joy. Find your own “right” way to sew. -Heather
This is very good and informational post and helpful for all. Thanks for sharing your experience.
Such a cute idea – I absolutely love it!
Such cute skirts. Your little ladies are beautiful
Thank you so much!