
Make a Baby Romper Pattern From a T-Shirt

This post may contain affiliate links.
Learn how to make a baby romper from a t-shirt with a free sewing pattern. This upcycle is a fun way to reuse t-shirts!
I’m so excited to share the free baby romper pattern and tutorial today! I have loved making these little rompers for my son and daughters and hope you do to! I love to see them in my old tees, and it brings back ALL the memories!
These come together fairly quickly, and it’s so fun to see your t-shirt on your little one. Enjoy this free baby romper pattern! I have reworked and updated the pattern and tutorial! Here’s the new tshirt romper tutorial and free pattern!
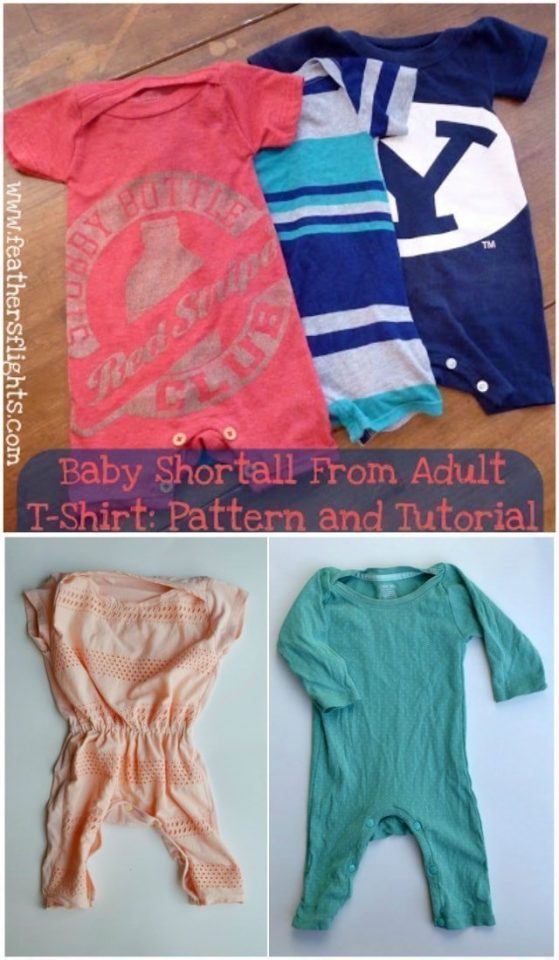
The pattern is for about a 6-12 month size. My baby is long and skinny with a smaller than average head, so you might have to adjust the pattern for your baby. If you have a chunky baby, add width to the sides of the body pattern. I’ll give you tips in the tutorial for adjustments.
Make a Baby Romper Pattern From a T-Shirt
Supplies
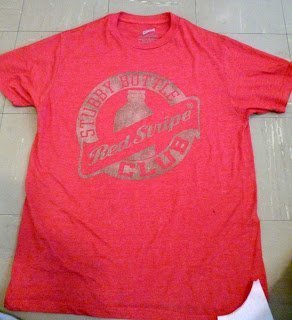
- One adult t-shirt in any size, I used a male medium
- sewing tools and sewing machine
- FREE Baby Romper PATTERN in size 6-12 mos – get it at the end of the post
- Tips for sewing knit fabric
Cutting Instructions
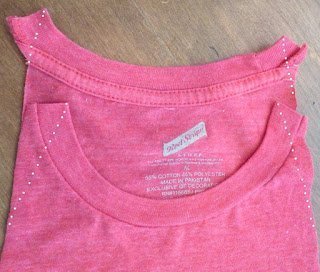
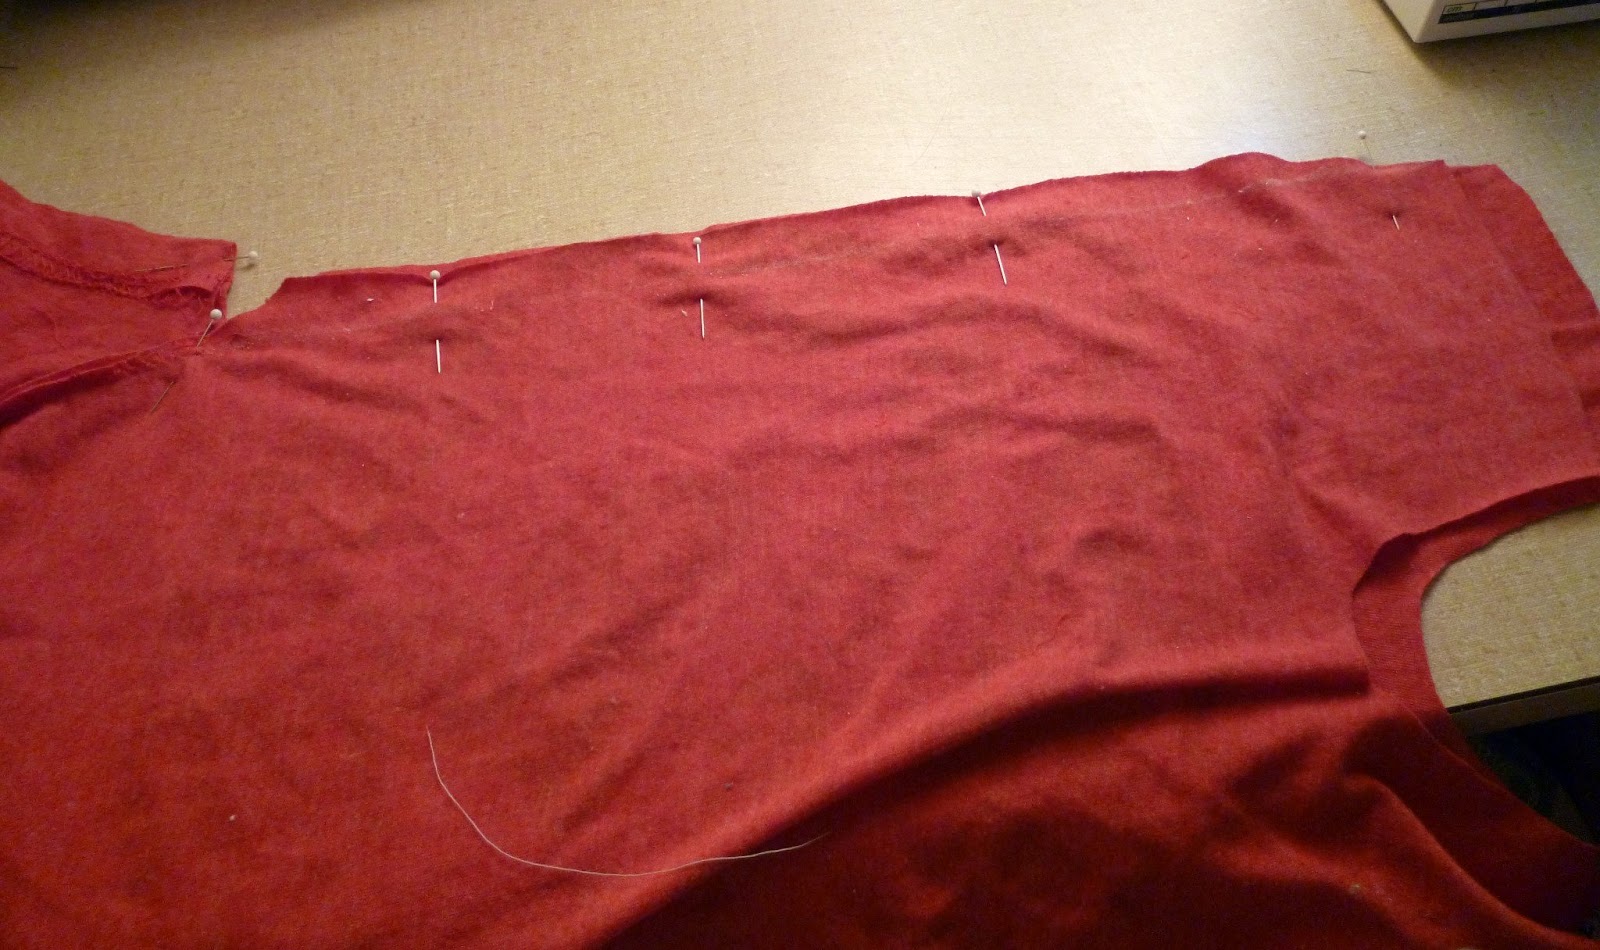
1. Lay out your t-shirt and place the neckline of the pattern on the neckline of the shirt.
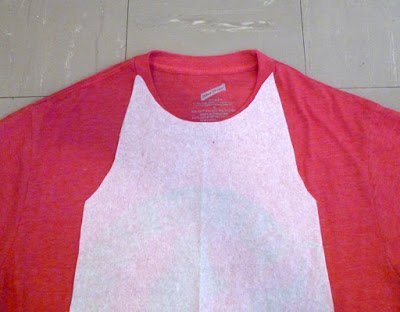
2. Pin through both layers.

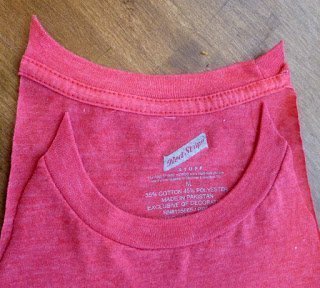
3. Cut out. At the neckline cut straight up then cut across into the neck hole at the top of the pattern. (If your neckline is really big, you might not need the whole neckline.
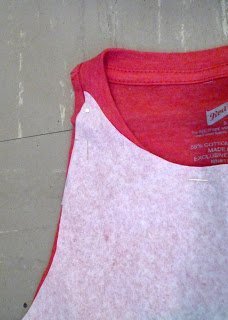
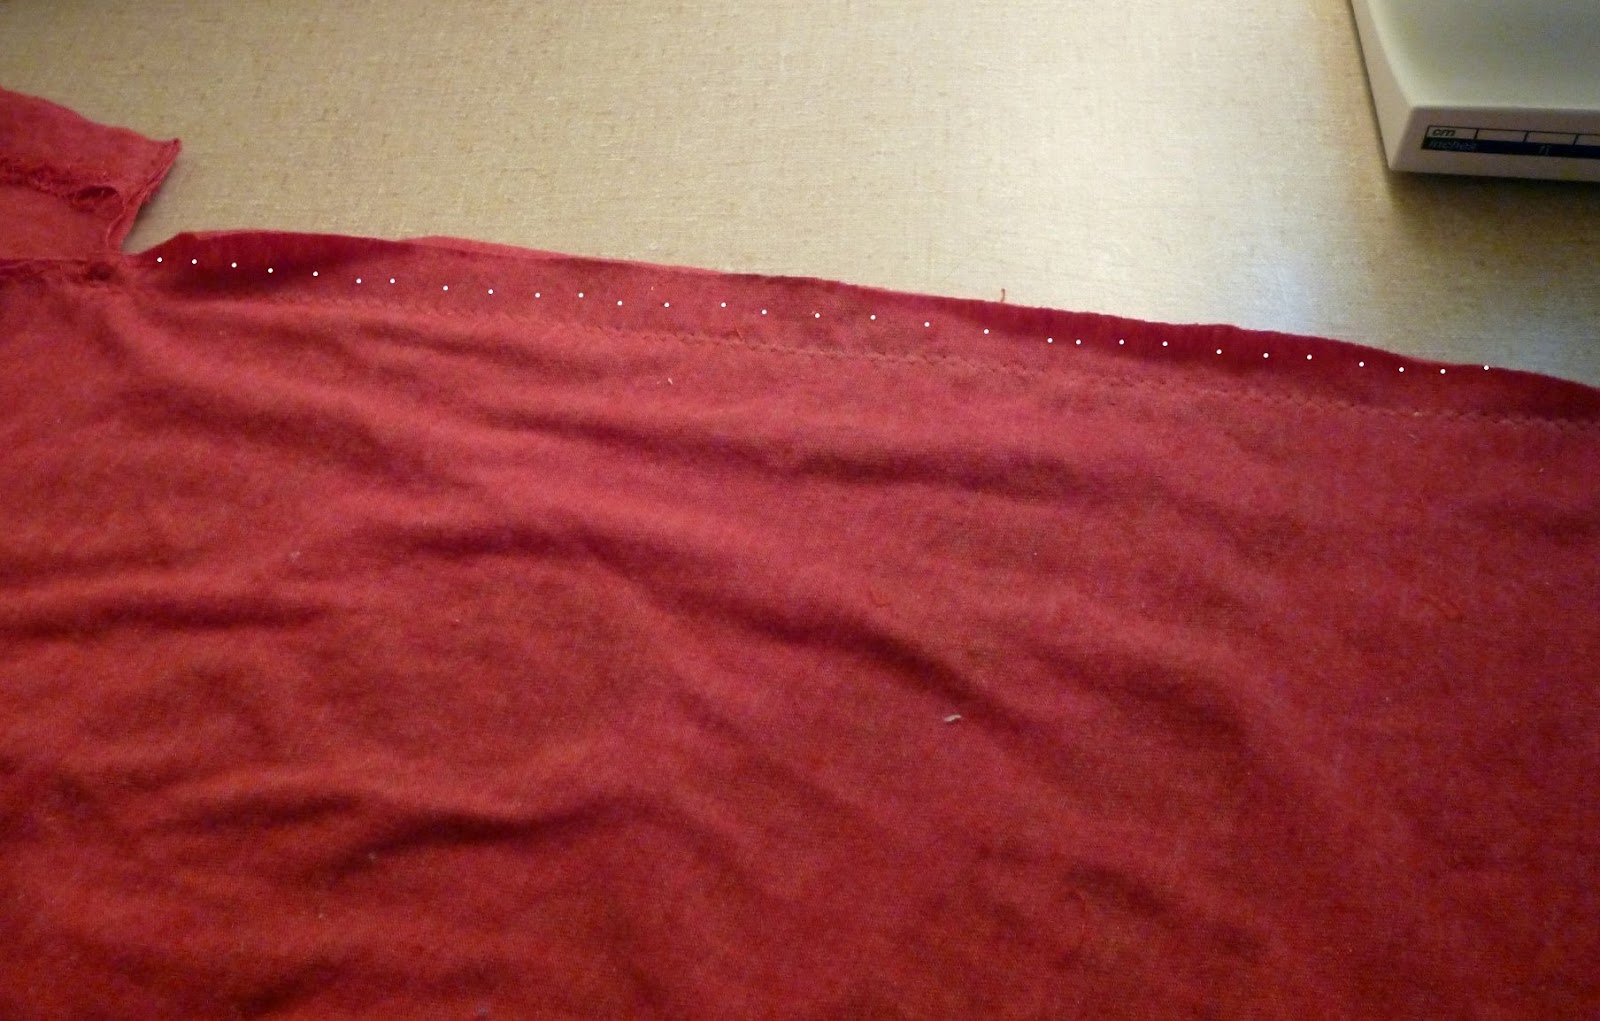
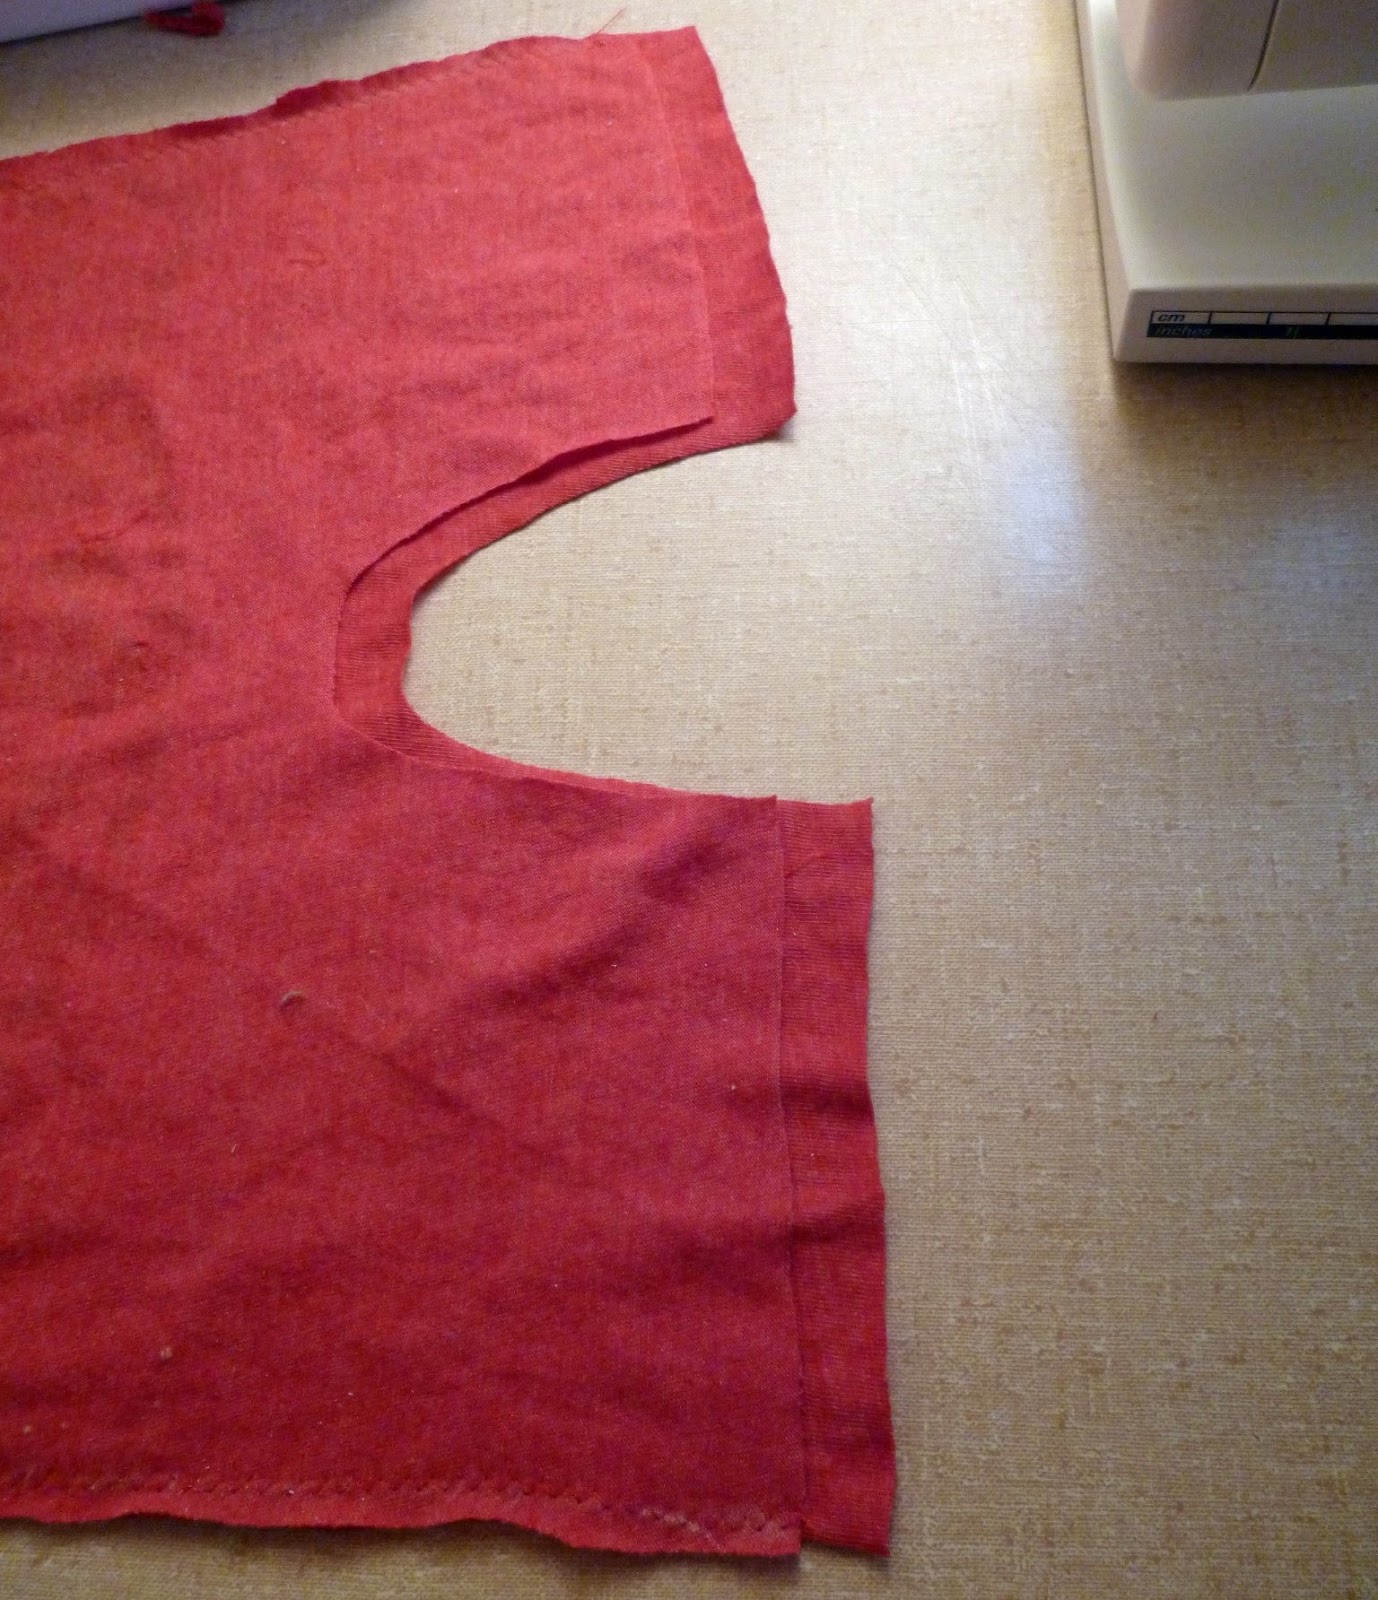
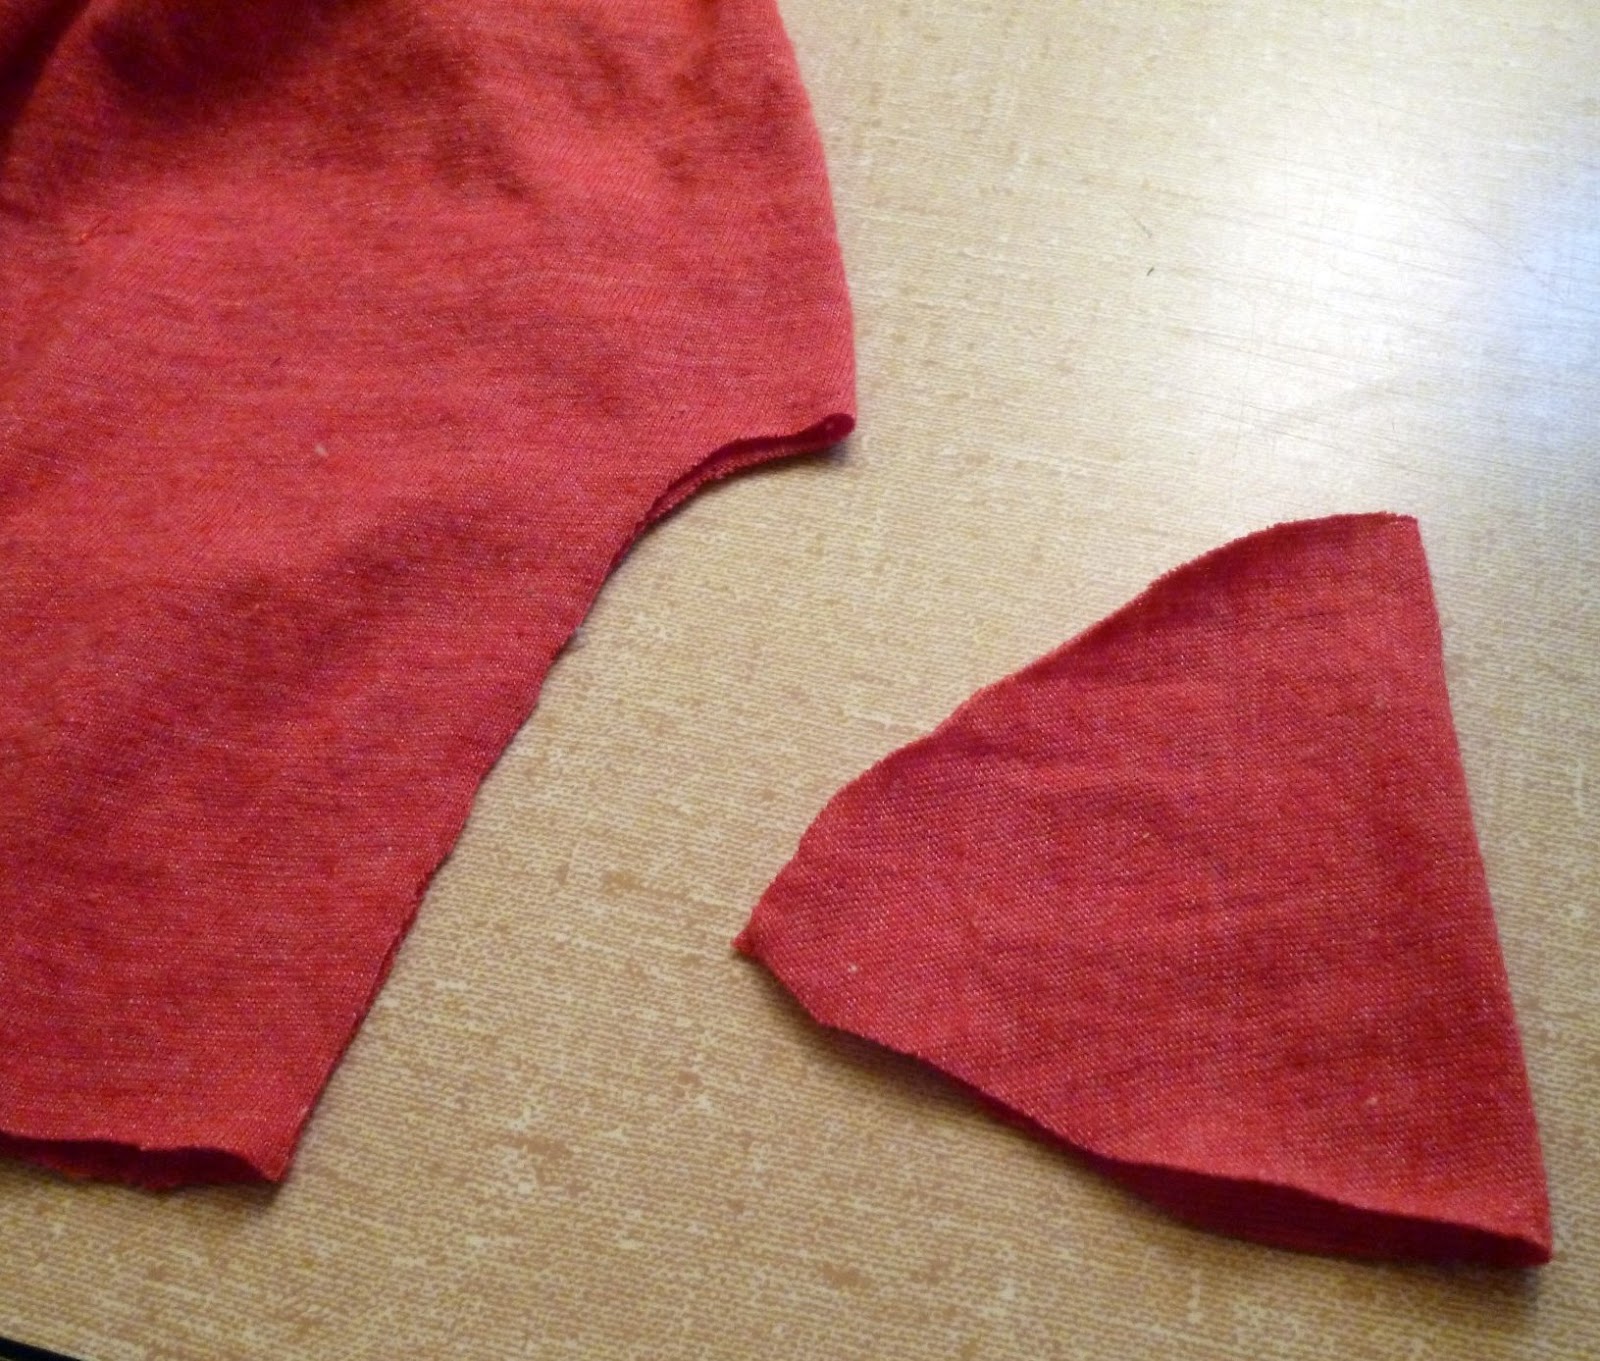
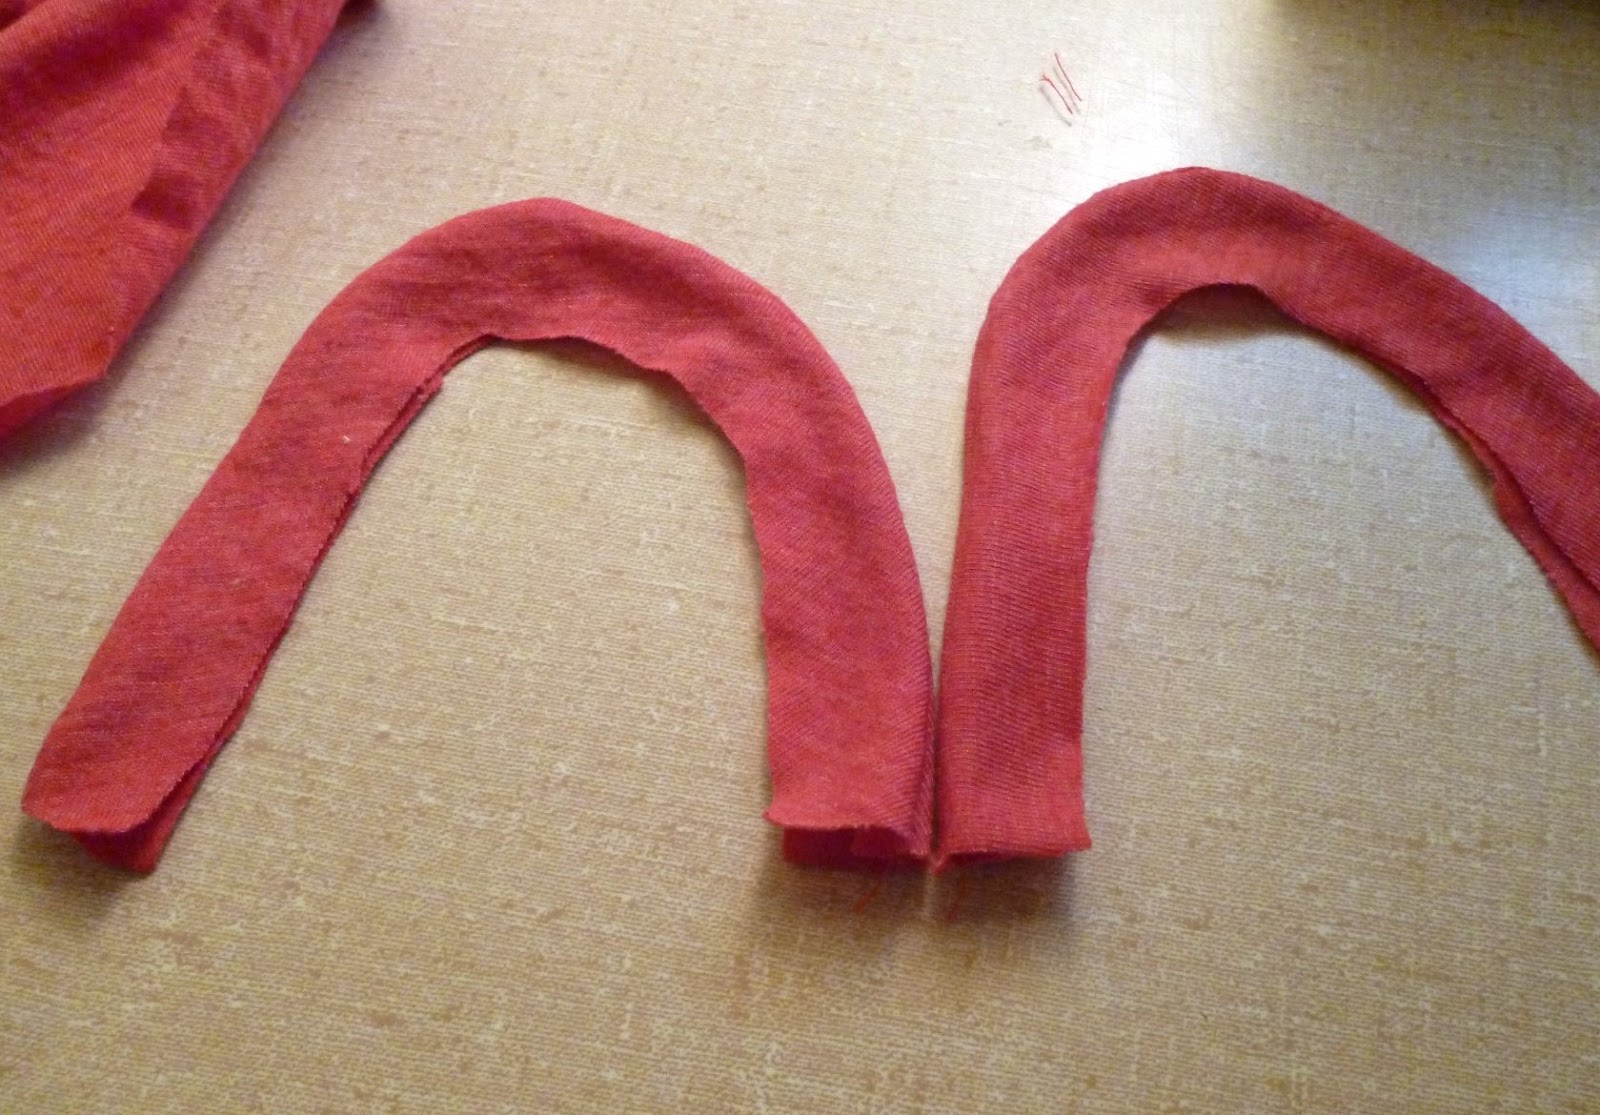
4. Cut out the other pieces. When cutting out the sleeves, place the bottom on a hem so you don’t have to hem the sleeves. You should have one front and one back, four leg opening pieces, two sleeves, and one crotch piece.

5. Perfect the shoulders by angling in the edge so that the neckline ends in a point.
Sewing Instructions
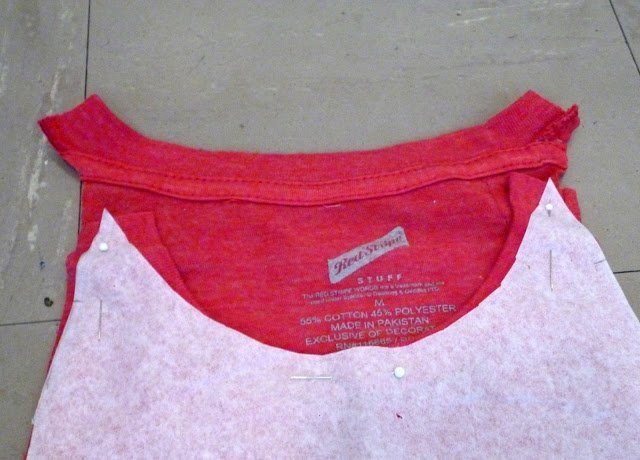
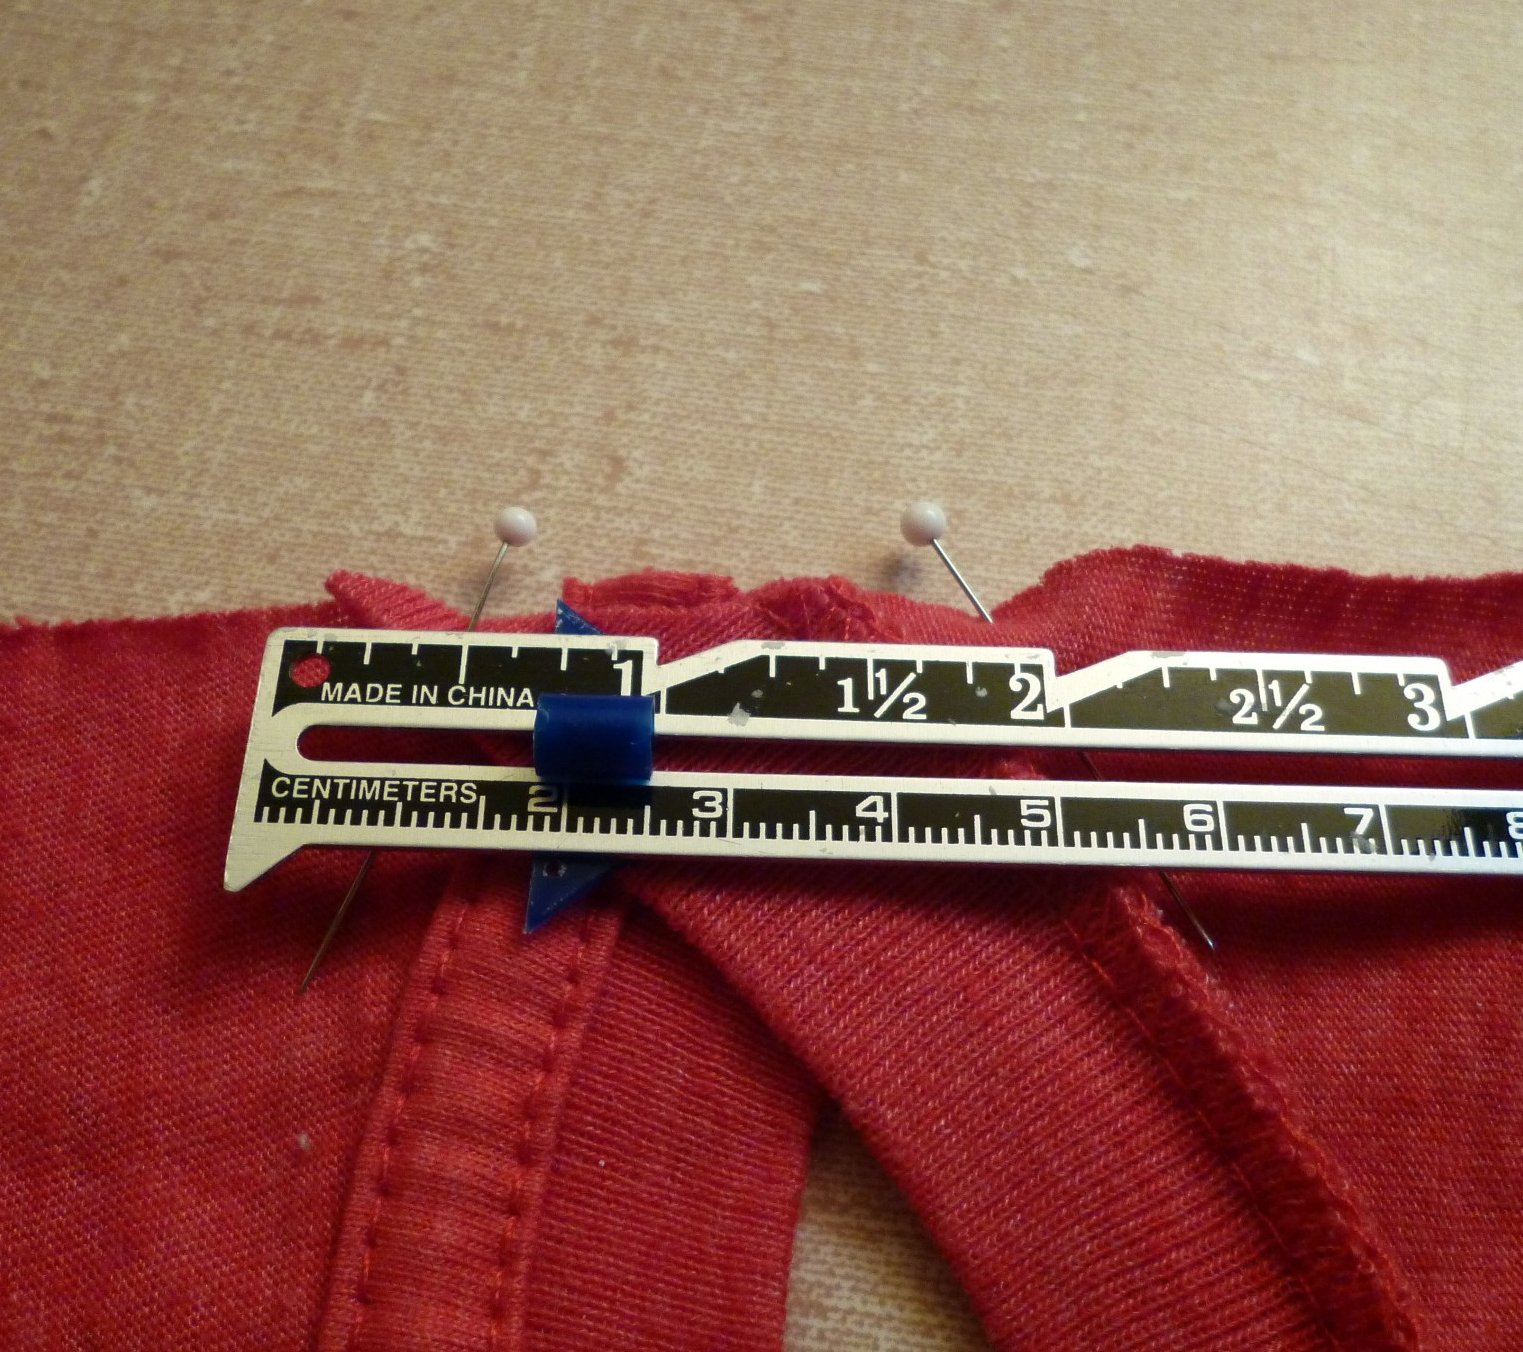
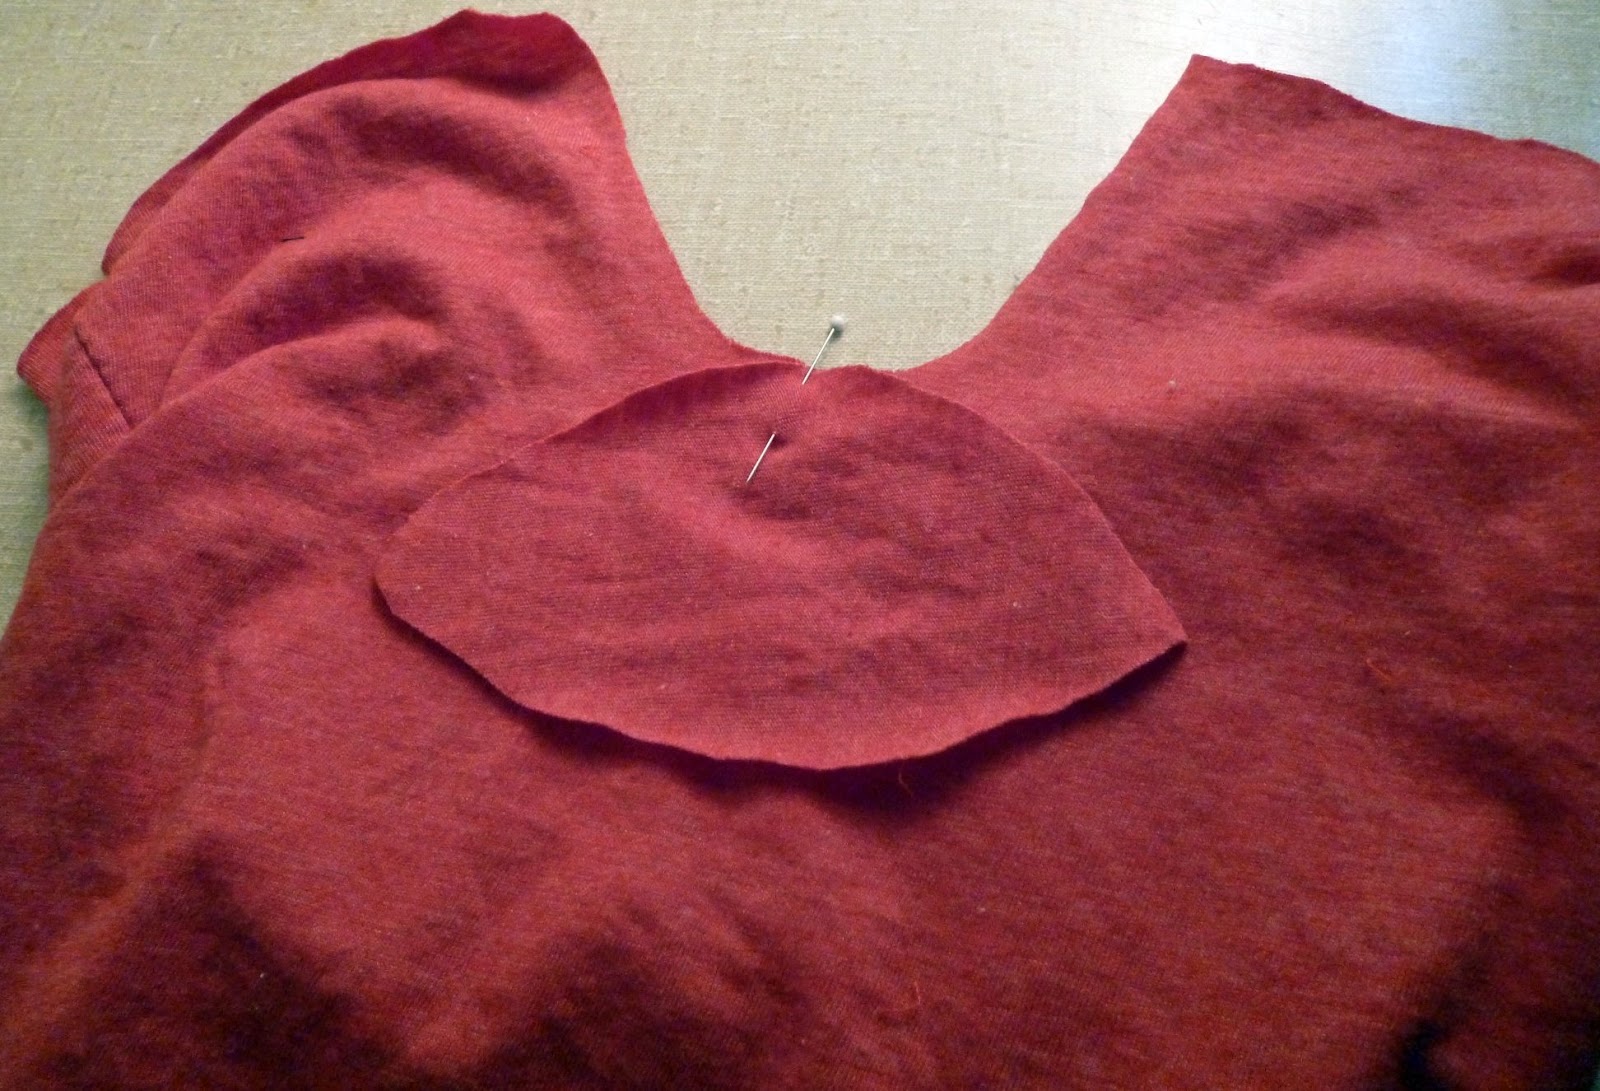
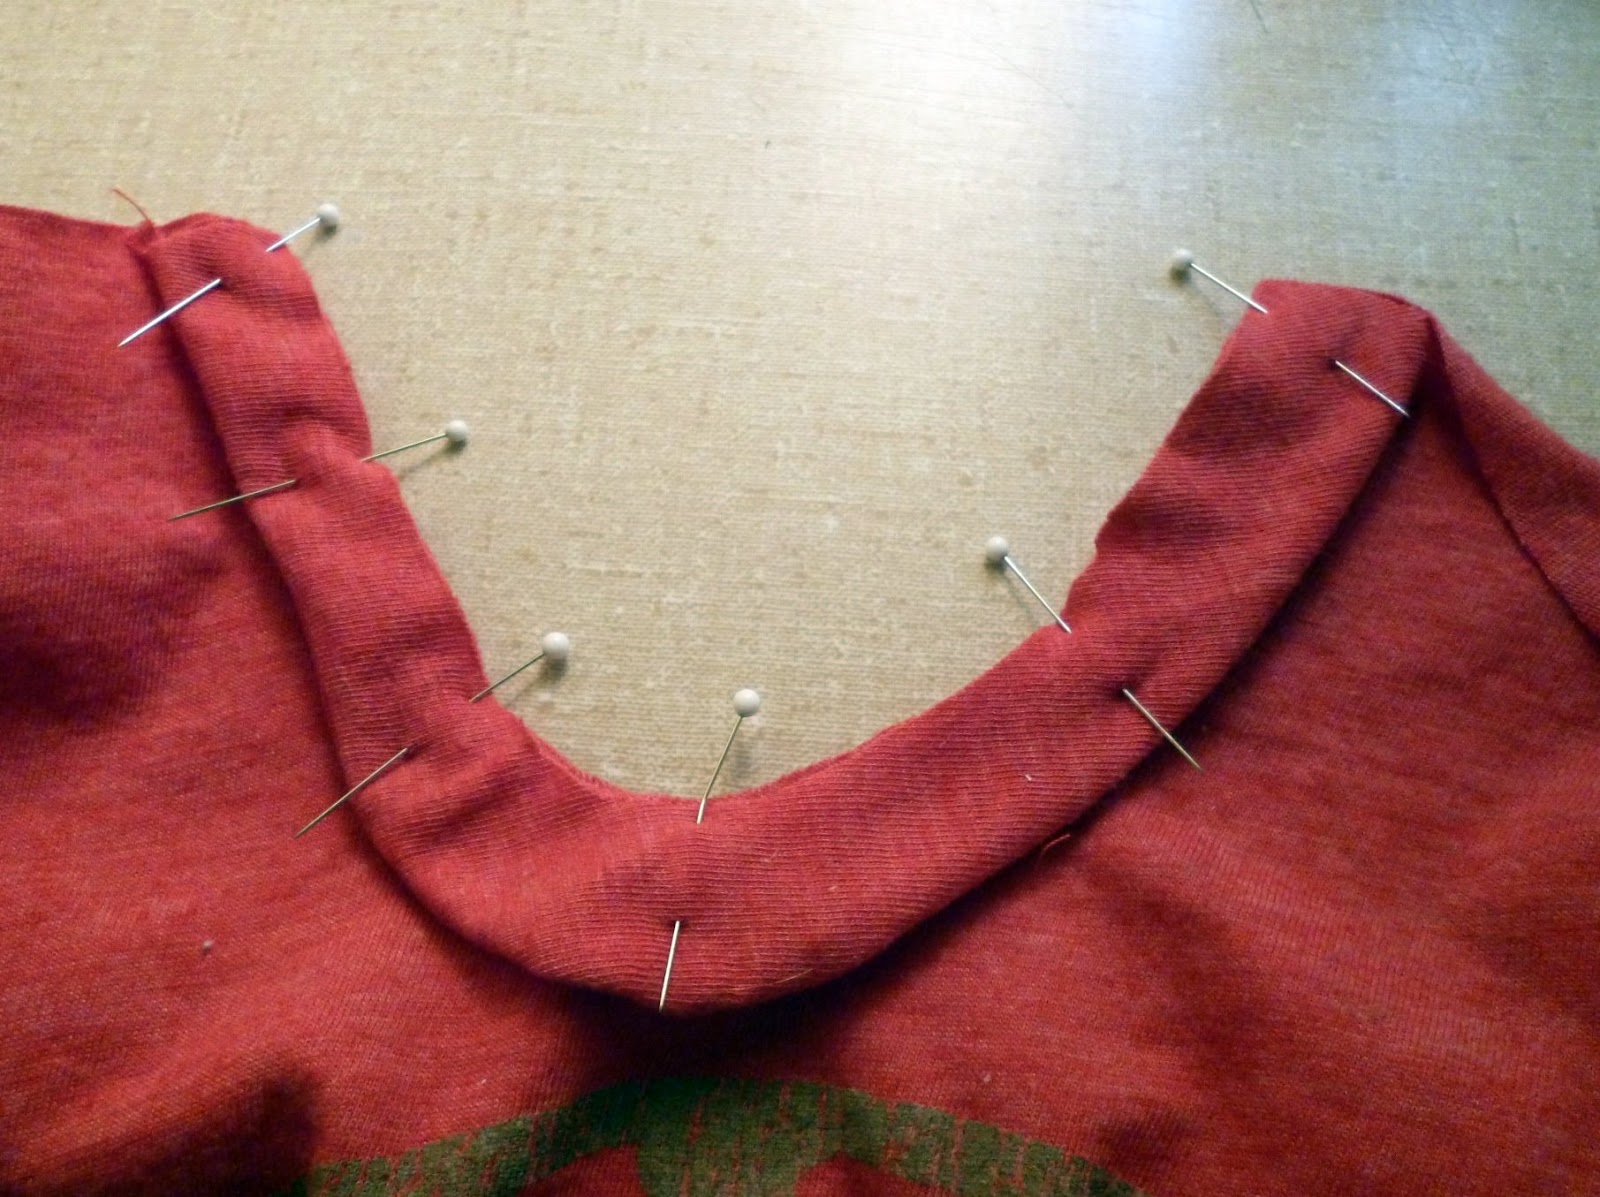
6. With the back on the bottom right side facing down and the front lying on top facing down, overlap the points by 2″.
*This is where you can alter the pattern for head size and shoulder width. If your baby has a big head and wide shoulders, overlap less. If your baby has a small head and small shoulders, overlap more.
7. Find the center of the sleeve by folding in half.

8. Line up the center of the sleeve with the center of the 2″ right sides together.

9. Sew a zigzag at 1/4″.

This is what your neckline and shoulders should look like.

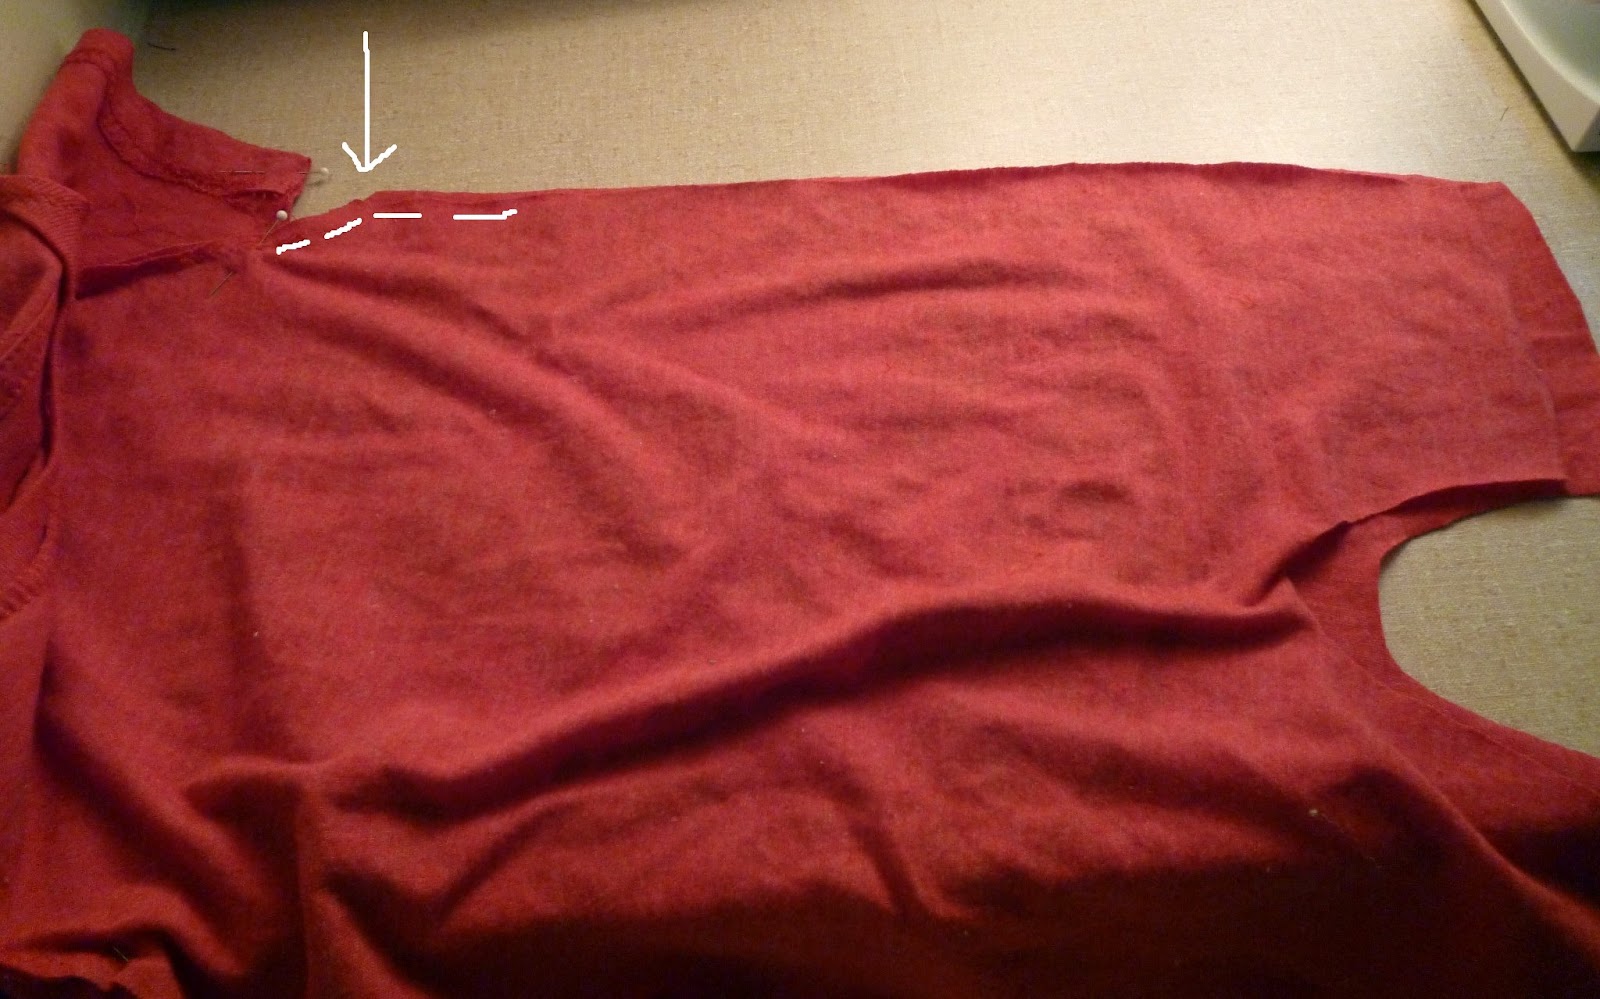
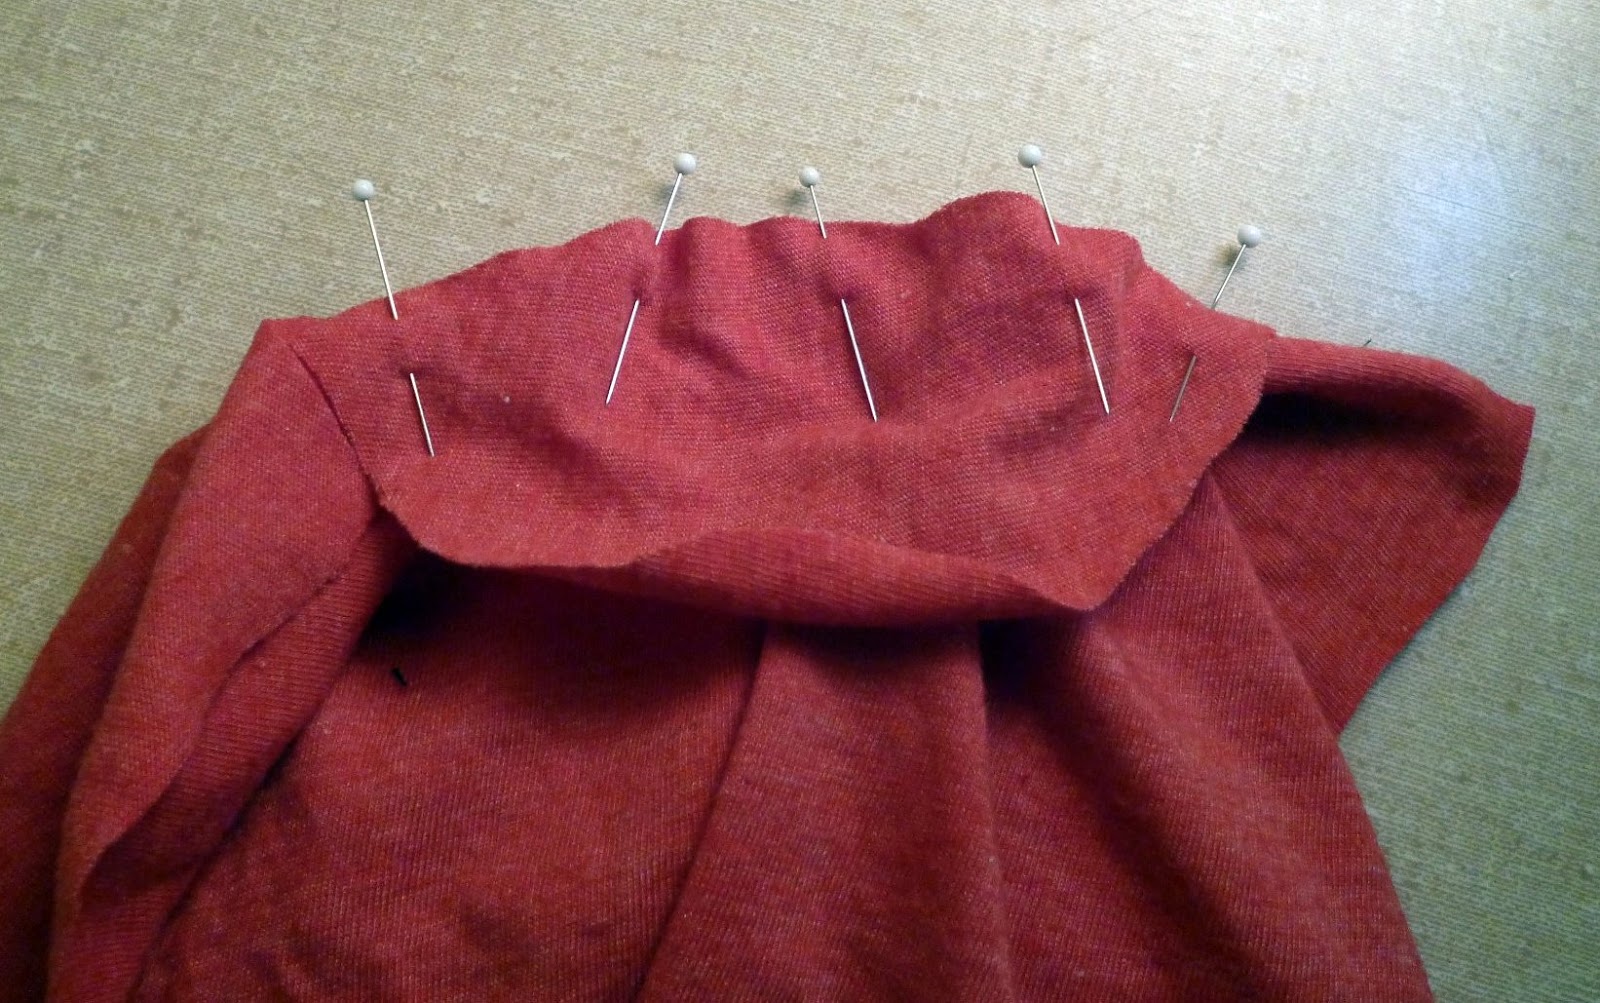
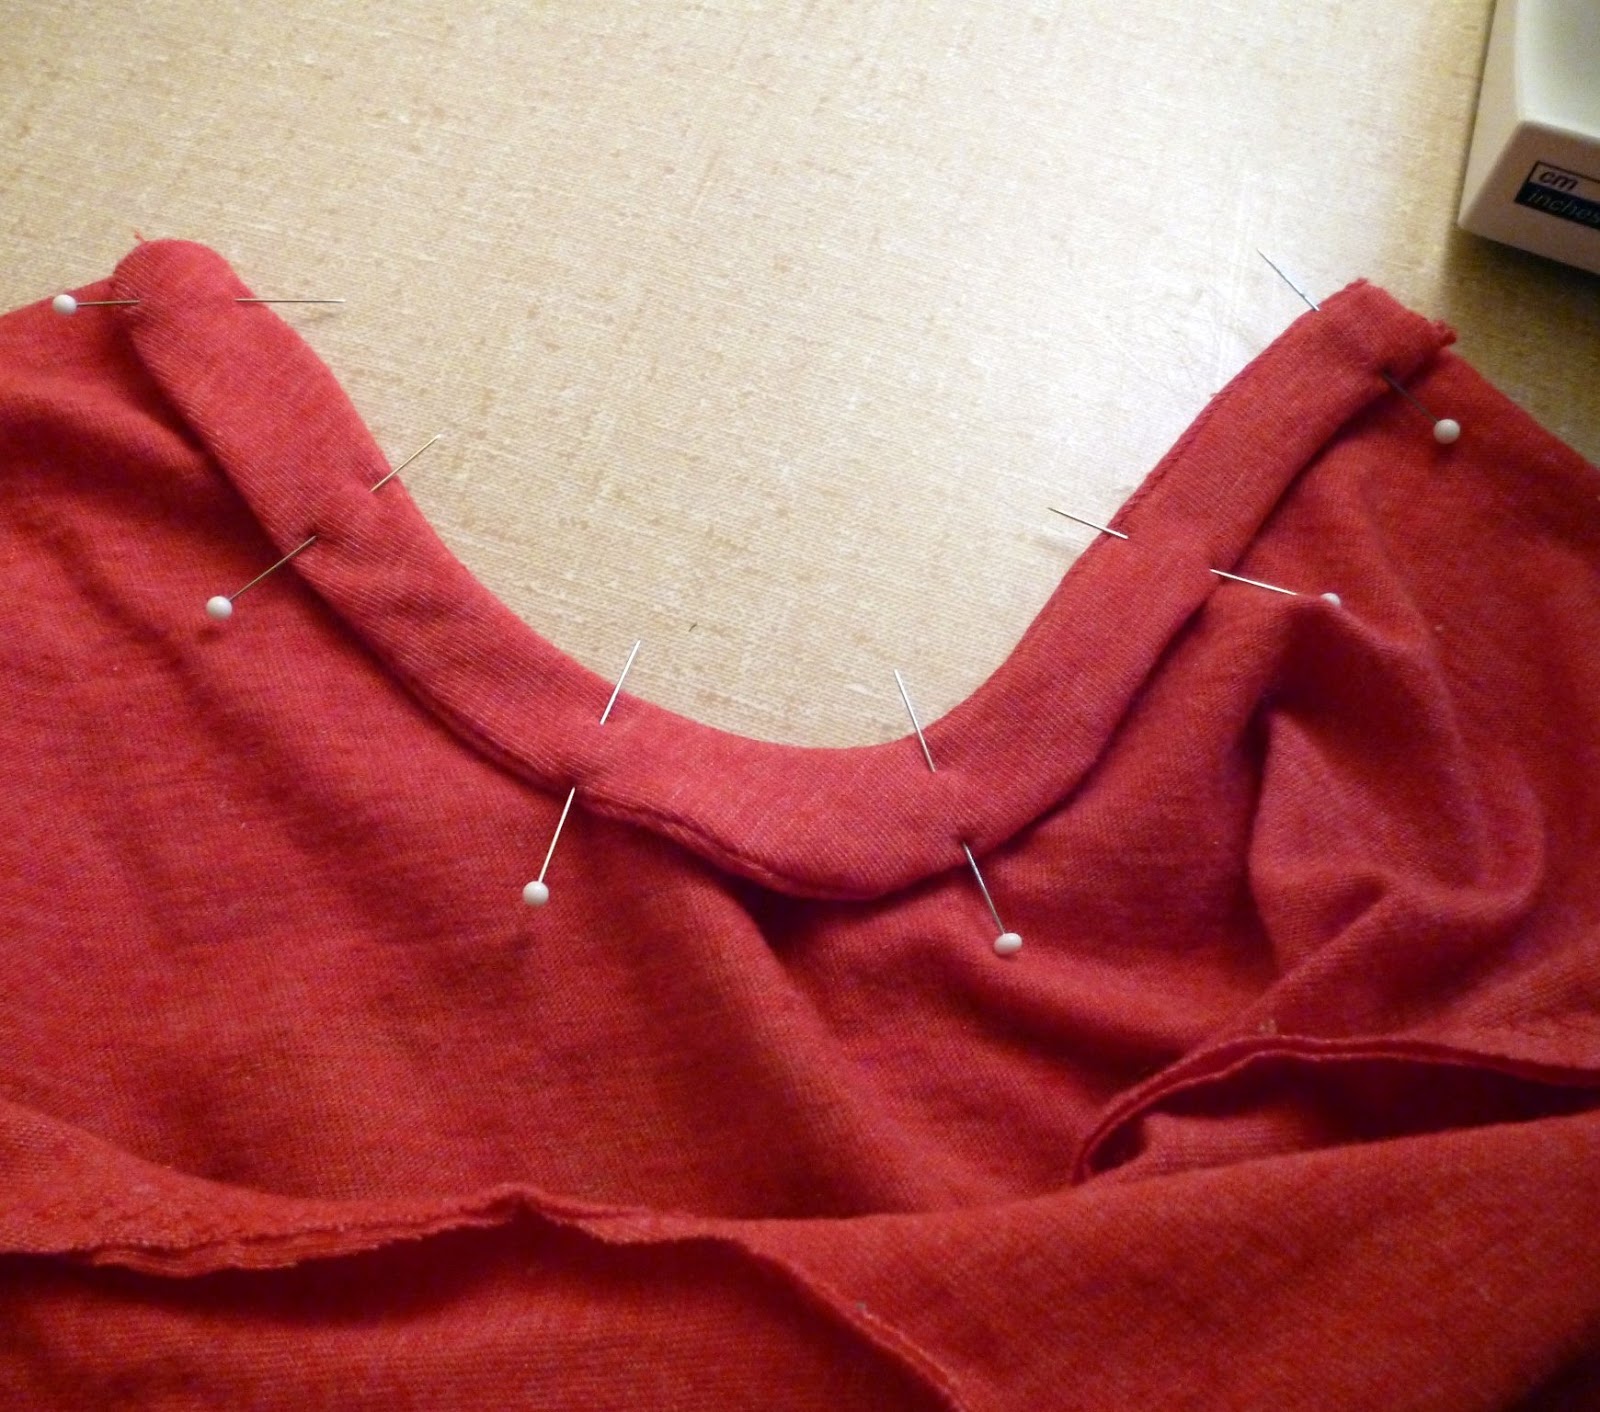
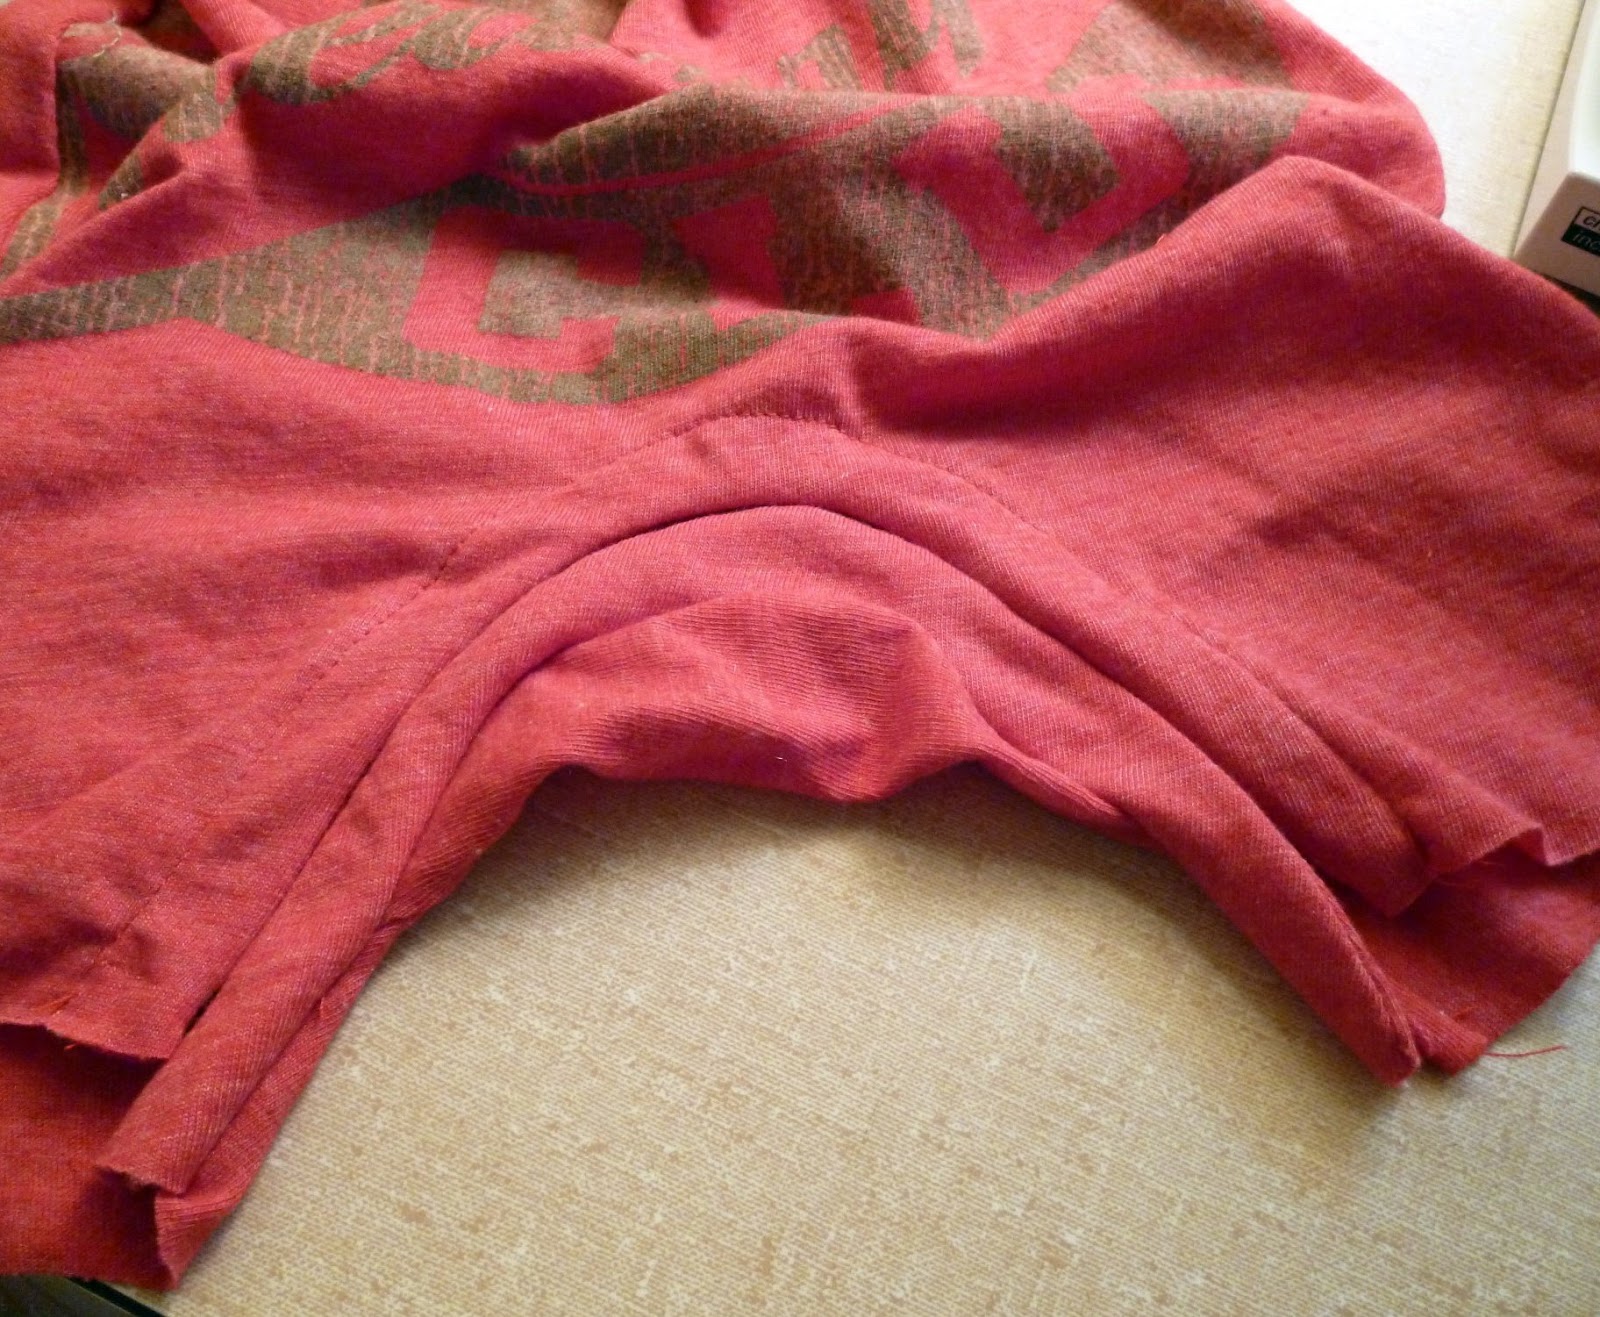
10. With right sides together line up the sleeve seams at the armpit. There will be a difference in length because of the size of the neckline.
Also, the white arrow is point to the corner where the side should meet the sleeve. It doesn’t meet because I overlapped my neckline 2″. If you overlap yours less, I left room on the pattern so that you will have more room in the sides.
11. I drew a line from my sleeve seem to my hem and pinned. (It’s hard to see in the picture.) Sew with a zigzag at 1/4″ from sleeve hem, pivot under the sleeve and then sew down to the bottom.
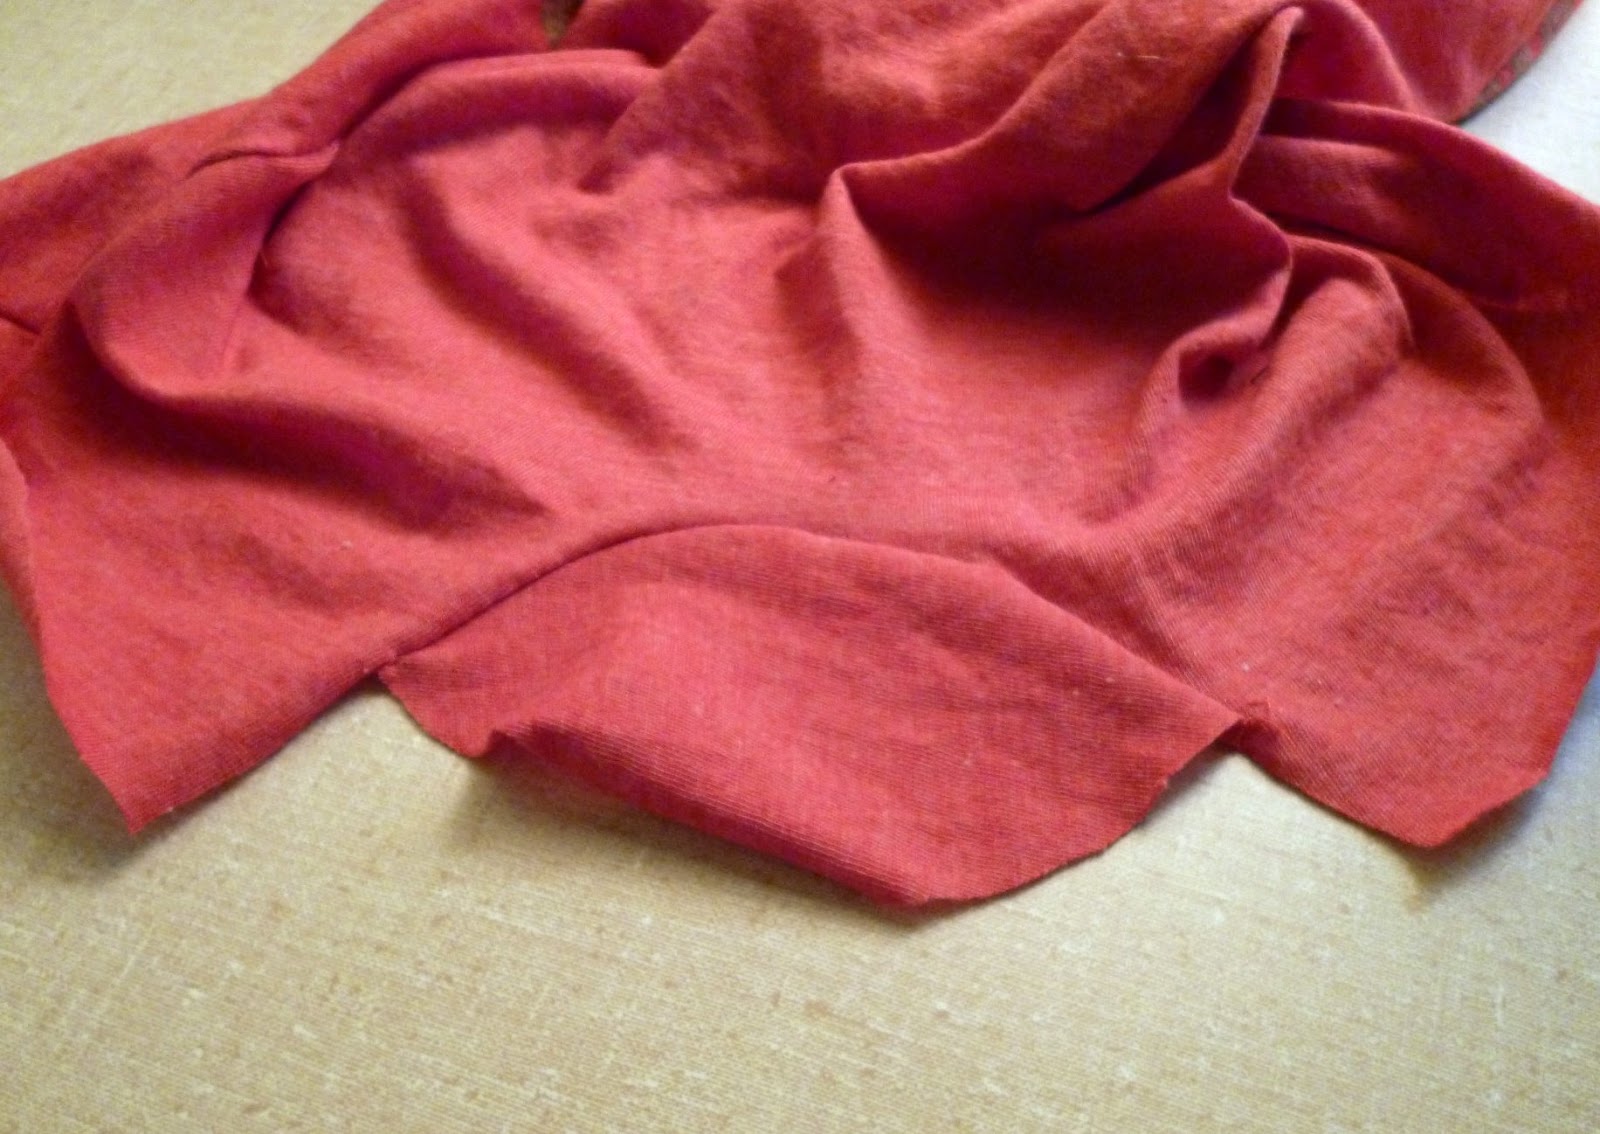
12. Trim off excess.
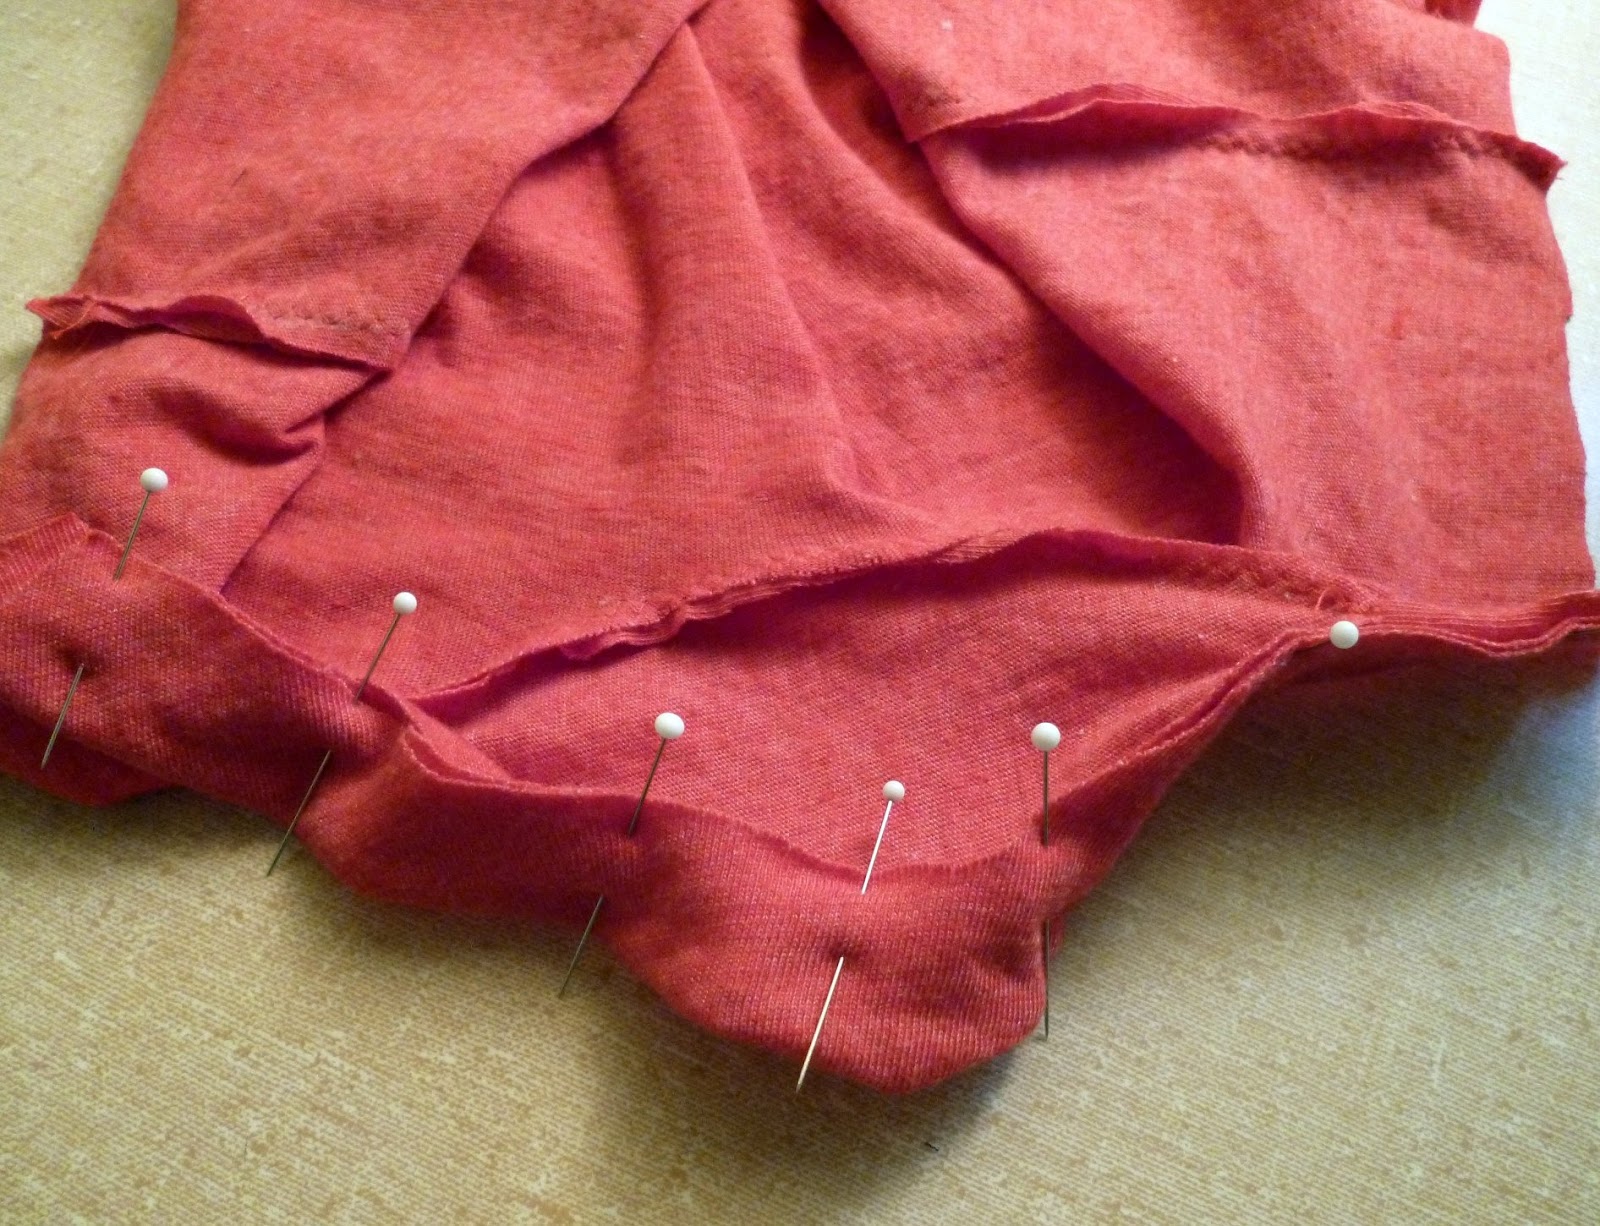
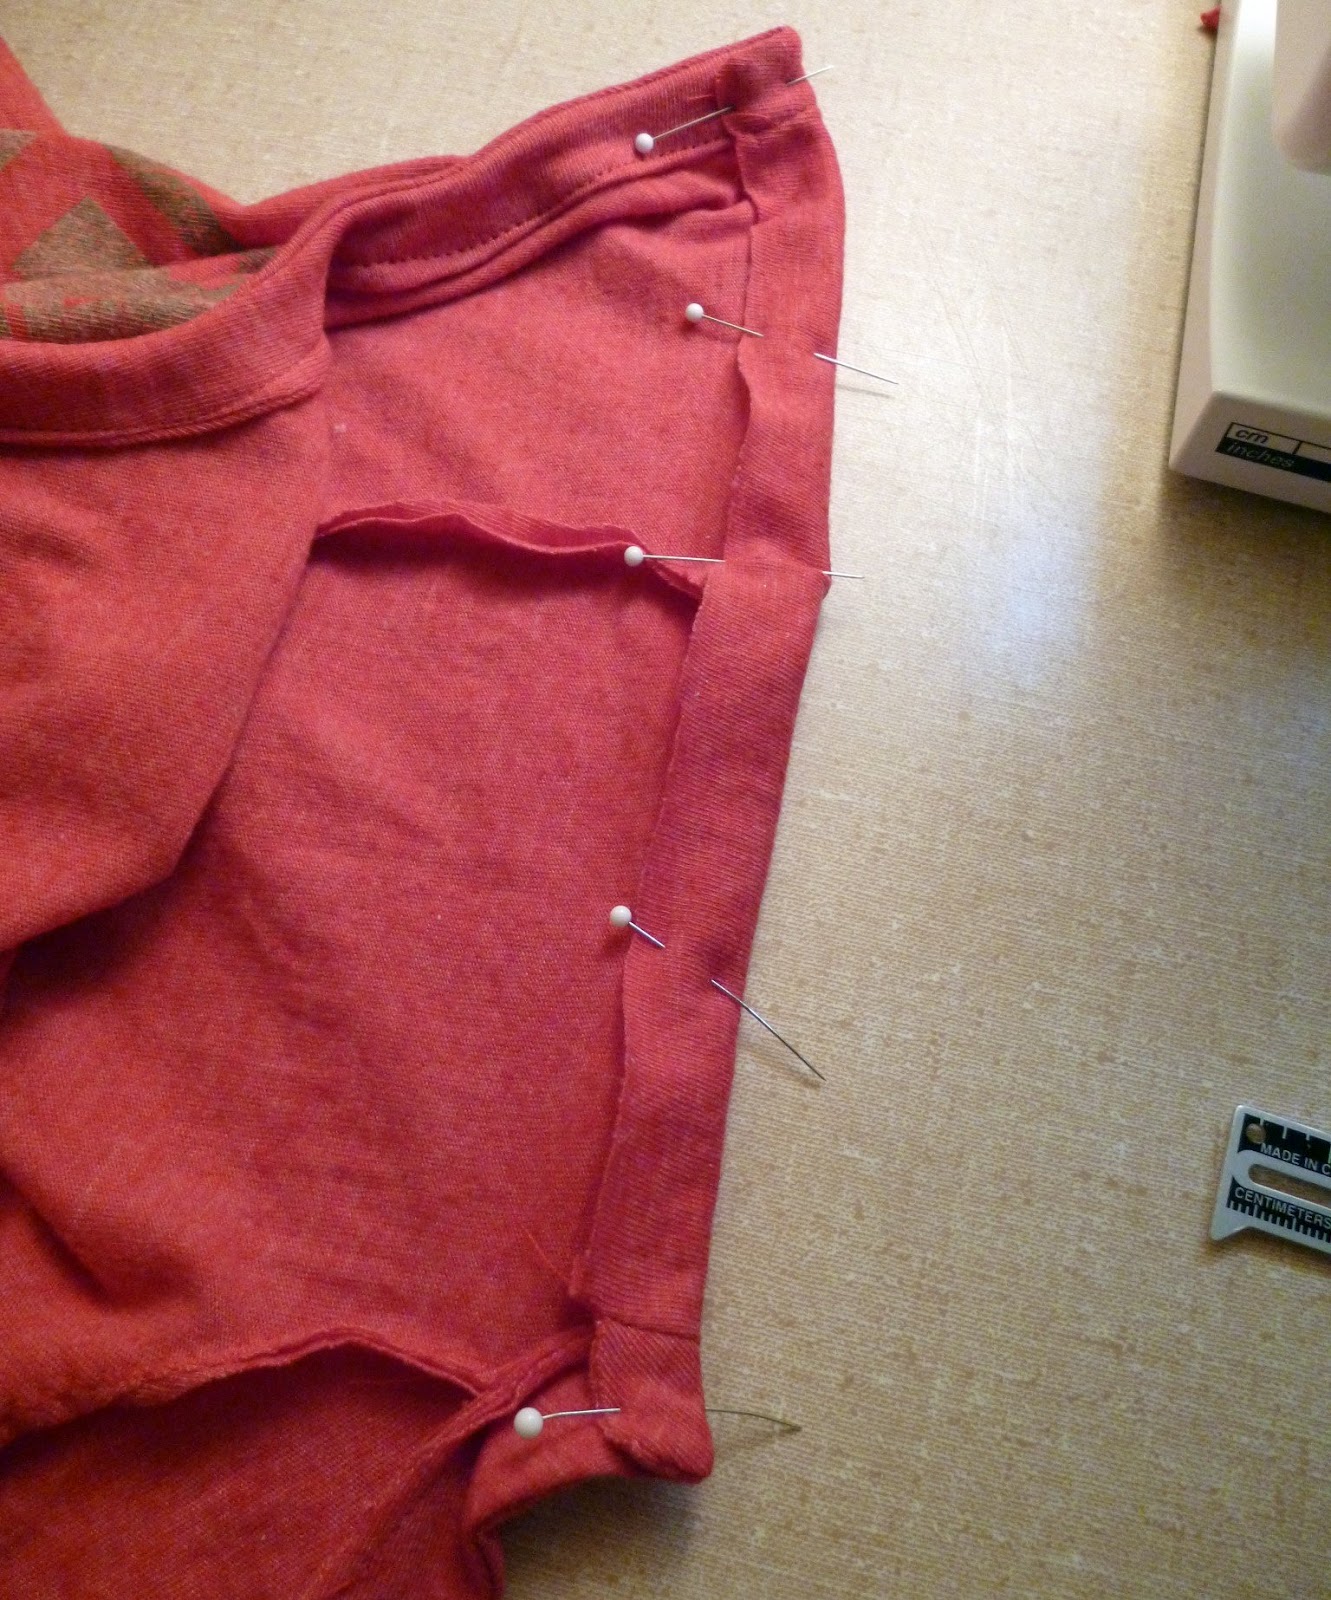
13. Now lay down your shortall and cut off the excess so that the back to matches the front.
14. Fold the back and the football to find the center of each.
15. With right sides together, match the centers together.
16. Pin together. This is a little tricky because the two pieces are opposing curves. Sew at 1/4″.
This is what it should look like.
17. With right sides together sew with a straight stitch at 1/8″ on the outside curve. Do the same to the other two.
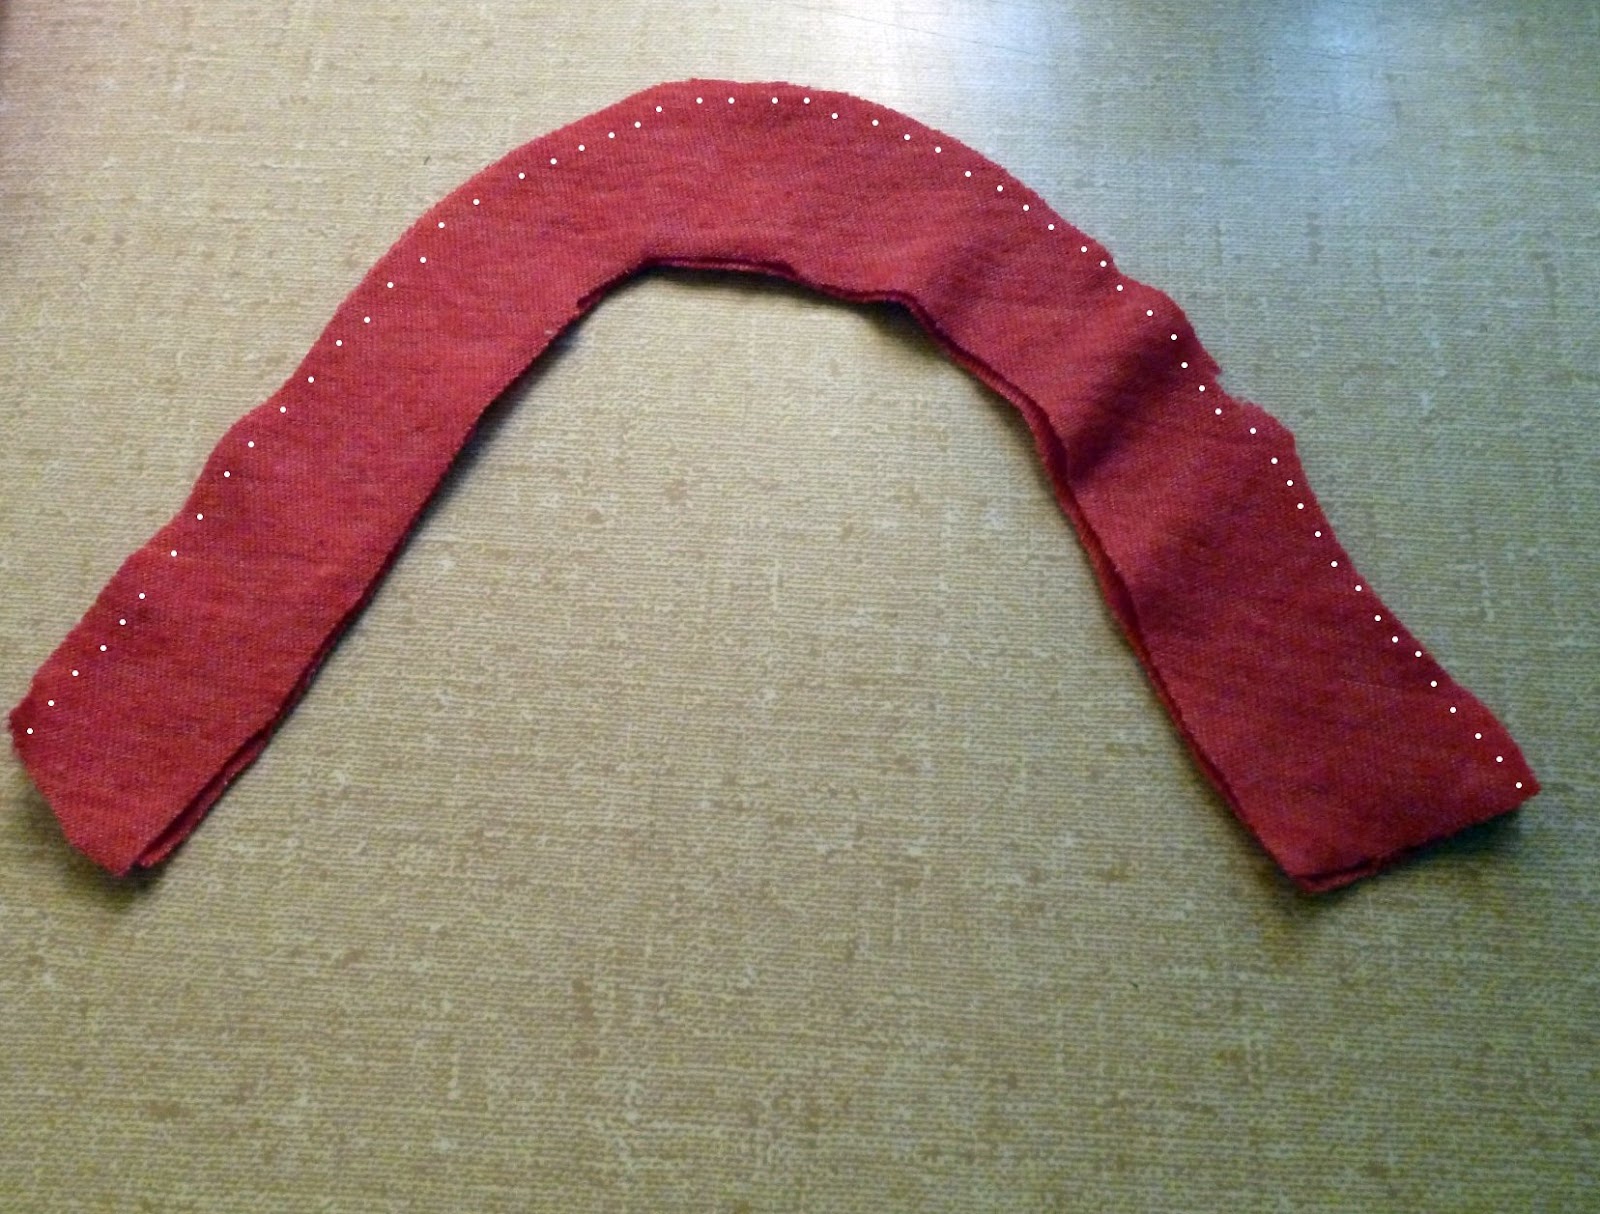
18. Turn right sides out.
19. With rights sides together pin the inside curve to the front inseam. Sew with a straight stitch at 1/8″.
20. Flip over to the inside and sew with a straight stitch at 1/2″ from the inseam.
This is what it should look like.

21. With right sides together pin the inside curve to the back inseam.
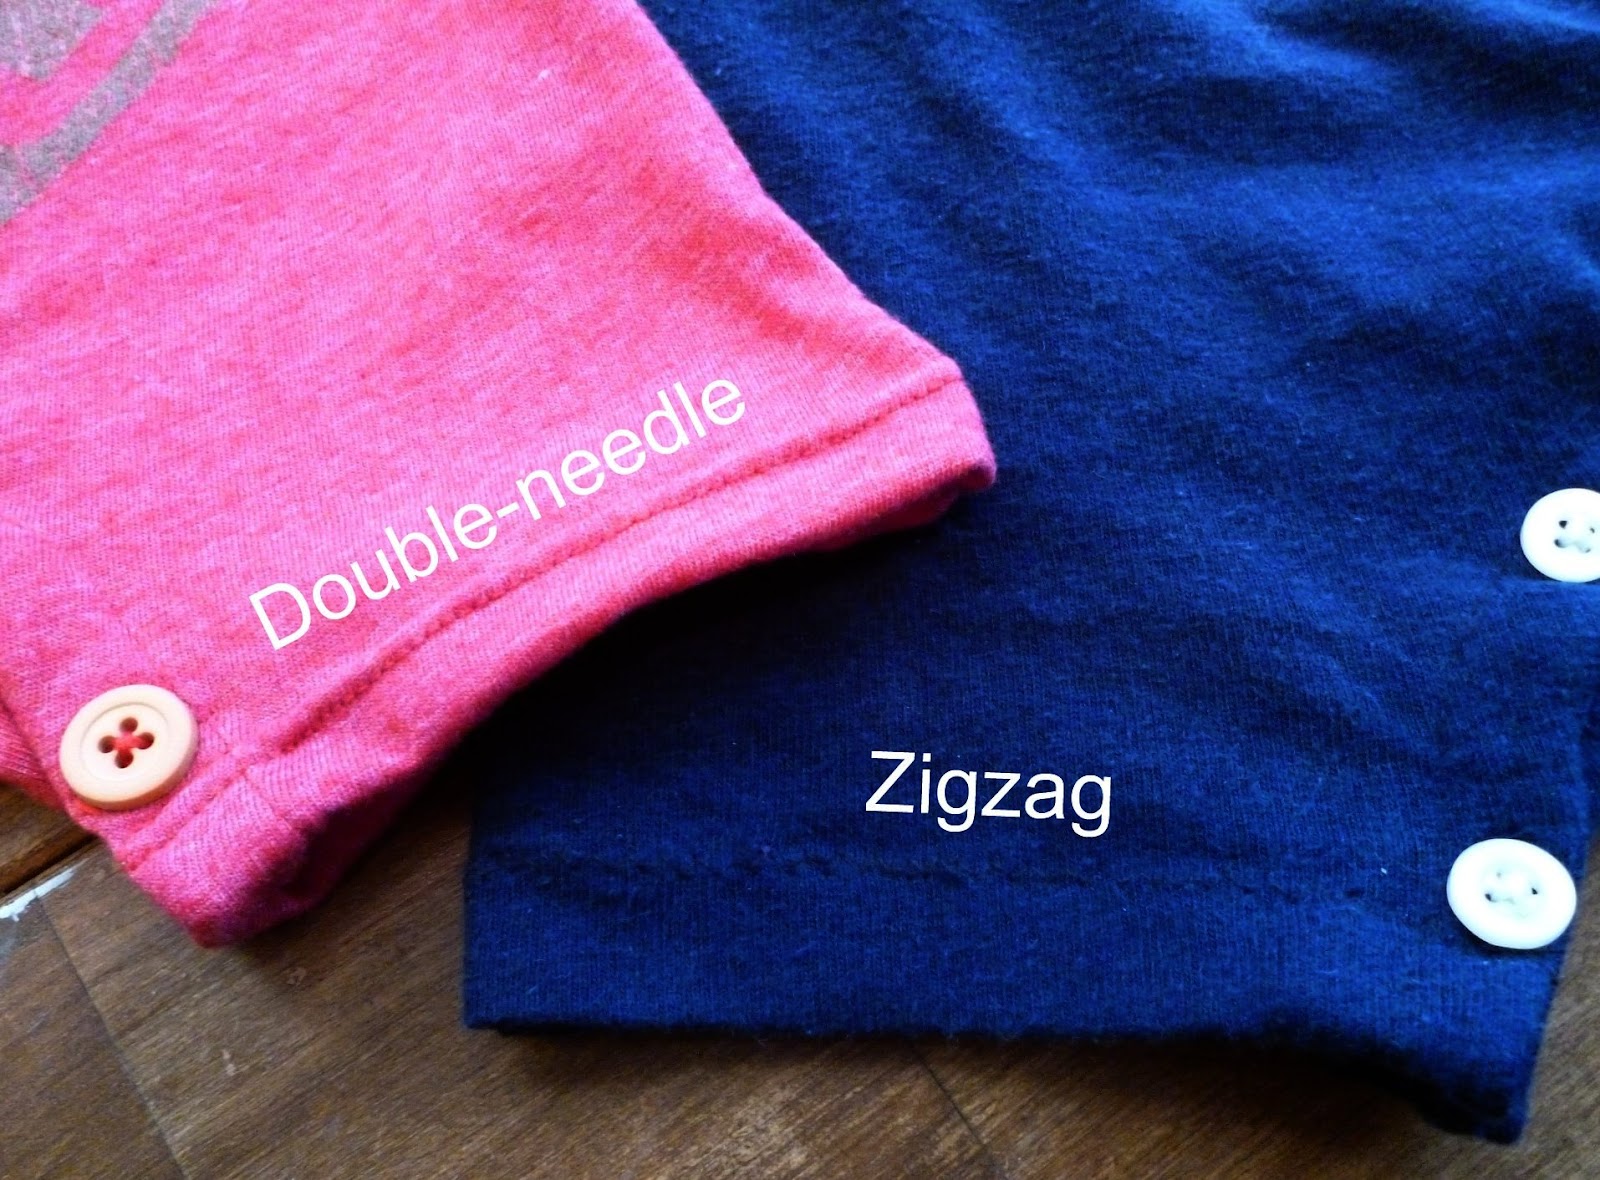
22. Pin up the bottom 5/8″ and sew with either a zigzag or a double needle. Here’s how to use a twin needle.
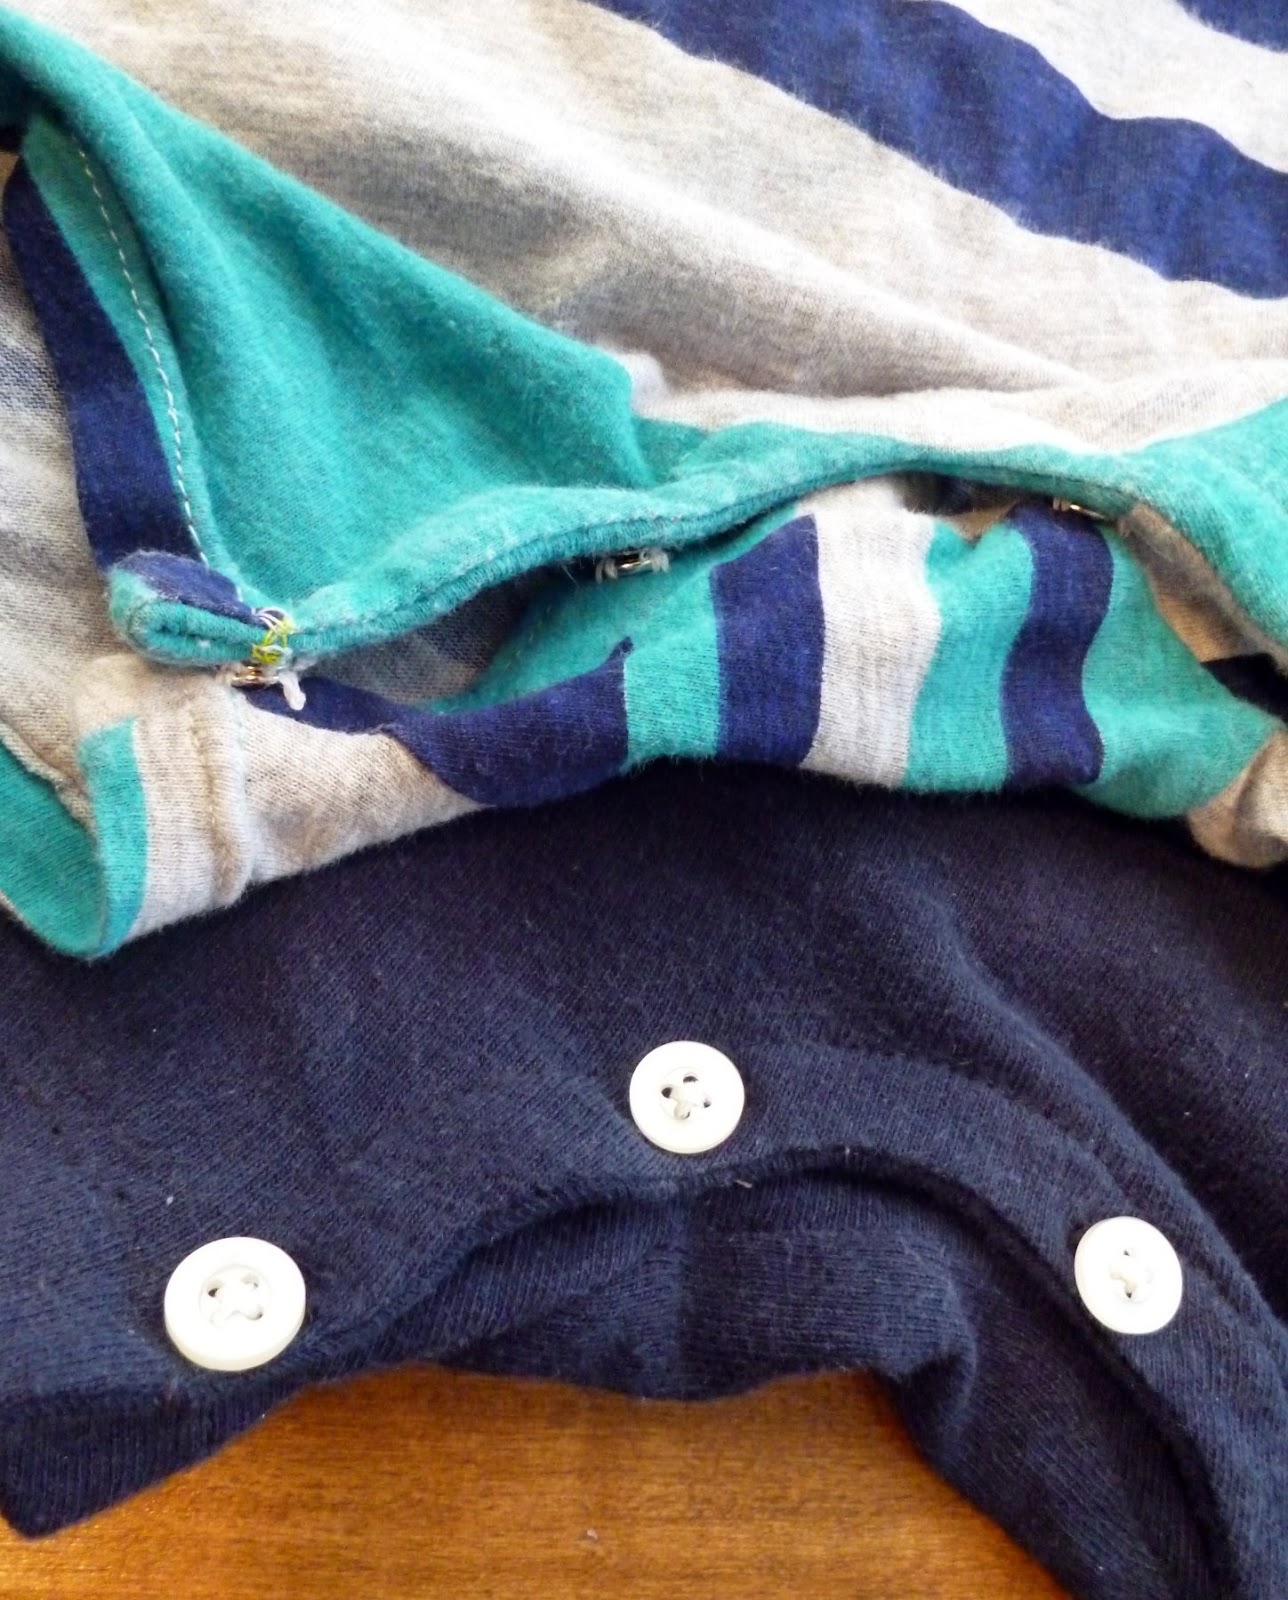
23. Apply the closure of your choice. I did both snaps and buttons. I actually prefer buttons and buttonholes.
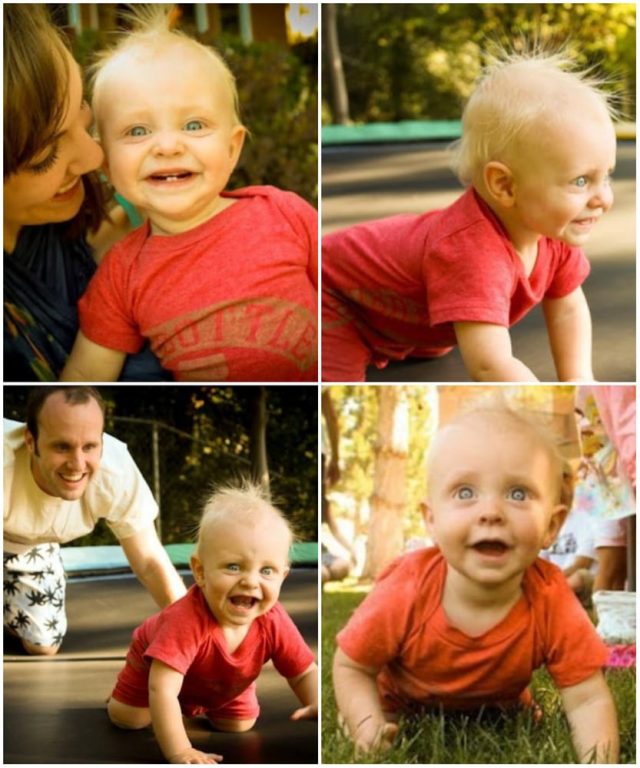
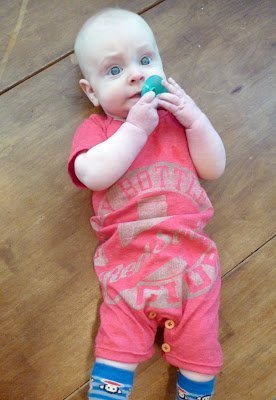
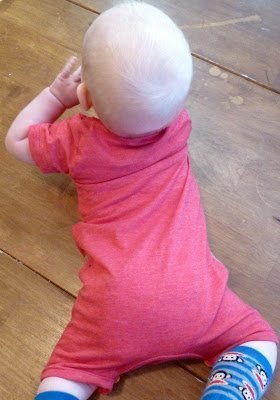
Put it on your cutie and enjoy upcoming summer!
Get the FREE Baby Romper Pattern or buy the multi-size pattern
Don’t forget to see the new tshirt romper tutorial for better instructions!
If you make something using this sewing project, I’d love to see! Please share it on social media with the hashtag #heatherhandmade and tag me!

I believe small sewing moments can create great joy. Find your own “right” way to sew. -Heather
Thank you SO much for sharing this tut! My little guy is going to look adorable in Mom & Dad's old shirts this summer! 🙂 Is there a Flickr group to share what I've made?
Yes! I just started one so feel free to add to it!
http://www.flickr.com/groups/tshirtshortalls
Great tutorial! You've been featured on the Quality Sewing Tutorials blog.
We hand select only the best free tutorials and patterns for the home sewist.
Grab a brag button!
I need some help, please. I'm pinning my pieces together and I'm stuck somewhere between steps 8 & 9. After pinning the sleeve to the neck/arm hole, I sew that seam first right? Should I leave a1/4 in space at each end of the sleeve so I can sew the sleeve seam at the armpit? And then when sewing the side seam how do I keep from getting a hole where the armpit is? I hope these questions make sense. I'm a beginner but eager to learn.
Becky
You do sew the shoulder seam first when you're connecting the sleeve to the neck/armhole. Sew from end to end and don't leave a 1/4" space or else you will get gaps. If you sew from end to end, then when you sew the side seams you will sew over the shoulder seam. This will prevent holes/gaps.
Does that answer your question?
Thanks! For some reason I thought you sewed the seam under the arm by itself. Once I realized you sew the arm seam and turn your work and keep going down the side it worked out. Thanks for the pattern!
Sorry for the confusion! I'm glad you figured it out!
Thanks for the CUTE idea! Wondering if you've tried it without the "football" piece? I was looking at some of my son's outfits like this and they don't have that extra fabric there so wondering if it would fit okay without that step? Thanks in advance for any help! 🙂
Thanks for the CUTE idea! I was just wondering if you tried it without the "football" piece? I was looking at some Carter's outfits I have like this and they don't have that extra piece in there. Wondering if the fit would be okay to skip that? Thanks for any help! I have a TOTE of T-shirts to use for fun stuff like this! 🙂
Cannot wait to try this! Thank you!
Hi Heather, I've featured your Shortall Tutorial today…
http://threadingmyway.blogspot.com/2012/04/threading-your-way-features.html
OMG you are AMAZING!!!! Thanks soo much for the tut! (found it on pinterest and now i am following your blog) Im new to sewing and my partner thinks its really lame. Lol maybe he wont think its soo lame when i turn his pile of band shirts he was giving to salvo's into amazing onie's for our son!! Thanks again this is just fantastic 😀
Wow this is awesome! I saw this on pinterest and I want to give it a try although my sewing skills are still pretty basic…but I'm learning! I just became you're newest follower! Oh and I too am a BYU grad. 😉 The Y shirt caught my eye.
How fun; I've seen this all over pinterest the last few days but didn't realize it was YOURS until I checked your blog as I do weekly. Such a great tutorial.
great post
you are so talented! this is adorable!! (and so is your baby!)
This is awesome, my baby is at that size right now and only has long-sleeves, so I am for sure doing this! I am going out to buy snaps later today, buttons would never work for us the baby crawls away too fast, or rolls over or just wiggles!
I did a full blog post on how I changed your idea into my own, I linked back but if you don't mind checking it out and let me know if it steals your idea too much. I am copying it because I loved your idea but I also don't want to steal any of your thunder because you came up with such a good idea. Thanks!
http://monzarts.blogspot.com/2012/05/sleeveless-onsie-from-adult-t-shirt.html
Love these, and that button bottom closure is so stinking cute. Well done!
Great way to recycle Daddy's old tees that shrunk in the wash! I have a snap tool that I got at Joann's that would be perfect for attaching snaps to the crotch for these shortalls. The snaps come in super cute colors! (Be sure to use a 40 or 50% off coupon when buying anything at Joann's!)
Hello,
Thank you for this beautiful model and great blog!
I read you several months from France.
Even if I do not understand English well, I use the google translator.
It is with the translator that I write, I hope it's understandable for you.
I love what you do!
Bonjour,
Merci pour ce beau modèle et ce super blog!
Je vous lis depuis plusieurs mois depuis la France.
Même si je ne comprends pas bien l'anglais, je m'aide avec le traducteur de google. C'est avec le traducteur que je vous écris, j'espère que ce sera compréhensible pour vous.
J'adore ce que vous faites!
Oh I'm so glad you like it! Thank you for telling me!
And I could understand the translation! (Hopefully you can understand this translated!)
Wonderful tutorial! I seen some ideas like this, but this one was the best explanation.
Oh I'm so glad! It's kind of hard because there are a lot of different size shirts and different size babies, so I'm glad the explanation was good!
What a stinkin cute idea! I will definitely be saving this for tiny baby to be, what perfect timing! You rock 🙂
This is fantastic! I love it! Great job, Heather, definitely saving this one for the future!
Fantastic refashion!!! It's great how you've used the existing ribbing at the neck! Thanks for sharing such a detailed tutorial!!!