
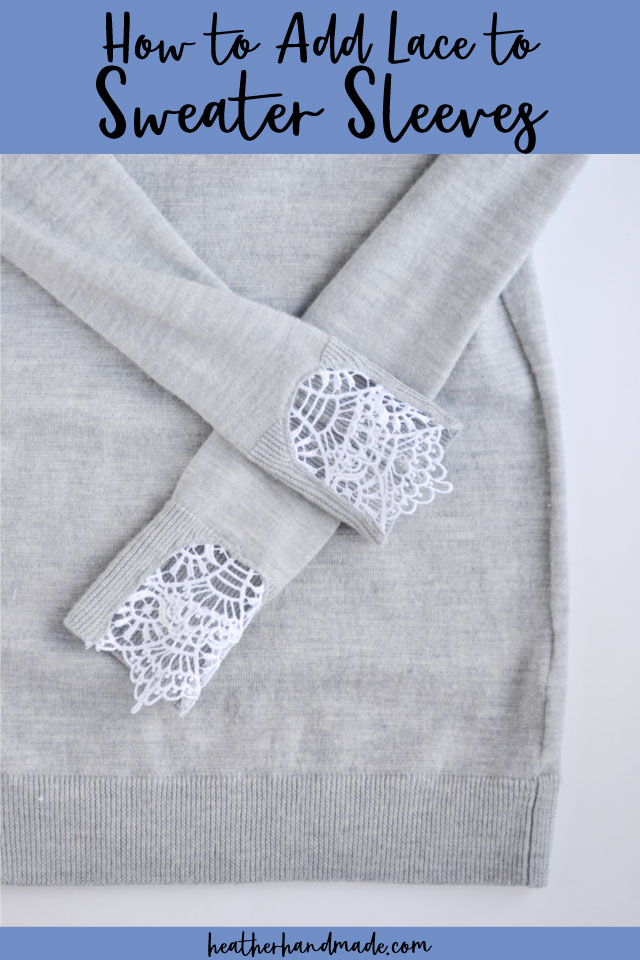
How to Add Lace to Sweater Sleeves

This post may contain affiliate links.
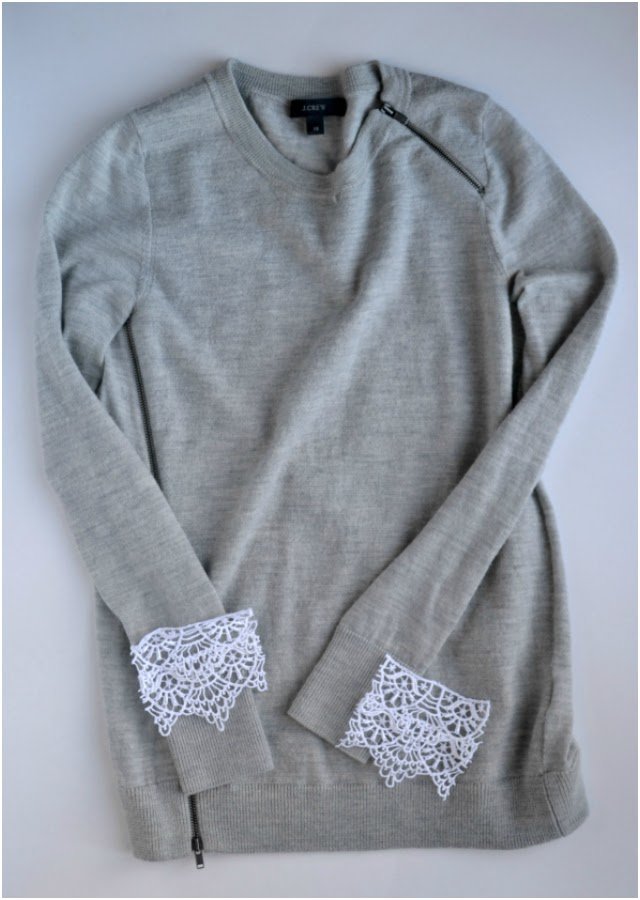
Learn how to make a DIY lace sleeve sweater! This refashion tutorial is great for sleeves that are too tight, too long, or too short.
Sometimes it’s fun to add a little extra detail to spice up your wardrobe. I love having lots of solids in my wardrobe, but every once in awhile I just wanted a little touch of personality and details.
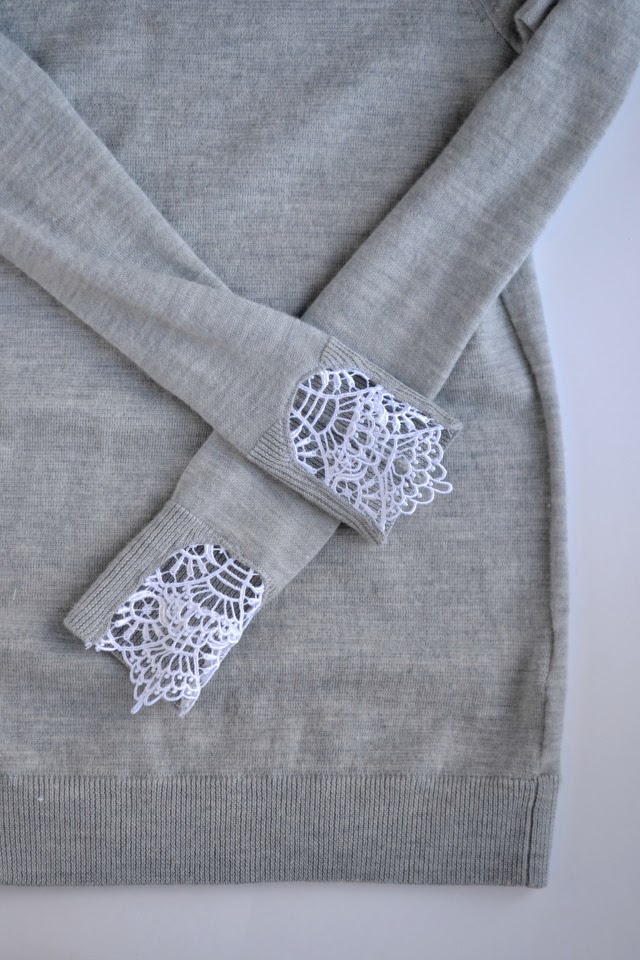
I love the lace details on sweater sleeves that I’ve been seeing lately, so I decided to make a simple tutorial to add lace to your sweater cuffs.
What is a sweater?
A sweater is an item of clothing with long sleeves that is made from wool, cotton, or synthetic fibers. It’s knitted or crocheted yarns or threads.
I’ve done this sewing technique on a sweater with yarns that were tightly knitted, and it worked well. I’ve done this on a cardigan, and it worked well. I’ve also done this on a sweater with yarns that were loosely knitted, and it worked well.

Do you like to sew? Try some of these projects:
- How to mend a sweater
- Sweater upcycle and refashion projects
- Glitter sweater sleeve refashion
- How to crop a sweater
- How to shorten sweater sleeves

How to Add Lace to Sweater Sleeves
Supplies
- Sweater to refashion
- Lace trim* or fabric with a pretty edge
- Sewing supplies
- Sewing machine
Instructions
Gather your sweater and lace trim. I cut mine about 2.5 inches wide, but I wanted to have one full motif. Cut the lace the height of the sweater cuff. Look at the size of your lace motif to determine your width just make sure that you add seam allowance.
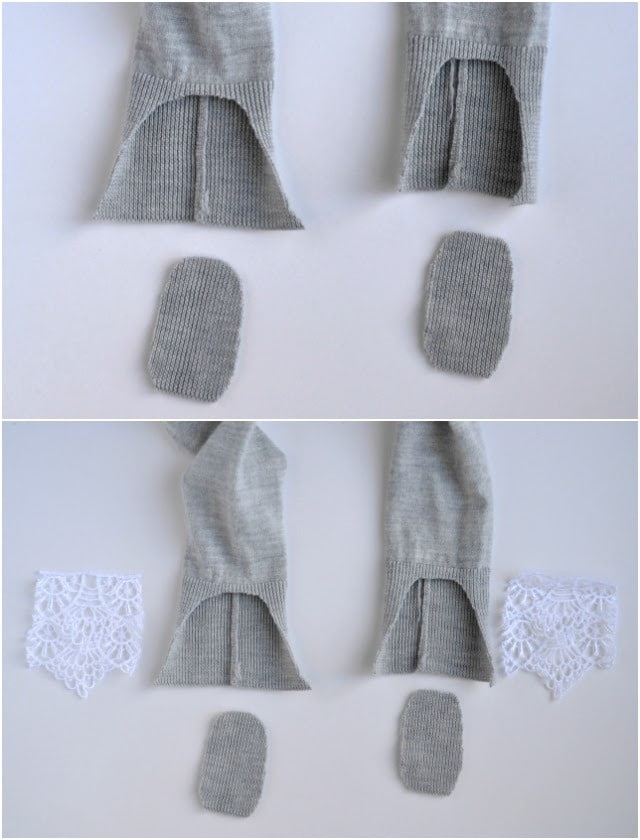
Cut rounded rectangles from the sweater cuffs on the top of the sleeves (opposite from the seam). The rectangles should be the a little less than the height of the cuff and 1.75″ wide.

Turn the sleeves right side out. With right sides together pin the edges of the lace to the cut edges of the cuff. Sew with a 1/4″ seam allowance and a zigzag stitch. I cut my lace with right angles but sewed them on with rounded corners. I didn’t want to cut into the lace too much since lace can come apart.
Trim the edges of the lace so that all the seam allowances are 1/4″. Use a zigzag stitch to finish all the edges.

With a straight stitch topstitch the seam allowance towards the sleeve and away from the lace. Press well and that’s it! Enjoy your pretty new lace sleeves!
If you make something using this DIY lace sweater tutorial, I’d love to see! Please share it on social media with the hashtag #heatherhandmade and tag me!

I believe small sewing moments can create great joy. Find your own “right” way to sew. -Heather
Cool project! Thanks for sharing.
I will be using your wonderful tutorial the next time I shorten the sleeves on a purchased sweater. This is perfect for short arms!
Super cute. And such a simple fix for a "plain" sweater. I love that sweater you found. It such a fun new piece for your wardrobe.