
DIY Men’s Shirt to Dress Refashion Tutorial

This post may contain affiliate links.
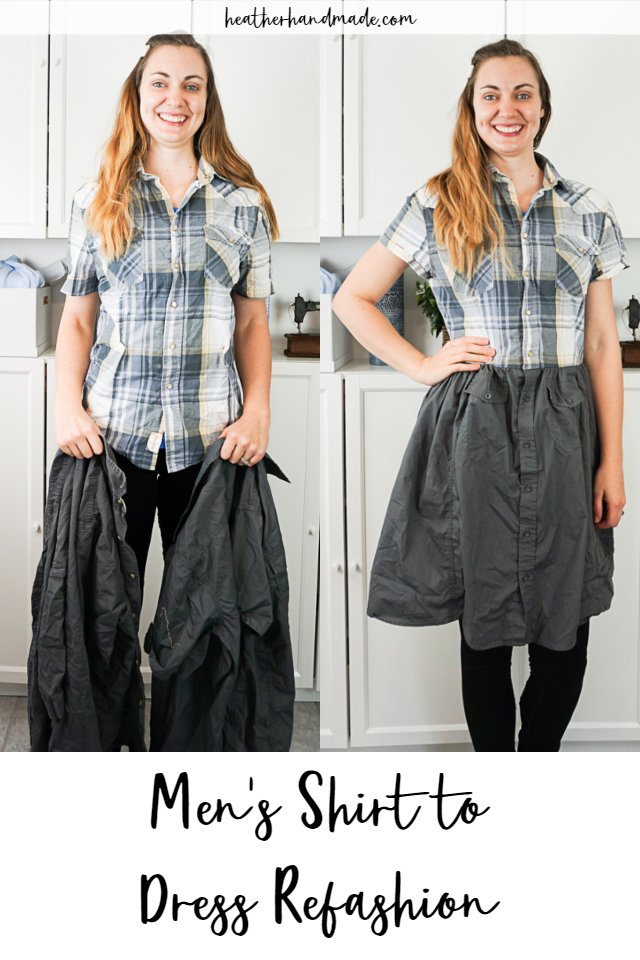
With this men’s shirt to dress refashion remake three men’s button up shirts into one women’s dress. Use either matching or coordinating shirts for a fun look.
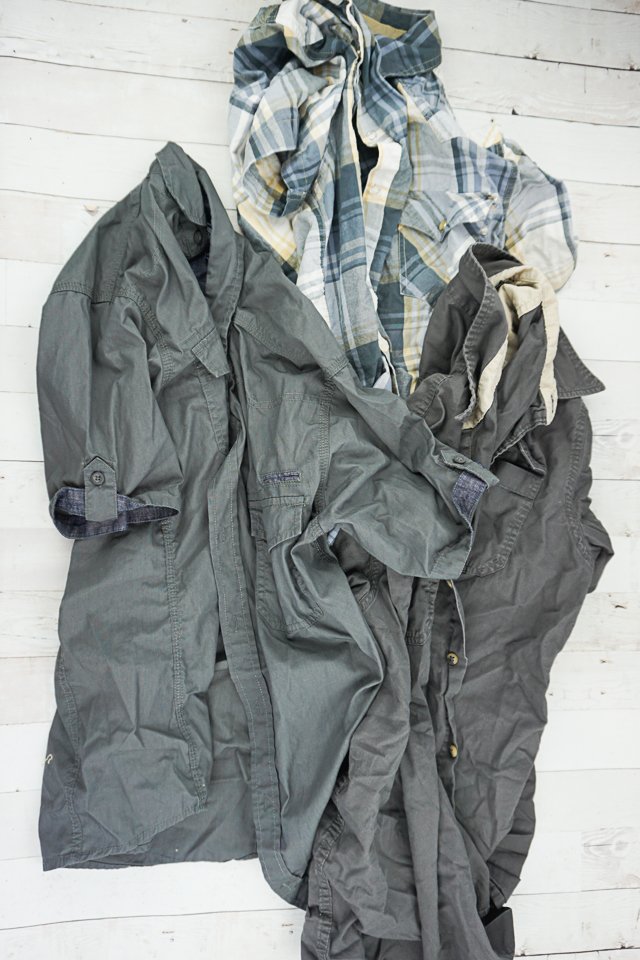
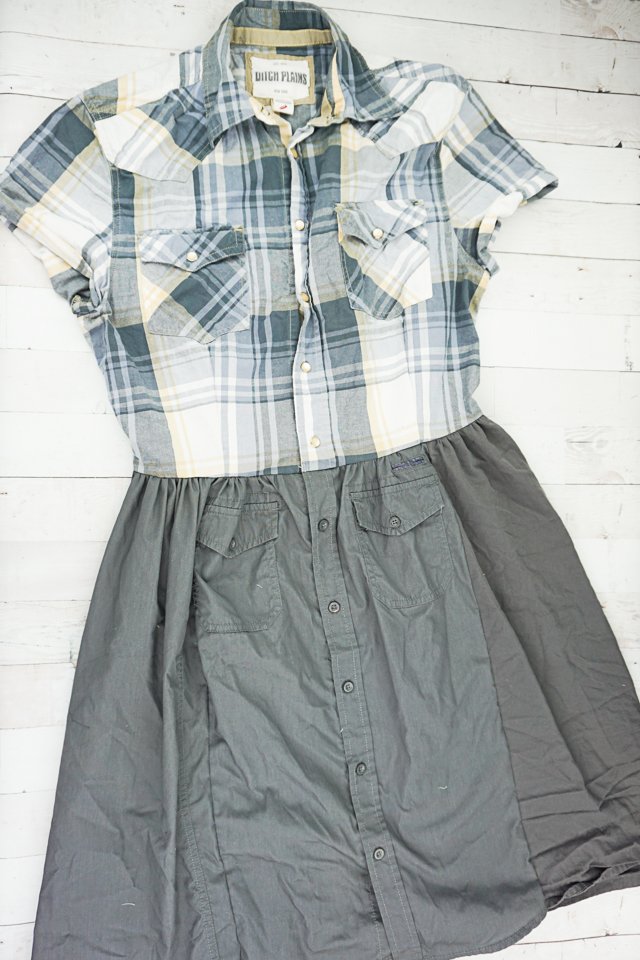
Over a decade ago I had the idea to combine three men’s shirts into a dress. I had three men’s button up shirt’s that were all gray color with subtle, tiny prints.
I loved that dress and wore it a lot, but I never made it into a tutorial. I’m finally revisiting this DIY men’s shirt to dress refashion, and I have a tutorial and video to share so you can make one to.
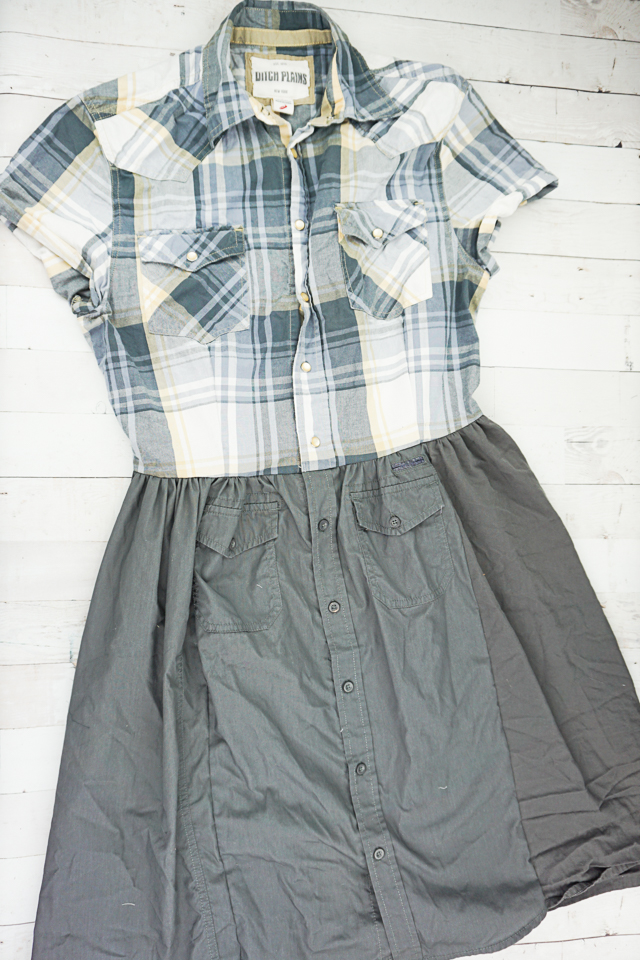
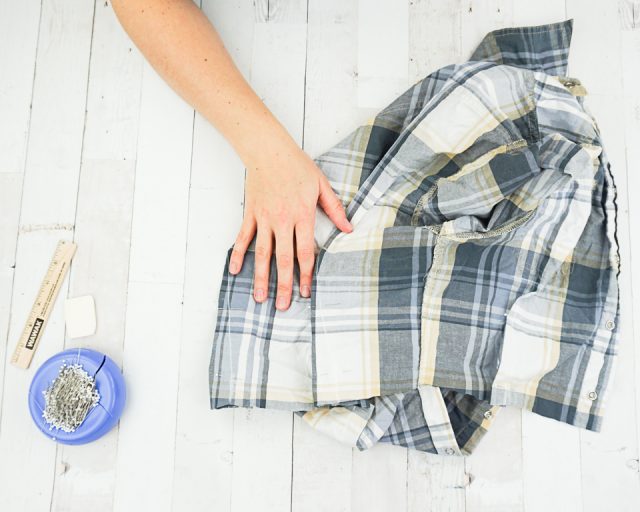
When I was searching for men’s shirts to refashion I could not find three that were all the same color. I had to resort to two dark gray ones that match almost perfectly, and one plaid one.
I do think it makes the tutorial easier to understand since you can see which shirt is the bodice and which ones become the skirt.
I have made a simpler refashioned shirt dress tutorial with elastic if you prefer that look. It’s a little easier than the original, but it’s more comfortable! Don’t miss all these other dress refashions!

In this original dress I did a lot more fitting and tailoring. I took in the sides and redid the sleeves. I don’t fit in that dress anymore and the sleeves were a little too tight. The new one is a much better fit, and I didn’t have to alter the shirts as much.
In the original I used the buttonhole band from the front of one of the shirts and sewed it around the waist to look like a belt. It’s a fun idea, but my waist is not as thin and wasn’t able to achieve it a second time.
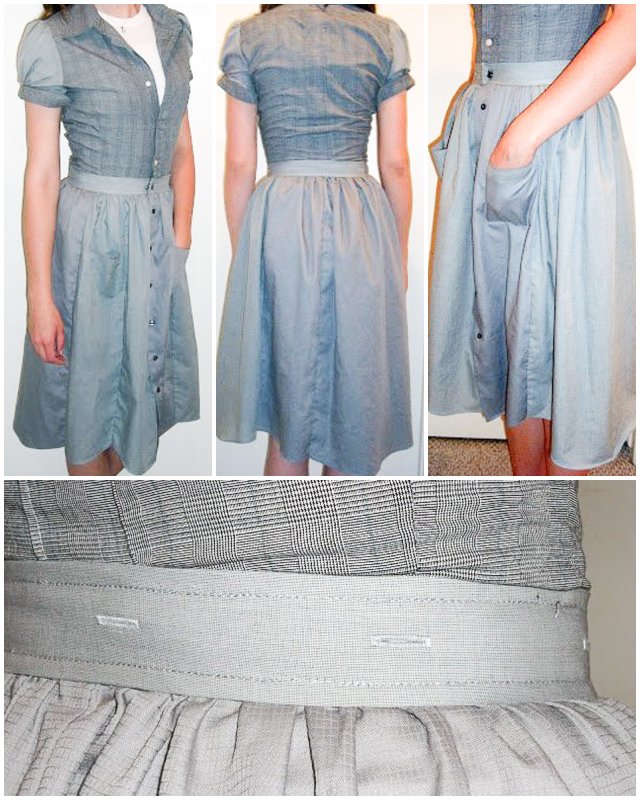
The original dress is actually the dress I wore the night I got engaged. It was perfect! And now my new dress can take me on to new special events and memories.

What is refashioning?
Refashioning is to fashion clothing again or differently. I usually use this to describe when I’m sewing clothing to fit different or to look different, but the majority of the item stays the same.
What is upcycling?
Upcycling is to reuse material to create something better than the original. I usually use this to describe when I’m sewing adult clothing into clothing for children or I’m sewing clothing into an accessory or house item.
DIY Men’s Shirt to Dress Refashion tutorial
supplies
- Three men’s button up shirts in matching or coordinating colors
- Sewing tools
- Sewing machine
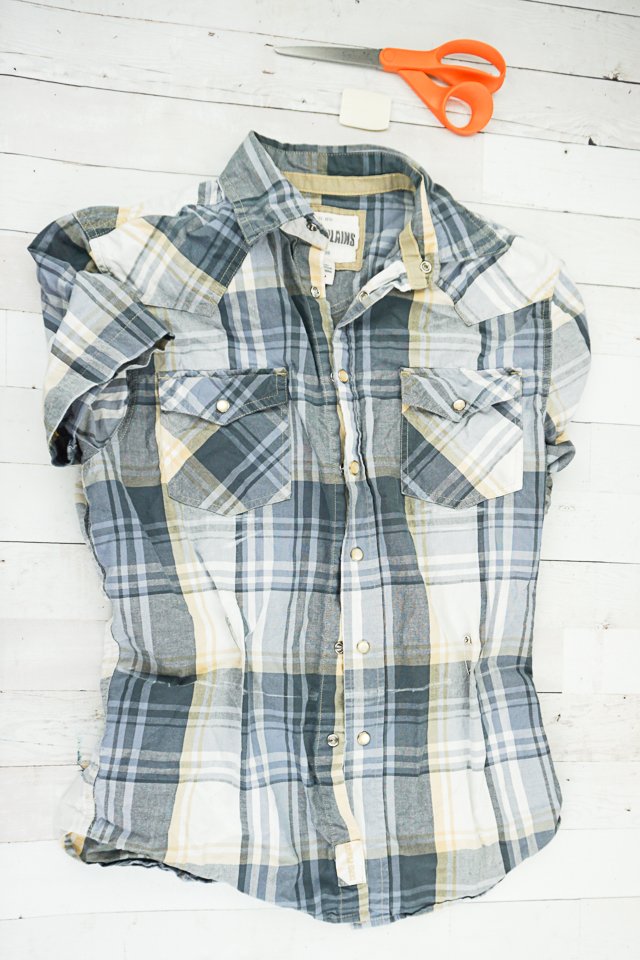
Choose a men’s shirt that fits your upper body the very best. It’s so much easier to start with a shirt that fits well. If you have a women’s button up shirt that fits well you could even choose that.
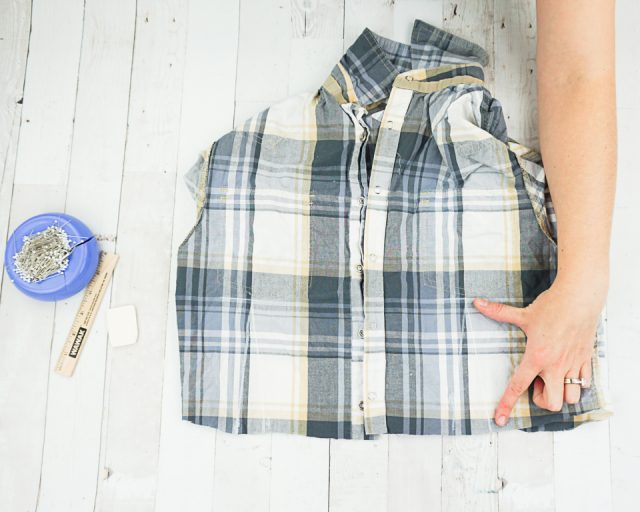
Mark the waist in the front, the back, and both sides. Then pin darts in the front and the back. Here are some tips for back darts that can also help you with front darts.

Take the shirt off and carefully draw the waist line all the way around the shirt. Make sure that when you mark the line across the button placket you go in between buttons instead of through a button.
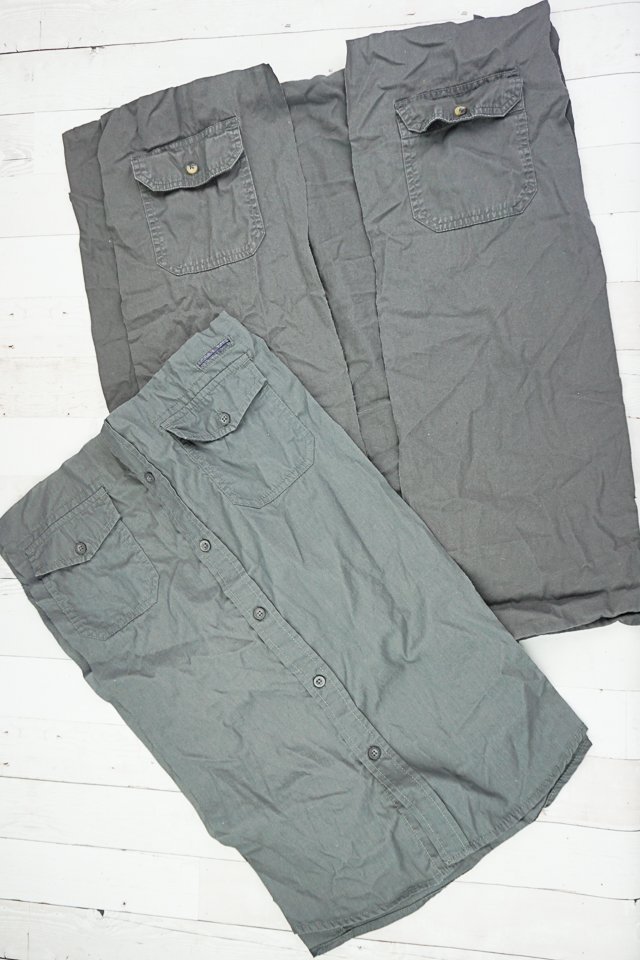
Cut along the line you drew to shorten the shirt.
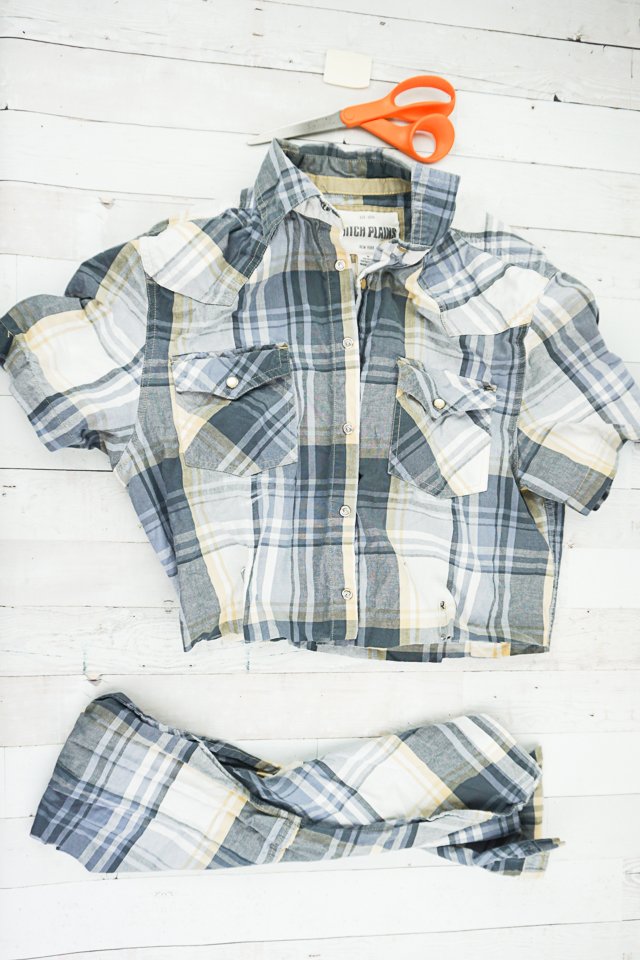
Cut off both of the sleeve hems.
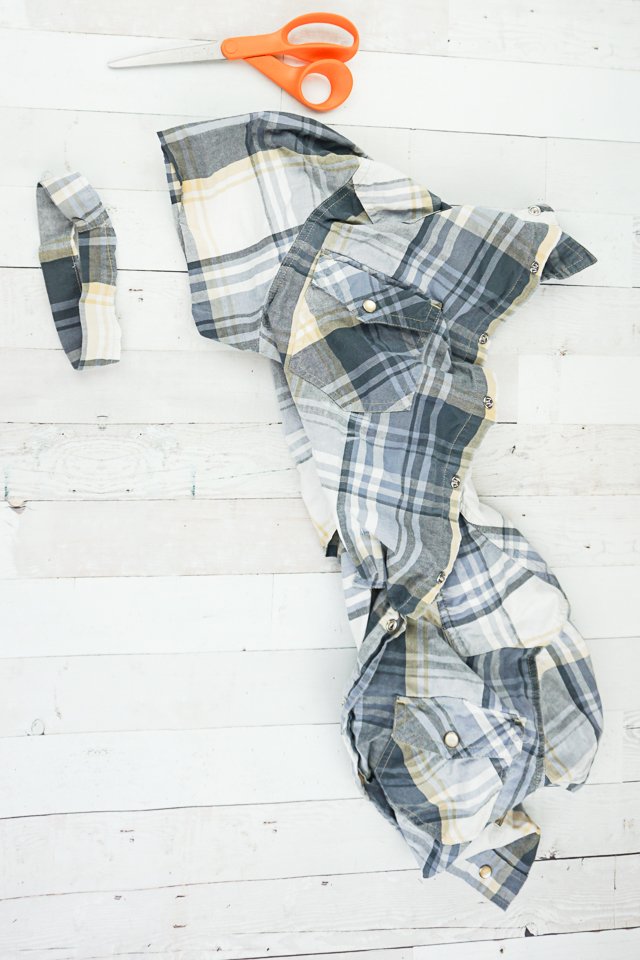
Mark where the safety pins are on the inside of the shirt. Remove the safety pins. Draw the dart legs and the point. Here are some tips for marking and sewing darts.
Pin the darts in half and sew them. Don’t backstitch at the end of the dart but tie it off instead.
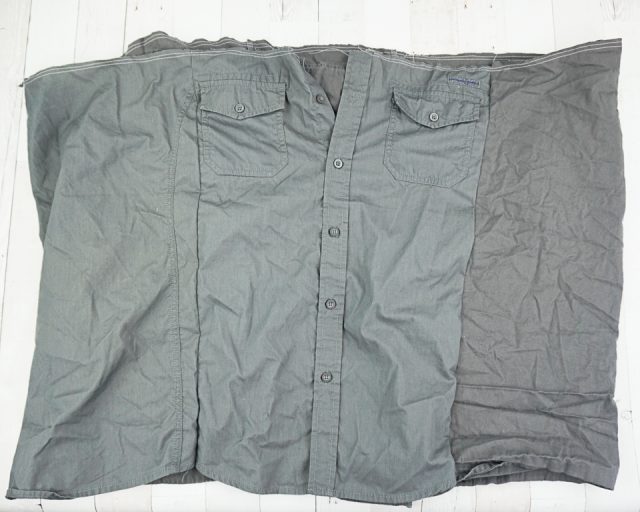
Cut the remaining shirts into rectangles that can be sewn into the skirt. Leave on the pockets so the dress will have pockets, or remove the pockets for a more streamlined look.
Keep one button placket to become the skirt front button placket. Cut the other button placket off.
With right sides together match all the side seams together. Start matching at the hem so that any difference in length can be changed at the waist of the skirt.
Sew the seams with a 1/4 inch straight stitch.

Press your darts.

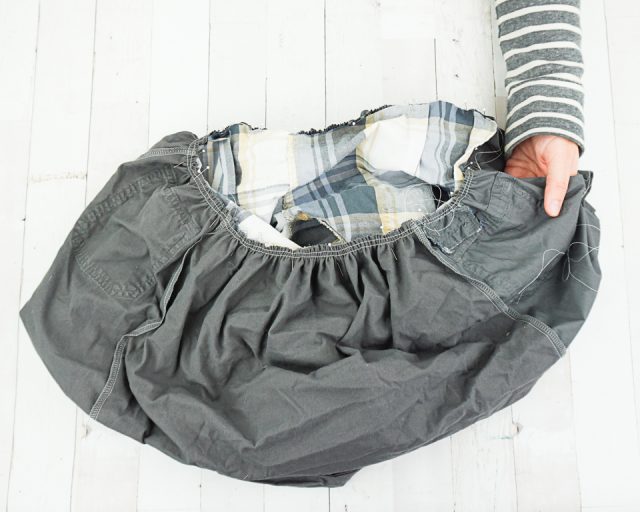
Sew two rows of basting stitches along the top of the skirt. Leave the button placket open and unstitched.
Gather the basting stitches along the top of the skirt.
With right sides together pin the skirt to the bodice matching up the button plackets and the center back.
Sew the skirt and bodice together with a 1/2 inch seam allowance.
Tack the waist seam allowance at the button placket up towards the bodice.
Fold the sleeve ends toward the outside of the sleeve twice and tack up in four places. This will create a soft cuff that gives a casual look.
Give everything a good press.
If you make a men’s shirt to dress refashion using this tutorial, I’d love to see! Please share it on social media with the hashtag #heatherhandmade and tag me!

I believe small sewing moments can create great joy. Find your own “right” way to sew. -Heather
In my opinion this doesn’t go together, you can only sew something like this for fun 🙂
You had me at “fabric fondler” !! I love searching thrift stores for quality fabric. Your shirt dress is a great idea.
Thanks for the FANTASTIC post! This information is really good and thanks a ton for sharing it 🙂 I m looking forward desperately for the next post of yours..
custom Made dress shirts
What a wonderful idea, I will try this if I can find some suitable shirts. x
I just found this post while looking for refashioning ideas for men's shirts. This is a gorgeous dress! I love the mix of patterns and how wonderfully tailored it is. The special details like the sleeves and the waistband make it truly extraordinary. I am inspired now!