
Free Cell Phone Bag Pattern

This post may contain affiliate links.
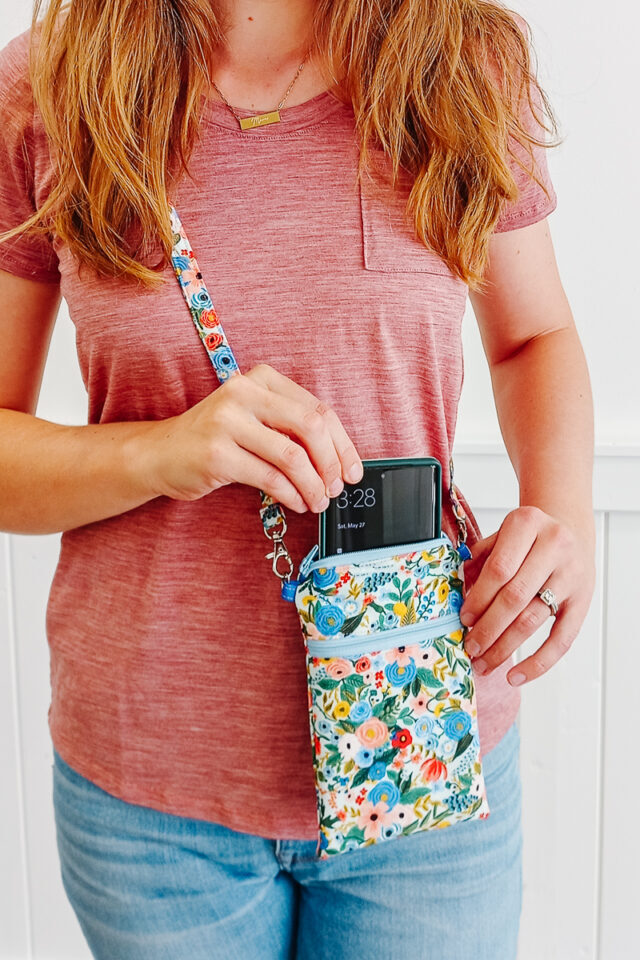
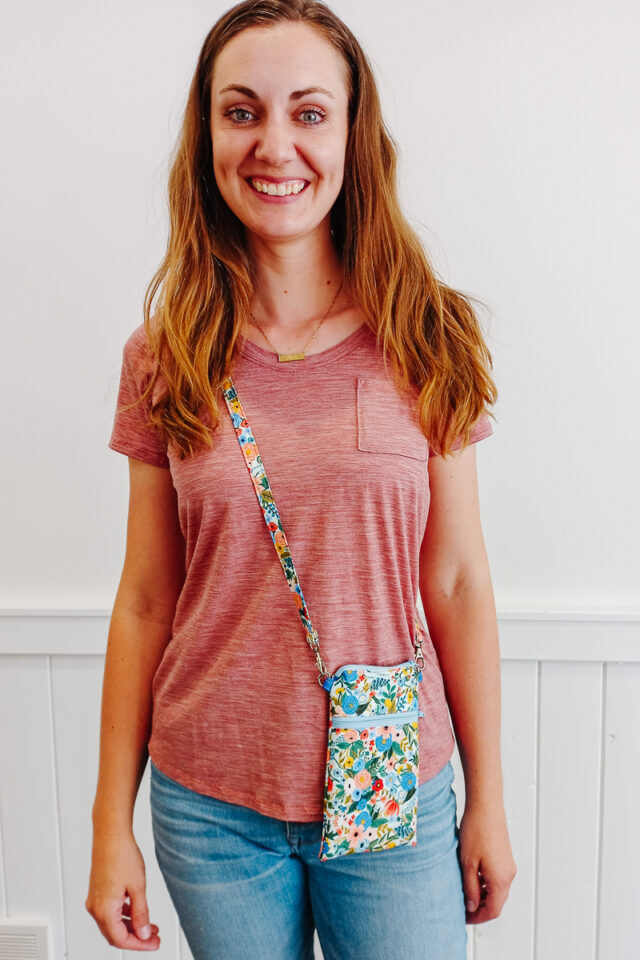
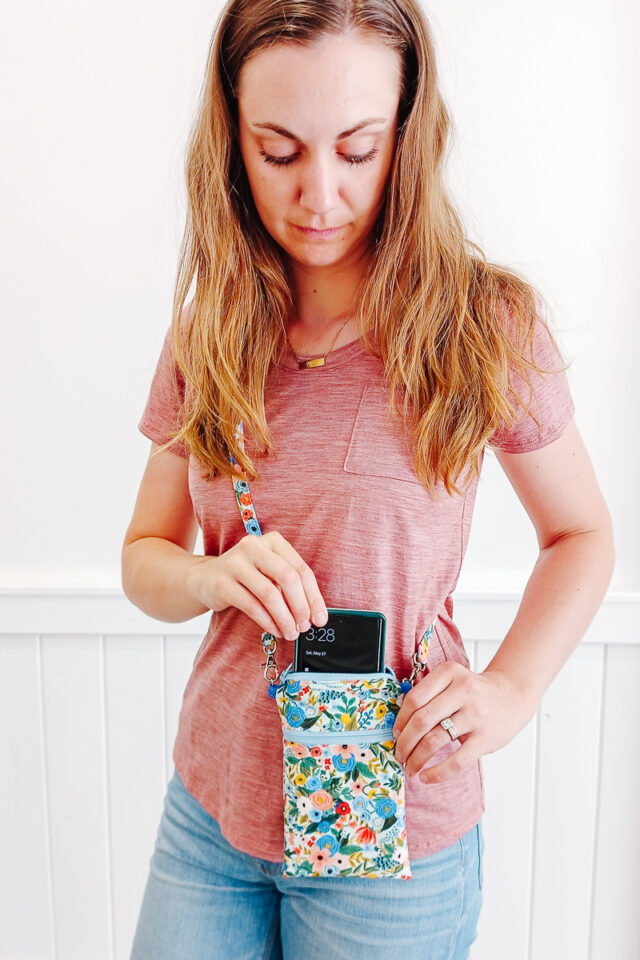
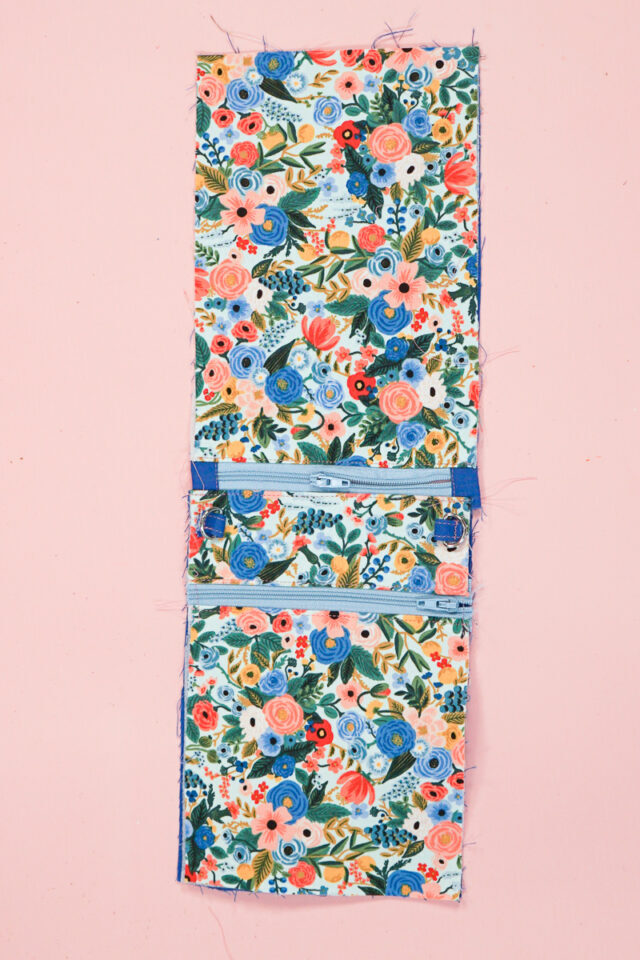
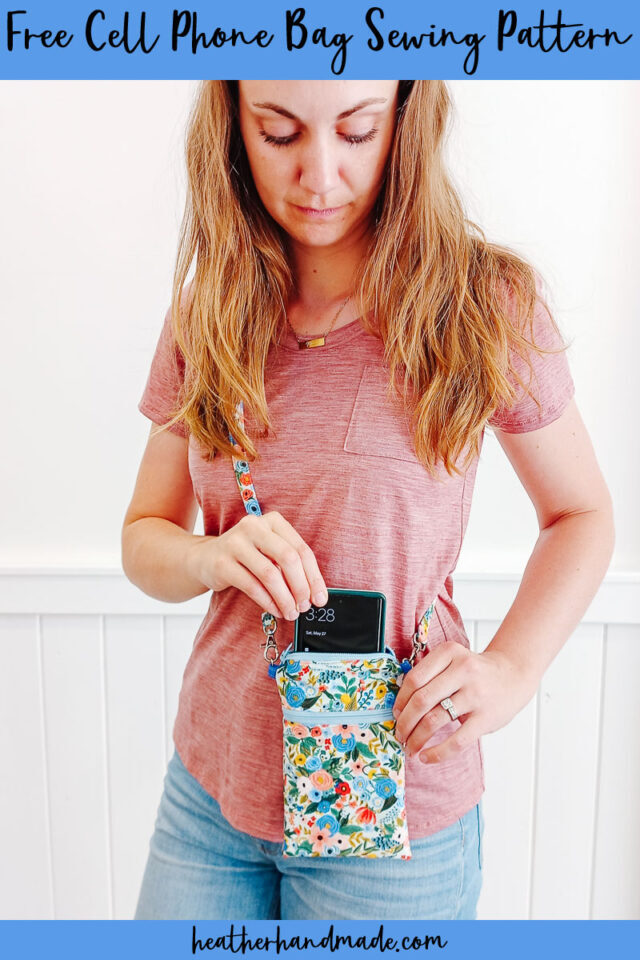
Learn how to make a cell phone bag with a free sewing pattern. This tiny crossbody bag is great for essentials and it’s a fun sewing project.
School is out for the summer where I take my kids on lots of different adventures. We love going hiking, visiting museums, swimming, etc. Now that my kids are old enough to not need as much when we are out and they are old enough to carry their own stuff, I hate carrying big bags.
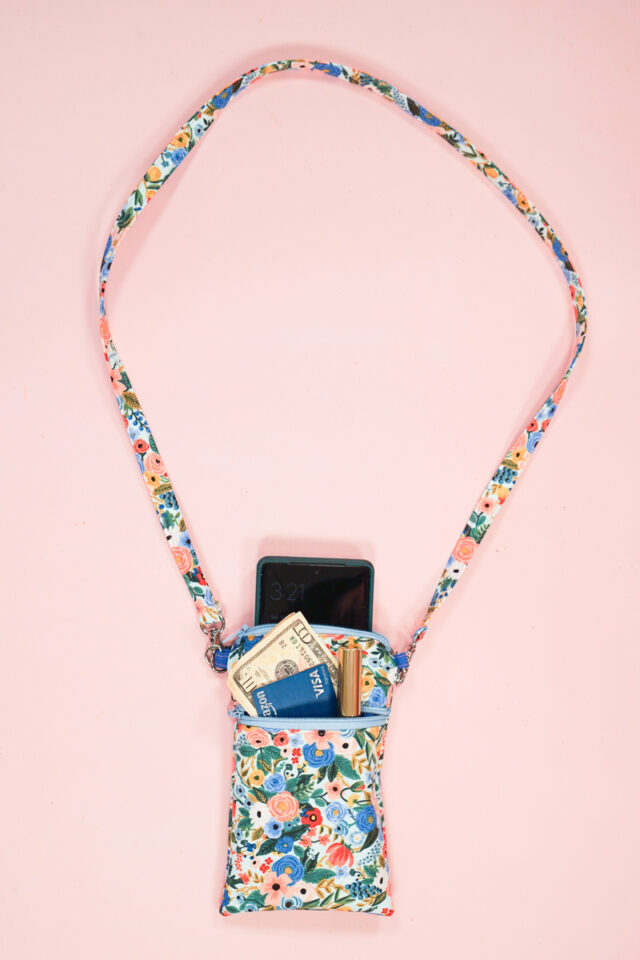
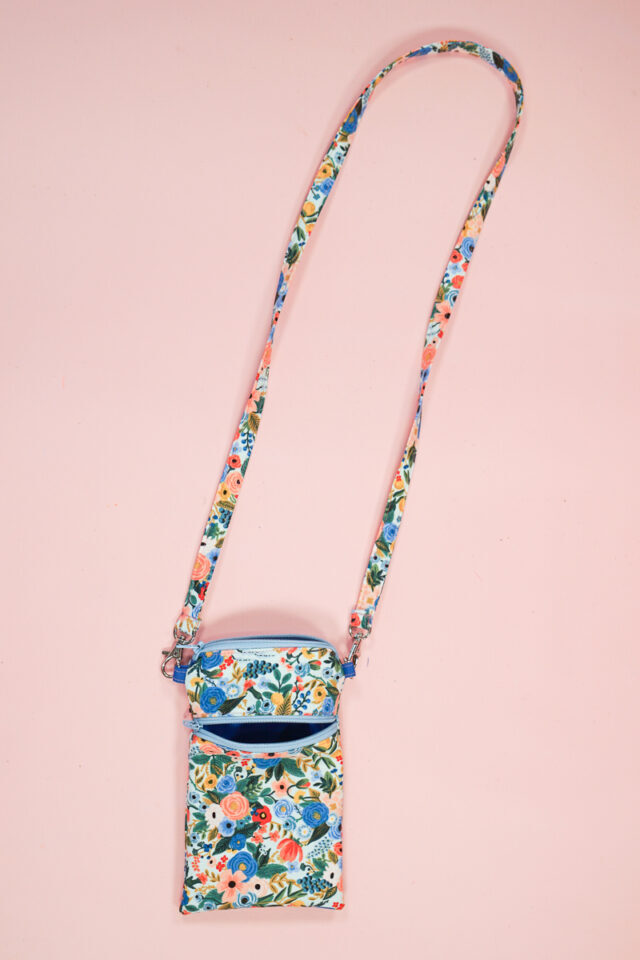
I needed a small bag that would carry my cell phone and a couple of essentials, and so this cell phone bag pattern was created. I was picky about what I needed it to do so that’s why it’s this size with two pockets, and it’s a crossbody bag.
To get the free sewing pattern, scroll to the end of the tutorial. Put your email address in the form under “Get the Free Sewing Pattern Here.” Once you confirm that you want to receive emails from Heather Handmade, the free pattern will be sent to your email address. Check your spam and promotions for the email.
If this free version is frustrating or confusing, get the UPDATED pattern and tutorial for $8. Or you can get it in the Ulitmate Pattern Bundle!
What fabric works for a cell phone bag?
The fabric that works best for a cell phone bag is quilting cotton for both the outer fabric and the lining fabric. There are so many prints that will be fun to use. Add interfacing to give stability to the pouch and help it hold its shape.
“I wanted to let you know how much I love your cell phone holder. I have made two so far and have cut out all the pieces for a third one in leather. My oldest granddaughter took the first one I made. I had to increase the size of the pattern because my cellphone would barely fit and it would not zip closed. I increased the width and length. I have a really bad hip and have to use a walker. I am also on oxygen and use an portable oxygen concentrator when not at home. Having the larger version of the cell phone holder allows me to leave my purse at home.” -Carol
What is a PDF sewing pattern?
A PDF pattern is a sewing pattern designed on the computer and organized so that it can be printed on several letter or A4 size pieces of paper.
I love using PDF sewing patterns because if the pattern gets ruined or if my children or I changed sizes, I can always print it again. It’ll never be destroyed since I have a digital version!
How do you use a PDF sewing pattern?
Open the PDF on a computer and click print. When printing make sure that the scaling is set to 100% or no scaling so that the pattern prints at the correct size.
Once the pattern is printed it can be taped together to get the full size. Then the pattern can be cut for each pattern piece size or individual sizes can be traced so that the pattern can be used again and again. Learn how to use PDF sewing patterns.
Do you love to sew? Try some of these fun sewing projects:
- Zipper pouch sewing projects
- How to sew a zipper
- How to fix a zipper if the pull came off
- Beginner sewing projects
- Scrap fabric projects
- Easy gifts to sew
- Fat quarter sewing projects
- Bag sewing projects
How to Make a Cell Phone Bag
Supplies
- Free phone bag sewing pattern – get it at the end of the post
- Fat quarter of fabric for the outer fabric
- Fat quarter of fabric for the lining
- Lightweight fusible interfacing
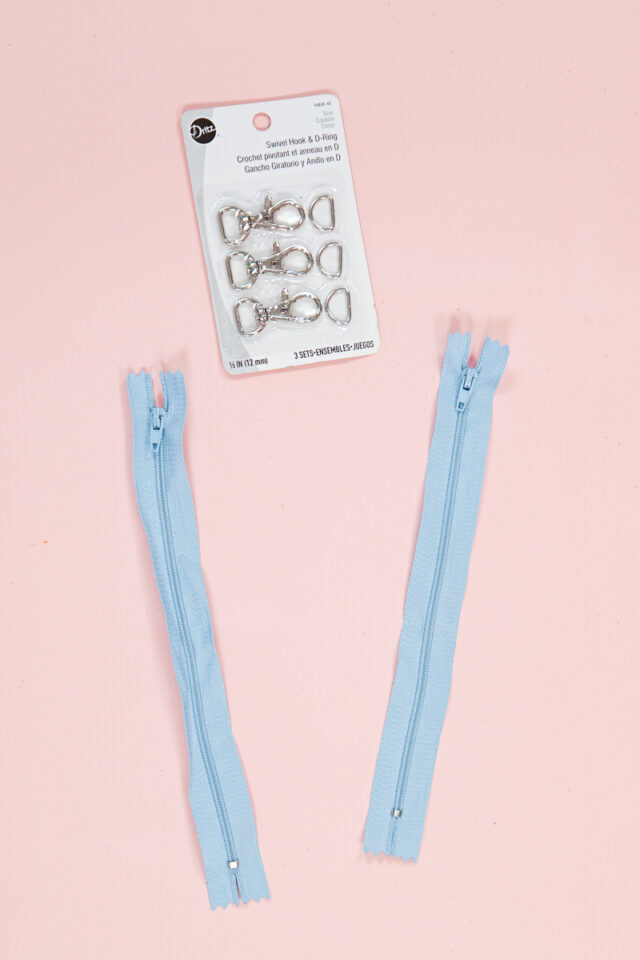
- Two 8 inch coil zippers (will be cut smaller about 5 inches)
- Two 1/2 inch lobster clasps and D-rings
- Sewing tools
- Sewing machine
If this free version is frustrating or confusing, get the UPDATED pattern and tutorial for $8. Or you can get it in the Ulitmate Pattern Bundle!
Seam allowance is 3/8 inch.
Cut out the pieces
Cut out all the fabric pieces as the pattern instructs.
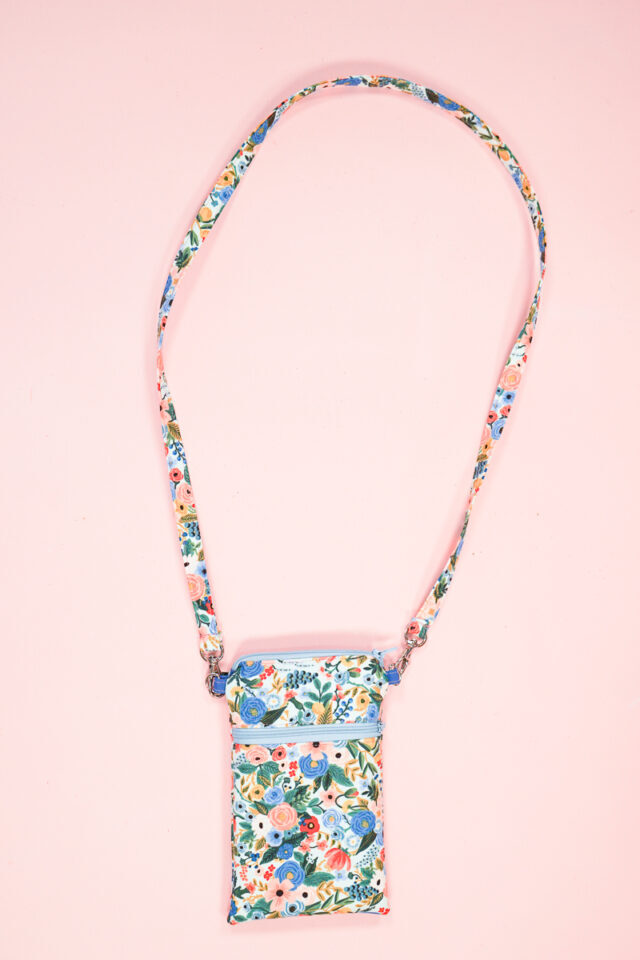
From the outer fabric: 1 back, 1 upper front, 1 lower front, and 1 strap.
From the lining fabric: 2 back, 1 upper front, 1 lower front, 2 zipper tabs, and 2 loops.
From the interfacing: 1 back, 1 upper front, 1 lower front, 1 strap, and 1 loops.
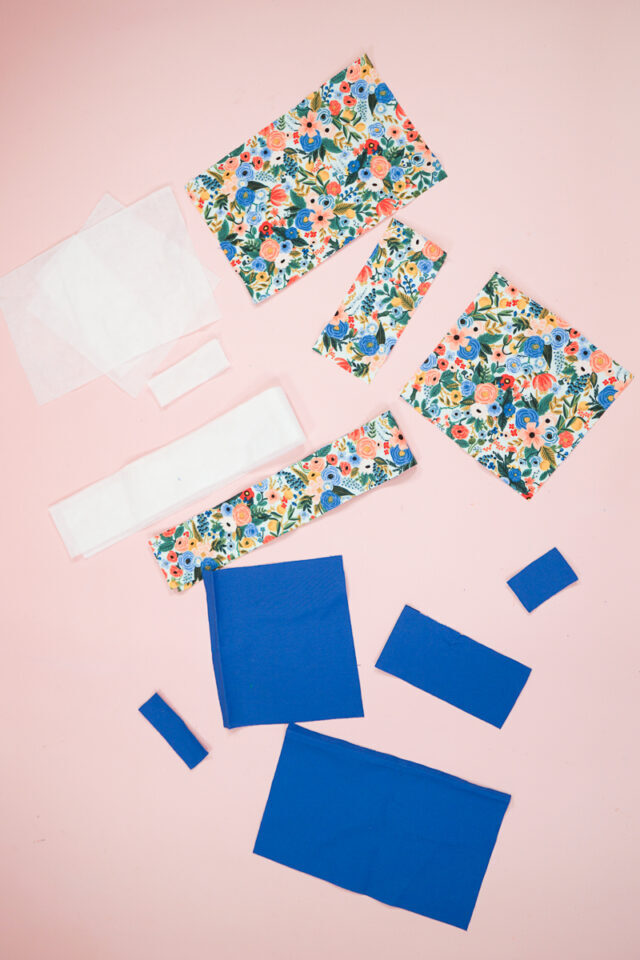
Apply the fusible interfacing to the wrong side of all the outer fabric pieces and the loops.
Sew the front zipper
I’m not going into a lot of details about how to sew a zipper but the article I linked to will teach you if you need a little extra help.
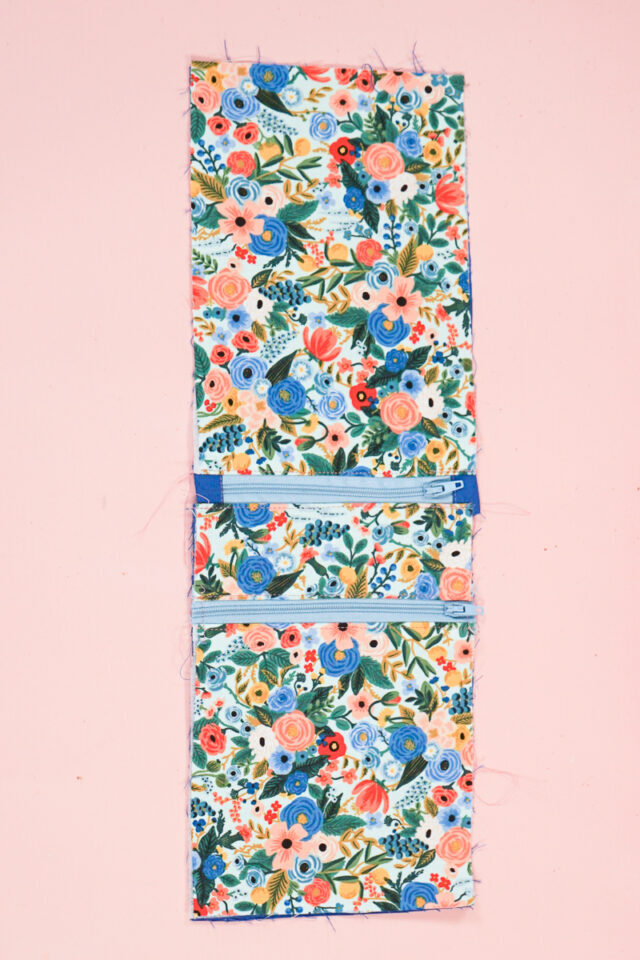
Insert one zipper between the upper front and the lower front pieces. The outer fabric will be on the right side of the zipper and the lining will be on the wrong side of the zipper. Make sure to topstitch the fabric away from the zipper.
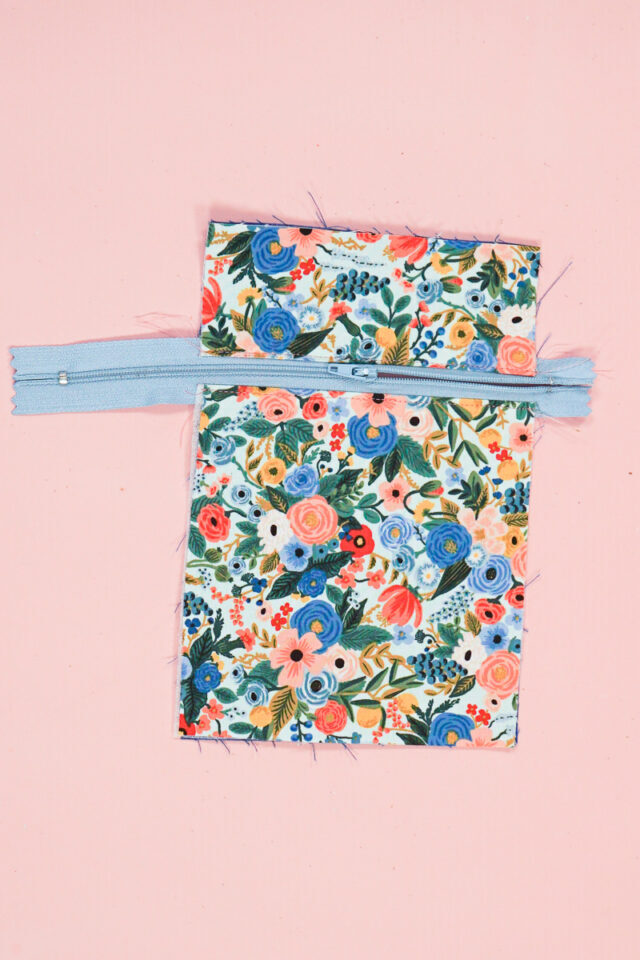
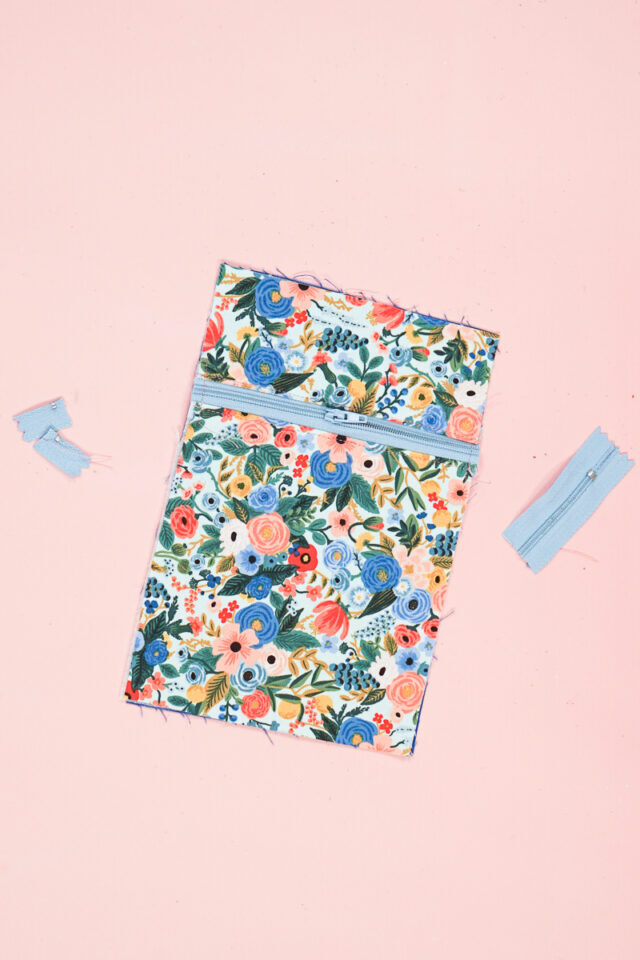
Pull the zipper pull to the center of the zipper. Baste down the sides of the front pieces. Trim off the excess zipper on each side.
Sew the top zipper
Pull the zipper pull to the center of the other zipper. Use the zipper guide to cut the zipper to the right size.
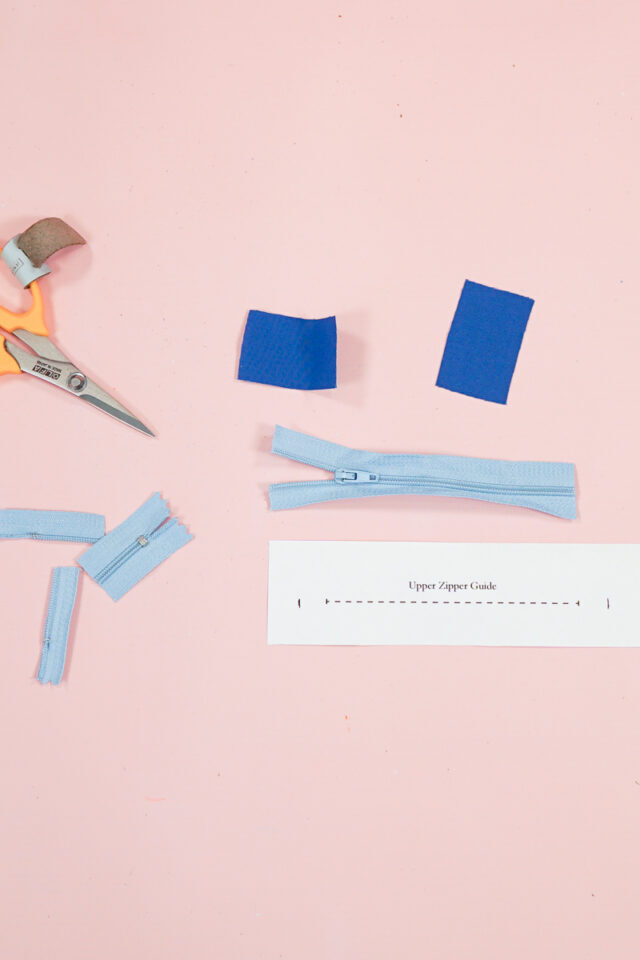
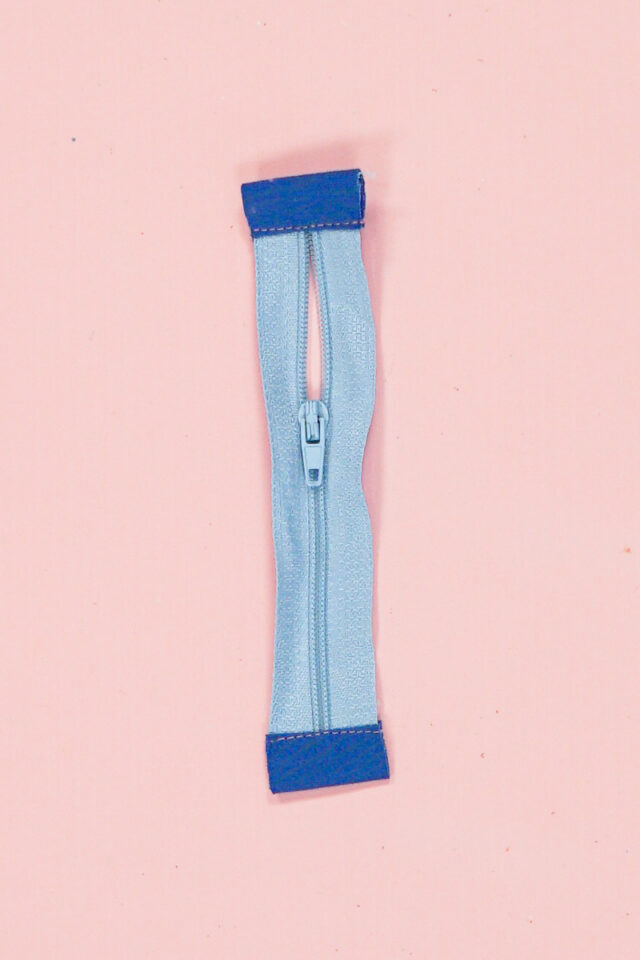
Add the zipper tabs to each side of the zipper. It’s like sewing bias binding with the raw edges inside and the fabric wrapped around. (See how I added zipper tabs in this zipper pouch sewing project.)
Insert the zipper with tabs between the front and back pieces. The front piece has the zipper added, and there will be two lining pieces so the front will actually have three layers of fabric.
The outer fabric will be on the right side of the zipper and the lining will be on the wrong side of the zipper.

Make sure to topstitch the fabric away from the zipper.
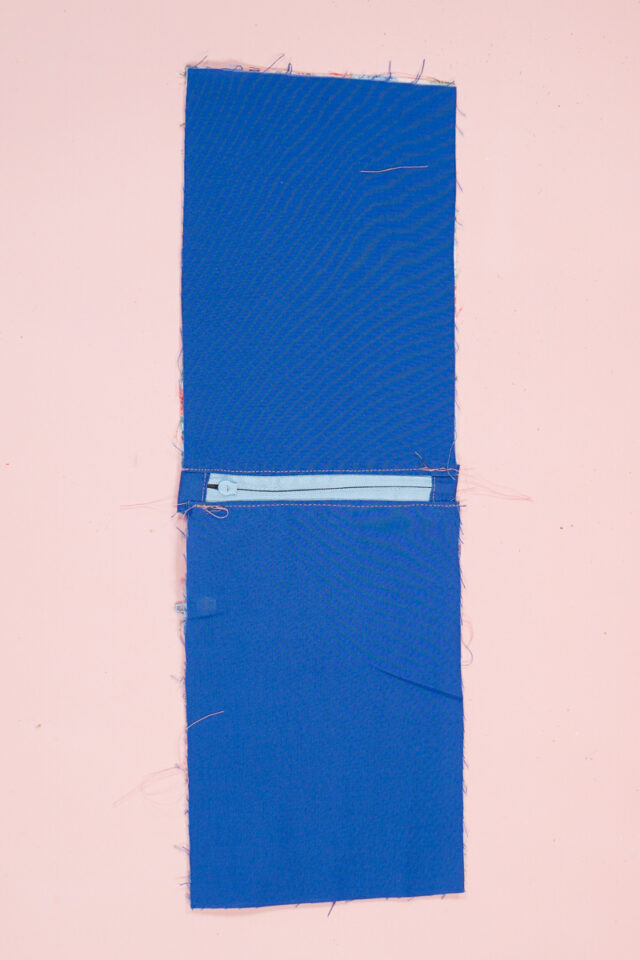
This is what the inside looks like.
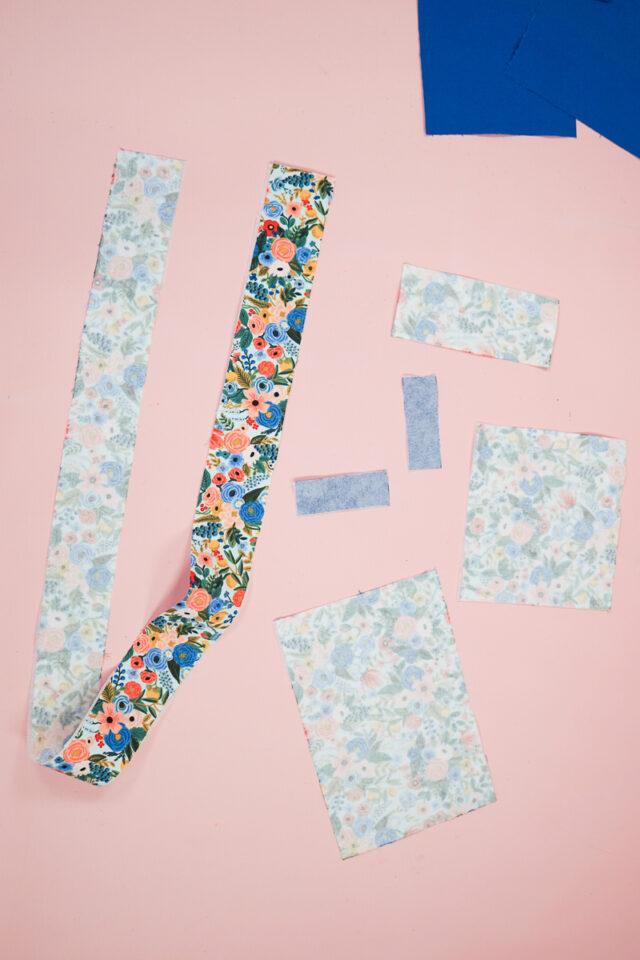
Sew the strap and the loops
Take the loops and the strap. Fold them in half with the long sides matching. Fold the long edges into the middle fold and fold all three folds (like bias binding). Press all three folds in place.
Sew along the long edges 1/8 inch from the edge to secure and enclose the raw edges.
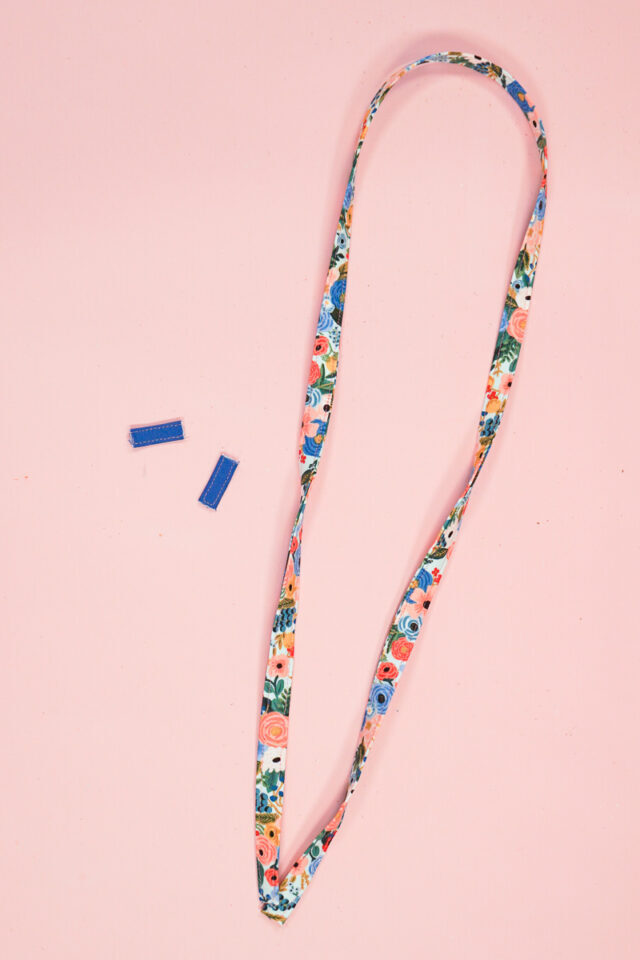
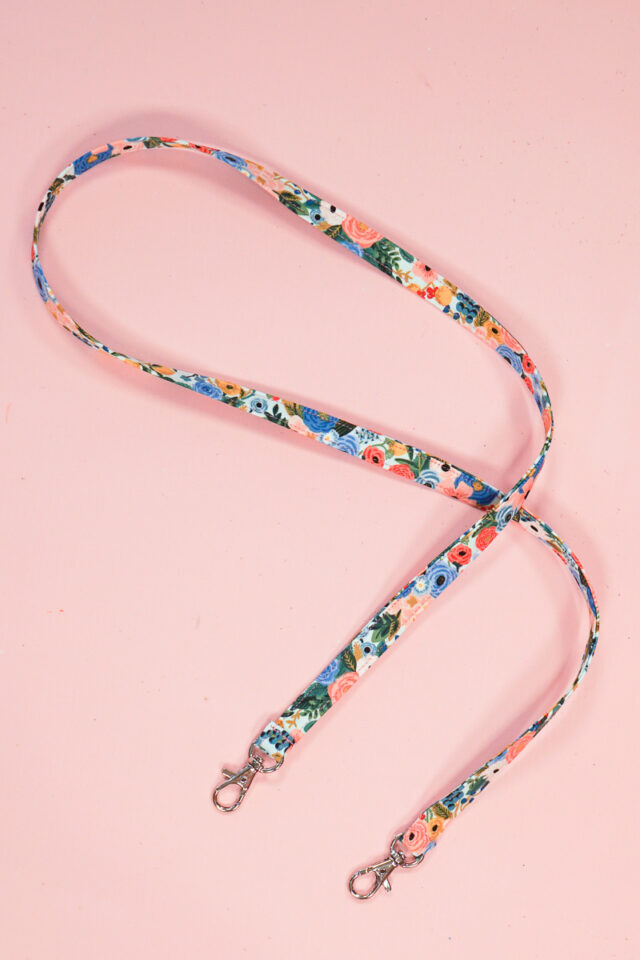
Slide the lobster clasp onto each end of the strap. Fold the short end of the strap over 1/4 inch and then again 1/2 inch around the loop of the clasp.
Fold the loops in half and slide the D-ring onto each. Clip the loop with D-ring 1/2 inch below the zipper on the front of the bag. Make sure you are clipping to ONLY the front fabric and not the big lining piece.
Baste the loops in place.
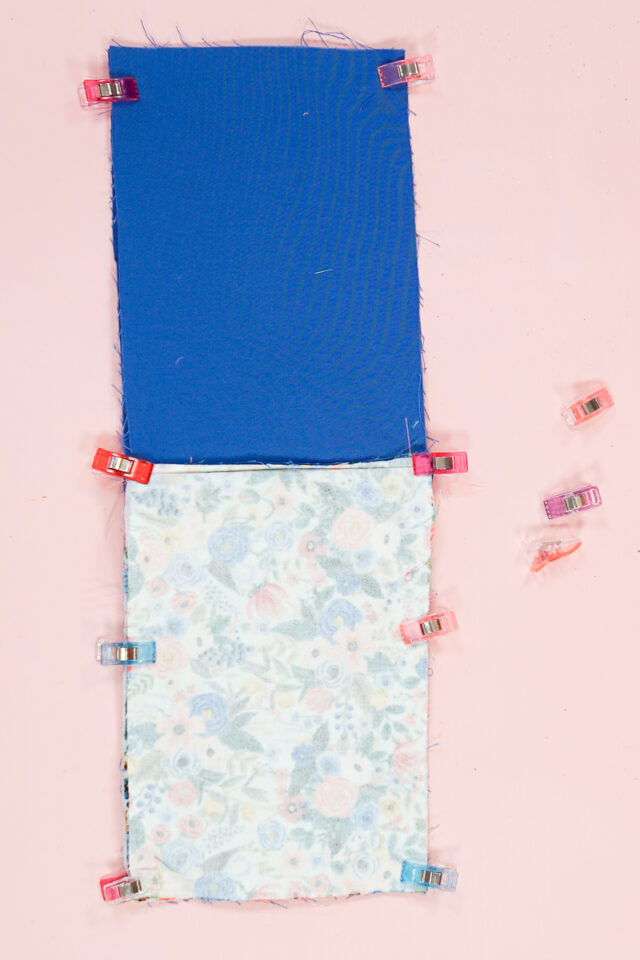
Sew the bag
Grab the two front pieces and bring them right sides together. Pin. Grab the two lining pieces and bring them right sides together. Pin.
One side will be lining fabric and the other side with be the outer pieces, and the top zipper will be in the middle.
Make sure the zipper is folded towards the outer fabric.
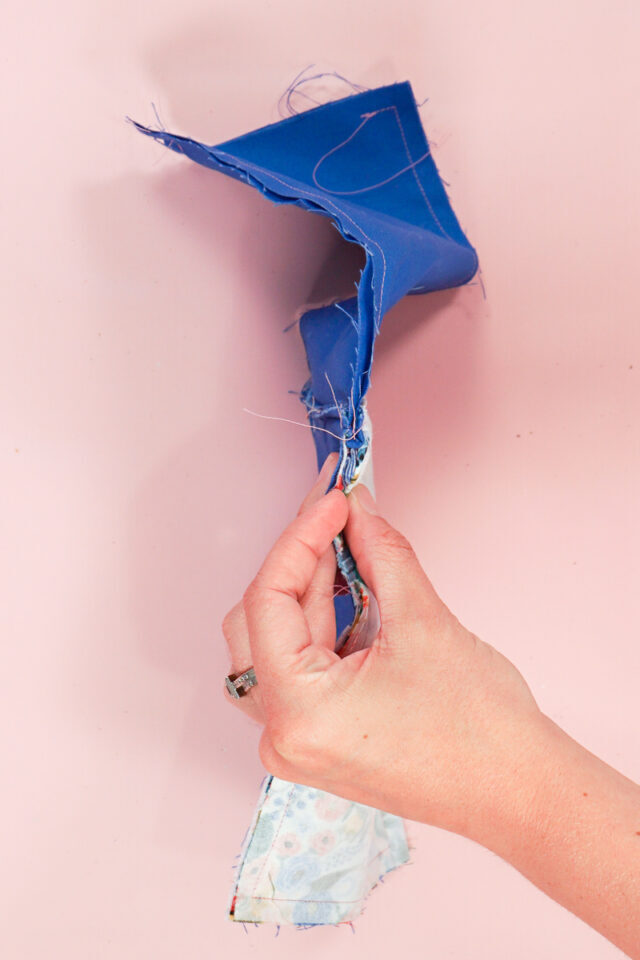
Starting at the bottom of the lining, sew around the whole bag and pivot at the corners. Leave a two inch hole to turn the bag right side out and backstitch when you start and when you stop.
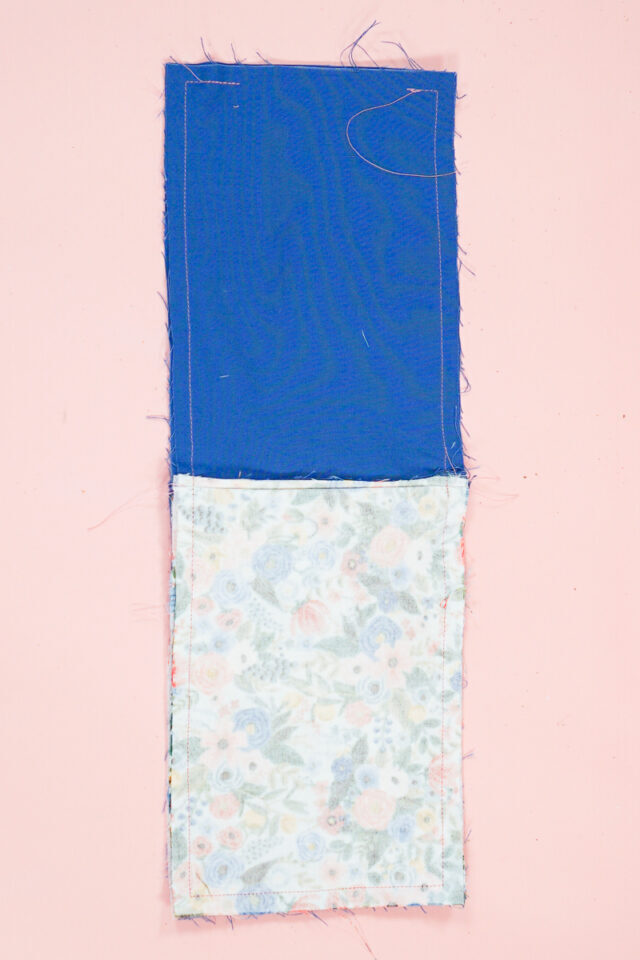
Trim the corners to reduce the bulk.
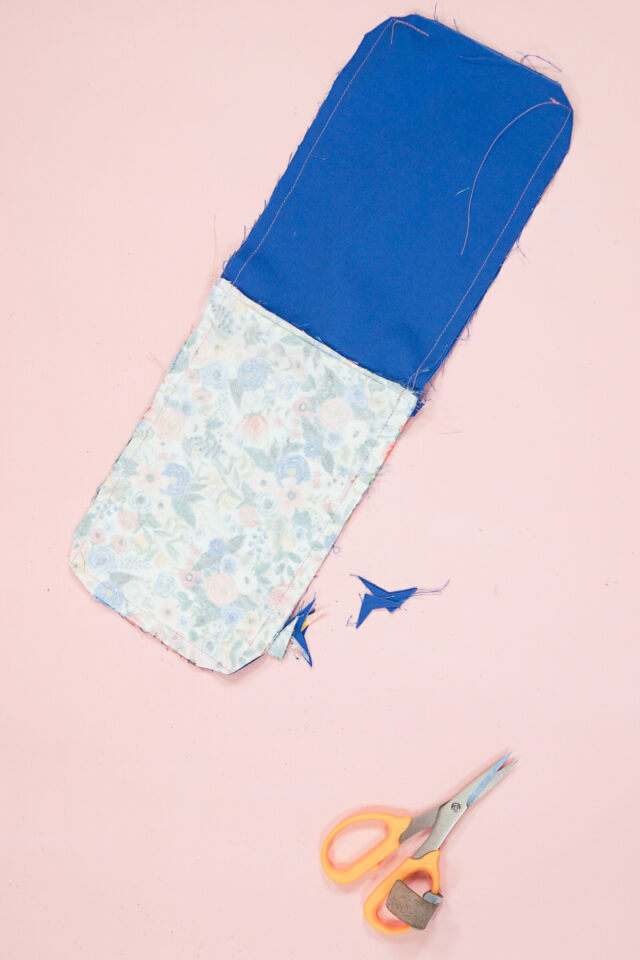
Turn the bag right side out. Poke out the corners of the outer fabric pieces.
Pinch the lining hole closed and sew across the top to close the hole.
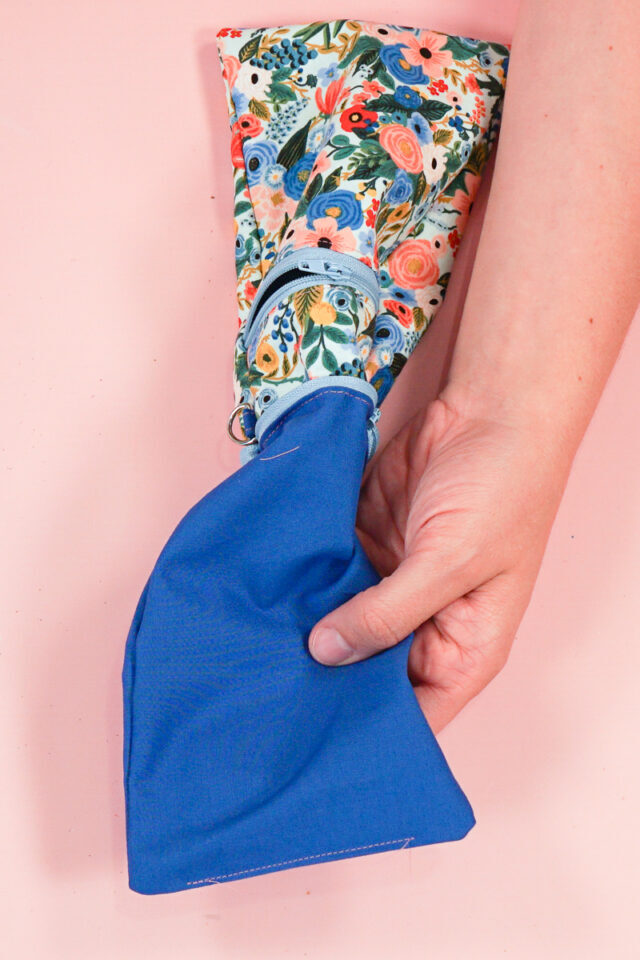
Push the lining into the bag and poke out the top zipper corners. Clip the strap onto the D-rings. You finished!
If this free version is frustrating or confusing, get the UPDATED pattern and tutorial for $8. Or you can get it in the Ulitmate Pattern Bundle!
Get the Free Sewing Pattern here!

I believe small sewing moments can create great joy. Find your own “right” way to sew. -Heather
What is the finished dimensions of the bag? Looking forward to sewing this up for my grandson.
It’s about 5 inches by 7 inches
Is the strap length in the pattern the same as in the pictures? The pictures make it seem a lot longer than 20 inches.
The strap piece needs to be cut on the fold as the pattern piece instructs.
Thank you so much!!!
The printed pattern piece says to cut 3 lining and I don’t know what to do with the extra piece.
Did you buy the pattern or get the free version?
What is the seam allowance when sewing the whole bag (inside out, before turning right side out)?
3/8 inch
How can I just print out the instructions without all the other information?
You can buy the formatted instructions here: https://heatherhandmade.shop/products/cell-phone-bag-pattern-and-tutorial
nice ideas. Thanks for sharing
thank you You are very talented
Thank you!
I never find the free pattern you offer at the end of your post. Am I missing something?
https://www.heatherhandmade.com/free-cell-phone-bag-pattern/#get-the-free-sewing-pattern-here
Yes it great and it me Mandy eades