
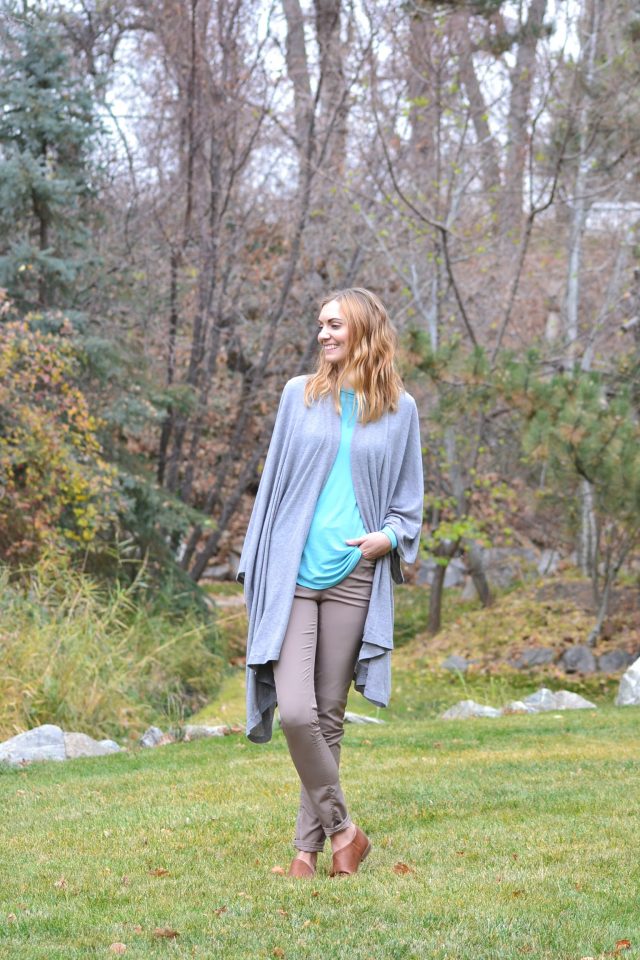
Free Draped Cardigan Sewing Pattern

This post may contain affiliate links.
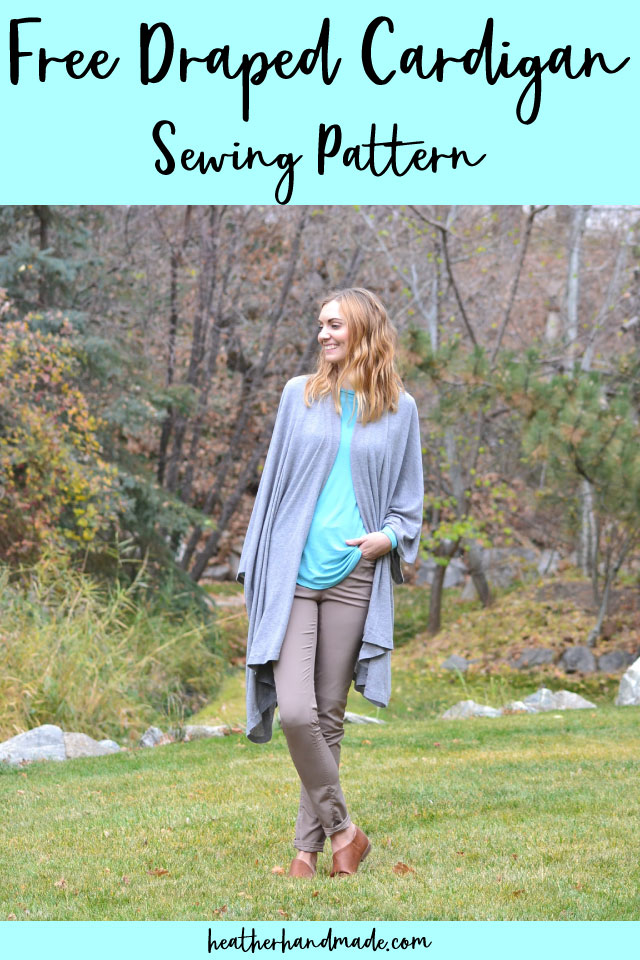
With this free draped cardigan sewing pattern you can make a cardigan the is adjustable for any size that is perfect for traveling.
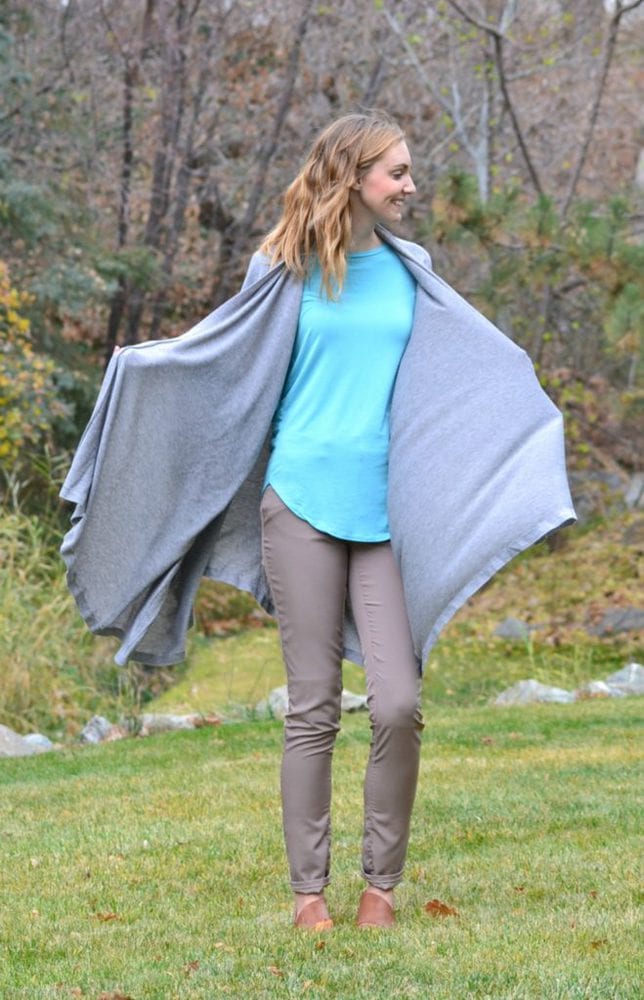
Have you ever wanted to wrap yourself in a blanket? Or wear a blanket all day? Well this draped cardigan tutorial is for you.
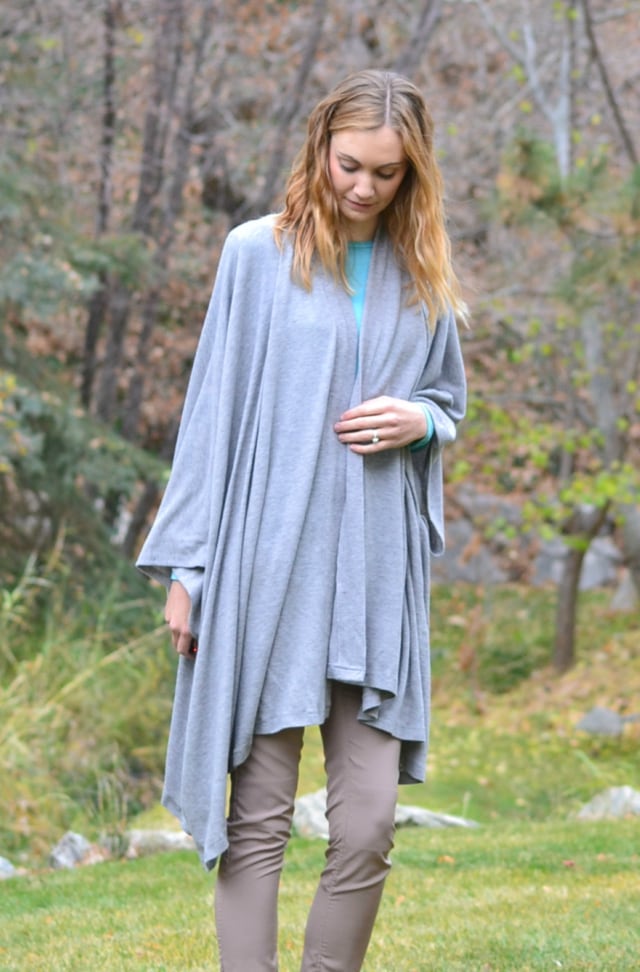
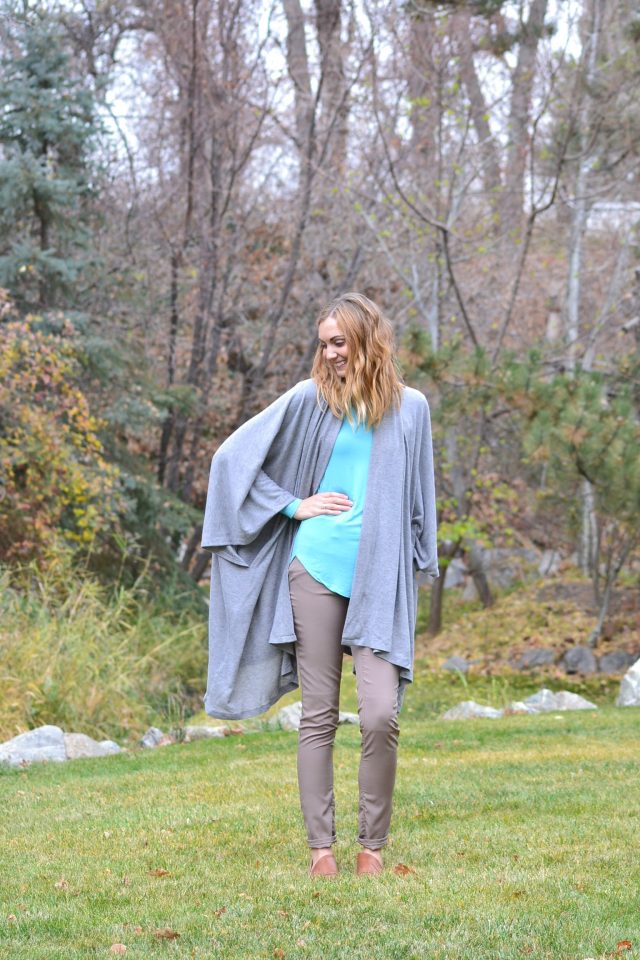
Not only is it a gorgeous draped cardigan, it’s a cardigan that will fit any woman in your life. It’s a one-size fits all cardigan.
I also made the tutorial simple enough that anyone can make one. It only requires a sewing machine and no serger, and I share a trick for hemming the cardigan so there’s no wavy hem! Get the free printable tutorial at the end of the post!
What fabric should I use for a draped cardigan?
This cardigan works best with a lightweight knit fabric. You want a knit fabric to make the cardigan comfortable to wear, and you want it to be lightweight so that the fabric drapes beautifully.
I recommend using lightweight sweater knit like Hacci knit, lightweight French terry, or rayon spandex jersey.
Should I prewash the fabric?
Yes, you should prewash the fabric. Wash and dry it on hot so that it will shrink before you use it.
If the fabric doesn’t recommend using hot water and hot dryer, then wash the fabric the way its recommended and the way that you will wash and dry it after it’s finished.
It’s just important that the fabric shrinks before you cut and sew it.
What sizes does this draped cardigan work for?
My goal was to make a cardigan that could fit anyone of any size or age. I wanted it to be an easy gift that you can give anyone in your life. It uses a lot of fabric, but it doesn’t have a lot of sewing making it quick and easy.
This cardigan is not fitted and the “sleeves” are connected to the body so it really can fit anyone. There are a couple of tips in the tutorial to make it for someone shorter, but it will work for anyone. Also, the hem hangs asymmetrically so there’s no worry about getting a perfectly straight hemline.
This cardigan pattern and tutorial really is like wearing a warm blanket all day. It’d be amazing while traveling since you could snuggle up whenever you needed to.
Do you love to sew? Try some of these sewing projects:
- Easy gifts to sew
- Gifts to sew with knit fabric
- Gifts to sew for women
- Sweater to cardigan refashion tutorial
- Sweater upcycle and refashion projects
- Jersey knit sewing projects
Free draped cardigan sewing pattern
Supplies
- Cutting mat, rotary cutter, and ruler*
- 2 yards of lightweight knit 56 inches wide – sweater fabric*, French Terry*, (I used gray Hacci Sweater* from Stylish Fabrics)
- 1 pkg lite HeatnBond 7/8 inch*
- Tips for Sewing Knit Fabric
Directions
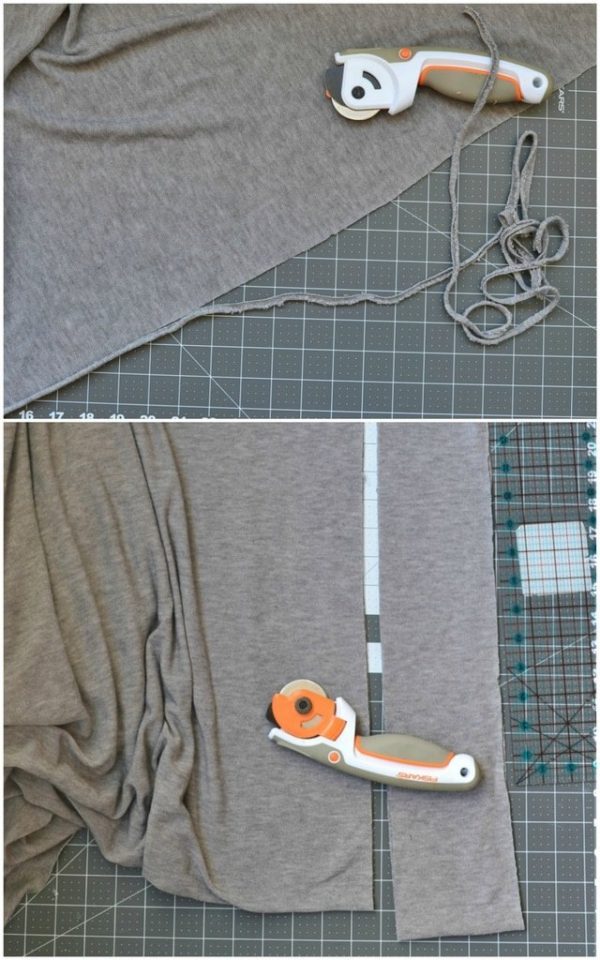
Trim the selvedges off of the edges.
Trim 4 inch off of one side of the fabric going up and down with the grainline or the same direction as the selvedges you just cut off. *If you are sewing for someone shorter than average cut off more from the side like 8 inch and then cut a 4 inch piece like the one I have that can be used later.*
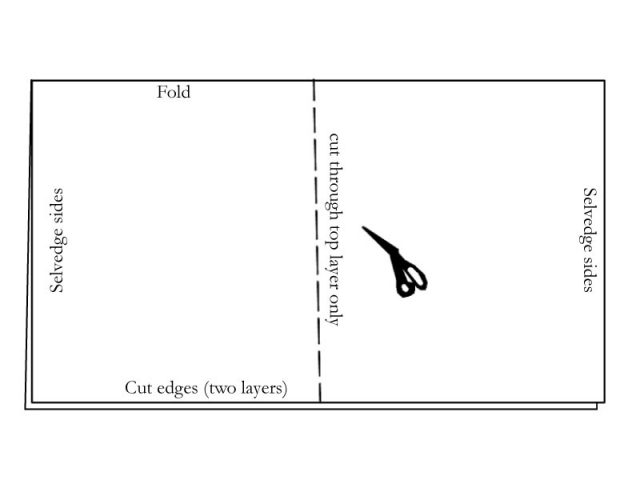
Fold the pattern in half with right sides together from the top to the bottom or fold along the grainline (NOT selvedge to selvedge).
Match up the raw edges on the sides and starting from the side opposite the fold, the sides with two raw edges, sew with a straight stitch up 20 inches at 1/2 inch seam allowances.
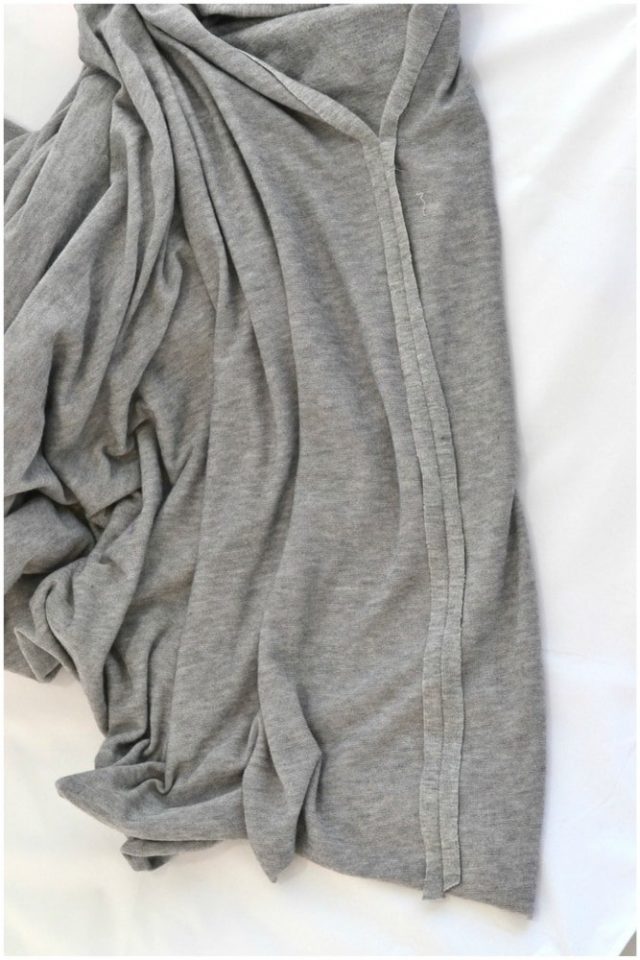
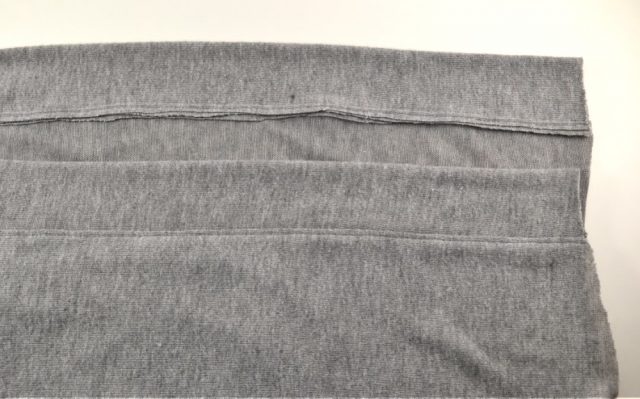
Press the seam allowances open. Then topstitch the seams on both sides which sews the seam allowance open. Instead of stopping at the top of the 20 inches sew a small hem around the armhole with the fabric folded over 1/2 inch.
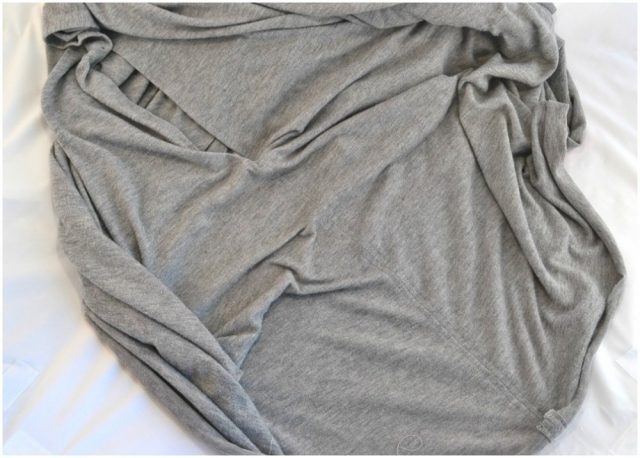
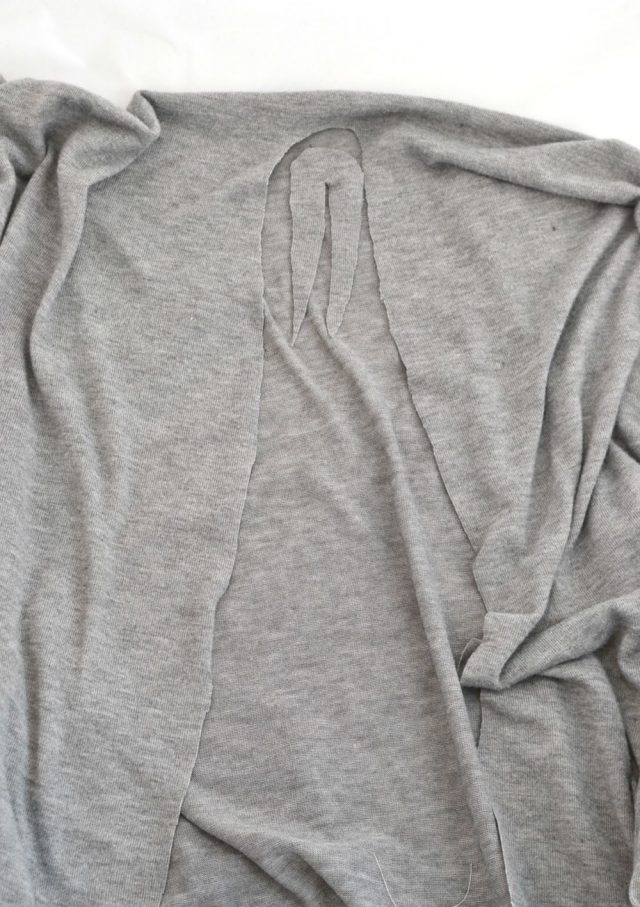
Lay the fabric flat with the seams and armholes on each side and the fold at the top. Cut a straight line through the very middle from the raw edge and stopping at the fold.
Where the cut stops, cut a raindrop shape from the top to make the cut one smooth, continuous seam.
Take the 4 inch piece you cut from the edge. It is about the same length as the center cut. Fold the 4 inch piece in half with wrong sides together. This is now the front band. Pin the raw edges of the band to the front cut with right sides together, and distribute the band evenly.
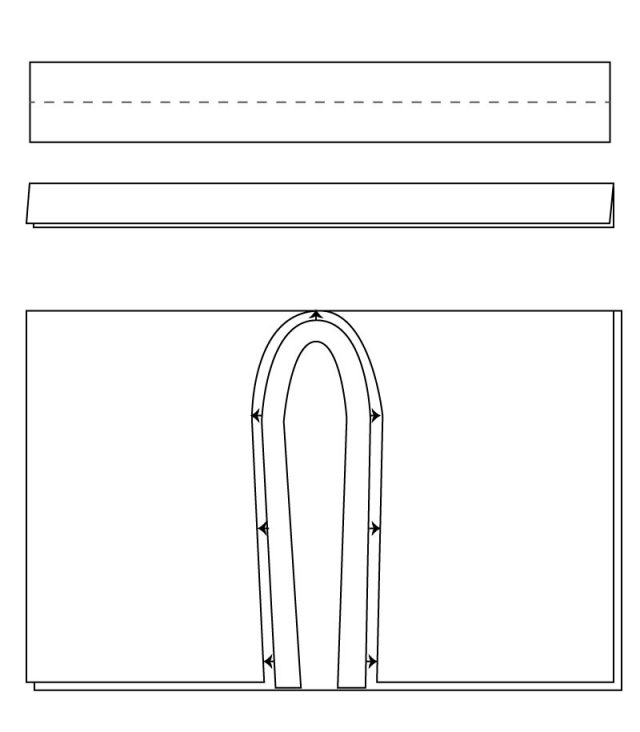
Sew the band to the center front with a straight stitch and a 3/8 inch seam allowance.
From the front edgestitch next to the band and sew the band seam allowance towards the body of the cardigan.
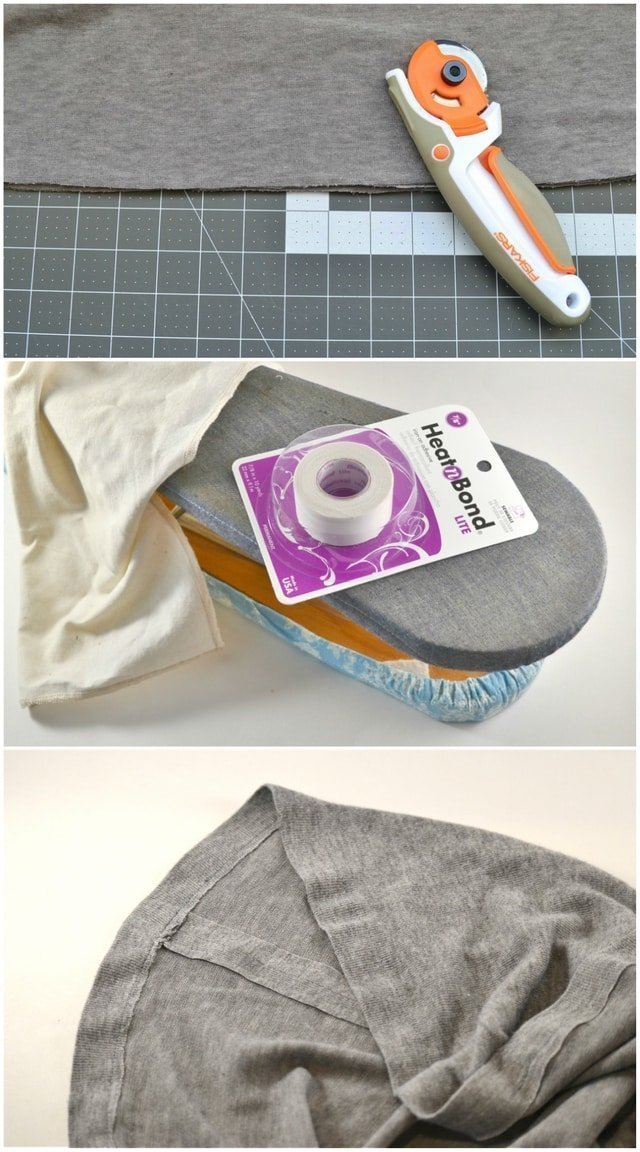
Lay out your cardigan and make sure the bottom raw edge is straight.
Apply the hem tape to the hem per the product’s instructions. *The hem tape is not needed and it is an extra product to buy, but it will make it so you don’t have a wavy hem after sewing it.*
Sew the hem with a straight stitch at 3/4 inch. Press.
Enjoy your gorgeous draped and warm cardigan! I know this is a more time consuming tutorial than most, but it’s a simple construction and can fit any size. You can also make it only using a straight stitch and without a serger!
Get the free PDF guide here!
If you make something using this sewing project, I’d love to see! Please share it on social media with the hashtag #heatherhandmade and tag me!

I believe small sewing moments can create great joy. Find your own “right” way to sew. -Heather
If there are 2 raw edges from the cutting in the store and then I trim off the selvages, aren’t there 4 raw edges? I’m confused at Step 3 already. Folding top to bottom depends on how you lay your fabric out. Does “not selvage to selvage” mean you fold by lining up the old selvages (that would be selvage to selvage) and then stitching on the old selvage raw line or you line up both old selvages on top of itself (also selvage to selvage) so the fold runs from the old selvage to selvage) on both sides and then sew along the raw store cutting line. Folding “with the grain” (to me that’s the length of the fabric with the selvages lined up against each other) seems the opposite of “NOT selvage to selvage”.
I will be following this as I am also a bit confused.