
DIY Witch Broom

This post may contain affiliate links.
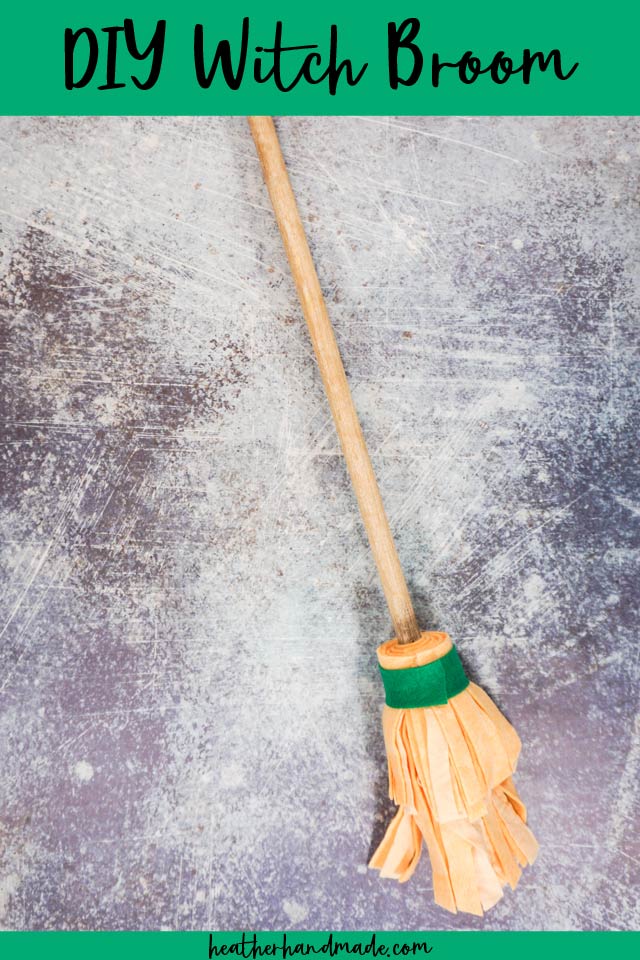
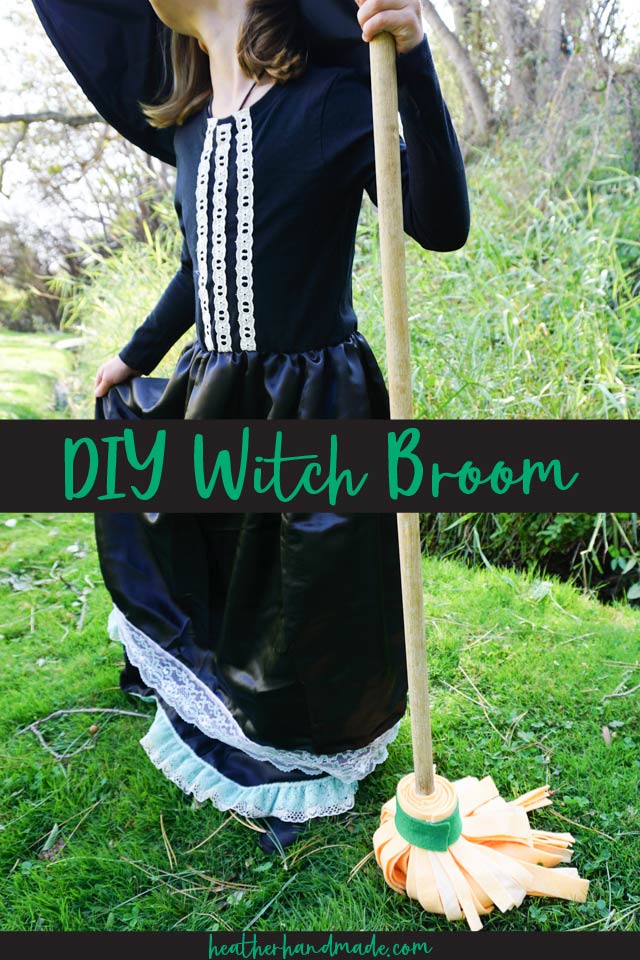
Learn how to make a DIY witch broom with felt, glue, and a stick. This also makes a great DIY Harry Potter Quidditch broom.
A couple of years ago, I did a simple Harry Potter birthday party for my son. We played Quidditch in our backyard for most of the time, so I needed to make a bunch of easy brooms.
I found a really quick way to make a simple DIY broom that works well for costumes! It works for both a DIY Harry Potter broom and a DIY witch broom depending on your costume!
For the first ones I made I found a bunch of $1 plungers at the dollar store, and then I twisted the plunger part off so that I could reuse the stick. Then I used the quick and easy method in this DIY tutorial.
You could also just use thick sticks found in nature. I used a stick left over from an old broken straw broom. (This is the same stick I used to make a DIY scythe for a grim reaper.)
Do you like making costumes? Check out these fun tutorials!
- DIY costume ideas
- free costume sewing patterns
- Upcycled costumes for Halloween
- DIY witch costume
- DIY Witch Hat Pillow
- DIY Harry Potter costume
- DIY patronus dog costume

DIY WITCH Broom
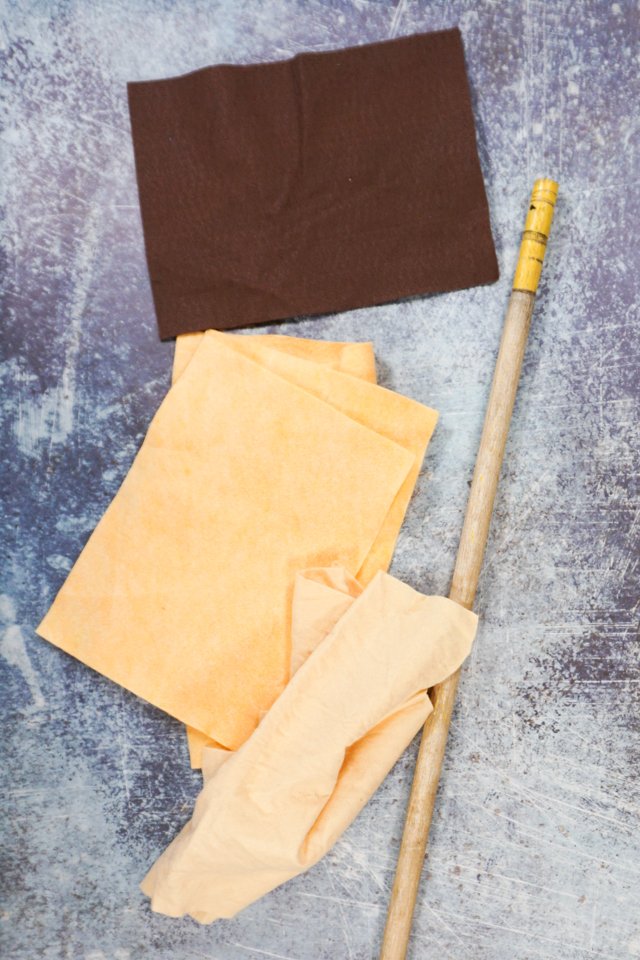
SUPPLIES
- A stick from an old broken broom, a plunger with the plunger part removed, or a stick from nature
- Felt in a straw color
- Colored felt (pictured is brown, but I used green later on)
- Hot glue gun and hot glue
- Scissors
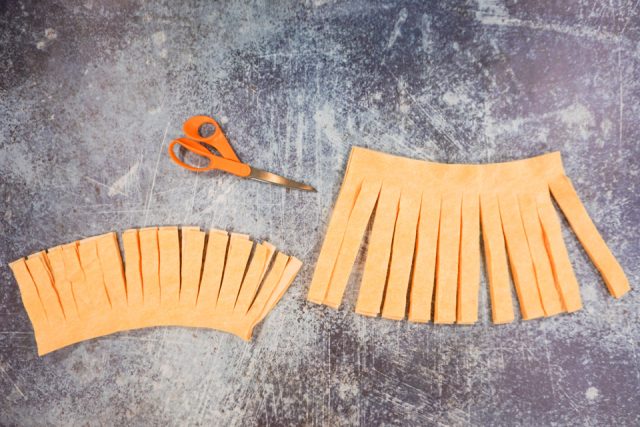
Cut the tan felt into rectangles. I did three large rectangles and three smaller rectangles. They are all the same width, but they are different heights.
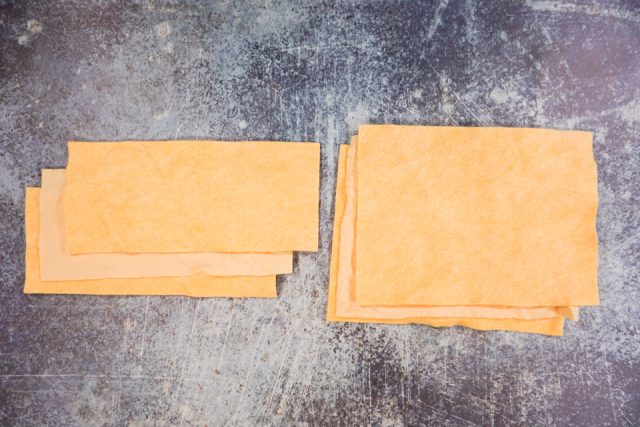
Layer the large felt rectangles on top of each other and cut it into strips leaving a one inch margin uncut at the top. I did one inch strips so my broom looks a little more like a mop, but if you cut thinner strips it’ll look more like a broom.
Do the same to the small felt rectangles.
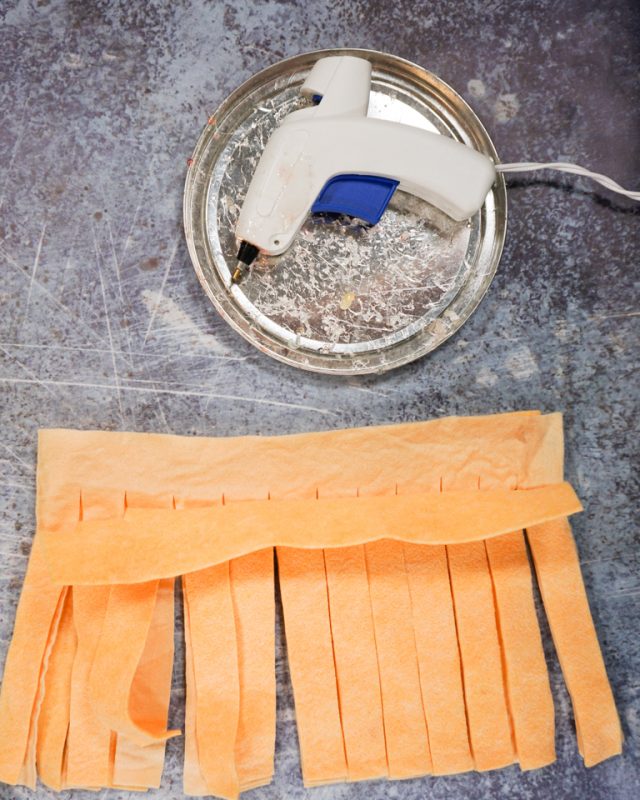
Glue the layers of felt together. You can stagger the strips for a more broom look.
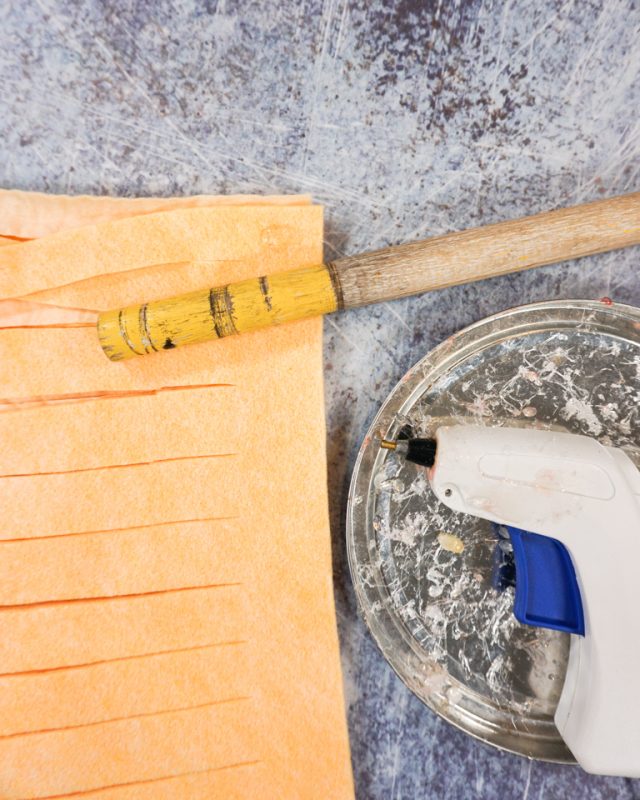
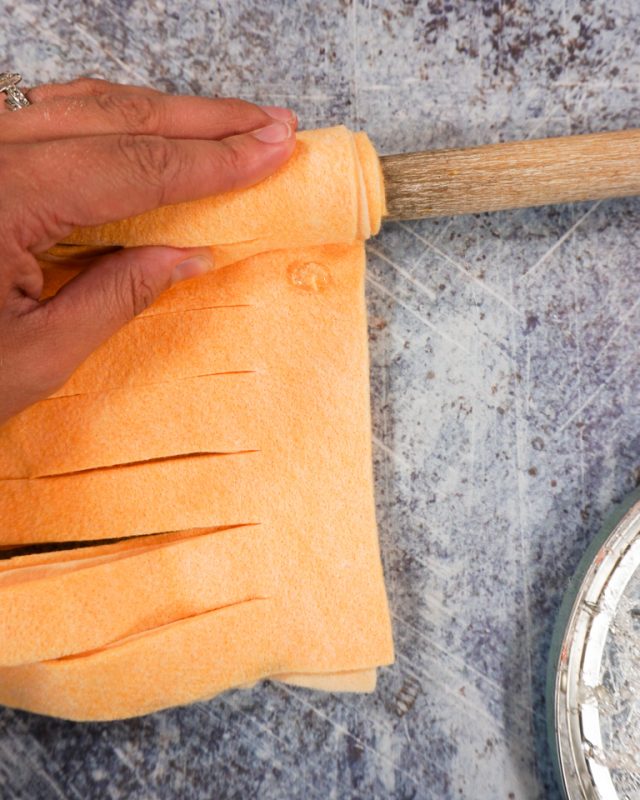
Start by hot gluing the edge of the felt to the stick.
Start rolling the felt around the stick. Add some hot glue every time you roll the felt.
(I didn’t do this the first time I made a bunch of little DIY brooms, and the felt started to pull off in the craziness of Quidditch.)
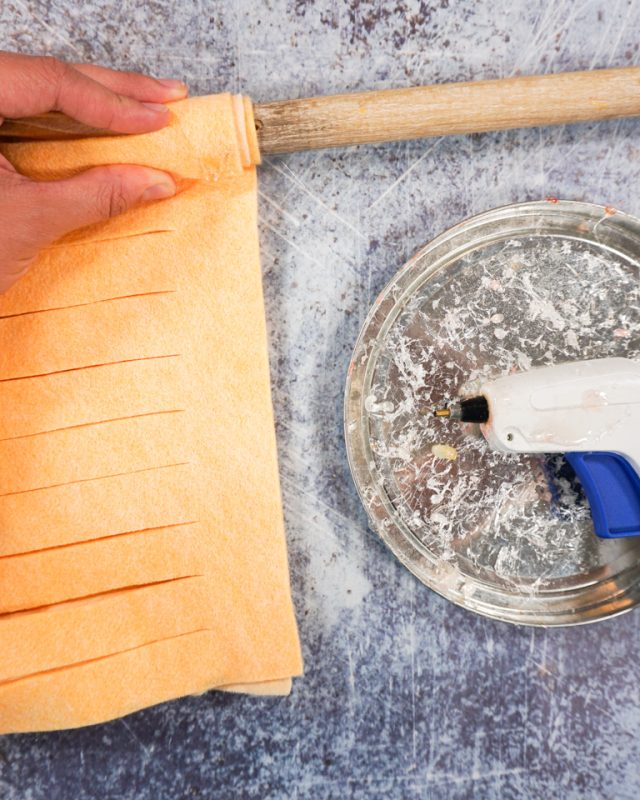
Keep rolling the felt around the stick, and keep adding hot glue every time you roll the felt.
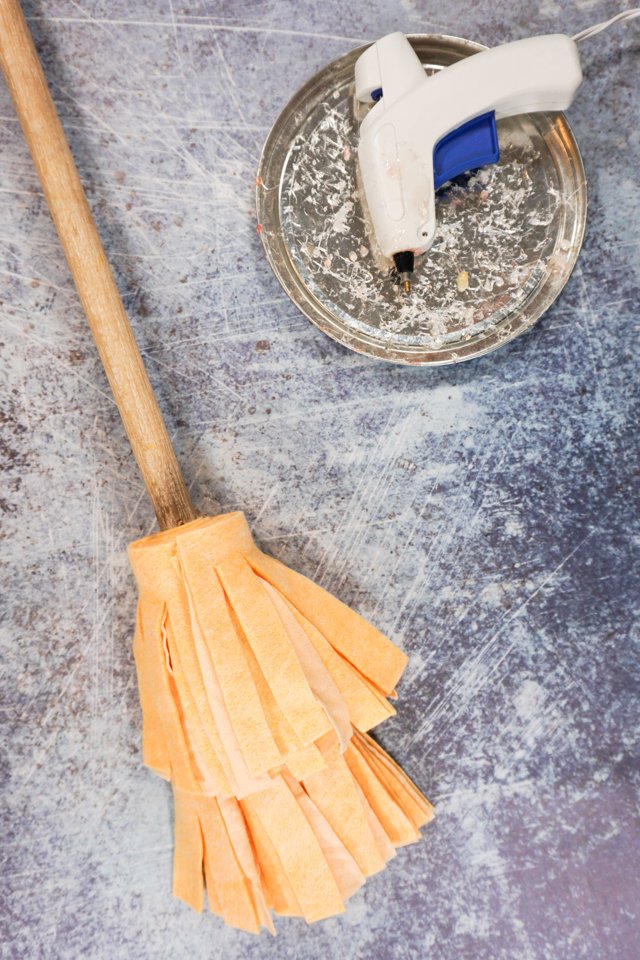
When you get to the end add a bunch of hot glue to secure the end.
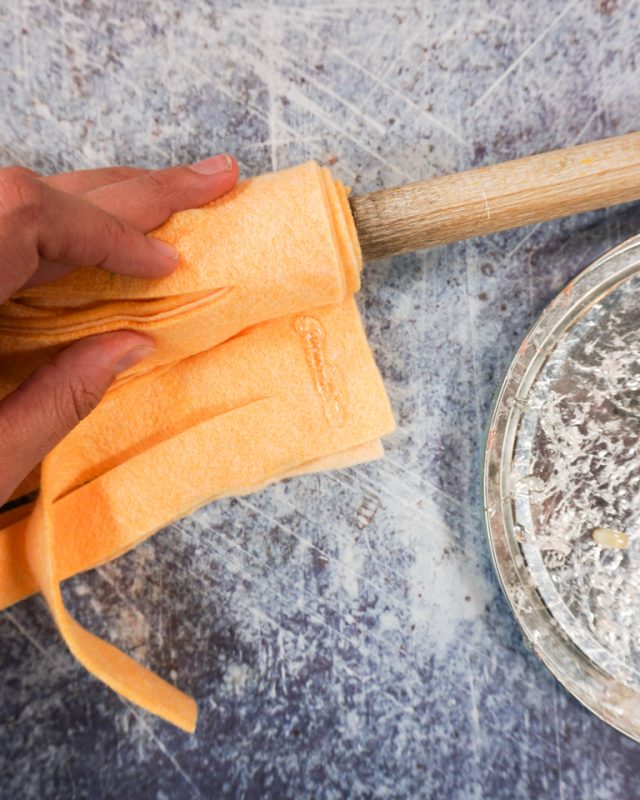
Do the same with the smaller rectangles of felt by first gluing the layers together, and then rolling and gluing the felt to the stick.
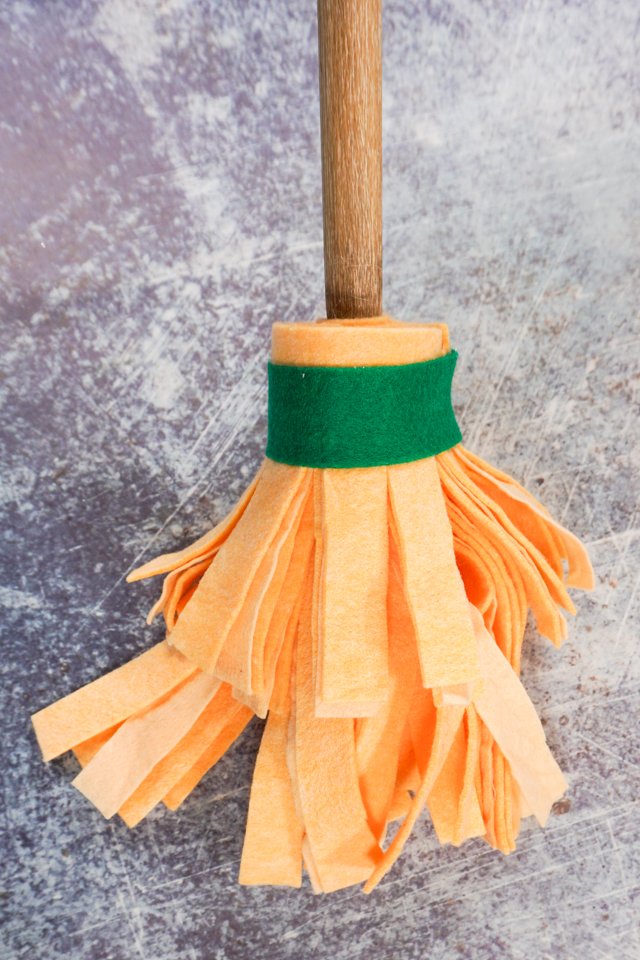
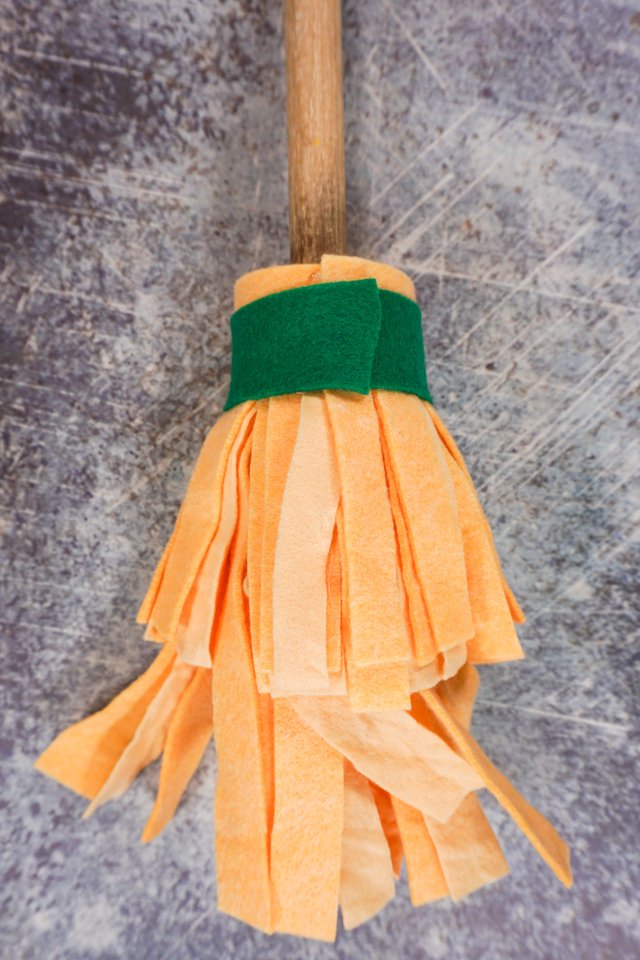
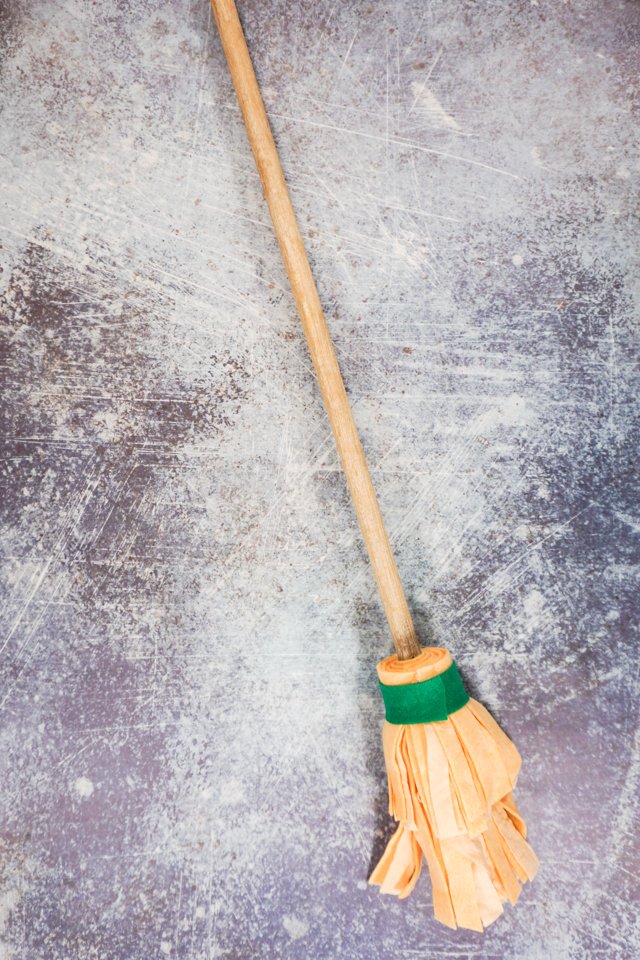
Cut a 1 inch strip of colored felt to “bind” the felt broom. I was originally going to use brown, until I realized it was boring and chose green instead. The green matched my daughter’s witch dress, but feel free to choose whatever color you want.
Glue one side of the felt near the top of the broom bristles.

Wrap the colored felt around and secure it with glue.
You finished! Add it to a DIY witch costume or a DIY Harry Potter costume.
If you make something using this tutorial, I’d love to see! Please share it on social media with the hashtag #heatherhandmade and tag me!

I believe small sewing moments can create great joy. Find your own “right” way to sew. -Heather