
DIY Pumpkin Pillow Applique

This post may contain affiliate links.
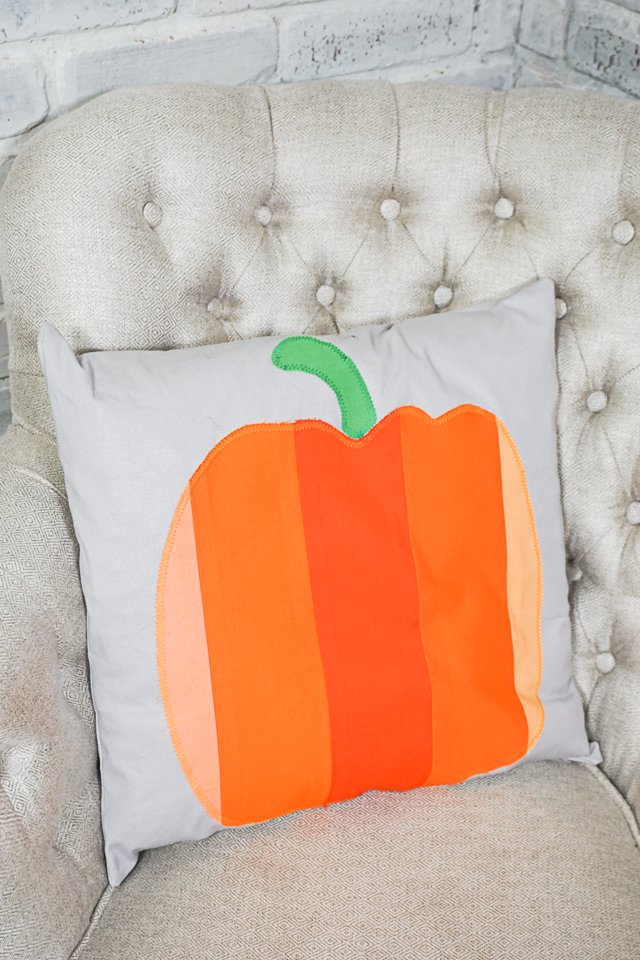
Learn how to make a DIY pumpkin pillow with scraps of orange fabric. Cut the pumpkin shape with the Cricut Maker and applique with a sewing machine.
Are you getting ready for Fall yet? It’s still hot here, but I often get in the mood for Autumn a little early. I think the kids going back to school makes it feel like the season is changing.
I like to pull out pumpkin and Autumn leaf inspired decorations first, and then transition into Halloween later. The first thing I made was a DIY pumpkin pillow that uses up scraps of fabric. It’s a simple but cute applique.
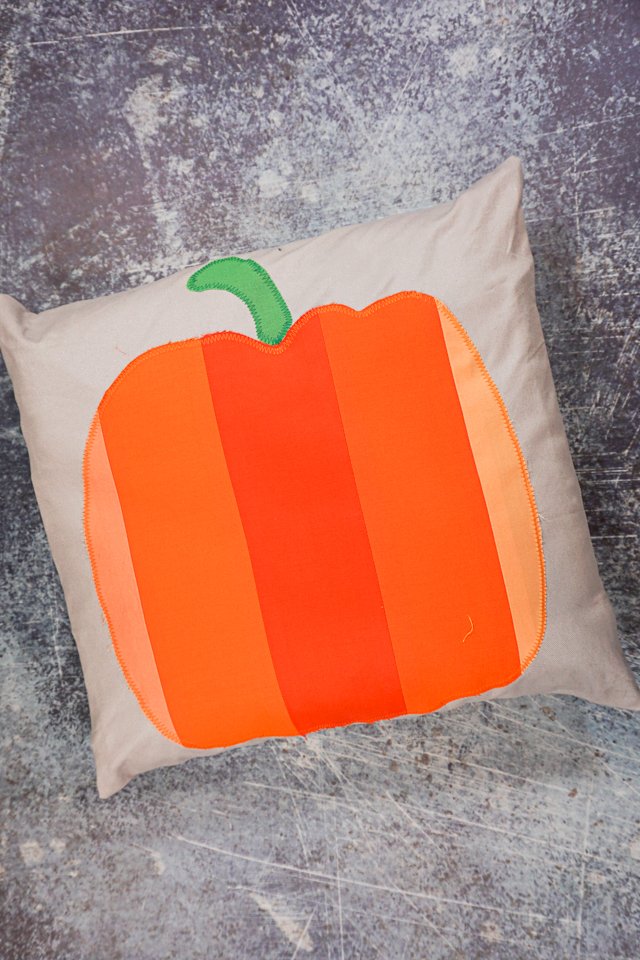
I chose to leave my pillow design simple so that the pumpkin would shine, but you could add words or even a jack-o-lantern face to make it more exciting.
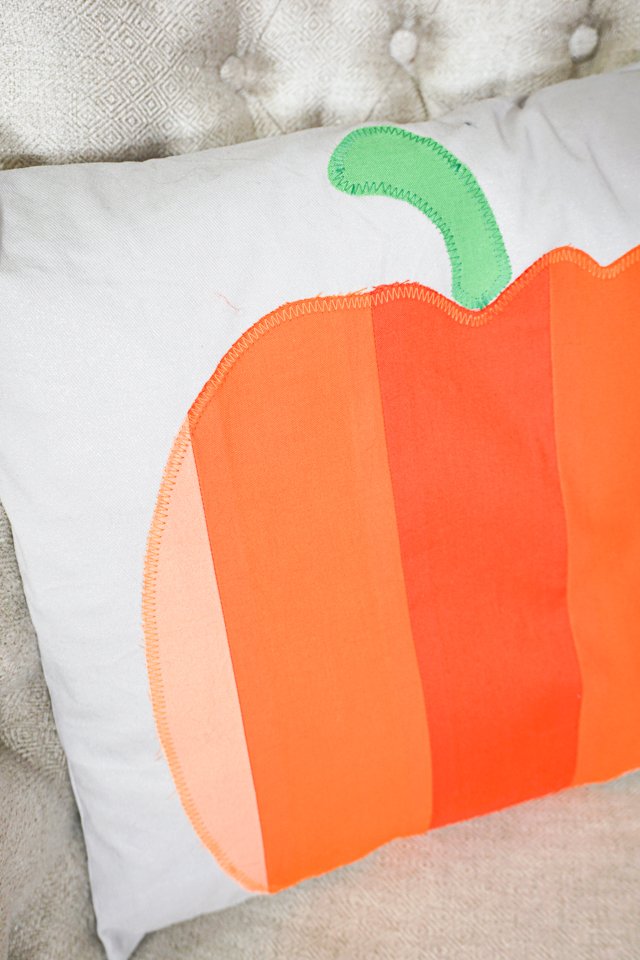
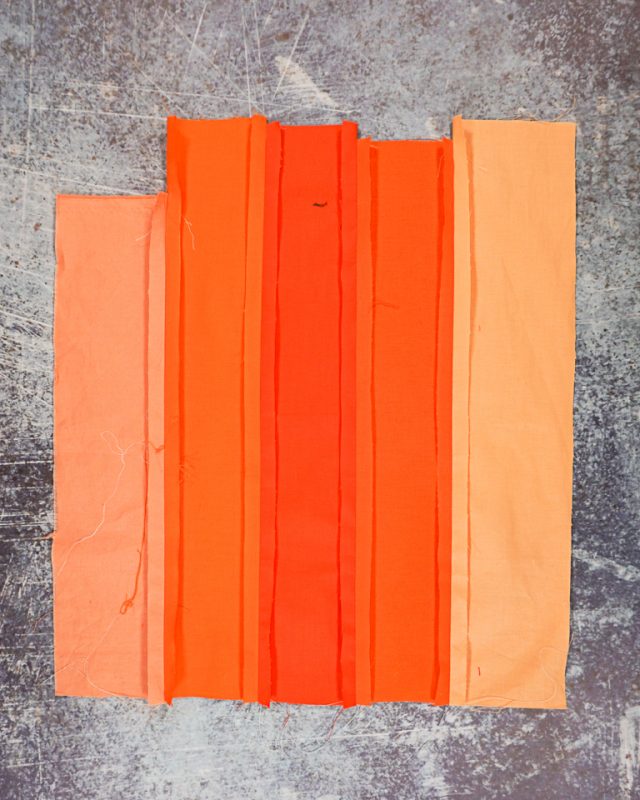
I loved that I was able to use up some orange scraps of fabric for this pumpkin applique. The scraps were small enough that I would have had a hard time finding a way to use them.
I chose to add the pumpkin applique to a pillow cover that I was making. I would recommend doing that so that you have access to sewing the applique on instead of fiddling with the back as you sew.
Do you love sewing or Cricut projects? Try one of these:
- Cricut sewing projects
- Scrap fabric projects
- Fall sewing projects
- Halloween sewing projects
- Cricut Halloween projects
- Ways to sew a pillow
- Applique patterns and ideas
DIY Pumpkin Pillow Applique
supplies
- Orange scraps of fabric
- Green scrap of fabric
- 1/2 – 1 yard of fabric for pillow cover – measurements for a pillow cover
- Fusible double sided adhesive – lightweight
- Cutting machine like the Cricut Maker*
- Sewing tools
- Sewing machine
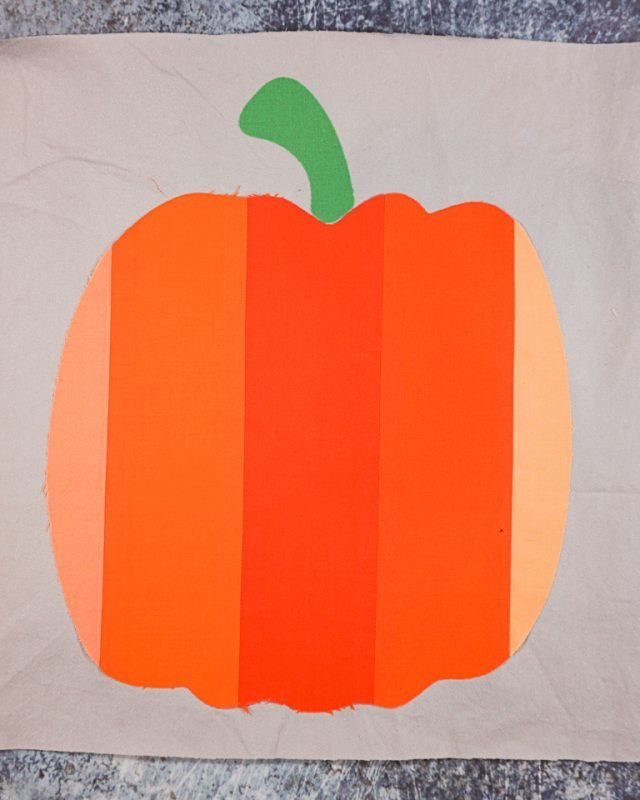
First, the orange pieces of fabric into 4 inches by 12 inches tall. If your fabric is thinner pieces then just add more strips of orange fabric. If your scraps are shorter than 12 inches then just do some creative piecing to make a piece of fabric 12 inches by 12 inches.
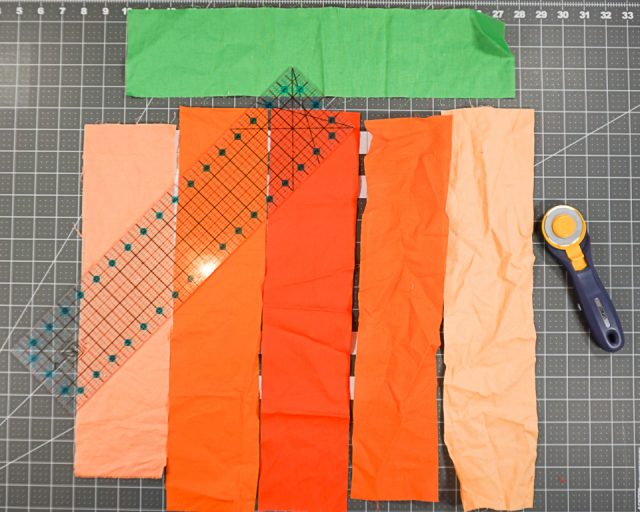
Press all the seams open. Trim the orange down to make a 12 inch by 12 inch square.
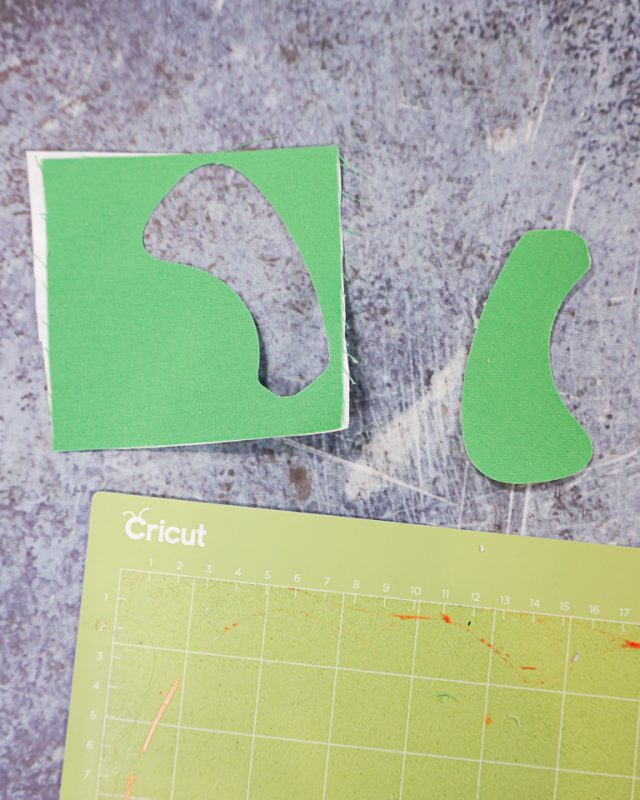
Cut a 4 inch by 4 inch piece of green fabric.
Cut a 12 inch by 12 inch piece of fusible double sided adhesive. Fuse it to the back of the orange pieced fabric.
Do the same to the small green fabric piece.
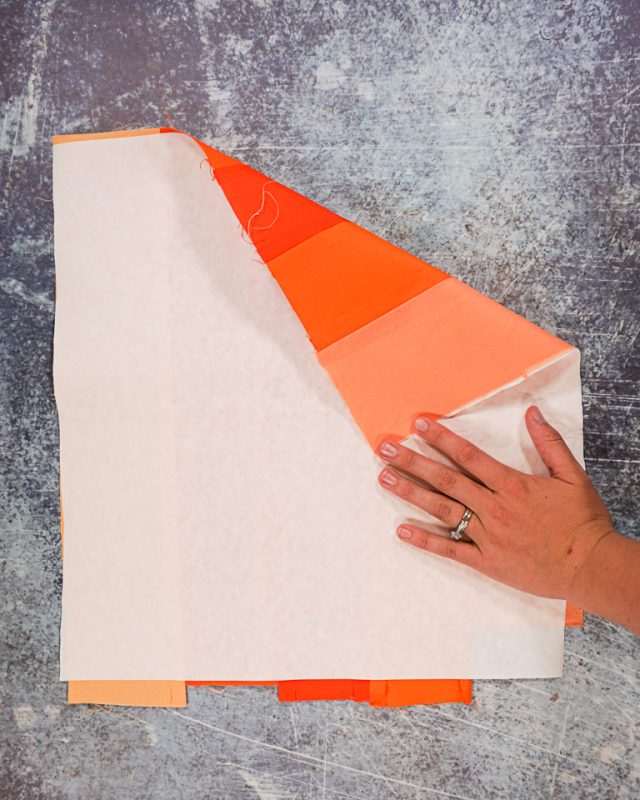
Use a cutting machine to cut out a pumpkin shape from the fabric. Place the fabric towards the mat with the paper backing of the adhesive side up.
You can also draw a pumpking shape onto the paper backing and cut it out by hand.
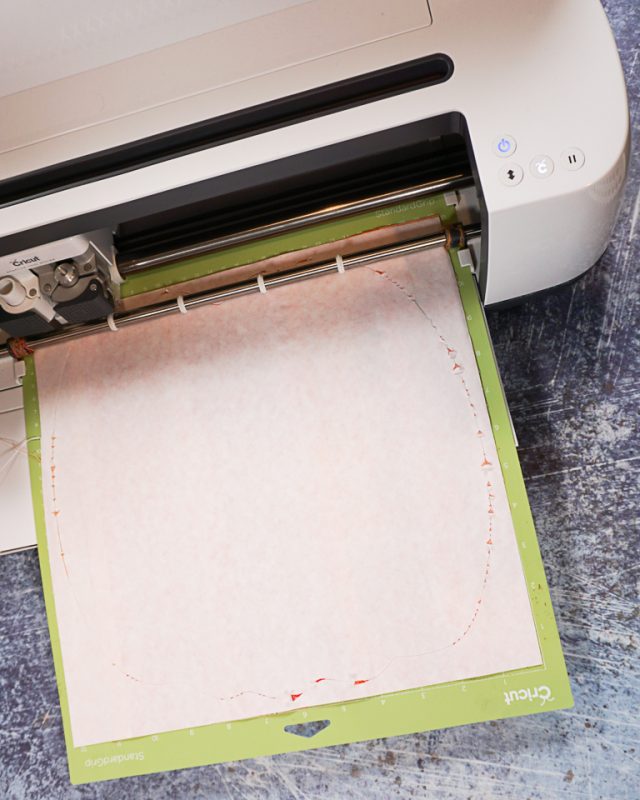
Peel the excess fabric away from the pumpkin and peel the pumpkin off of the mat.

Use the cutting machine to cut a green stem from green fabric. Peel it off of the mat along with the excess fabric.
Peel the paper backing off of the stem and the pumpkin.

Fuse the pumpkin and the stem to the fabric that you will be using for the pillow cover.
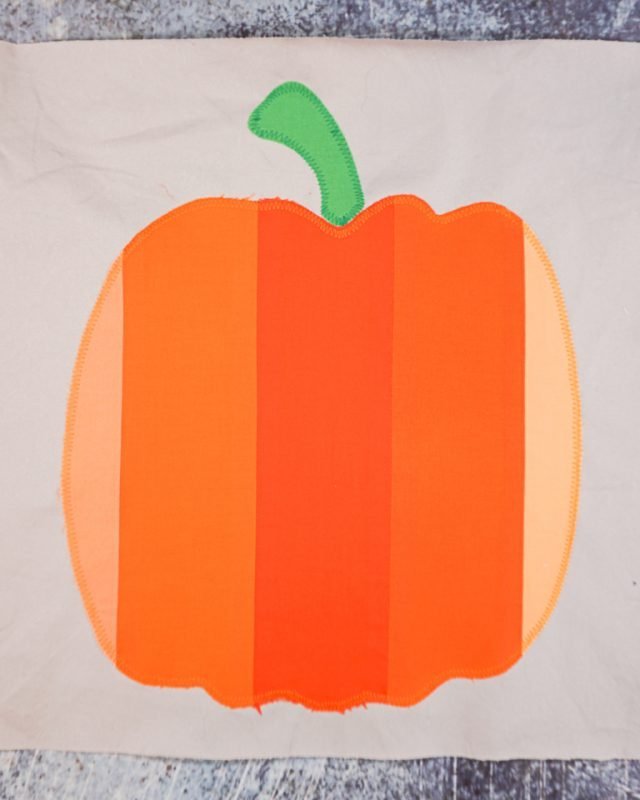
Use a zigzag stitch and matching thread to sew around the shape of the pumpkin and the stem. One side of the zigzag stitch should line up with the edge of the fabric. I tried to be pretty accurate, but I didn’t worry too much as I went around.
Sew the edges of the pillow cover with right sides together to finish it. Turn the pillow cover right side out.
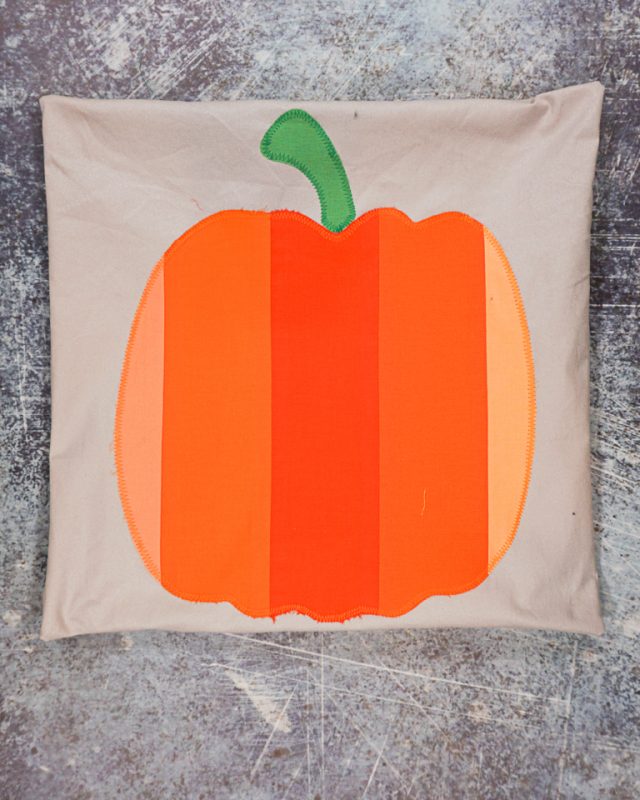
Stuff a pillow form into the pillow cover to finish.
If you make something using this sewing project, I’d love to see! Please share it on social media with the hashtag #heatherhandmade and tag me!


I believe small sewing moments can create great joy. Find your own “right” way to sew. -Heather