
DIY Marshmallow Costume

This post may contain affiliate links.
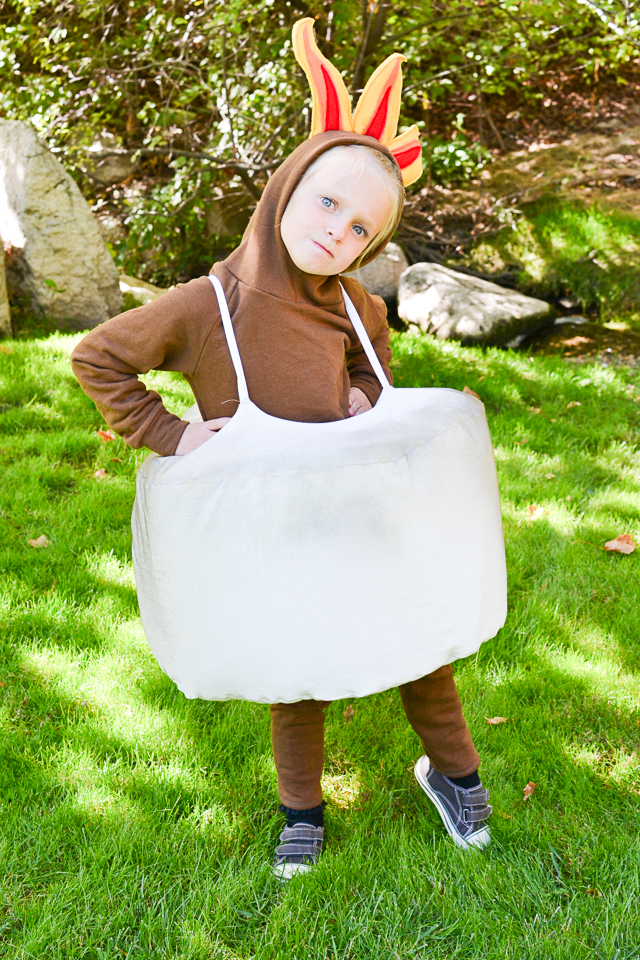
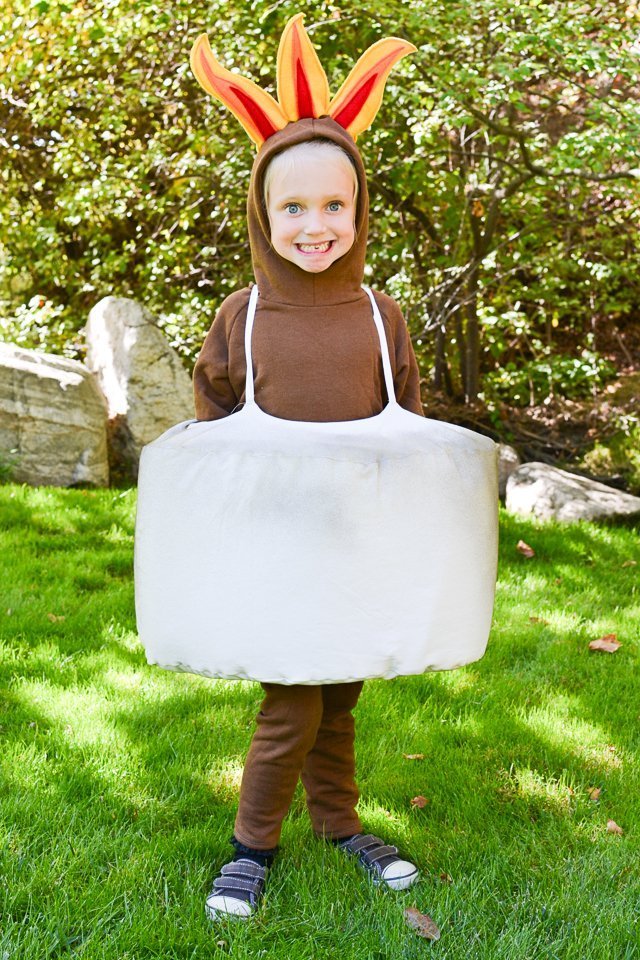
Learn how to make a DIY marshmallow costume that is roasting on a stick in the fire! The marshmallow is easily worn over the shoulders and stuffed with batting!
I was so excited to create such a unique Halloween costume. I’ve never seen anyone dress up like a marshmallow. I wanted to avoid a Fortnight and a Ghostbuster look.
I also wanted her to be recognizable and not just dressed up in fluffy white clothes. Instead I went for a cute and classic DIY marshmallow costume that’s being roasted on a stick.
My daughter has been requesting to be a marshmallow for Halloween for about a month. I gave her lots of time to think about it and decide on her costumes, but she daughter kept going back to a marshmallow.
My favorite part is the touch of toasting I did with brown spray paint around the top.
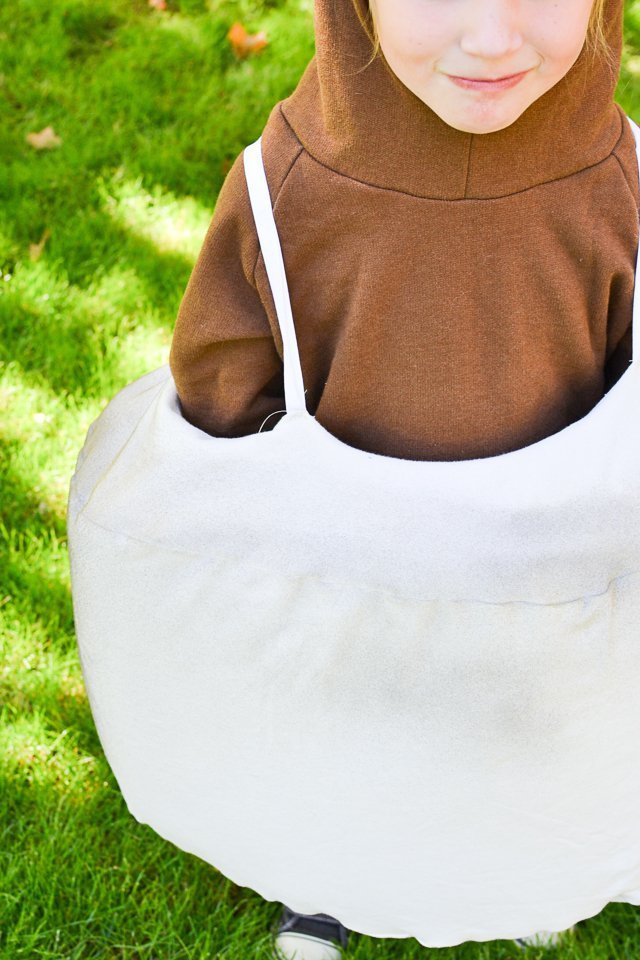
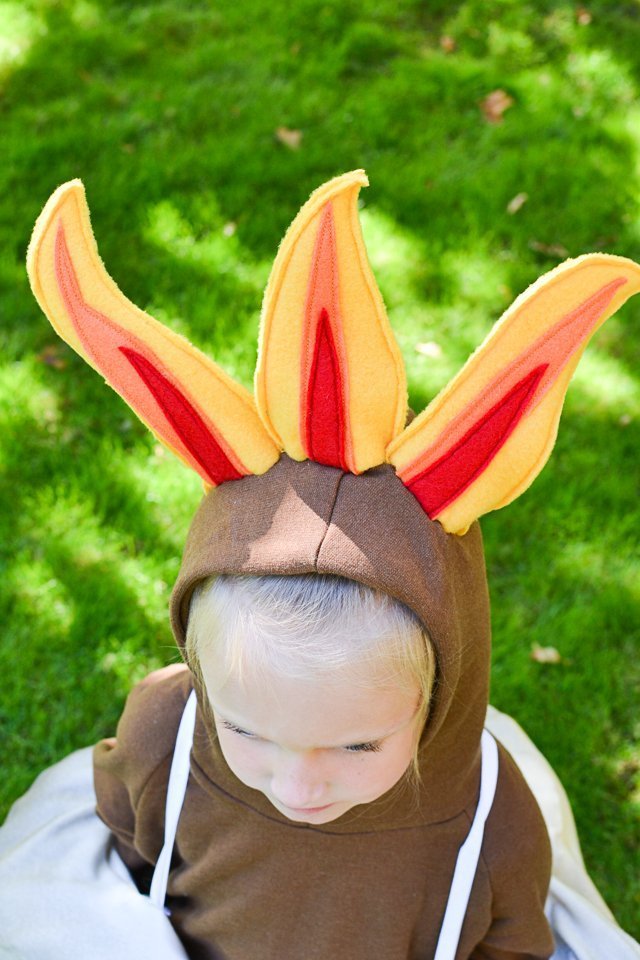
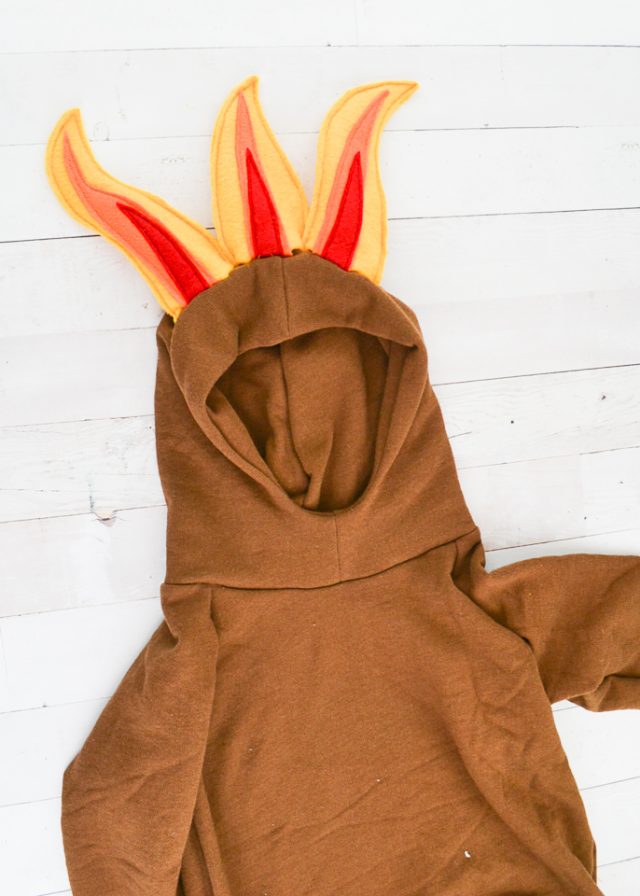
I made a big white toasted marshmallow that she could wear over her clothes. Then I made her brown leggings and a brown sweatshirt to be the “stick” that the marshmallow is being roasted on. Then I added a crown of fire to the hood to finish the look. The fire crown is just so fun!
It’s so fun to make her marshmallow costume dreams come true. I really, really enjoyed working on this costume, and I feel like this is one of the best costumes I’ve ever made. It is the exact look I had it my mind.
Do you love to make costumes? Check out some of these ideas:
- DIY costume ideas
- Free costume patterns for kids
- DIY cupcake costume
- DIY Marshmello Fortnite Costume
DIY Marshmallow Costume
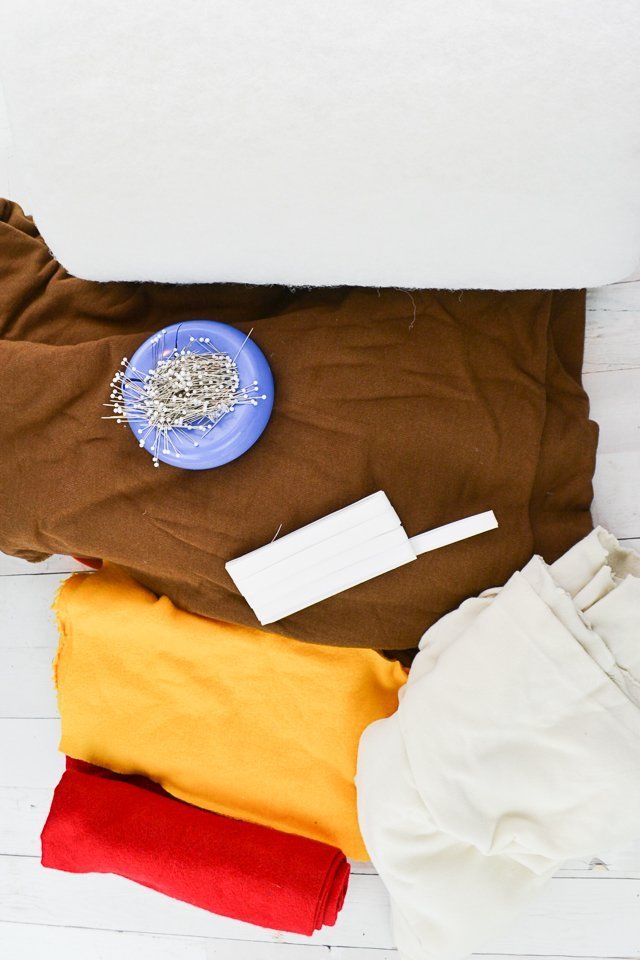
supplies
- 1-2 yards of stable white knit fabric (like ponte or french terry with spandex)
- Brown hoodie and brown leggings – I made mine, but you can buy them
- Batting 30″ x 10′ – I used cushion wrap batting. (buy it at amazon*, joann fabrics*, or hobby lobby*)
- White ribbon or bias binding – learn how to make and use bias tape
- scraps of orange, yellow, and red felt
- sewing supplies
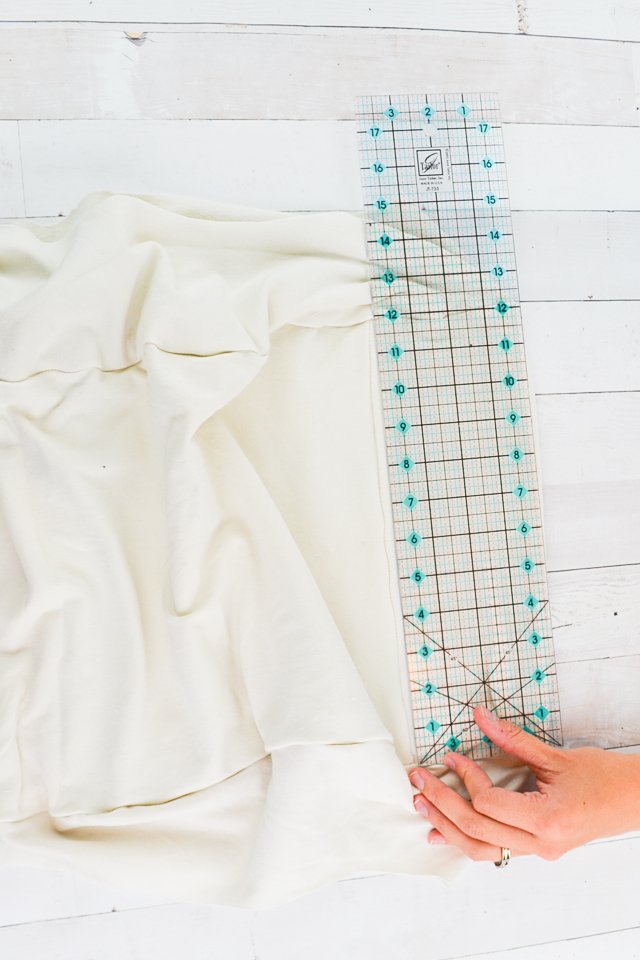
Cut two donut shapes out of the white fabric. I made my inner circle 12 inches in diameter plus seam allowance and the outer circle 18 inches in diameter plus seam allowance. I felt like my marshmallow stretched slightly bigger than these measurements.
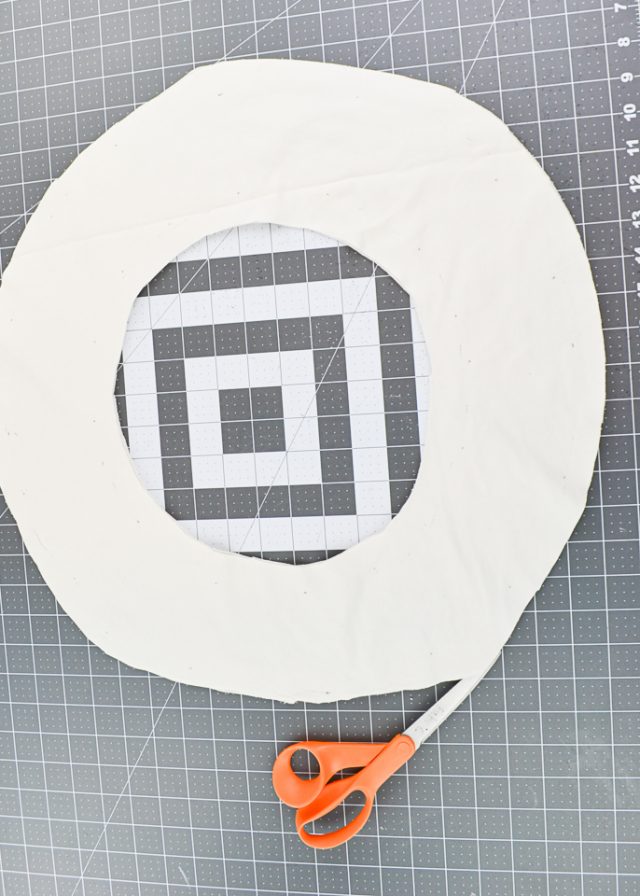
Using a circumference calculator find the measurement of the circumference of each circle. Cut out two rectangle 12 inches tall by the inner and outer circumference. Remember to add seam allowance!
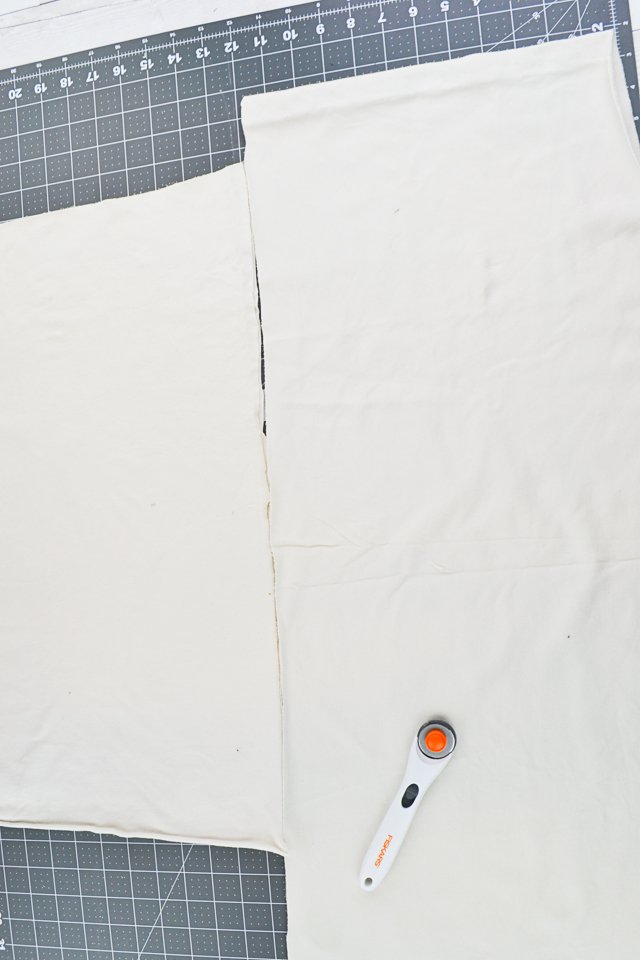
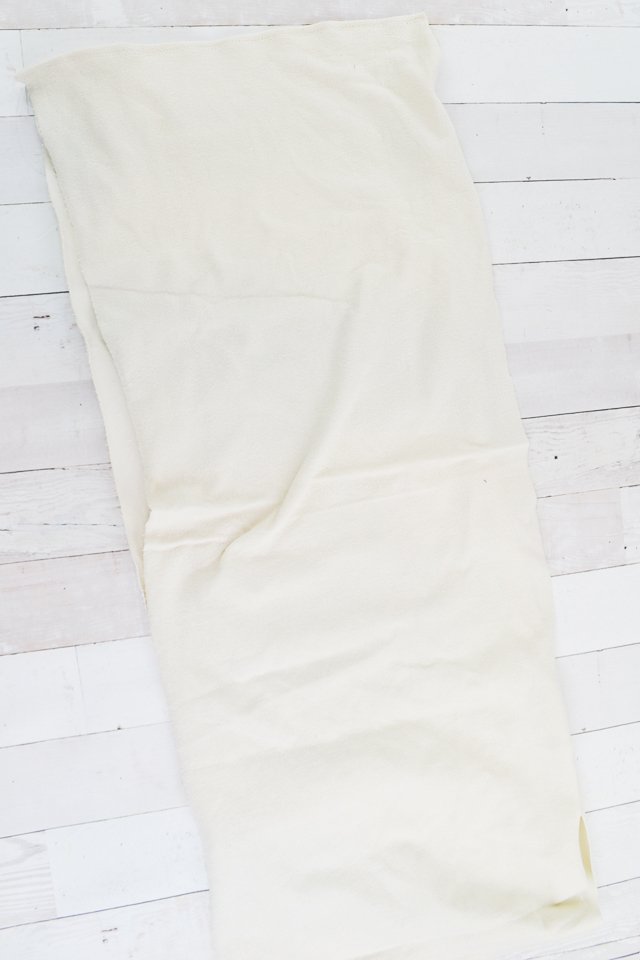
Sew each rectangle into a tube by sewing the short ends together. Use a zigzag stitch.
Pin the outer circle to the large tube with right sides together. Divide them both into four equal sections and then match up each section. Use lots of pins to distribute the rectangle evenly around the circle.
Sew around with a zigzag stitch. Do the same to the other side.

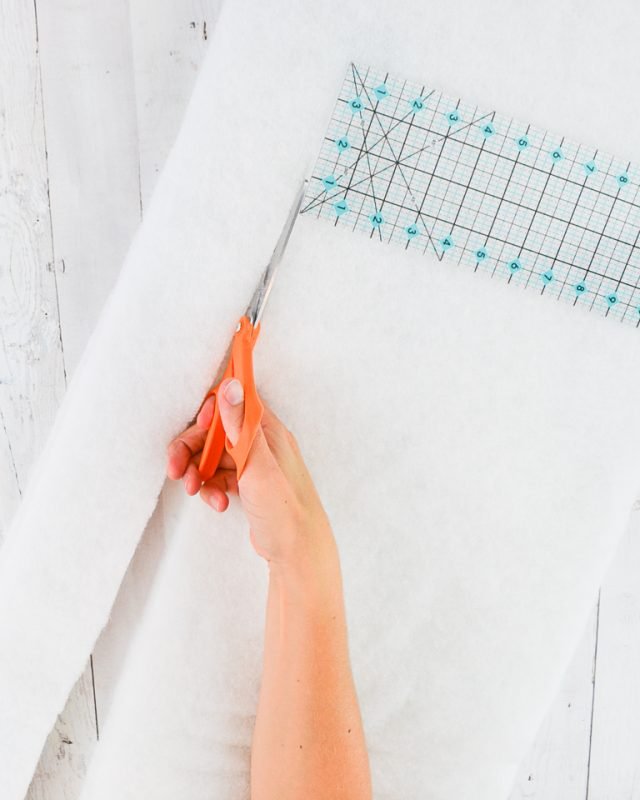
Measure the height of your marshmallow.
Use this measurement to cut the batting to the right height. I folded by batting in half and cut it as a double layer.
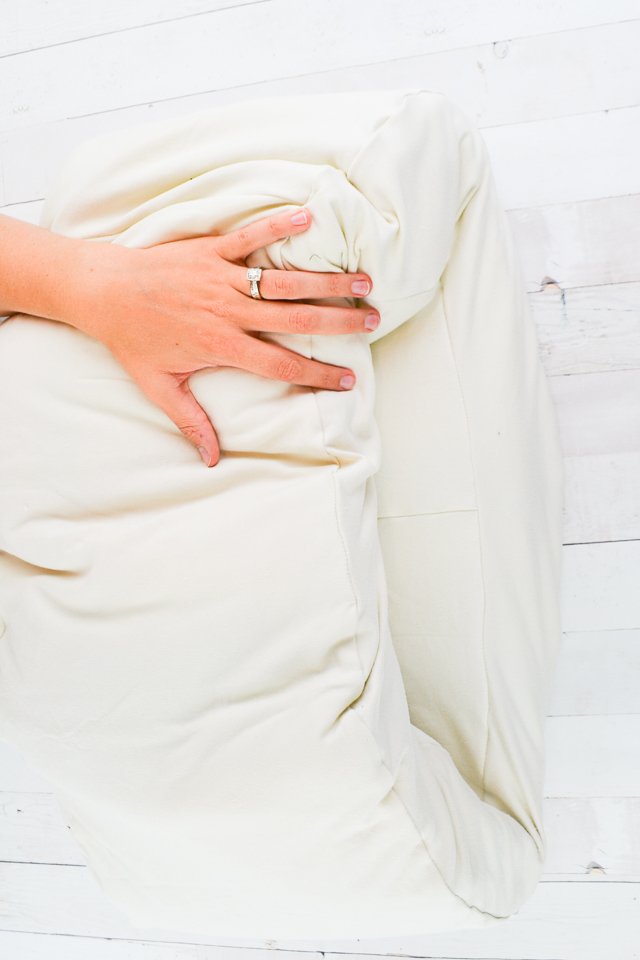
Take two corners of the batting and tack it into the marshmallow. I sewed one corner to the upper seam allowance and the other corner to the bottom seam allowance of the marshmallow.
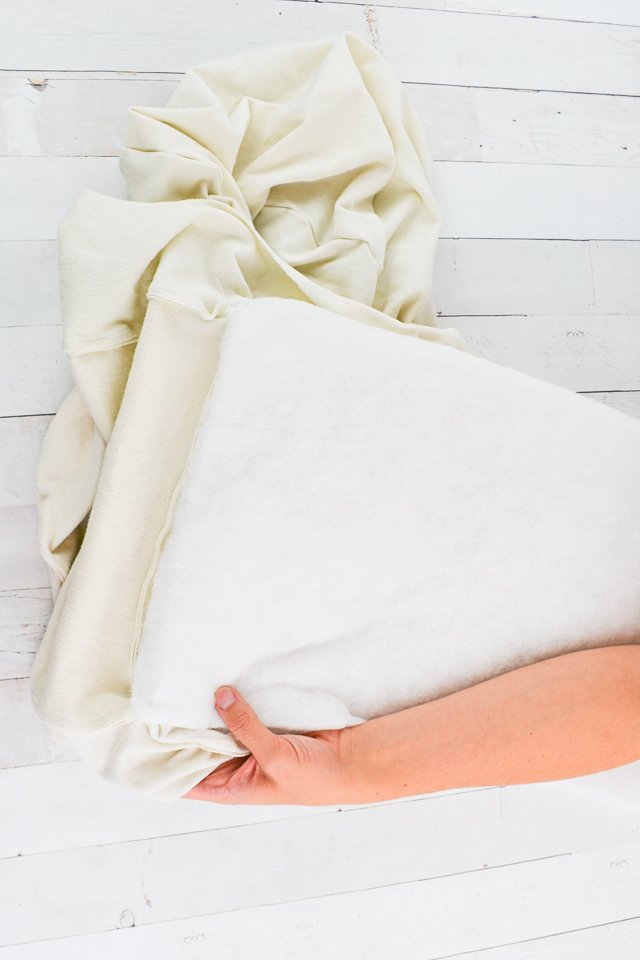
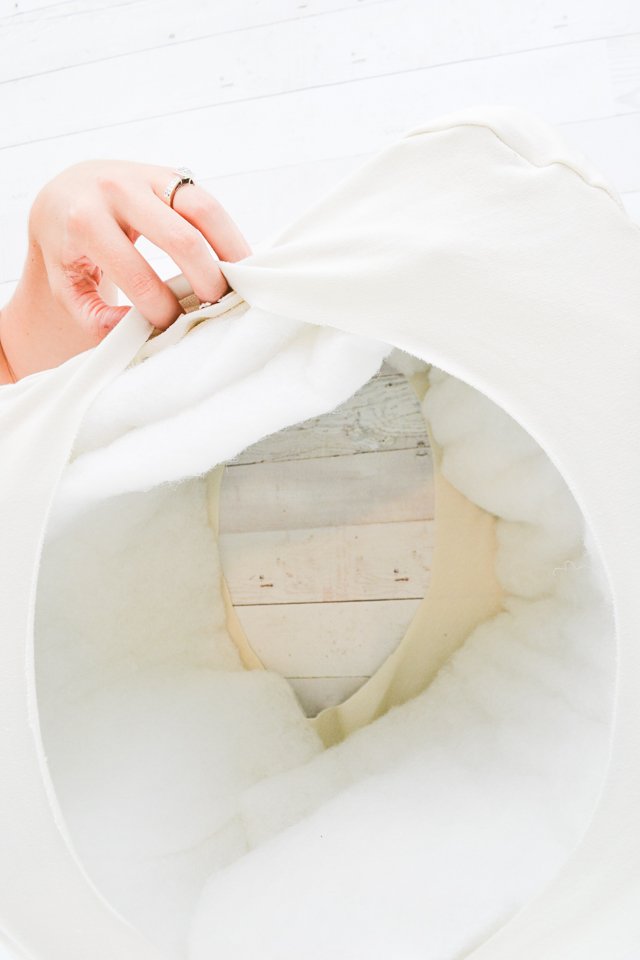
Carefully roll the batting around inside the marshmallow filling it up. I actually found the easiest way was to turn the marshmallow right side out and roll the batting around it. Then I turned it right side out and adjusted the batting on the inside.
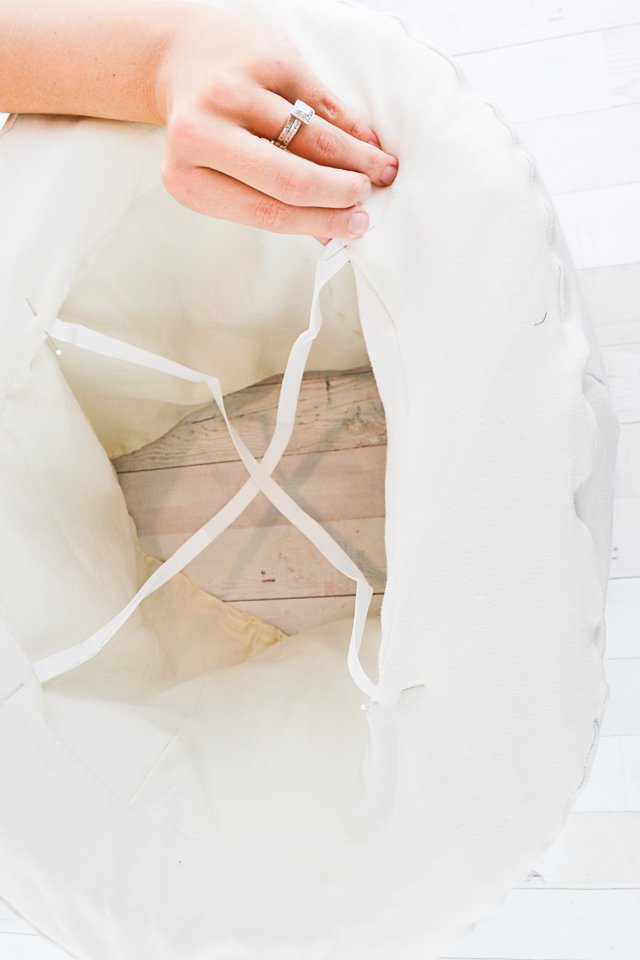
Sew the smaller tube to the inner circle of the donut pieces. One side I did right side together and then the other side I did wrong sides together so I would have to worry about turning it right side out.
Cut two pieces of ribbon or bias binding and sew it to the inner seams on the top of the marshmallow. I did a really strong straight stitch to hold it in place.
Cut pieces of yellow, orange, and red felt into fire like pieces. The yellow pieces all have double pieces, and the orange and red have one piece.
Sew the red and orange felt pieces onto one of the yellow pieces. I just topstitched them on.
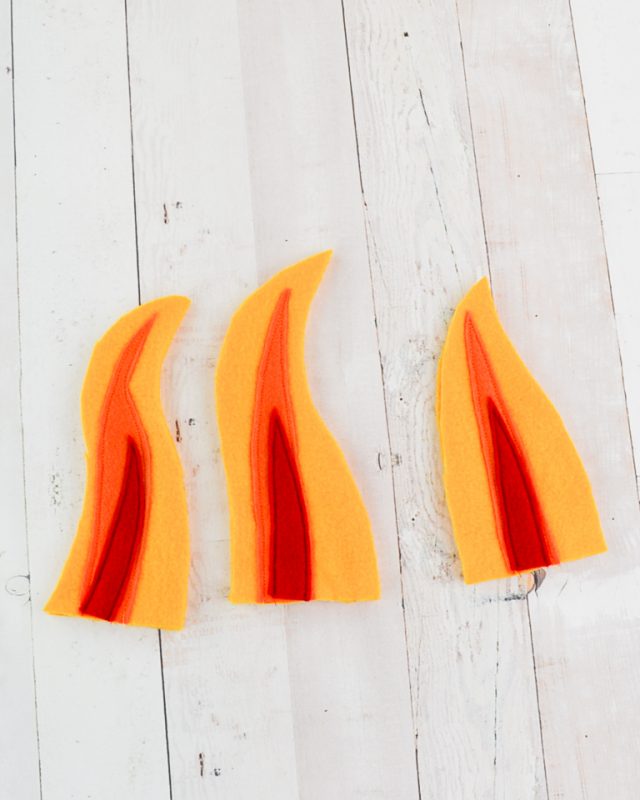
Place the front yellow pieces on the back yellow pieces and sew around the edge. If you want your fire to be extra stiff add interfacing before sewing the front and back together.
Hand stitch the fire pieces onto the hood. Overlap them slightly and make them look a little bit like a crown.
To add “toasting” to the marshmallow lightly dust the marshmallow with brown spray paint. Mine doesn’t show up well in the photos but there are a couple spots of toasting around the marshmallow near the top.
If you make something using this sewing project, I’d love to see! Please share it on social media with the hashtag #heatherhandmade and tag me!


I believe small sewing moments can create great joy. Find your own “right” way to sew. -Heather
That is about the cutest thing I have seen. I once made an M & M costume by a similar method. Wish I had thought about rolled batting. All thes ideas a re simply super.
thank you!
So adorable! Any chance you’d be willing to sell the marshmallow? My daughter’s name is March and we call her Marchmallow 🙂 She’d be so thrilled to have this costume!
Soooo cute! What a fun idea!