
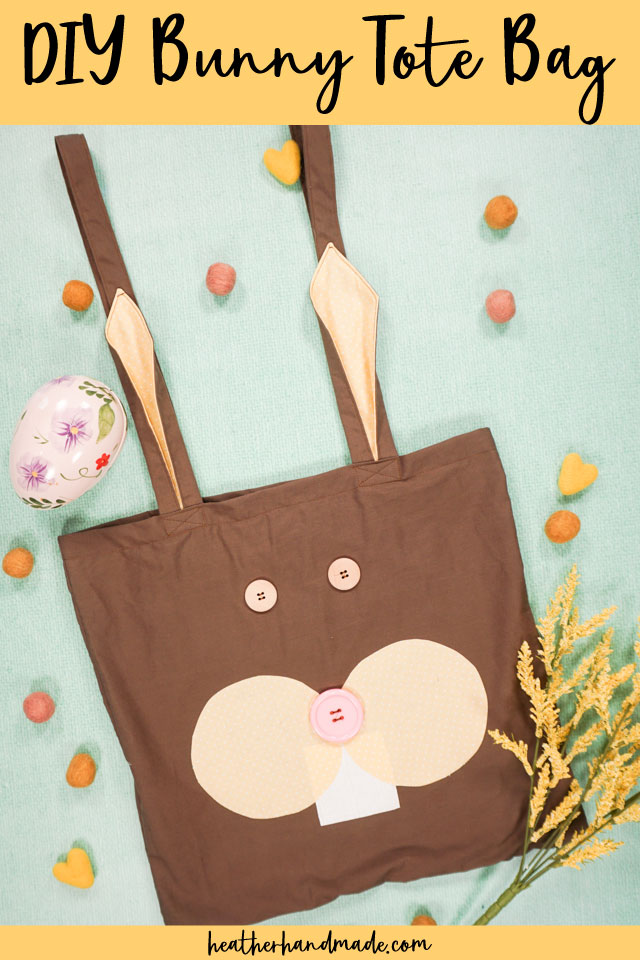
DIY Bunny Tote Bag

This post may contain affiliate links.
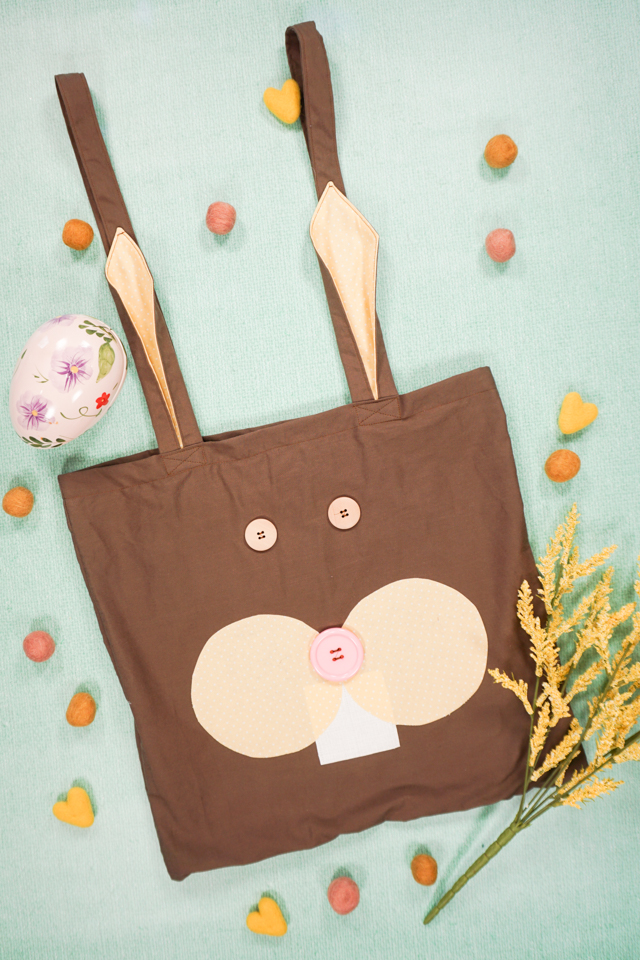
Learn to make a DIY bunny tote bag that is perfect for spring and gathering nature treasures! This beginner sewing project is easy and fun!
Every Spring I get excited to decorate with flowers, plants, and baby animals. I just love living in a place where I get four seasons and get to see the changing seasons. It’s really motivating for me.
I’ve put out my Spring decorations, but I needed a tote bag to carry library books and kids’ activities. I often choose a bunny design when the weather warms up, and that’s how the DIY bunny tote bag was born. I even created a free sewing pattern to share!
Once I finished my kids immediately asked if they could use it! They loved it so much. Tote bags always get a lot of use at our house.
They’ve already used it to get library books and to gather rocks, sticks, and flowers from the backyard.
What is a PDF sewing pattern?
A PDF pattern is a sewing pattern designed on the computer and organized so that it can be printed on several letter or A4 size pieces of paper.
I love using PDF sewing patterns because if the pattern gets ruined or if my children or I changed sizes, I can always print it again. It’ll never be destroyed since I have a digital version!
How do you use a PDF sewing pattern?
Open the PDF on a computer and click print. When printing make sure that the scaling is set to 100% or no scaling so that the pattern prints at the correct size.
Once the pattern is printed it can be taped together to get the full size. Then the pattern can be cut for each pattern piece size or individual sizes can be traced so that the pattern can be used again and again. Learn how to use PDF sewing patterns.
Do you love to sew? Try one of these sewing projects:
- Easter sewing projects
- Spring sewing projects
- Free tote bag patterns and tutorials
- DIY bunny baskets
- Bunny sewing projects
- Free tote bag sewing pattern

DIY Bunny Tote Bag
supplies
- half yard of solid colored canvas fabric or denim
- scrap of yellow fabric
- scrap of white fabric
- double sided adhesive
- three buttons – one pink and two tan
- Bunny tote bag sewing pattern – get it at the end of the post
- sewing tools
- sewing machine

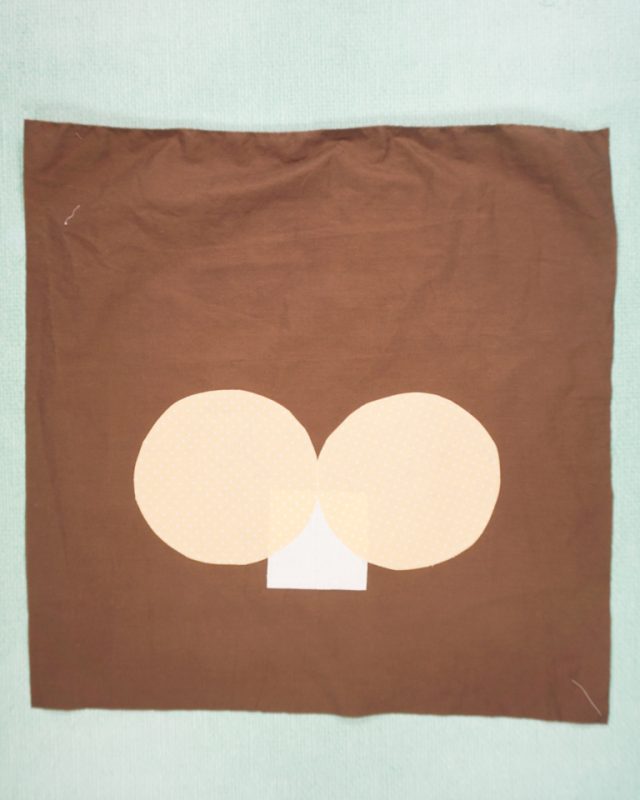
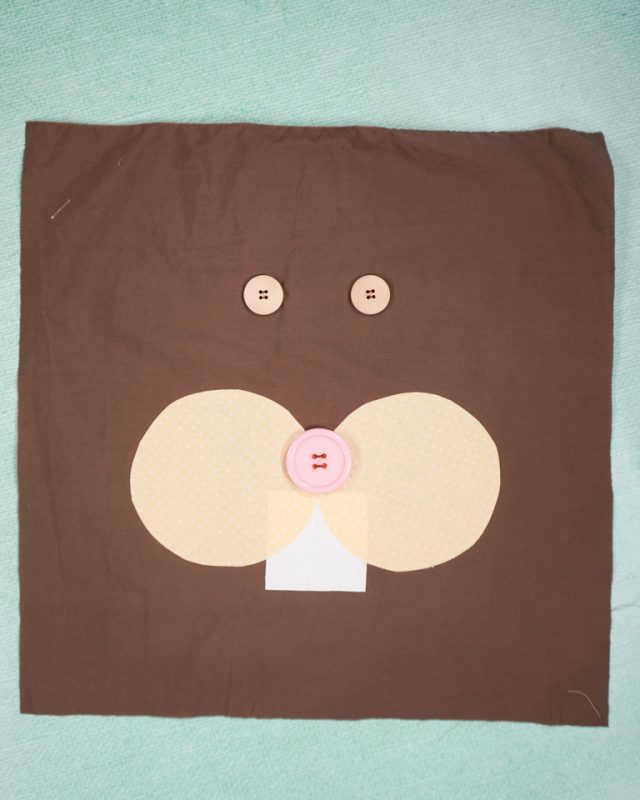
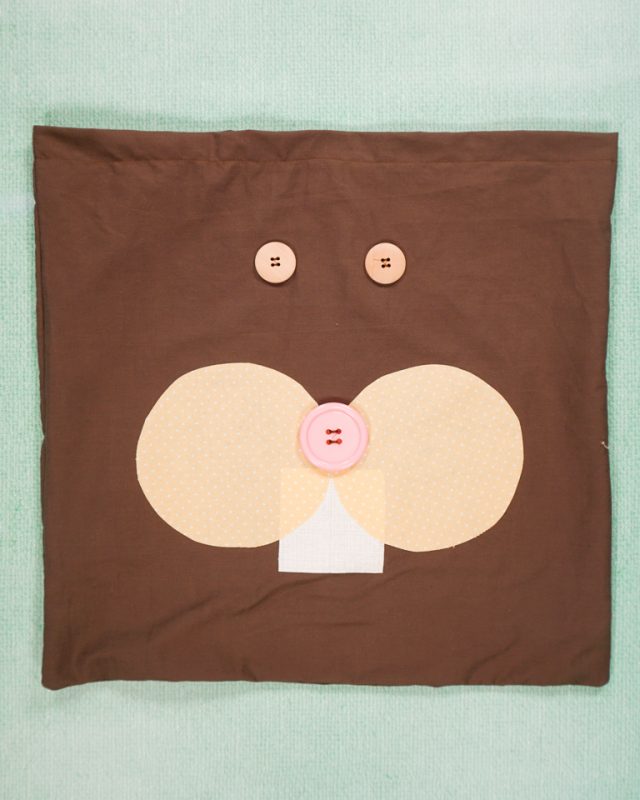
Apply the double sided adhesive to the back of the cheek fabric and the white fabric.
Cut out two circles from the cheek fabric.
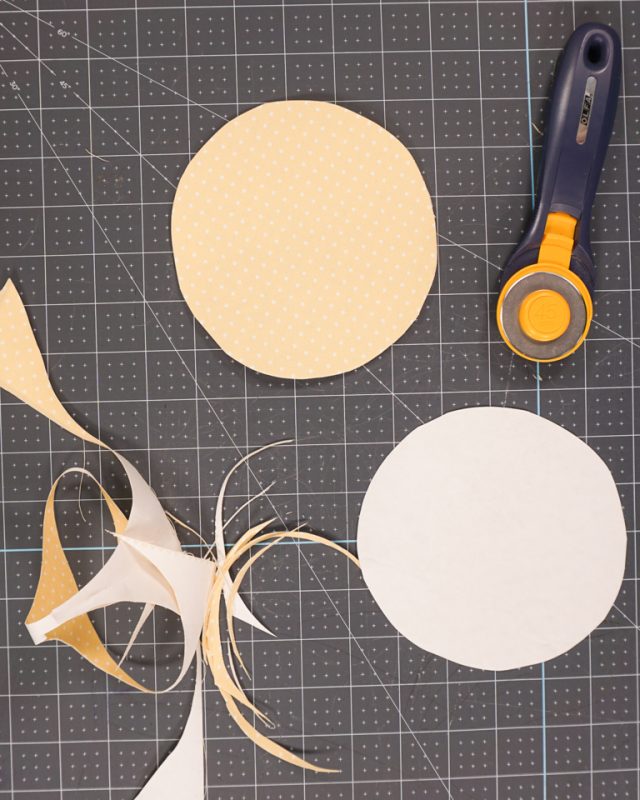
Cut out the teeth from the white fabric.

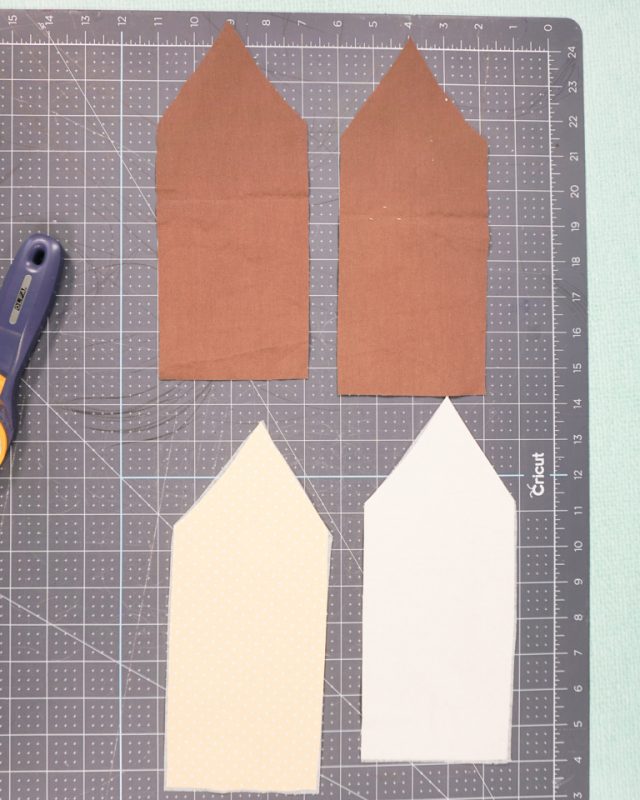
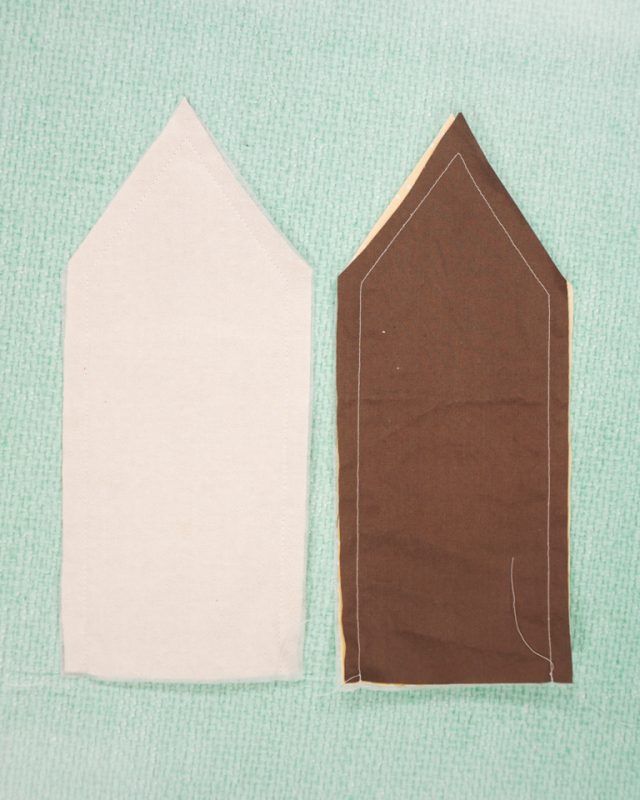
Cut out four ear pieces: two from the bag fabric and two from the cheek fabric.
Cut out two straps.
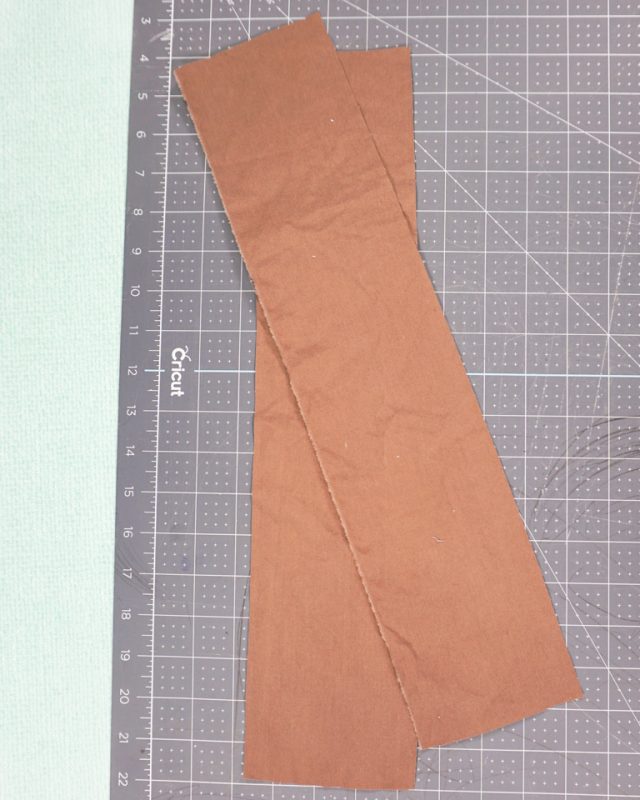
Cut out two bag pieces.

Fold the straps in half and press. Take each long side and fold it in to meet the center fold. Press those two folds in place.
Fold all three folds and press again. When folded the long raw edges are enclosed.

Place the face pieces on one bag piece. Fuse them to the bag. Edgestitch around the teeth and cheeks to secure.
Edgestitch along each side of the straps to keep the folds in place.

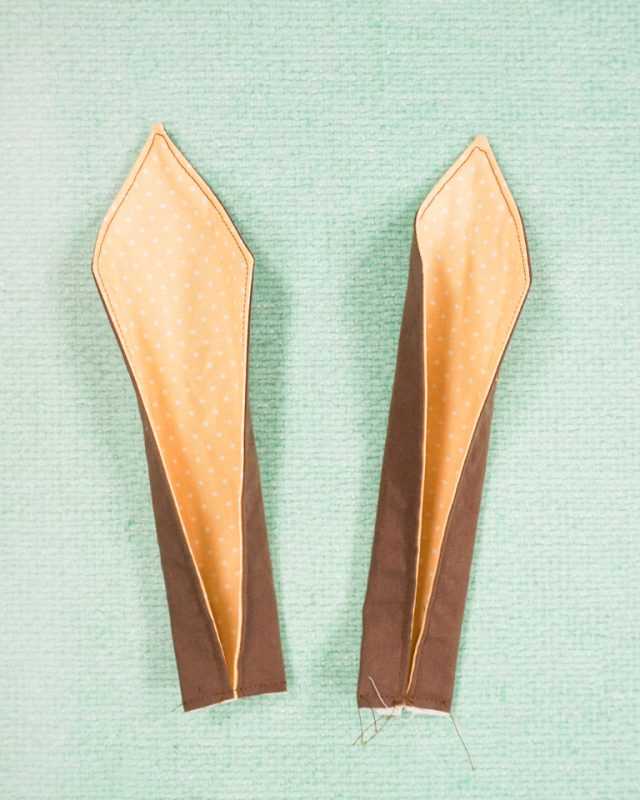
Place a brown ear right sides together with a yellow ear. Pin and sew along the sides and the point.
Trim the points to reduce bulk.

Turn the ears right side out and poke out the points.

Edgestitch around the sides and top of the ears. Fold the bottom sides into the center to create pleats.
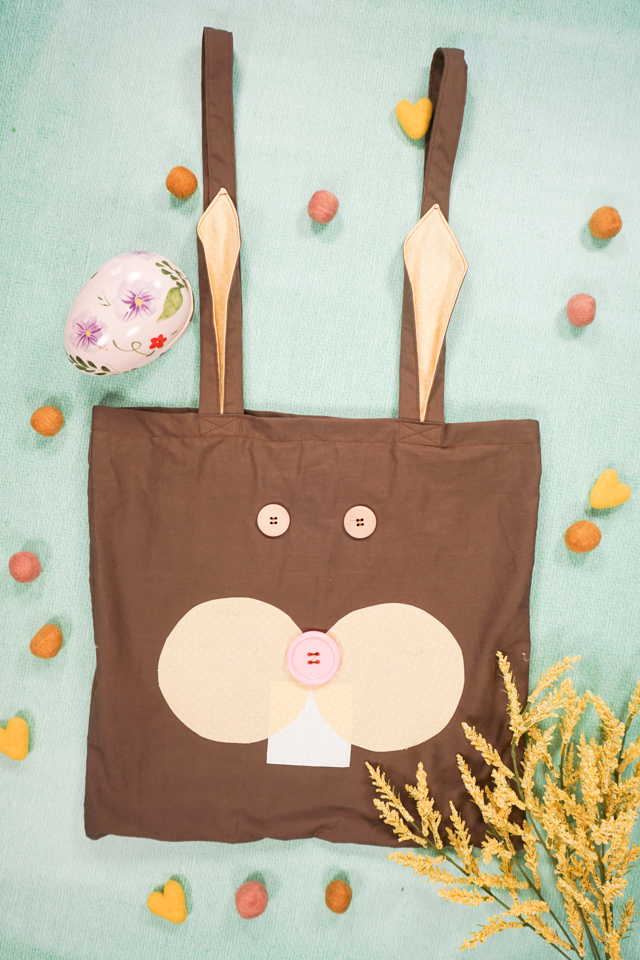
Sew the eye and nose buttons onto the face.
Place the bag pieces right sides together and sew the sides and the bottom. You can sew and serge or sew a French seam.

Fold the top down 1 inch and press. Fold it down another 1 inch and press. Sew around the top to keep the hem in place.
Add the straps and ears to the top of the bag. I made the straps from front to back instead of side to side. Place the ears right in front of the straps on the side with the face.
Sew a rectangle and “X” around the bottom of each strap. Tack the top of the ear to the straps to keep them up.

Get the Free Sewing Pattern here!
If you make something using this sewing project, I’d love to see! Please share it on social media with the hashtag #heatherhandmade and tag me!

I believe small sewing moments can create great joy. Find your own “right” way to sew. -Heather
What a darling bunny! I love your pattern as a tote bag, but I think it would also be cute as a toss pillow! pinning and sharing on Facebook. -Marci @ Stone Cottage Adventures
Oh I didn’t even think of that! That would be so cute!
This is soooo cute! And I love how this idea could be adapted for all sorts of different animal characters too.