
DIY Gingham Apron Tutorial

This post may contain affiliate links.
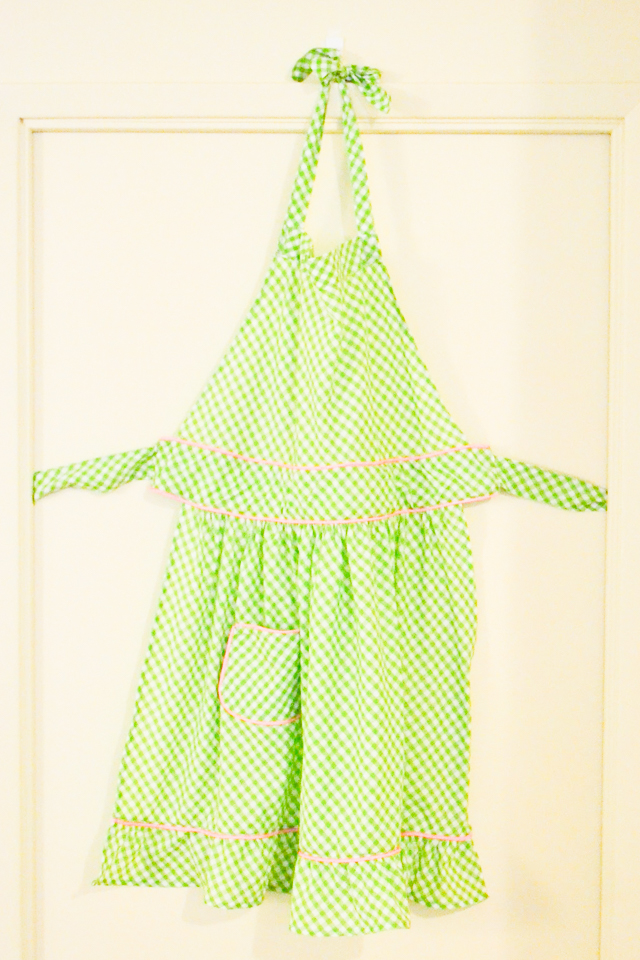
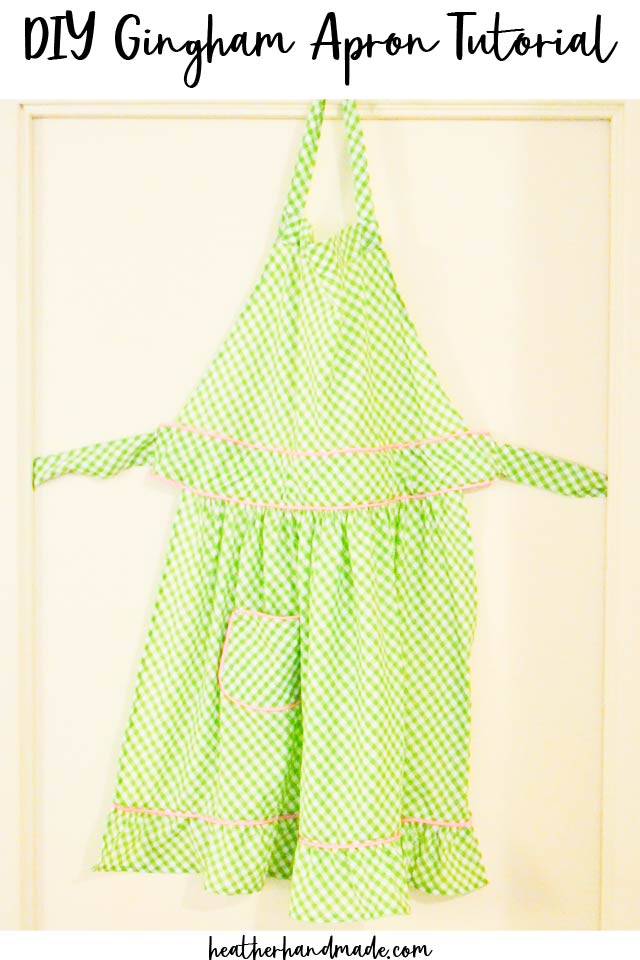
Learn how to make a DIY gingham apron with a free sewing pattern. This is an intermediate sewing project that makes the perfect gift!
I’m not in the habit of wearing aprons in the kitchen, but having a cute one always gives me the perfect incentive!
I love gingham fabric especially when it’s on the bias. I planned a whole gingham apron where everything is cut on the bias.
Do you love sewing projects? Check out these fun ones:
- Free apron patterns and tutorials
- DIY harvest apron
- Tea towel apron
- Beginner sewing projects
- Sewing gift ideas
- Scrap fabric projects
- Spring cleaning sewing projects
DIY Gingham Apron Tutorial
supplies
- 2-3 yards of cotton fabric
- 1 yard of interfacing
- 3 yards of piping – Learn how to sew piping
- sewing tools
- sewing machine
Pieces – cut all on the bias

Hem sides of bodice with a .25″ double turn.
Add 1.5 inch of interfacing to the top of the bodice. Hem top of bodice with a 1.5″ double turn. Fold it towards the front. Sew at the top and the bottom of the fold.

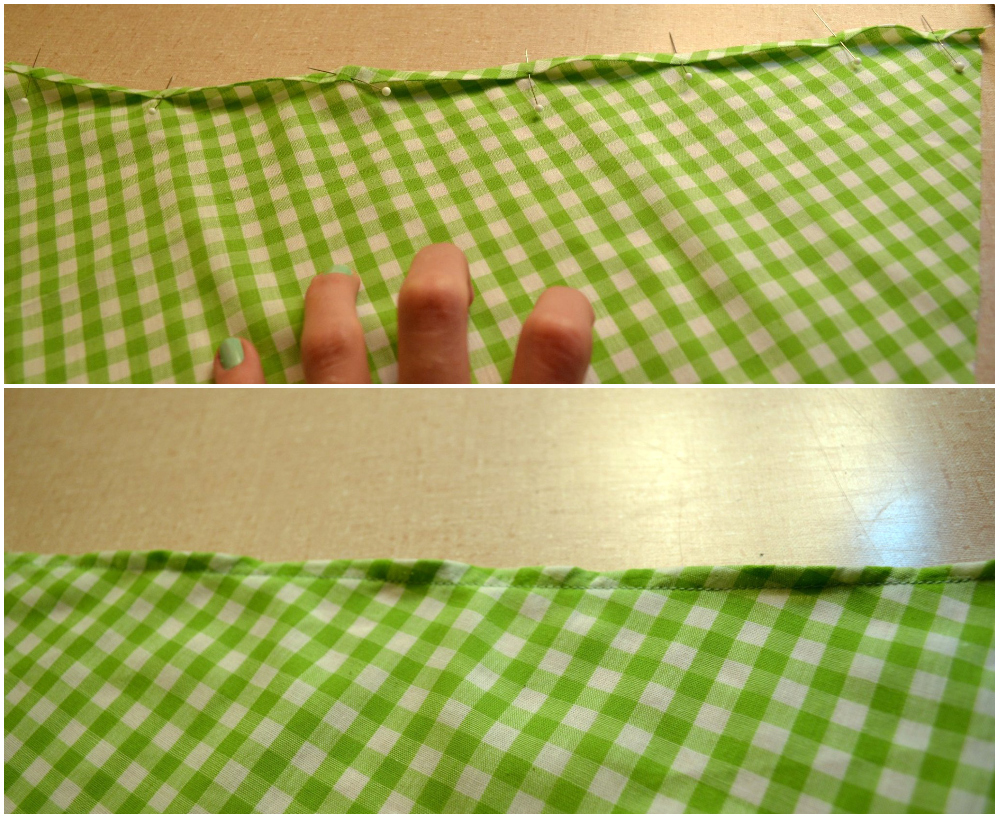
Gather the top part of the skirt and the top part of the flounce. (Here’s how to gather fabric.)
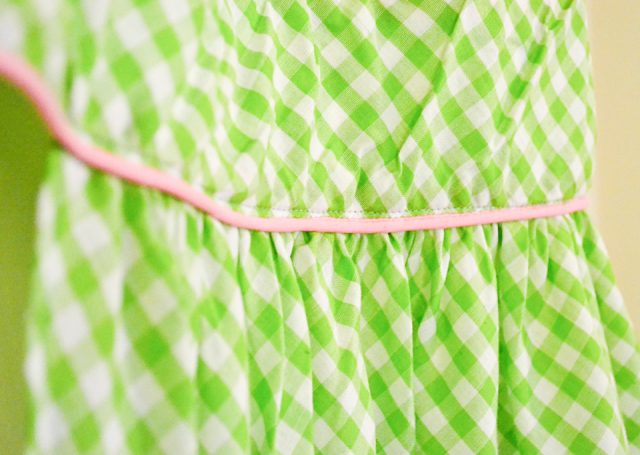
Sew piping onto the bottom edge of the skirt piece.
Sew the gathered edge of the flounce to the piped edge of the skirt.
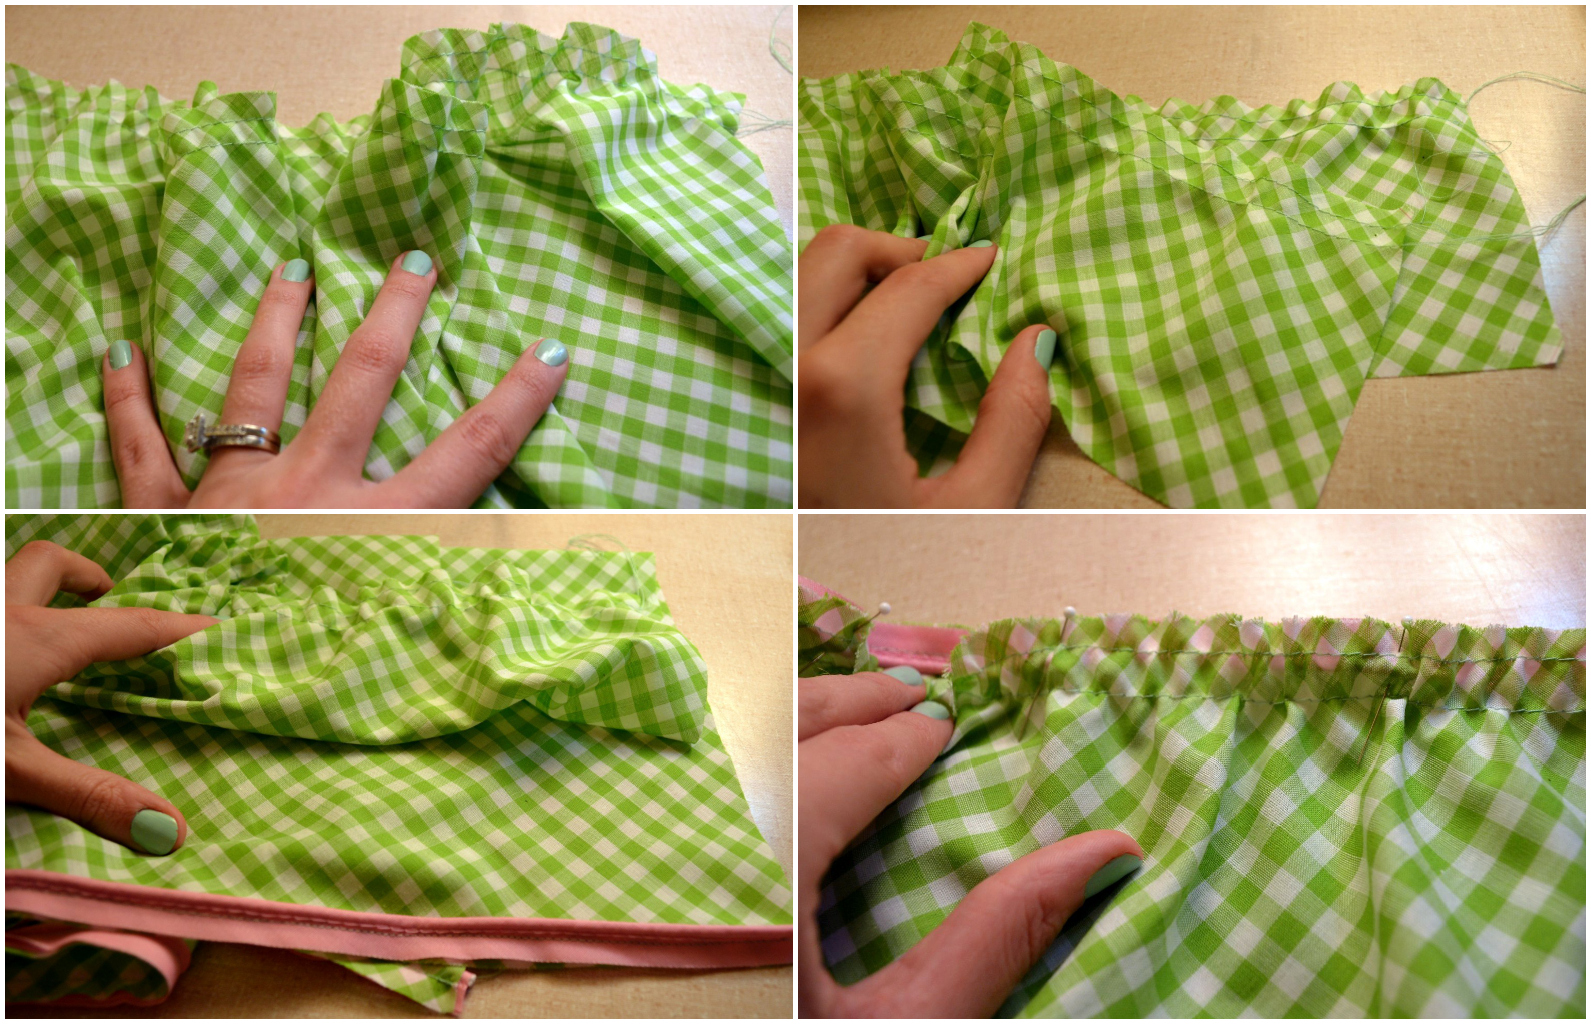
Tip: Whenever I sew with piping, I always look at the piping side while sewing.
Finish seam allowance of skirt. This is the only non-enclosed seam, and finishing the edge isn’t that important since everything is on the bias.
Take out any stitches that can be seen from the gathering stitches.

Hem the edges of the skirt at .25″ double turn. Make sure you don’t sew over the gathering stitching at the top of the skirt.
Hem the bottom of the flounce at .25″.

Sew piping to both long sides of one of the band pieces.
Center the gathered skirt edge on the band. Pin the other band piece, the back, to that edge and sew. The skirt is now attached and the band pieces can be pulled up.
Take out any leftover gathering stitches.
Center the bodice piece on the other piped edge of the band.
Roll up the bodice and the skirt tightly so you can see the back band.
Pull the back band over the roll and pin to the piping edge. Sew and turn band right side out.

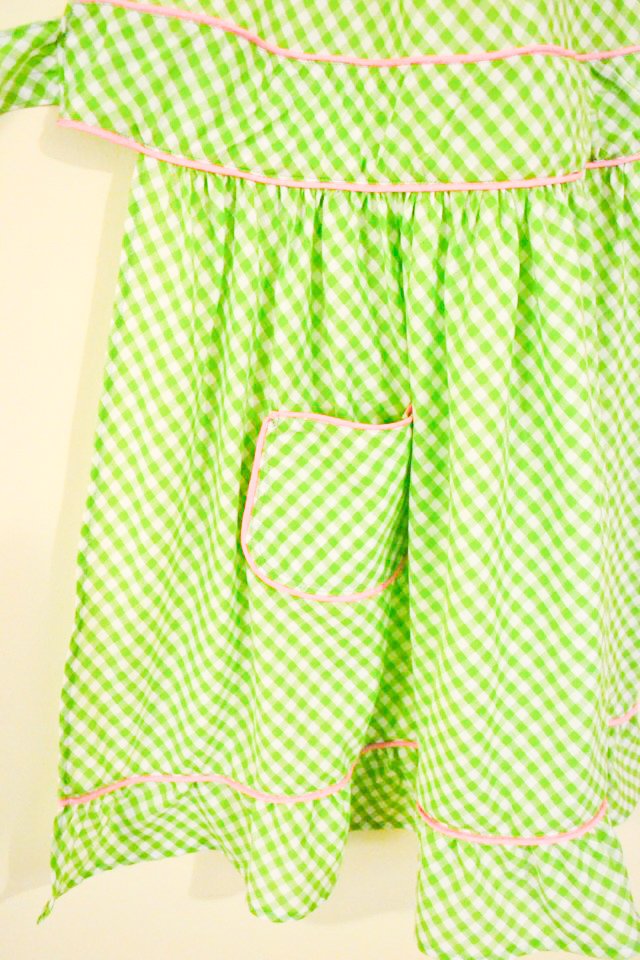
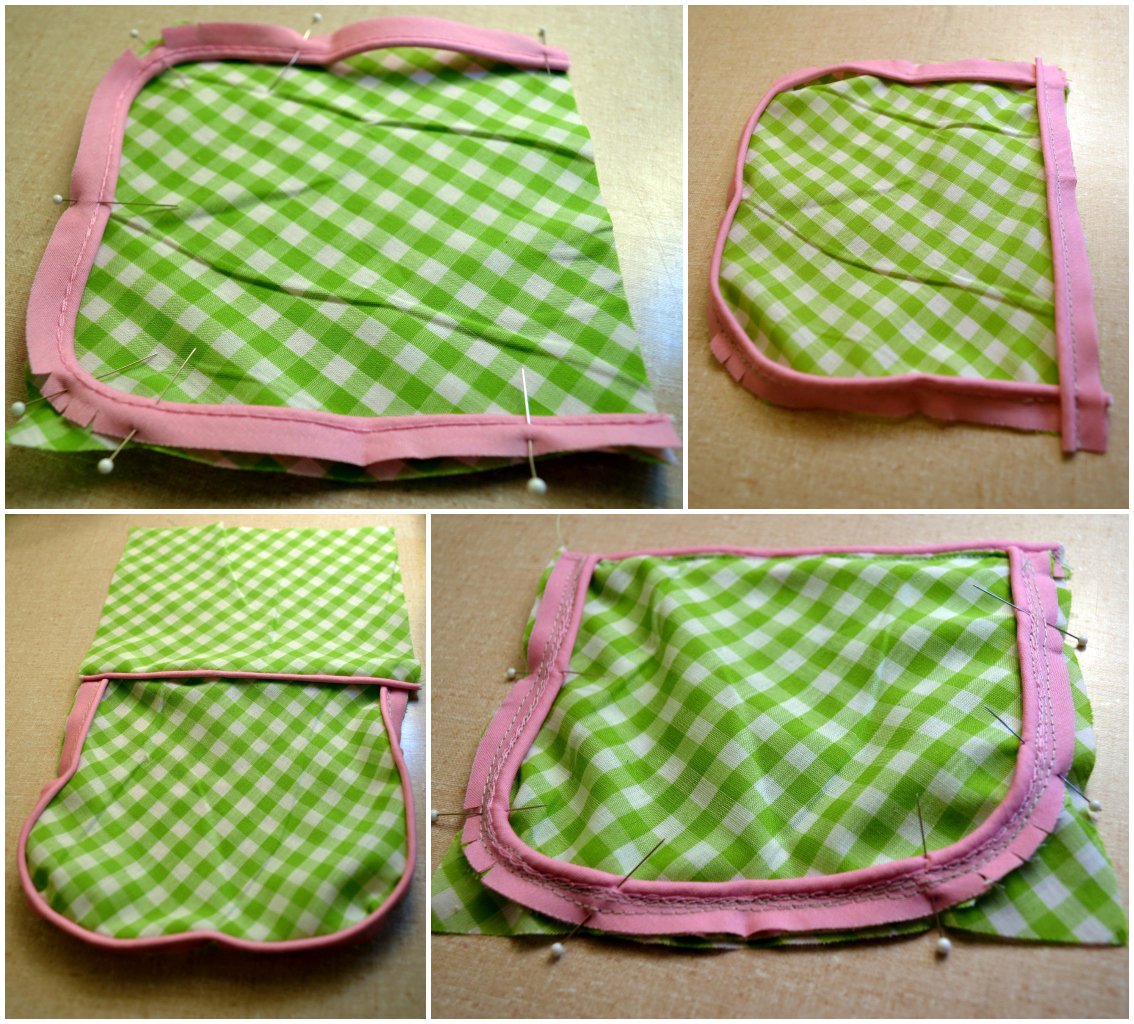
Sew piping onto three side of one pocket curving corners.
Sew piping across the top. Sew back pocket over piping.
Flip pocket around with the back in the back and the piped pocket on top.
Baste the two pocket pieces together.
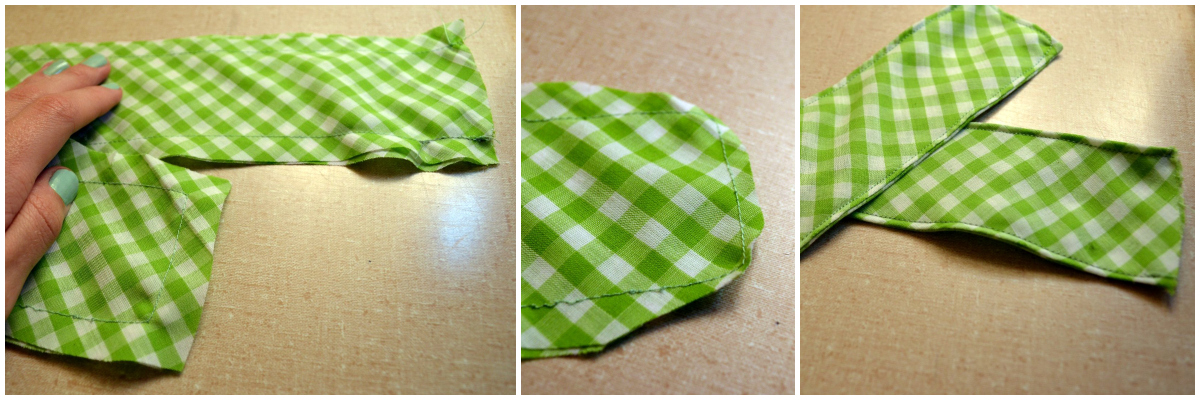
Assemble the straps by sewing three sides at .5″ right sides together. Trim corners.
Turn right side out and topstitch edge.
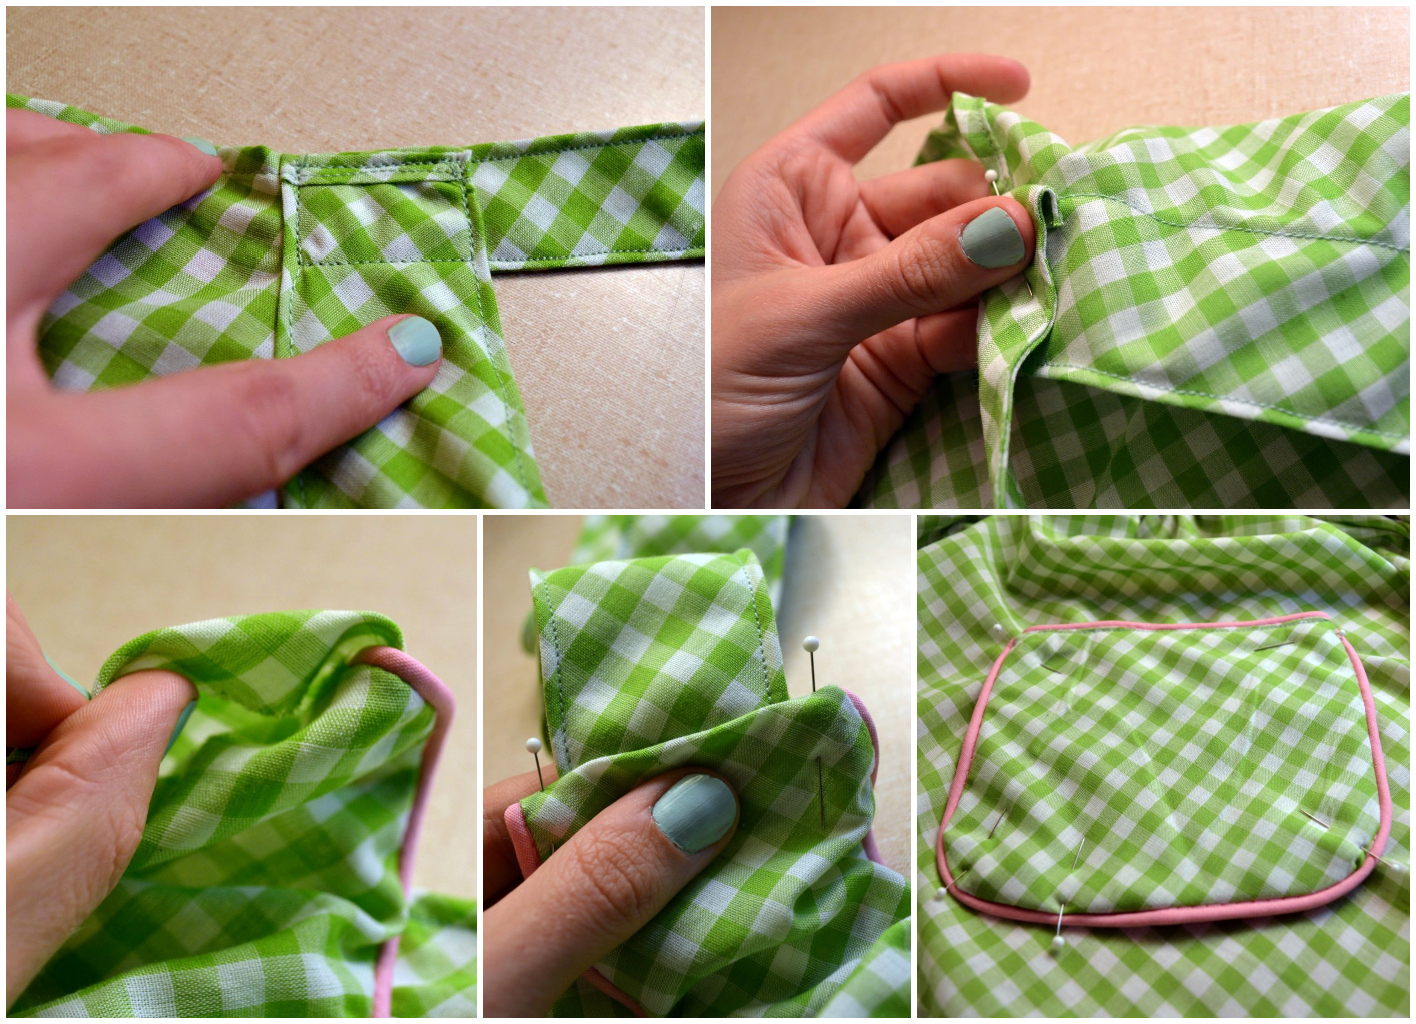
Sew smaller straps onto top corners of bodice. Make sure raw edge is folded.
Fold edges of the band in at .5″. Slide straps in and topstitch.
Sew pocket onto skirt.
If you make something using this sewing project, I’d love to see! Please share it on social media with the hashtag #heatherhandmade and tag me!

I believe small sewing moments can create great joy. Find your own “right” way to sew. -Heather
I think this looks great – so have linked to it on my blog – http://alittlebirdmademe.wordpress.com/2013/07/05/27-free-tutorials-and-patterns-for-aprons/
Gorgeous apron… Thank you for the fabulous tutorial… Hugs May x x x
Hi,
Will you please post a link to your Blog at The Sewing Community? Our members will love it.
Members include: Needleworkers, Clothes and Dress Makers, Enthusiasts, Experts, Groups, Clubs, etc.
It's easy to do, just cut and paste the link and it automatically links back to your website. You can also add Photos, Videos and Classifieds if you like.
Email me if you need any help or would like me to do it for you.
Please feel free to share as often and as much as you like.
The Sewing Community: http://www.vorts.com/sewing/
I hope you consider sharing with us.
Thank you,
James Kaufman, Editor
Heather, your apron os adorable and kinda retro looking ( which I adore ) I love it! waving hi from the hills of North Carolina 🙂
Very cute. Love the colors you choose. Thanks for sharing.