
Cozy DIY Sweater Stockings + Free Sewing Pattern

This post may contain affiliate links.
Learn how to make a sweater into a beautiful Christmas stocking. Add trim for unique details on these DIY sweater stockings.
I love seeing stockings hanging up to welcome the Christmas season. It’s an old tradition, and my family loves. I love the look of knitted stockings, but I can’t knit so upcycling sweaters is a better option for me.
Using this sewing tutorial you can turn sweaters into beautiful stockings. Add trim in matching colors or even a rainbow design.
The hard thing about making and having stockings when you have a young family is that if you use specific fabric it won’t be around when the next kid comes. Do you care about having stockings that all match?
It tooks me years to decide on stockings to make because I didn’t want to remake stockings if I had more kids. I came up with the idea to make sweater stockings because I’ll always be able to find sweaters at thrift stores. If you don’t use the exact same sweater it’s always easy to add another stocking to the collection.
What is Upcycling?
Upcycling is to reuse material to create something better than the original. I usually use this to describe when I’m sewing adult clothing into clothing for children or I’m sewing clothing into an accessory or house item.
What is a sweater?
A sweater is an item of clothing with long sleeves that is made from wool, cotton, or synthetic fibers. It’s knitted or crocheted yarns or threads.
I’ve done this sewing technique on a sweater with yarns that were tightly knitted, and it worked well. I’ve done this on a cardigan, and it worked well. I’ve also done this on a sweater with yarns that were loosely knitted, and it worked well.
What kind of sweater can I use? Can I use a cardigan?
Use an adult sweater for stockings since they are big enough to make stockings. Make sure the sweater has a tight knitting weave. You don’t want a sweater that is too lightweight and can’t hold the weight of items hanging inside, and you don’t want a sweater that has such an open weave that there are holes. It can unravel too easily.
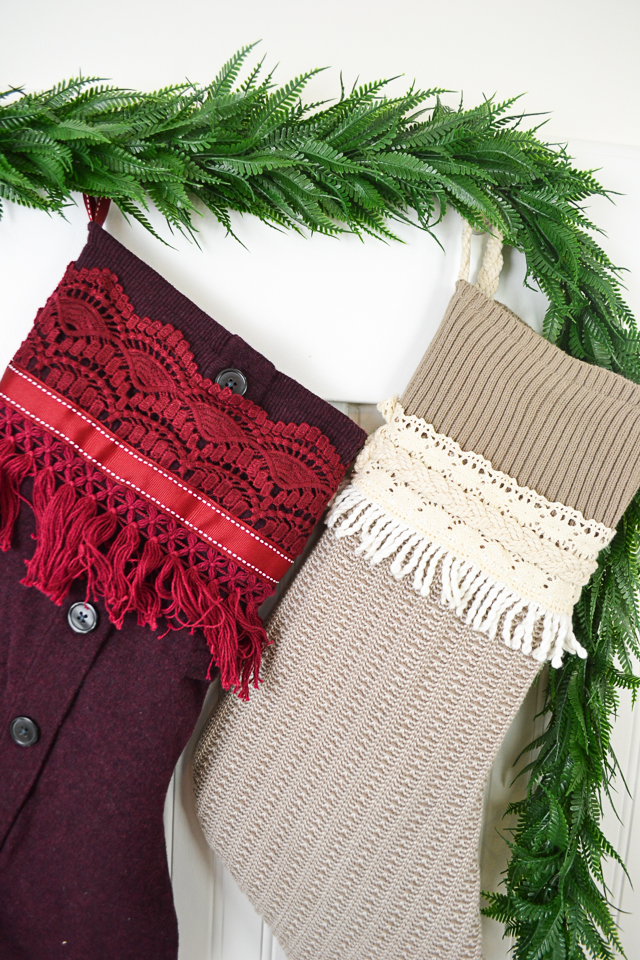
I love using cardigans to make sweater stockings, but make sure all the buttons are there. You’ll have to sew the top and bottom of the plackets together so that you can treat it like one piece of fabric.
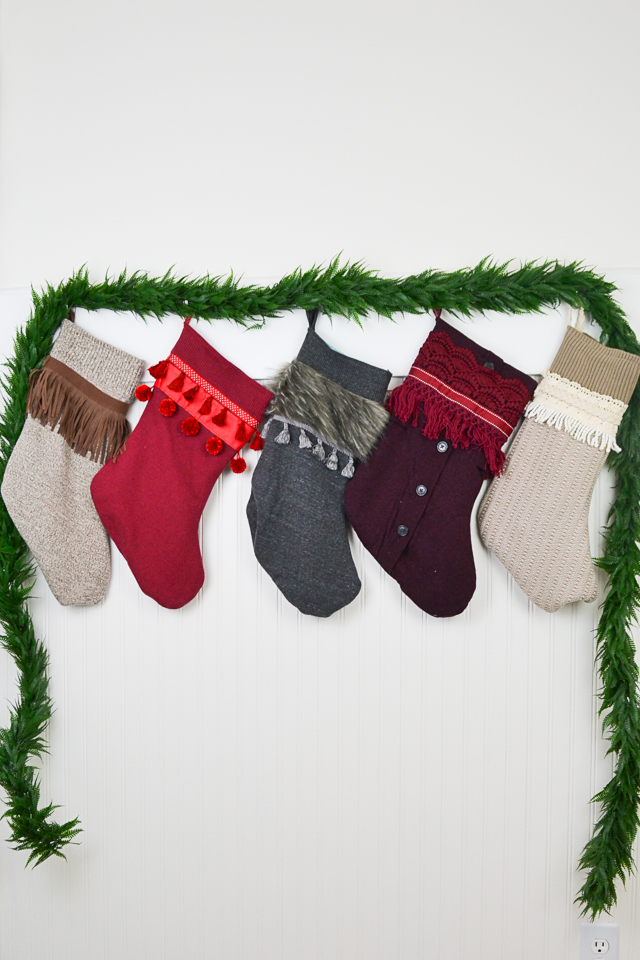
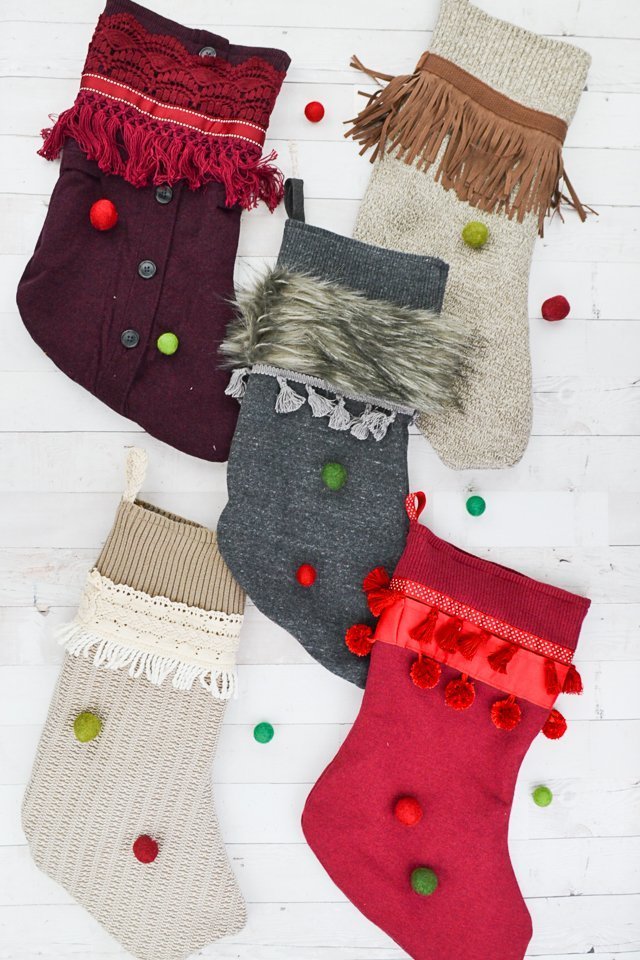
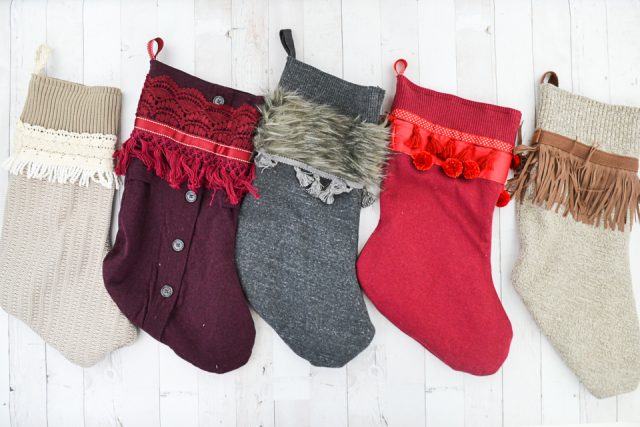
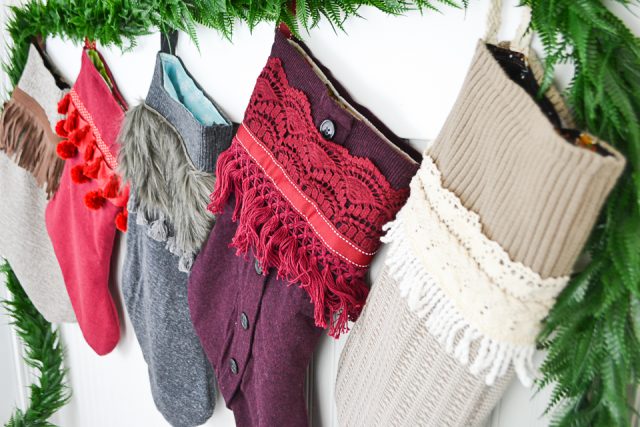
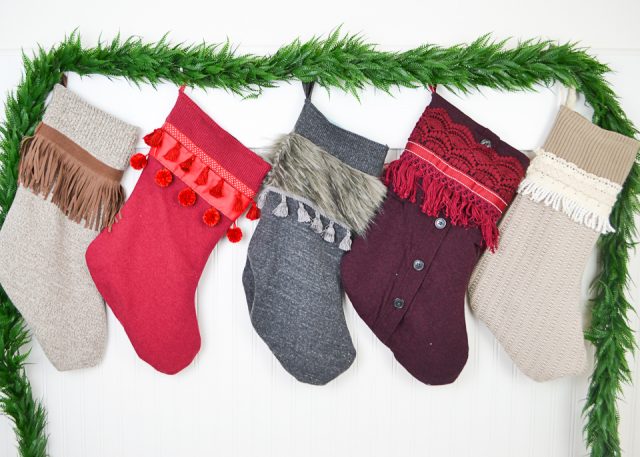
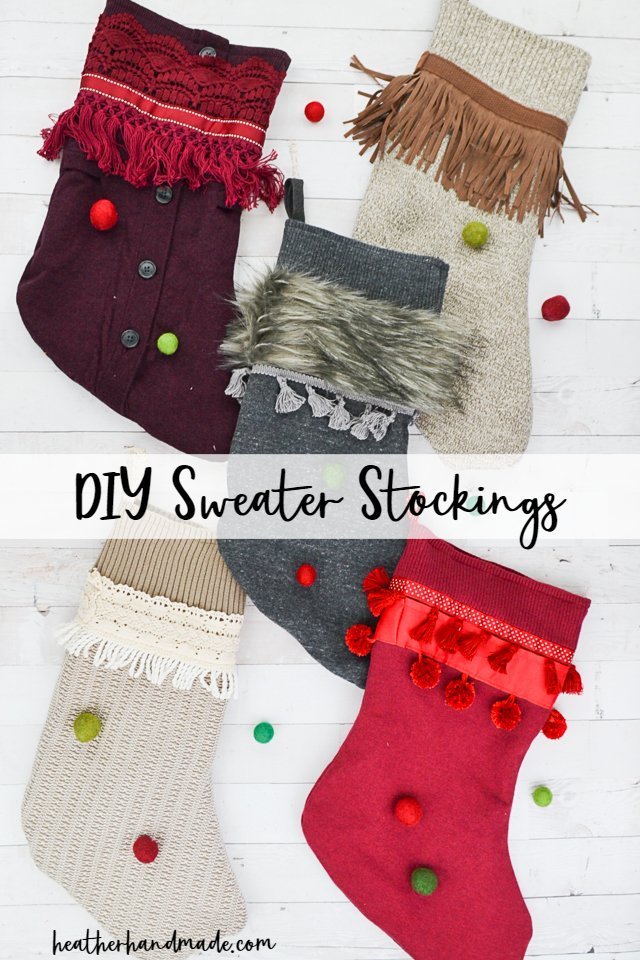
I was inspired by the stunning stockings from Anthropologie that have matching trim all around the top. I went with multiple Christmas and neutral solid colors, and I am really happy with how they all look together. It’s going to look so good with my other simple and neutral Christmas decor.
I made one for each person and tried to make the lace ones for the girls and the simpler ones for the boys. My favorite one is the cardigan stocking. I love the buttons up the front!
Do you love to sew? Try one of these fun sewing projects:
- Christmas sewing projects
- DIY free stocking patterns to make
- Stocking stuffer gifts to sew
- Free Christmas sewing patterns
- Sweater upcycle and refashions
DIY Sweater Stockings
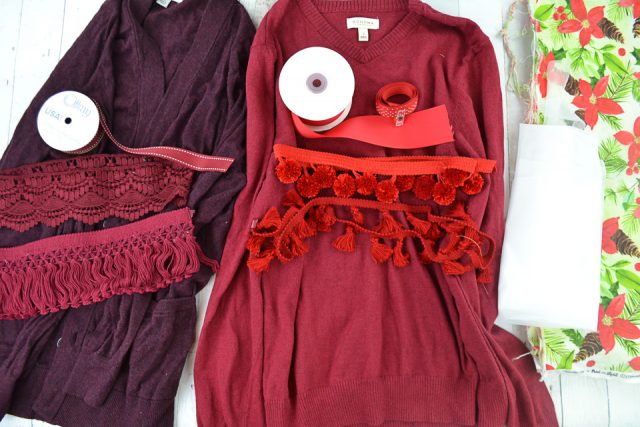
Supplies
- One adult sweater per stocking
- 1/2 yard of quilting cotton per stocking
- 1/2 yard of lightweight interfacing per stocking
- 1/2 yard of ribbon, trim, tassels, pompoms, braided cord, lace, etc.
- Sewing tools
- Sewing machine
- Get the free stocking pattern – get it at the end of the post behind the locked content box
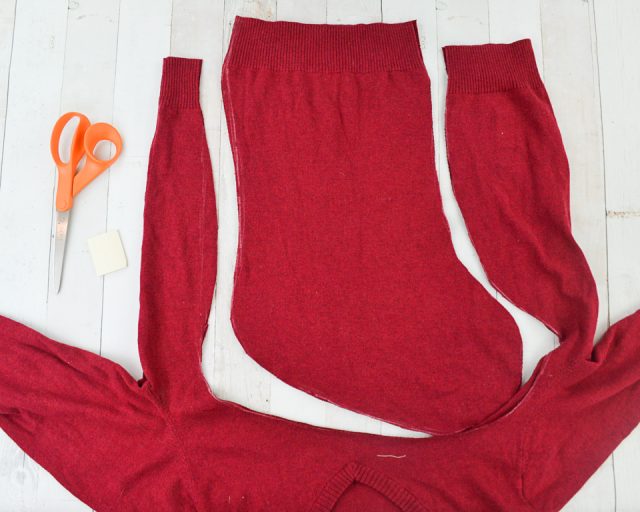
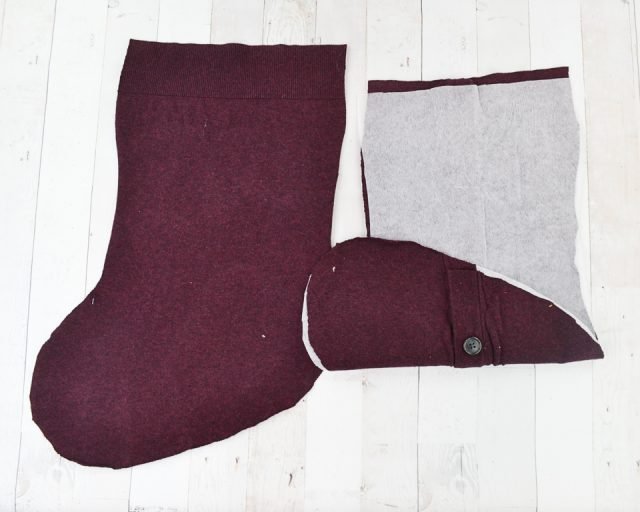
Draw out the stocking shape on your sweater. Add 1/2″ seam allowance to the sides and bottom. Do not add any hem allowance to the top but reuse the ribbing of the hem.
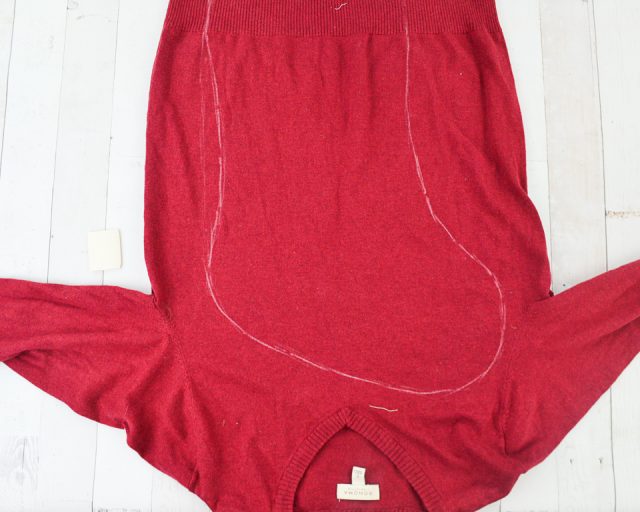
Cut out two oppostie stocking pieces.
You can use a cardigan instead of a sweater and treat it just like a sweater. Button up the buttons, cut out the stocking, and then baste the opening at the bottom of the stocking together.

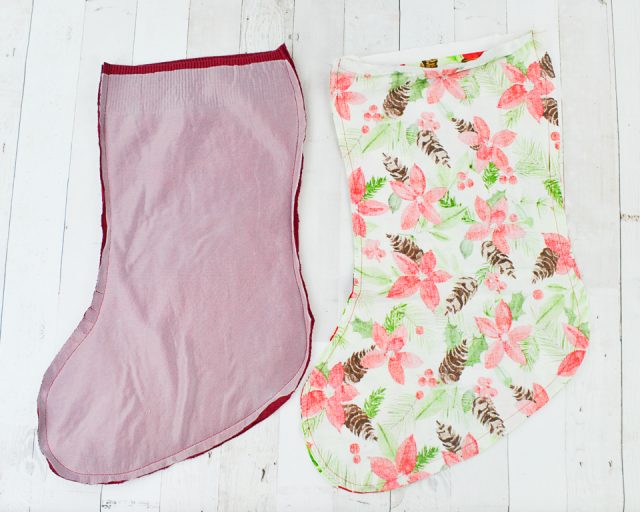
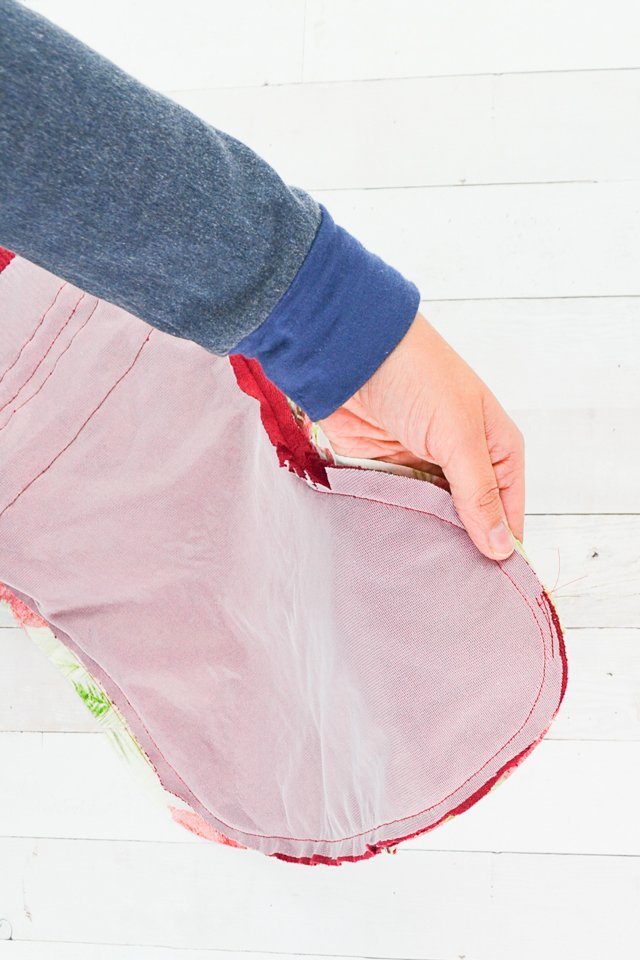
Cut out two opposite pieces of interfacing in the shape of the stocking. It should be 1/2″ shorter than the sweater stocking.
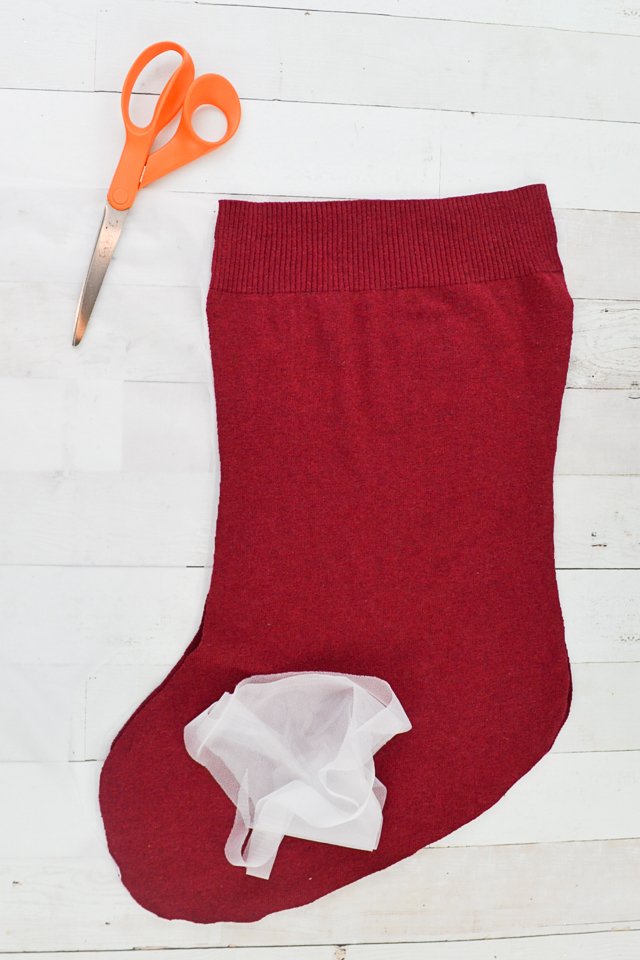
Cut out two opposite pieces of the quilting cotton exactly the same size as the sweater stocking.
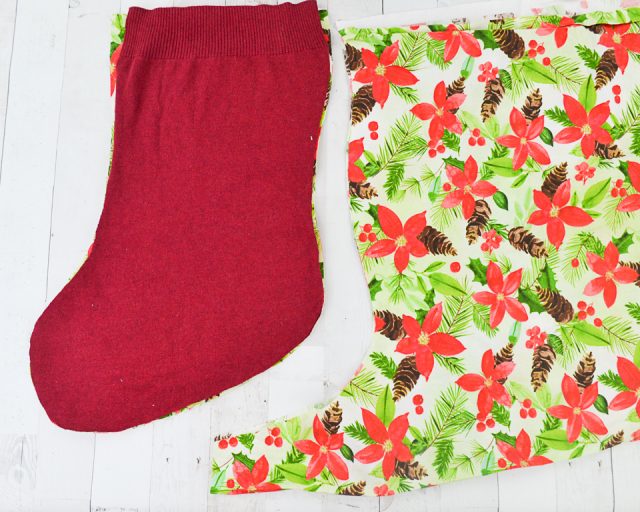
Fuse the interfacing to the back of each sweater stocking piece.
Treat the cardigan sweater stocking the same and apply the interfacing to the back.
Sew around the sides and bottom with a 1/2″ seam allowance. Use a straight stitch and back stitch when you start and stop.
Clip the inner curves and notch the outer curves.
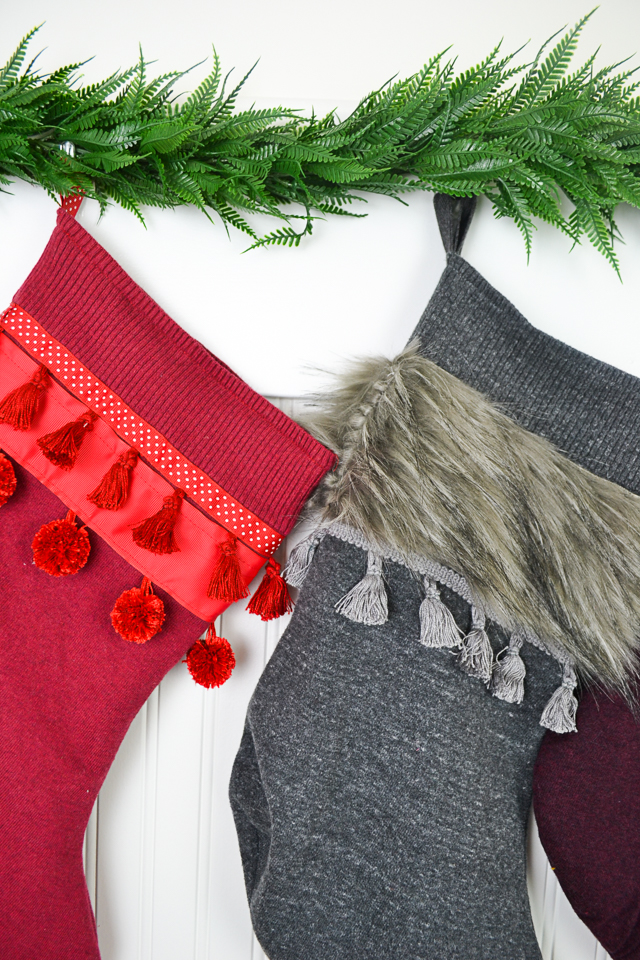
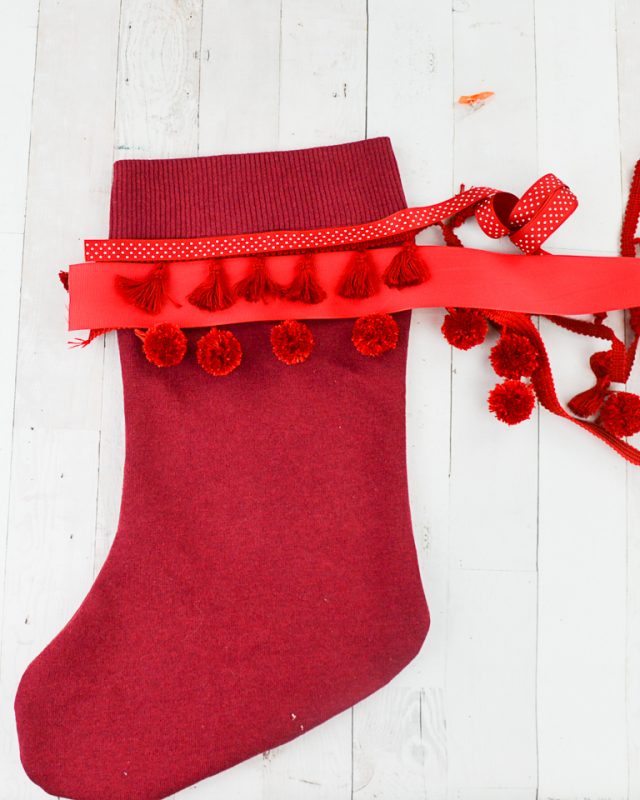
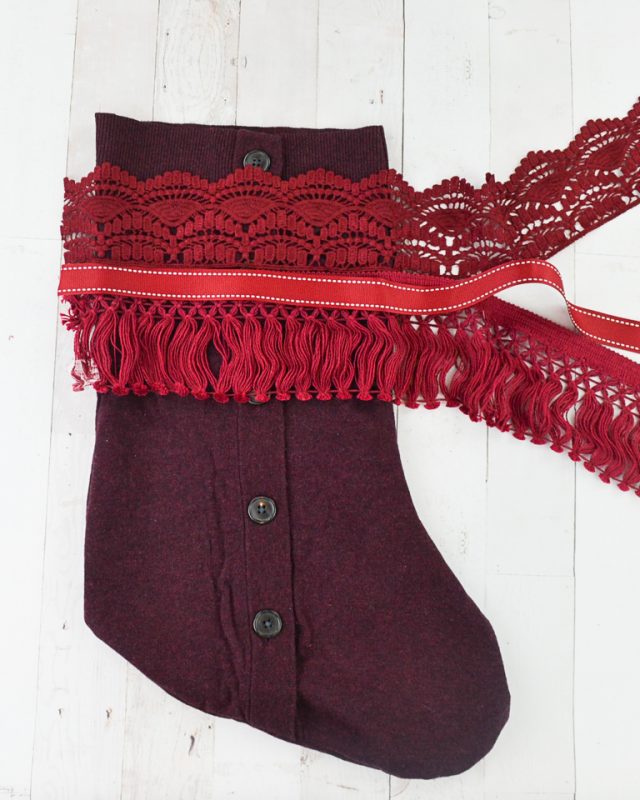
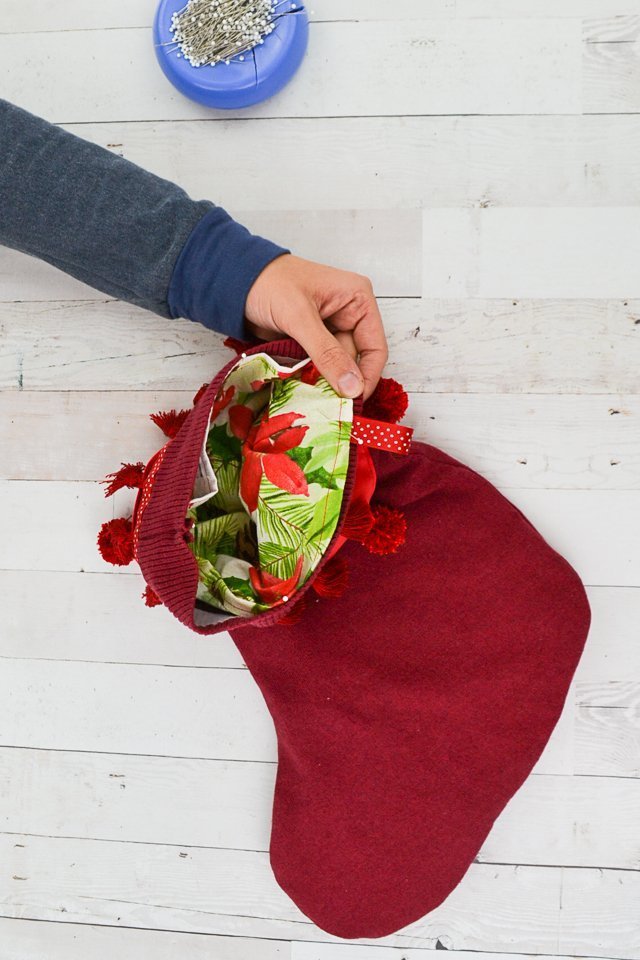
Turn the sweater stocking right side out. Sew the trim around the top of the stocking just under the ribbon. Layer different kinds for a textured and interesting look.
If you are using a cardigan then be careful of the buttons. You might have to remove a button or two so you don’t sew over it.
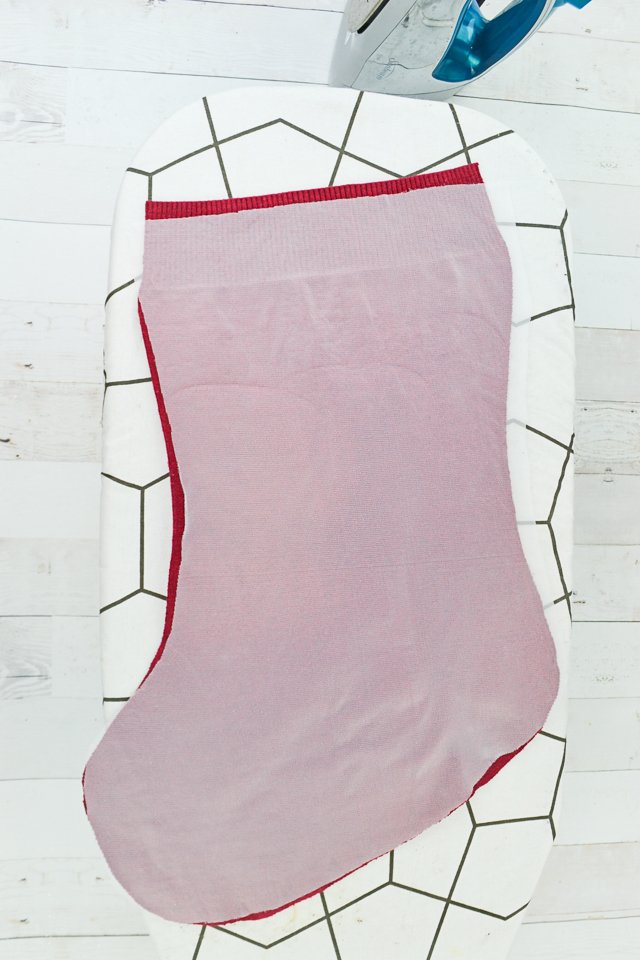
Fold the top edge of the lining down 1/2″ and sew it in place. Don’t worry about finishing the edges.
Turn both the sweater and lining right side out. Lay them on top of each other and line up all the edges. Sew a stitch through the seam allowance across the toes so that the lining will stay inside the sweater stocking.
Turn the sweater stocking right side out.
Pin the top edge of the lining to the top edge of the sweater stocking 1/2″ from the top. Make sure the lining covers the interfacing

Cut a piece of ribbon 8″. Fold it in half and pin it to the top back of the stocking between the lining and the sweater.
Sew around the top of the sweater 1/2″ from the edge to secure the lining in place. Sew the loop to the sweater 1/8″ from the edge of the ribbing.
Make more sweaters and hang them up! I can’t wait to see what beautiful stockings you create!
Get the Free Sewing Pattern here!
If you make DIY sweater stockings using this sewing tutorial, I’d love to see! Please share it on social media with the hashtag #heatherhandmade and tag me!

I believe small sewing moments can create great joy. Find your own “right” way to sew. -Heather
I too love the buttons down the front for the former cardigan, I’m a big fan of saving old clothes and repurposing them 🙂
I LOVE that cardigan stocking! So fun to keep the buttons up the front, and also to choose pretty matching trim! 🙂 Lisa
What a great idea! I have tons of old sweaters and practically no use for them. Well, now I do!
I would never have thought to upcycle sweaters like this. And using the buttons is beautiful!
SO adorable!! I love the fluffy embellishments!!
Love these! How cute! They all go together but each one is unique. And you'll never get tired of the neutral colors. Easy to add to like you had hoped.
Love LOVE this idea. I was having the same conundrum on stockings, and you have solved it! Great idea.
LOVE the stockings you made, you are so darn creative! waving hi from the hills of North Carolina 🙂
Cute!!!!
WOW- I LOVE this idea- I've never heard of sweater stockings before. Not sure the kids will go for it, but I'm going to have to do this. Now I just have to review your info on which needle, stitch, etc, to use on knits like this.