
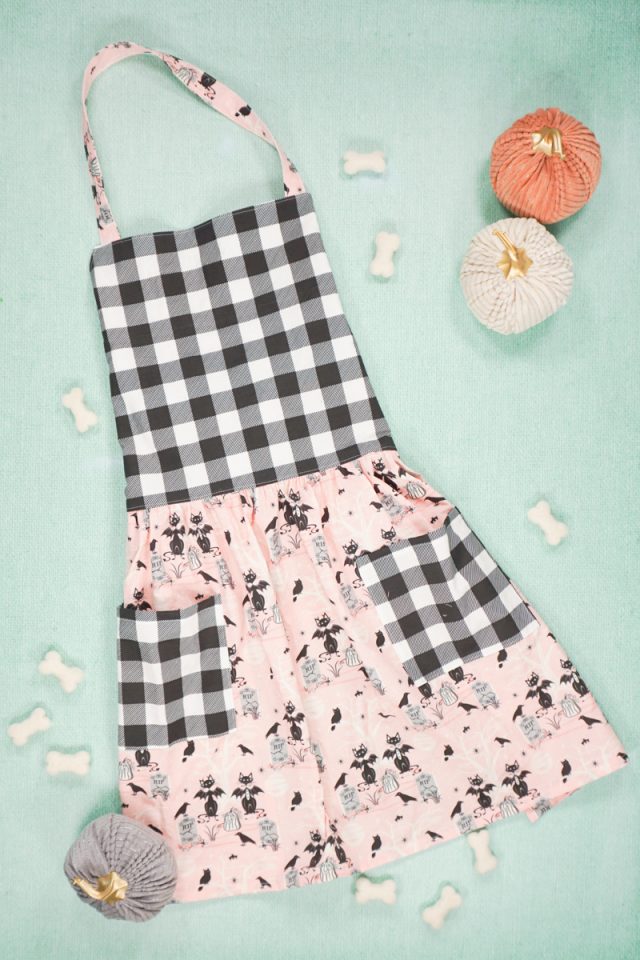
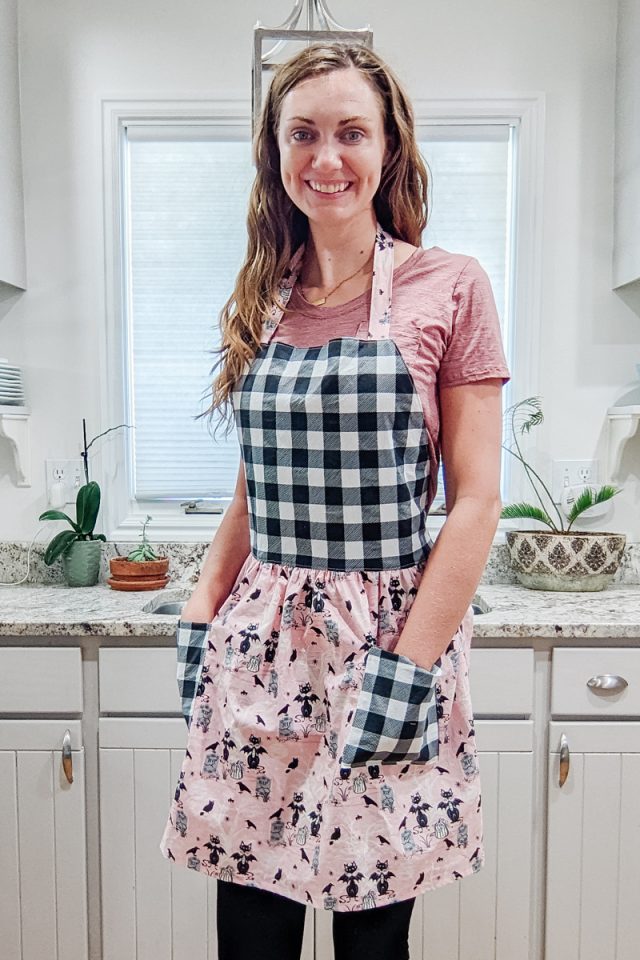
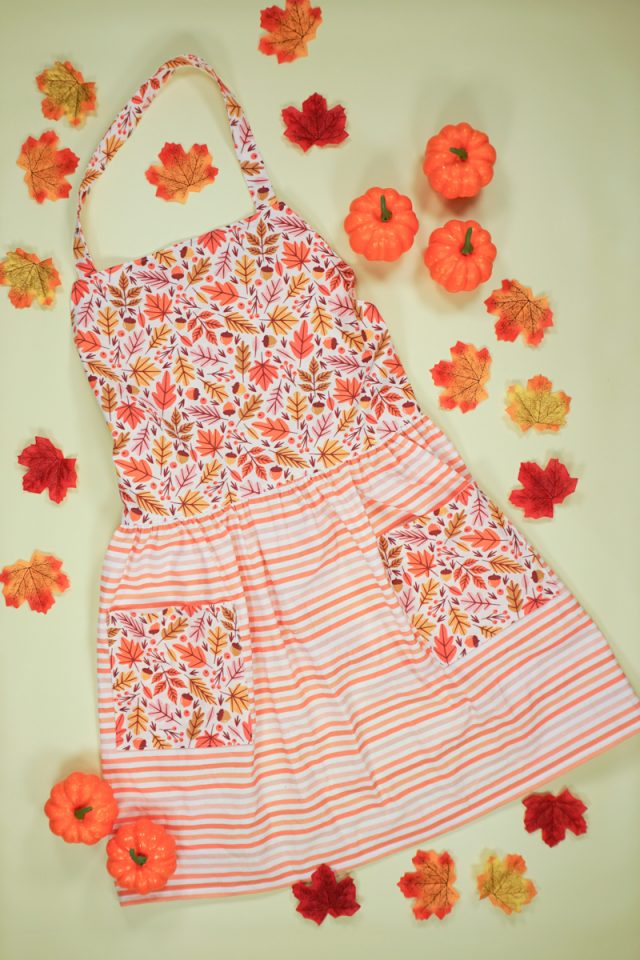
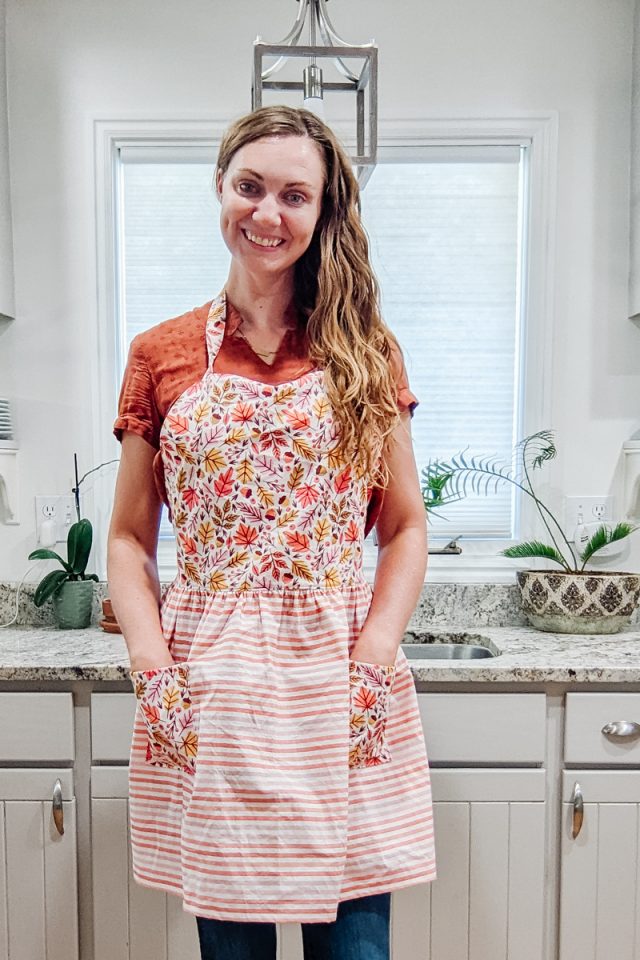
DIY Fall or Halloween Apron

This post may contain affiliate links.
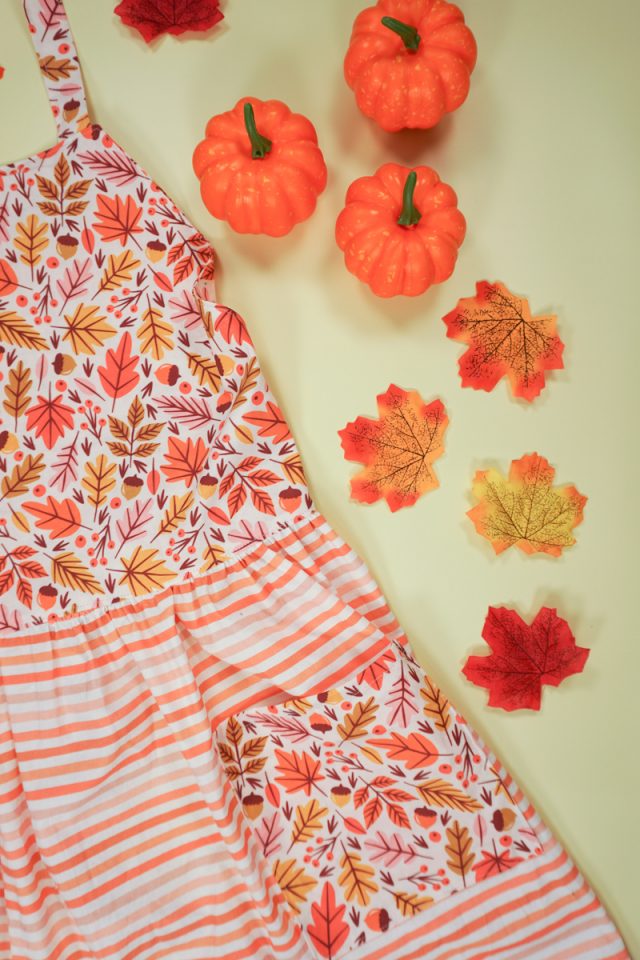
Learn how to make a DIY Fall apron or a DIY Halloween apron with a free sewing pattern. This beginner sewing project inspires me to bake.
Do you love to cook or bake? I always get the baking bug in the Fall with the weather getting colder. I can get pretty messy when I’m working in the kitchen. Especially when I’m making anything from scratch.
I have a free apron sewing pattern in a classic style that works great with Halloween fabric and Fall fabric. It’s an easy sewing project with lots of steps. Make one for all your friends and family members that love being in the kitchen!
To get the free sewing pattern, scroll to the end of the tutorial. Put your email address in the form under “Get the Free Sewing Pattern Here.” Once you confirm that you want to receive emails from Heather Handmade, the free pattern will be sent to your email address. Check your spam and promotions for the email.
What fabric should I use to make an apron?
The best fabric to use to make an apron is quilting cotton. Quilting cotton is easy to find and easy to sew. It’s strong, durable, and washable.
Cotton comes in solid colors or any print you can imagine. It presses beautiful which makes all the hems and straps easy to sew.
What is a PDF sewing pattern?
A PDF pattern is a sewing pattern designed on the computer and organized so that it can be printed on several letter or A4 size pieces of paper.
I love using PDF sewing patterns because if the pattern gets ruined or if my children or I changed sizes, I can always print it again. It’ll never be destroyed since I have a digital version!

How do you use a PDF sewing pattern?
Open the PDF on a computer and click print. When printing make sure that the scaling is set to 100% or no scaling so that the pattern prints at the correct size.
Once the pattern is printed it can be taped together to get the full size. Then the pattern can be cut for each pattern piece size or individual sizes can be traced so that the pattern can be used again and again. Learn how to use PDF sewing patterns.
Do you love to sew? Try one of these sewing projects:
- Beginner sewing projects
- Free PDF sewing patterns
- One yard sewing projects
- Handmade sewing gift ideas
- Kitchen sewing projects
- Eco-friendly sewing projects
- Home sewing projects
- Free apron sewing patterns
- Free Halloween sewing patterns
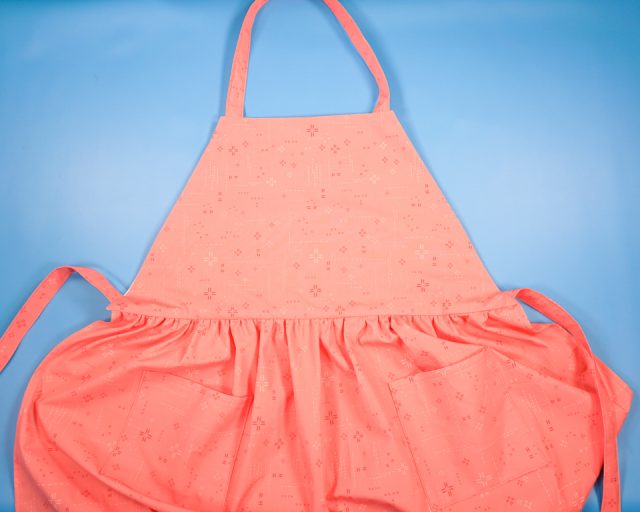
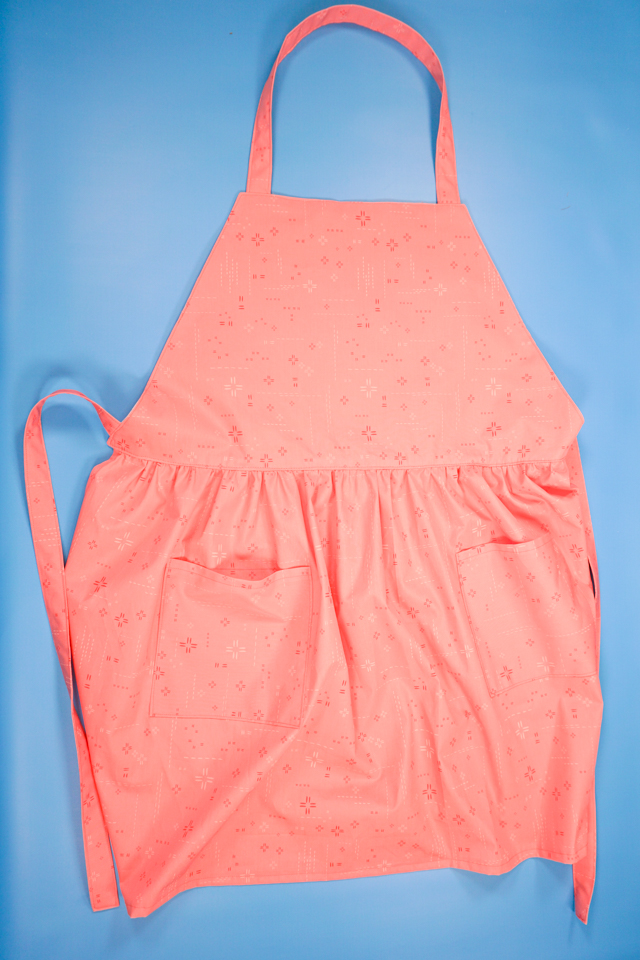
How to Sew a DIY Halloween Apron with a Free Pattern
Supplies
- 1.5 yard of quilting cotton or 1 yard of two different fabrics that coordinate
- .5 yard of fusible interfacing
- Sewing tools
- Sewing machine
Do you just want the pattern and tutorial as a PDF? Get the pattern and photo tutorial for just $5. You won’t need to access the internet every time you want to make it. Or get the Pattern Bundle with ALL the PDF tutorials!
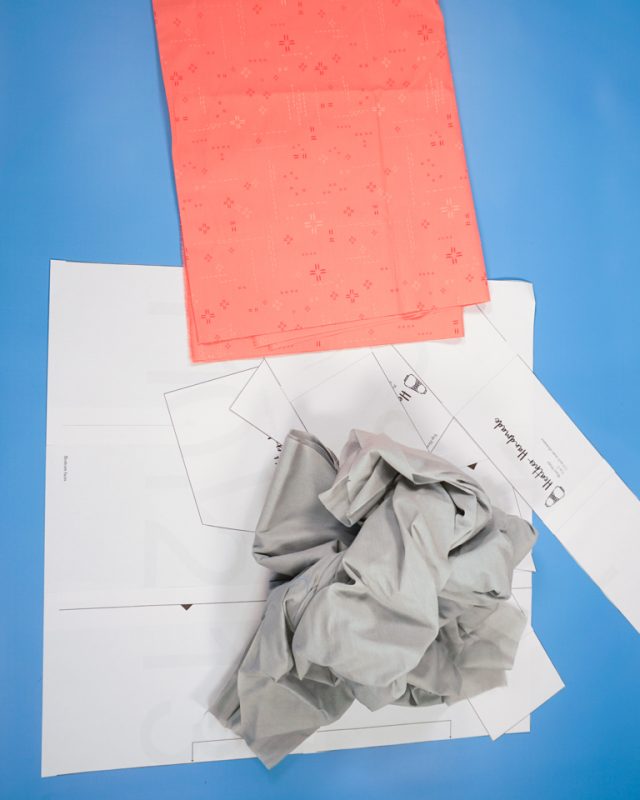
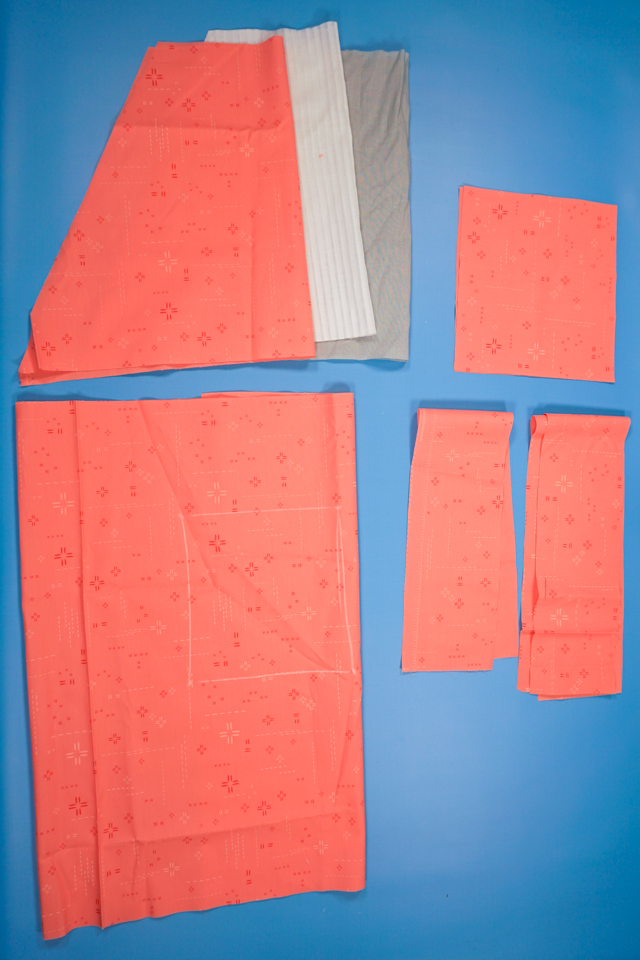
The pieces you need to cut out:
- 2 bib pieces from fabric (either matching or coordinating)
- 1 bib piece from lightweight fusible interfacing
- 2 pockets
- 1 neck strap
- 2 waist ties
- 1 skirt
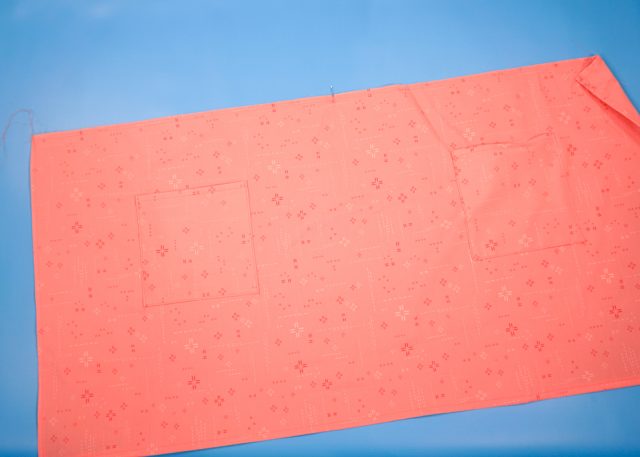
Make sure you transfer all the markings, like pocket placement and strap placement, to the fabric pieces.
Fuse the interfacing with an iron to the back of one of the bib pieces.

Take a strap piece. Match up the long edges and press them in half. Take both long edges and fold them in to meet the center fold. Press two new folds.
Fold all three folds with the long raw edges inside the center and press in place. Do this to the other two straps.
On the two waist ties, fold in one short end 1/4 inch before folding all three folds. This will create a fold on the short end for a nice finished edge.
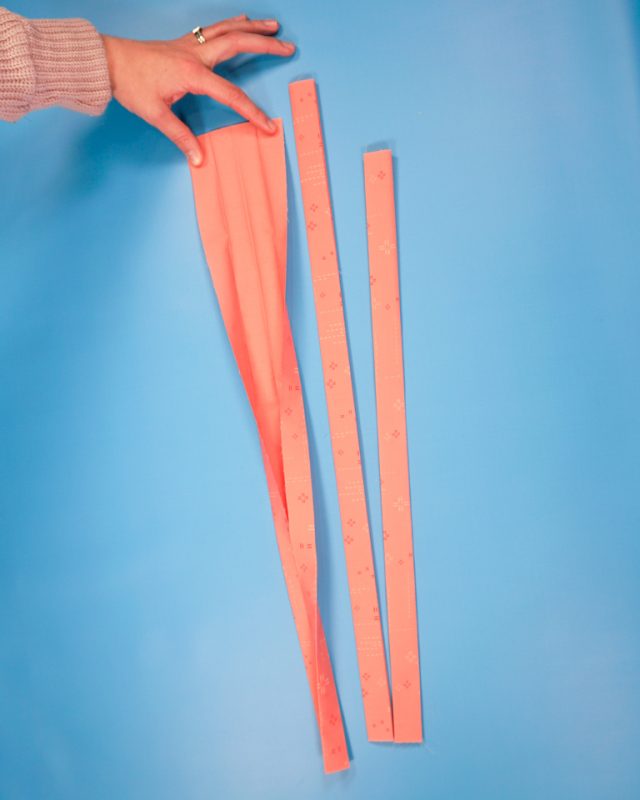
Sew around the straps 1/8 inch from the edge.
Baste the short ends of the straps and ties to one of the bib piece at the marks.

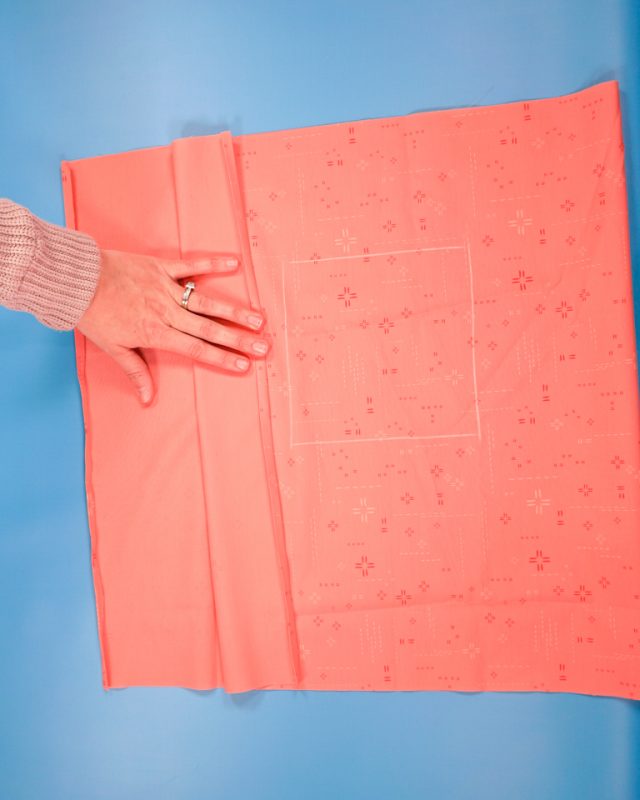
Fold the short ends of the skirt over 1/4 inch and press. Fold them over again 1/4 inch and press.
Sew the hem in place 1/4 inch from the edge.
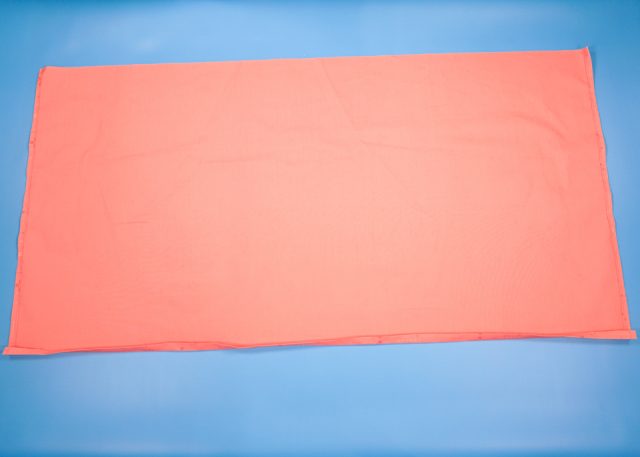
Fold the bottom edge of the skirt over 1/2 inch and press. Fold it over again 1/2 inch and press.
Sew the hem in place 1/2 inch from the edge. Backstitch when you start and when you stop.
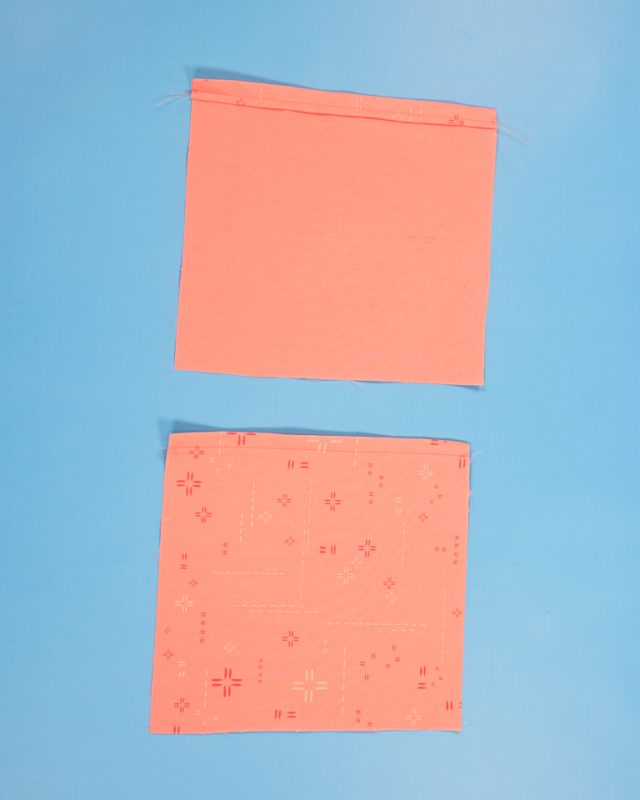
Fold the short ends of the pockets over 1/4 inch and press. Fold them over again 1/4 inch and press.
Sew the hem in place 1/4 inch from the edge.
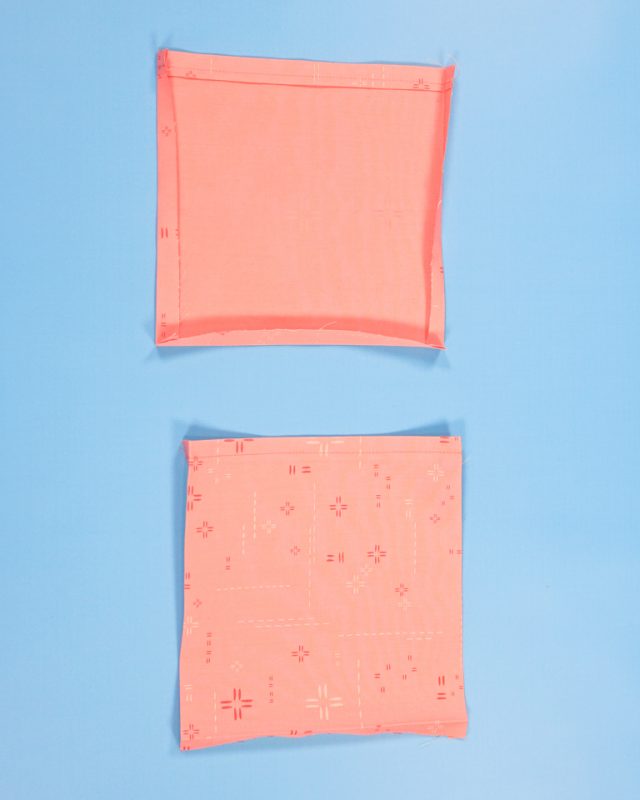
Fold the other three sides of the pocket in 1/2 inch a press in place.
Pin the pockets onto the marks on the skirt. Sew around three sides of the pockets. Backstitch when you start and when you stop.

Sew two rows of basting stitches along the top of the skirt. Sew one row at 3/8 inch and one row at 1/2 inch. Mark the center of the skirt with a pin.
Pull the bobbin threads to gather the top of the skirt.
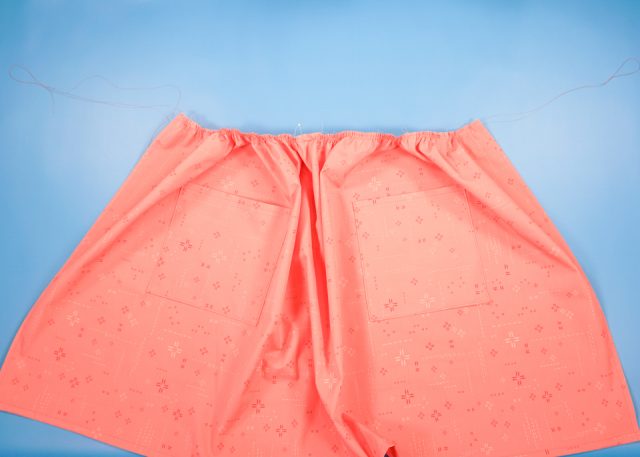
Find the center of the bottom of the bib with the basted straps. Match the center of the bib with the center of the skirt and pin right sides together.
Adjust the gathers of the skirt so that it matches with the bib. Distribute the gathers evenly and pin.
Baste the two pieces together at a 3/8 inch seam allowance.
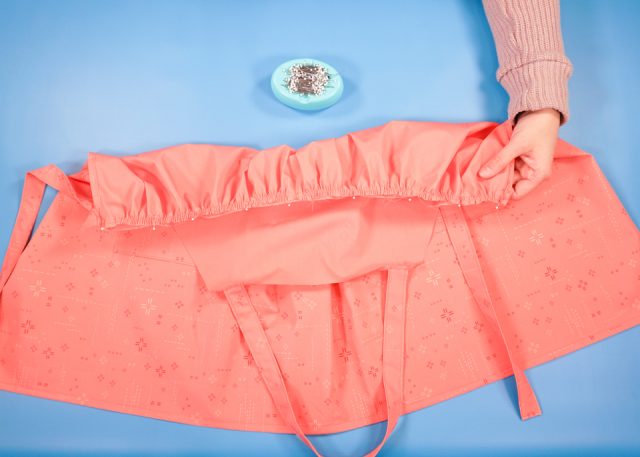
Fold the straps and skirt in towards the center of the bib with the skirt extending up towards the top. Pin the other bib on with right sides together matching all the edges and corners.
Starting at the top near the straps, sew all the way around the bib trapezoid shape. Backstitch when you start and when you stop and pivot at the corners.
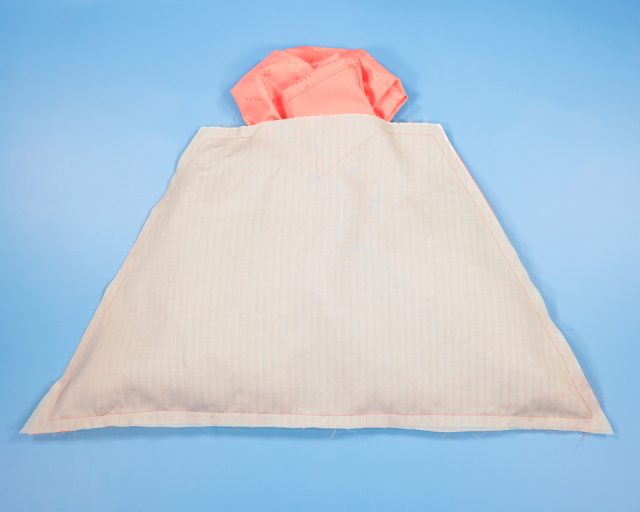
Trim the corners to reduce bulk.
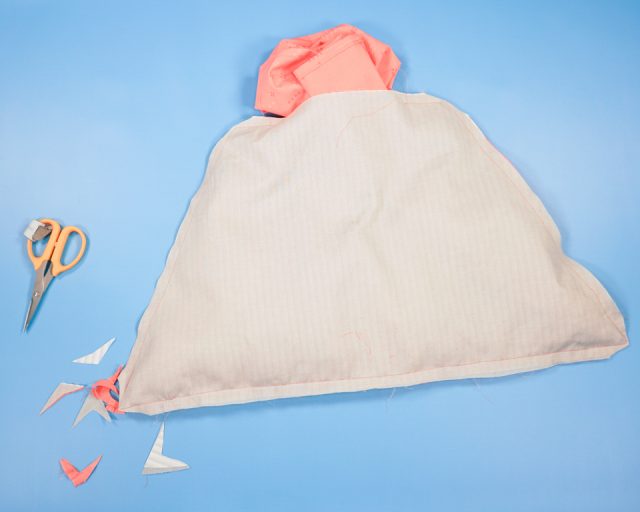
Turn the bib right side out. Press all the edges flat. Make sure the seam allowance of the hole is pressed inside at the hole.
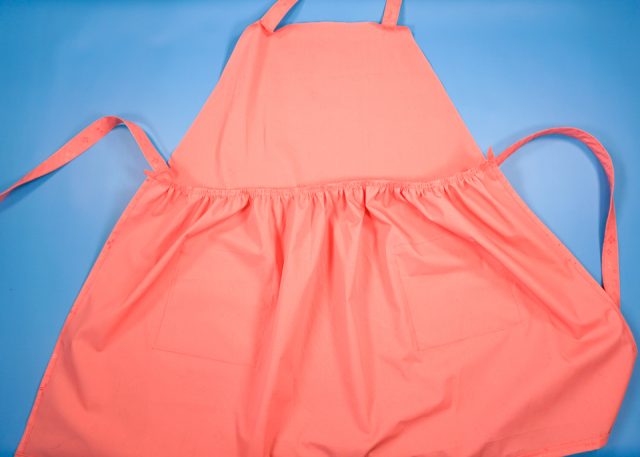
Sew an edgestitch all the way around the bib and close the hole. Pivot at all the corners.
Get the Free Apron Sewing Pattern
If you make something using this sewing project, I’d love to see! Please share it on social media with the hashtag #heatherhandmade and tag me!


I believe small sewing moments can create great joy. Find your own “right” way to sew. -Heather
I love these fall patterns, they are cute, colorful, whimsical and cheery….great ideas! Keep them coming. I love creative, imaginative varieties of patterns.
thank you!