
How to Make a Cardigan Onesie: UPDATED

This post may contain affiliate links.
Learn how to make a baby cardigan onesie with a simple DIY tutorial. This baby sewing project is fun and easy to make!
Little babies are so fun to sew for. They look so cute in anything you make with their soft skin and sweet smiles. My favorite way to sew for babies is to refashion or upcycle something. That way I can fit in a small project between all their baby needs.
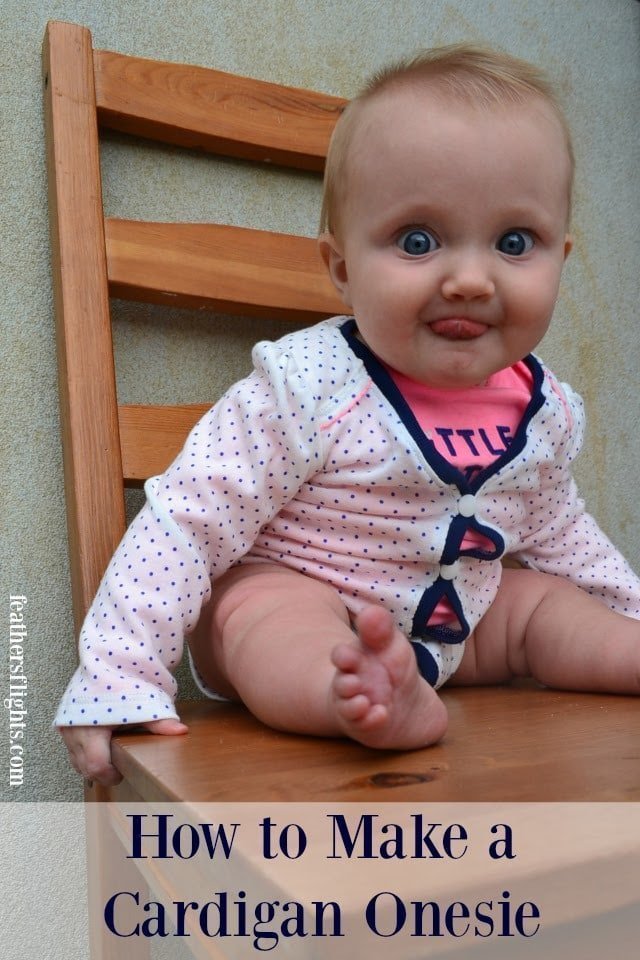
I’m excited that I’ve redone my original and popular cardigan onesie tutorial. The pictures needed updating since the original is 4 years old, and those little babies have grown up. Now I have a cute little baby girl to photograph wearing a cardigan onesie!
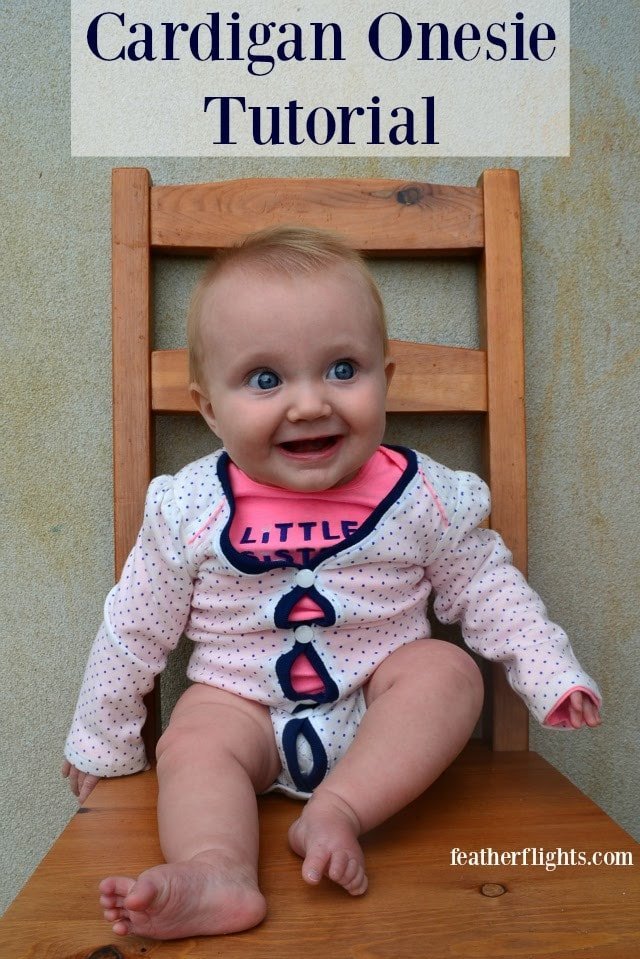
I made this version way simpler so it’s easier and quicker to make. (You can also try the simplest and easiest cardigan onesie.) This is a girly version, but I love that cardigan onesies work well for both boys and girls. I can’t wait to pair this cardigan onesie with a little skirt and knee high socks.
I also added a cardigan onesie tutorial video to the end!
How to Make a Cardigan Onesie
SUPPLIES
- Long-sleeved onesie
- 1/8 yd ribbing/rib knit with good stretch and recovery
- Buttons or snaps*
- Sewing tools and sewing machine
INSTRUCTIONS
Sew the overlapping shoulders together so that they aren’t separate. I sewed mine with a straight stitch since this part doesn’t need to stretch. I sewed my straight stitch one top of the original stitching so you wouldn’t see it.
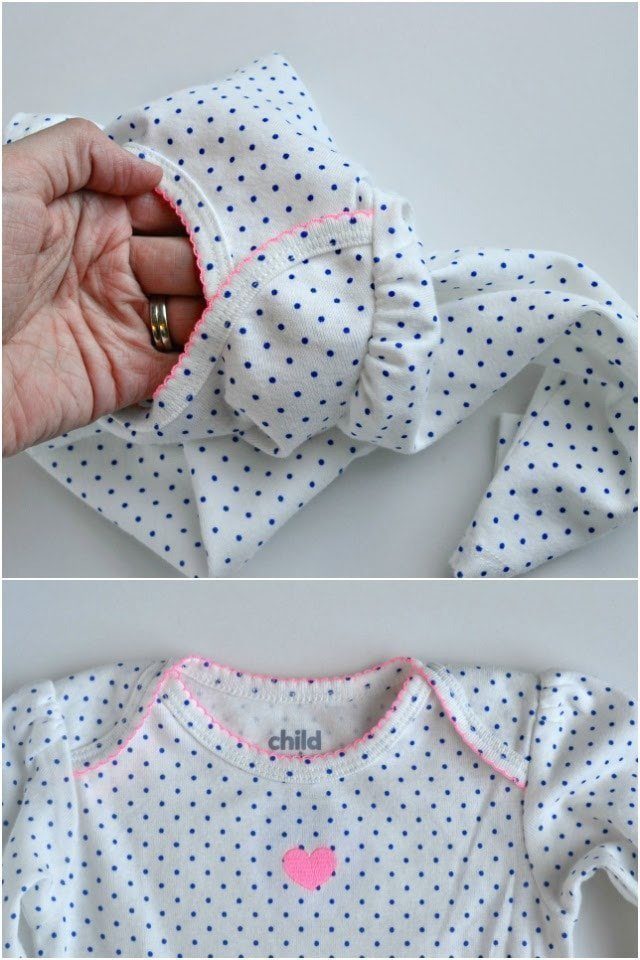
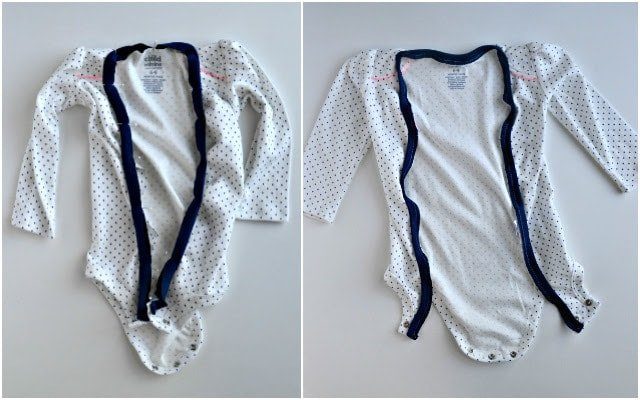
Cut the edge of the neckline off and cut a v-neck. Cut straight down the center front with a little detour between two of the snaps at the bottom.
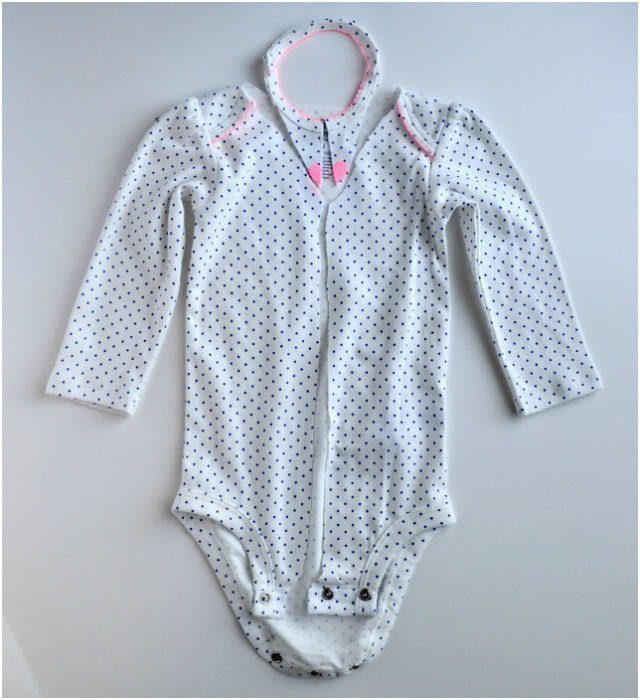
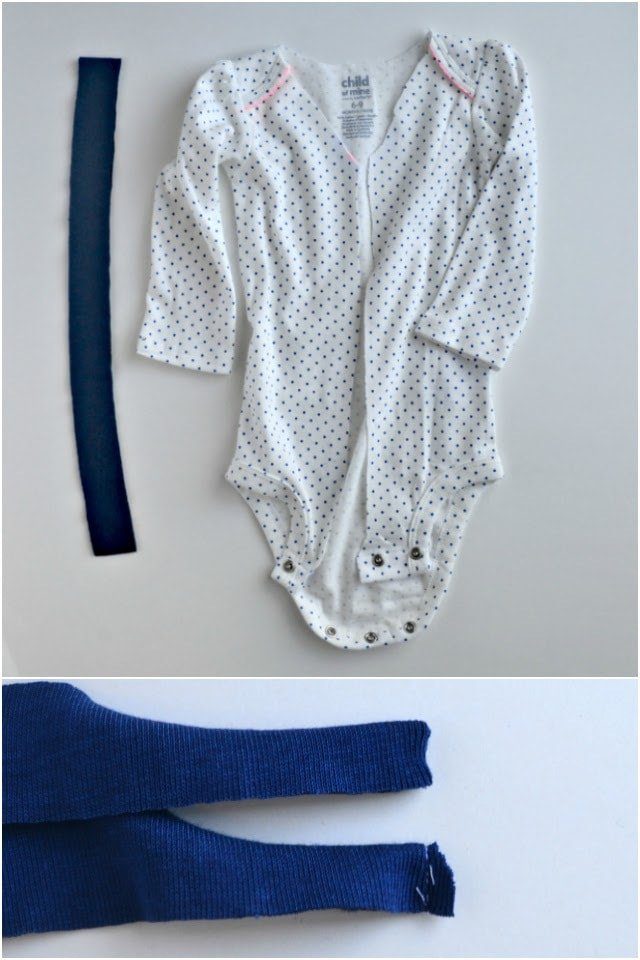
Measure the total length of the edges you just cut.
If you are using a ribbing with 50% stretch and good recovery multiply the length by 80%. If using ribbing with more than 50% stretch and less recovery multiply the length by 75% or less.
Cut this long length with the long side going with the stretch of the ribbing. The height of the ribbing should be between 2″.
Fold the ribbing right sides together and lengthwise. Sew the short edges together at 1/4″. Trim the corner. Turn right side out. Do the same to the other short end.
Fold the ribbing in half lengthwise. Pin the center of the ribbing to the center back of the neckline.
Pin the finished ends of the ribbing to the bottom edge of the onesie near the snaps. Dividing each piece in sections, stretch and pin all along the edge.
Sew the ribbing to the onesie with a zigzag stitch. Carefully stretch the ribbing to fit the onesie but don’t stretch the onesie while sewing.
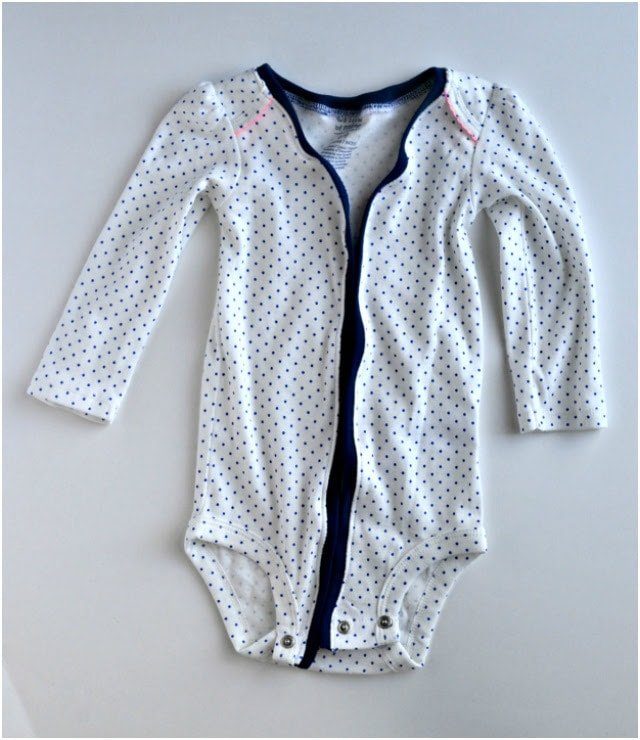
Finish the edges with a serger or zigzag stitch. Press well.
Sew the seam allowance towards the body of the onesie with a straight topstitch.
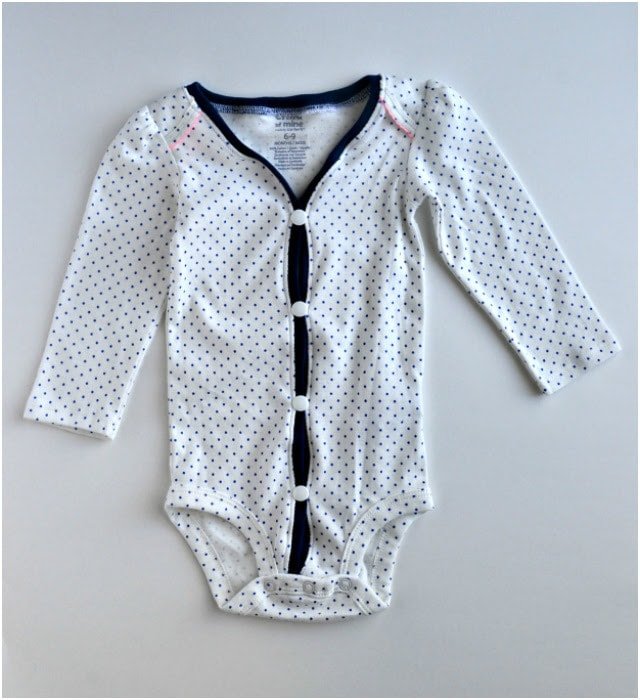
Add snaps or buttons depending on the look you’re going for to close the front like a cardigan. You’re done!
Enjoy the cute, preppy baby cardigan onesie tutorial! If you make something using this tutorial, I’d love to see! Please share it on social media with the hashtag #heatherhandmade and tag me!

I believe small sewing moments can create great joy. Find your own “right” way to sew. -Heather
Maggie's tongue!! I also love the little pink detail!