
How to Sew a Lanyard

This post may contain affiliate links.
Learn how to sew a lanyard with a beginner sewing project. This quick and easy sewing project is useful and makes a great handmade gift.
I love little sewing projects that are fun and satisfying to sew, but that also solves a problem. How great is it when you making something so useful you see it over and over and over again?
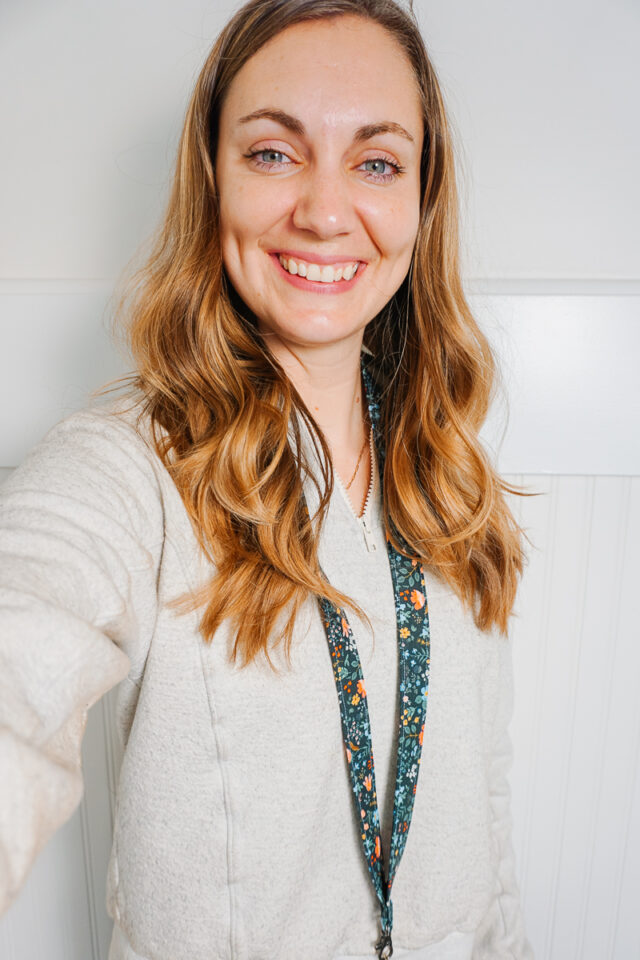
I have a great tutorial to teach you how to sew a lanyard. This is a simple and quick sewing project! Choose your favorite fabric so the lanyard makes you happy every time you see it and use it.
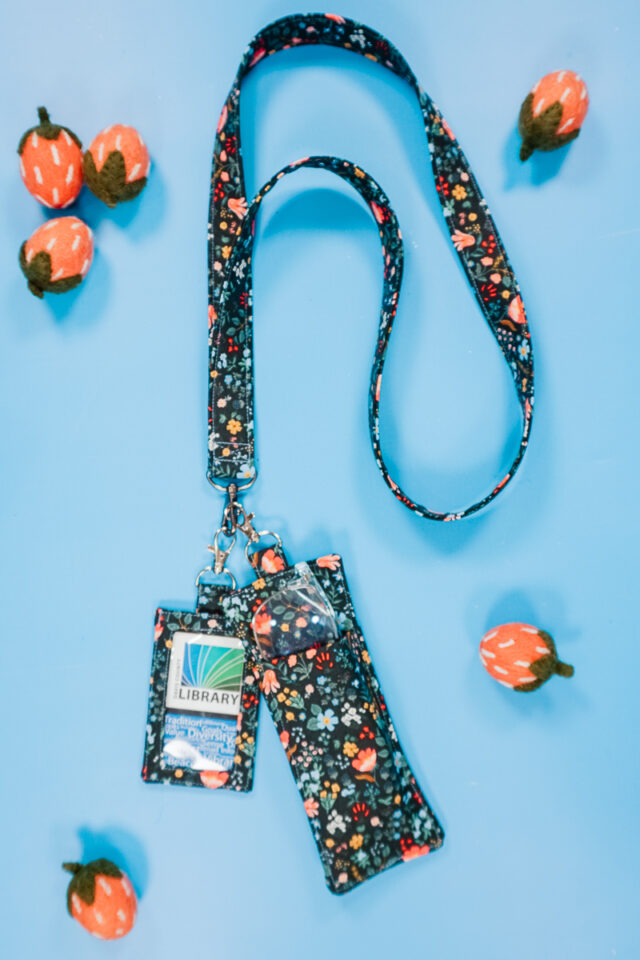
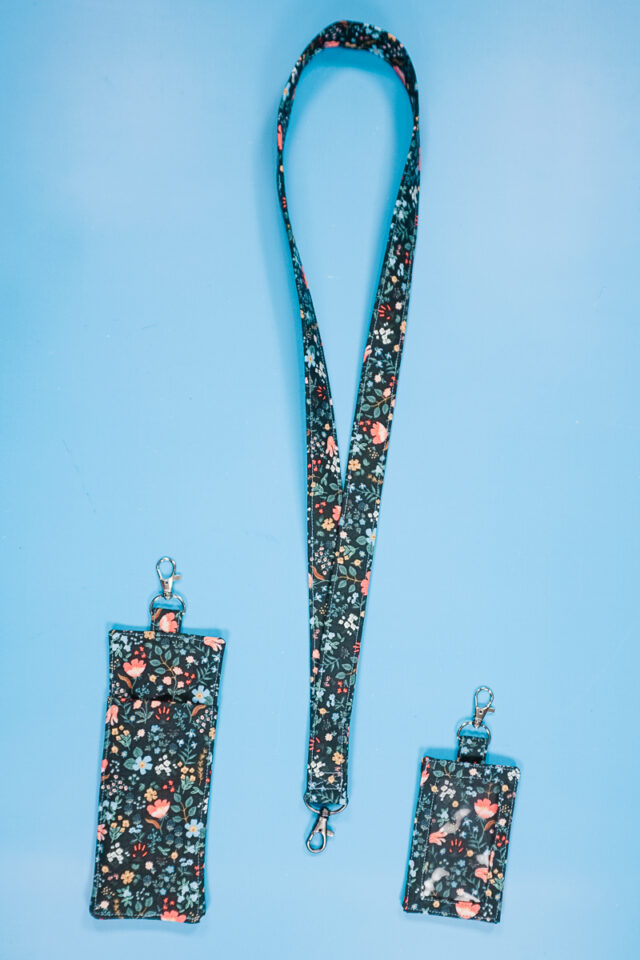
If you need to show your ID badge regularly or if you need a little holder for glasses and pens, buy the sewing pattern that includes the lanyard, ID badge holder, and pen and glasses holder.
To get the free sewing pattern, scroll to the end of the tutorial. Put your email address in the form under “Get the Free Sewing Pattern Here.” Once you confirm that you want to receive emails from Heather Handmade, the free pattern will be sent to your email address. Check your spam and promotions for the email.
What fabric should I use to make a lanyard?
The best fabric to use for a lanyard is quilting cotton. It’s easy to sew, easy to find, and comes in every color and pattern imaginable. You can use small cuts of fabric to make a lanyard which is a great way to use up beloved leftover fabric.
What interfacing should I use to make a lanyard?
Any lightweight interfacing will work great for a lanyard. I prefer to use fusible interfacing, but you can also use lightweight sew-in interfacing.
What clasp should I use for a lanyard?
You will need to get a 1 inch clasp* for this sewing project. I prefer lobster clasps because I like how they work, they are easy to find, and they are a great price.
Want more sewing projects? Try these:
- Beginner sewing projects
- Small sewing projects
- Scrap fabric sewing projects
- Sewing projects to sell
- Gifts to sew for women
- Gifts to sew for teens
- Back to school sewing projects
Get the Lanyard Sewing Pattern
Get the Lanyard sewing pattern that comes with instructions and pattern pieces for an ID badge holder and for a pen and glasses holder. These two holders can clip onto a the lanyard, a key fob, a purse strap, etc. You can use them all together or all separately!
How to Sew a Lanyard
Supplies
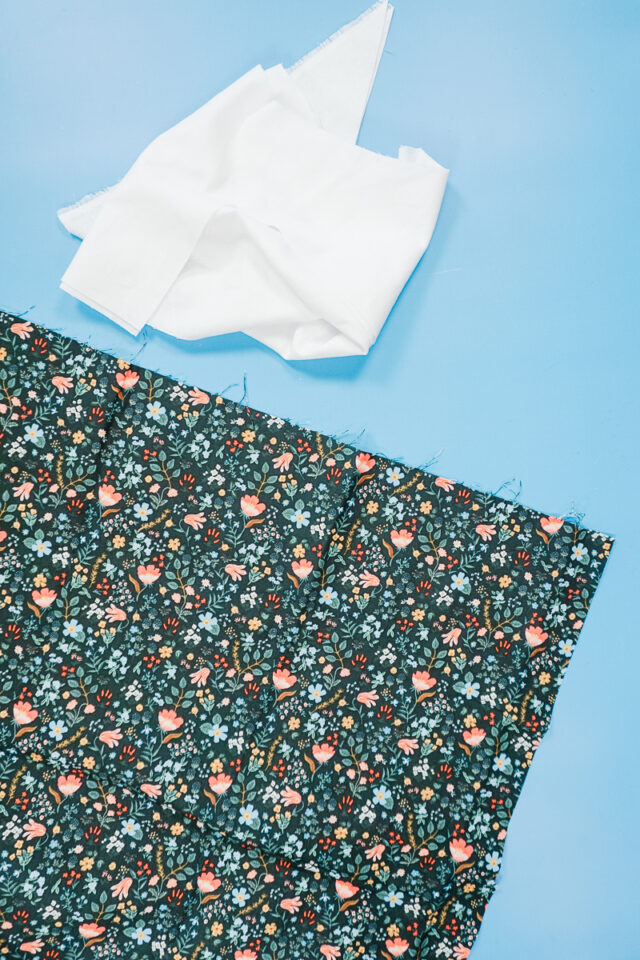
- 1/8 yard of quilting cotton
- 1/8 yard of fusible interfacing
- 1 inch lobster clasp*
- Sewing tools
- Sewing machine
Directions
Cut 1 piece of fabric that is 44 inches wide and 4 inches tall OR cut 2 pieces of fabric that is 22.25 inches wide and 4 inches tall.
Cut 1 piece of fusible interfacing that is 44 inches wide and 4 inches tall OR cut 2 pieces of fusible interfacing that is 22 inches wide and 4 inches tall.
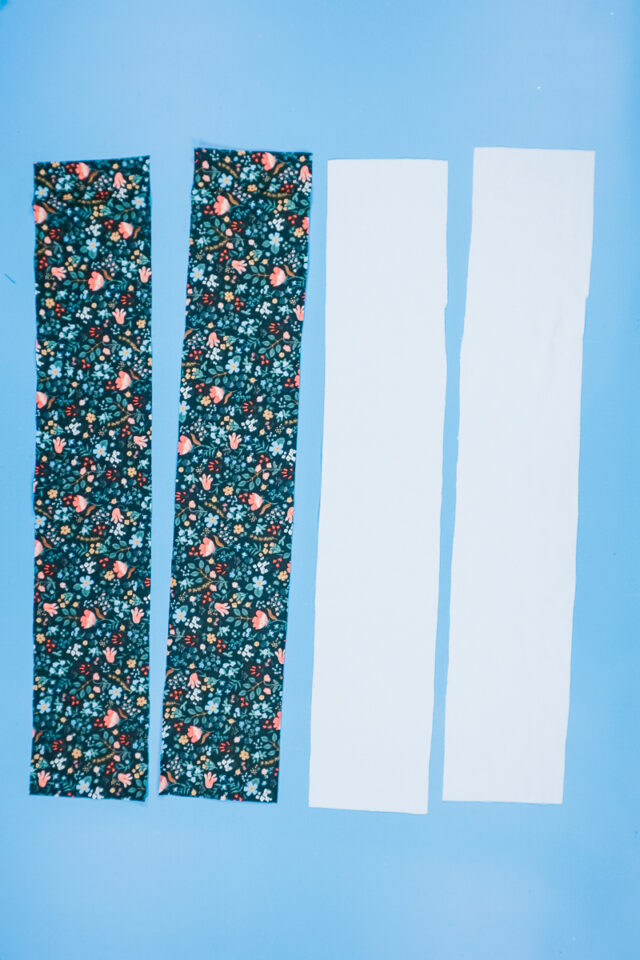
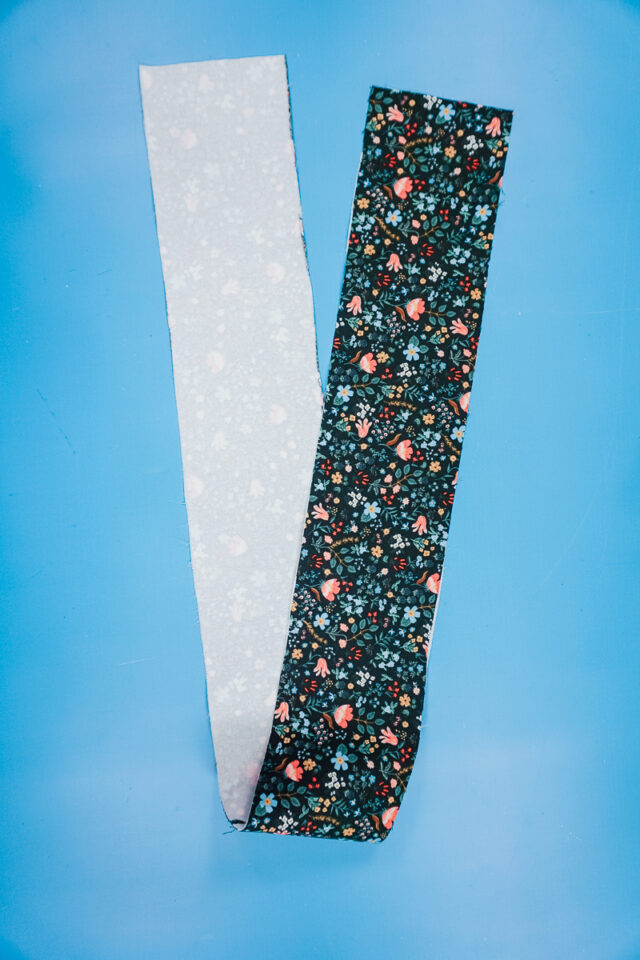
If you are using two pieces of fabric, then sew the two rectangles together on the short side. Match the short sides right sides together and sew with a 1/4 inch seam allowance. Press the seam allowance open. Then apply the interfacing to the back of the fabric with an iron.
If you are using one piece of fabric, then apply the interfacing to the back of the fabric with an iron.
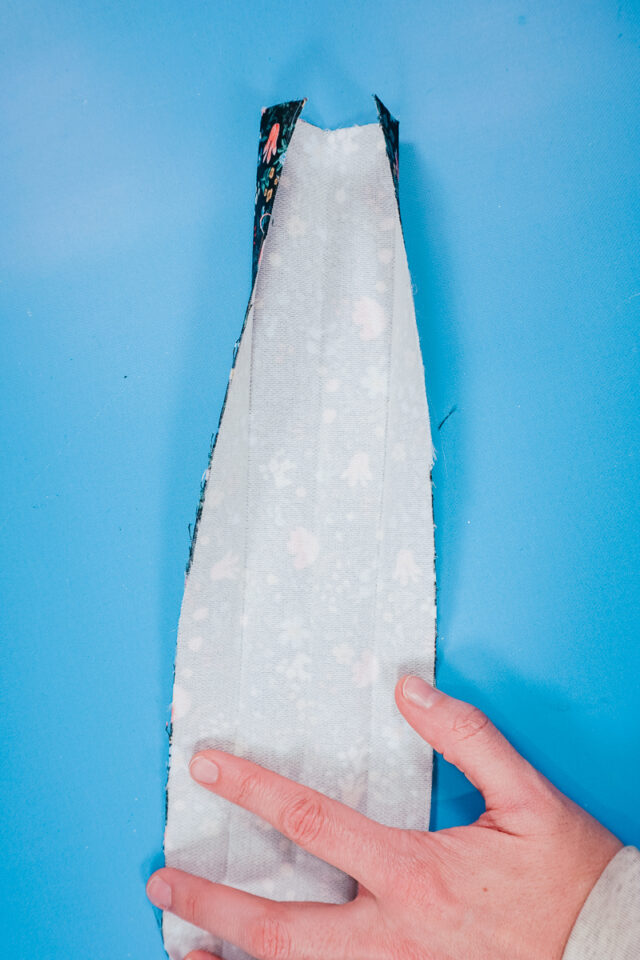
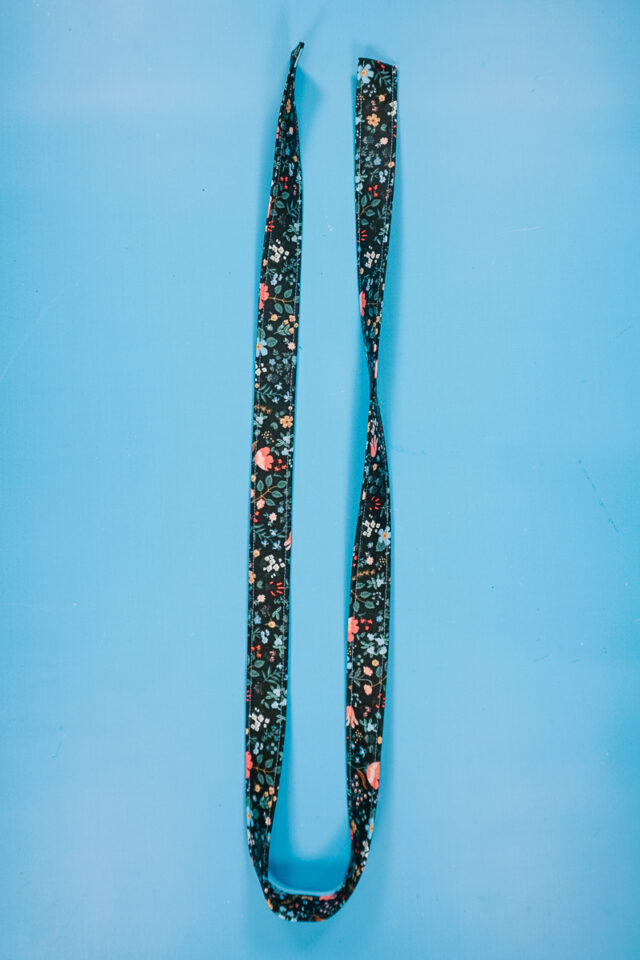
Fold the rectangle in half with wrong sides together matching the long edges. Press the fold in place.
Fold the long edges in to meet at the center fold with wrong sides together. Press the two folds in place.
Fold the first fold so that the long edges are enclosed inside. Press all three folds.
With the folds all folded and the raw edges enclosed inside, sew along each long edge 1/8 inch from the edge. Backstitch when you start and when you stop.
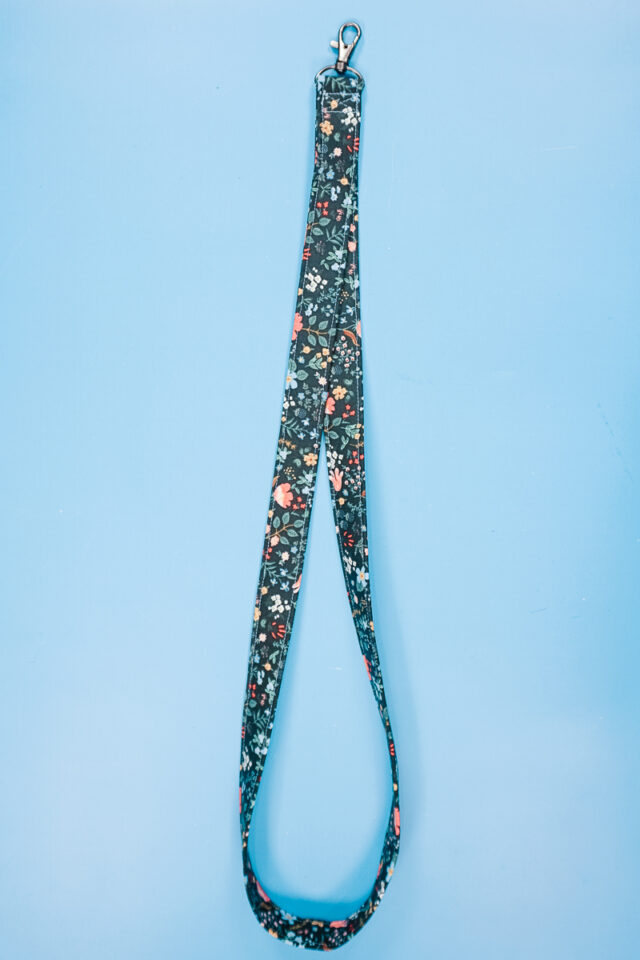
Slide the lobster clasp onto the lanyard.
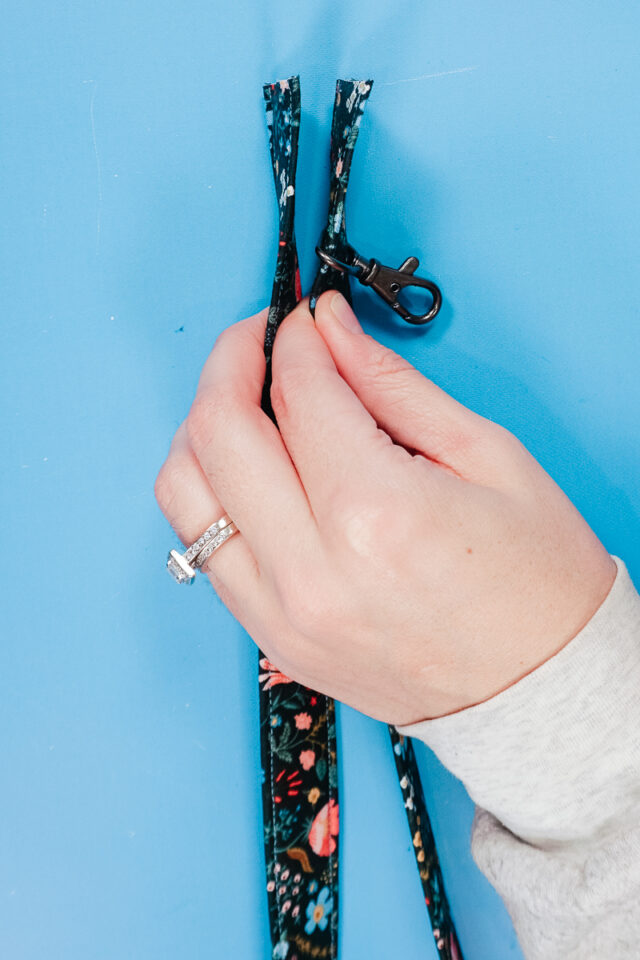
Make sure the lanyard is not twisted at all. Sew the short ends with a 1/8 inch seam allowance. Backstitch when you start and when you stop.

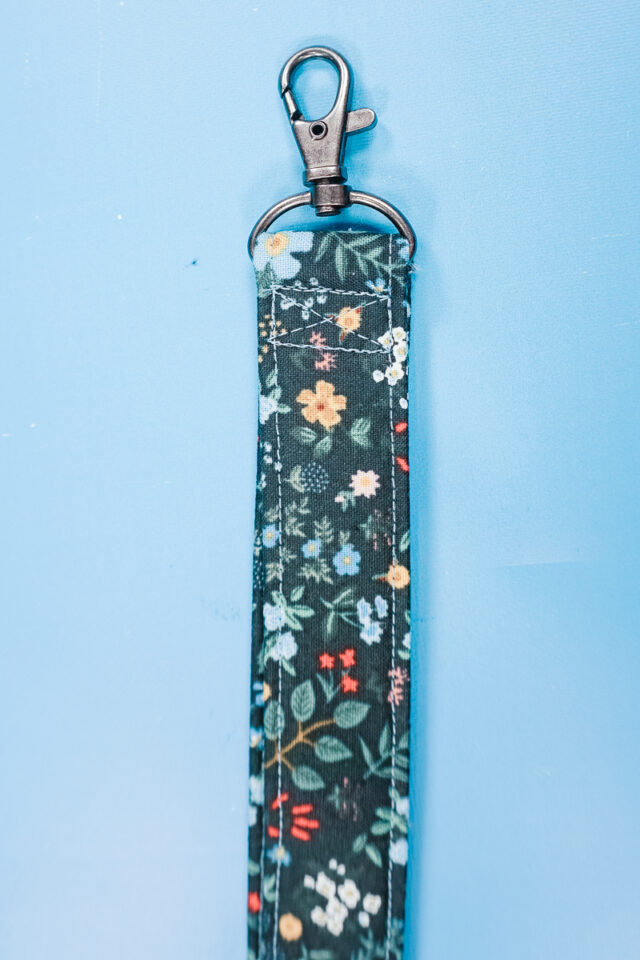
Flip the lanyard around so that the seam is now on the outside. Slide the clasp down so that it’s right next to the seam allowance. Pinch the lanyard together right under the lobster clasp.

Sew a rectangle and “X” just beneath the lobster clasp to secure the layers together. Backstitch when you start and when you stop. You finished!
If you make something using this sewing project, I’d love to see! Please share it on social media with the hashtag #heatherhandmade and tag me!

I believe small sewing moments can create great joy. Find your own “right” way to sew. -Heather