
Mini Felt Mermaid Softie + Free Pattern

This post may contain affiliate links.
Learn how to make a mini felt mermaid softie with a free sewing pattern! This is a great stuffed mermaid that can be carried in purses and pockets to play!
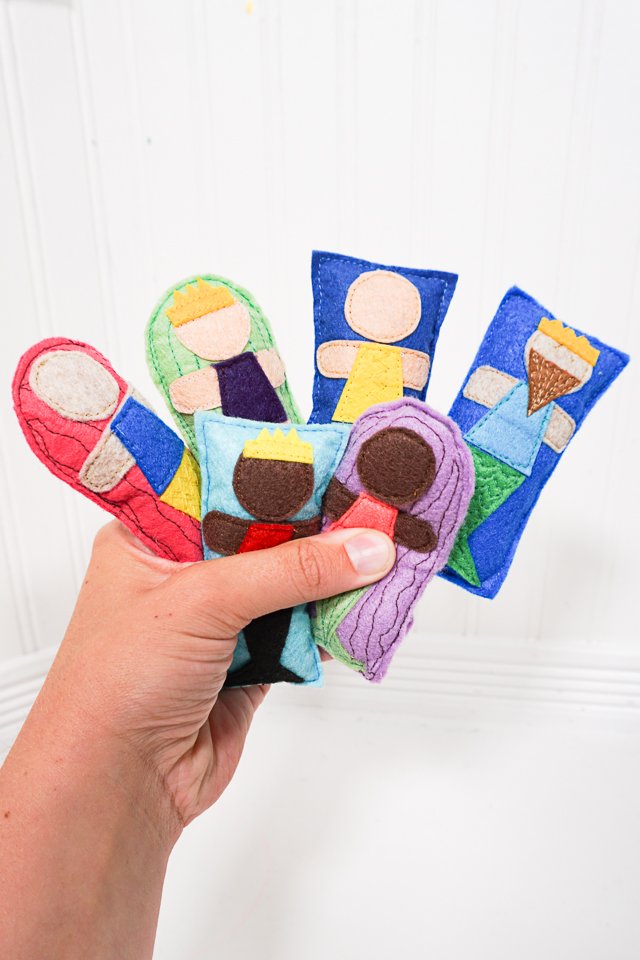
I’m so excited to share a free sewing pattern for the cutest little felt mermaid softie. It is a tiny size that fits in pockets and purses for an easy toy that can be brought anywhere like a waiting room or waiting in line. Change up the colors for mermaids that look like your child.
The small size makes it a quick sew on the machine or a quick sew by hand. This works great for a child practicing their sewing machine skills or their hand sewing skills.
Today I’m joining the fun Sew a Softie tutorial hop that’s going on through the month of July. It’s a whole month of beginner, kid-friendly softie sewing projects to get kids sewing! There has been so many fun projects that have already been shared!
I had so much fun designing this simple pattern and choosing all the colors for the mermaids. I had to stop myself at 8 because I would have kept going will all the color combinations!
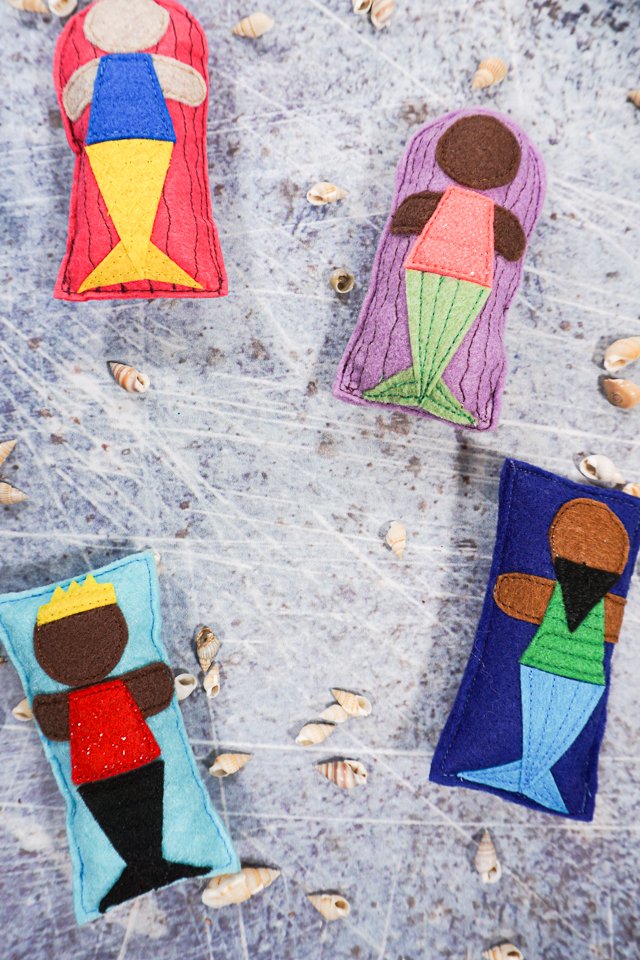
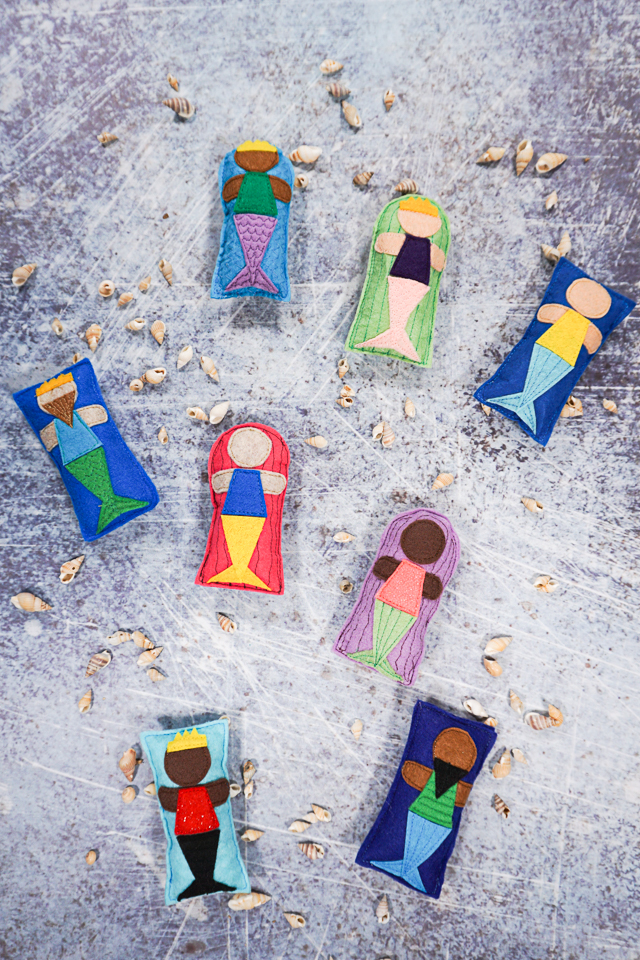
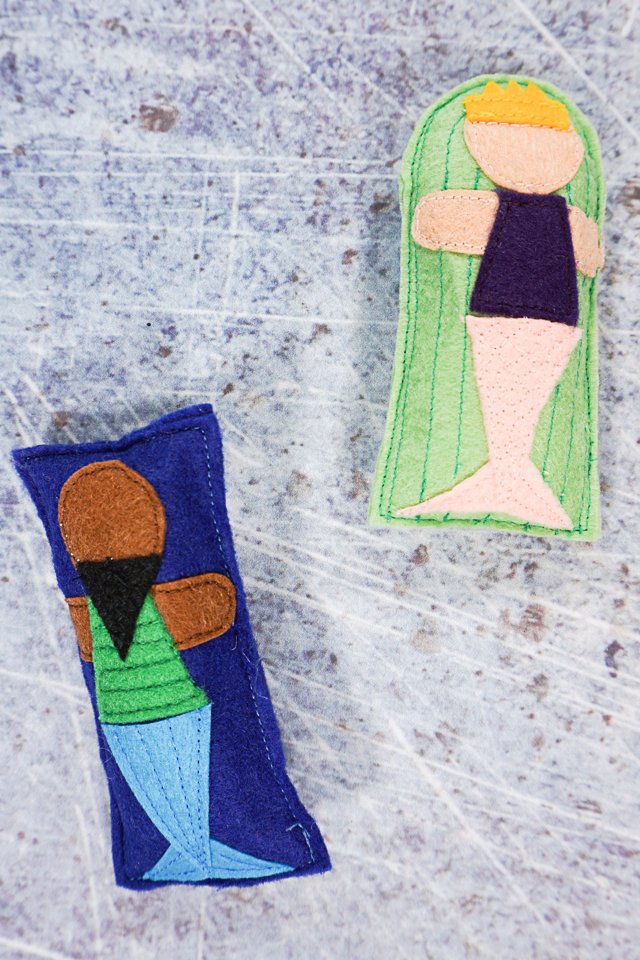
The mermaids are set against the background of their long, long hair and then sewed into a little pillow. The mermans are set against a water background, and then sewed into a little pillow.
Each can be customized with a crown or beard, and all the different colors for the hair, water, skin, shirt, and tail. Then added unique stitching for each mermaid.
I chose to have the mermaids stuffed as little pillows to make them so much easier to sew. It’s just sewing a rectangle instead of the arms and tail.
Do you like mermaid sewing projects?
- Felt sewing projects
- DIY mermaid skirt
- DIY mermaid inspired dress
- make a mermaid tail skirt with tulle
- mermaid tote bag pattern
- mermaid ornament
- How to make a felt alligator
- Sewing projects for kids
- Free sewing patterns for kids
what is a pdf sewing pattern?
A PDF pattern is a sewing pattern designed on the computer and organized so that it can be printed on several letter or A4 size pieces of paper.
I love using PDF sewing patterns because if the pattern gets ruined or if my children or I changed sizes, I can always print it again. It’ll never be destroyed since I have a digital version!
Learn how to use PDF sewing patterns.
mini felt mermaid softie
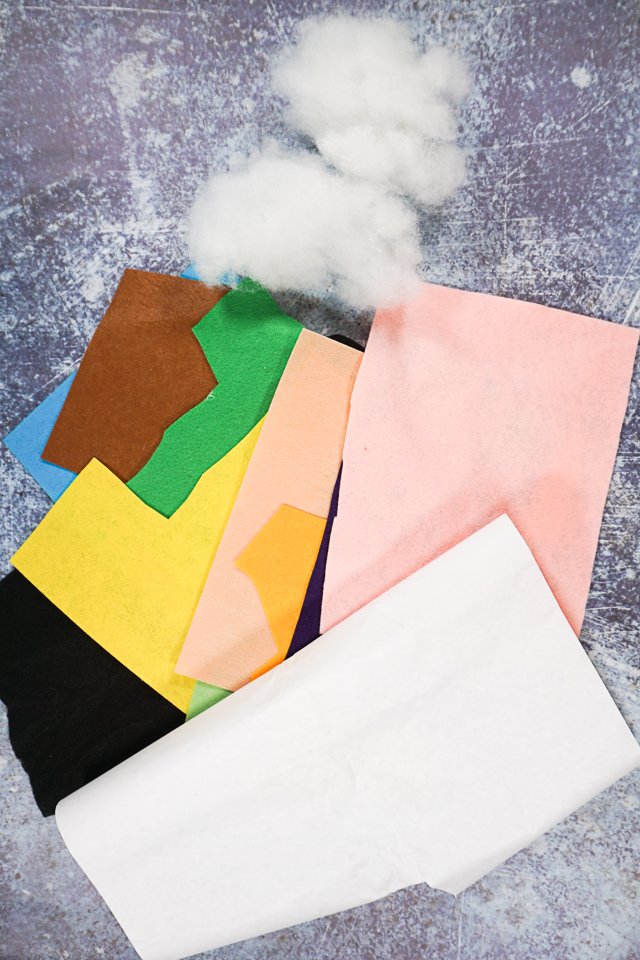
supplies
- Acrylic felt in all different colors
- Free mini felt mermaid stuffie sewing pattern – get it at the end of the post behind the locked content boxt
- Double sided iron-on adhesive
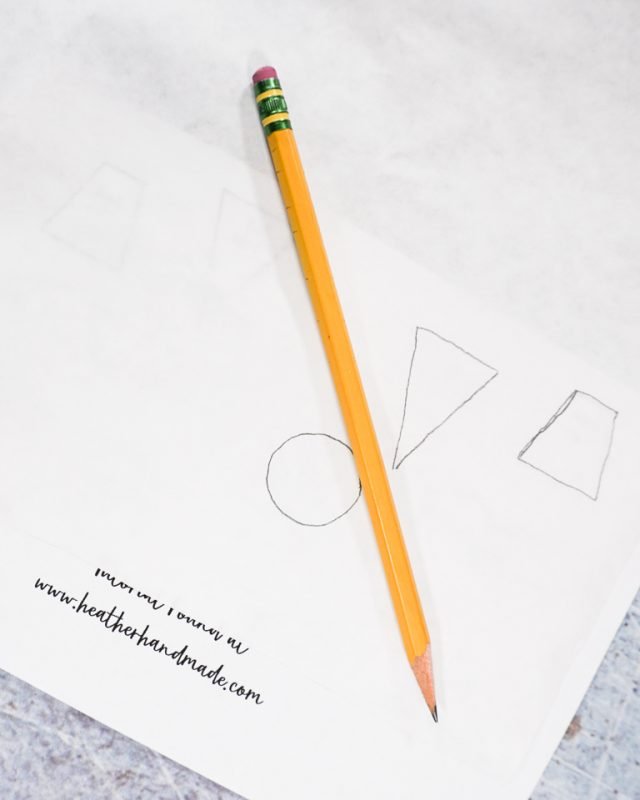
- Pencil
- Iron, ironing board, and press cloth
- Scissors
- Bits of stuffing
- Sewing machine or hand sewing tools
Print out the mini felt mermaid stuffie sewing pattern. There is a picture of the finished mermaid for guidance, and your child can color it to give them an idea of what they want their mermaid to look like.

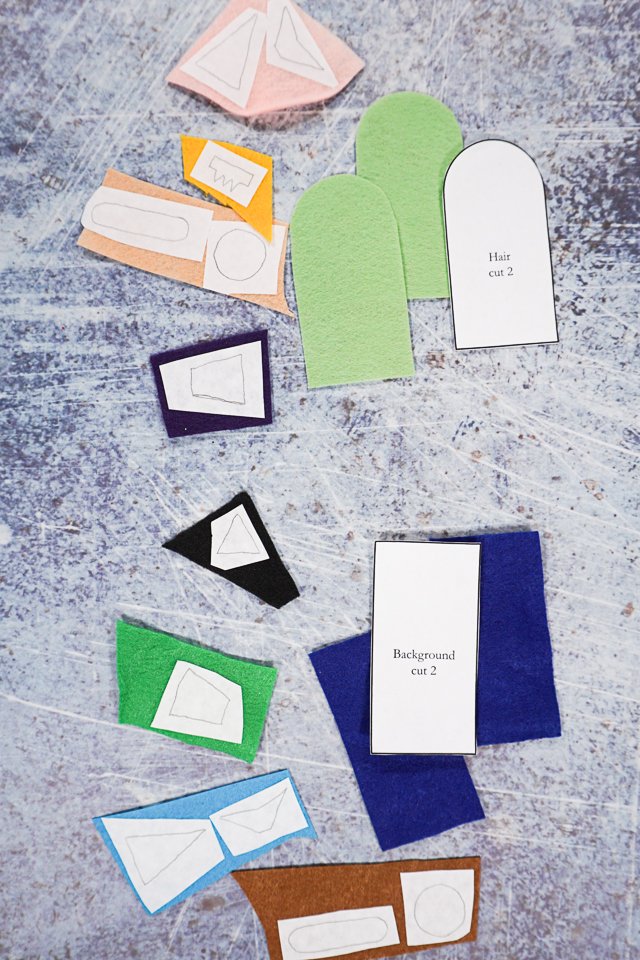
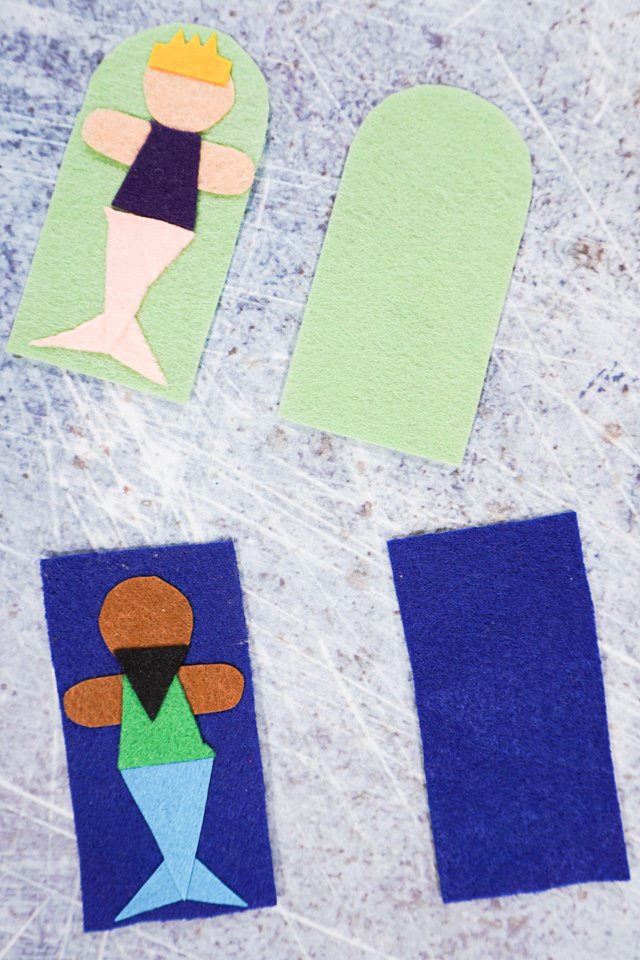
Trace the mermaid shapes onto the paper backing of the double sided adhesive. I found the pencil worked best since I could trace well on the paper backing, but the iron would not smudge or lift the pencil.
Don’t trace the hair or water backgrounds onto the paper backing but cut it out.
Iron the shapes onto the felt in the colors you want. I like the cut the adhesive larger than the shapes, and then iron them onto the felt.
Cut out the felt using the shapes. The double sided adhesive will make sewing the shapes easier, but it also makes cutting the felt easier and more precise.
Cut out two pieces of felt for the background hair or water.
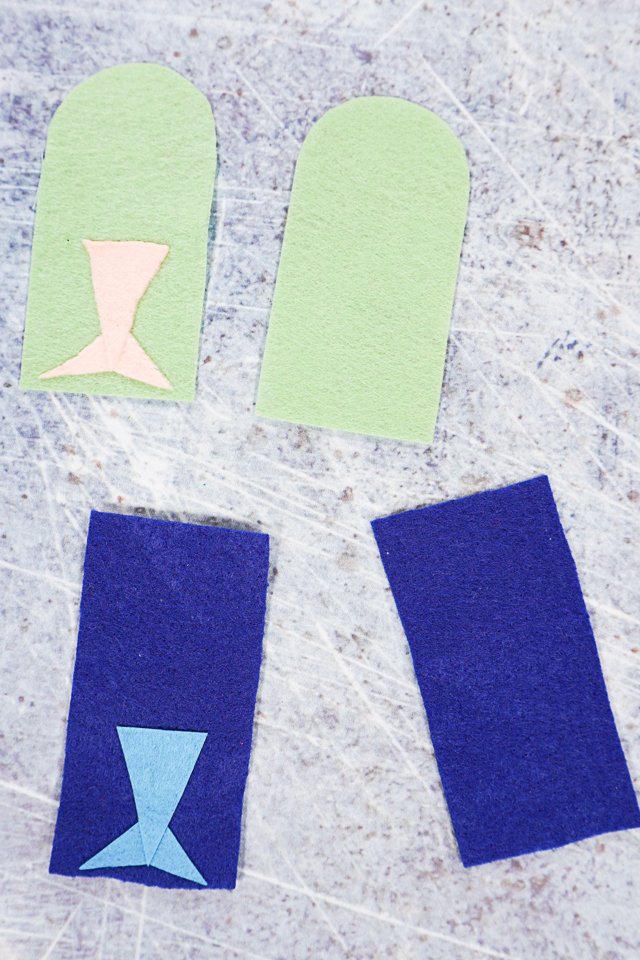
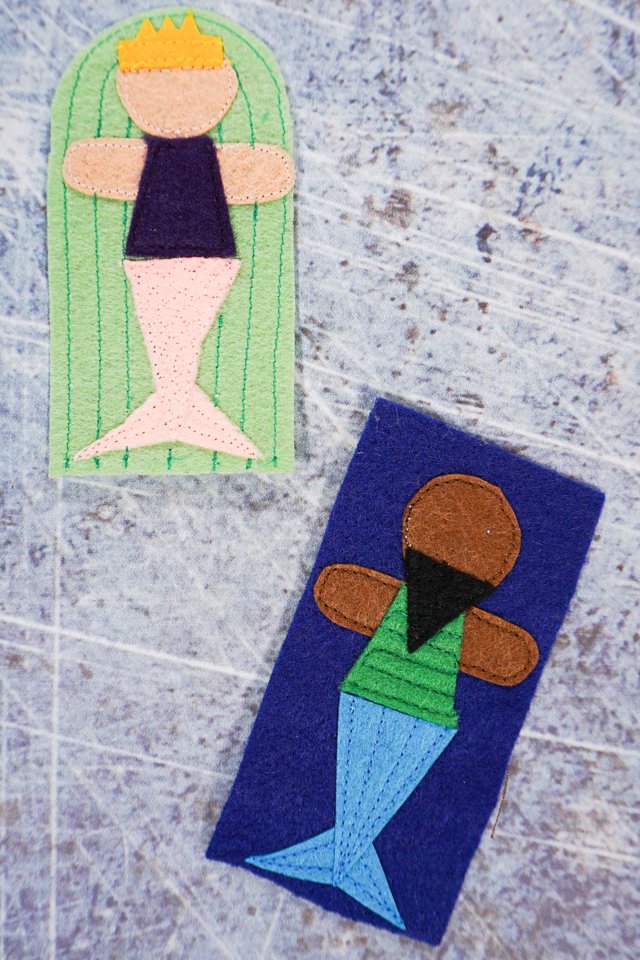
Once all your pieces are cut out, start by adding some stitching to the hair or water background. I don’t have an example below, but this is the easiest time to add hair or water details. I did straight hair, zigzag hair, and wavy hair.
Place the mermaid tail pieces close to the bottom on the background that has stitching. Peel the paper backing off and iron them in place. Use a press cloth throughout the project to protect the felt from melting.
Peel the paper backing off of the arms, shirt, and head. Place these on the background and iron in place.
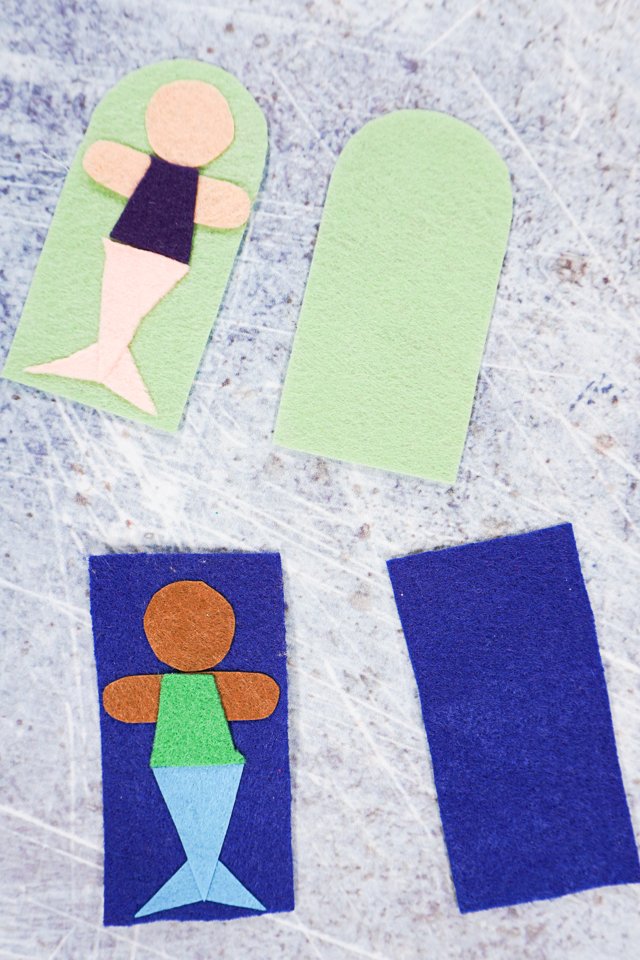
Optional: add the crown and or the beard. Peel the paper backing off and iron in place.
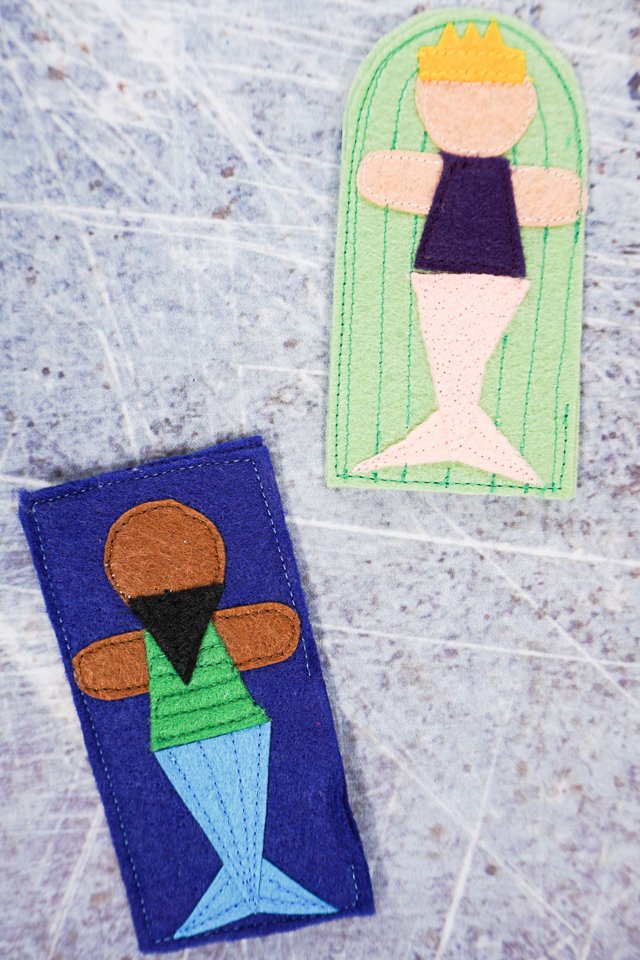
Using a sewing machine or hand stitching, sew and secure the pieces onto the background. Add stitching details like stripes, scales, fins, etc. Switch up the colors of stitching as wanted.
Place the front background piece onto the back background piece. Sew around but leave a 2 inch hole opening on one side.
Take a little bit of stuffing and fill the mermaid pillow. Don’t stuff too much, just enough to fill the rectangle.
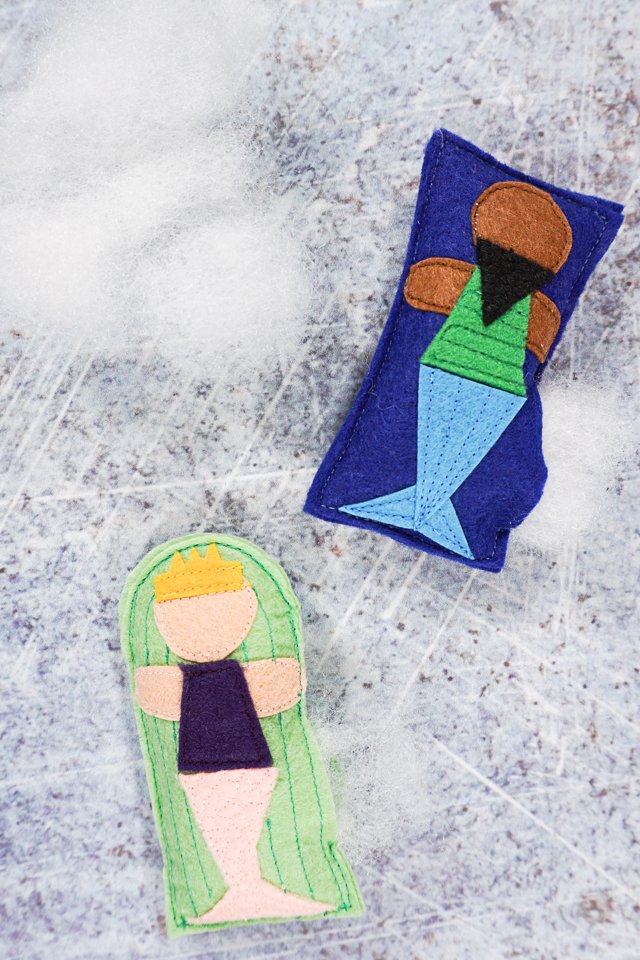
Stitch the hole closed.
Make lots and lots of mermaids in lots of different colors!
Get the Free mini felt mermaid softie pattern

If you make something using this sewing project, I’d love to see! Please share it on social media with the hashtag #heatherhandmade and tag me!

I believe small sewing moments can create great joy. Find your own “right” way to sew. -Heather