
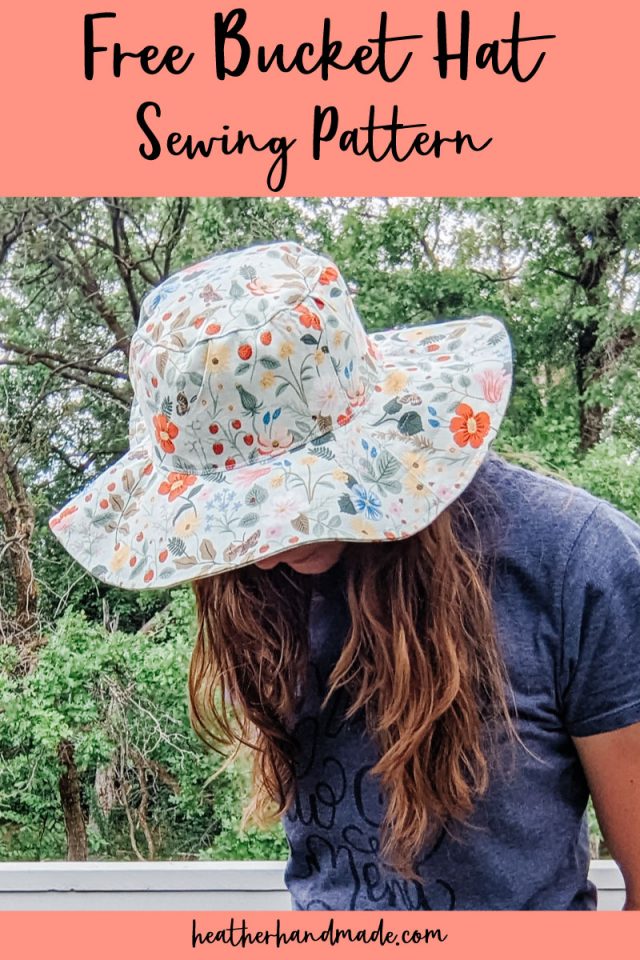
Free Bucket Hat Sewing Pattern for Summer

This post may contain affiliate links.
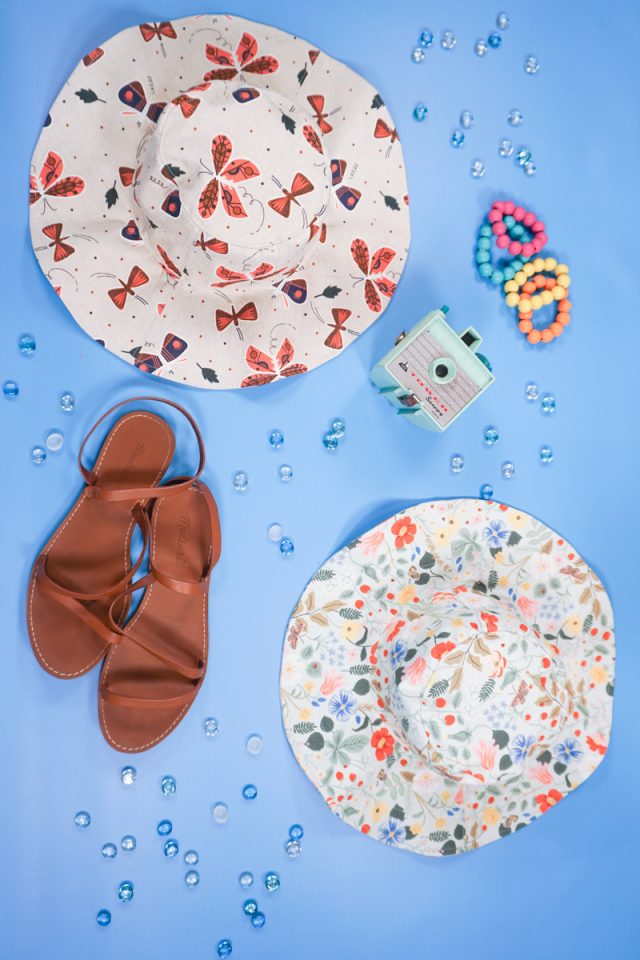
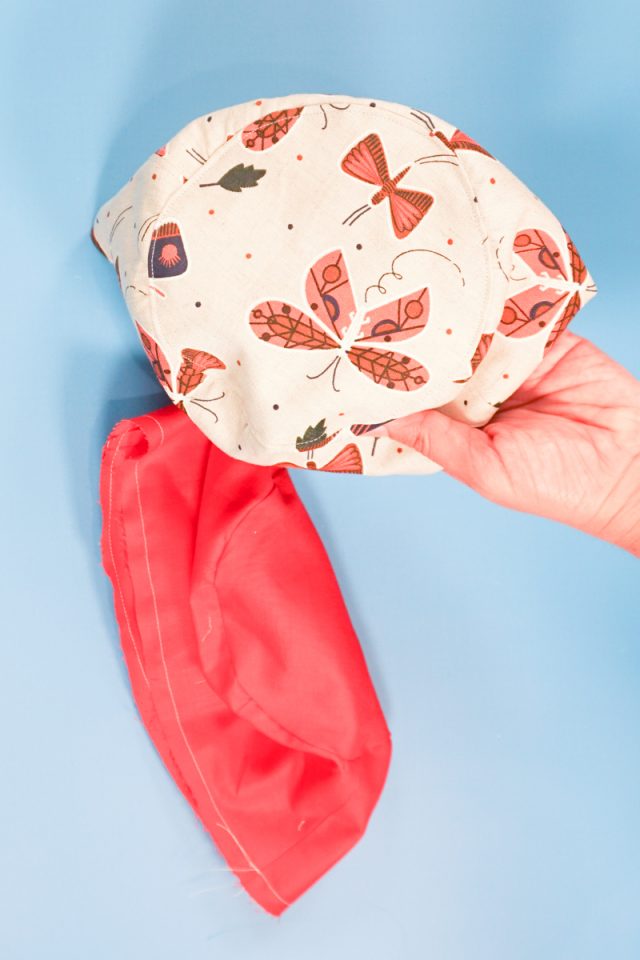
Learn how to make a bucket hat with a free sewing pattern in baby, child, and adult sizes. This beginner sewing project is great for summer!
Summer is here, and I love spending time outdoors. We love to hike, garden, and swim so having a hat to keep our face shaded and protected from the sun is so important.
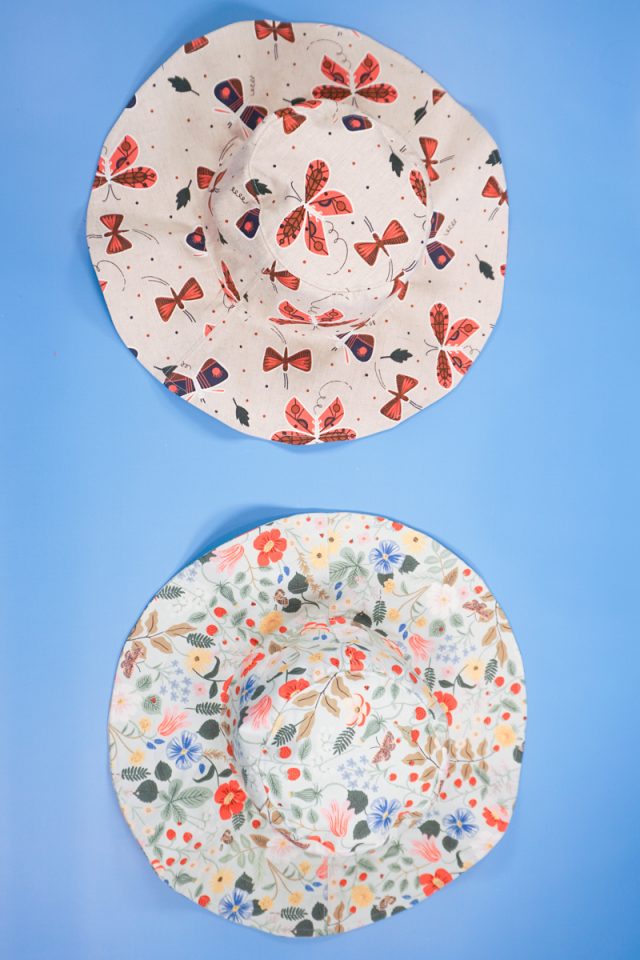
I started designing this hat as a bucket hat, but I widened the brim for more sun coverage. It’s almost more of a sun hat, but I’m still calling it a bucket hat.
This hat comes with one design, but it comes in 9 sizes from baby to child to several adult sizes. It works for the whole family!
To get the free sewing pattern, scroll to the end of the tutorial. Put your email address in the form under “Get the Free Sewing Pattern Here.” Once you confirm that you want to receive emails from Heather Handmade, the free pattern will be sent to your email address. Check your spam and promotions for the email.
What fabric works for a bucket hat?
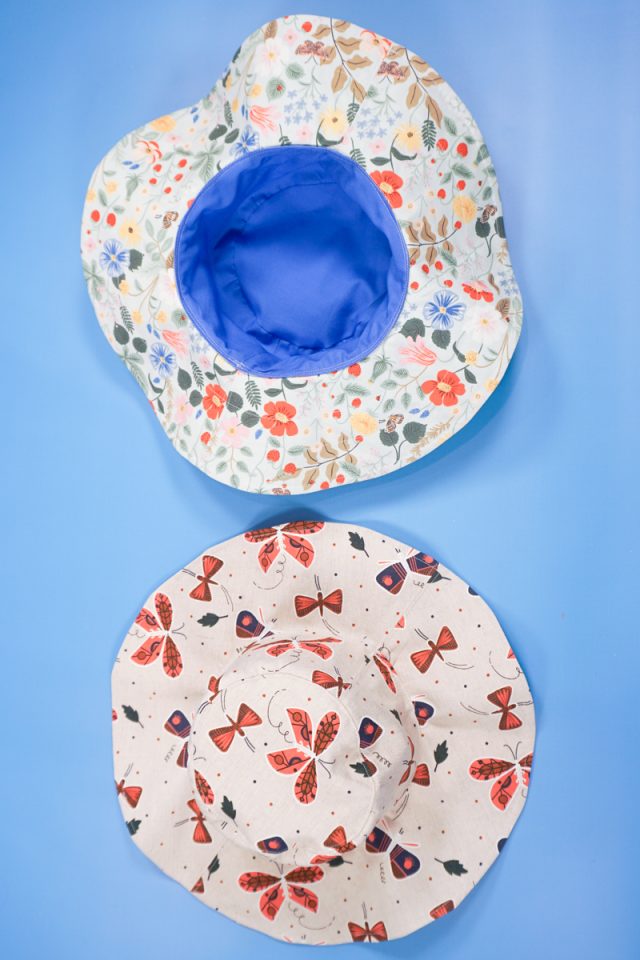
The fabric that works best for a bucket hat is cotton canvas or quilting cotton. I used both for the two hats I made with great success. The canvas makes the hat a little bit stiffer, but it also makes the hat a little harder to sew.
Canvas and cotton are easy to find and easy to sew, and it comes in every print and color imaginable. You’ll also need a fat quarter of quilting cotton for the lining.
Should I prewash the fabric?
Yes, you should prewash the fabric. Since the hat will get used and it’s washable, you should wash and dry the fabric on hot before cutting out the pattern pieces.
What is a PDF sewing pattern?
A PDF pattern is a sewing pattern designed on the computer and organized so that it can be printed on several letter or A4 size pieces of paper.
I love using PDF sewing patterns because if the pattern gets ruined or if my children or I changed sizes, I can always print it again. It’ll never be destroyed since I have a digital version!

How do you use a PDF sewing pattern?
Open the PDF on a computer and click print. When printing make sure that the scaling is set to 100% or no scaling so that the pattern prints at the correct size.
Once the pattern is printed it can be taped together to get the full size. Then the pattern can be cut for each pattern piece size or individual sizes can be traced so that the pattern can be used again and again. Learn how to use PDF sewing patterns.
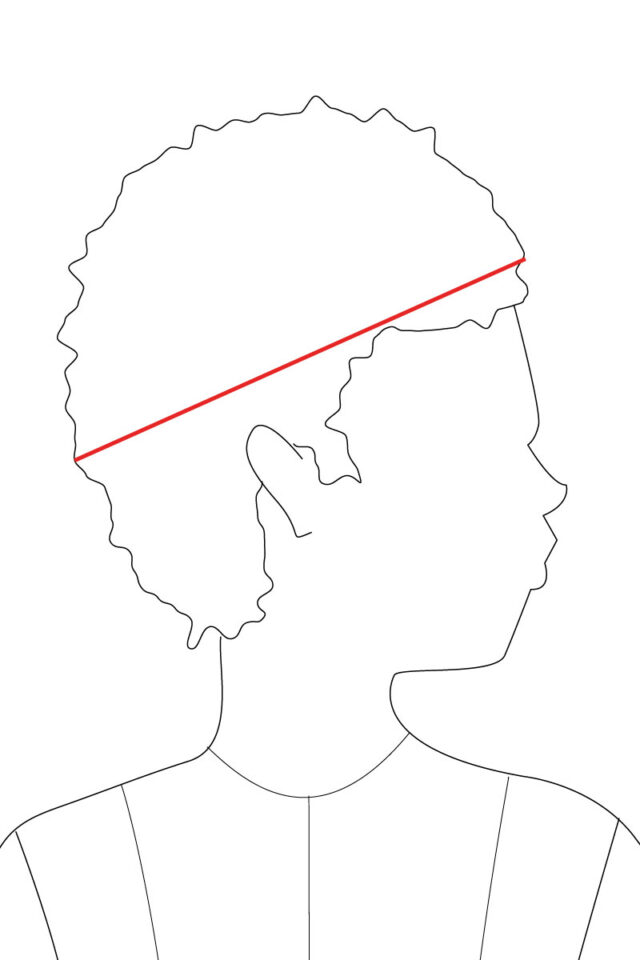
How to Measure Your Head
To measure the circumference of your head correctly, the tape measure needs to be over the middle of your forehead, go around above your ears and then sit in the middle at the back of your head at the widest part. Do not pull the tape too tight unless you want your hat to be that tight when you wear it.
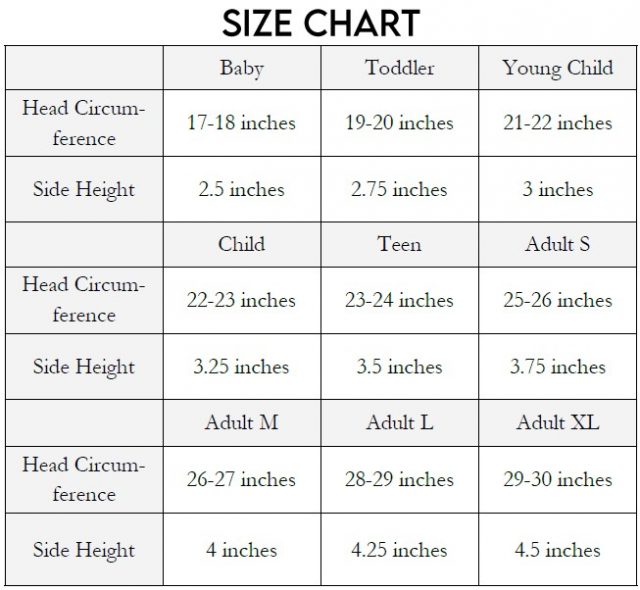
What sizes does the pattern come in?
The pattern comes in sizes baby, toddler, young child, child, teen, and four adult sizes. Use the measurement chart below to find the right size to make.
When you measure your head, make sure you are measuring around the widest part of your head so that you make the right size.
Do you love to sew? Try one of these fun sewing projects:
- Free PDF sewing patterns
- Beginner sewing projects
- Summer sewing projects
- Canvas sewing projects
- Quilting cotton sewing projects
How to Make a Bucket Hat
Supplies
- Free Bucket Hat Sewing Pattern – get it at the end of the post
- 3/4 yard quilting cotton or cotton canvas (for the main part of the hat)
- 1 fat quarter of quilting cotton (for the lining of the hat)
- 1/2 yard fusible interfacing
- Matching thread
- Sewing tools
- Sewing machine
Do you just want the pattern and tutorial as a PDF? Get the pattern and photo tutorial for just $6. You won’t need to access the internet every time you want to make it. Or get the Pattern Bundle with ALL the PDF tutorials!

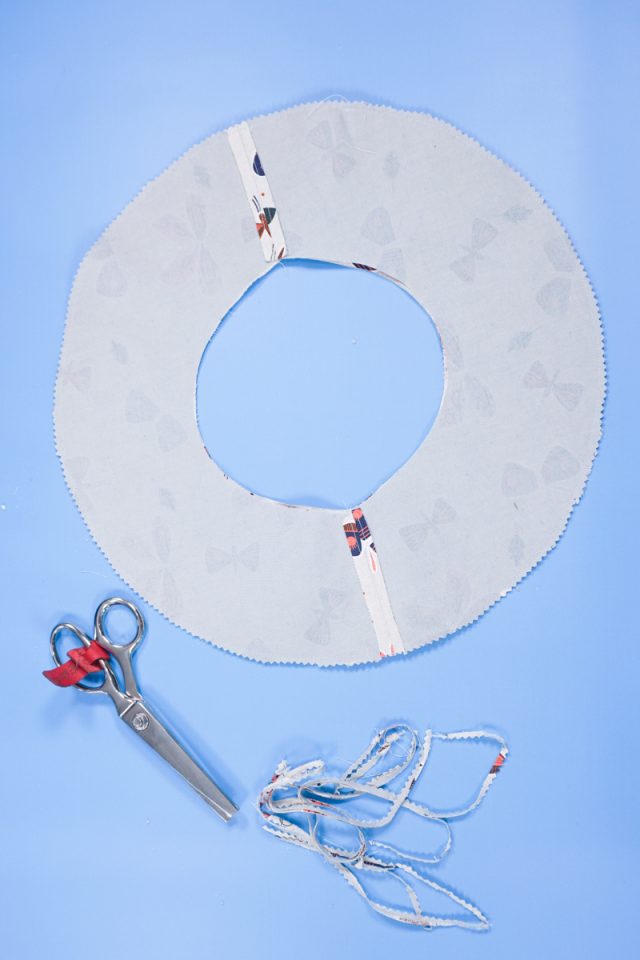
Cut out all the pattern pieces as instructed in the pattern. From the outer fabric you’ll need 1 crown, 2 sides, and 4 brims. From the lining you’ll need 1 crown and 2 sides. From the interfacing you’ll need 1 crown, 2 sides, and 4 brims.
Fuse the interfacing pieces to all the wrong side of the outer fabric pieces.
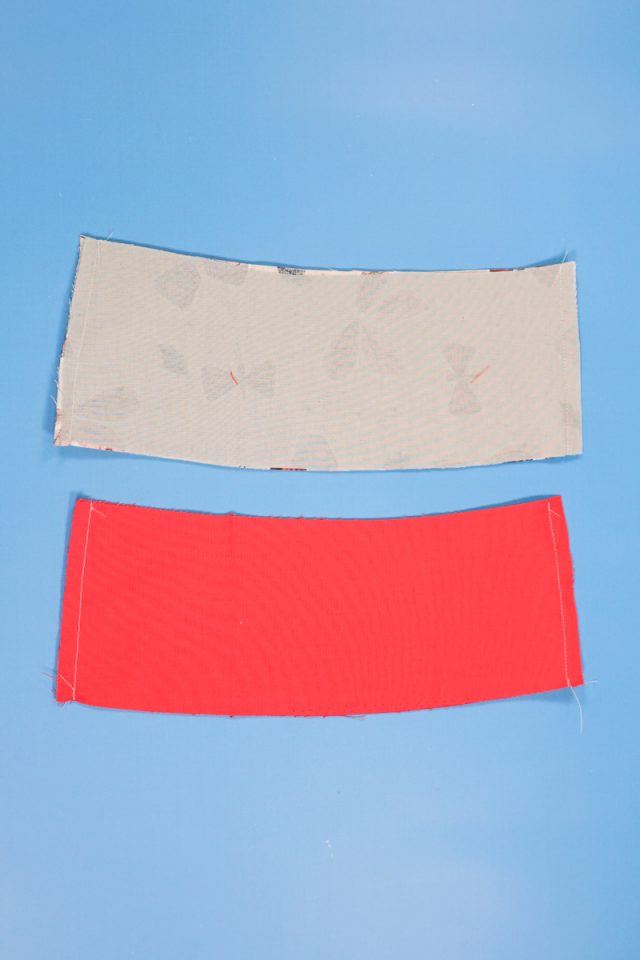
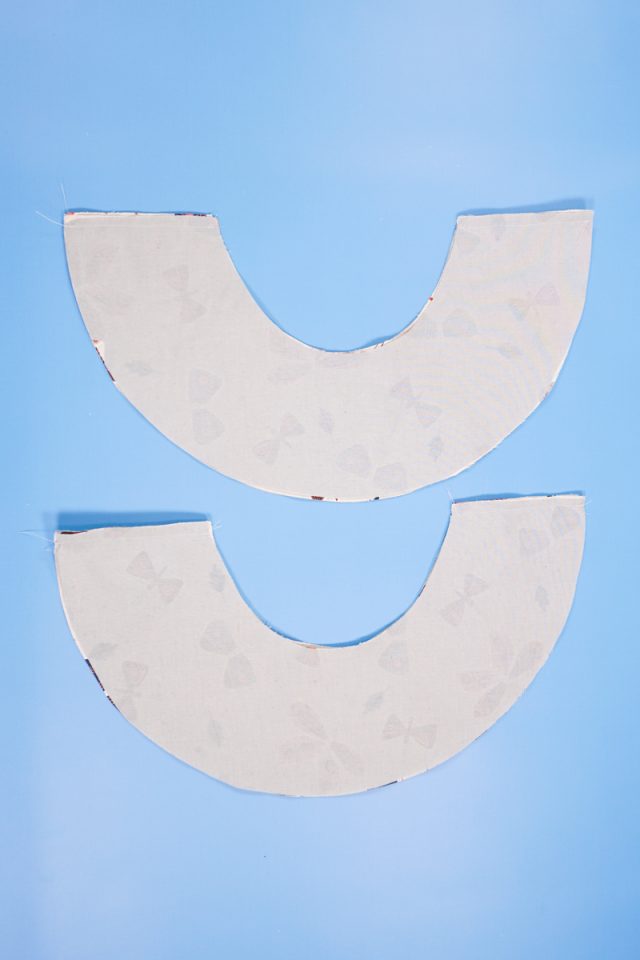
Match up the short sides of the outer fabric sides with right sides together. Match up the shorts ides of the lining fabric sides with right sides together. Sew each side and backstitch when you start and when you stop.
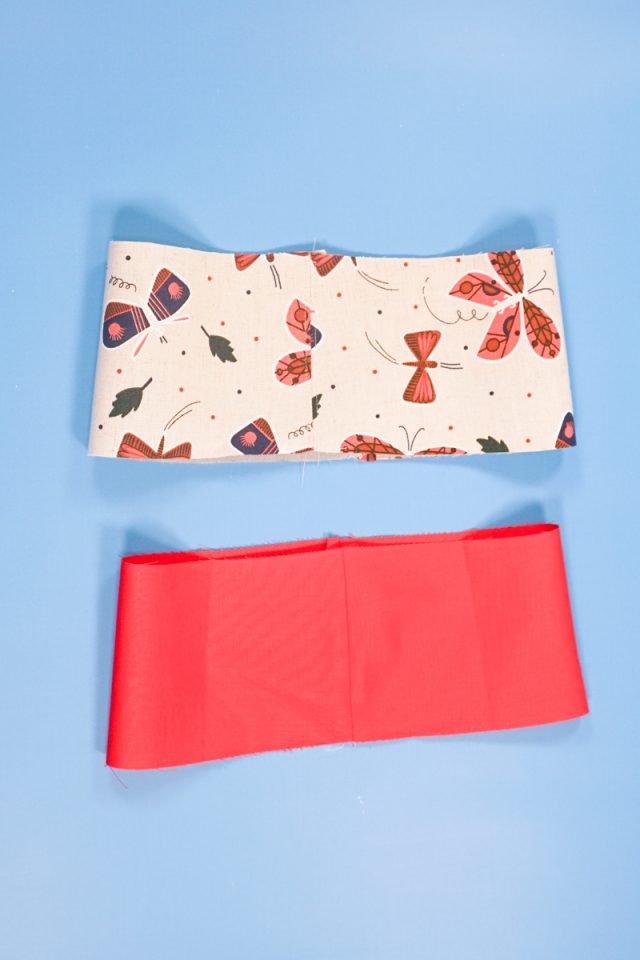
Press the seams open.
On the outer fabric side (that is now a tube), edgestitch the seam allowances open. This creates a nice, casual look and makes it easier to sew and wear with the seam allowances stitched flat.
Pin the crown to the top (the smaller circumference) of the side with right sides together and match the notches to the side seams. Sew the crown to the side being careful since you’re sewing a curve to a straight edge.
Do the same to the lining. Press the seam allowances towards the crown on both the outer piece and the lining piece.
Edgestitch the seam allowance towards the crown on the outer hat piece.
Sew around the bottom of the lining piece 3/8 inch from the edge. This is a guide stitch.
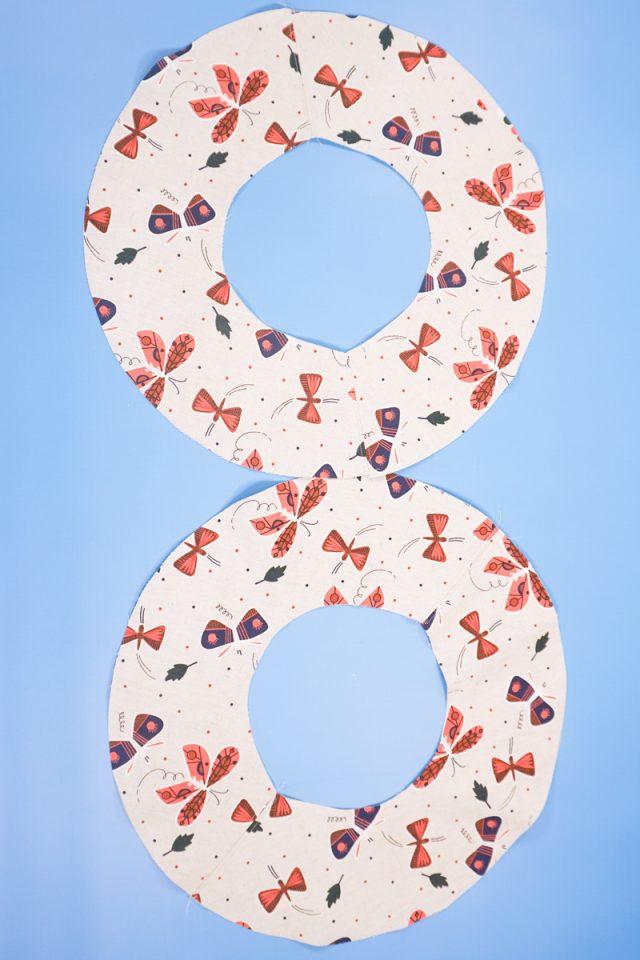
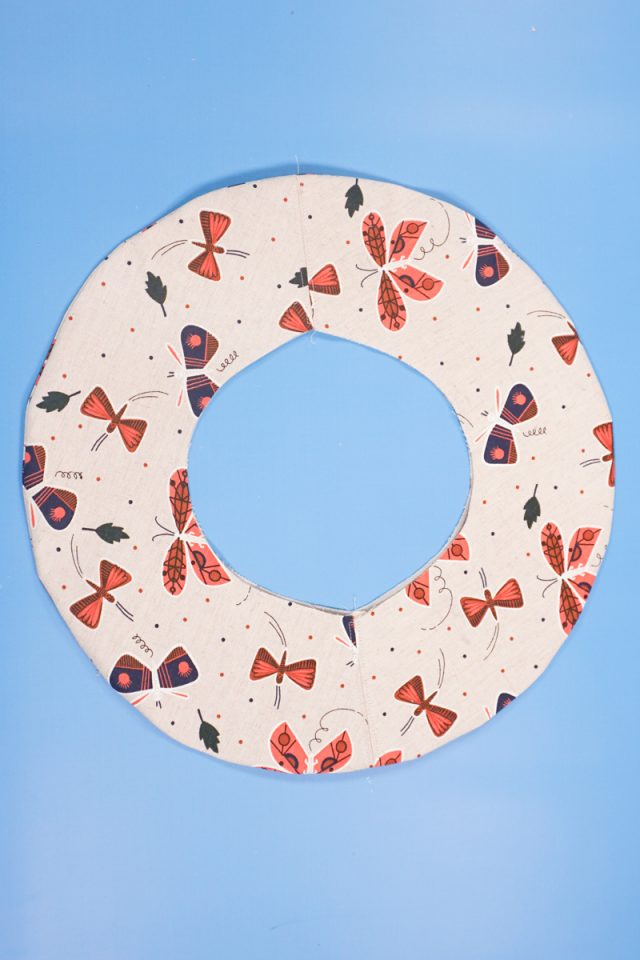
Pin one brim to another at the short side seams with right sides together. Pin the other brim to the remaining brim with right sides together.
Sew all four side seams and backstitch when you start and when you stop.
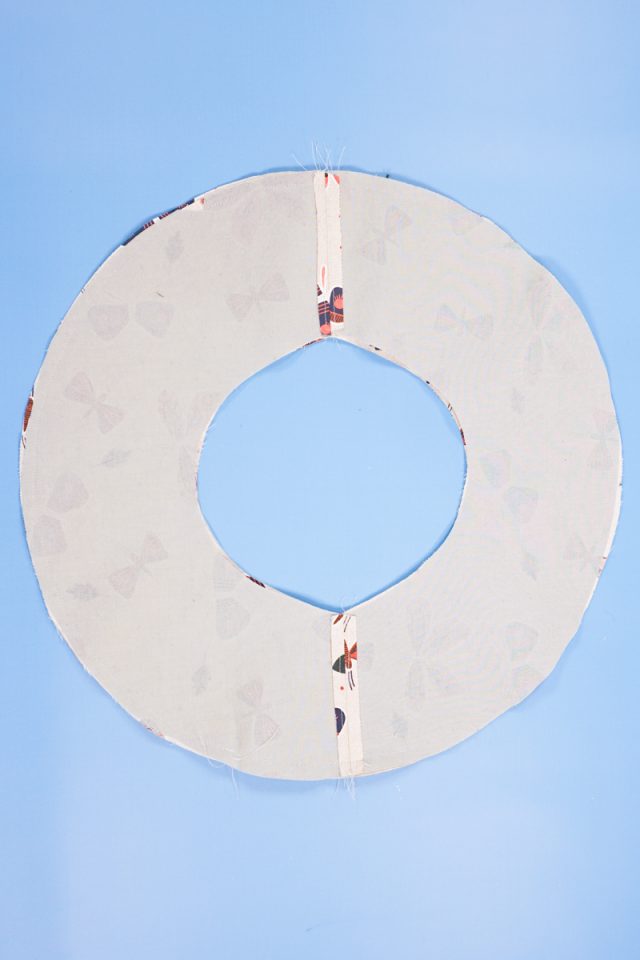
Press the seams open. Edgestitch around the seam to keep the seam allowance open and flat.
Place the brims right sides together and match up the outer circle. Pin it together.
Sew the outer edge of the brim all the way around.
Notch the seam allowance or trim it with pink shears.
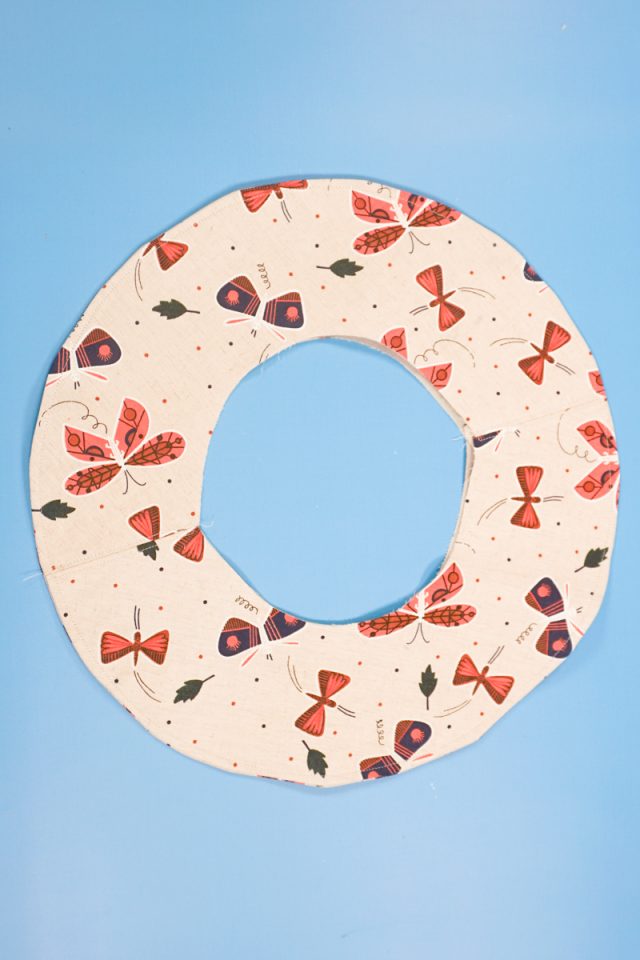
Turn the brim right side out and press flat.
Topstitch around the edge of the brim 1/4 inch from the edge.
Optional: sew more rows of stitching in smaller and smaller circles around the brim. This just adds to the look.
Pin the brim to the side with right sides together. Match up the side seams of the brim with the sides seams of the sides.
Sew the seam. Be careful and adjust as you sew since you’re sewing a curve to a straight edge.
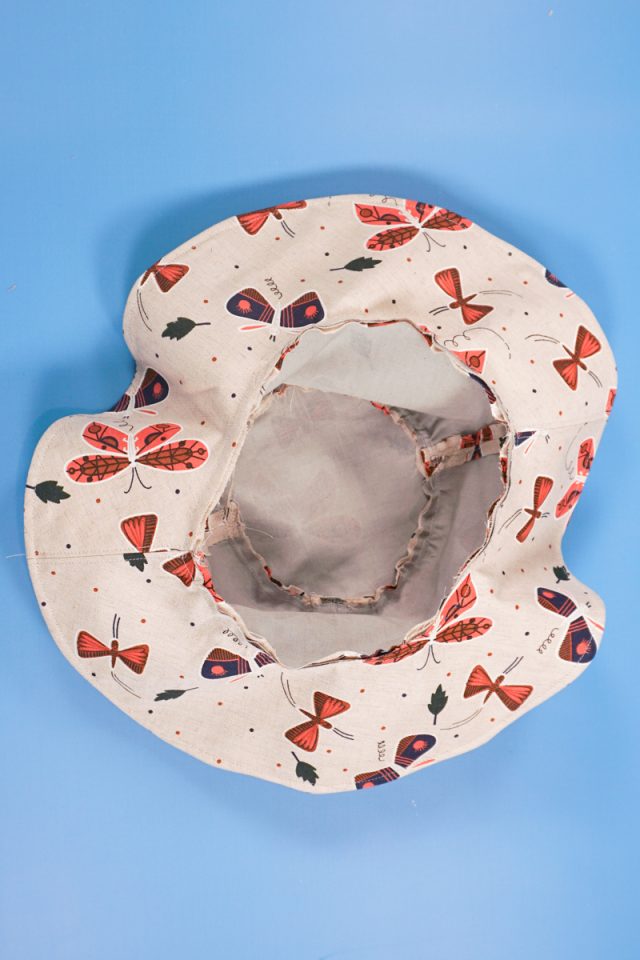
Clip 1/4 inch into the seam allowance with scissors about every 1 inch.
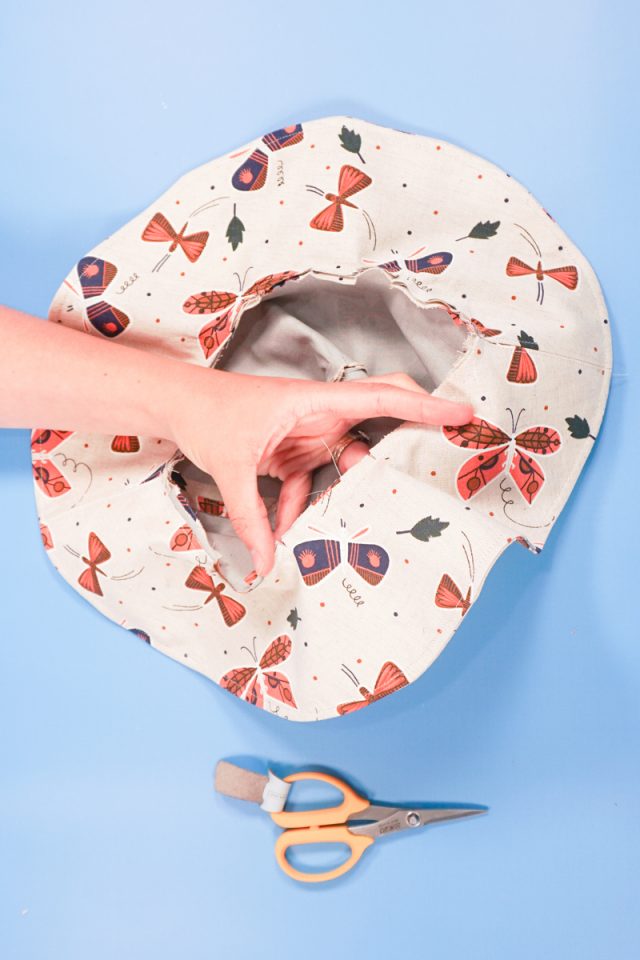
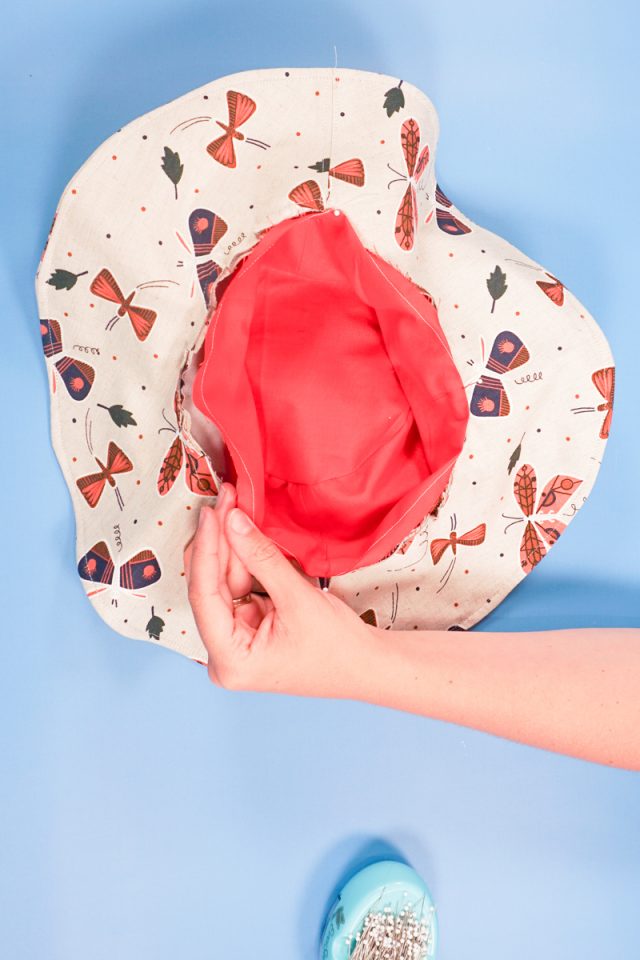
Place the lining inside with the wrong side of the lining facing the wrong side of the hat. Fold the lining inside at the 3/8 inch guide stitch. Pin the lining in place with all the raw edges folded inside.
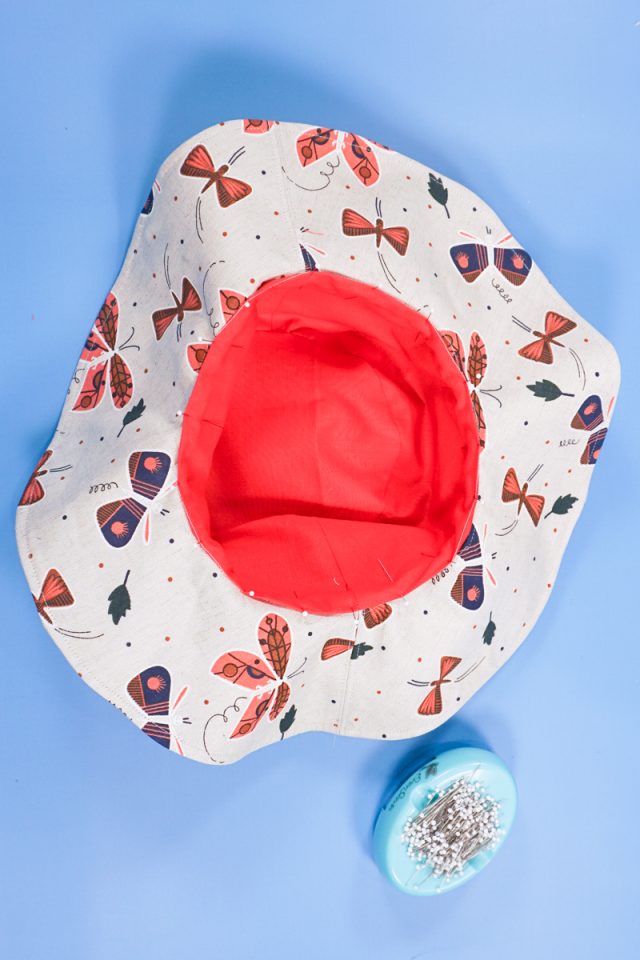
When looking at the hat from the outside, sew in the seamline between the brim and the side to secure the lining inside.
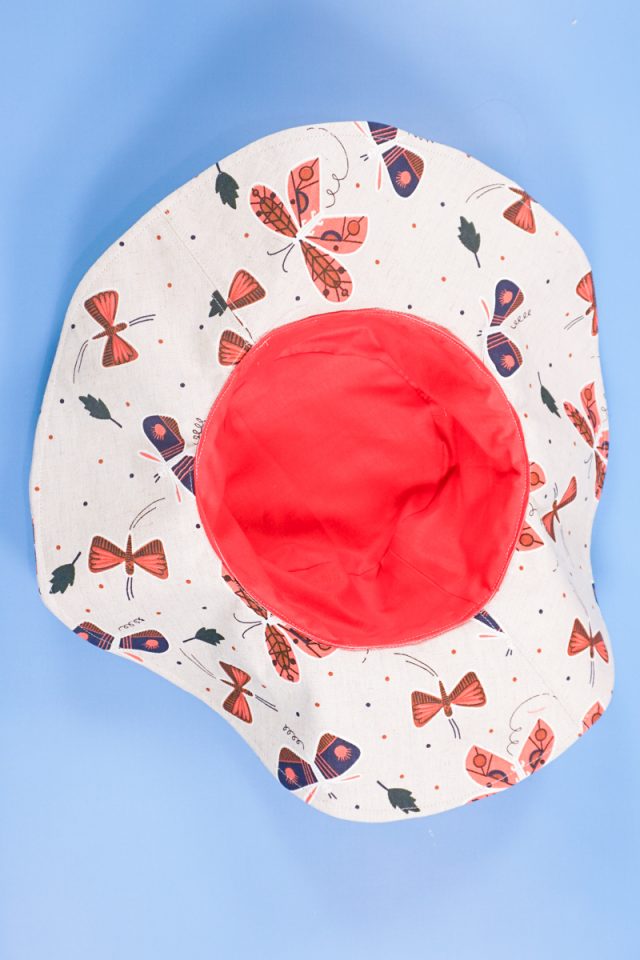
You finished!
Get the Free Sewing Pattern here!
If you make something using this sewing project, I’d love to see! Please share it on social media with the hashtag #heatherhandmade and tag me!

I believe small sewing moments can create great joy. Find your own “right” way to sew. -Heather
I want to thank you! My 8 year old granddaughter asked for a bucket hat and we found your pattern online. It was very easy to do. I cut it out and did the pinning for her but she was able to see it together on her own. She was so excited at how it turned out. She is going to wear it for and end of school year event and excited to share that she made it.
That is so awesome! I’m so glad she was able to make the hat!
I am not good at puzzles and I am also 84 years old. I love this wide brim pattern, I downloaded the pattern, cut it out and can’t figure how to fit the pieces together It seems very complicated. Am I the only one having this problem?
Are you talking about taping the pattern together? Or assembling the hat process?
Hi, I’ve measured my head at 22″ But I’m 62-year-old women. I certainly wouldn’t wear a baby size. What could I be doing wrong? What size did you make?
I made a teen size, I know I have a small head and it fit me well. Are you measuring your around your forehead and the widest part of your head in the back? Don’t measure too low on the back of your head.
I normally wear a large woman’s or medium men’s hat size, so I didn’t believe that I needed the teen size called for by measuring. I should have followed directions…the medium size is enormous on me!
I love this pattern. I wanted a brim that was circle vs angled down. And this was exactly what I wanted.
I did like other said had problems with the head part and brim fitting together. After trial and error. I figured out the side panel and circle peice were about 3/4inch smaller than the brim. After adding seam allowance to the side panel and circle top. Head peices. I got the pattern to work great. I made the child side. And before the head piece was way to small for the size it was supposed to be for.
I’m glad you got to work it out even if it was frustrating! Thank you for letting me know!
Help.. Printed the pattern at 100% and my box measures correctly but the hat part is to small by about 2 in fron the brim. Im trying to make a hat for my 3 year old but the hat part almost fits my 4 month old. I checked all my lines and sizes and everything matches up.
Can you email me so I can see pictures and help you? My email is [email protected]
I am so frustrated, I have tried and tried to find the “free” bucket hat pattern, but no matter where I look/click, it is not there. It keeps taking me back to the instruction page, and there is no link anywhere on the page. I would appreciate your help with this.
Maybe a silly question: Is the seam allowance built into the pattern, or do I need to add it before cutting?
yes the seam allowance is added, it’s 3/8 inch
Sorry, I’m an idiot. But what you mean is that I need to add it?
Oh I didn’t give a good answer. Sorry! There is already 3/8 inch seam allowance in the pattern. You don’t need to add anything.
Thank you! My husband was right. haha. We disagreed on what you meant the first time, which is why I asked for clarification. Good thing I did! I appreciate your patience with responding twice!
My brim pattern printed out looking pointed, is this normal? The brim looks rounded so I’m confused about this.
This is not normal but this happens for me depending on which printer I use. I usually see this problem on HP printers, and I honestly don’t know a setting to fix it. I’ve done a lot of research and read a lot of forums without a fix. I usually do my best to trace the point into a curve.
This is one helpful place I read about it to help with settings. https://community.adobe.com/t5/illustrator-discussions/curves-printing-as-angles/td-p/10525128
I printed the pattern, before I start – on the first page shows a 1in scale and it matches to 1 inch. So that tells me I printed the pattern correctly, correct?? I did printed two times to see the difference: one to fit the paper – to which the scale was larger to a 1in scale. Next, I printed again to custom and the first page (scale) measured to a perfect 1in. So, if anyone can tell me IF THE SCALE MEASURES 1IN, then the pattern is safe to start and not waste any fabric/interfacing. Thank you!
If the scale measures to a perfect 1 inch, it is printing the correct size. Also, be very careful when measuring your head to get an accurate measurement.
I have a question about the sizing. I made an adult small. before i measured my head. it is way too big. but after i measured my head it equals a child size. is that correct? i love the pattern though. it was pretty easy to sew. and it looks great. i just want to know what size i should make. because i need this floppy hat. thanks.
The most important thing is where you are measuring your head. You should be measuring around the widest part of your head.
I measured the widest area of my head a few times and it always came to 22″, so I think that’s the size I’m going to make (even though it says child, haha).
I almost always do the teen size of everything for my head size
I can’t even find the bucket hat pattern to print as there are all sorts of stuff on the webpage and no easy way to find it unless I am just not seeing it.
I would like to know if anyone else has successfully followed this pattern? I have tried 3 times – 3 different sizes – and I get the same problem every time. I cut and assembled the patterns correctly, but the sides end up too long for the top, and then after I either trim them down (by 2″) or gather them, then the brim is too big for the sides and I have to gather it too. I am following the video precisely but cannot figure out what I’m doing wrong? I measured the pattern, it is printing at the correct size….I am lost. It should be so easy. I would love to know what I’m doing wrong!
I’m having the same problem. Did you figure it out?
What size are you making and what fabric are you using? I’m emailing Audrey right now.
I think I figured it out. It’s your printer settings. Mine was set on fill the page. I changed it to fit the page. I printed it again and it looks right now.
Sherry, did you figure it out? My husband printed it for me a few times. I’m not sure what he did to the settings, but we finally got it to print with the correct scale (the one inch measured correctly and all the pieces fit together). However, I just wasted so much time, fabric, and interfacing, because it 100% does not get anywhere near fitting when done this way. Like the above person posted, it’s inches too long. I’m so frustrated.
I’ve reached the part where I’ve completed the brim and I’m attaching it to the ‘head’ part of the hat, and the brim is way too big! My pattern printed correctly (I confirmed the 1″ square), I’m an advanced sewist, and everything else has come together. So it’s not just you – something is off here.
Update: I was able to finagle the brim around the hat portion carefully enough to get it to work. It’s definitely a bit larger (the brim circle) than I wanted it to be, so I’m making a note next time to use a 5/8″ seam allowance when sewing the brim pieces together and that should resolve the problem for me. But my hat is complete and I love it! I made it for a trip to Thailand and used fabric that I designed for Cotton + Steel last year so it’s really special! Thanks for the pattern!
I’m so glad it worked out even though it was so tricky and I’m glad that you love it! I don’t know if you have the older version or newer version of the hat pattern because I recently went in and carefully measured each size of the brim, side, and top, to make them all fit together better. Maybe I need to do it again!
It’s all good now. I found the link. And I am so impressed by the professional work you’ve done! So neat to have all sizes at once. So easy to assemble!
im having a hard time figuring out how to download the free bucket hat pattern. I hit the download template & I end up in a site that has nothing to do with the pattern you have offered
Love this pattern! Is there a reason you could not cut out just two brim pieces, as a solid circle, rather than piecing 4 pieces together?
You can definitely do this. It just uses a lot of fabric with a lot of wasted fabric in the middle.
Thank you so much for the pattern! I want to make this for me!
I’m trying to download it, if I try to sign up, it says the email is already in use. If I try to sign in, it doesn’t accept the password I use. There is no option to change the password which I guess is not what I thought it was. I tried the magic link thing and am getting nothing at my email. So how do I download it? I’d love to make one…. or several.
Check your spam or promotions email folder. That’s where I found mine! Once you get that link you can change your password.
Also, you need to turn off an ad blocker you might have on.
Thank you, thank you ~ yesterday I decided to look for a bucket hat pattern and today you provided a perfect one with excellent instructions!
You must be a teacher! Amazingly easy to follow video tutorial! Thank you for this lovely pattern! I cannot wait to make my hat! Now, to dig through my material and see what I have to make it!
Thank you!
What a compliment! I’m not a professional teacher, but I do try to teach so that people can understand!
This hat looks awesome and I’m excited to make it!
Can you tell me where to find the adult size chart — I’m only seeing baby/toddler/young child. My husband was recently told to wear a floppy bucket hat while riding his yard tractor, to prevent sun exposure to a couple patches of pre-cancerous cells on his head. I’d like to make a masculine version of this for him!
If you look lower on the chart you’ll find all the sizes. The baby/toddler/young child is at the top.