
How to Make Fabric Pumpkins

This post may contain affiliate links.
Learn how to make fabric pumpkins with this easy sewing tutorial and free pumpkin sewing pattern! It’s a great way to decorate for Fall!
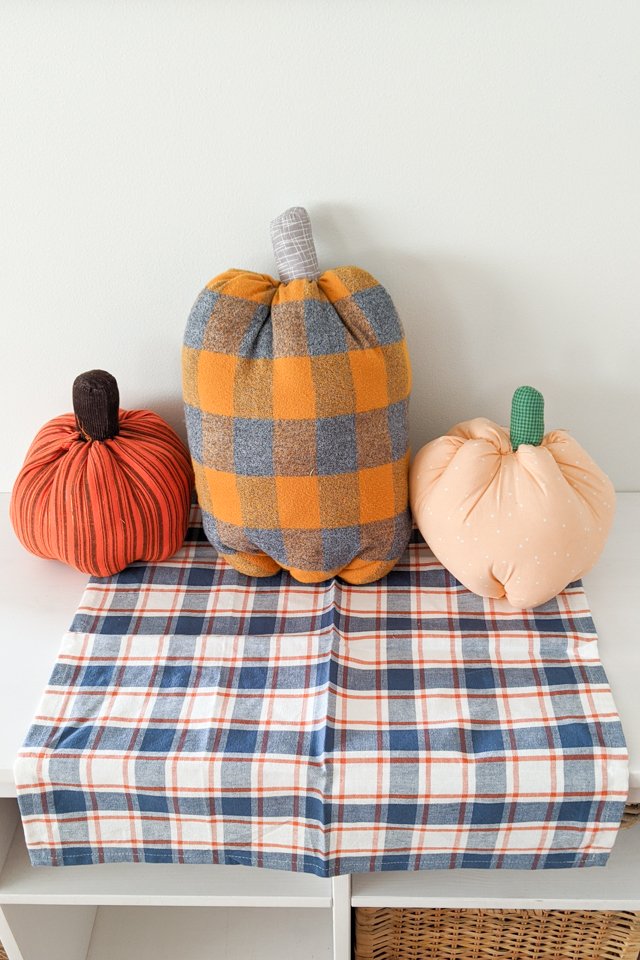
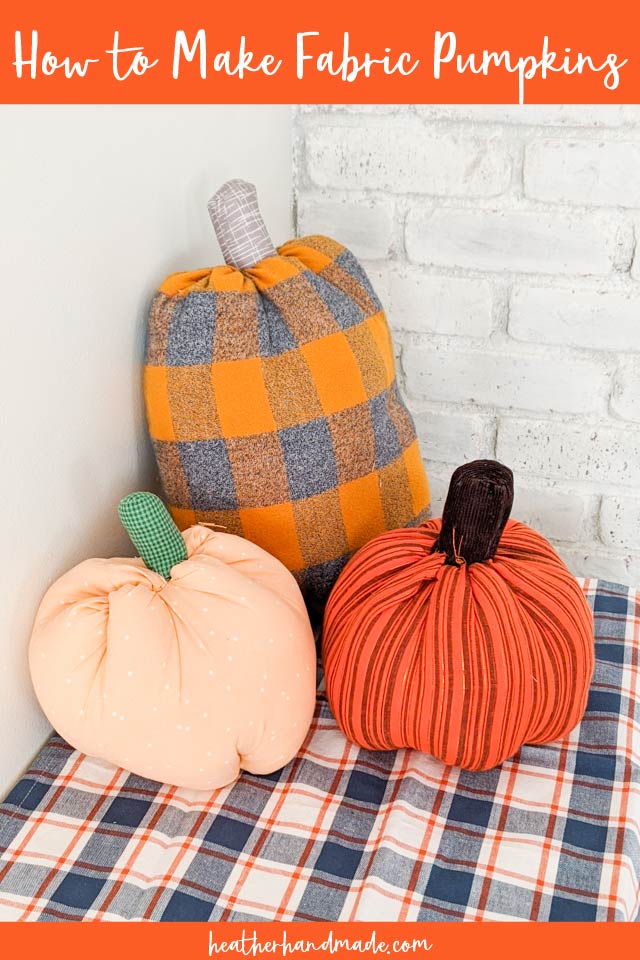
These lumpy pumpkins make me think of a witch using them to make a Halloween potion. They are just cute, lumpy, and perfect for to decorate for Fall. Learn how to make a fabric pumpkin with this easy pumpkin sewing tutorial and free template!
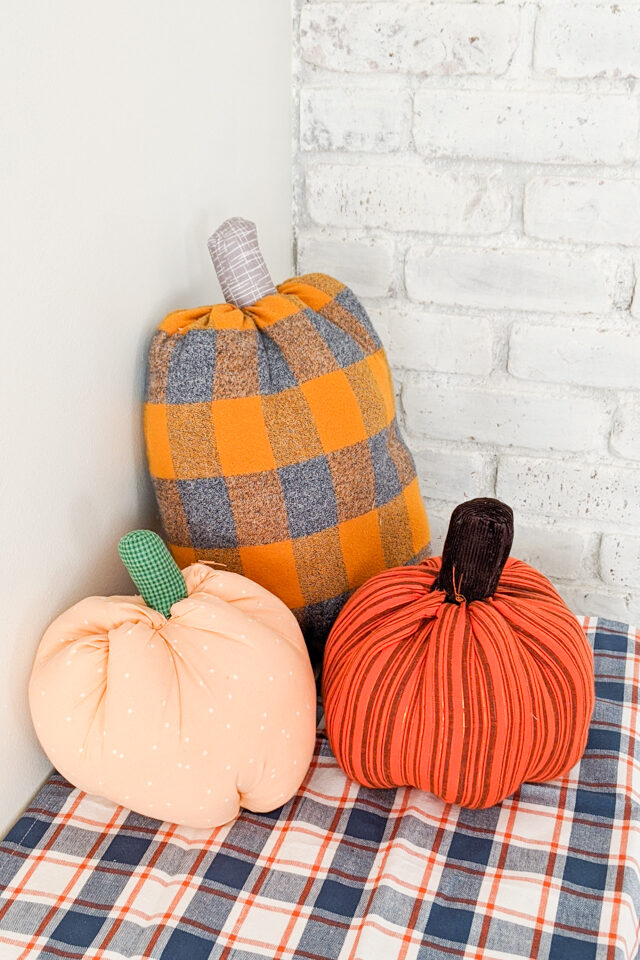
My peach polka dotted pumpkin turned out the lumpiest, and I love the silly look. My kids love playing with them and pretending they are Halloween characters. I like that I can decorate with these pumpkins for Autumn, Halloween, and Thanksgiving!
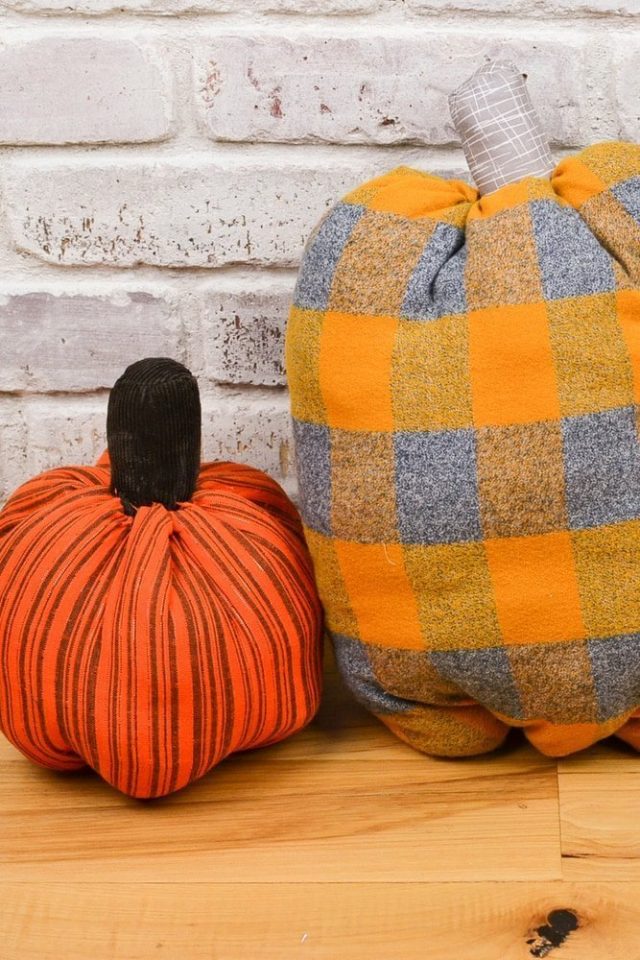
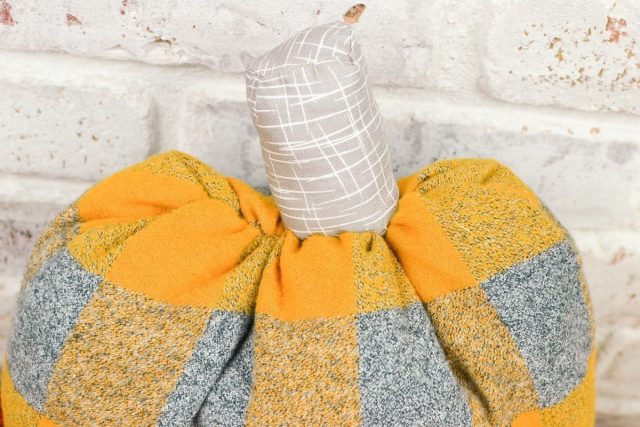
I was testing my template and the proportions of the giant plaid one came out a little wrong. It’s just a little too tall, but I love the plaid look for Fall. And it looks really cute next to the two small pumpkins.
Do you love making Fall and Halloween sewing projects? Check out some of these:
- DIY pumpkin pillow
- DIY Fabric Pumpkins
- spooky halloween sign
- DIY tassel garland for Fall
- DIY fall garland
- Fall sewing projects
- DIY Pumpkin Pie pillow
- Halloween sewing projects
how to make fabric pumpkins
Supplies
- 1/3 yard of pumpkin colored fabric*
- 1/4 yard of stem colored fabric
- Polyfil* or other stuffing
- Sewing tools
- Embroidery thread for gathering
- Hand needle
Free Pumpkin Sewing Pattern
The pumpkin can be cut to any size but the best proportion is the width should be twice as long as the height. For example the two small pumpkins are 12 inches tall and 24 inches wide. This can be increased or decreased as needed.
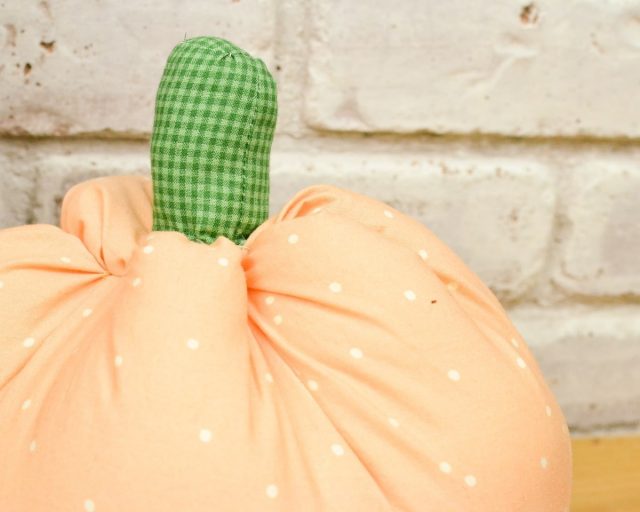
The stem should be small. I cut my stem 3 inches tall and 4 inches wide. I ended up shortening my green stem about 1/2 inch. The circle is about 2 inch in diameter. There will be tucks when you sew the stem, but it just adds character to your pumpkin.
Easy Pumpkin Sewing Tutorial
Watch the video and then read the instructions below. I use 1/4″ seam allowance throughout the pumpkin project.
1. Cut out your pumpkin from orange fabric. Use a bowl to cut large scallops along the top and the bottom. With right sides together sew the side seam together and leave a 3 inch hole.
2. Sew a gathering stitch along the scallops on the top and the bottom. I like to use a zigzag and embroidery thread for this project. Pull the thread and gather the scallops.
3. With right sides together sew the top and the bottom of the pumpkin closed with a 5/8 inch seam allowance. If you sew the top and the bottom the same direction your pumpkin will turn out a little flatter like the plaid pumpkin. If you sew the top and the bottom the opposite direction your pumpkin will turn out a little lumpier like the polka dotted pumpkin.
4. Turn the pumpkin right side out. Stuff it and make sure to stuff all the little spots.
5. Cut out the stem pieces from coordinating fabric. With right sides together sew the rectangle stem piece into a tube. With right sides together sew the circle onto one side of the tube. Don’t worry about any tucks sewn in since it’s tricky to sew a circle to a tube.
6. Turn the stem right side out. Stuff the stem with small pieces of stuffing so you fill the whole tube. Cut off any part of the stem if it’s too long.
7. Hand sew the pumpkin closed with a ladder stitch. Hand sew the stem onto the pumpkin.
If you learn how to make fabric pumpkins using this easy pumpkin sewing tutorial, I’d love to see! Please share it on social media with the hashtag #heatherhandmade and tag me!

I believe small sewing moments can create great joy. Find your own “right” way to sew. -Heather
I can’t seem to find a link for your pattern for the stem. Am I missing something?
I cut my stem 2.5 inches tall and 4 inches wide. The circle is about 2 inch in diameter.
I love the tall plaid one!!