
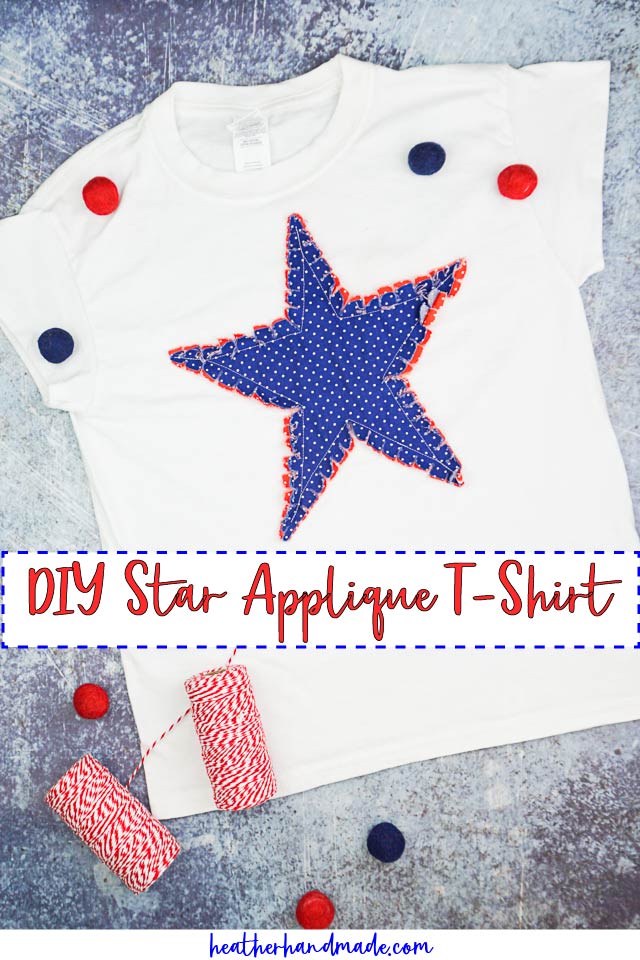
DIY Rag Star Applique T-Shirt for July 4th

This post may contain affiliate links.
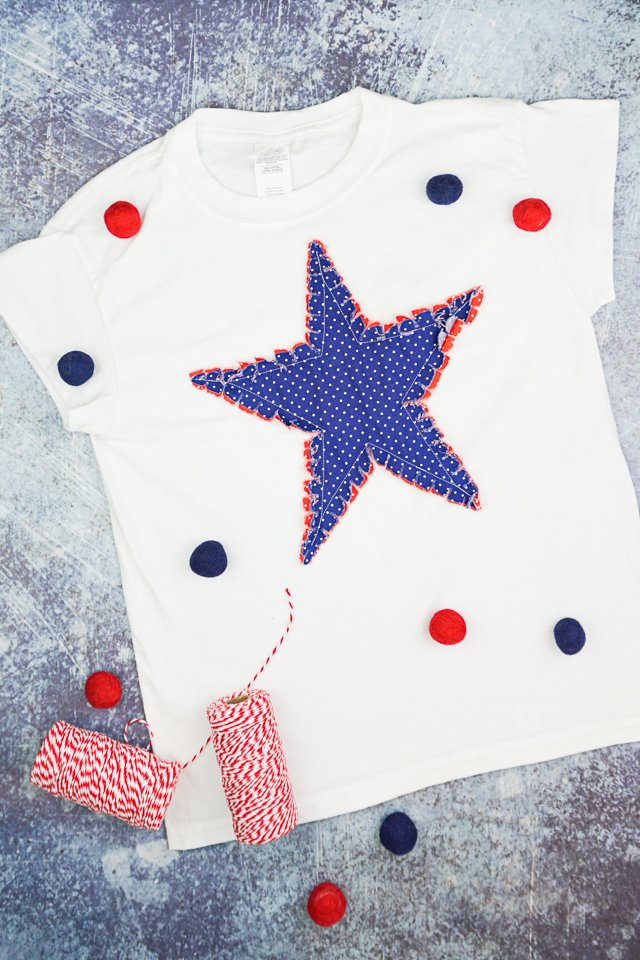
Learn how to add a DIY star applique to a t-shirt with a simple rag edge. This is an easy sewing project that’s perfect for summer and the 4th of July.
Sometimes I need a simple and easy sewing project to satisfy the need the create. One of my favorite ways to do this is to add an applique to a t-shirt.
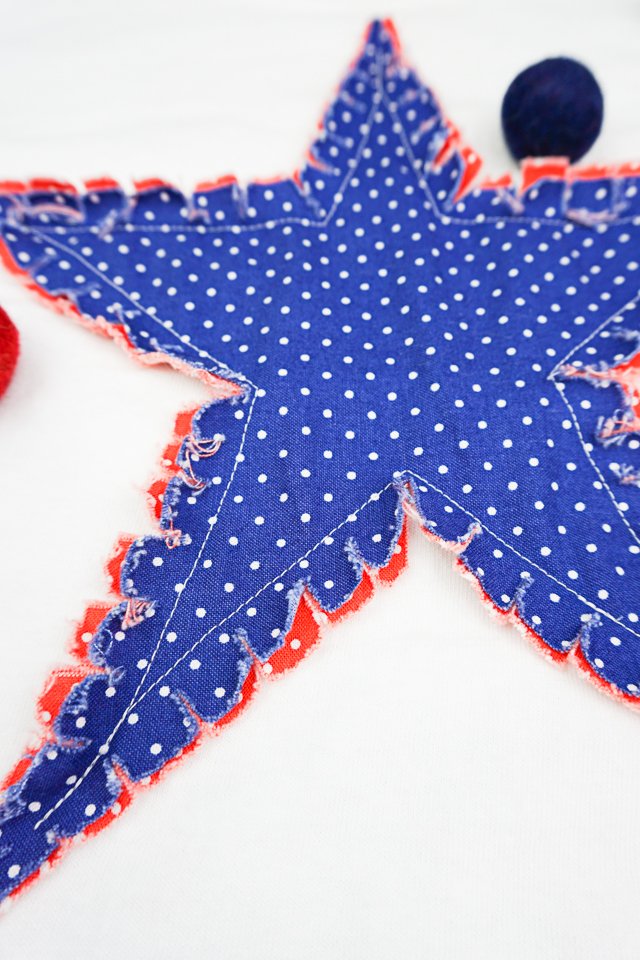
I love that with some scrap fabric and a little bit of sewing I can create a whole new look for a t-shirt. This star applique is easy to sew because it has a rag edge which leaves the egdes raw and frayed.
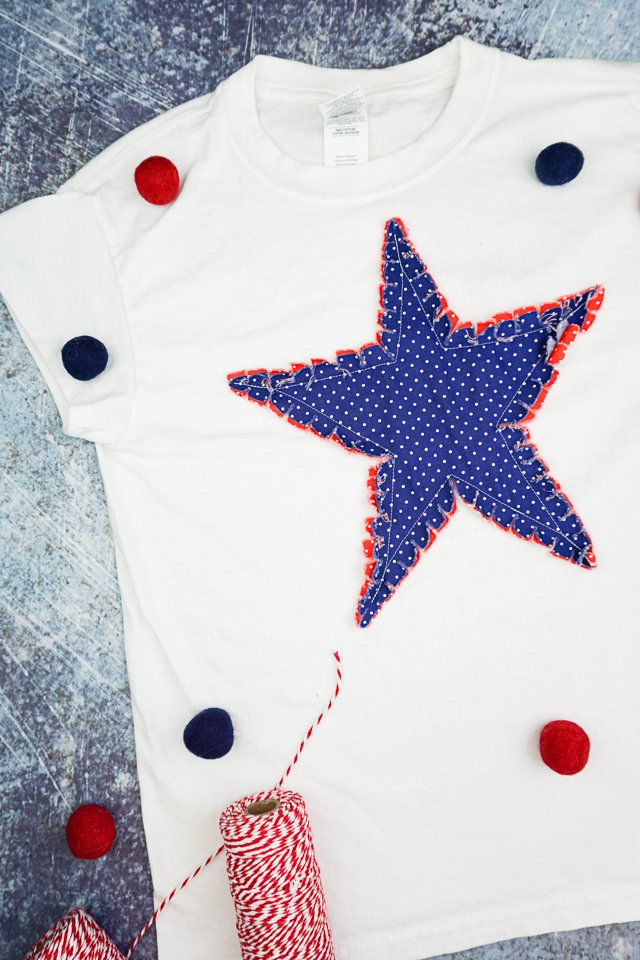
With this project the two layers of fabric create a unique look. It’s almost like the edge of the star is spreading out like a firework. I used a red, white, and blue look, but any colors of fabric can be used for a different look.
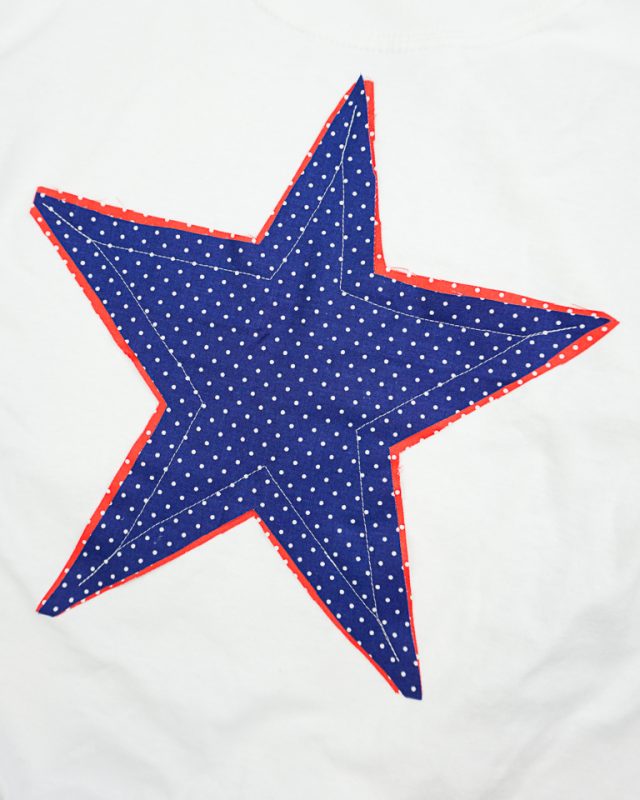
This is how much it frayed after one time of washing and drying. It will continue to fray as it gets washed again and again.
Do you love fun and easy sewing projects? Try one of these:
- scrap fabric sewing projects
- beginner sewing projects
- 4th of July sewing projects
- Applique patterns and ideas
DIY Star Applique T-Shirt
Supplies
- t-shirt
- two different colors of scrap fabric 12 inches by 12 inches – I used red and blue
- Optional: tricot interfacing
- sewing tools
- sewing machine
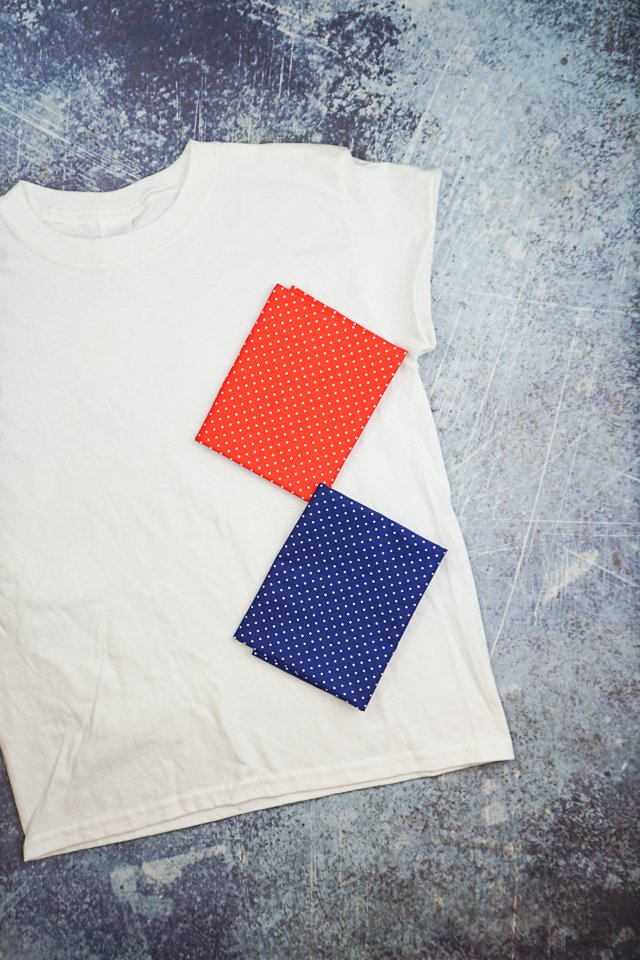
Measure the space across the front of the t-shirt to decide on the size. My t-shirt is a medium child size, and I did 10 inches wide and 10 inches tall. Remember 1 inch of the star will be the frayed part on each side.
Draw out the star on the back of the fabric that will be in the back. Cut it out. Don’t worry if the points are perfectly sharp.

Cut the front star out making it 1/8 inch smaller than the back star. Don’t worry if the points are perfectly sharp.
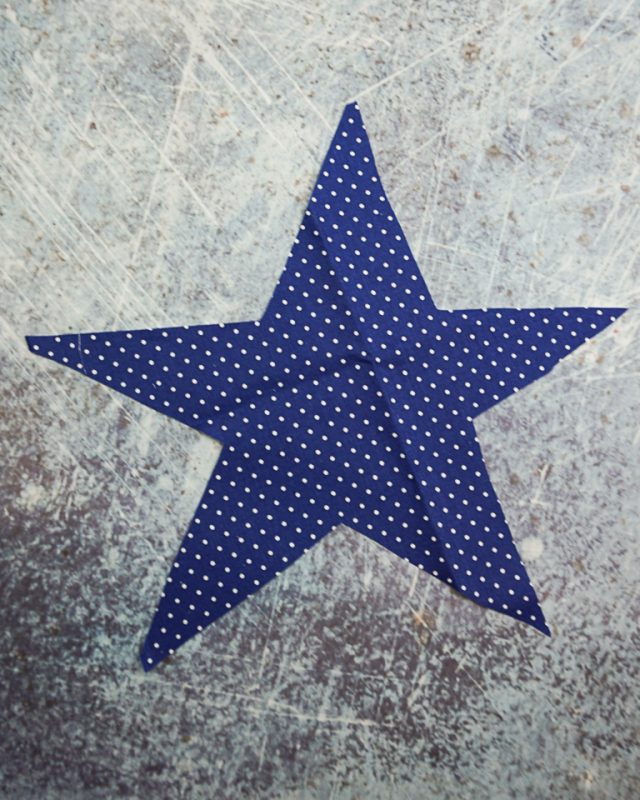
Here is my blue star on top of my red star. My points aren’t perfect and the blue star is a little too big in some sections. The rag edge is very forgiving.
Optional: iron a piece of lightweight interfacing to the back of the t-shirt where you are going sew the star.

Pin the two stars onto the front of the t-shirt. Make sure it’s centered and about 1 inch below the neckband.
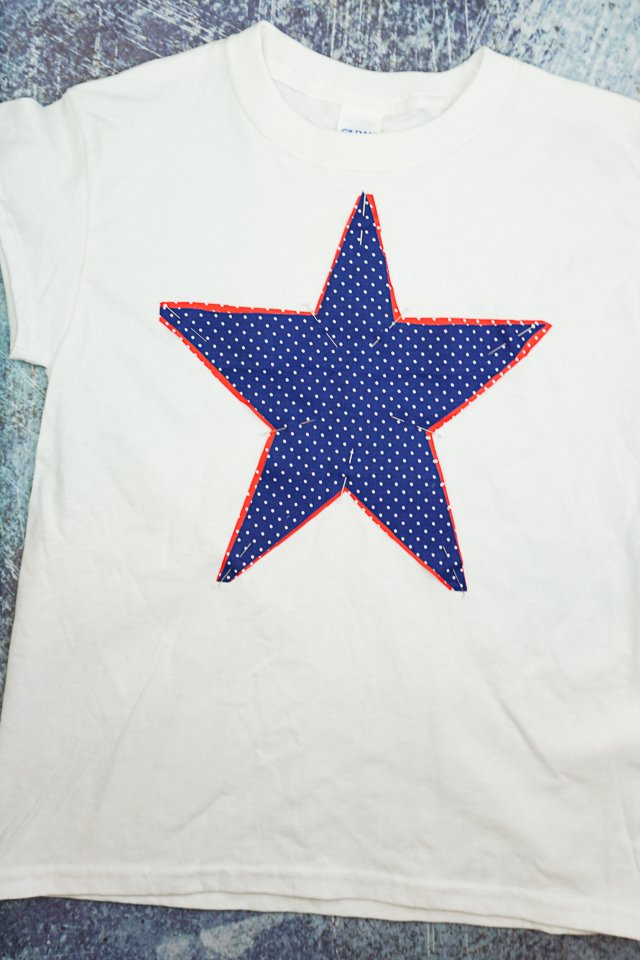
Sew about the edge of the star 1/2 inch from the edge of the front star. I had to put my guide onto my sewing machine foot to help me get it right.
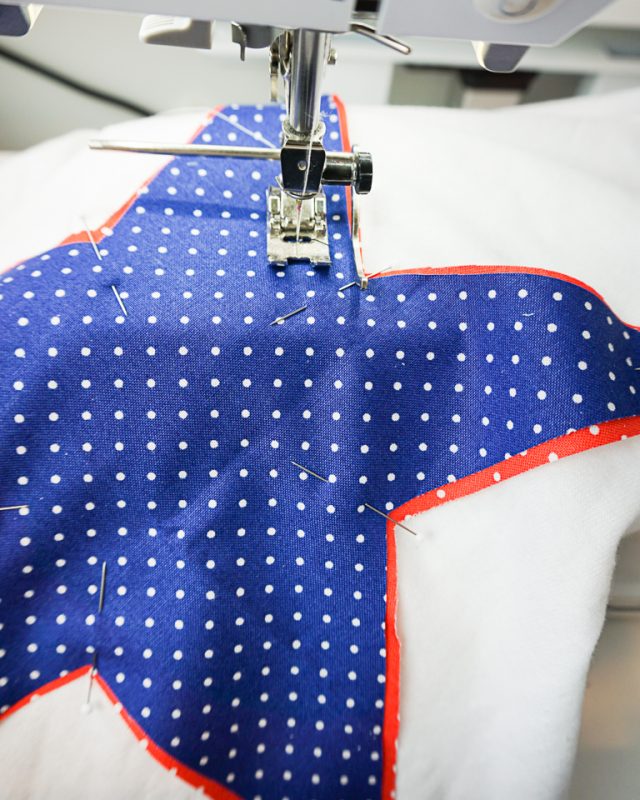
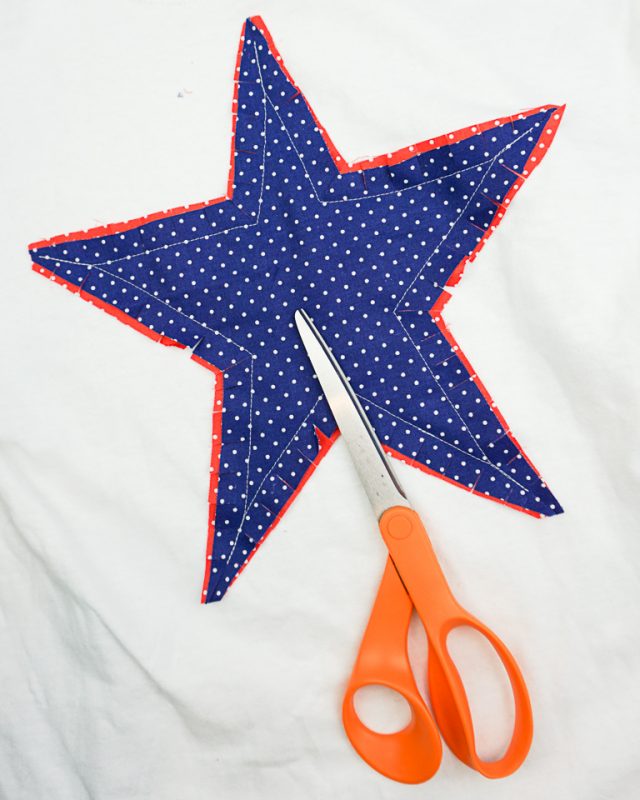
When I got to each point of the star I sewed a straight line out to the point to get closer to the edge.
Clip up to the stitching every 1/2 inch all the way around the star. I would start at the inner point and clip out to the outer point.
Throw the t-shirt in the washer and dryer to get the edges all soft and frayed.
Enjoy the t-shirt for the summer or the 4th of July!
If you make a DIY star applique t-shirt using this tutorial, I’d love to see! Please share it on social media with the hashtag #heatherhandmade and tag me!

I believe small sewing moments can create great joy. Find your own “right” way to sew. -Heather