
DIY Fair Isle Ornament with a Free Pattern

This post may contain affiliate links.
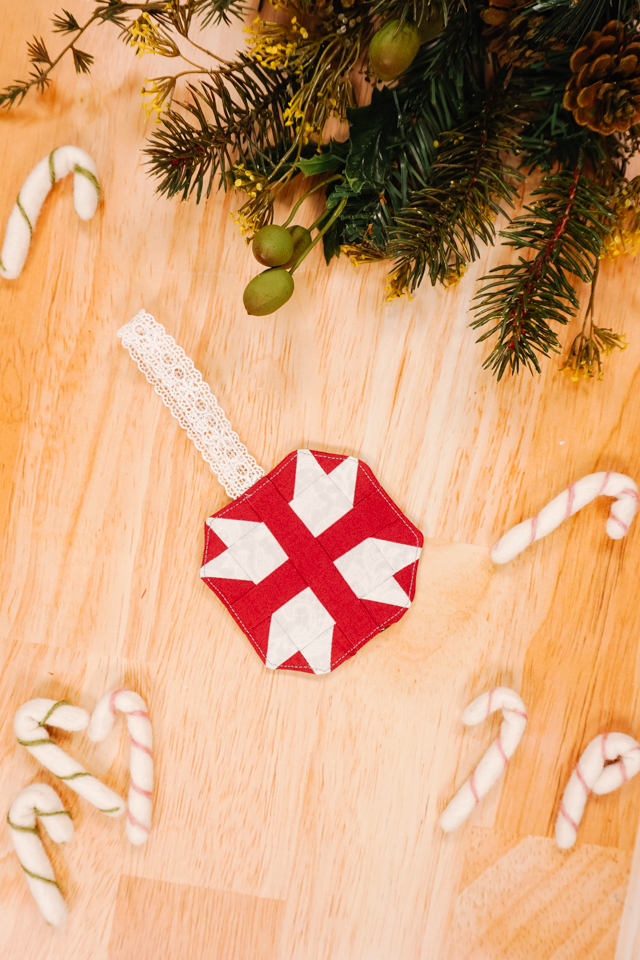
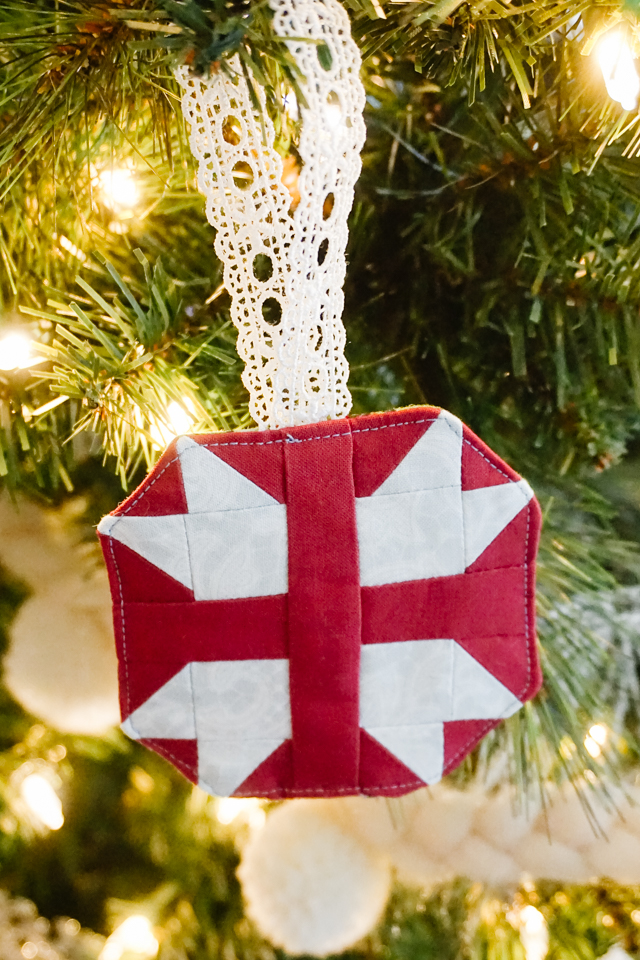
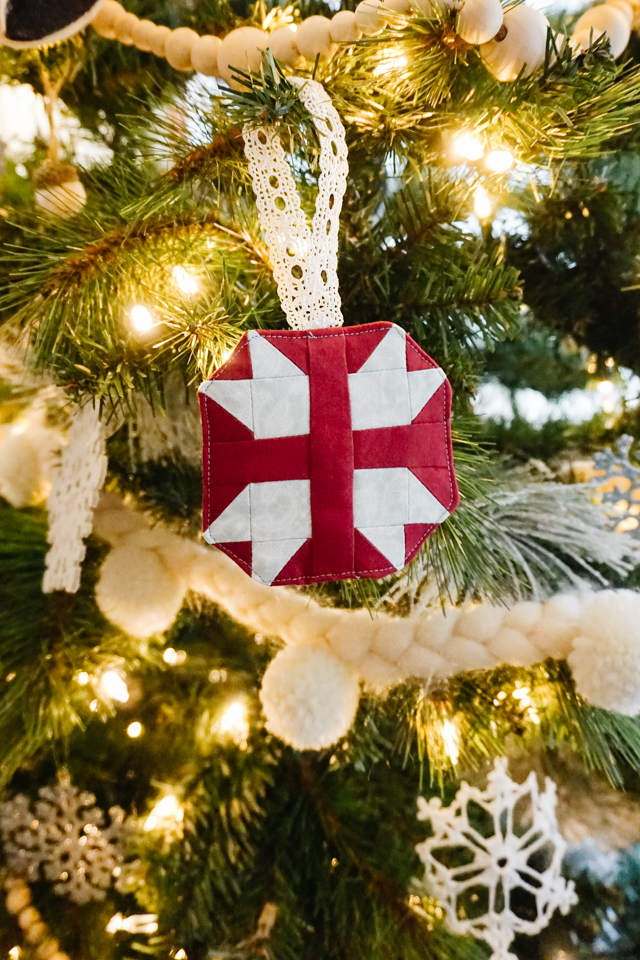
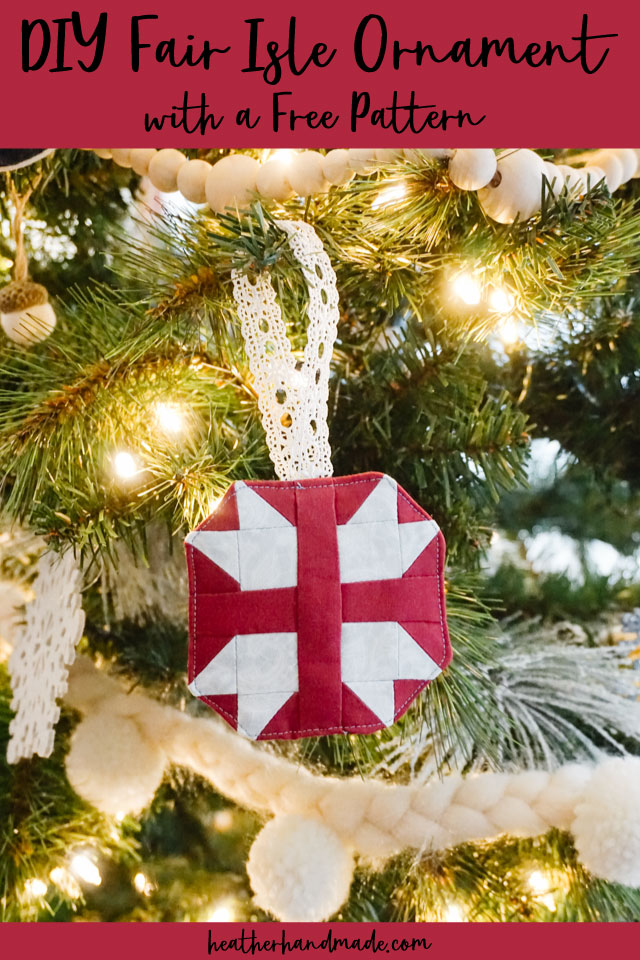
Learn how to make a DIY fair isle ornament with a free mini quilt pattern. This intricate pattern makes a great Christmas sewing project!
The fair isle design is so beautiful. I love seeing it throughout the winter. I’ve made a fair isle Christmas tree skirt, and I decided to make an DIY ornament design with a free sewing pattern to go with it.
It’s a very similar design, just simplified, and it’s very tiny. This is not the fastest Christmas ornament to make, but it is stunning and beautiful.
What fabric should I use?
The best fabric to use for this project is quilting cotton. Use quilting cotton in solid colors or tiny prints. Use a fun Christmas print fabric for the backing.
What is a PDF sewing pattern?
A PDF pattern is a sewing pattern designed on the computer and organized so that it can be printed on several letter or A4 size pieces of paper.
I love using PDF sewing patterns because if the pattern gets ruined or if my children or I changed sizes, I can always print it again. It’ll never be destroyed since I have a digital version!
How do you use a PDF sewing pattern?
Open the PDF on a computer and click print. When printing make sure that the scaling is set to 100% or no scaling so that the pattern prints at the correct size. Learn how to use PDF sewing patterns.
Do you love to sew? Try one of these sewing projects:
- Christmas sewing projects
- DIY Christmas pillow ideas
- DIY stockings and free patterns
- DIY Ornaments to Sew and Make
- Free Christmas sewing patterns
DIY Fair Isle Ornament
Supplies
- Scraps of quilting cotton
- Scrap of batting
- Scrap of lace or ribbon
- Sewing tools
- Sewing machine
- Get the free fair isle ornament pattern at the end of the post
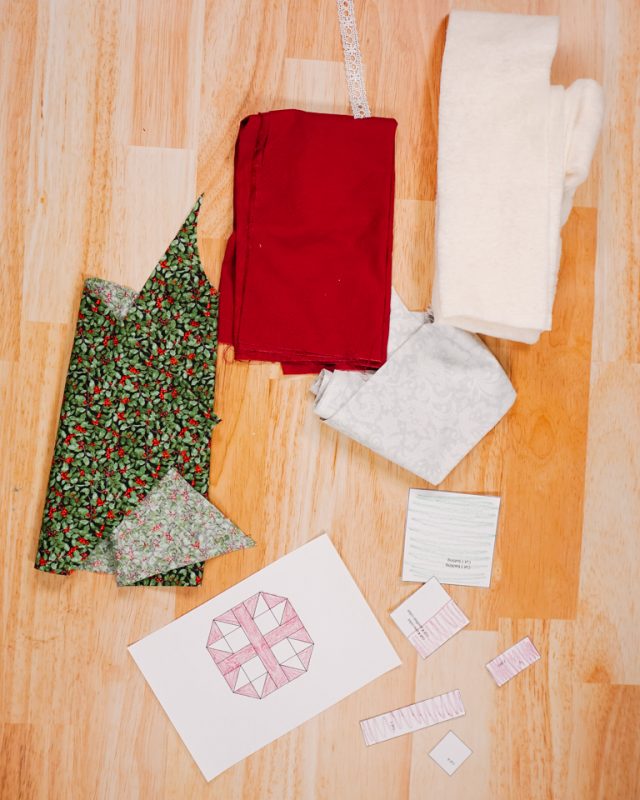
Cut out all the pattern pieces:
- 1 long rectangle
- 2 short rectangles
- 8 large squares (4 of each color)
- 4 small squares
- 4 triangles
- 1 fabric backing
- 1 batting backing
- 1 ribbon or lace 8 inches long

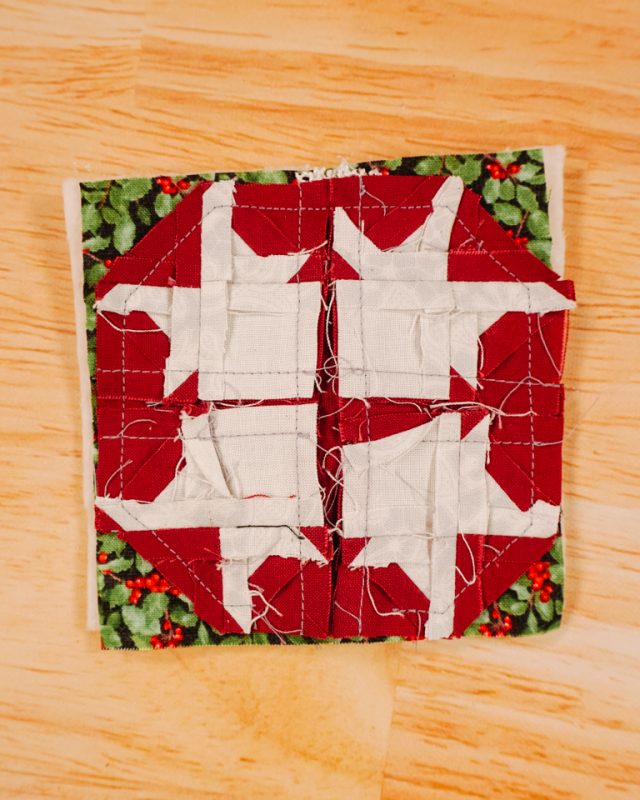
Place the 4 large squares of one color right sides together with 4 squares of the other color. Draw a line from corner to corner on each pair. Sew 1/4 inch away from the line on both sides.
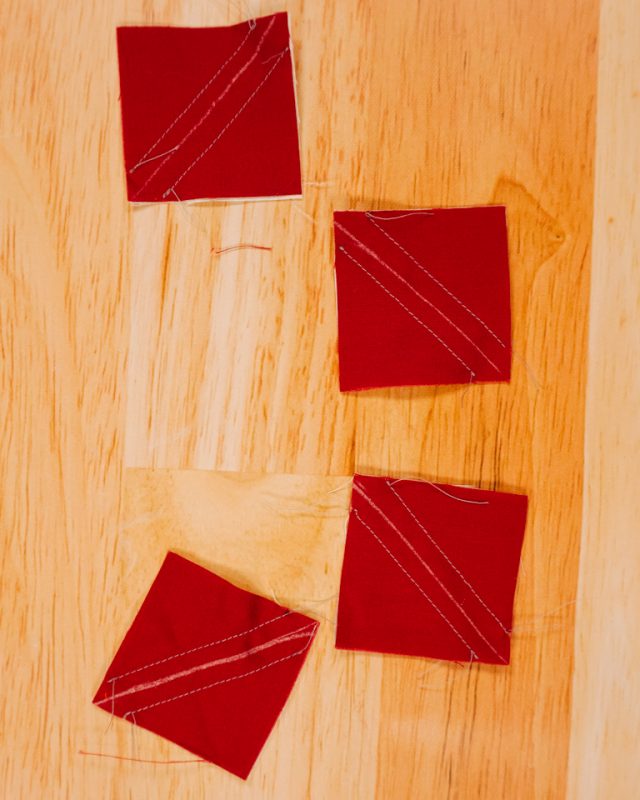
Cut along the line to separate the 4 pieces into 8. Press the seams open.
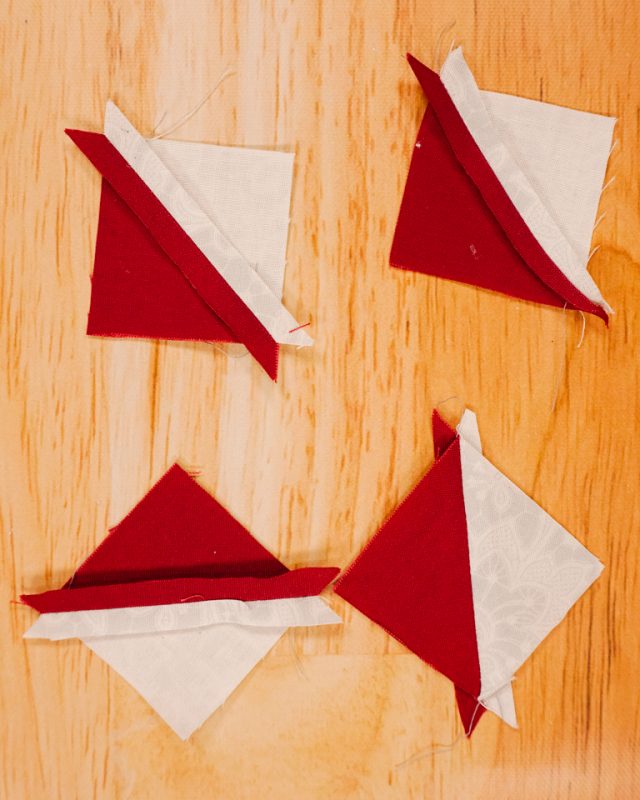
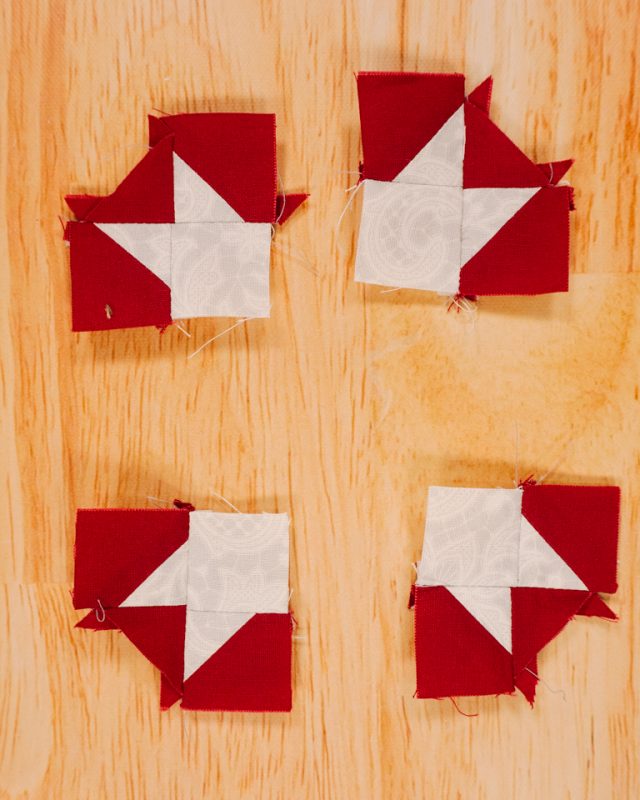
Sew each corner together by sewing a triangle to a half square triangle and the sewing a half square triangle to a small square. Then sew the two pieces together.
Sew one small rectangle between two corners. Do the same to the other side.
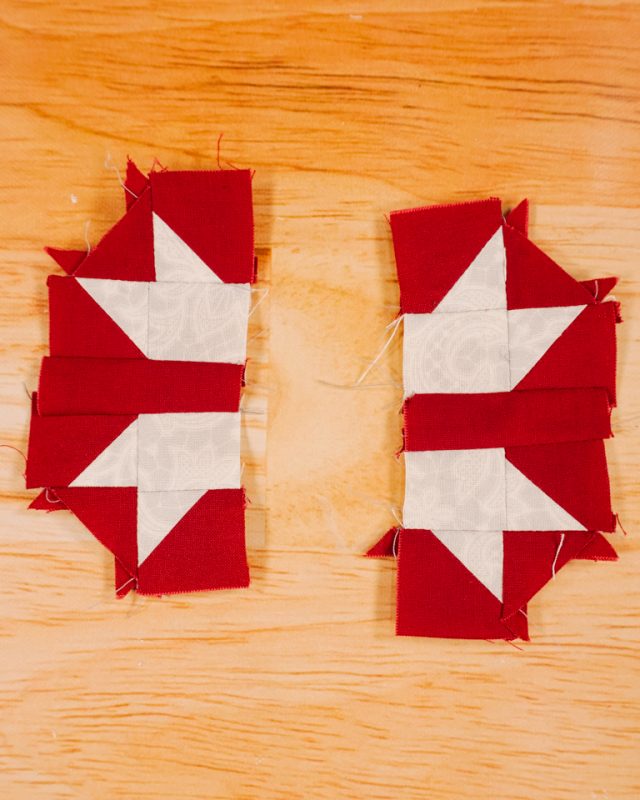
Sew the long rectangle between the two sides.
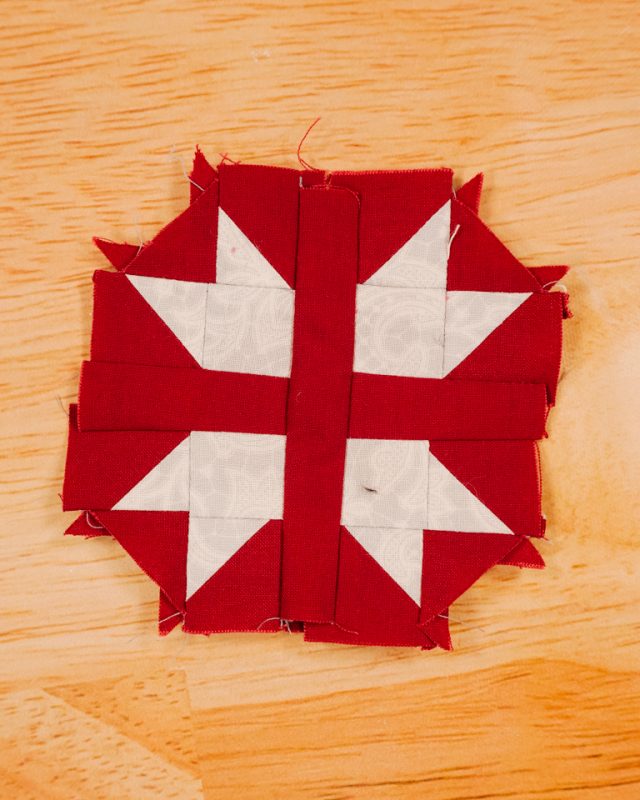
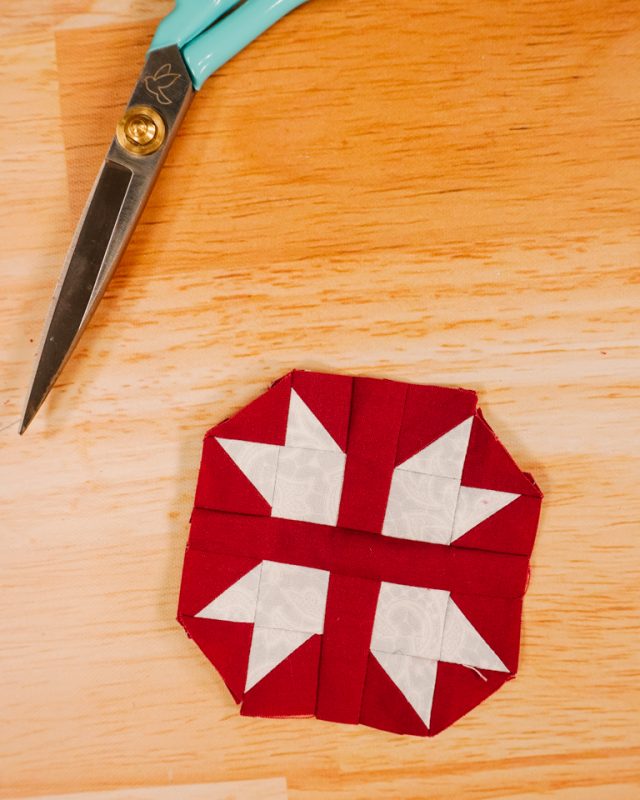
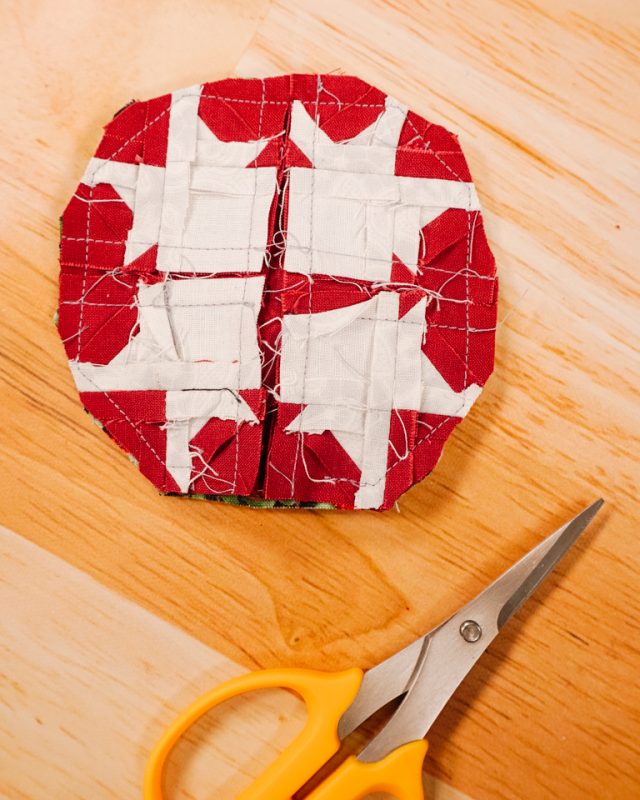
Press all the seams open. Trim everything so it makes an octagonal shape.
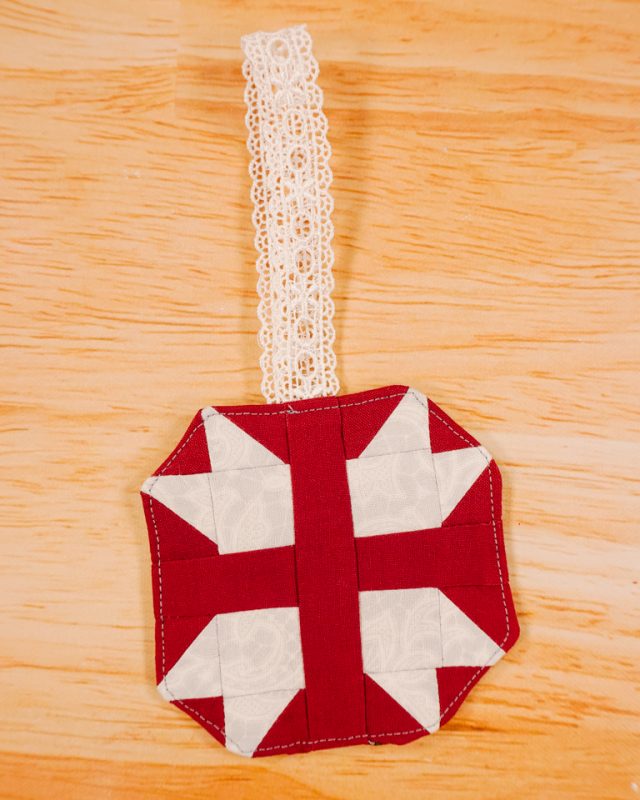
Layer the batting, the backing fabric right side up, and the front with right side down.
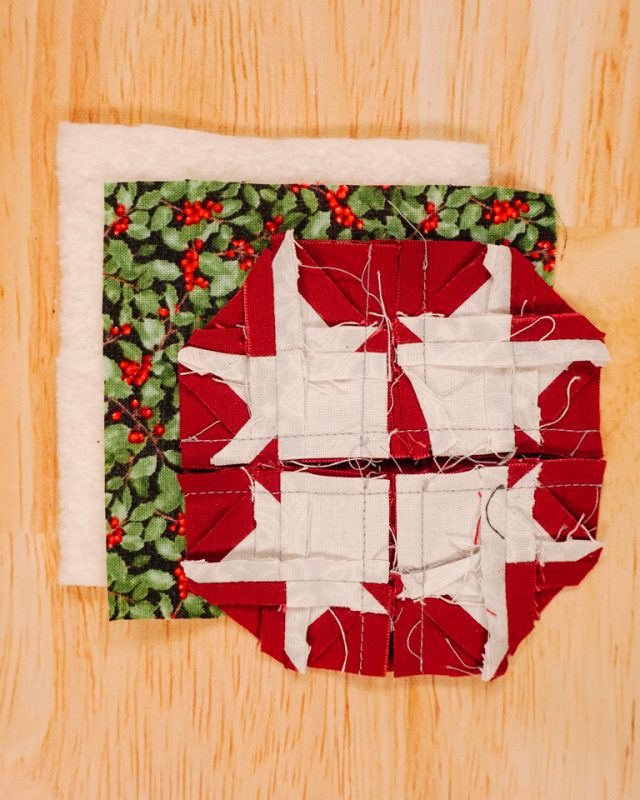
Fold the loop in half and place between the fabric layers with the short ends touching the top.
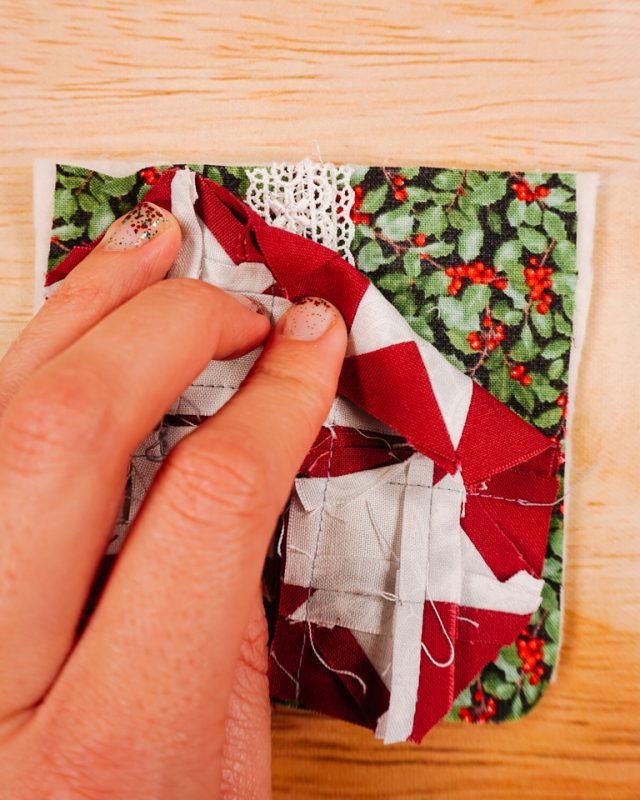
Sew around the outside and leave a 2 inch hole for turning. Backstitch when you start and when you stop.
Trim the corners and the seam allowances.
Turn the ornament right side out and carefully poke out the corners.
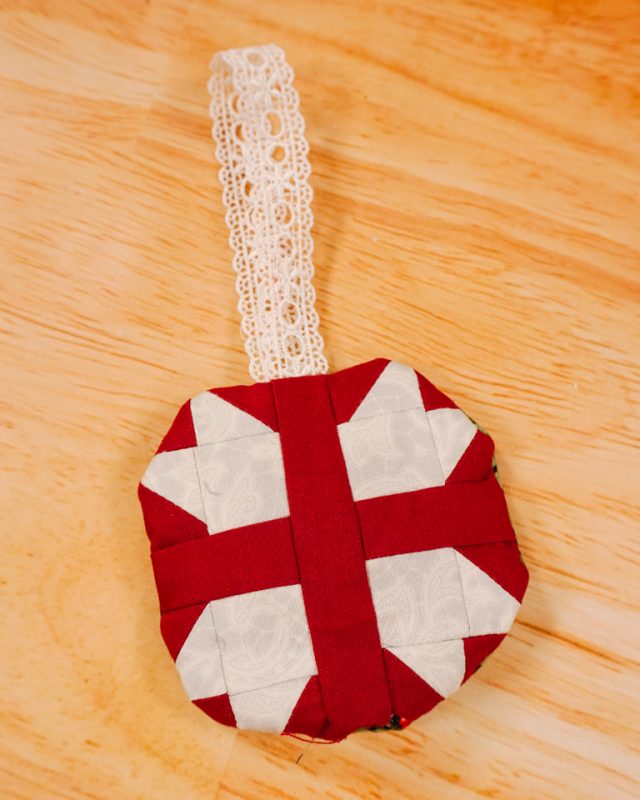
Press the ornament flat. Edgestitch around the edges 1/8 inch from the edge. You finished!
Get the Free Sewing Pattern here!
If you make something using this sewing project, I’d love to see! Please share it on social media with the hashtag #heatherhandmade and tag me!

I believe small sewing moments can create great joy. Find your own “right” way to sew. -Heather