
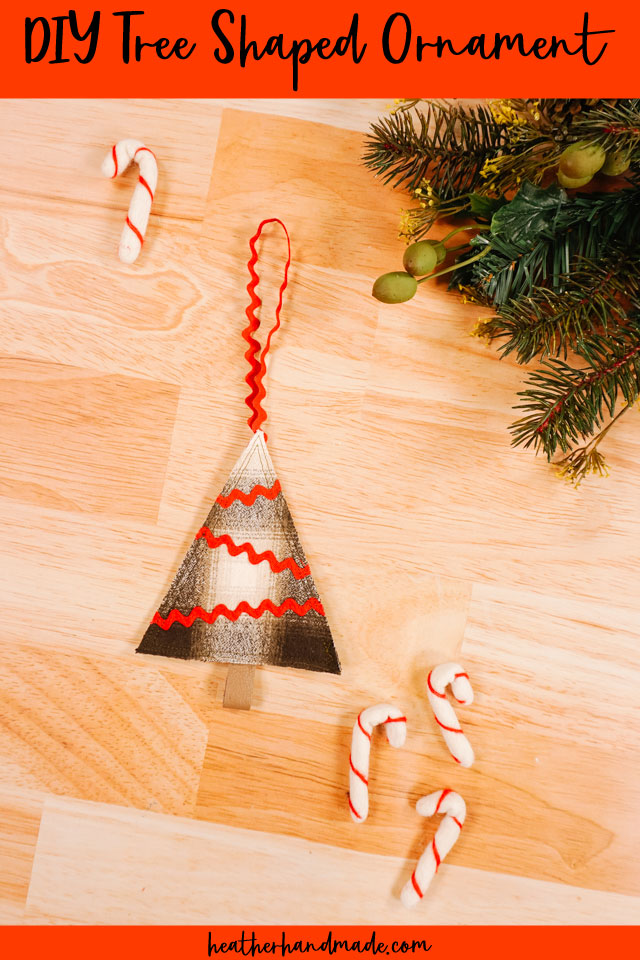
DIY Tree Shaped Ornament

This post may contain affiliate links.
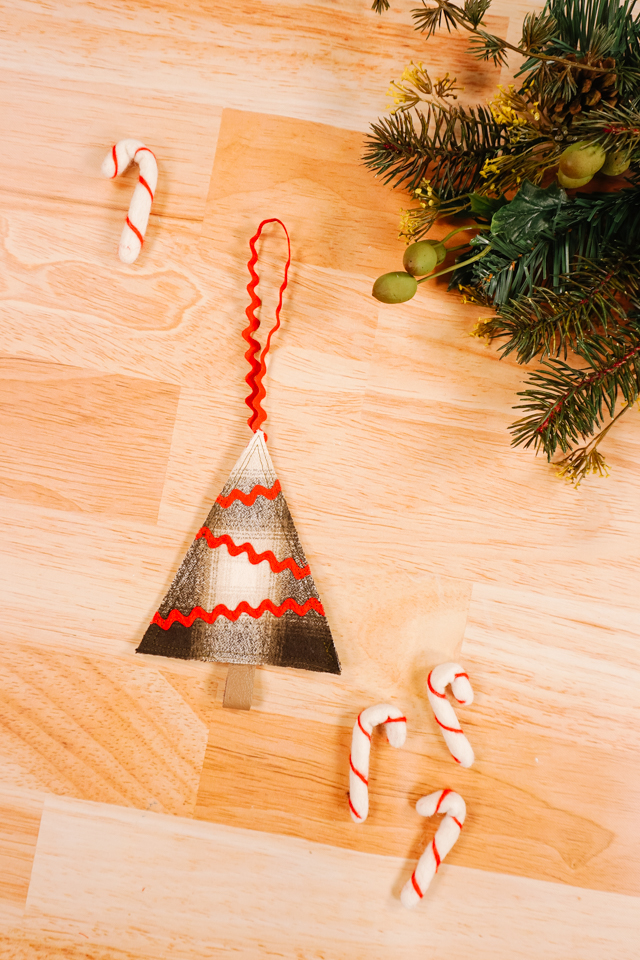
Learn how to make a DIY tree shaped ornament for a Christmas tree. This Christmas sewing project is a great little gift to decorate the tree.
DIY Christmas ornaments are a great way to use up scraps of fabric, batting, interfacing, and trim. There’s so many beautiful ornaments you can sew with just scraps!
I’ve always wanted to make a tree shaped ornament since it’s so classic, and I thought it would be a great way to use up my rickrack since it would look like a little tree garland.

What fabric works for a tree ornament?
I used flannel fabric for my tree, but you can also use quilting cotton. I added interfacing and batting for strength and shape.
What trim works for the tree details?
I used a 1/4 inch rickrack for my trim, but you can also use ribbon, mini pompom trim, or lace. I used leather for the trunk, but you can also use ribbon.
Do you love to sew? Try one of these sewing projects!
- Christmas sewing projects
- DIY Christmas pillow ideas
- DIY stocking and free patterns
- Christmas sewing themed ornaments
- DIY Ornaments to Sew and Make
DIY Tree Shaped Ornament
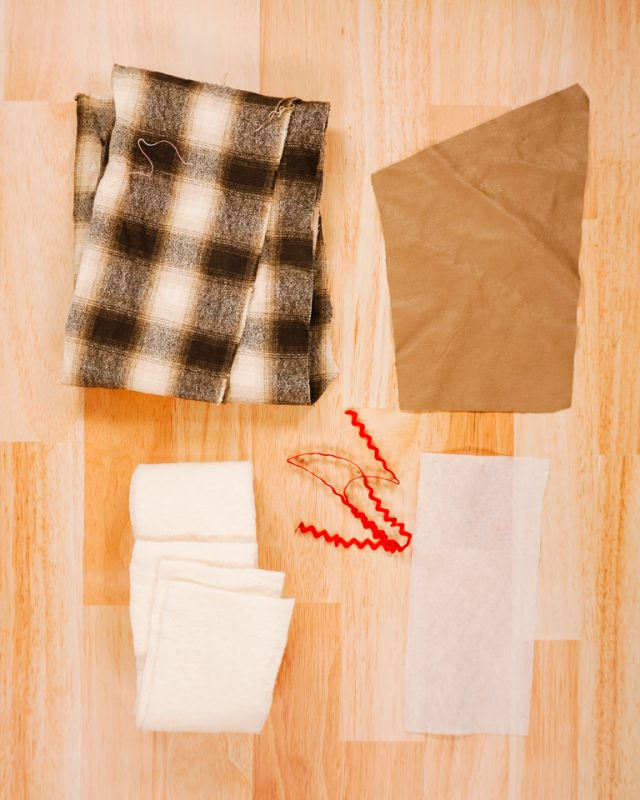
Supplies
- Scraps of green quilting cotton or flannel
- Scraps of fusible interfacing
- Scrap of batting
- Scrap of brown leather or ribbon
- 18 inches of trim
- Sewing tools
- Sewing machine
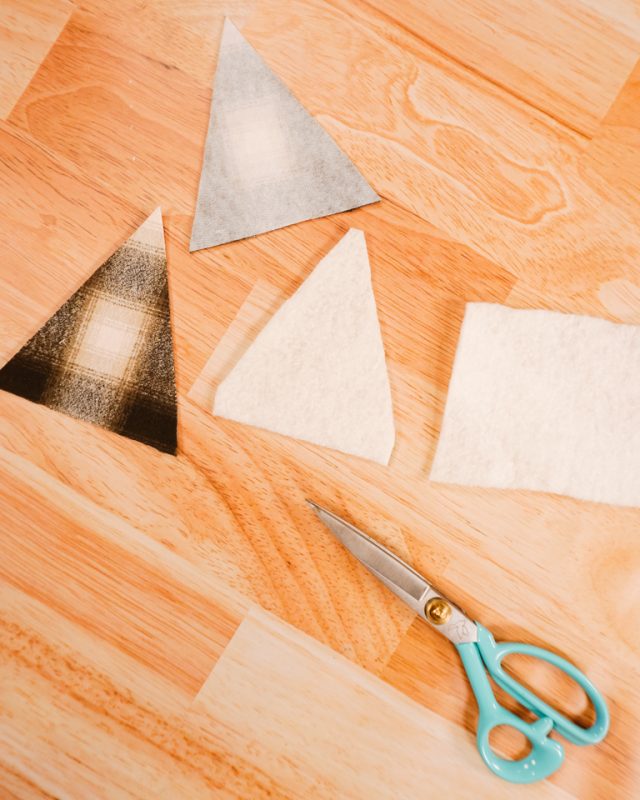
Apply the fusible interfacing to the back of the fabric.
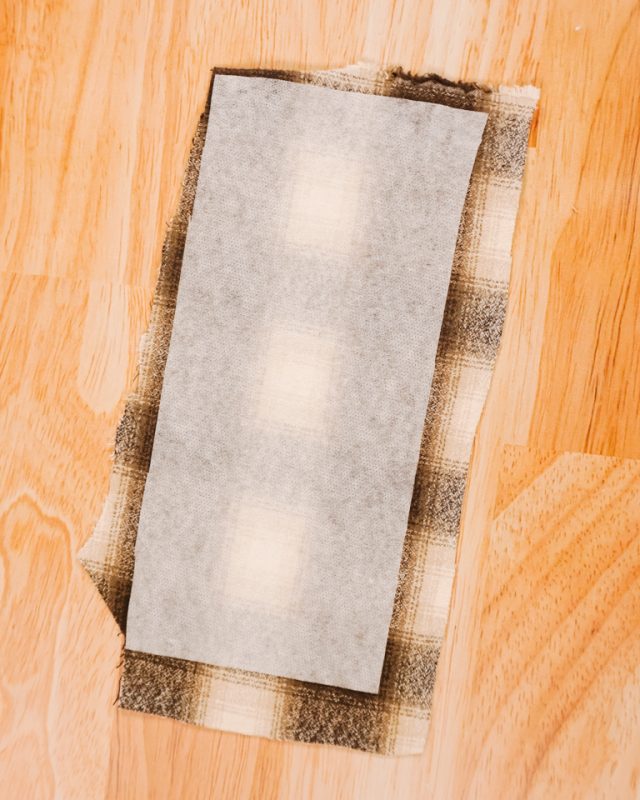
Cut out two identical triangles from the fused fabric.

Cut out a triangle from the batting. Trim just the tips of the corners off the batting so it doesn’t poke out as easily.
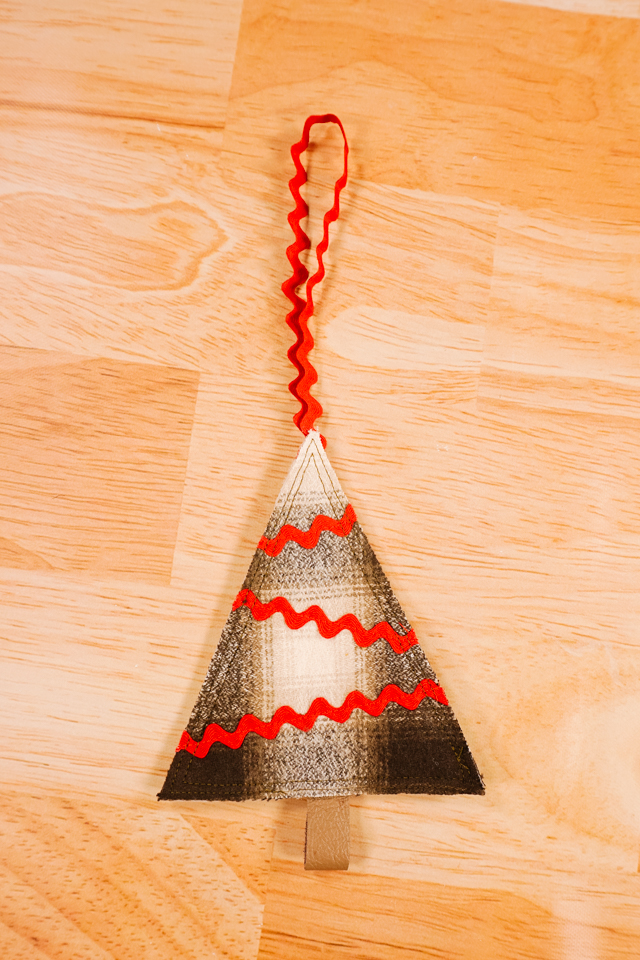
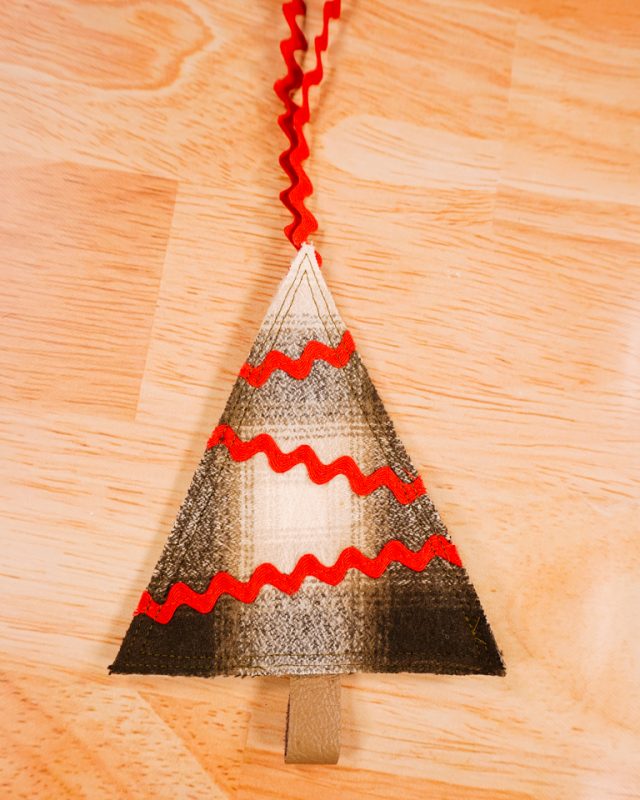
Cut a piece of trim 8 inches long for the loop. Cut three pieces of trim in three different lengths to go across the front tree triangle piece.
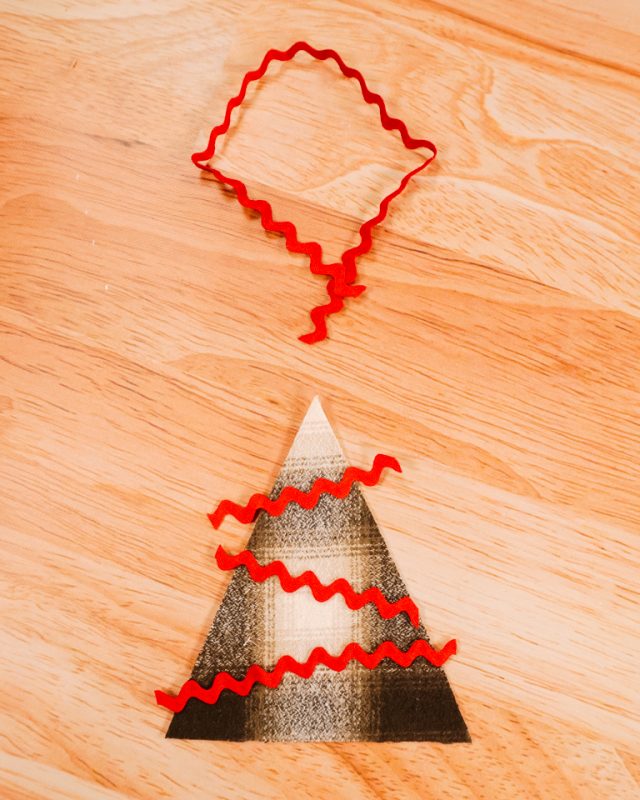
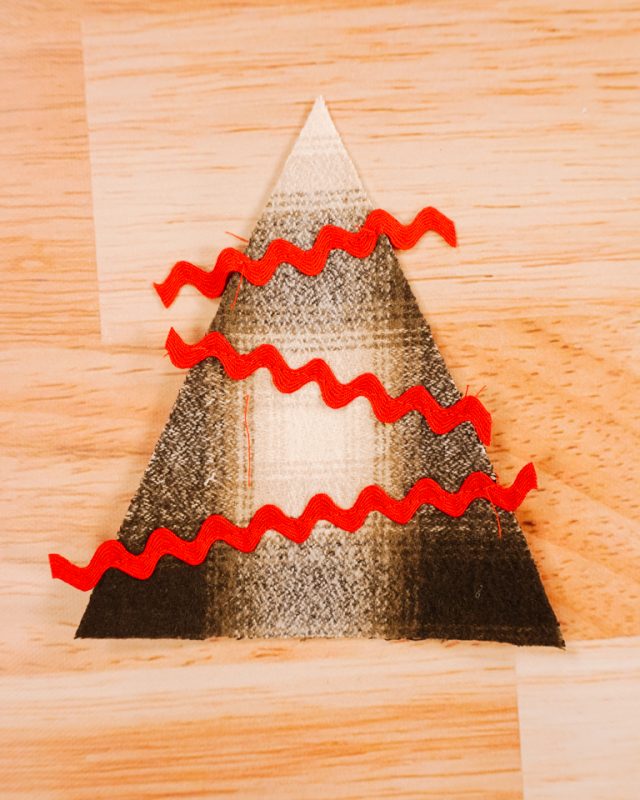
Sew the rickrack to just the front triangle.
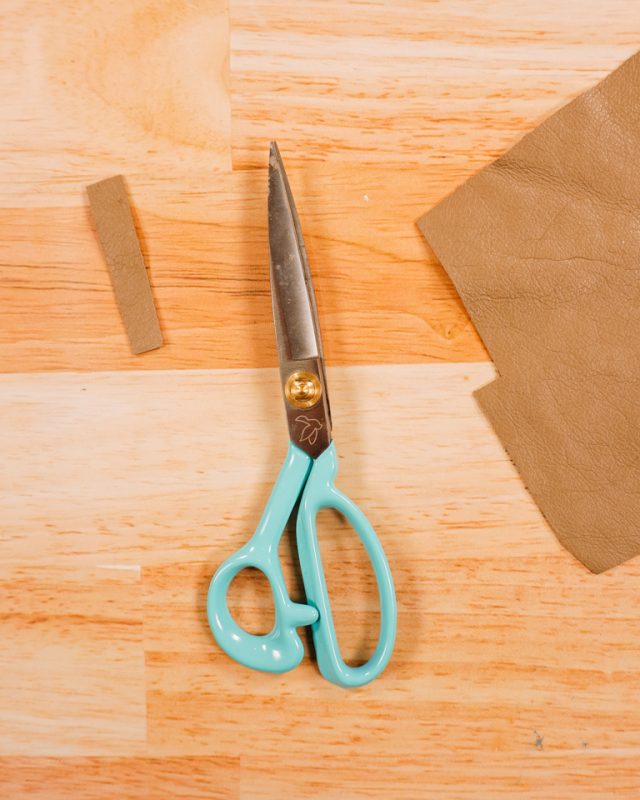
Cut a piece of leather (or brown ribbon) 2.5 inches long and .5 inch wide.
Layer the back triangle right side down, then the batting triangle, then the front triangle right side up. Place the loop at the top in between the layers. Fold the leather in half and place the short ends between the layers at the bottom of the triangle. Pin or clip the layers together.
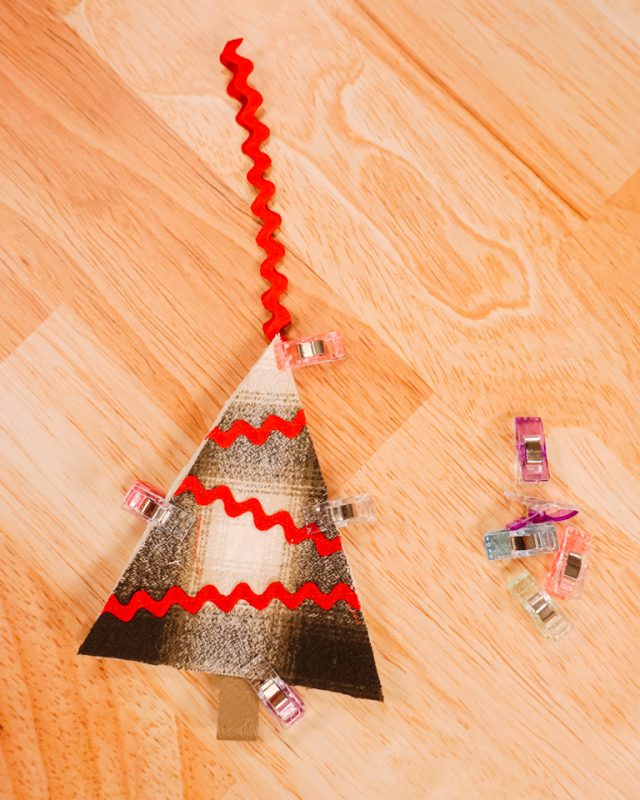
Sew around the triangle 1/8 inch from the edge to secure all the layers. Add another row of stitching if you want. You finished!
If you make something using this sewing project, I’d love to see! Please share it on social media with the hashtag #heatherhandmade and tag me!

I believe small sewing moments can create great joy. Find your own “right” way to sew. -Heather