
Cute and Easy DIY Quilted Pie Hot Pad Pattern

This post may contain affiliate links.
Learn how to make a quilted hot pad that looks like pies. This kitchen sewing project is cute and easy, and it’s perfect for Thanksgiving.
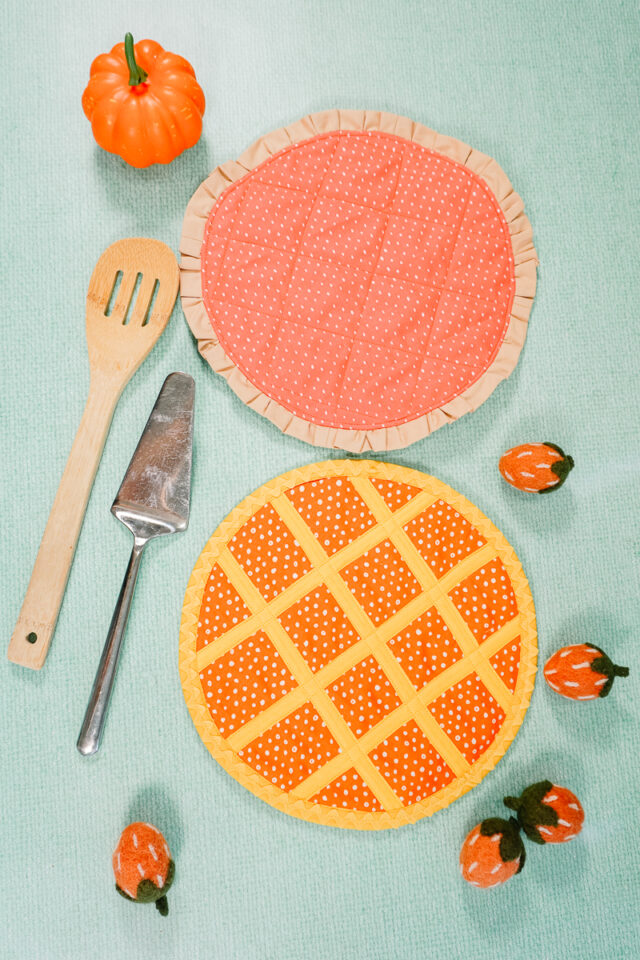
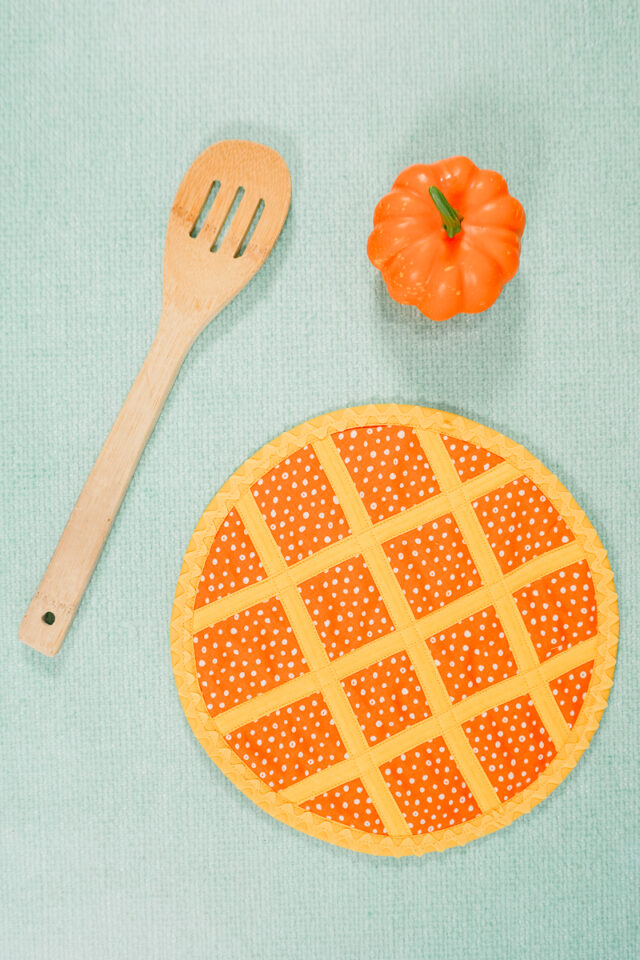
Do you have some hot pads to protect your surfaces from your hot pots and pans? Have you ever wanted to make some cute pads? Hot pads are so fun and easy to sew, and these ones look like yummy pies. I chose some small print fabrics, but you can choose fruit print fabrics to make them even more fun.
There is one pie hot pad that looks like a pie with a woven crust across the top, and the other pie hot pad looks like an open top pie with a crimped edge. I can’t wait to have these pie hot pads decorating my Thanksgiving table.
What fabric should I use for a hot pad?
It’s very important to use 100% cotton fabric like quilting cotton for this project. Cotton is the best fabric to use when it’s going to be interacting with heat.

What batting and thread should I use for a hot pad?
When choosing batting you can either use two layers of 100% cotton batting or you can use one layer of insul-bright batting. They both work great at protecting from heat.
Make sure you also use 100% cotton thread. Any other thread will melt when heat is put on it.

Love to sew? Try one of these sewing projects:
How to Make a Quilted Pie Hot Pad
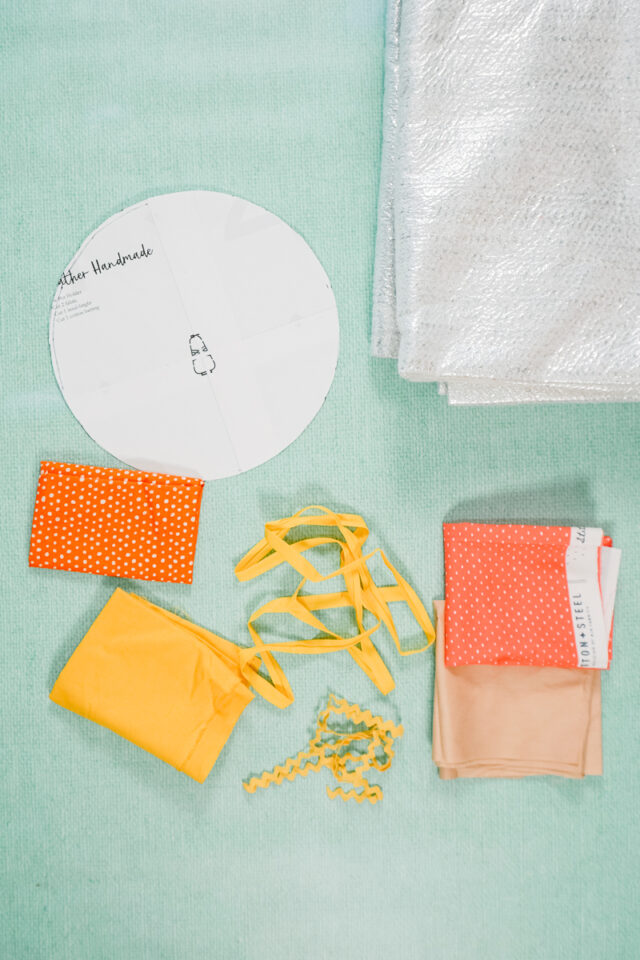
Supplies
- 2 fat quarters of cotton fabric
- Cotton thread
- Cotton batting or insul-bright batting
- 1 yard of 1/2 inch single fold bias binding
- 1 yard of ric rac
- 1 yard of 1/2 inch double fold bias binding
- Sewing tools
- Sewing machine
Instructions for Woven Top
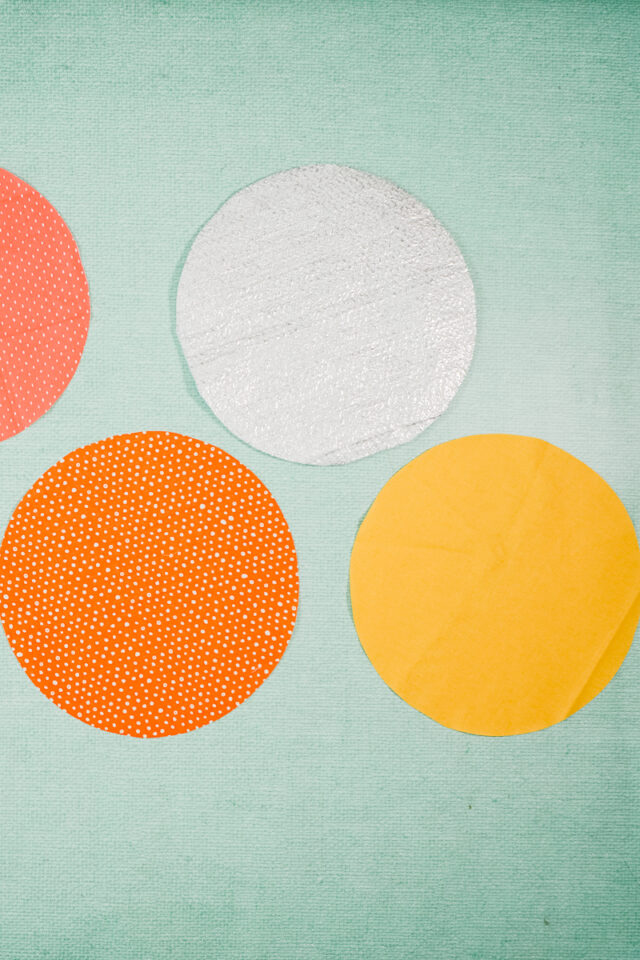
Cut out three 10 inch diameter circles from the top fabric, bottom fabric, and the batting.
Layer the bottom fabric right side down, then the batting, then the top fabric right side up.
Cut the single fold bias tape into 6 or more pieces. Pin the single fold strips onto the fabric sandwich distributing them evenly across the circle to look like a woven pie crust. Make sure the single fold strips are raw edges down.
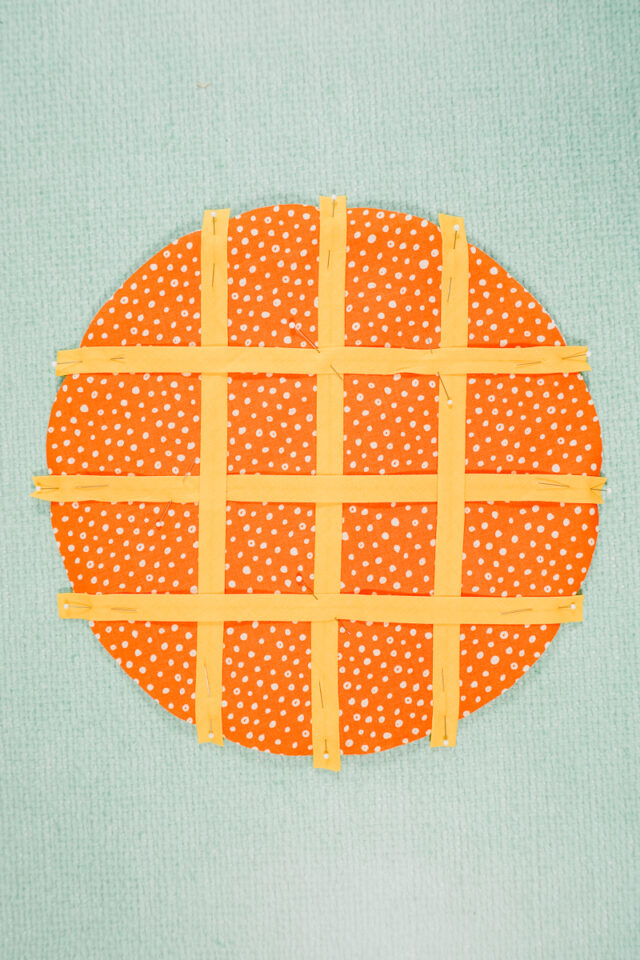
Sew along both sides of each single fold strip securing all the layers and keeping the strips in place.

Trim all the edges and any layers that got off center when sewing so you have a clean circle edge.

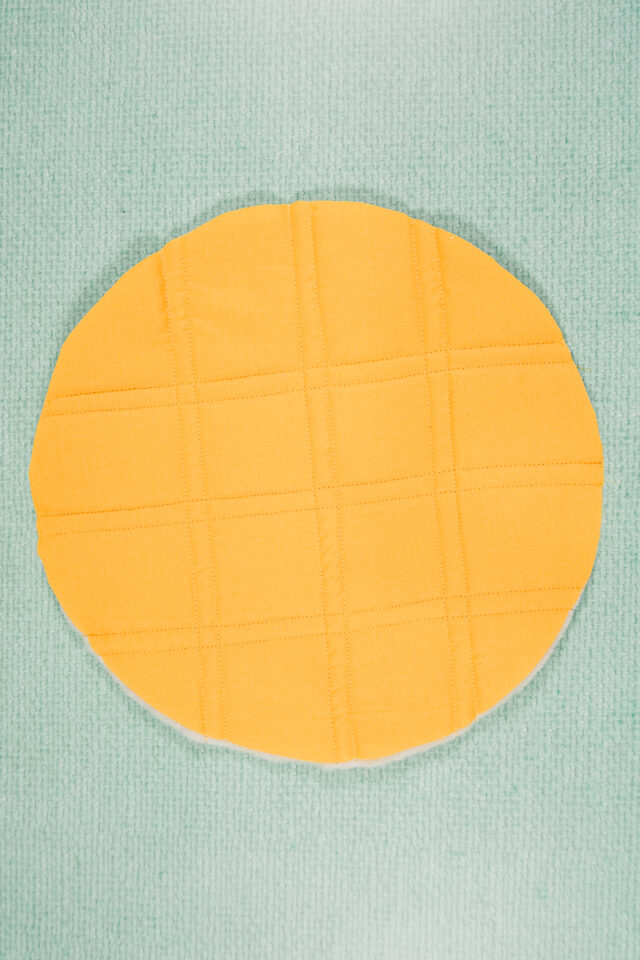
You can see the stitching on the back showing that all layers were quilted together.
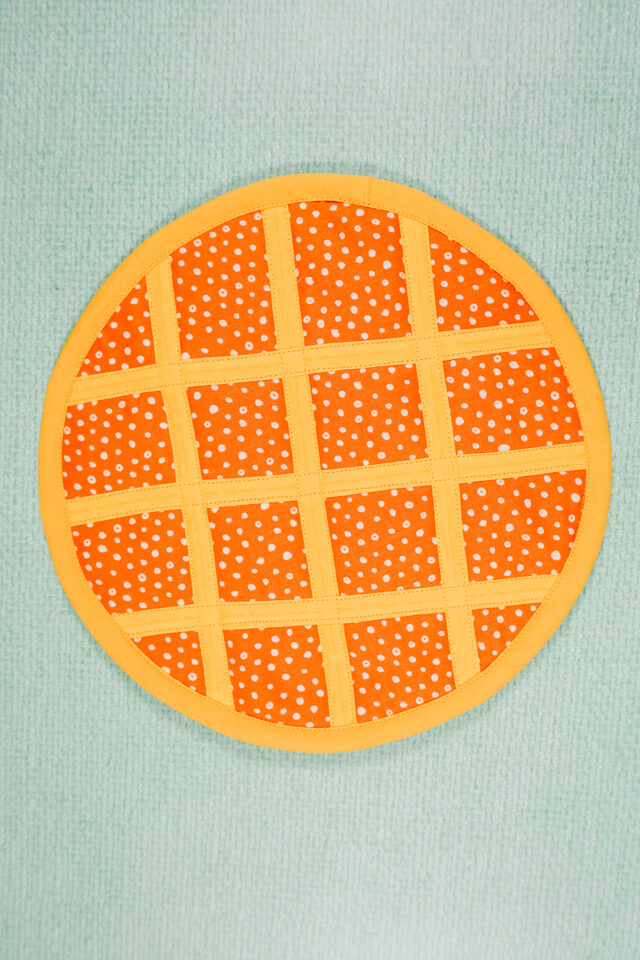
Use the double fold bias tape to finish the edges of the circle. When I’m doing a curve, I sew the bias tape to the back all the way unfolded. Then I wrap the bias tape around to the front and topstitch it in place.
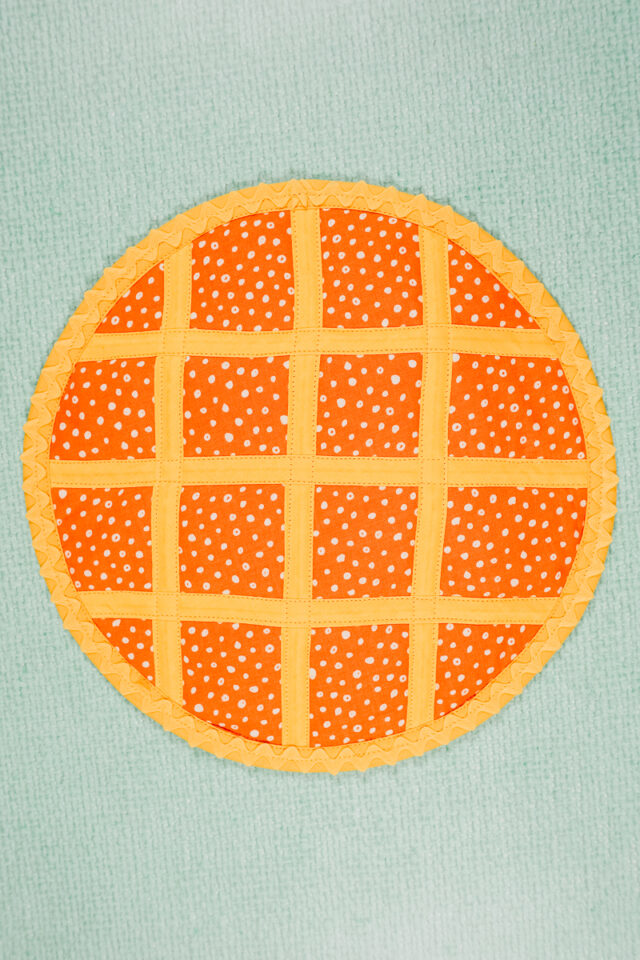
Take your ric rac and pin it onto the bias tape. Sew the ric rac onto the bias tape by sewing down the center of the ric rac. Press it well. You finished!
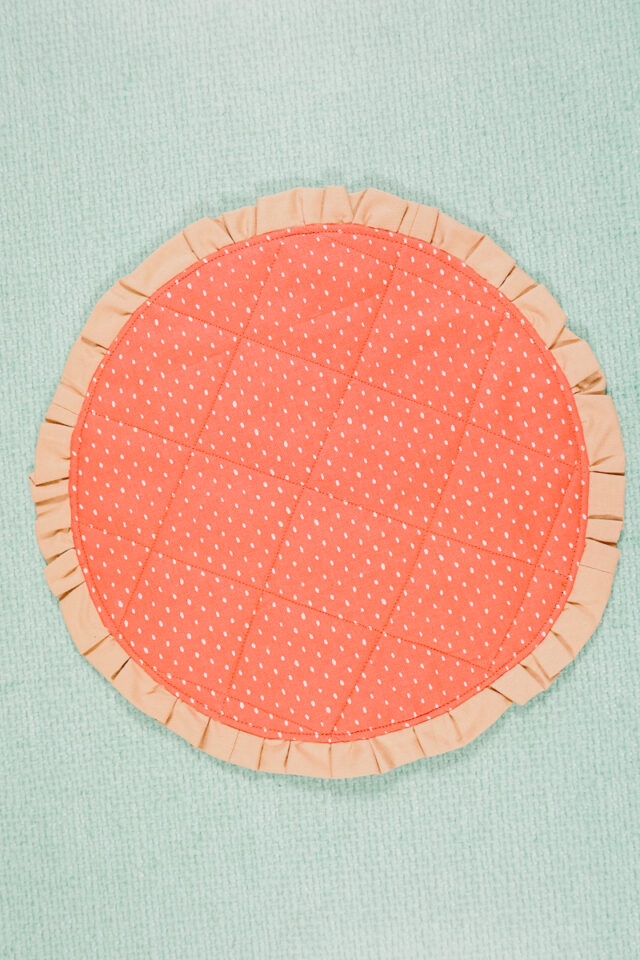
Instructions for Ruffle Edge
Cut out three 10 inch diameter circles from the top fabric, bottom fabric, and the batting. Cut out a strip of fabric that measure 2 inches tall and 45 inches long. You can cut multiple strips that when sewn together will measure 45 inches.

Layer the top fabric over the batting. Pin the layers together.
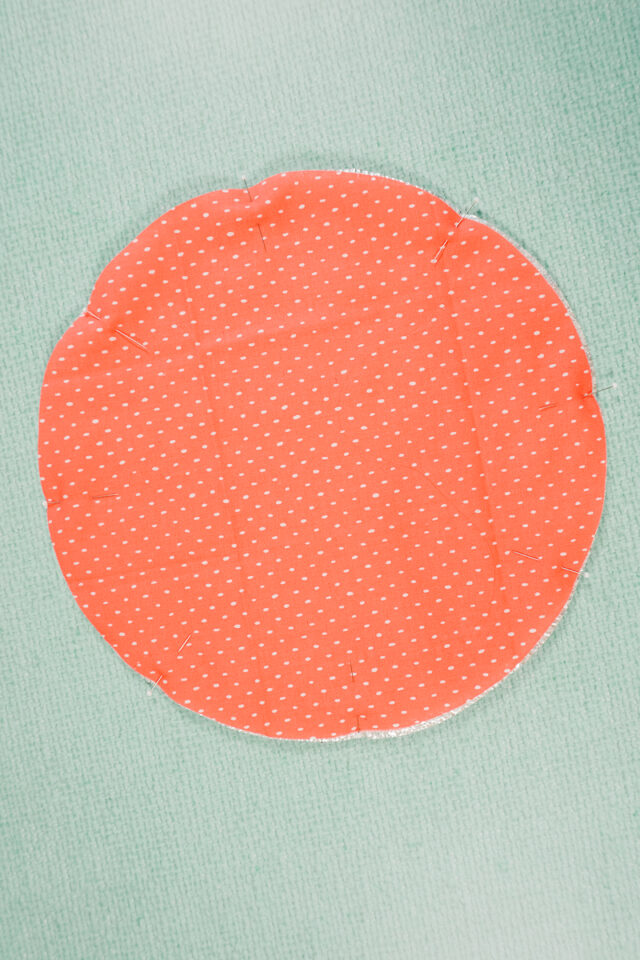
Sew quilting lines through the layers in whatever design you want.

Trim any edges that got offset.
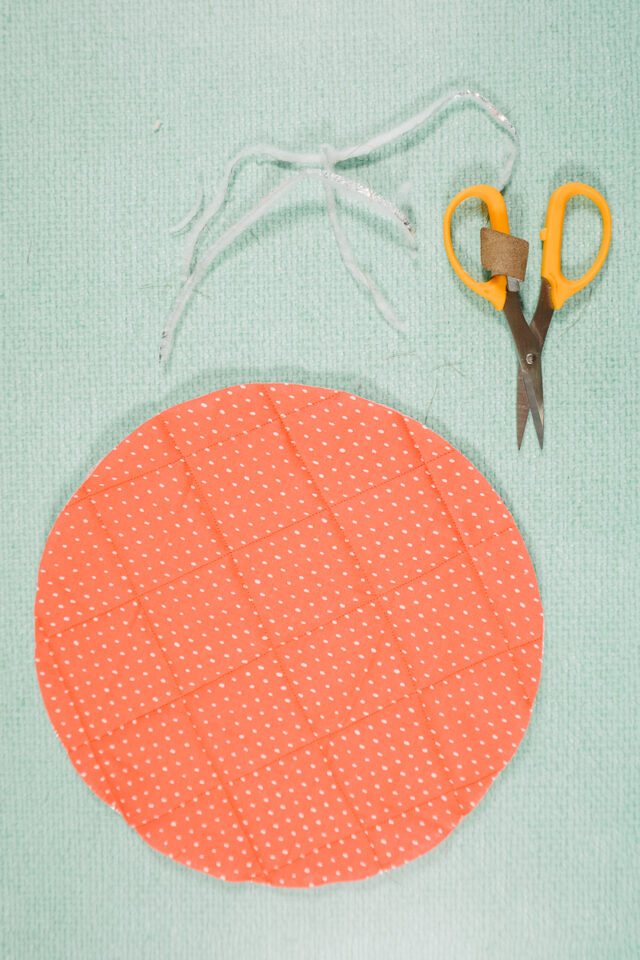
Sew the strip into one large tube.

Fold it in half with wrong sides together. Sew a gathering stitch along the long cut edge.

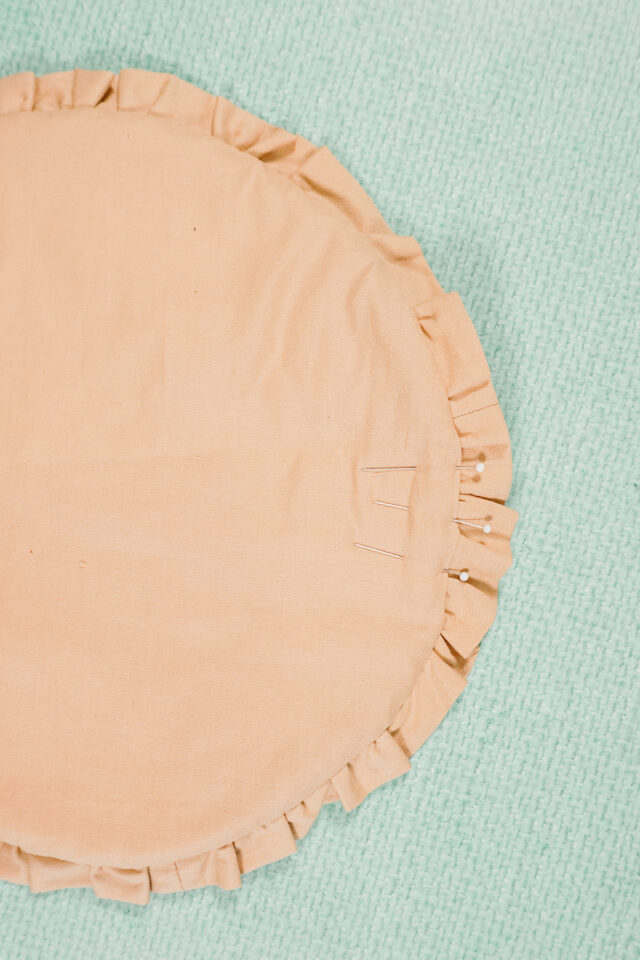
Gather the strip and then pin it around the edge of the quilted circle. The fold will be on the inside and the raw gathered edge will line up with the raw edge of the circle.
Baste the ruffle in place.

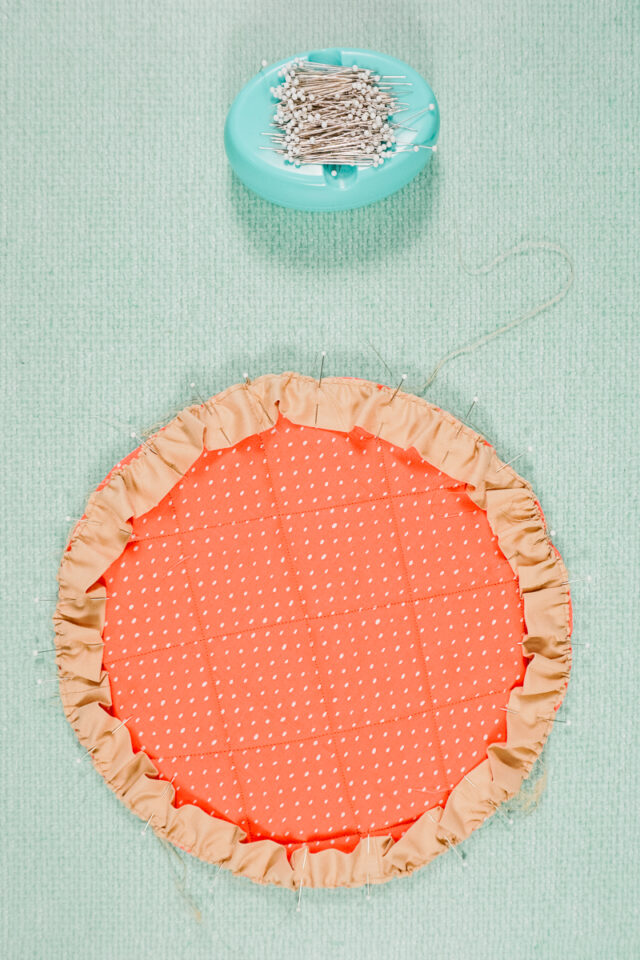
Pin the bottom fabric circle right sides together with the quilted circle. Sew around the edge with a 3/8 inch seam allowance. Leave a 2-3 inch hole for turning. Backstitch when you start and when you stop.

Notch the seam allowances to reduce the bulk.

Turn it right side out.

Press it flat with the seam allowance of the hole folded inside.
Pin the hole closed.
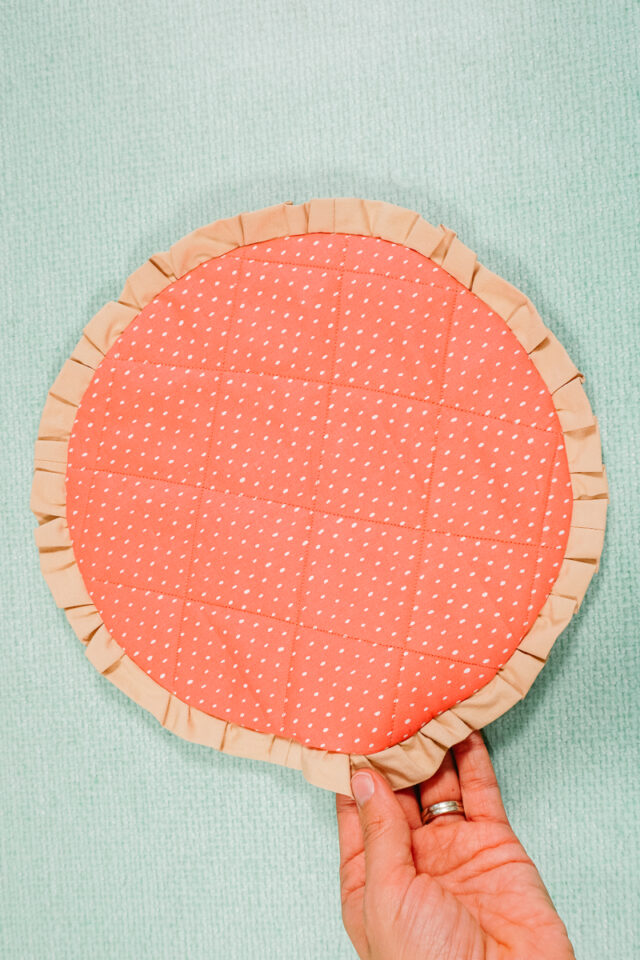
Edgestitch around the hot pad 1/8 inch from the ruffle. This will neaten the edges and close the hole. Press flat. You finished!
If you make something using this sewing project, I’d love to see! Please share it on social media with the hashtag #heatherhandmade and tag me!


I believe small sewing moments can create great joy. Find your own “right” way to sew. -Heather
Thank you so much! I love this pattern! The hot pads look so much like pies and can be adapted to a Christmas theme as well as Thanksgiving! I did make two gathering stitch lines for the Woven Pie Crust Hot Pad because I had some trouble with my single gathering stitch breaking. Other than that, they were fun and easy to sew!
That’s a great tip!
So cute and different. Thanks for sharing.