
Free Heart Oven Mitt Sewing Pattern

This post may contain affiliate links.
Learn how to make a heart oven mitt with a free sewing pattern. This Valentine sewing project is easy and fun to sew, and it’s perfect for the kitchen.
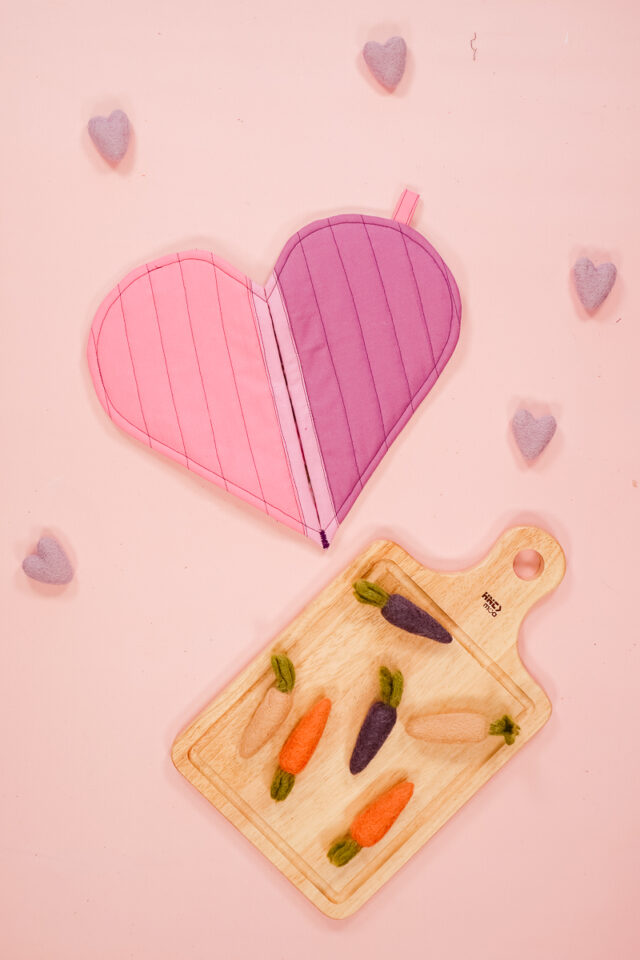
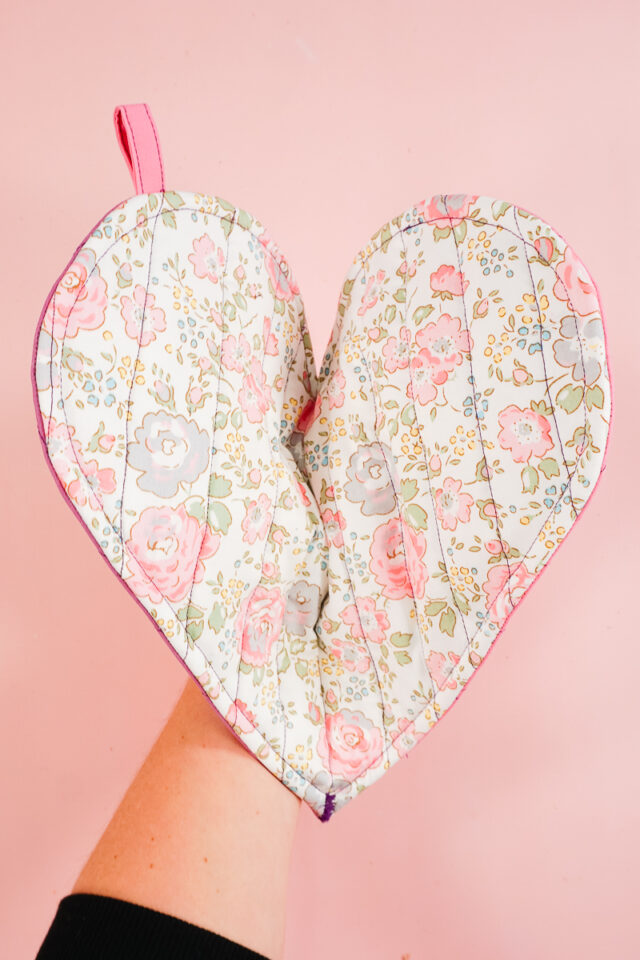
Do you want a Valentine sewing project for the kitchen? This heart oven mitt is so cute in the kitchen, but it’s so useful and protects your hand. It’s fun and easy to sew, and some of the pattern pieces use up your cute scraps of fabric.
It can also be used as a heart shaped hot pad. I loved quilting the fabrics and then sewing them together. It makes me happy every time I see it in my kitchen!
To get the free sewing pattern, scroll to the end of the tutorial. Put your email address in the form under “Get the Free Sewing Pattern Here.” Once you confirm that you want to receive emails from Heather Handmade, the free pattern will be sent to your email address. Check your spam and promotions for the email.

What fabric should I use for a heart oven mitt?
The best fabric to use for a heartoven mitt is quilting cotton. Cotton is best for heat, and quilting cotton is easy to find and easy to sew. There are so many fun colors and prints you can use.
What batting should I use for a heart oven mitt?
It’s very important to use cotton batting for anything that will be exposed to a lot of heat. I used one layer of cotton batting and one layer of insul-bright for this heart oven mitt, and it works perfectly.

What is a PDF sewing pattern?
A PDF pattern is a sewing pattern designed on the computer and organized so that it can be printed on several letter or A4 size pieces of paper.
I love using PDF sewing patterns because if the pattern gets ruined or if my children or I changed sizes, I can always print it again. It’ll never be destroyed since I have a digital version!
How do you use a PDF sewing pattern?
Open the PDF on a computer and click print. When printing make sure that the scaling is set to 100% or no scaling so that the pattern prints at the correct size.
Once the pattern is printed it can be taped together to get the full size. Then the pattern can be cut for each pattern piece size or individual sizes can be traced so that the pattern can be used again and again. Learn how to use PDF sewing patterns.
Want more sewing projects? Try these:
- Free PDF sewing patterns
- Gifts to Sew
- Kitchen sewing projects
- 30 minute sewing projects
- Gifts for a hostess
- Oven mitt sewing pattern
How to Make a Heart Oven Mitt
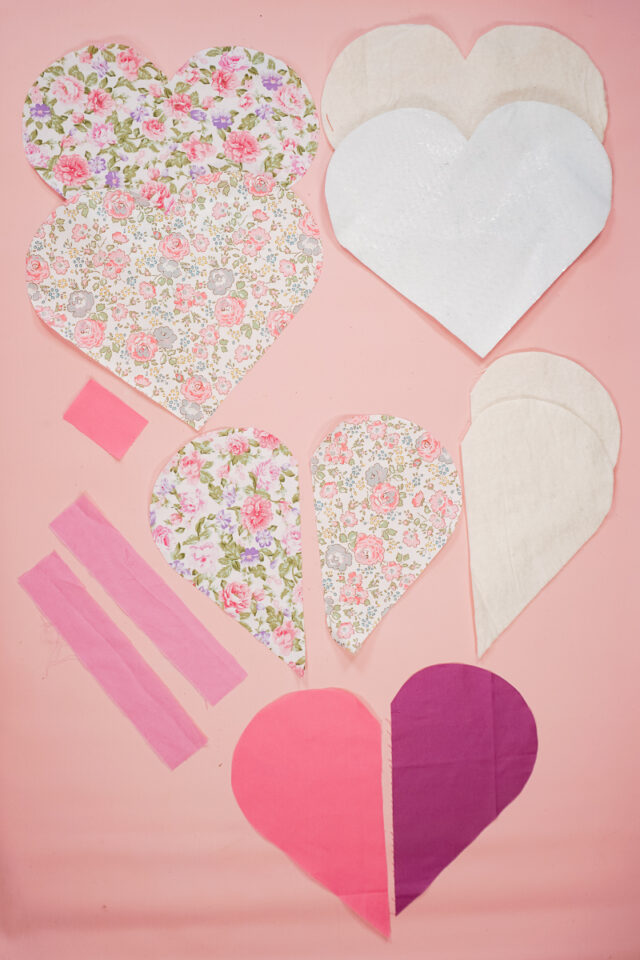
Supplies
- Two fat quarters and/or scraps of fabric
- Free heart oven mitt sewing pattern – get it at the end of the post
- Cotton batting
- Insul-bright
- Sewing tools
- Sewing machine
Do you just want the pattern and tutorial as a PDF? Get the pattern and tutorial for just $5. You won’t need to access the internet every time you want to make it. Or get the Pattern Bundle with ALL the PDF tutorials!
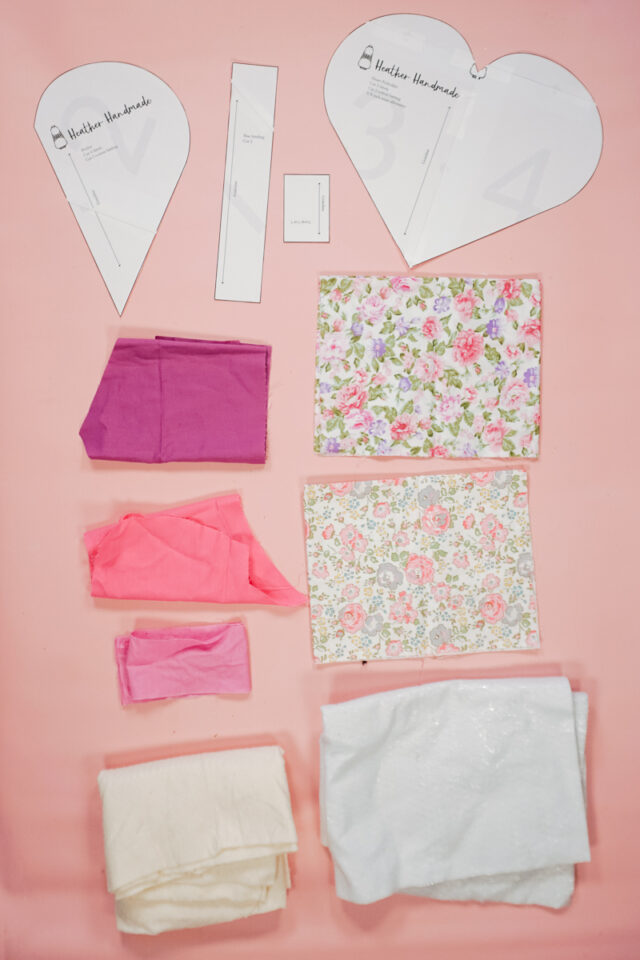
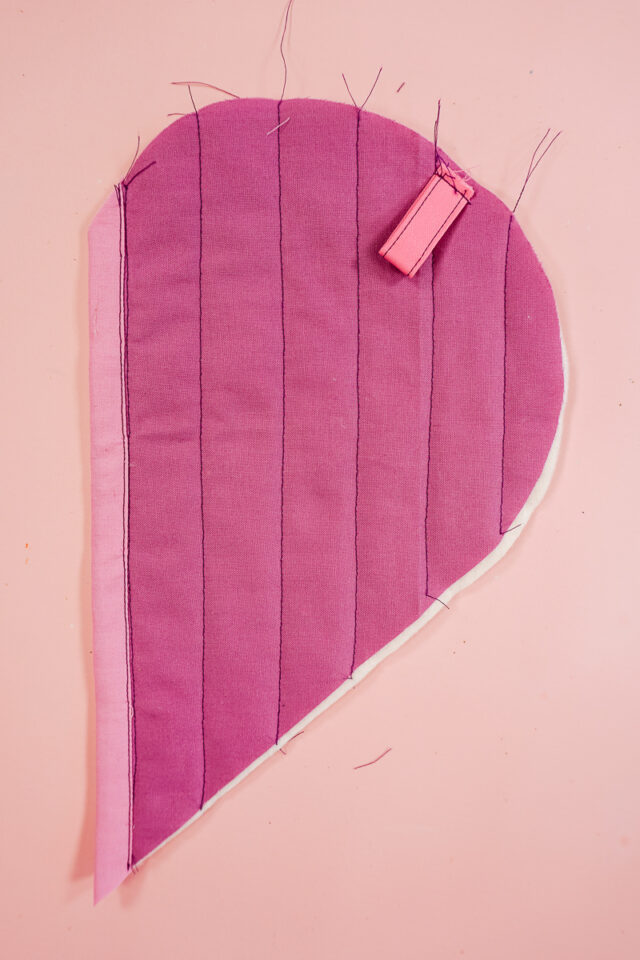
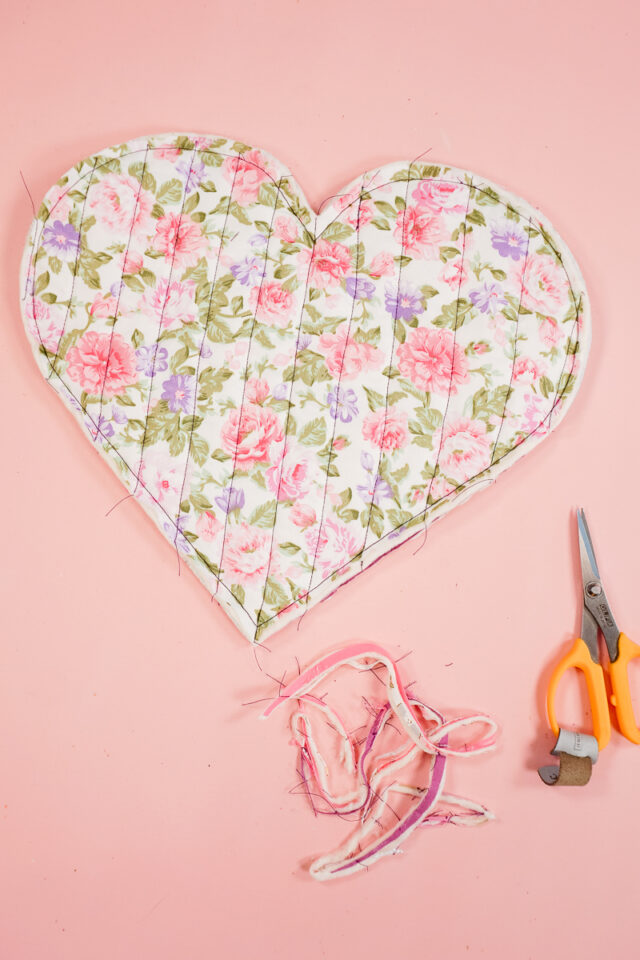
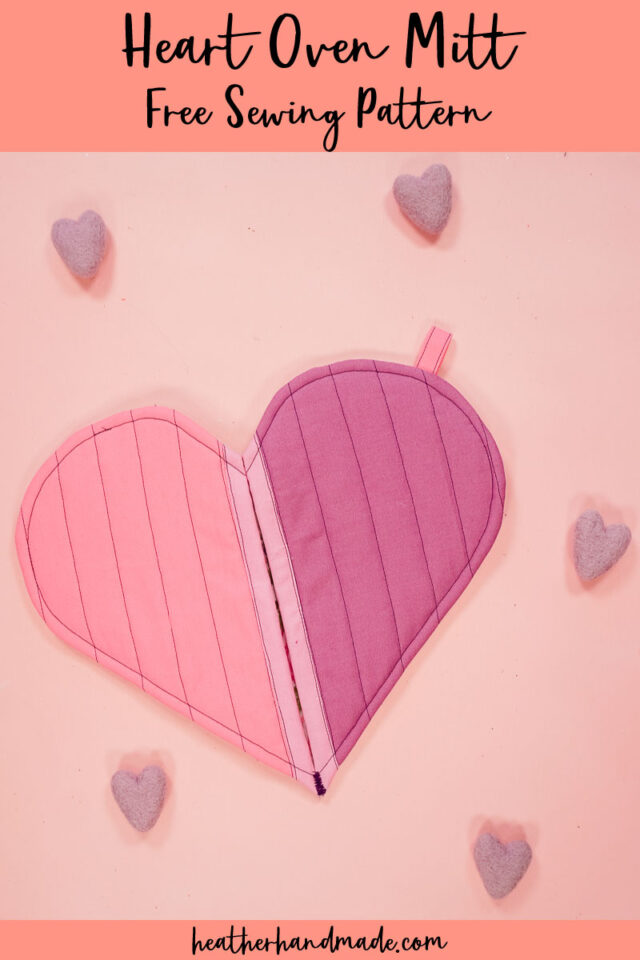
Cut 2 fabric hearts, 1 cotton batting heart, and 1 insul-bright heart. Cut 4 pockets, 2 cotton batting pockets, and 2 insul-bright pockets. Cut 1 loop and 2 binding pieces.
Make a sandwich with fabric on the outside and batting and insul-bright on the inside. Do it with the two pockets and with the heart.

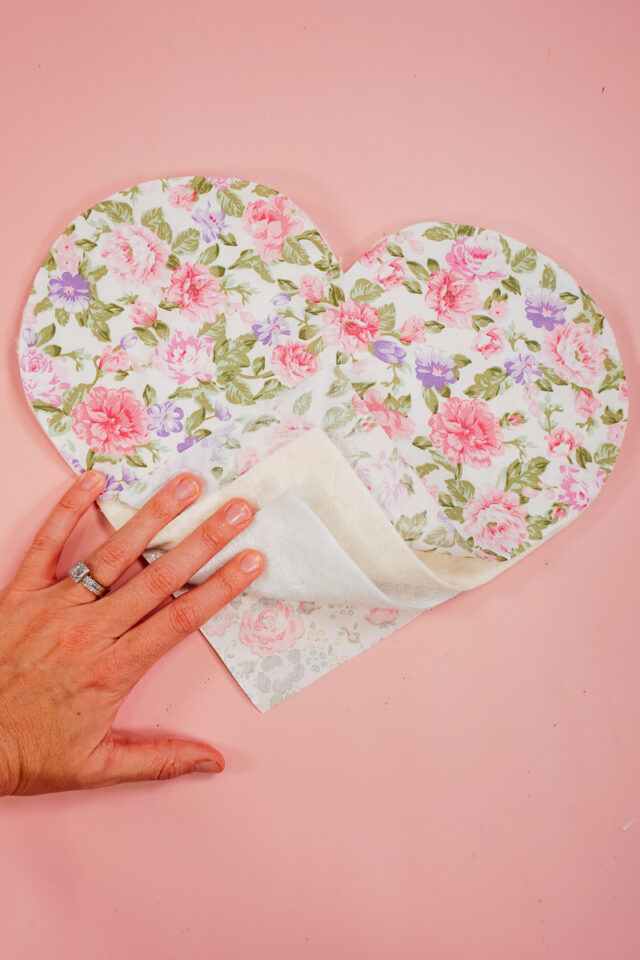
Quilt the layers together of both pockets and the hearts. I chose to do vertical parallel lines that were 1 inch apart.

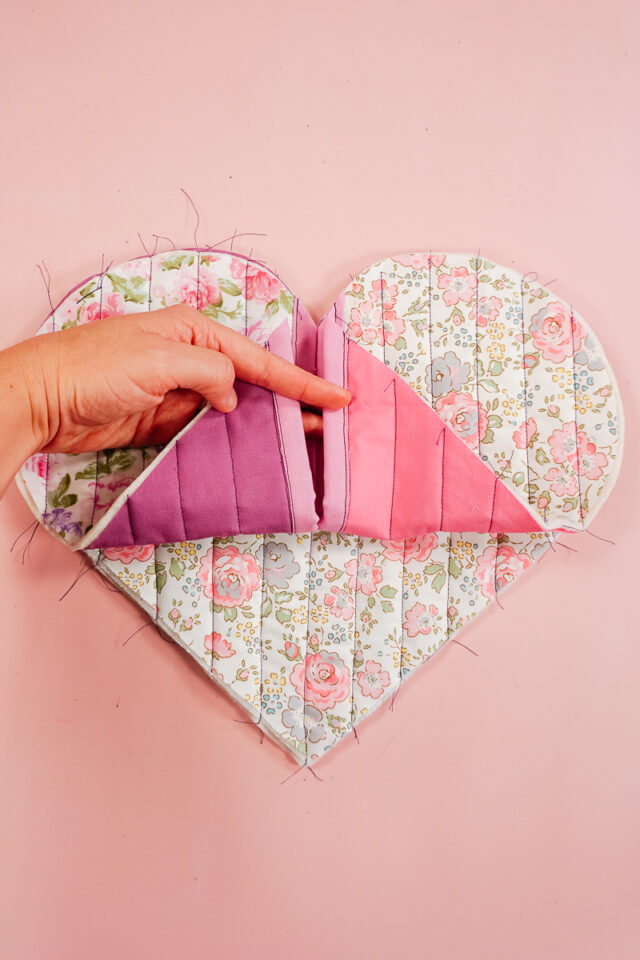
Sew the binding to the wrong side of the straight edge of the pockets.
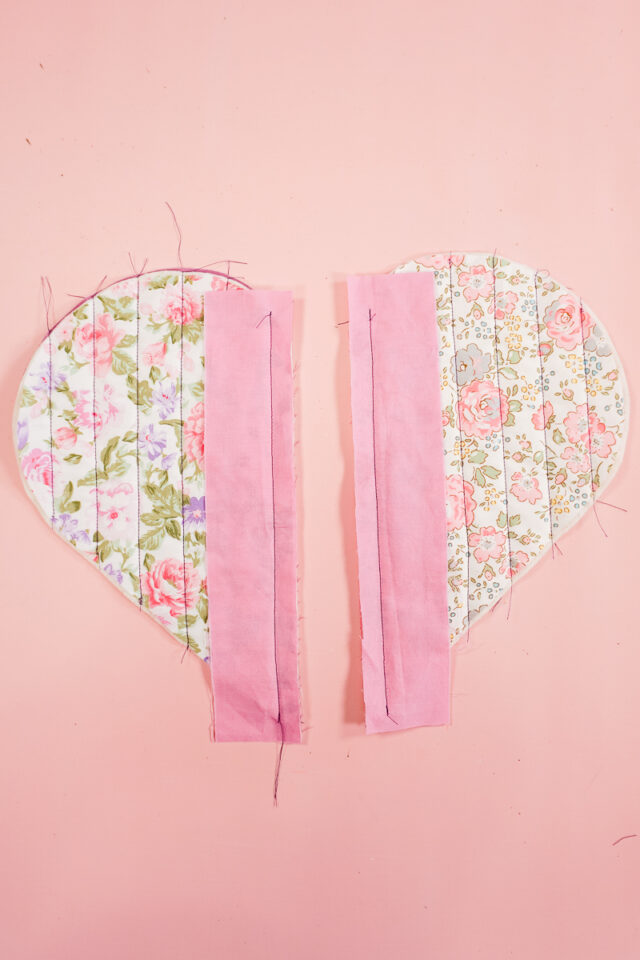
Fold the binding around the front enclosing all the raw edges. Sew in place.
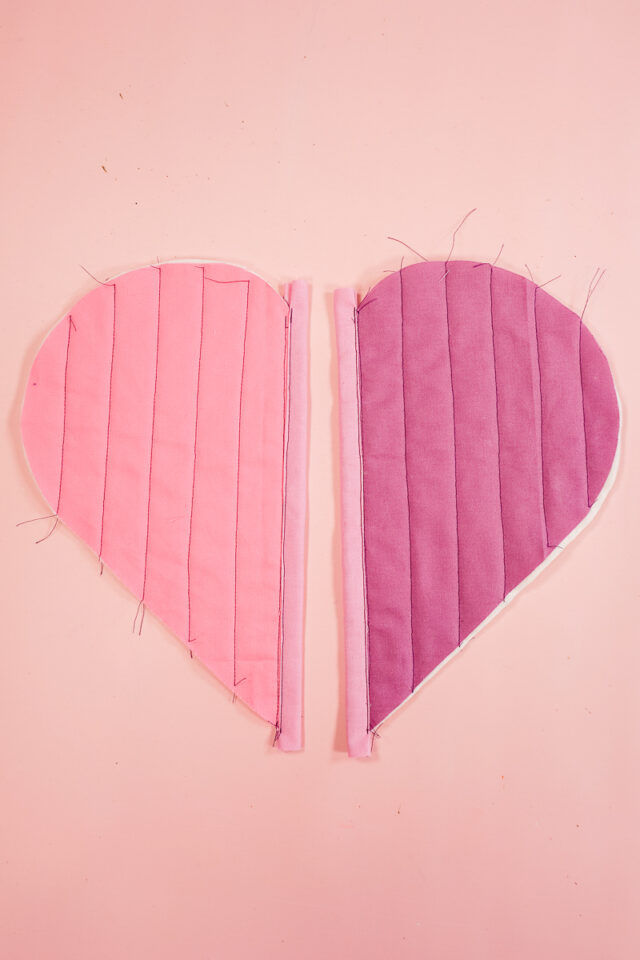
Trim the binding to fit the shape of the pockets.

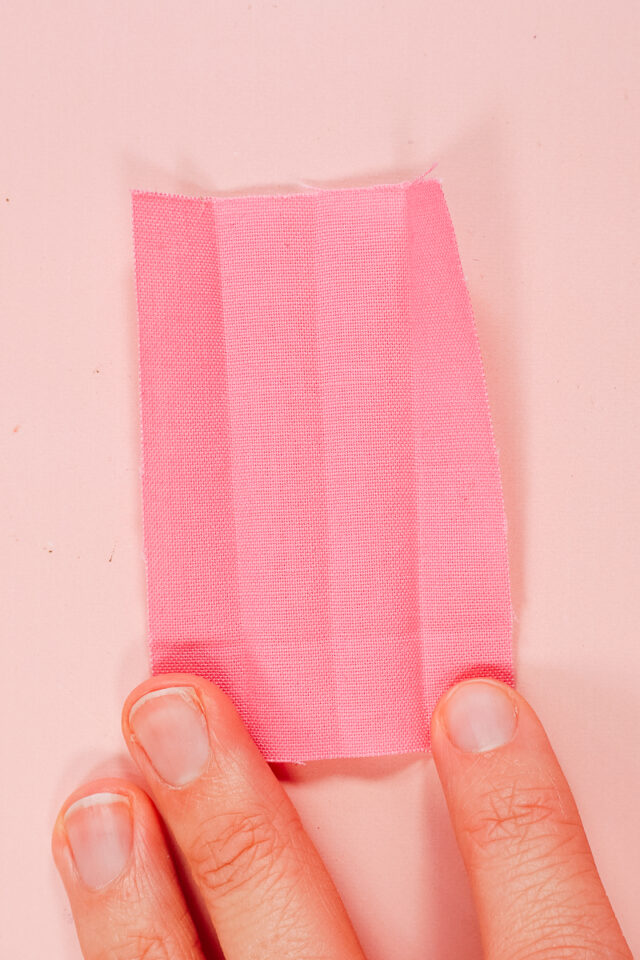
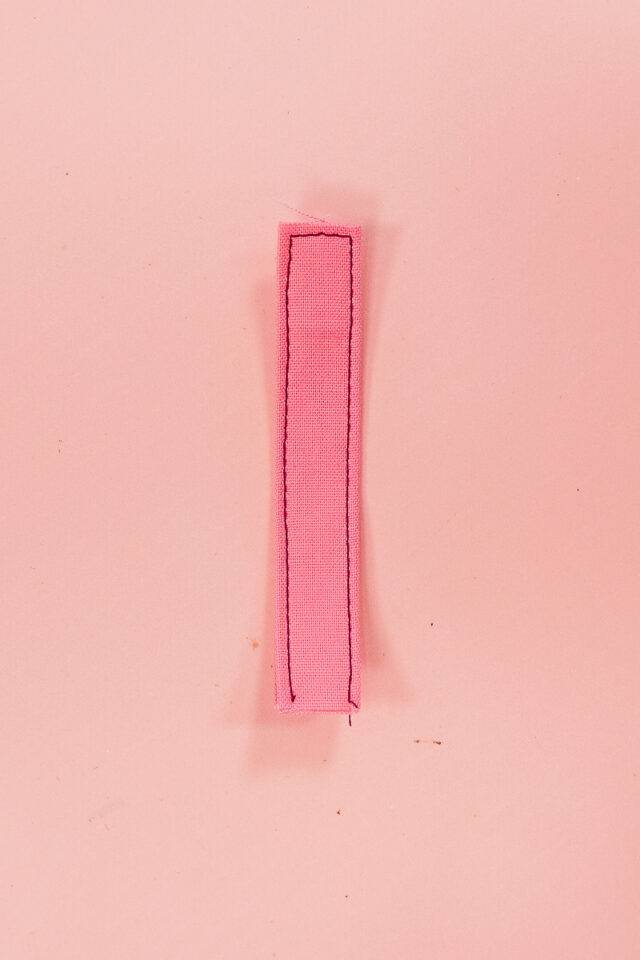
Fold the loop in half with wrong sides together matching the long edges and press. Take each long edge and fold into the center fold and press. Fold all three folds so that the long edges are enclosed and press.
Sew around the edges of the loop to keep the folds in place.
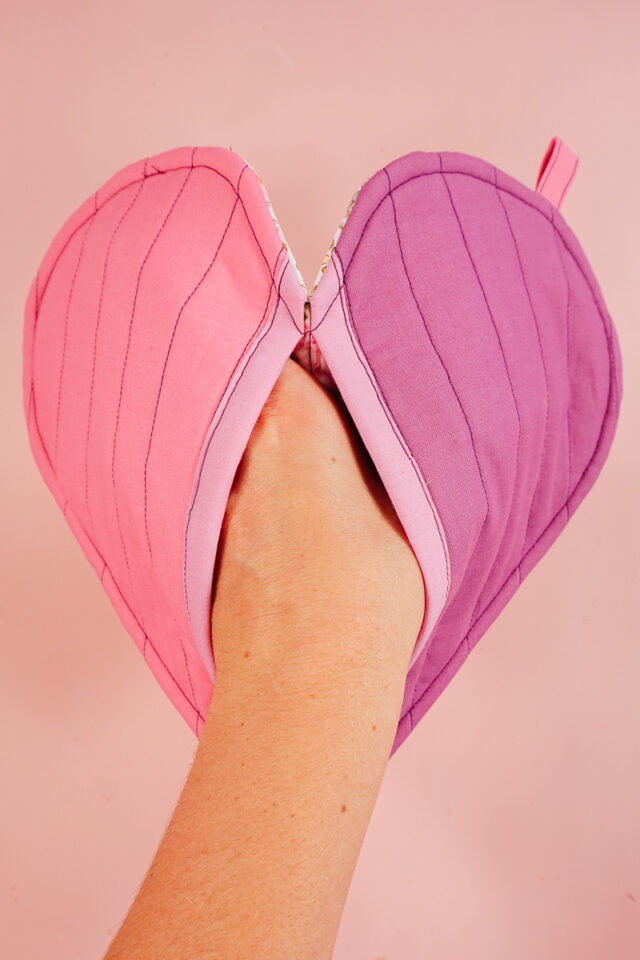
Fold the loop in half matching the short edges. Baste it to the top front of one of the pockets.
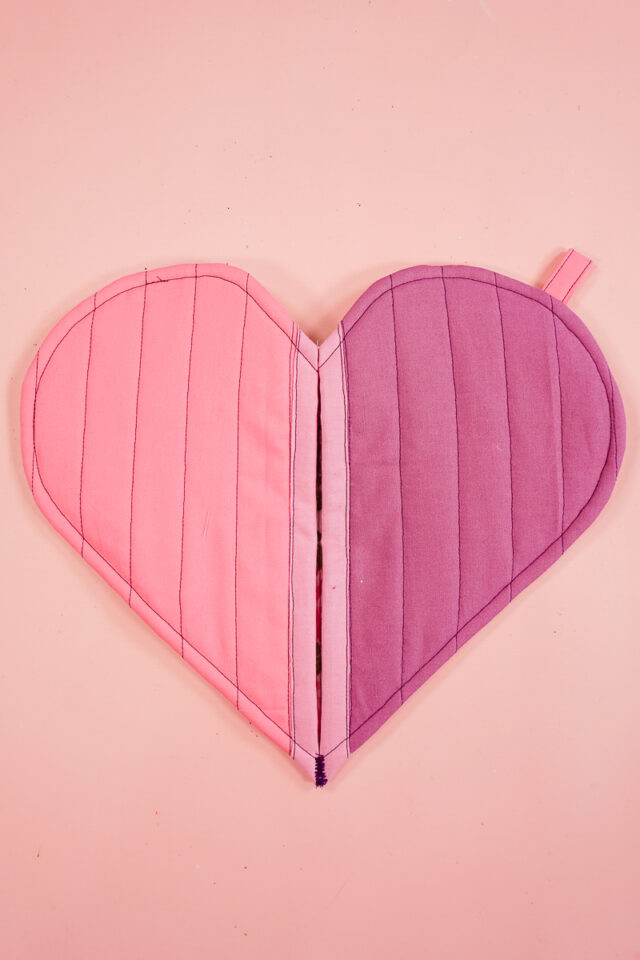
Pin the heart and pockets right sides together.
Sew around the edge of the heart at 3/8 inch.

Trim the seam allowance down to 1/4 inch.
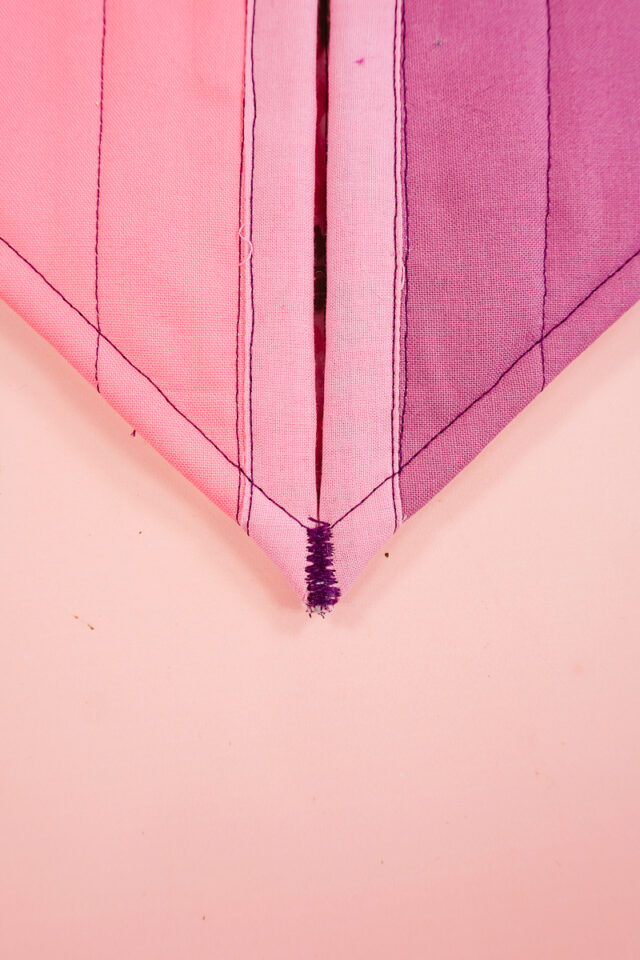
Trim the bottom outer point of the heart.

Clip the top inner point of the heart.
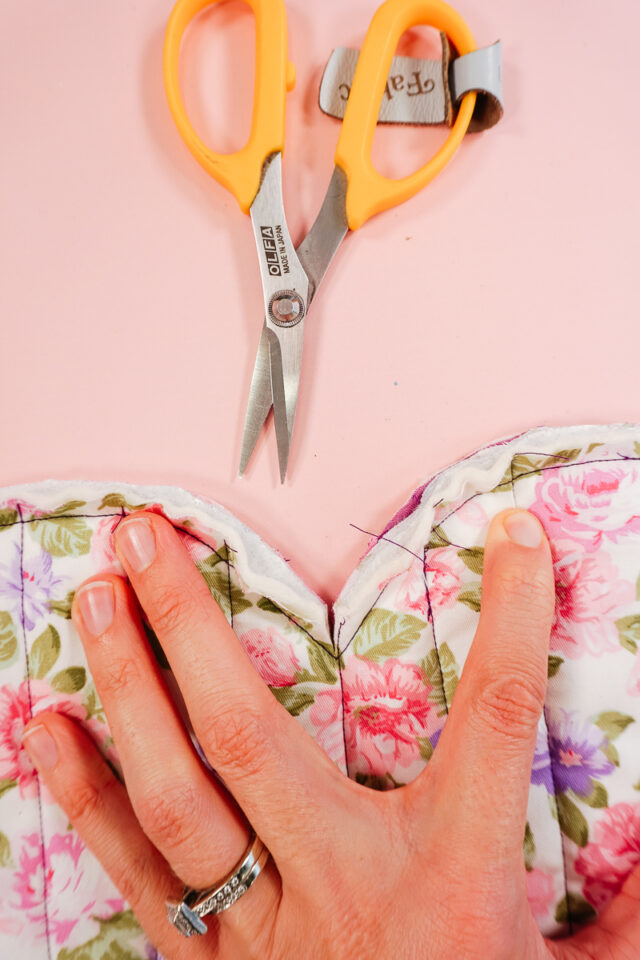
Turn the heart right side out and push out the curves.

Sew around 1/4 inch from the edges.
To secure the bottom point, sew a zigzag stitch over the pocket edges between the edge and the stitch line. You finished!
Get the Free Sewing Pattern here!
If you make something using this sewing project, I’d love to see! Please share it on social media with the hashtag #heatherhandmade and tag me!

I believe small sewing moments can create great joy. Find your own “right” way to sew. -Heather
So cute!!
Just finished making 2 for friends at church. They’re darling! Thanks, Heather! Wish I could share a pic here. I did 3/4” quilting rows and love how that looks. Also, I cut the batting pieces 1/4” smaller for the sake of less thickness when topstitching at the end. Figured out the value of that when making bowl cozies. Next time will cut them even smaller because they ended up right at the edge anyway. My Singer HD handled it well; it was just a pain getting that thickness under the presser foot. Thanks again.
Yay! That’s so fun!
Looking forward to making 2 of these. Thank you for the pattern and tutorial.