
Free DIY Cooling Neck Wrap Sewing Pattern

This post may contain affiliate links.
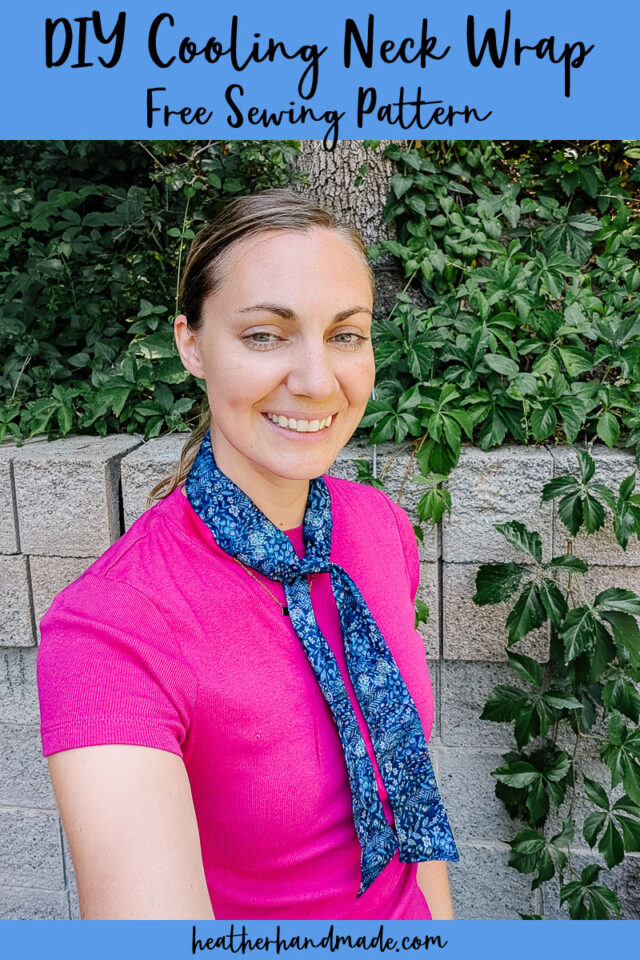
Learn how to sew a cooling neck wrap with a free sewing pattern. This summer sewing project is easy, and it keeps you cool in hot weather.
What do you do when you are outside in the heat? Are you watching summer sports, a parade, or hanging out by the water somewhere? How do you keep cool?
Besides wearing lightweight clothing and a hat, and drinking lots of water, I needed another option to help me stay cool. I’ve seen cooling neck wraps and wanted to try my own. I had some doubt that it would work and that I would like it, but after trying it just for pictures, it’s so awesome! I cannot wait to wear this all summer!
To get the free sewing pattern, scroll to the end of the tutorial. Put your email address in the form under “Get the Free Sewing Pattern Here.” Once you confirm that you want to receive emails from Heather Handmade, the free pattern will be sent to your email address. Check your spam and promotions for the email.

How does a cooling neck wrap keep you cool?
There are water beads sewn into pockets in the neck wrap. When they are soaked in water and expand, they slowly dry and release water over a long period of time. The long term evaporation keeps you cool for a long time. It’s a really great solution for keeping your neck and head cool in the heat.

Why is this better then a fan or electric neck cooler?
I realized that this version is great for camping or being away from electricity for a long time. Fans and electric neck coolers need to be charged and work for a fair amount of time, but eventually they need to be charged or have the batteries replaced.
This neck cooler can be “replenished” by soaking it in water, and it’s good to go for another day.

Love to sew? Try one of these sewing projects:
- Free PDF sewing patterns
- Beginner sewing projects
- Summer sewing projects
- Small sewing projects
- Gifts to sew
- Sewing projects to sell

How to Sew a DIY Cooling Neck Wrap
Supplies
- Quilting cotton
- Water beads or aqua beads* – There are a couple of different sizes. It doesn’t matter what size you get, but you’ll have to adjust the amount you put in each pocket.
- Sewing tools
- Sewing machine
Do you just want the pattern and tutorial as a PDF? Get the pattern and tutorial for just $5. You won’t need to access the internet every time you want to make it. Or get the Pattern Bundle with ALL the PDF tutorials!
Instructions
Cut a piece of fabric 42 inches wide (full width of fabric) and 5 inches tall. Trim off any white selvedge edges.

On the wrong side of the fabric mark the center. Then mark 3 inches away on each side of the center.

Fold the fabric right sides together so that the long sides match up. Pin on the short sides and the full long side.
Backstitch and then sew along one short end, pivot, sew to one mark and backstitch. Starting at the other mark backstitch, sew to the corner, pivot, sew along the short end and backstitch.

Trim the corner seam allowances.

Turn the piece right side out through the center hole. Carefully poke out the corners. Press everything flat with the hole seam allowances tucked inside.

Now mark the center and then 4 inches away on each side of the center and 8 inches away on each side. There should be 5 marks. The three center marks are over the center hole.

Edgestitch around the edges of the neck wrap by starting at the furthest mark from the center and sewing out to the ends and then back in. You are essentially sewing two rectangles on the end of the wrap to make it look nice and to keep the water beads up in the center.

Depending on the size of your water beads, add 1/8 teaspoon (larger size) to 1/4 teaspoon (smaller size) to the neck wrap on each side. Push them down to the 8 inch marks (and stitching) farthest away from the center.

Sew a vertical line through each 4 inch mark to keep the water beads in that pocket.
Also, sew a vertical line through the center mark with the seam allowances folded correctly even though one side of the wrap is still a hole.

Again, add 1/8 teaspoon (larger size) to 1/4 teaspoon (smaller size) to the neck wrap on each side closest to the center. Push them away from the hole so that you can close it.
Pinch the hole and edgestitch it closed.

Soak the neck wrap in water. I found it took awhile to activate the water beads the very first time and let them soak overnight. Once they have been soaked once, they suck up water quickly and don’t take as long to grow and hold water.

The cooling neck wrap can now be wrapped and loosely tied around your neck. Enjoy it at all your hot, summer events!

If you make something using this sewing project, I’d love to see! Please share it on social media with the hashtag #heatherhandmade and tag me!

I believe small sewing moments can create great joy. Find your own “right” way to sew. -Heather
really cool idea ,my husband likes working in the garden this would keep him cool! Great idea Thanks
thanks!
What a cool idea, Heather!
Thank you!