
Free Curved Top Zipper Pouch Pattern

This post may contain affiliate links.
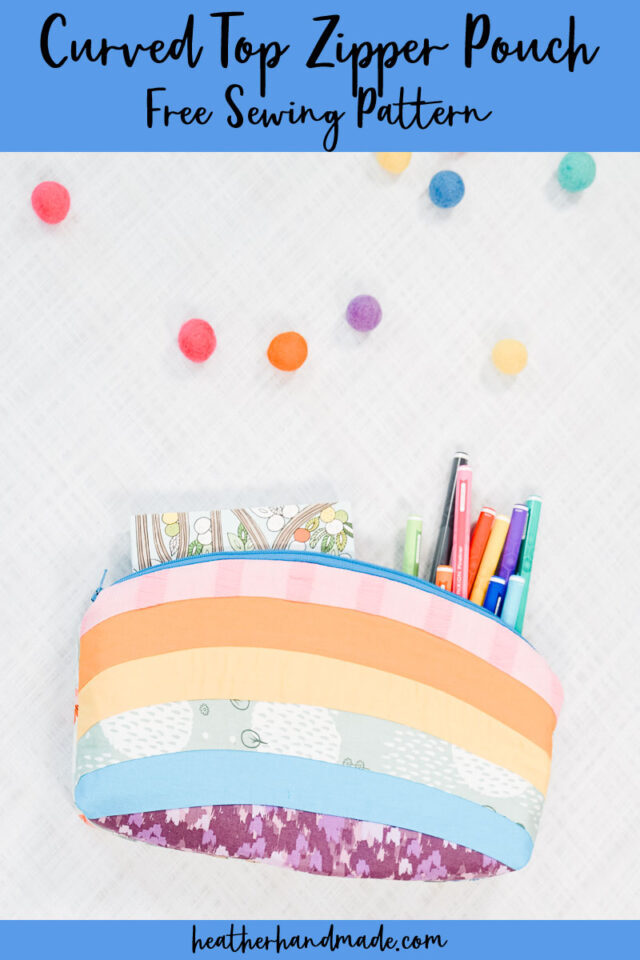
Learn how to make a curved top zipper pouch with a free sewing pattern. This beginning sewing project is cute and great for organizing.
I used to hate sewing zippers, but I’ve come to love making zipper pouches. They are quick and easy, and they use a small amount of fabric. You can keep them to organize or you can give them away as handmade gifts.
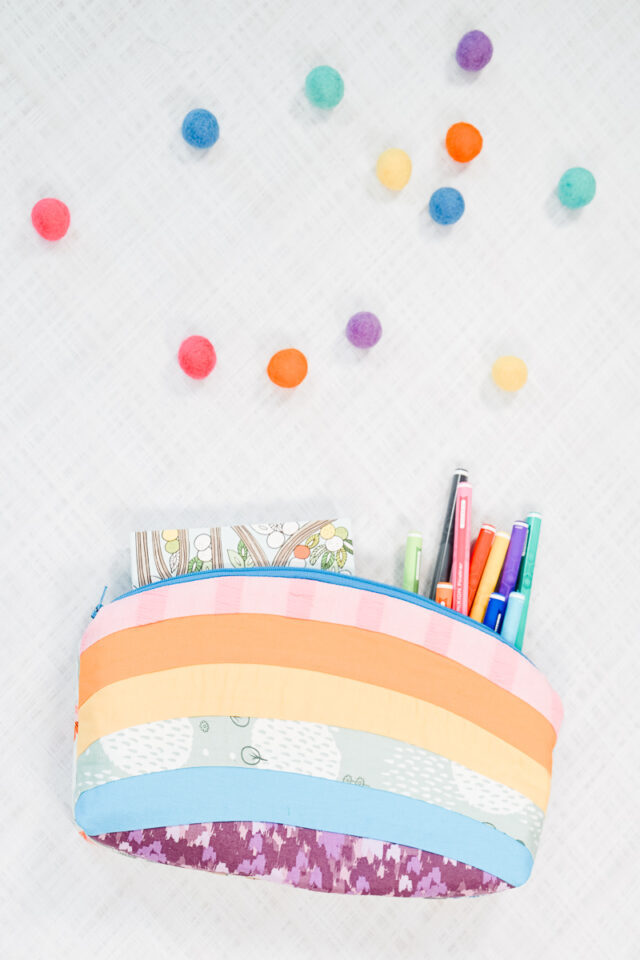
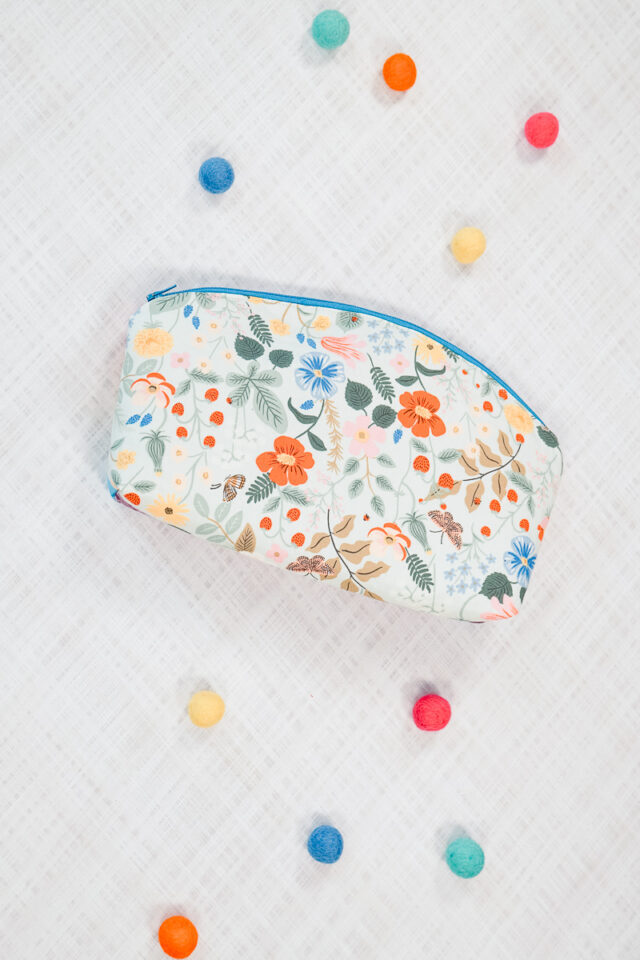
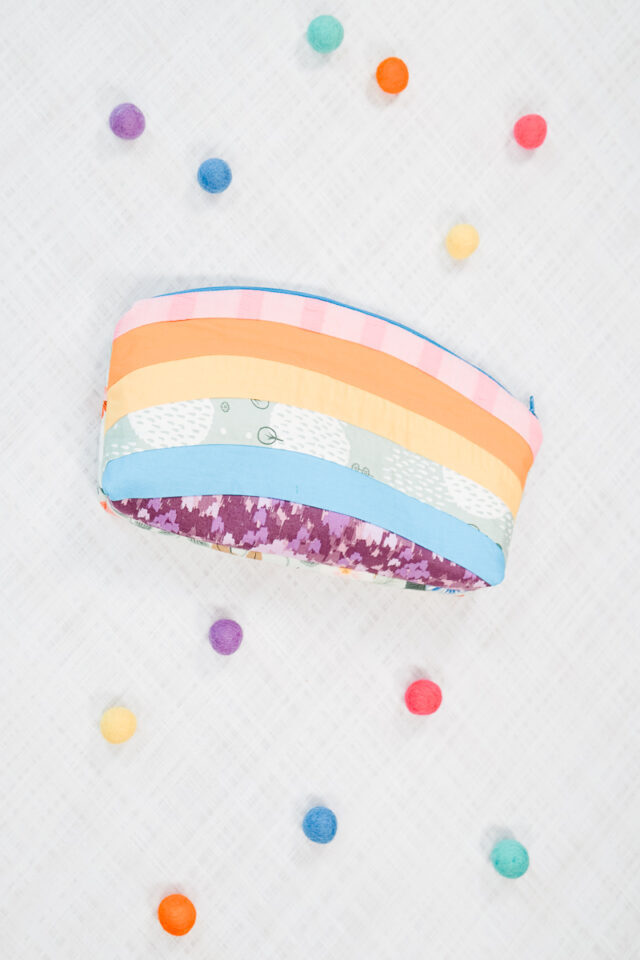
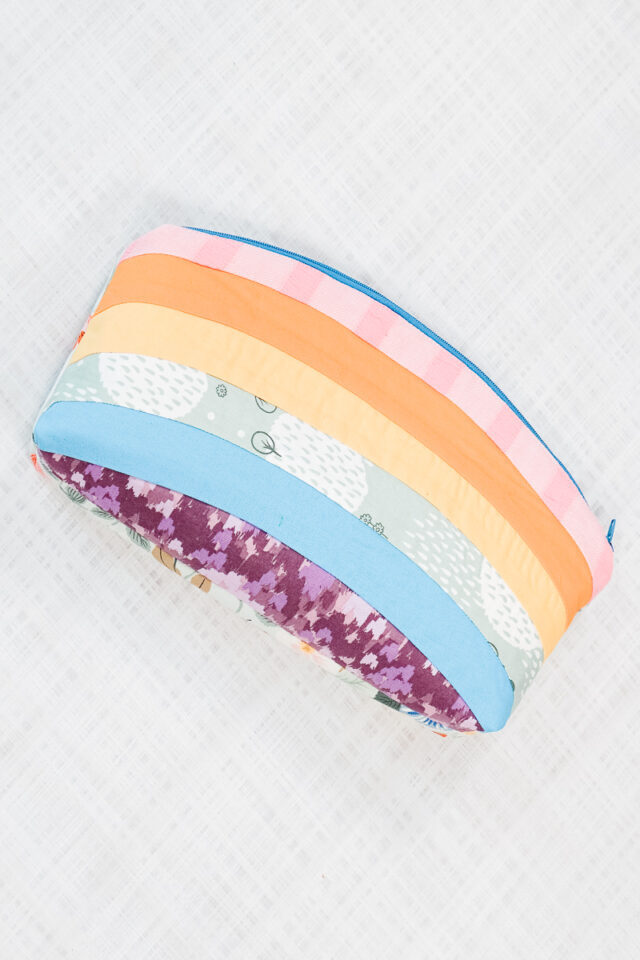
I designed a curved top zipper pouch that can be a simple zipper pouch, or it can be a rainbow or striped zipper pouch. There are the full pieces to create the simple zipper pouch, and there are the smaller pieces to create the stripes or rainbow. You can do one or the other, or you can do both like I did!
To get the free sewing pattern, scroll to the end of the tutorial. Put your email address in the form under “Get the Free Sewing Pattern Here.” Once you confirm that you want to receive emails from Heather Handmade, the free pattern will be sent to your email address. Check your spam and promotions for the email.
What is a zipper?
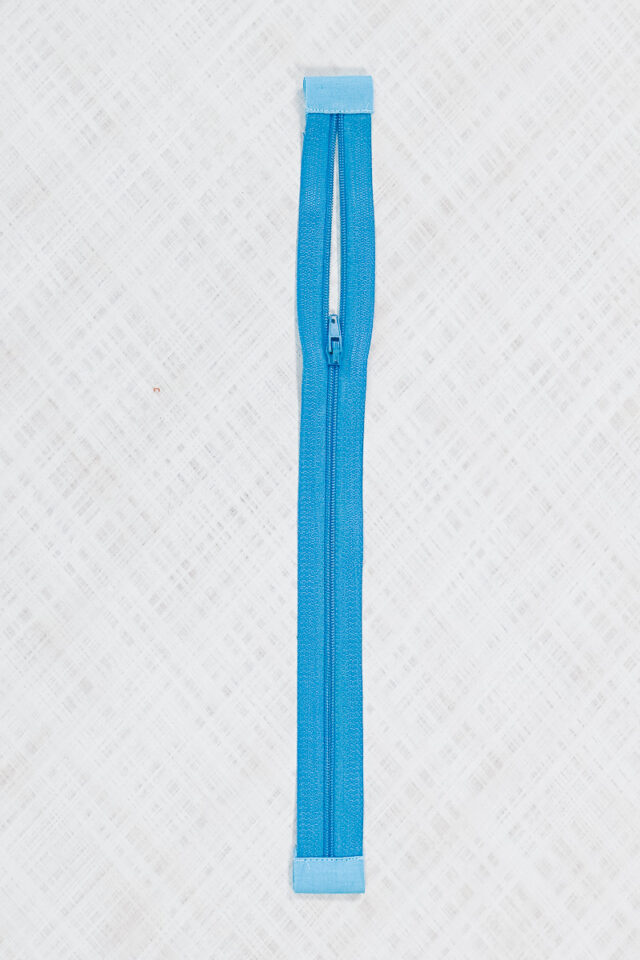
A zipper is two strips of fabric tape with interlocking metal or plastic teeth that are closed or open with a metal or plastic pull or slide. It’s used to fasten clothing and bags.
In this tutorial I use the words “teeth” meaning the interlocking projecting metal or plastic teeth, “zipper tape” meaning the two strips of fabric along each side, and “pull” meaning the slide that connects or disconnects the teeth.
What fabric should I use for a zipper pouch?
The fabric that works best for a zipper pouch is quilting cotton for both the outer fabric and the lining fabric. There are so many prints that will be fun to use. Add interfacing and fusible fleece to give stability to the pouch and help it hold its shape.
What is a PDF sewing pattern?
A PDF pattern is a sewing pattern designed on the computer and organized so that it can be printed on several letter or A4 size pieces of paper.
I love using PDF sewing patterns because if the pattern gets ruined or if my children or I changed sizes, I can always print it again. It’ll never be destroyed since I have a digital version!
How do you use a PDF sewing pattern?
Open the PDF on a computer and click print. When printing make sure that the scaling is set to 100% or no scaling so that the pattern prints at the correct size.
Once the pattern is printed it can be taped together to get the full size. Then the pattern can be cut for each pattern piece size or individual sizes can be traced so that the pattern can be used again and again. Learn how to use PDF sewing patterns.
Want more sewing project ideas?
- Beginner sewing projects
- Easy Gifts to sew
- Zipper pouch sewing projects
- St Patrick sewing projects
- How to sew a zipper
- How to fix a zipper
- Free PDF sewing patterns
How to Make a Curved Top Zipper Pouch
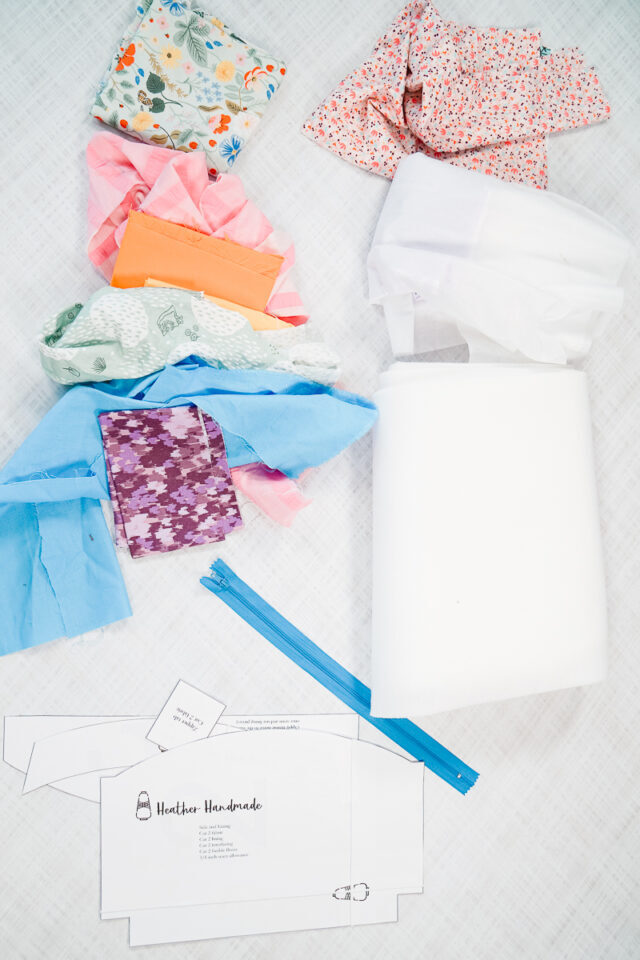
Supplies
- Curved top zipper pouch pattern – get the free sewing pattern at the end of the post
- Fat quarter of quilting cotton for the outside
- Fat quarter of quilting cotton for the lining
- Optional: multiple colors of scraps to make the rainbows or stripes
- 12 inch zipper
- Sewing tools
- Sewing machine
Do you just want the pattern and tutorial as a PDF? Get the pattern and tutorial for just $5. You won’t need to access the internet every time you want to make it. Or get the Pattern Bundle with ALL the PDF tutorials!
Instructions
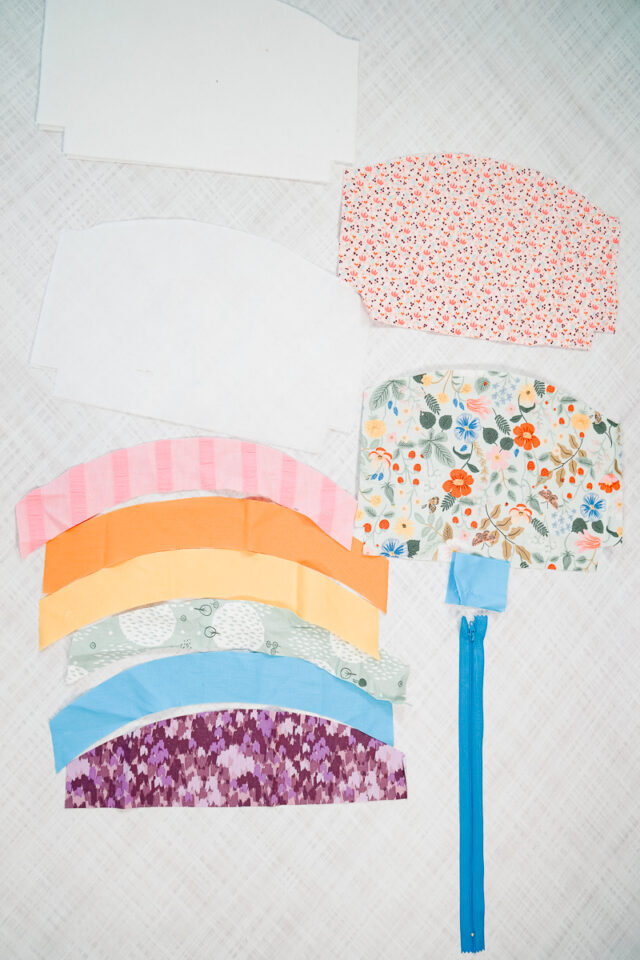
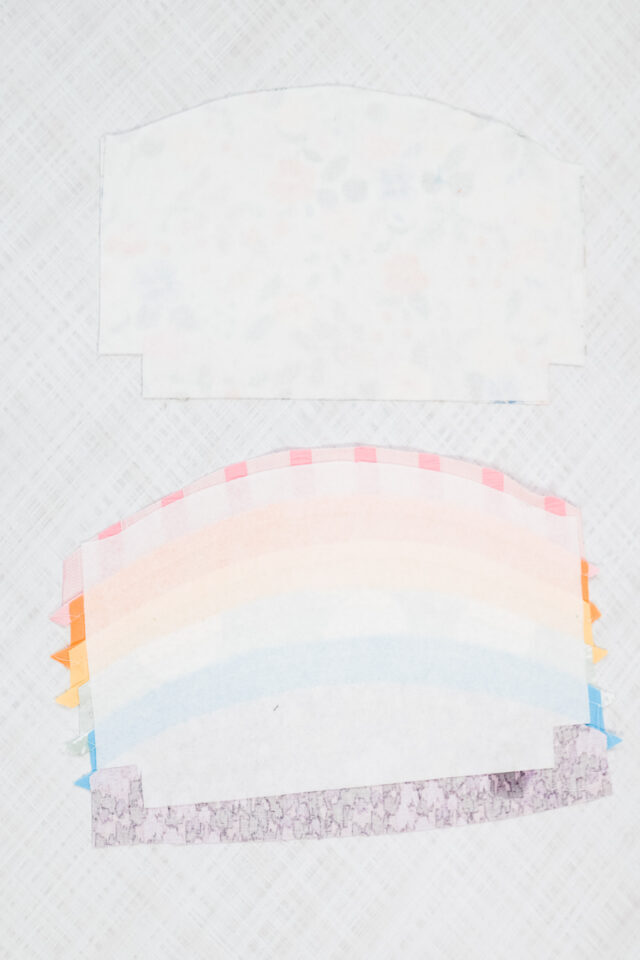
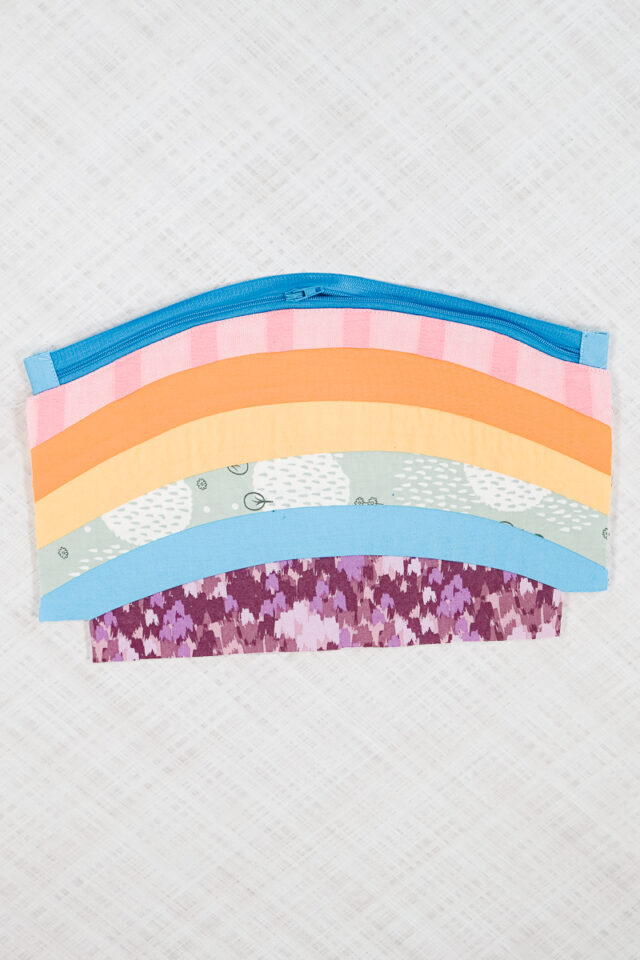
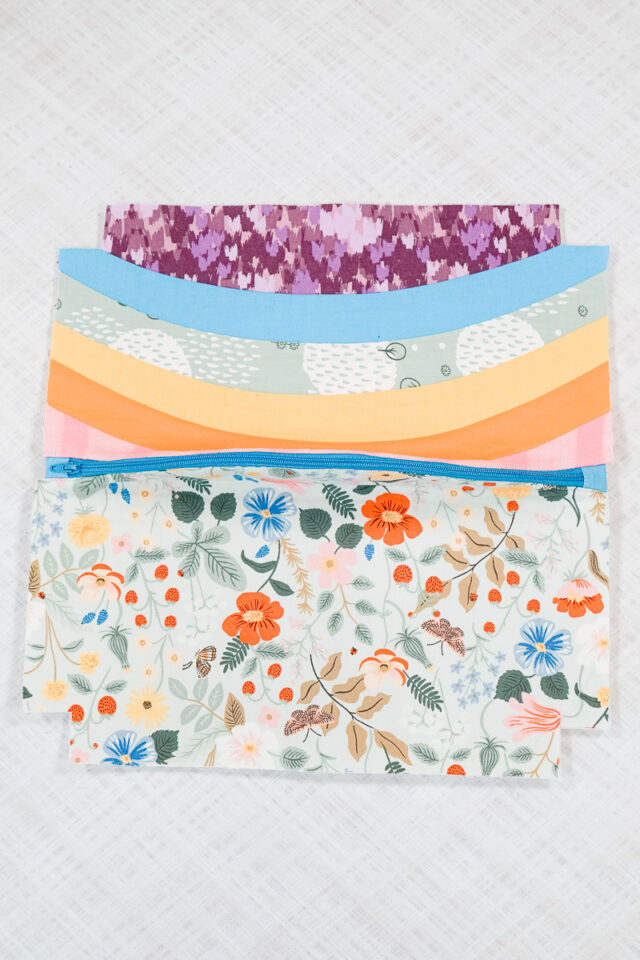
Cut out all the pattern pieces. If you are doing the rainbow outside:
- 10 striped pieces in different colors
- 2 lower striped pieces
- 2 side lining pieces
- 2 zipper tabs
- 2 side fusible fleece
- 2 side fusible interfacing
If you are doing the simple zipper pouch:
- 2 side pieces
- 2 side lining pieces
- 2 zipper tabs
- 2 side fusible fleece
- 2 side fusible interfacing
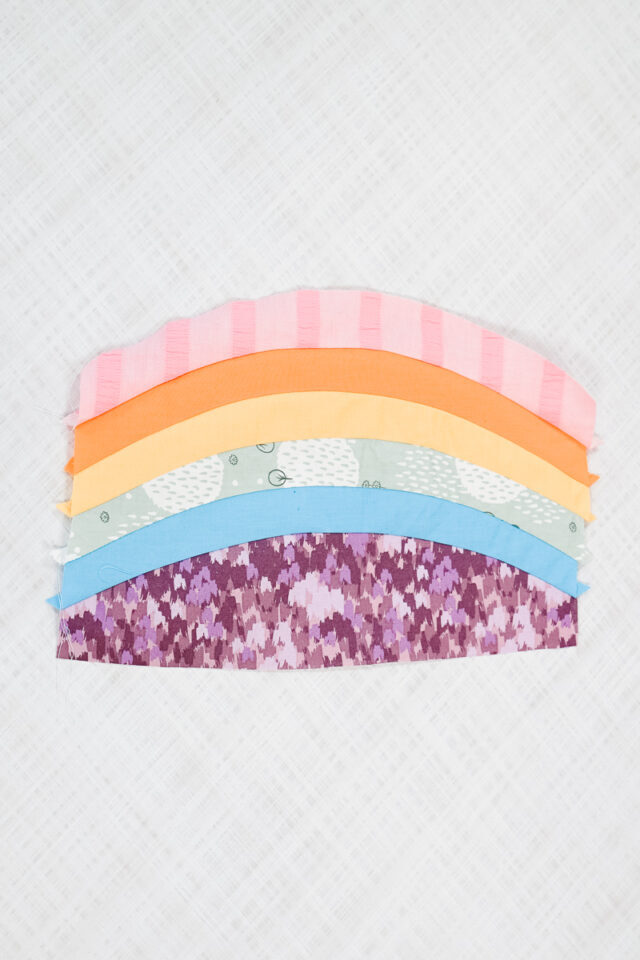
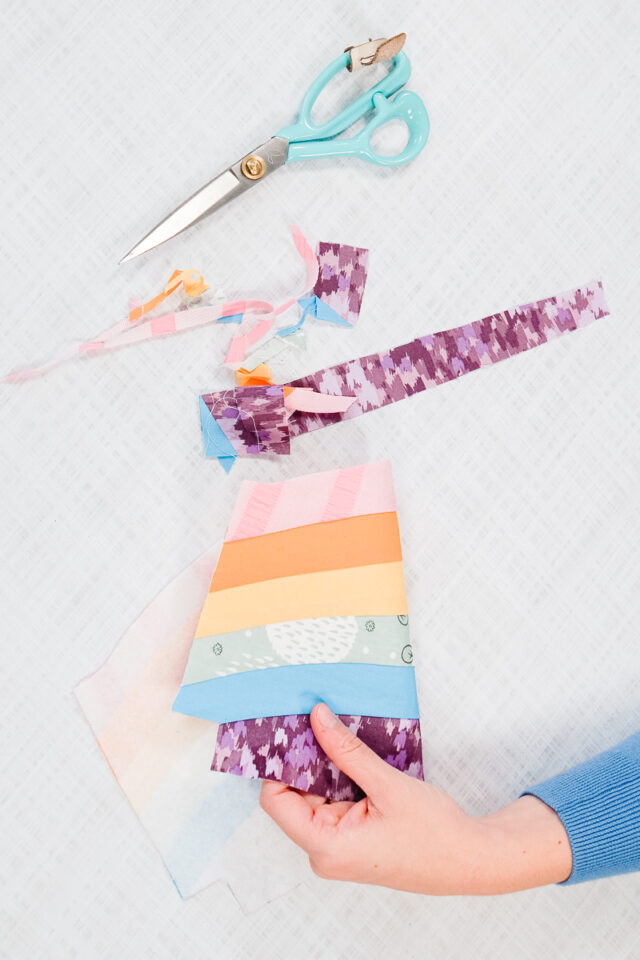
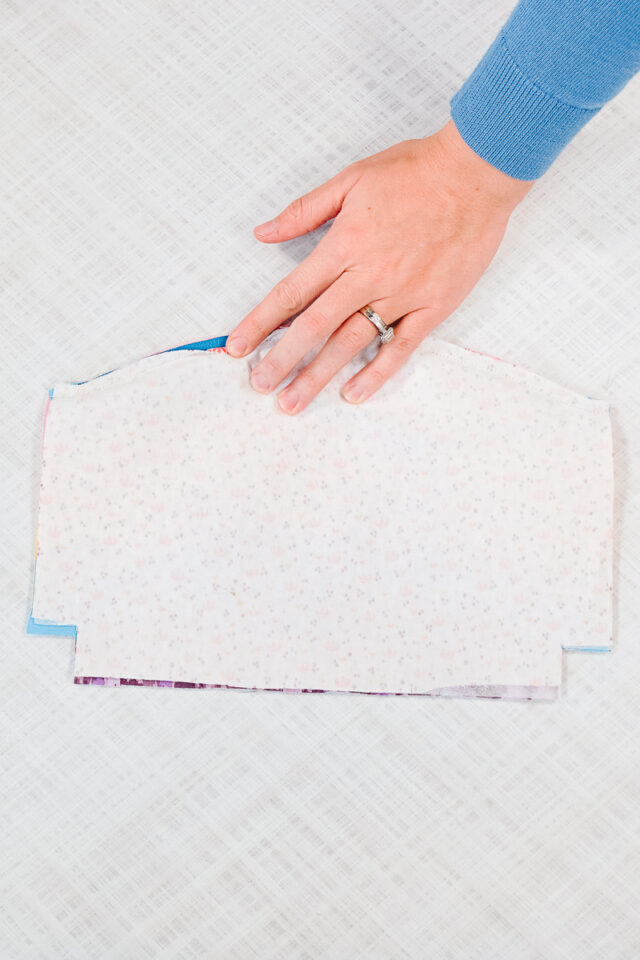
If you are doing the rainbow side, sew all the pieces together in the order that you want. The easiest way to sew opposing curves is to match the centers. Start in the middle and sew to one side. Start in the middle again and sew to the other side.
Press all the seam allowance up towards the curve.
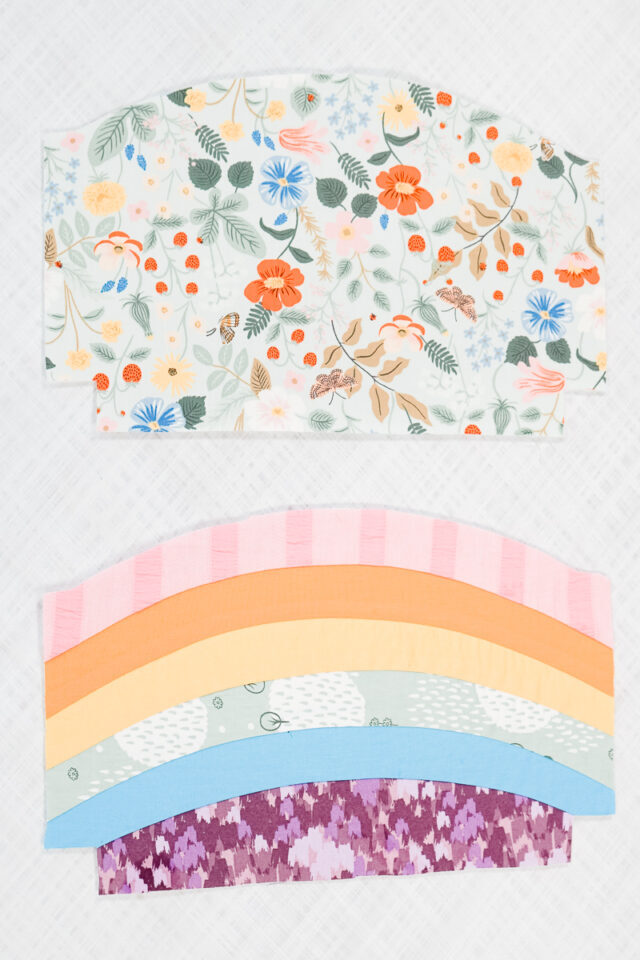
Apply the fusible fleece to the back of the two outside pieces. If you are doing the rainbow side make sure you fuse it so that the stripes are symmetrical.
Trim the striped side down so that it’s the size and shape of the fusible fleece.
This is the time to add quilting to the outer pieces if you want.
The zipper needs to be 12 inches long from zipper stop to zipper stop. If it’s too long cut it slightly shorter, but make sure there’s 1/2 inch on each side to use as seam allowance.
Line up the short end of the zipper tab with one end of the zipper. Pin it in place. Do the same to the other zipper side and zipper tab.
Sew the tabs in place with a 1/2 inch seam allowance and be very careful sewing over the zipper teeth.
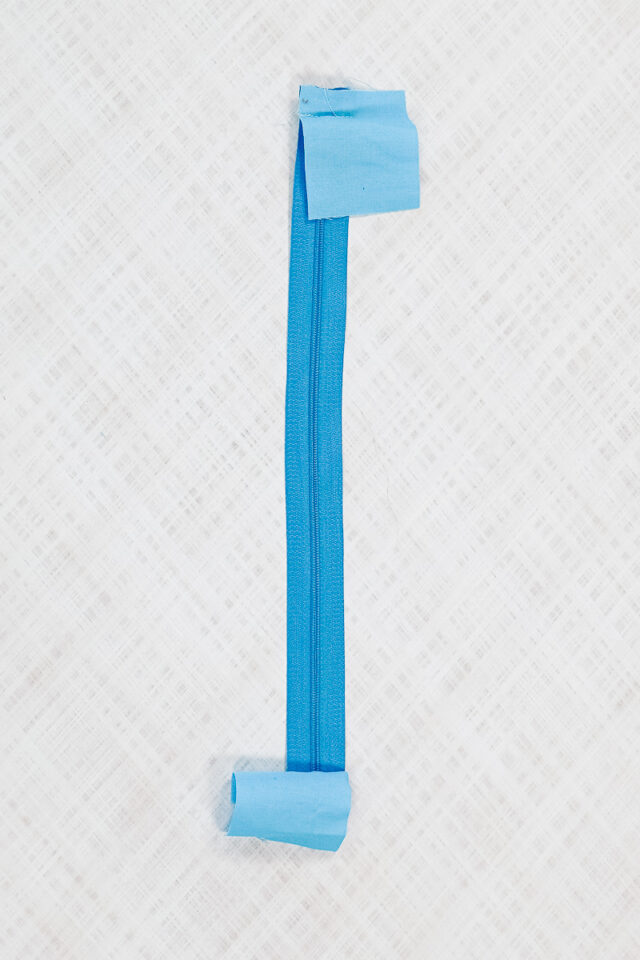
Trim the zipper tab so the it’s the same width as the zipper. Fold the short end to meet the end of the zipper. Fold it again so that all the raw edges (tab and zipper) are enclosed. Pin place.
Sew across the top of the tab to secure the back of the fabric.
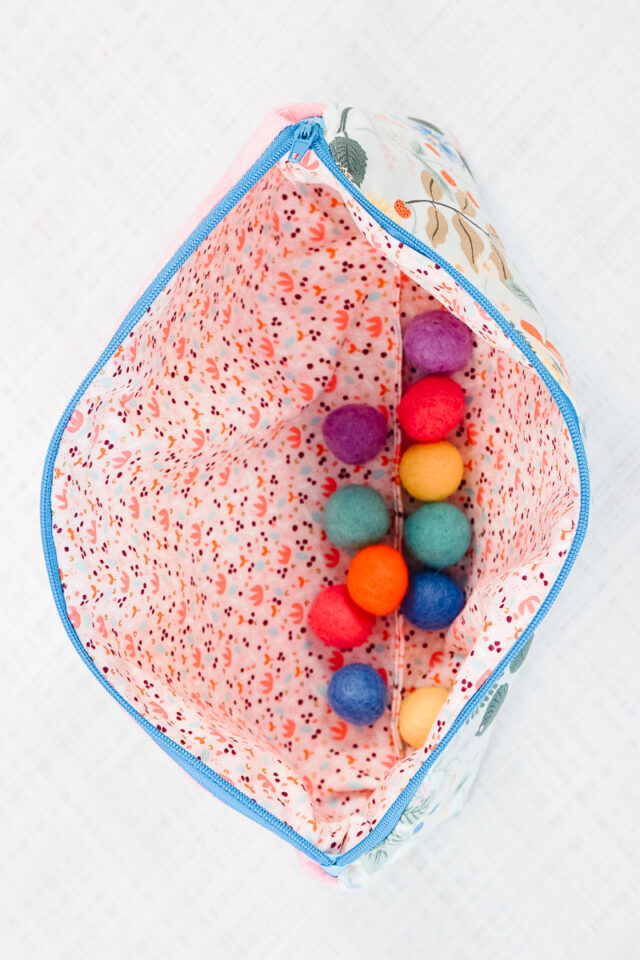
Unzip the zipper. Place the right side of the zipper on the curev of one of the outer pieces. Place a lining with the curved right side of the lining with the back of the zipper. Pin the three layers together.
Sew the zipper in place with a zipper sewing machine foot. Backstitch when you start and when you stop.
Turn it right side out and pull the fabrics away from the zipper. Topstitch right next to the zipper tape to keep the fabric out of the zipper.
Do the same to the other side of the zipper.
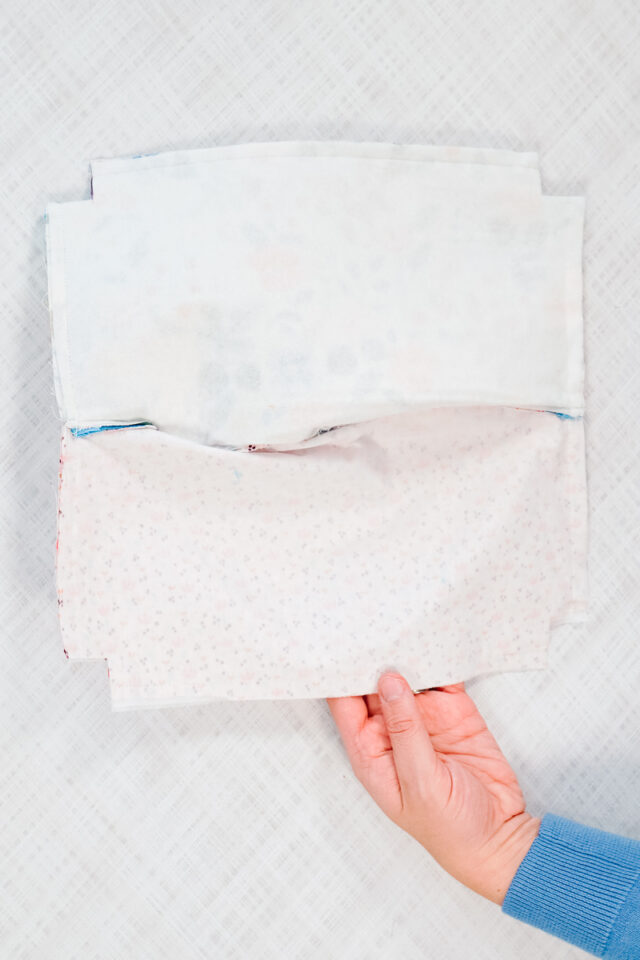
Match up the right sides of the lining together. Match up the right sides of the outer pieces together. The zipper should be in the center. Fold the zipper tab to face the outer pieces. Pin all four sides together.
Sew along each side with a 3/8 inch seam allowance and backstitch when you start and when you stop. On the lining pieces leave a 3 inch hole for turning the bag right side out.
Swivel each corner right sides together so that the seams are on top of each other and the notches create straight lines.
Sew each corner with a 3/8 inch seam allowance. Backstitch when you start and when you stop.
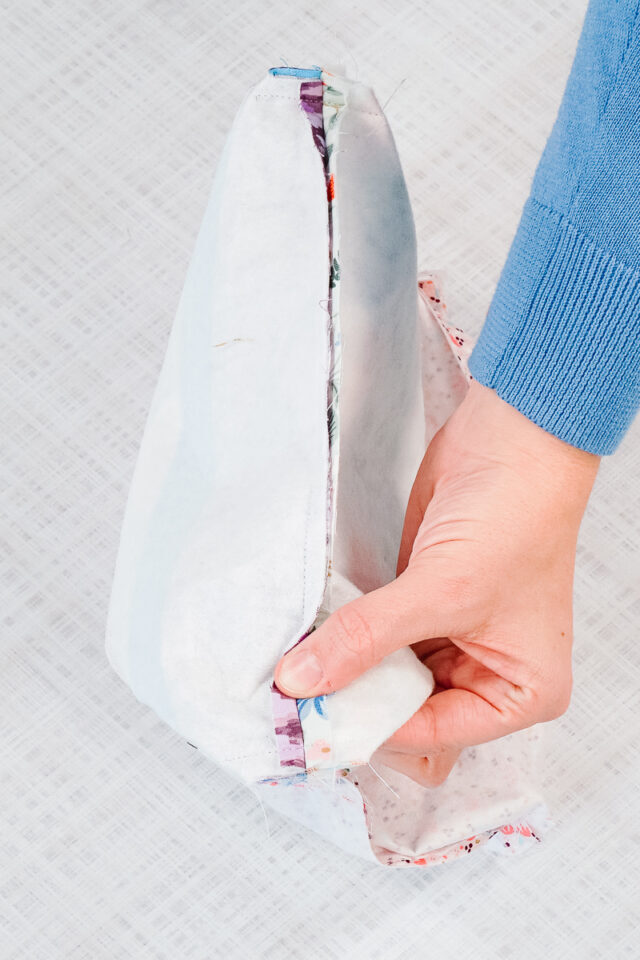
Turn the pouch right side out. Pinch the hole in the lining closed and topstitch the layers together.
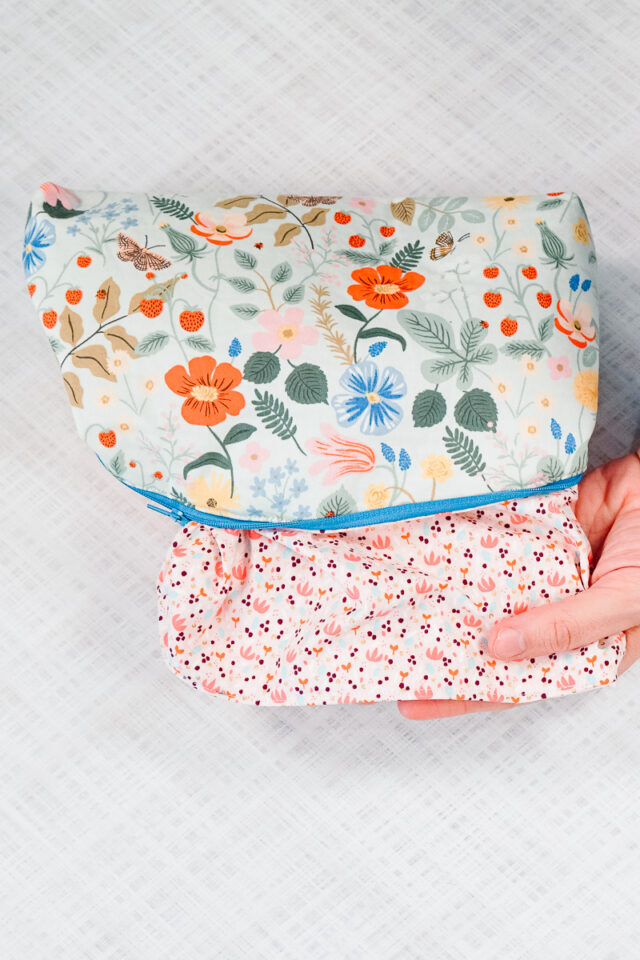
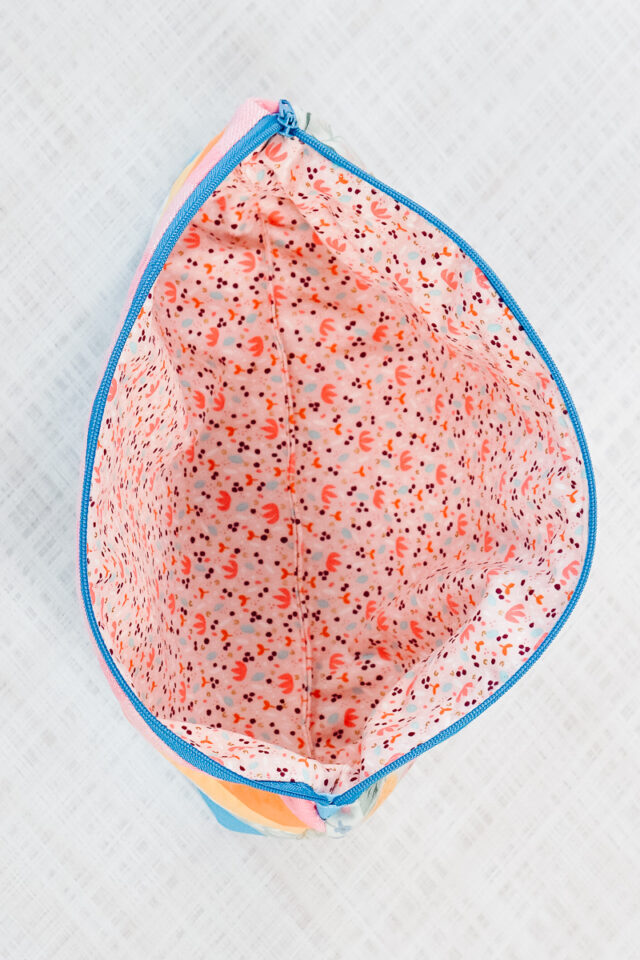
Push the lining down inside. You finished! You have either a simple zipper pouch,
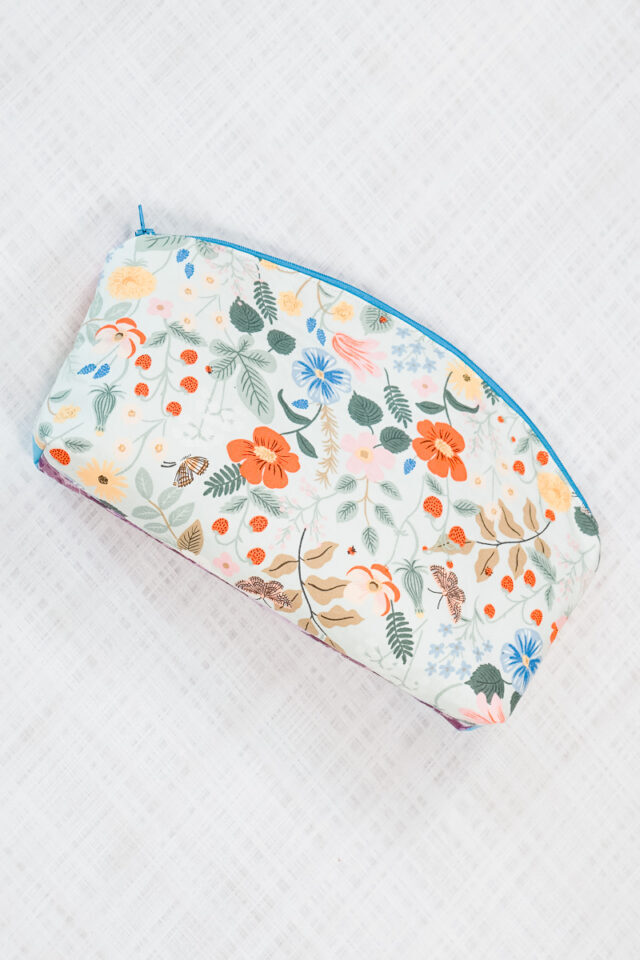
Or a rainbow striped zipper pouch!
Get the Free Sewing Pattern here!
If you make something using this sewing project, I’d love to see! Please share it on social media with the hashtag #heatherhandmade and tag me!

I believe small sewing moments can create great joy. Find your own “right” way to sew. -Heather
Great tutorial. The steps shown make it easy to follow. Thanks
Love this cute pouch/purse, has a kind of classic elegance to it, I’m sure I’ll be making several of these once my friends see mine!!