
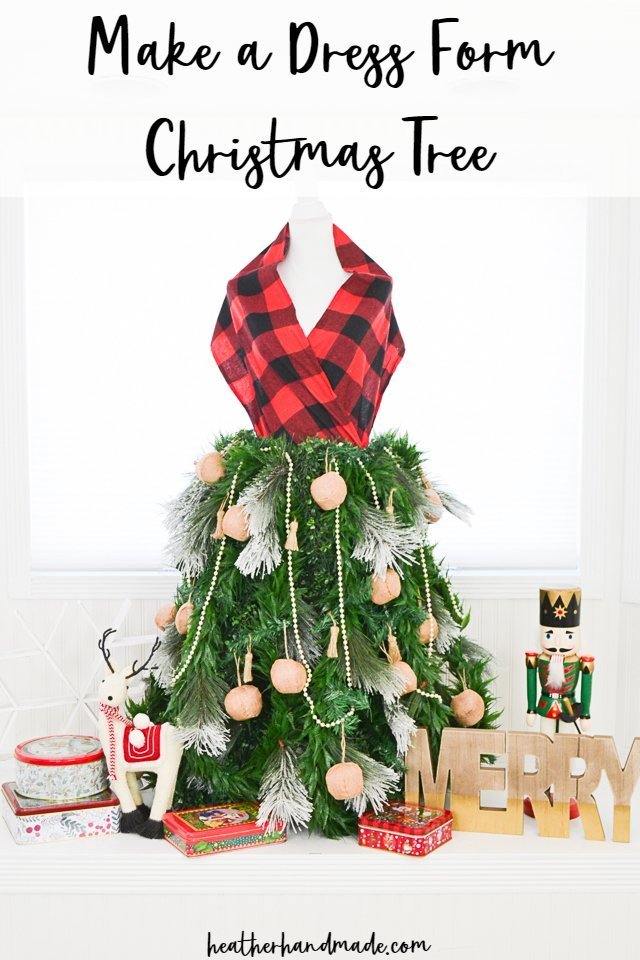
Make a Gorgeous DIY Dress Form Christmas Tree

This post may contain affiliate links.
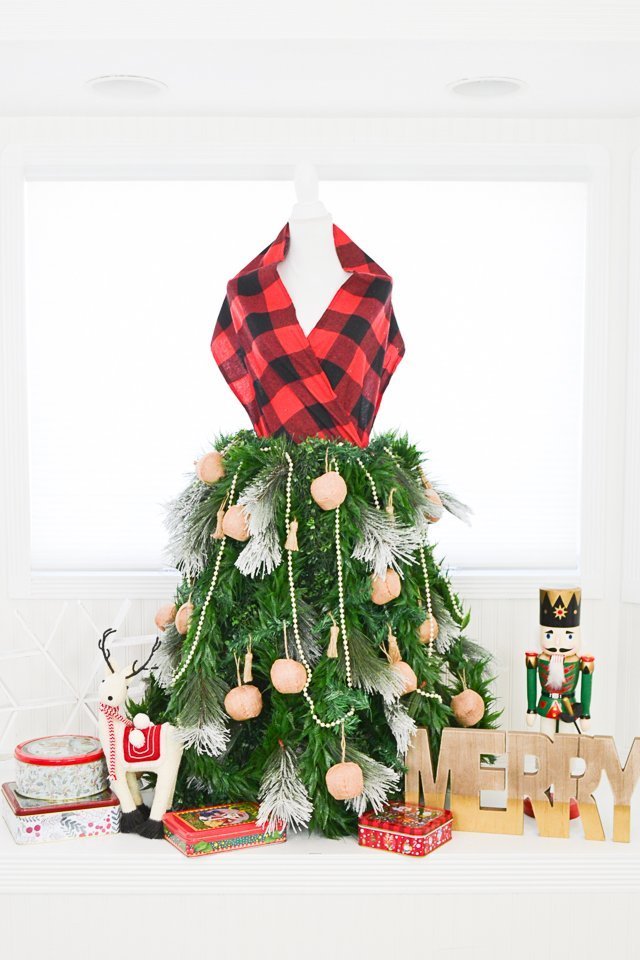
Make a dress form Christmas tree using your sewing dress form. Add garlands to an embroidery hoop and ornaments to reuse it year after year.
I’ve always admired mannequin christmas trees from afar, but I never wanted to buy one. I wanted to figure out how make one that would work with my dress form, but a way that wouldn’t ruin my dress form. I figured out how to make a dress form Christmas tree with just an embroidery hoop.
I love the idea of bringing the holidays into my sewing room in little ways. I don’t have extra to have a dress form and a mannequin Christmas tree, so turning my dress form into a Christmas tree for one month is a great solution.
The best part about attaching everything to an embroidery hoop is that you can remove it at the end of the season. Save it in a box and then get it out again for next year!
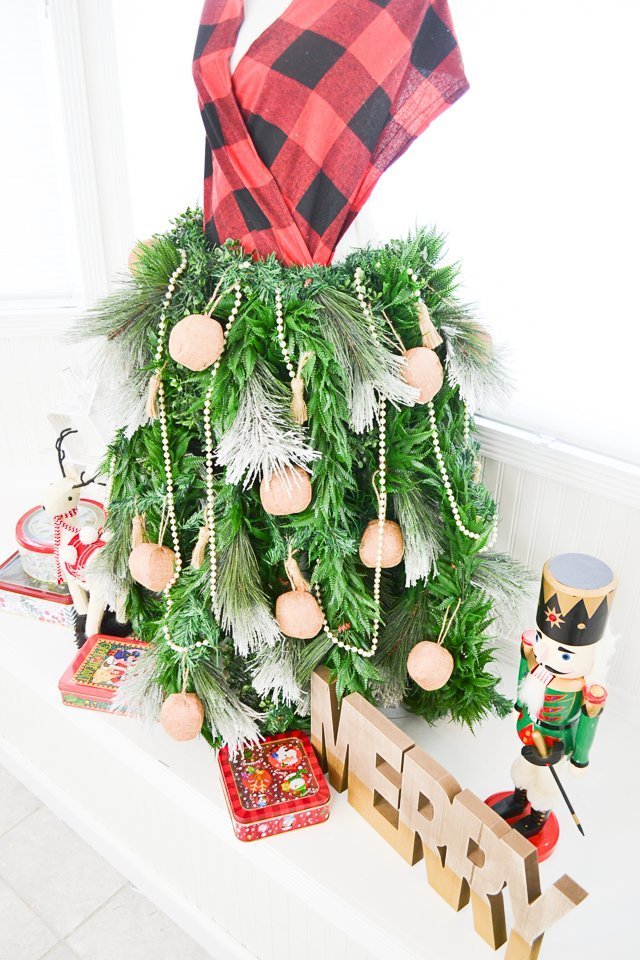
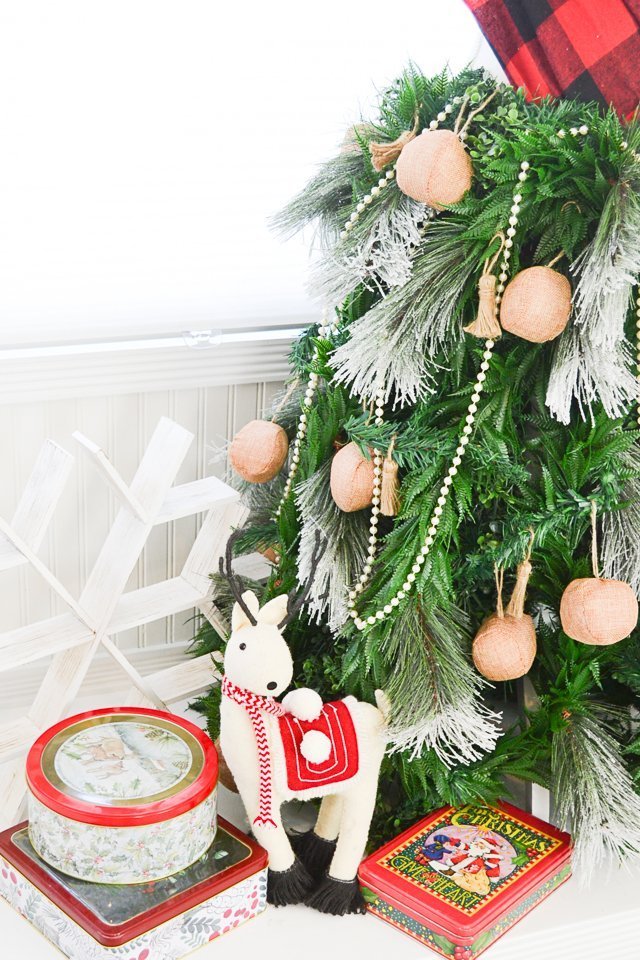
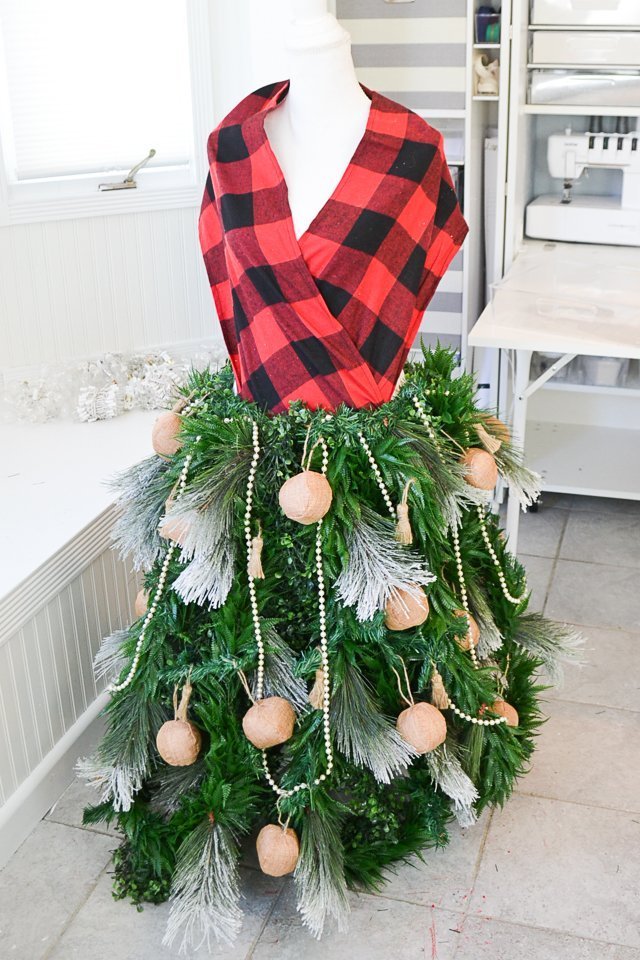
I went for a simple look with tassels and simple burlap ornaments. I also added a pearl garland to make it look even more like a skirt. I chose some things that might actually be seen on a dress. You could even make these DIY sewing ornaments to decorate the skirt.
I got all the Christmas tree supplies* from Oriental trading because I needed bulk items for a fair price. Get free shipping with the code “SQUAD19”.
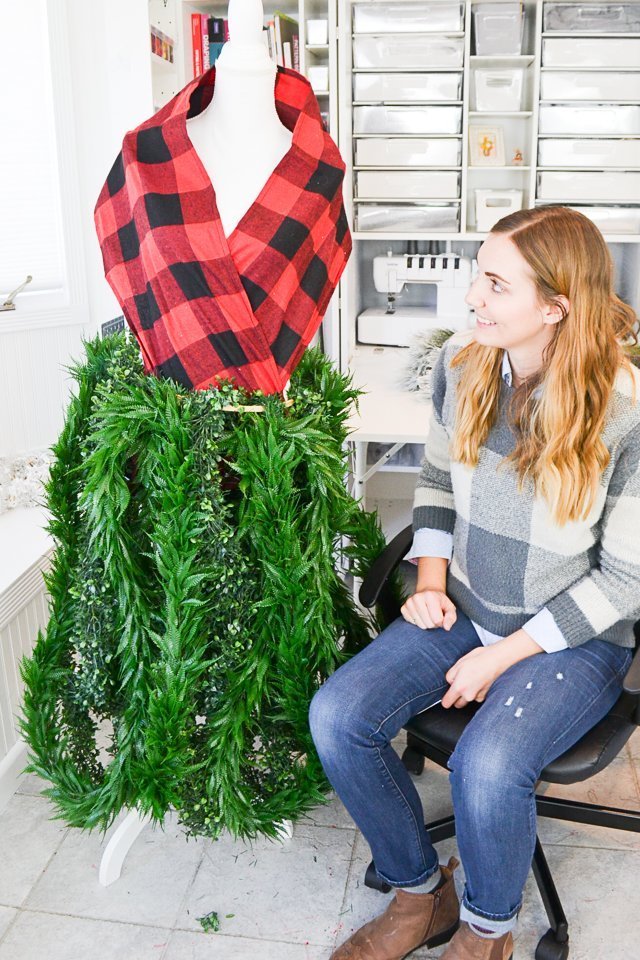
I used a buffalo plaid table runner as the top. I wanted to add buffalo plaid without it being over powering. It was great to use a table runner because all the edges were finished, but it was the perfect length for a crossover top. It mostly only covers the front, but I like it anyway.
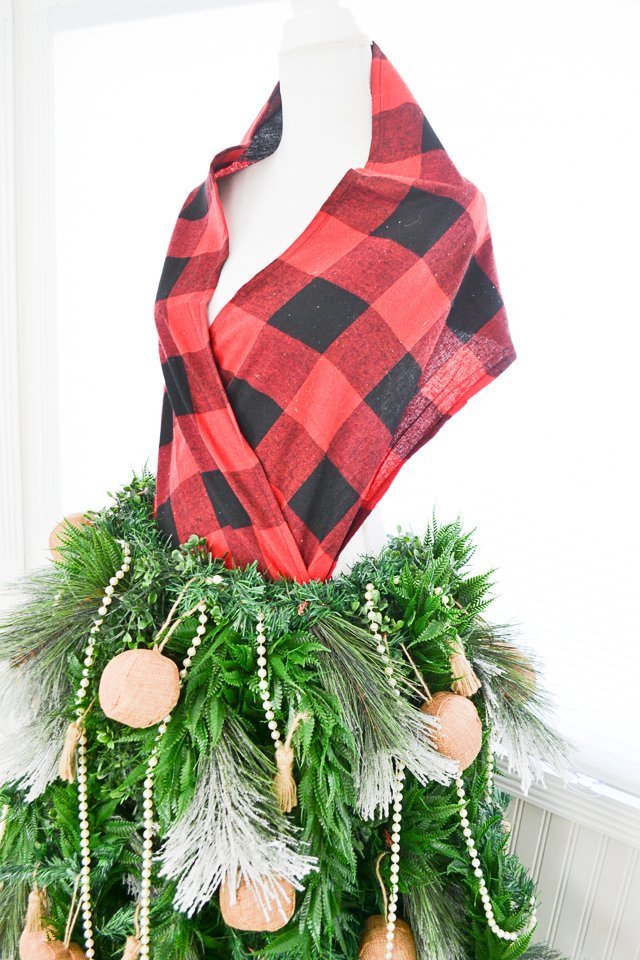
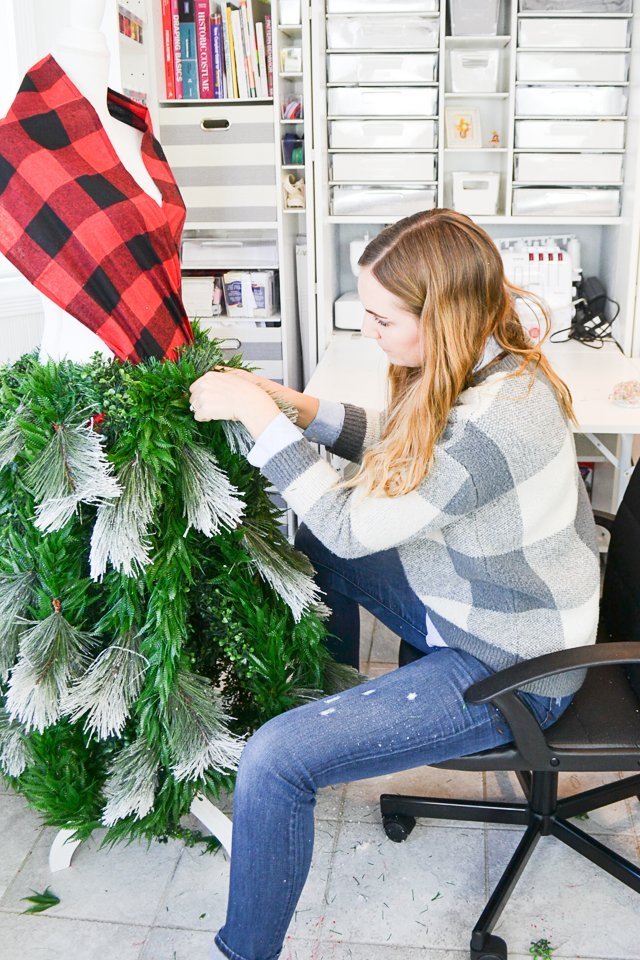
I use two different types of artifical green garlands which I attached to an embroidery hoop thats attached to the waist of the dress form. I like how the different kinds of greens adds layers of texture. I also added snow dipped pine boughts all around the skirt for more texture and more of a Christmas tree look.

Make a Dress Form Christmas Tree
Supplies
- Large embroidery hoop*
- 4 green garlands*, 10-12 feet long (for the under layer)
- 4 green garlands*, 10-12 feet long (for the top layer)
- Snow dipped pine boughs*
- Wire pine boughs*
- Pearl garland*
- Burlap ornaments*
- tassel ornaments*
- Buffalo plaid table runner*
- Safety pins
- Dress form*
Untwist the screws of the embroidery hoop and remove the inner hoop. Place the outer hoop that opens up on the waist of your dress form.

Using the wire pine boughs attach each of the garlands to the embroidery hoop. I attached each garland on each end and in the center. I used boxwood garland for the under layer because it fills out the space nicely. I also like have lots of different texture for more depth.

Attach the next four garlands to the embroidery hoop the exact same way with the ends being attached and then the middle. I distributed all the different garlands evenly for the best look Christmas tree skirt.

Wrap the table runner around the dress from with the ends meeting in the front. Secure with safety pins. This is a little easier done if attached before you put the embroidery hoop and garlands on.
Using the wire pine boughs cover up the embroidery hoop that is still showing.
For texture and depth add the snow dipped pine boughs all around the skirt. Adding these made the dress look most like a Christmas tree. Add the rest of the wire pine boughs near the bottom of the skirt to give the most volume where a Christmas tree has volume.
Add the pearl garland in a draped up and down motion. Decorate the dress form Christmas tree with ornaments of your choice.
You can add lights if you want. I decided to leave mine off because I really liked the simple casual farmhouse look.
If you make a dress form Christmas tree using this tutorial, I’d love to see! Please share it on social media with the hashtag #heatherhandmade and tag me!

I believe small sewing moments can create great joy. Find your own “right” way to sew. -Heather