
DIY Cutting Mat for a Tabletop

This post may contain affiliate links.
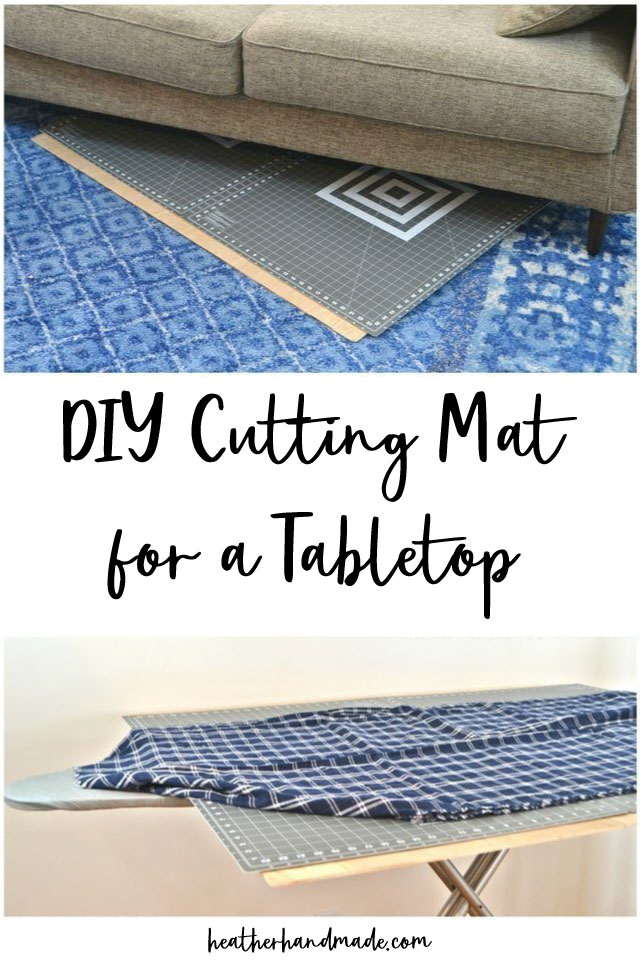
Make a DIY cutting mat for sewing that can be moved from table to table. It is portable and can be stored under a bed or under a couch.
Ever since my son was born, I’ve been lucky enough to always have a dedicated sewing area, but I’ve never had a fully dedicated sewing room. I’ve always sewn in a multi-purpose room with multiple uses.
I currently sew in our “sewing, office, homework, and arts & craft” room, and these are my sewing room hacks.
There is a table in my sewing room where I can cut out fabric, but it’s often being used by my children while I’m sewing. They love doing art and crafts near me while I sew, and I love having them close.

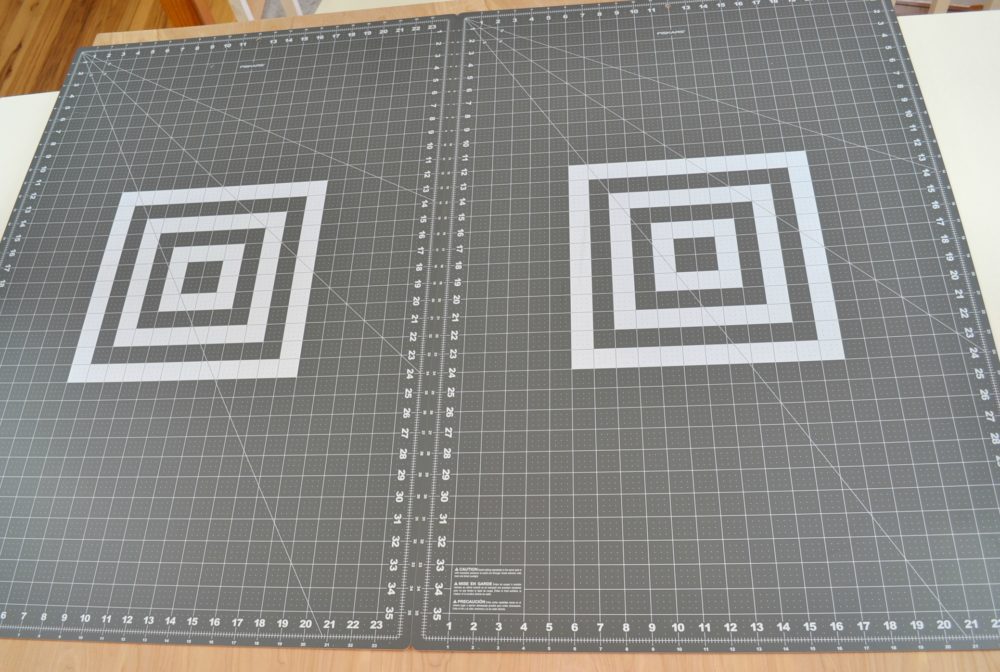
Since I can’t have a dedicated cutting table I’ve always been a little creative with my storage and sewing process. I have big cutting mats that I love, but I needed two next to each other and needed it to be portable since I share my table.
I figured out how to make a portable cutting mat for sewing that can be used on a table and then stored when not in use. It’s a really simple process to make one!
*There are affiliate links in this post.*
How to make a DIY cutting mat for a tabletop
SUPPLIES
- 4’x8′ underlayment* – This was the lightest wood I could find in a size close to 4’x4′. You want the wood to be light but strong and big enough to go under two large self healing cutting mats.
- Sticky tack*
- Fiskars Cutting mats*
- Sandpaper*
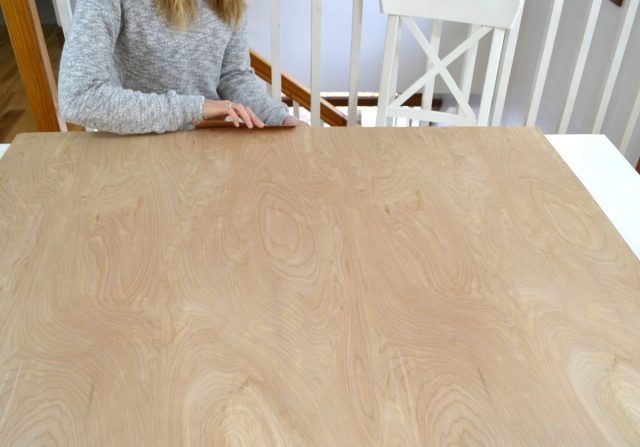
Get your wood and get it cut to 4’x4′. (I bought my wood at a place that cut it for me. There might be options of just buying 4’x4′, but I couldn’t find that near me.)
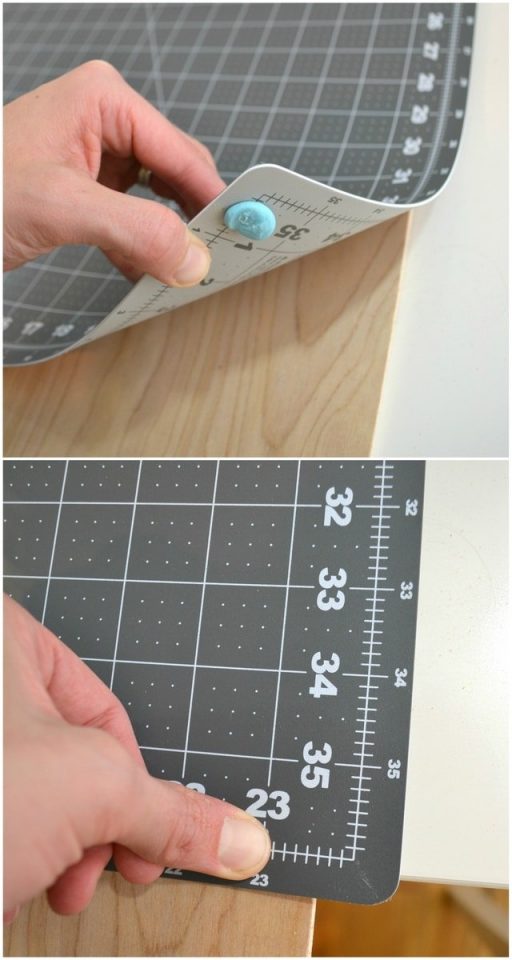
4’x4′ is slightly smaller than the longest side of the two mats since there is an 1/2″ edge around each cutting mat. I didn’t mind having part of my portable cutting mat hang over the edge slightly.
Sand the edges and corners of the wood. This isn’t entirely necessary, I just didn’t want any rough edges that could ruin any of my fabric.
Use the sticky tack to adhere all four corners of each cutting mat for fabric. I chose sticky tack so that I would be able to use the other side of the mat whenever I wanted.
Press hard to make sure the mat is secure.
Your portable cutting mat is done! It’s that easy!
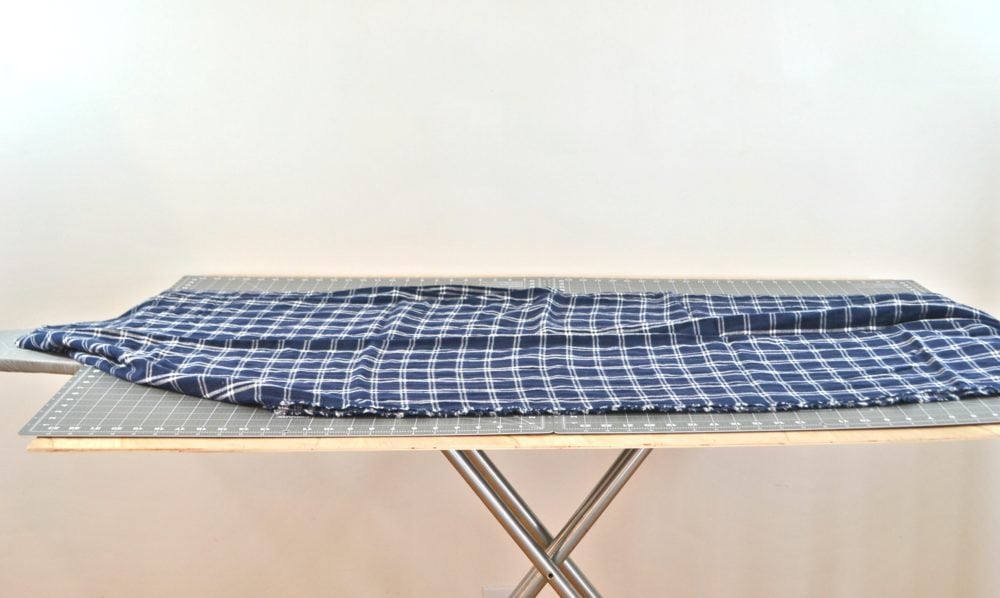
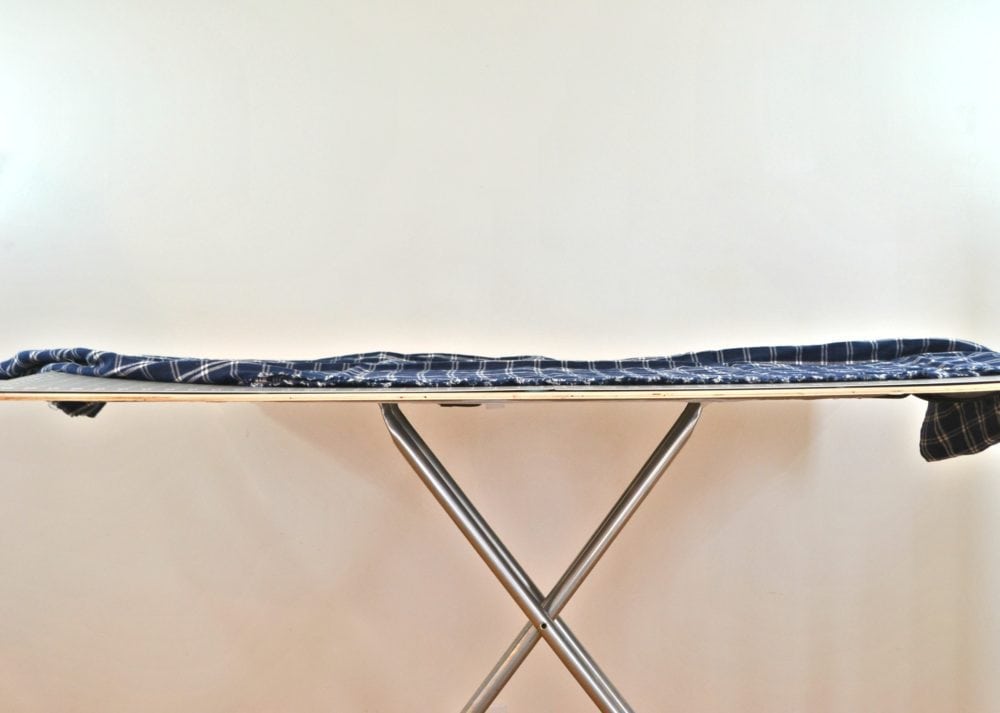
You can use this portable cutting mat on the floor, a table, a countertop, or even an ironing board. It’s portable and can go wherever you need it to.
The wood makes it sturdy so that it can be used on any surface. Where would you use a portable cutting mat in your house or apartment?
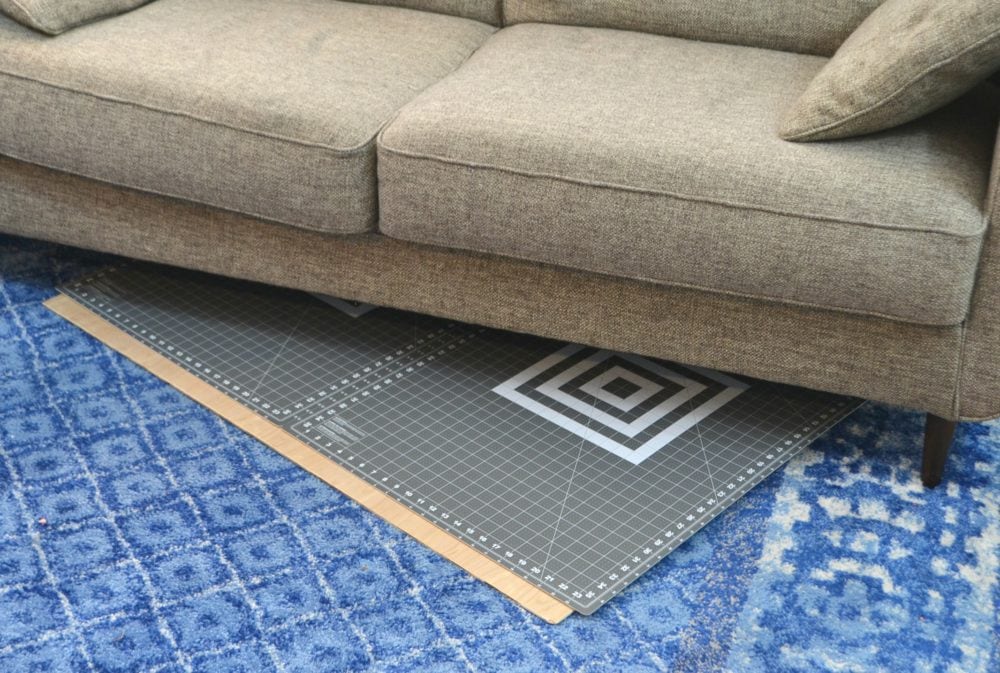
I found it easiest to store it horizontally so that I wouldn’t have to worry about the portable cutting mats separating from the wood. I love if a project that is half cut out then I could store it under a bed or a couch to be finished another day.
When I store mine under the couch a little bit peeks out, but it would be completely hidden under a bed.
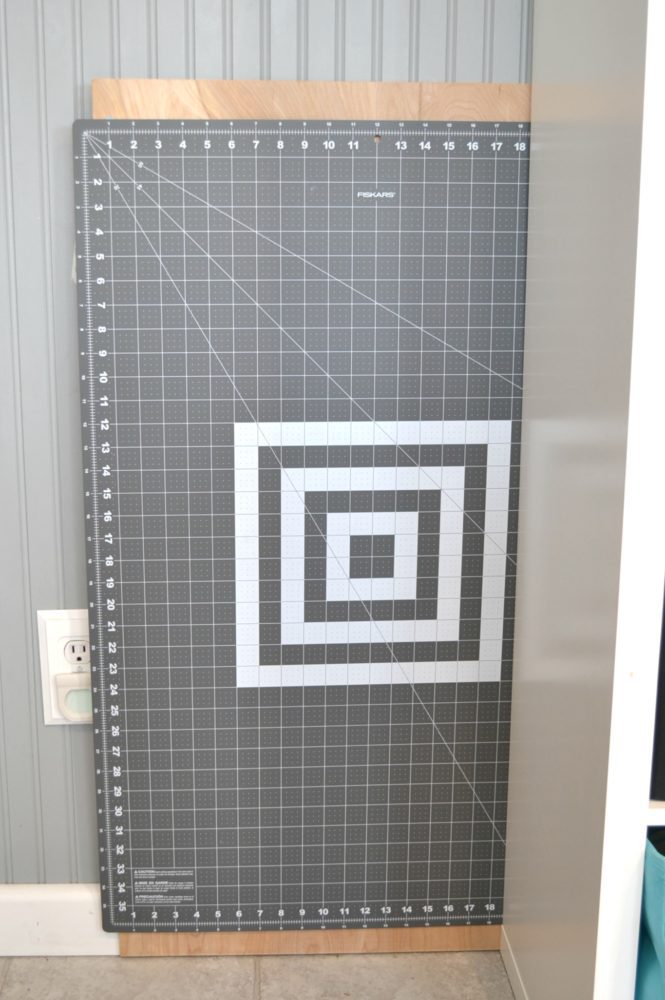
I tried storing the portable cutting mat vertically, and it kind of works. The sticky tack is not strong enough to keep the cutting mats on the wood long-term.
If it’s stored behind something in a tight space and keeps the cutting mats stuck to the wood, then it works great.
I hope this can solve some problems for you if you have a tiny space or a multi-purpose sewing area! You can definitely make it work with whatever situation you have!
I’ve even my updated my sewing room with IKEA furniture, and I still use this DIY cutting mat!
If you make something using this sewing project, I’d love to see! Please share it on social media with the hashtag #heatherhandmade and tag me!

I believe small sewing moments can create great joy. Find your own “right” way to sew. -Heather
This is a fantastic idea! I’m always having to move my mat around and it’s a total pain. I thought about doing something like this but didn’t consider underpayment- good choice! Thanks for the tip!
love this …i have the old cardboard big mat , wow never even though of just adding it to some lumber that would make it so much stronger and nice and flat …yes it will have to find a new place to put it but it will be great and so much more useful…thank you for such a great idea…