
DIY Dog Ornament Tutorial

This post may contain affiliate links.
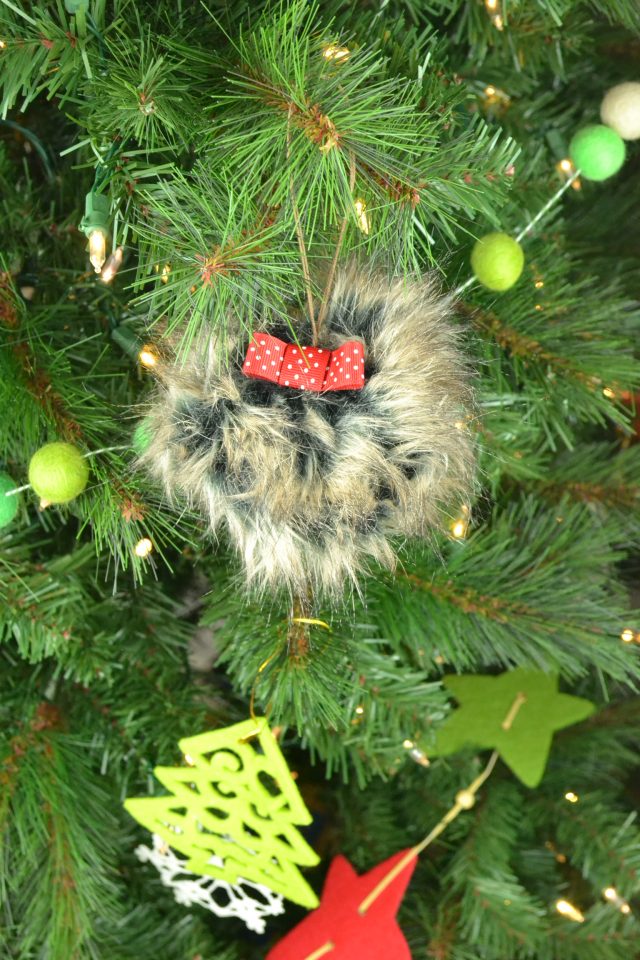
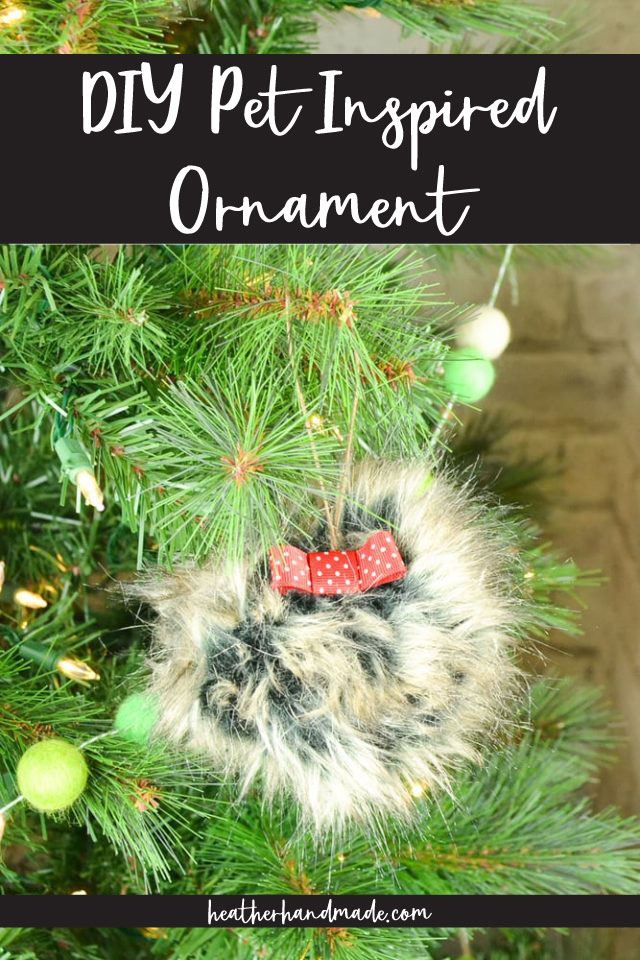
Learn how to make a cute faux fur ornament for the love of your beloved cat or dog. Match the color of the ribbon to the color of your pet’s collar.
I love making ornaments and they are extra special when they have meaning. We have a new puppy in our family so we decided to make an ornament to remind us of him!
Use this DIY dog ornament tutorial to make a Christmas ornament inspired by your furry pet.
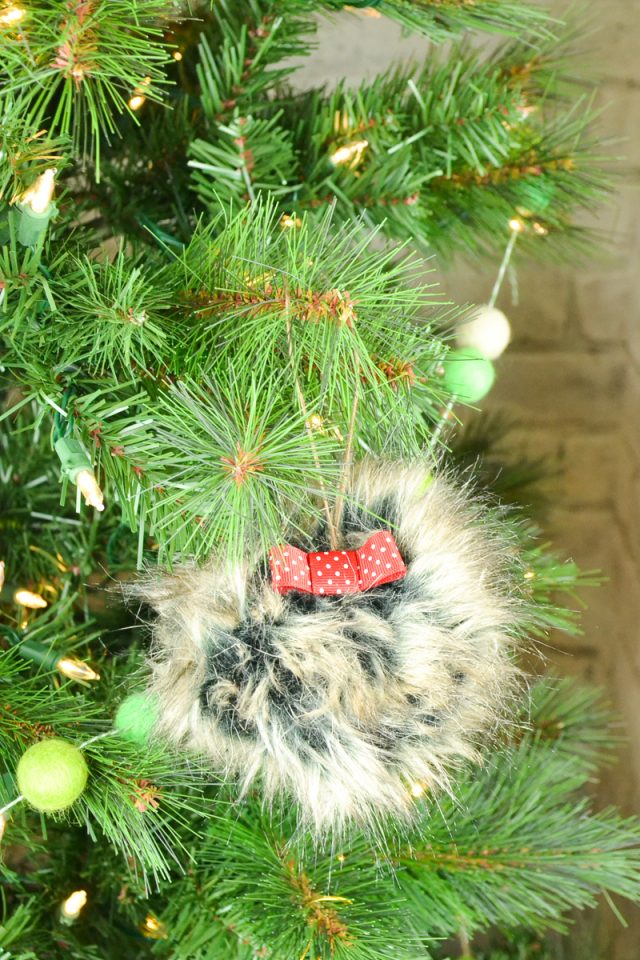
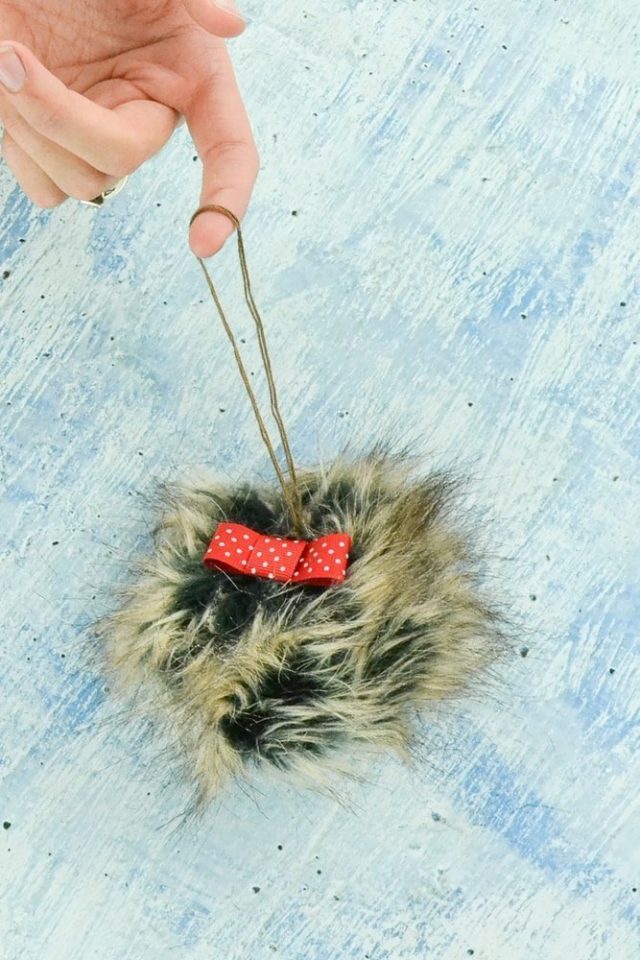
You can choose a really fun ribbon to remember your pet’s personality or collar. This ornament is easy and almost a no-sew project! There’s just a little bit of hand sewing to make the fur into a ball.
Make as many faux fur ornaments as you like to remember all your wonderful pets. You can make an easy and cute ornament that will always remind you of your favorite pets.
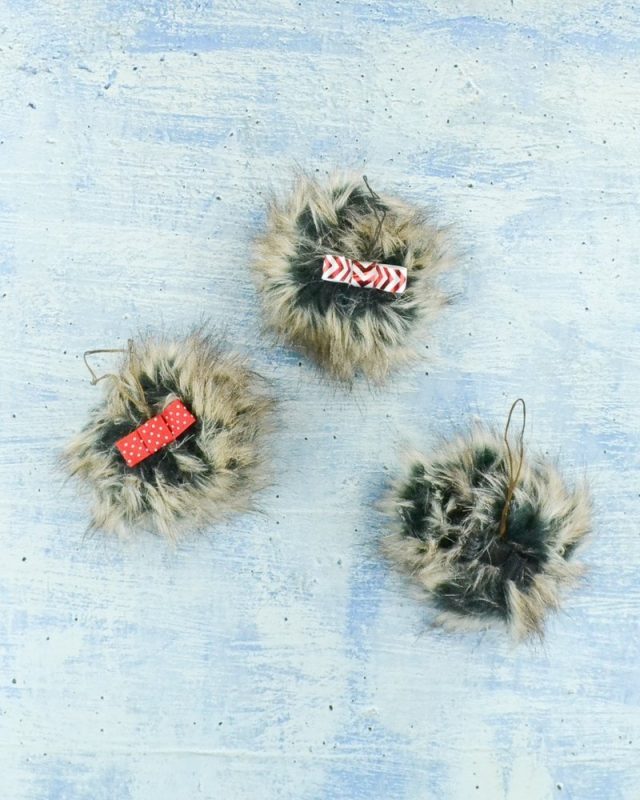
You can even make a black leather bow that looks like the nose of a sweet dog. It doesn’t pop as much as the colorful red ribbons, but I love that the texture looks like a dog nose.
Do you love to sew? Try one of these fun sewing projects:
- Christmas sewing projects
- Make a fur pompom
- Sewing themed felt ornament patterns
- DIY Ornaments to Sew and Make
- Sewing projects for dogs
DIY Dog Ornament Tutorial
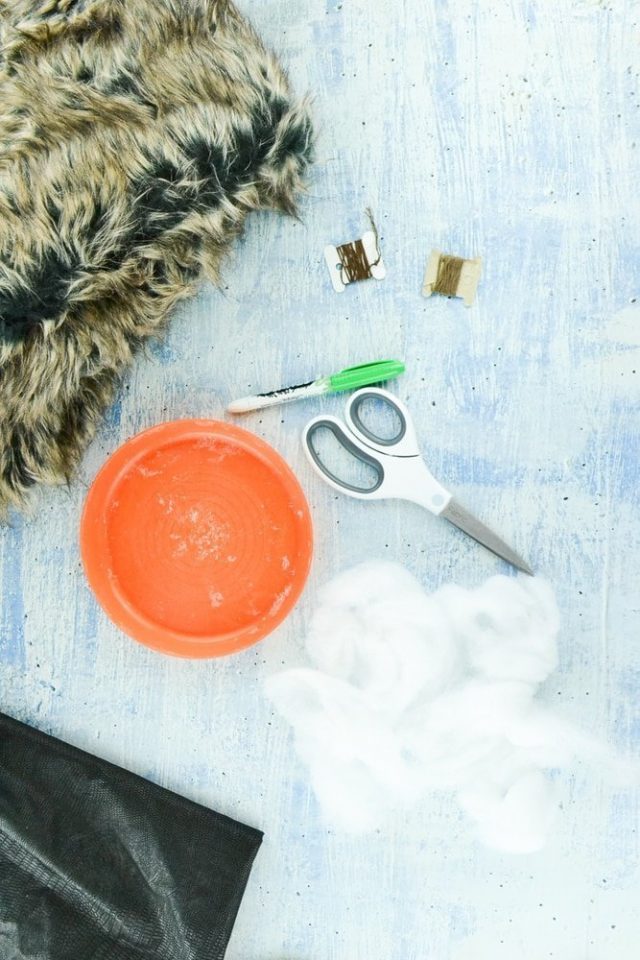
Supplies
- Faux Fur*
- Ribbon*
- Embroidery floss and needle
- A handful of poly-fil
- Scissors
- Plate or other round object
- Marking tool – a pencil is great!
- Hot glue gun and hot glue*
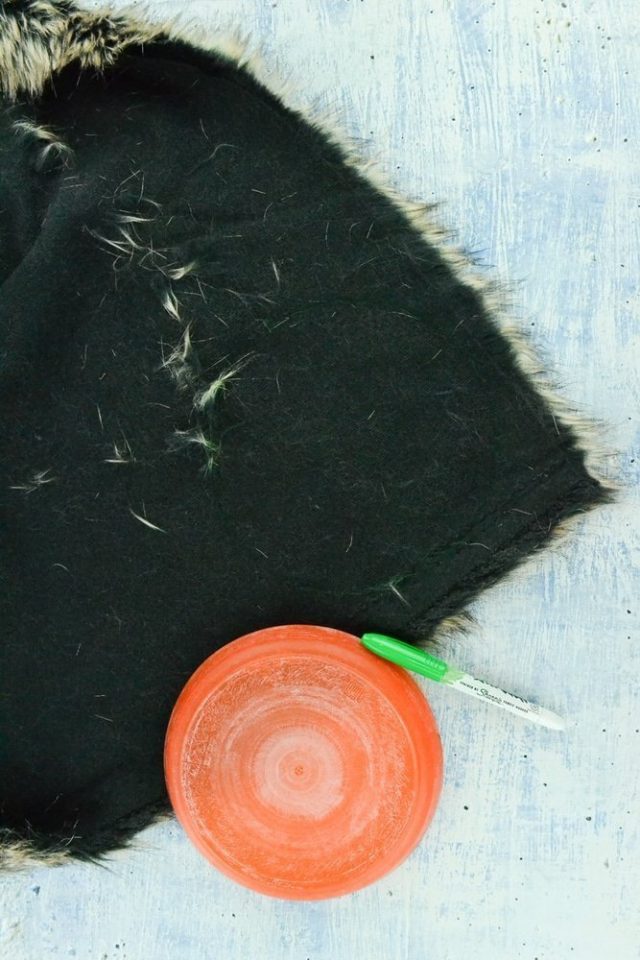
2. Using the round object and marking tool draw a circle on the back of the faux fur. Don’t worry about the mark being permanent since it won’t show up in the end.
3. Carefully cut out the circle of fur.
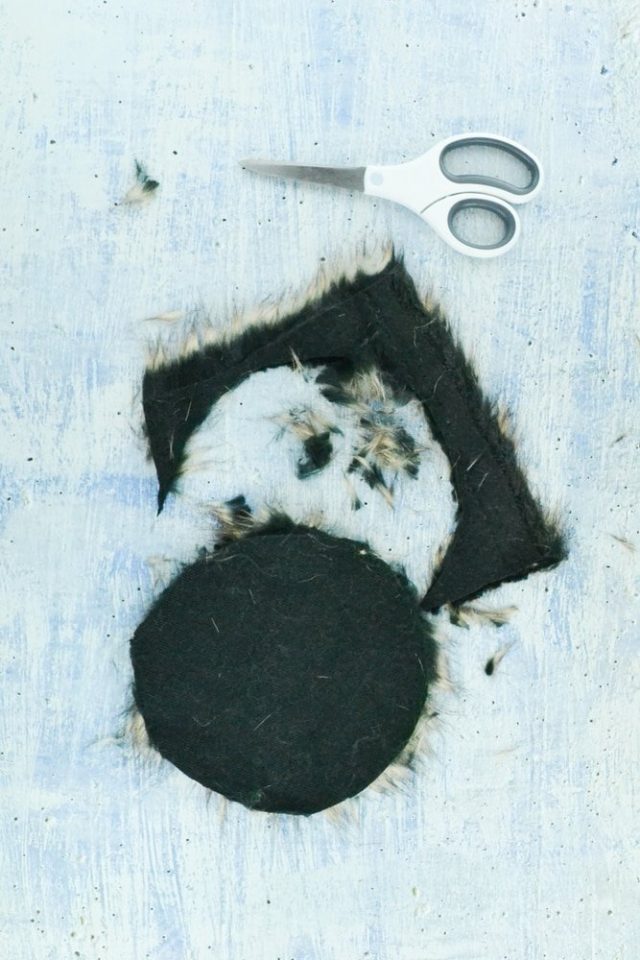
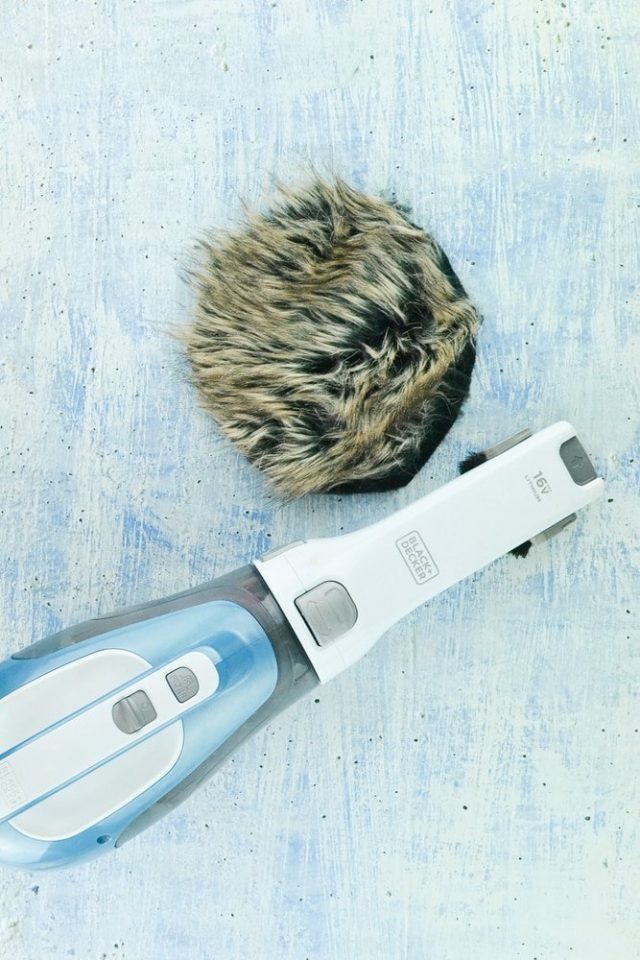
4. During the process vacuum all the shedding faux fur to help keep your area clean. I vacuumed multiple times to keep the fur from spreading.
5. Get your needle and embroidery floss. I chose embroidery floss because it is strong, and it won’t break when you’re pulling it tight.
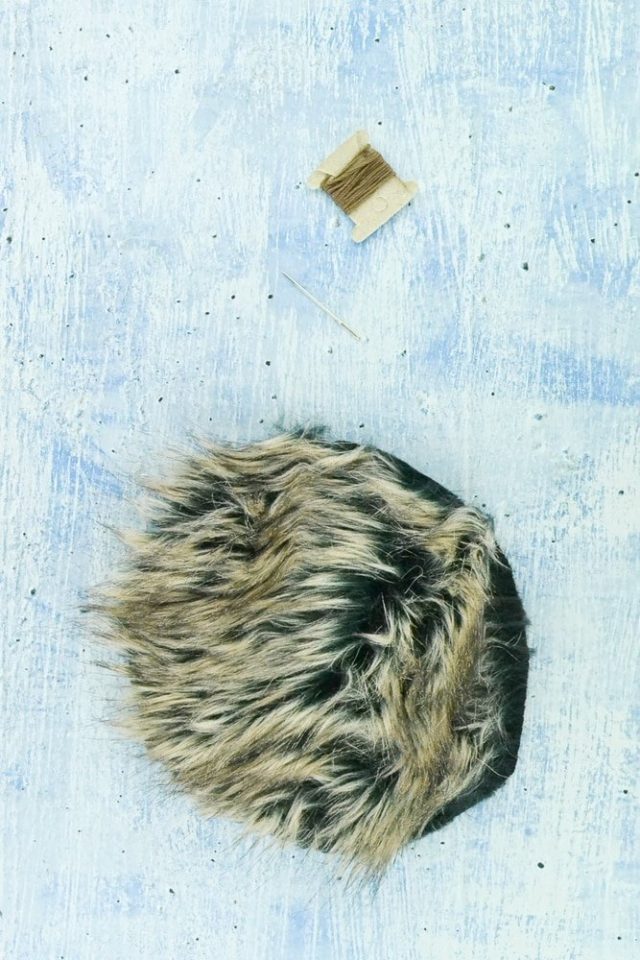
6. Thread the needle with all six strands. Sew a large stitch around the circle 3/8 inch from the edge. My stitches were about 1/4 inch big and 1/4 inch apart.
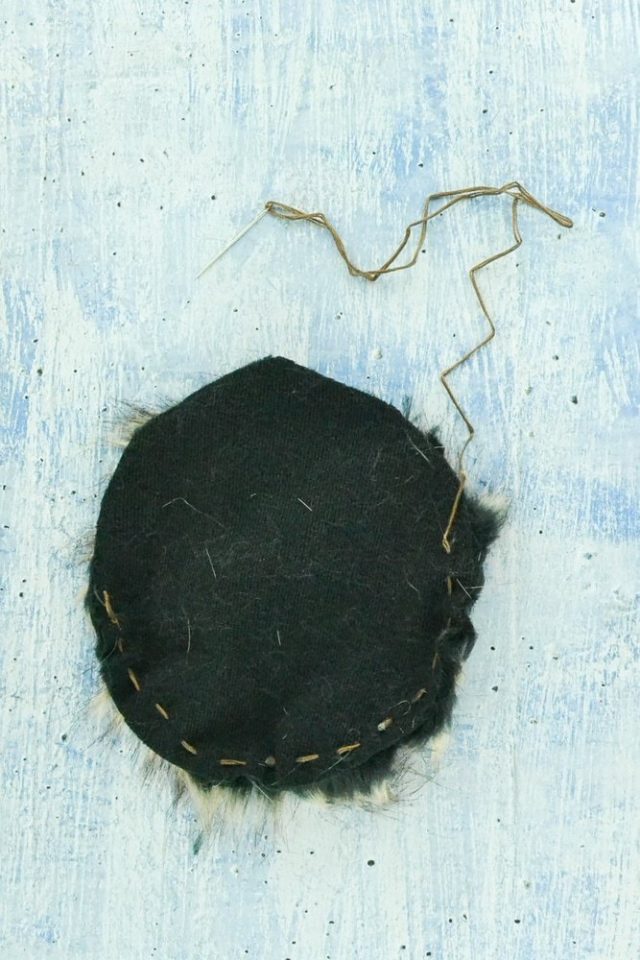
7. Once you go all the way around the circle start pulling the thread tight which will gather the edge of the fur.
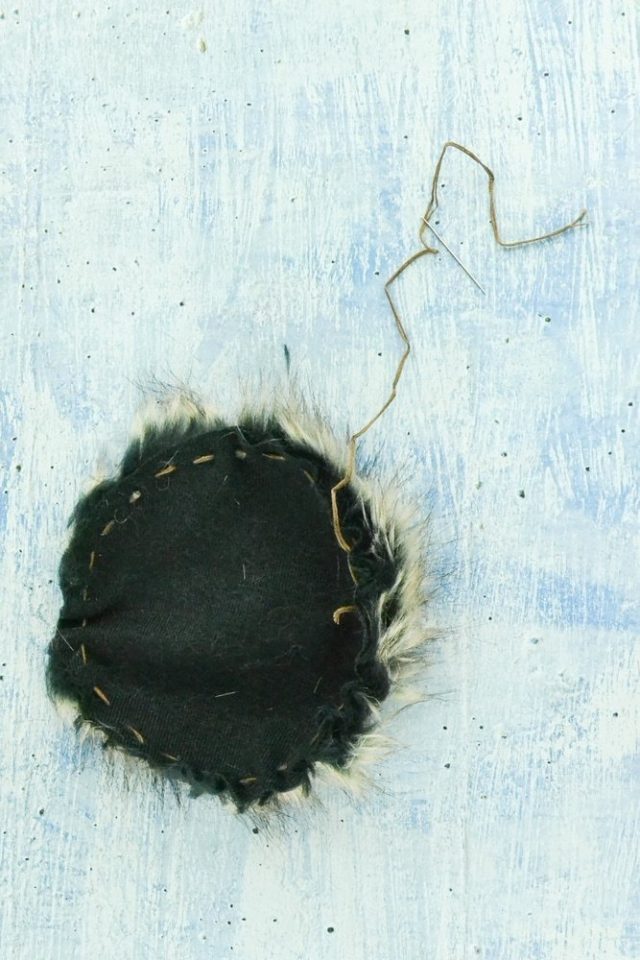
8. Pull it until you have a fist sized hole at the top.
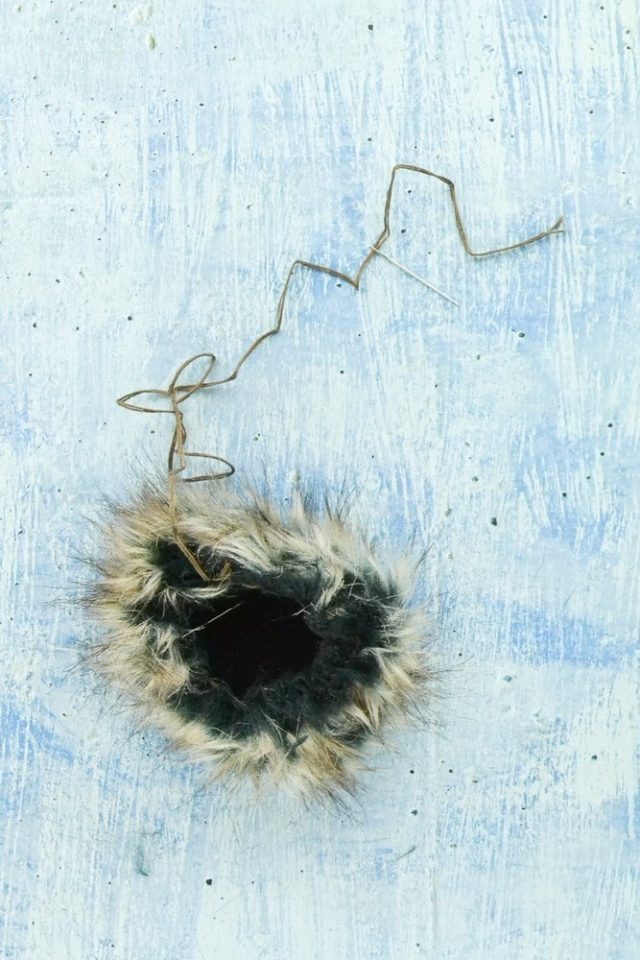
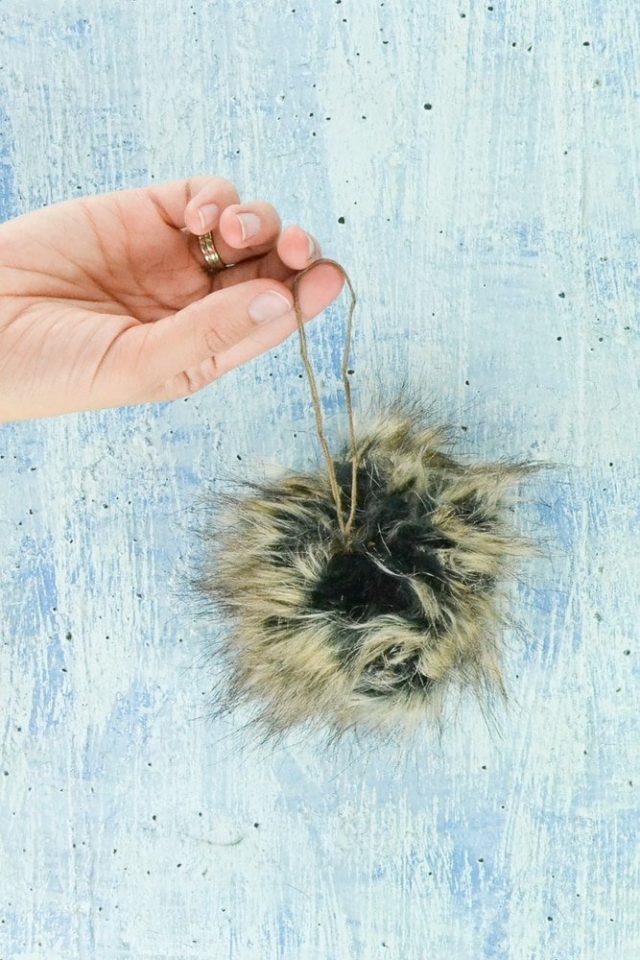
9. Stuff the ornament with some poly-fil or other stuffing.
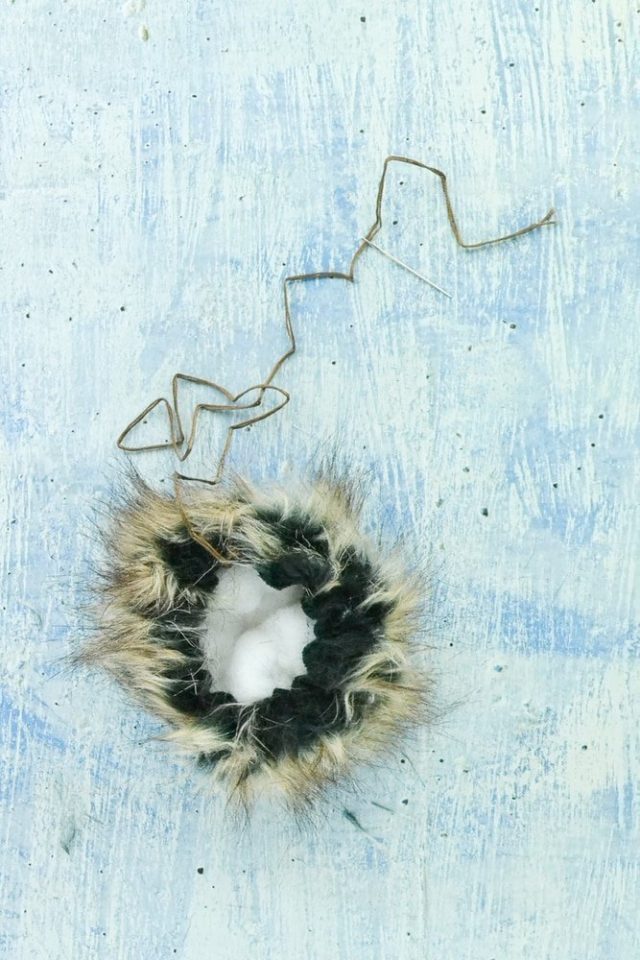
10. Pull the thread tight and tie off in a square knot. Feel free to add any reinforcement stitches to keep the top of the ornament closed.

11. Sew a loop to the top of the ornament for hanging.
Ribbon Bow Tutorial
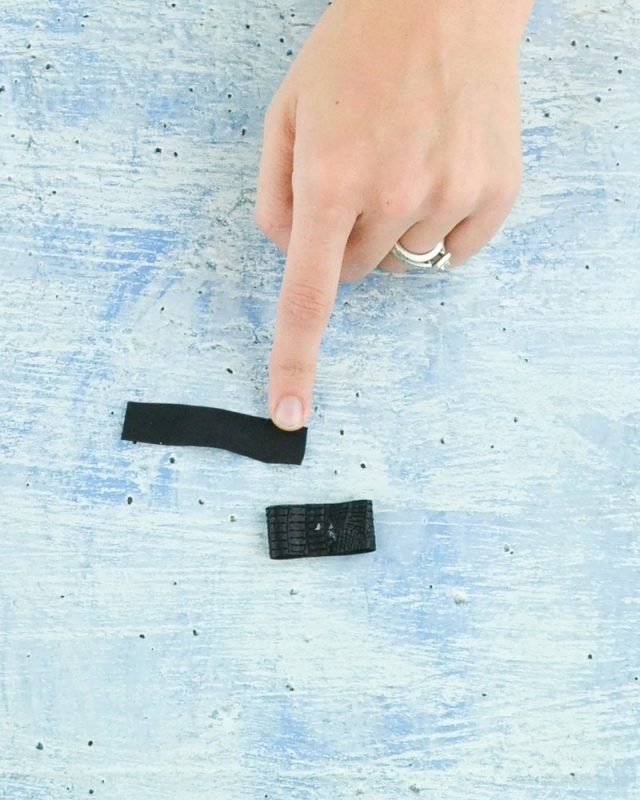
1. To make the bow cut a long rectangle of leather or a long piece of ribbon.
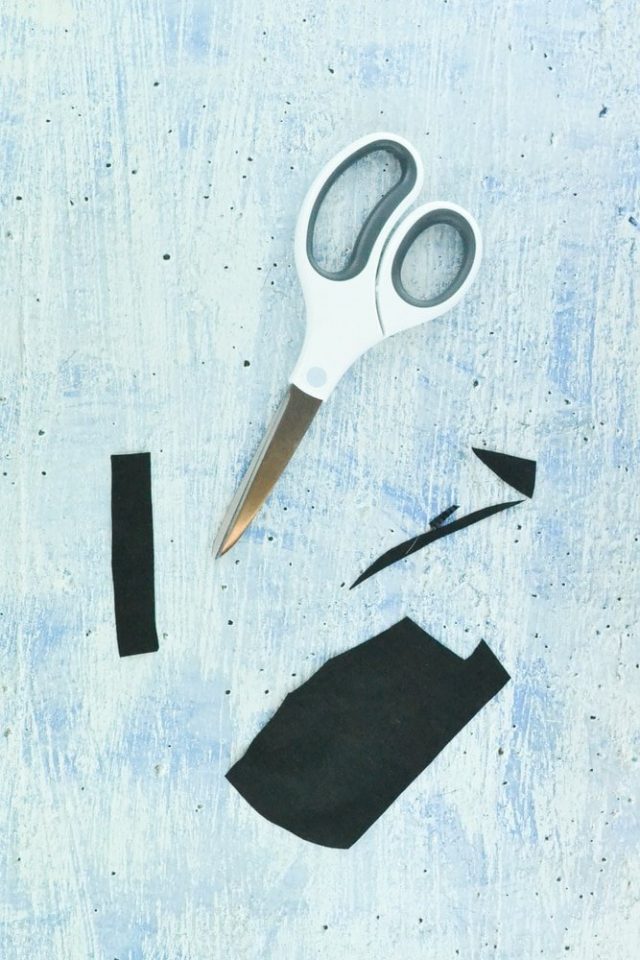
2. Put a dot of hot glue on the back in the middle. Bring both short edges in to the glue to keep the edges in place.
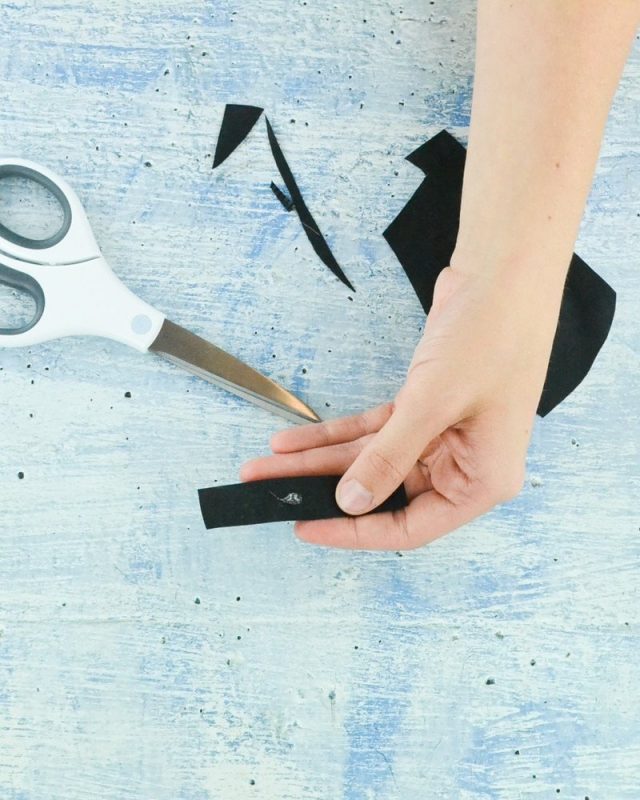
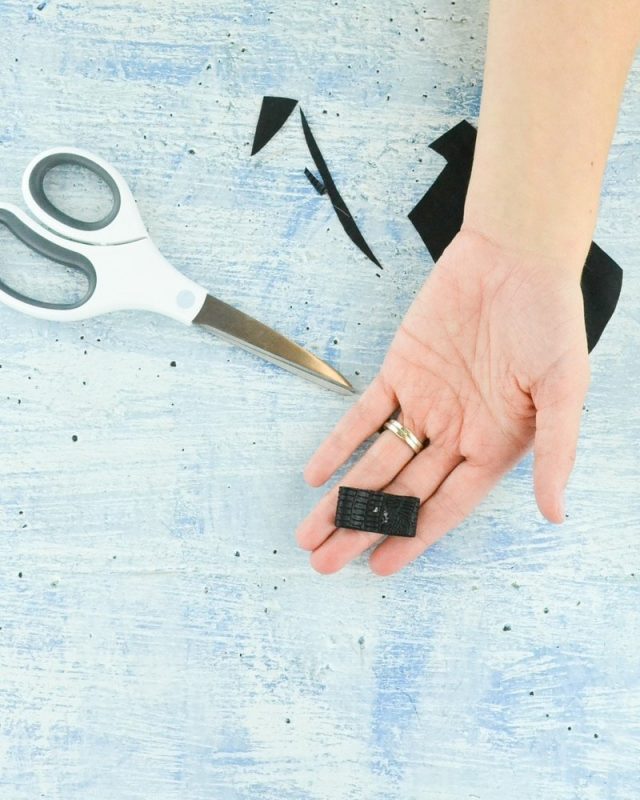
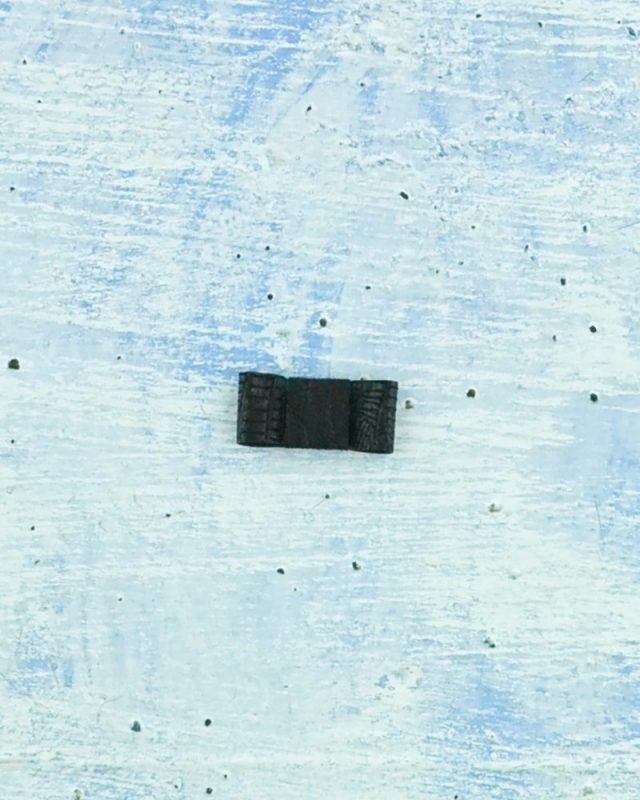
3. Cut a shorter rectangle out of leather or ribbon to wrap around the middle of the bow. Add a dot of hot glue to the back of the bow in the center. Start wrapping the shorter rectangle around the center of the bow making sure the end gets glued down.
5. Once you have your bow glued and cooled you can glue it to the top of the ornament right next to the loop.
If you make something using this DIY dog ornament tutorial, I’d love to see! Please share it on social media with the hashtag #heatherhandmade and tag me @heatherhandmade!

I believe small sewing moments can create great joy. Find your own “right” way to sew. -Heather