
DIY Cute Ghost Decorations

This post may contain affiliate links.
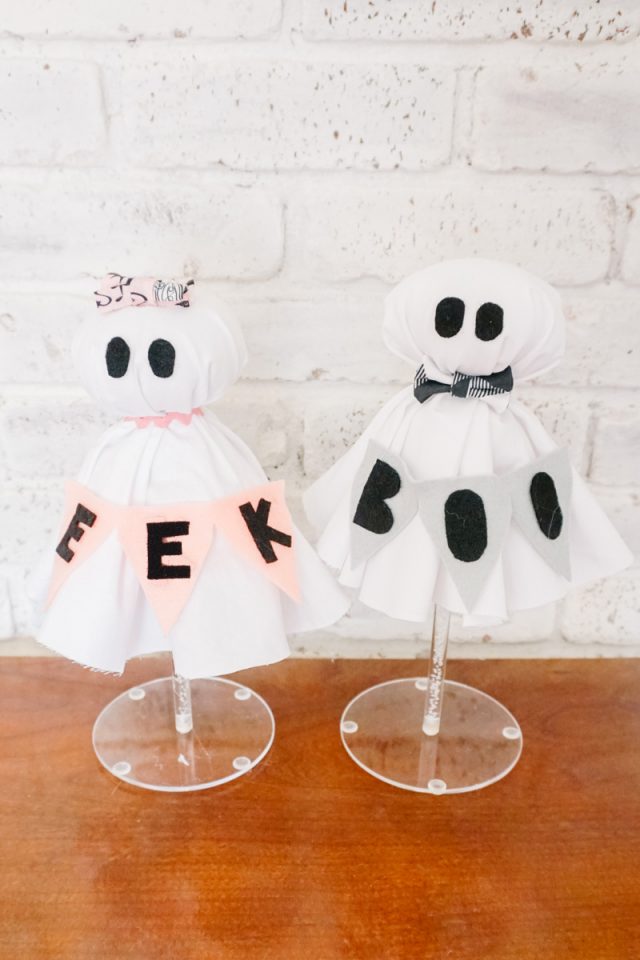
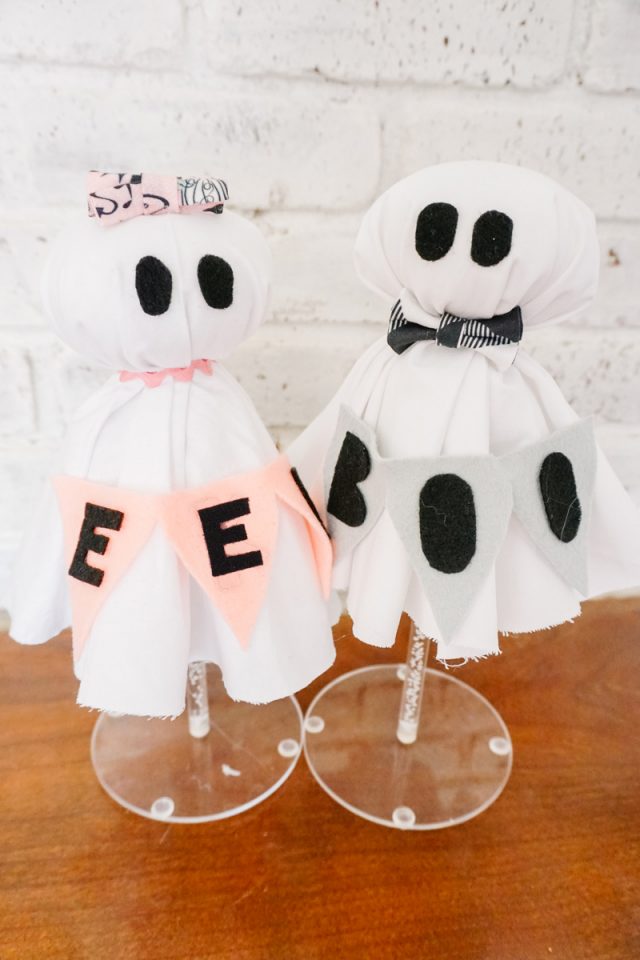
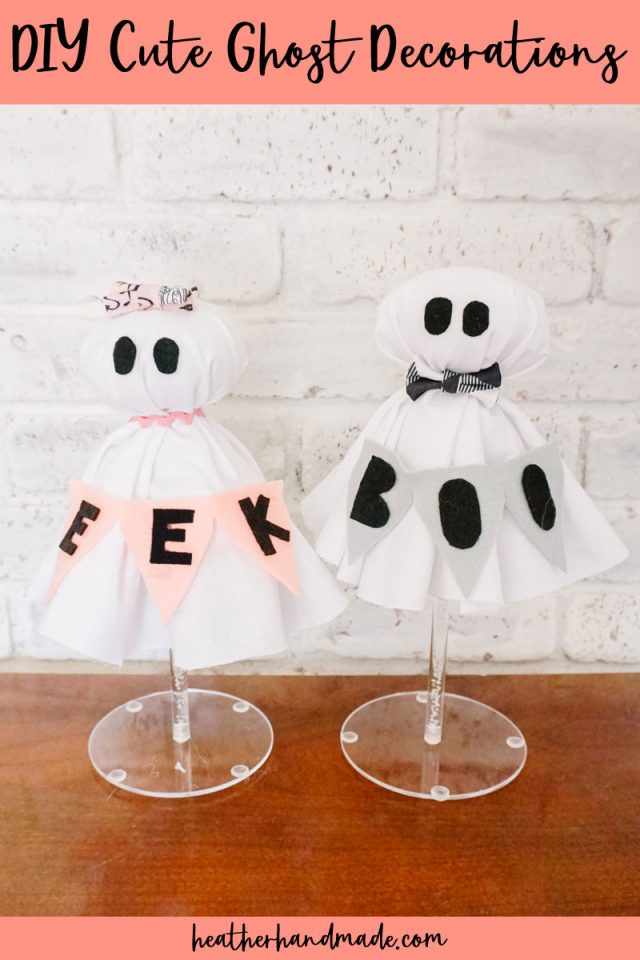
Learn how to make cute ghost decorations with fabric, felt, and glue. Make a pair holding signs for a fun Halloween craft project.
Ghosts are one of my favorite Halloween decorations. I love that you can make them so cute and fun without being too scary. I’ve made several ghost costumes, ghost t-shirts, and a ghost throw pillow.
I’ve seen some cute ghost decorations on Pinterest and in stores, but I wanted to make my own version. These ghosts are made entirely with hot glue so it’s a fun no-sew craft project. It was so fun to make a cute little ghost couple.
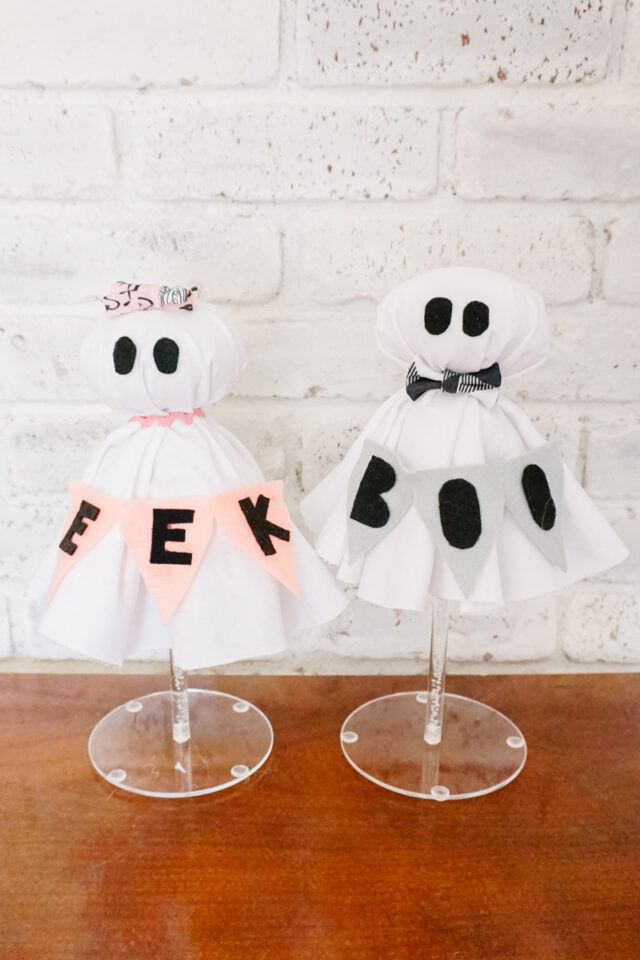
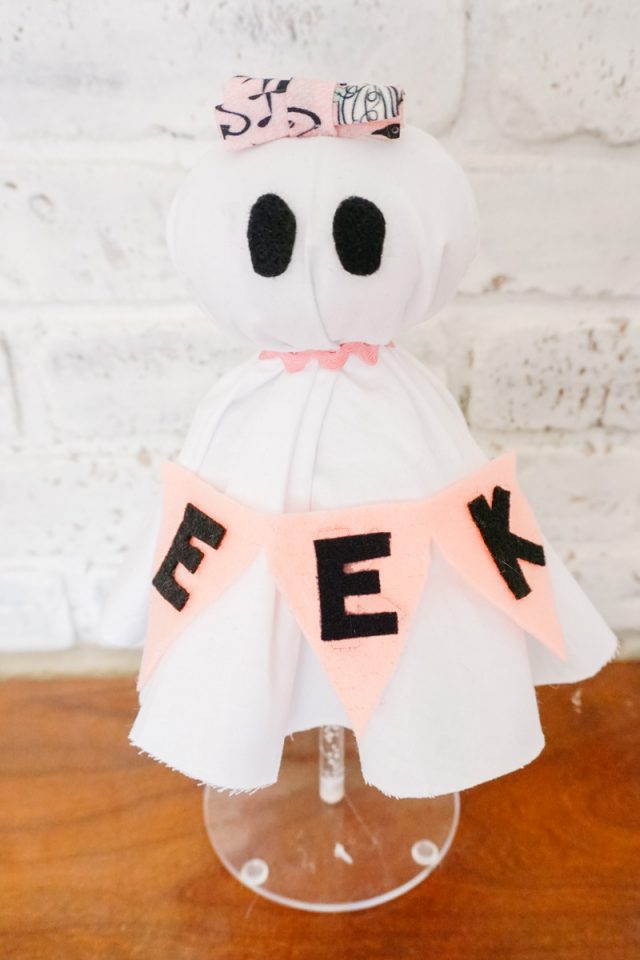
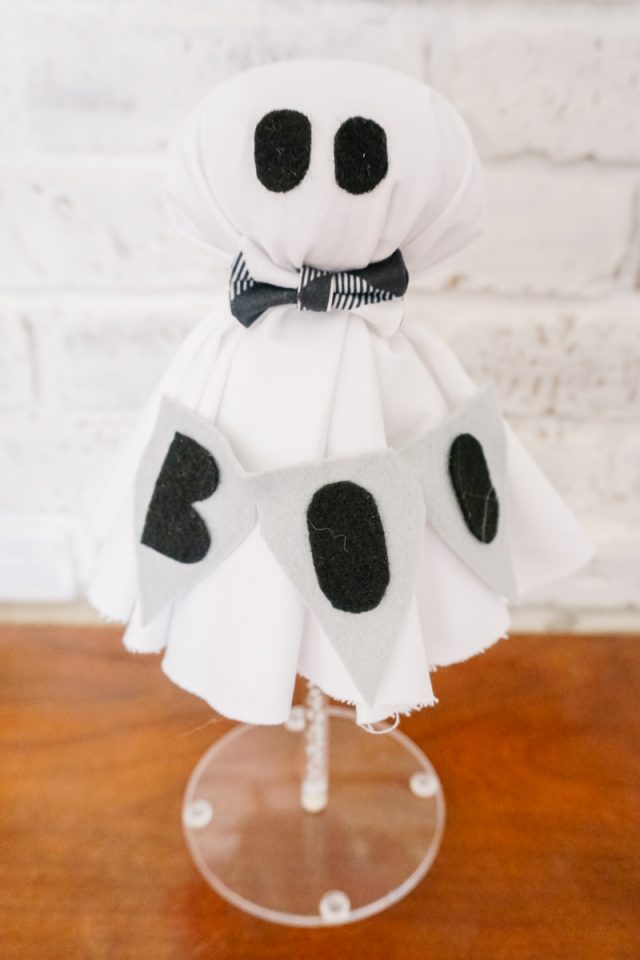
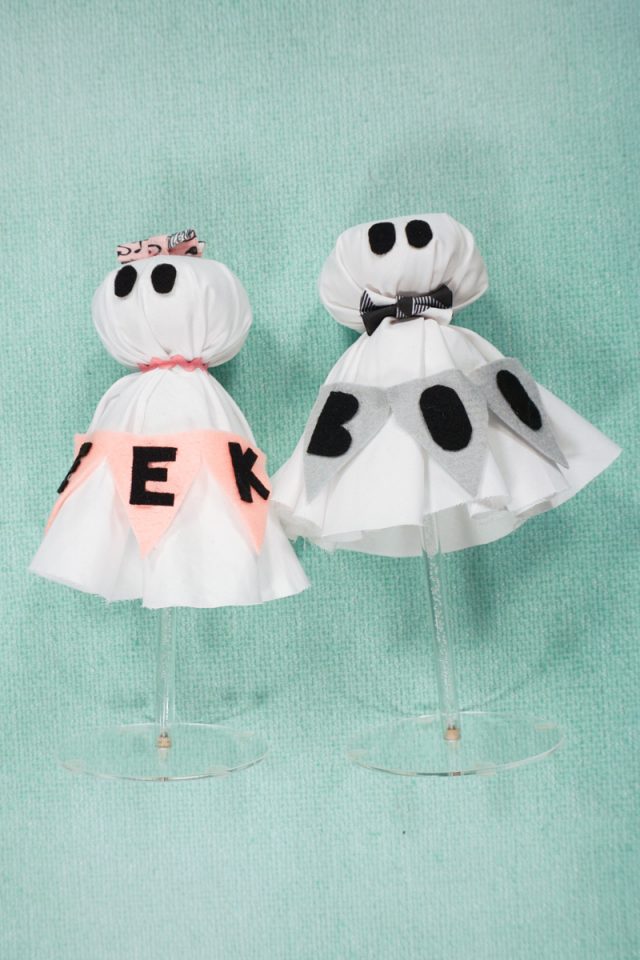
These ghosts are so cute. I love that the girl has a bow on her head and the ghost has a bow tie. They look so cute and spooky standing next to each other.
What materials should I use to make the ghosts?
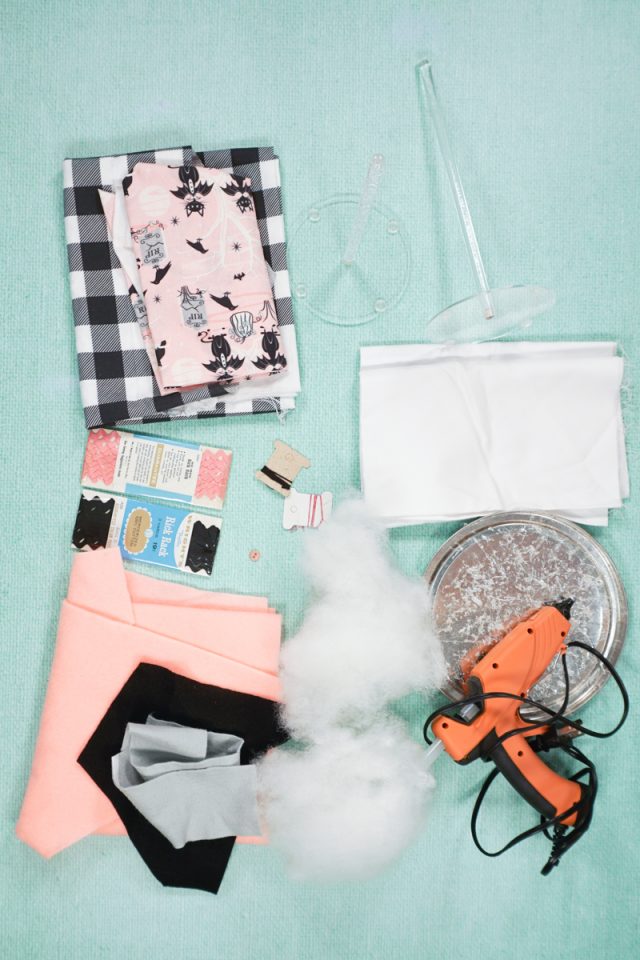
The ghosts are made from quilting cotton, felt, and poly-fil. I kept my ghosts pretty simple, but you can add any fun details you want to your ghosts like buttons, jewels, paper details, beads, etc. You can even add trim around the bottom edge of the ghosts for a extra fun look.
What makes the ghosts stand up?
I thought about using a paper towel holder for the ghosts, but they were so big and weren’t in the colors I was looking.
I finally found donut stands (for events) in all different colors, but I chose a clear acrylic stand so the ghosts would stand up and look like they were floating. Most donut stands come with several in a pack so you can make several ghosts at different heights.
Do you love to sew? Try one of these fun sewing projects:
- Halloween sewing projects
- Fall sewing projects
- DIY costume ideas
- Free ghost SVG cut files
DIY Cute Ghost Decorations
Supplies
- 1 fat quarter of white fabric for each ghost
- Scraps of fabric in Halloween prints or colors
- Scraps of felt in matching colors
- Scraps of rick rack in matching colors
- Scraps of black felt
- Thread or embroidery floss
- Poly-fil
- Hot glue gun and hot glue
- Acrylic donut stand*
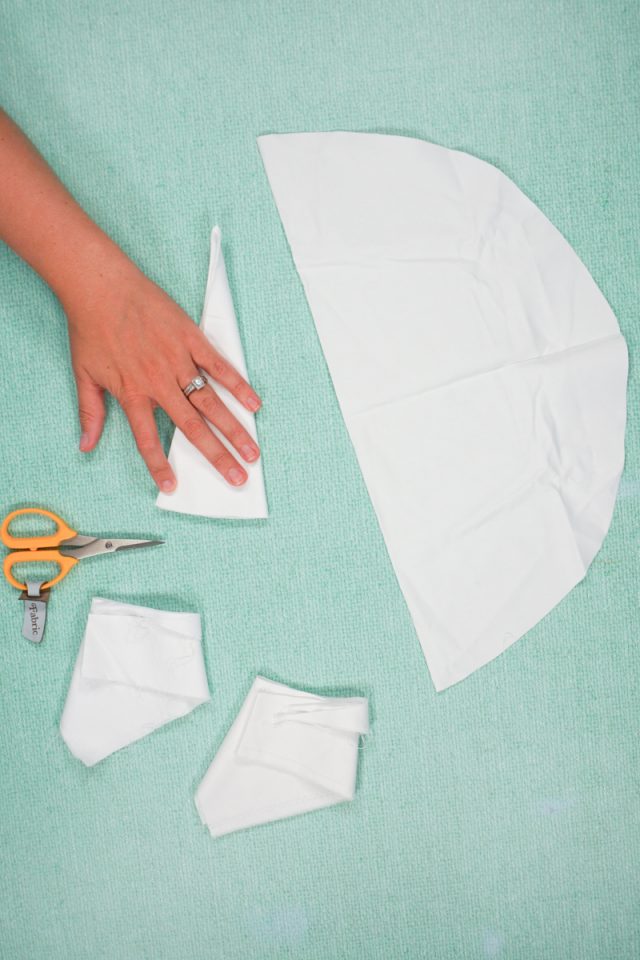
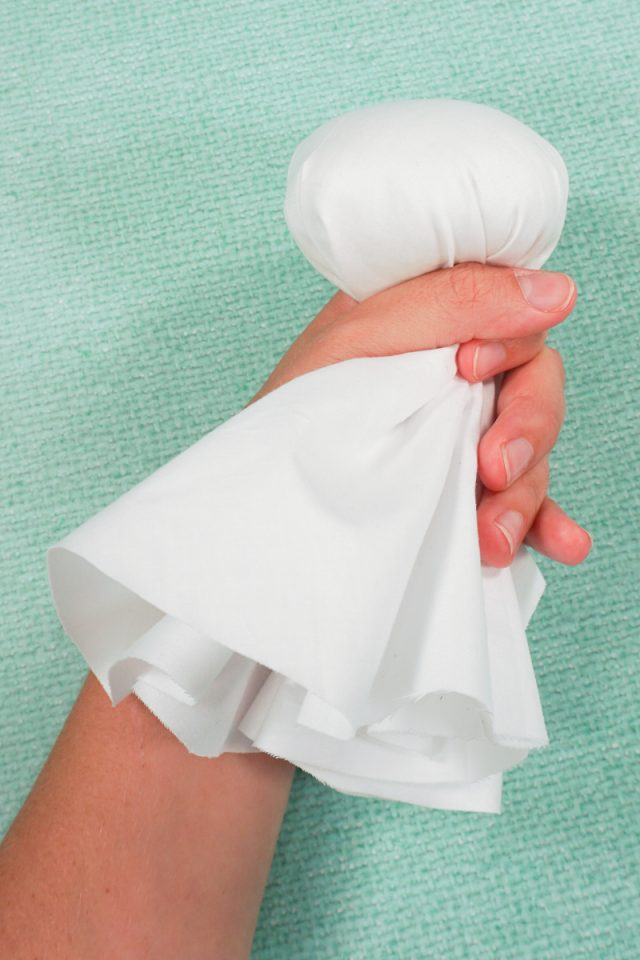
Fold the fat quarter so that the very center of the fabric is at a point. Cut a curve on the other end. The fat quarter is now cut into a circle.
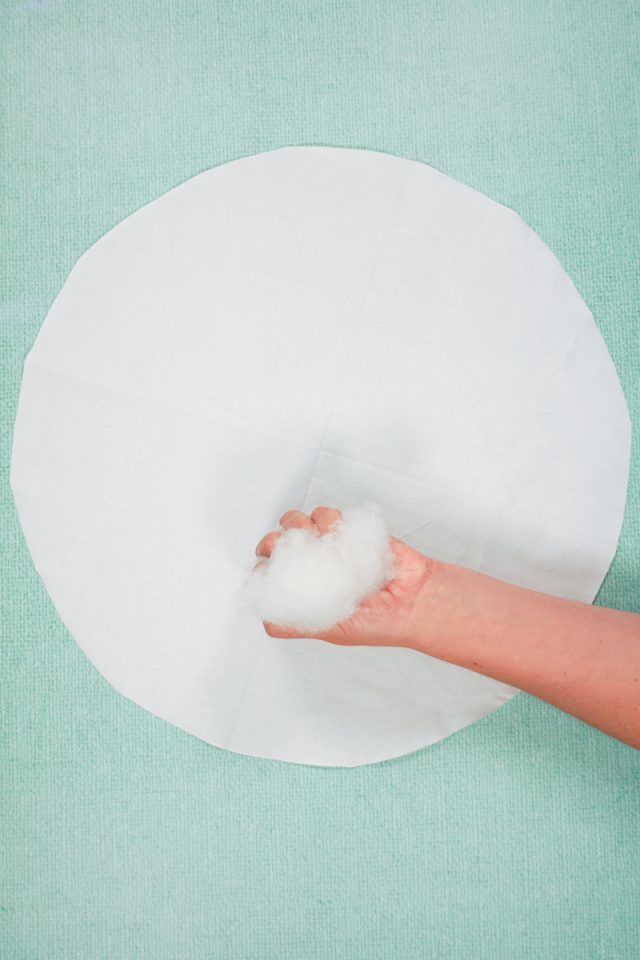
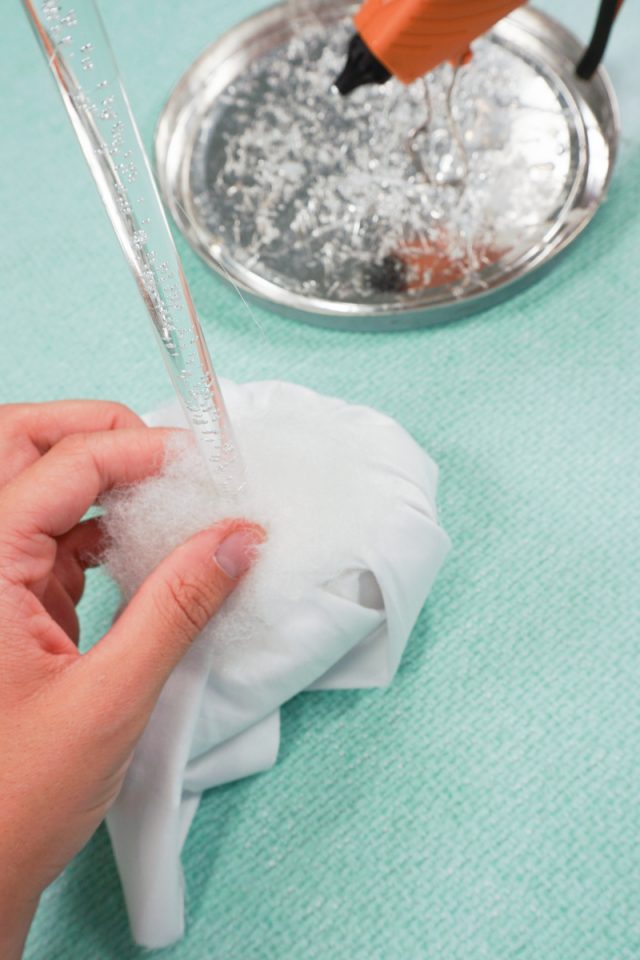
Grab a handful of poly-fil and place it in the center of the fabric circle.
Wrap the fabric around the poly-fil so that it stays in the very center. Hold onto the fabric right under the poly-fil head.
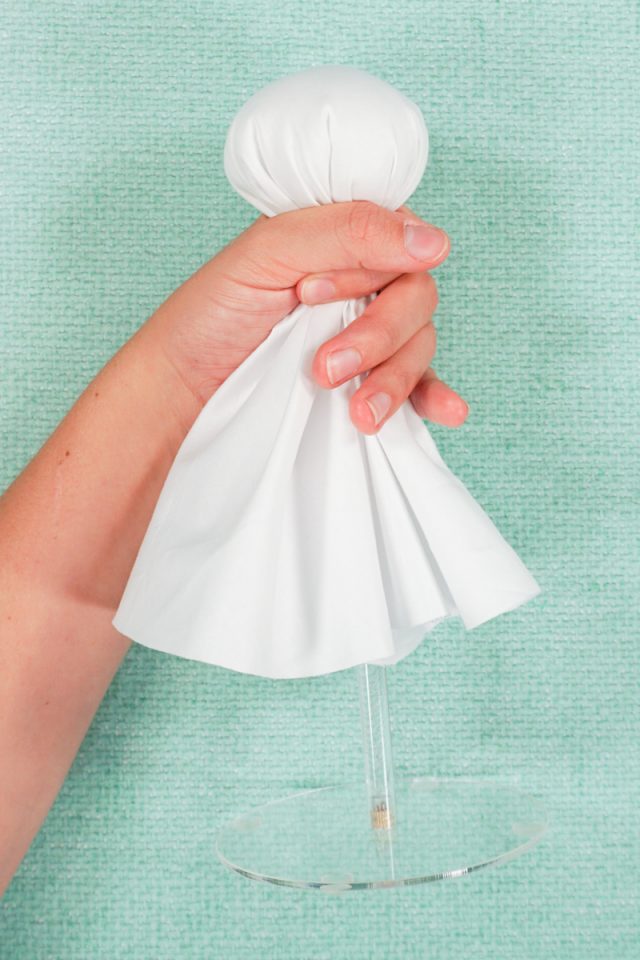
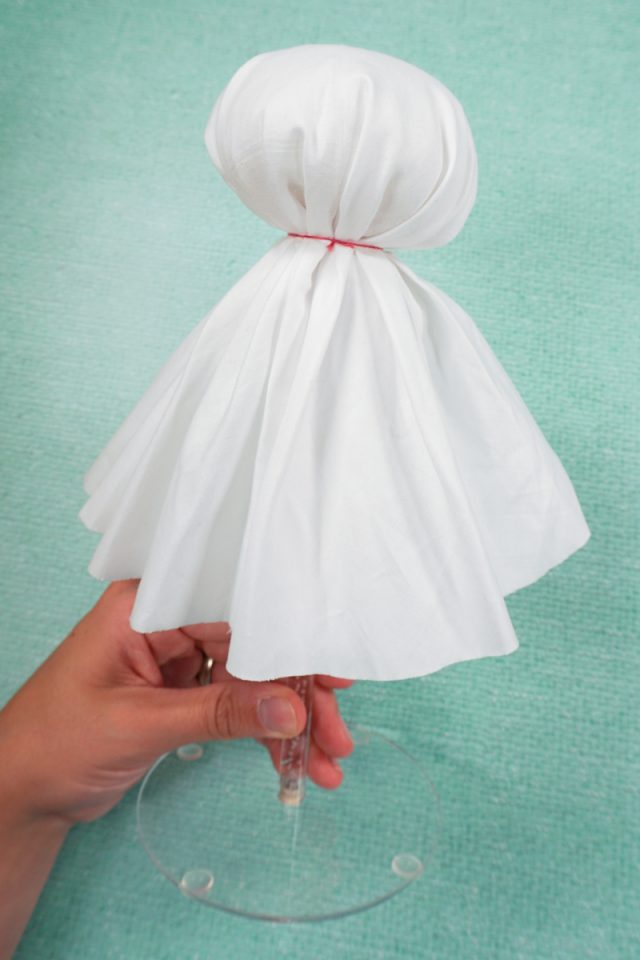
Add some hot glue to the top of the stand. Push the top of the stand into the poly-fil head to glue the head onto the stand. Hold it in place until the glue is set.
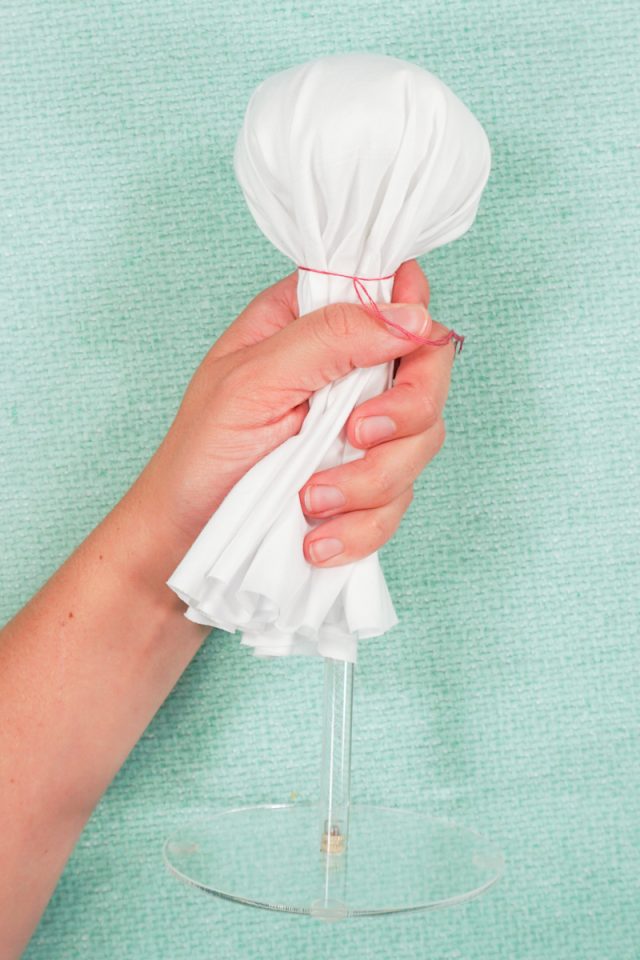
Tie some thread around the fabric right under the head.
Lift up the hanging fabric so you can see the underside of the head. Add glue all the way around the neck area.
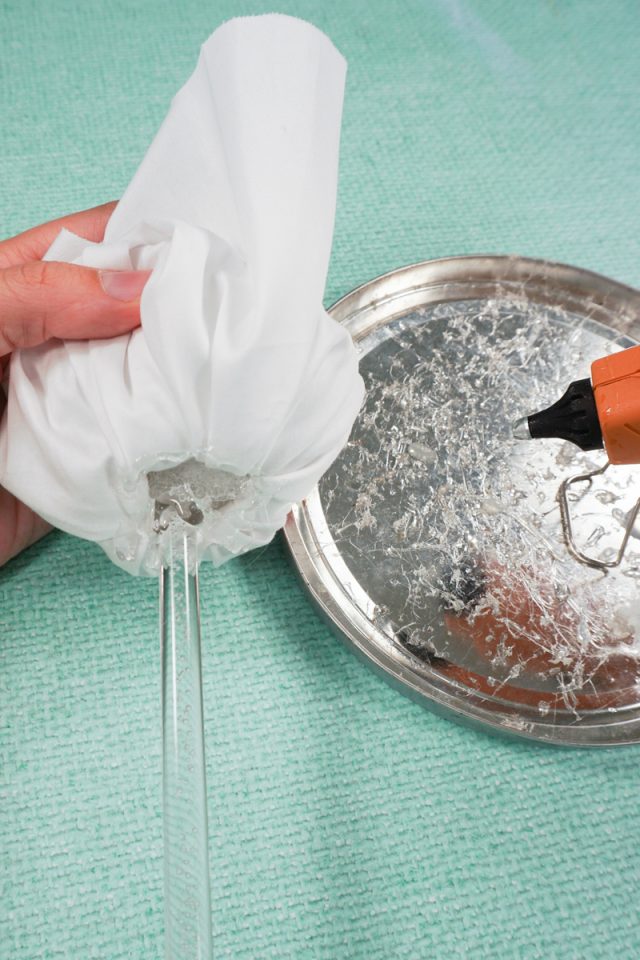
Add a “collar” of poly-fil around the glue.
Now the body of the ghost sticks out a little instead hanging flat.
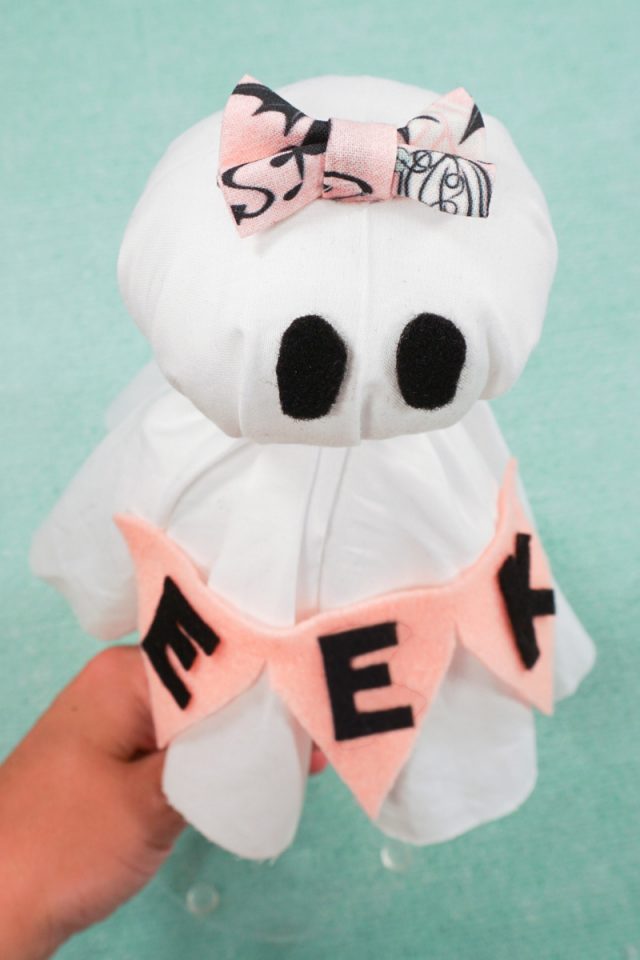
Cut out black ovals from the felt for the ghosts eyes. Cut out a triangle banner from the colorful felt. Cut out a simple word like “BOO” or “EEK” for the banner.
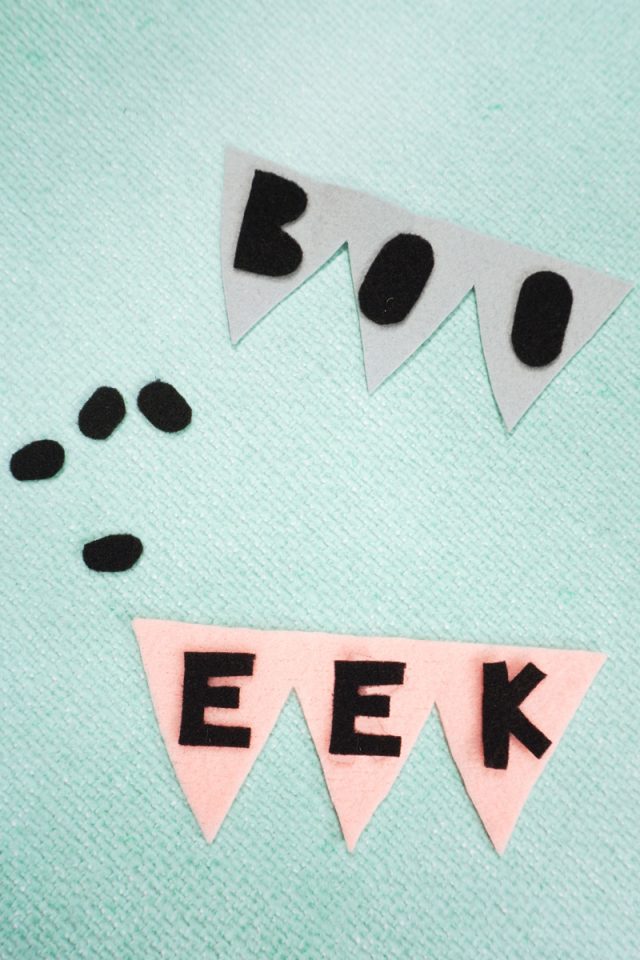
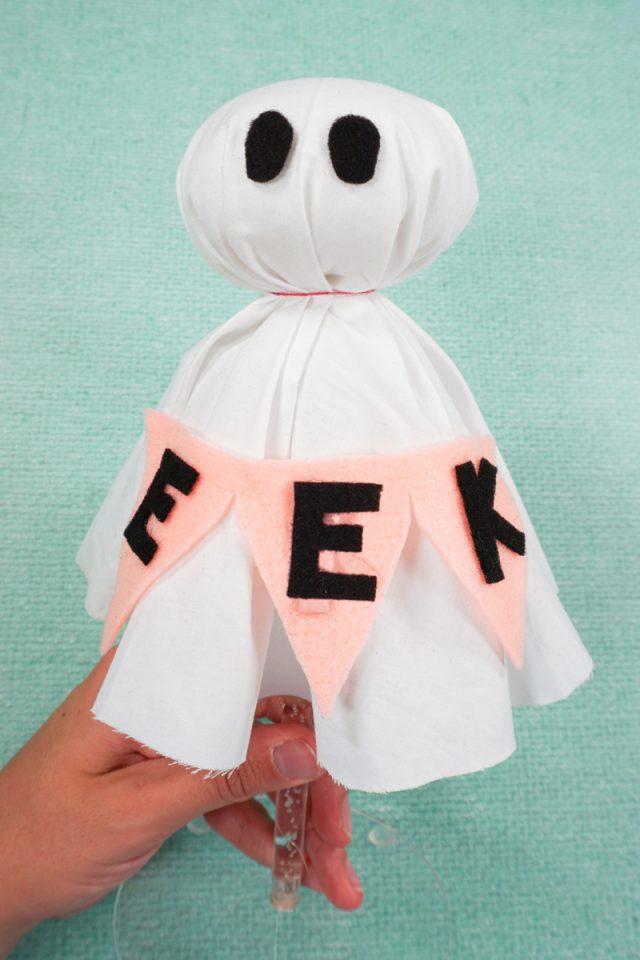
Glue the letters onto the banner. Glue the banner onto the belly of the ghost.
Glue the eyes onto the ghost head for the face.
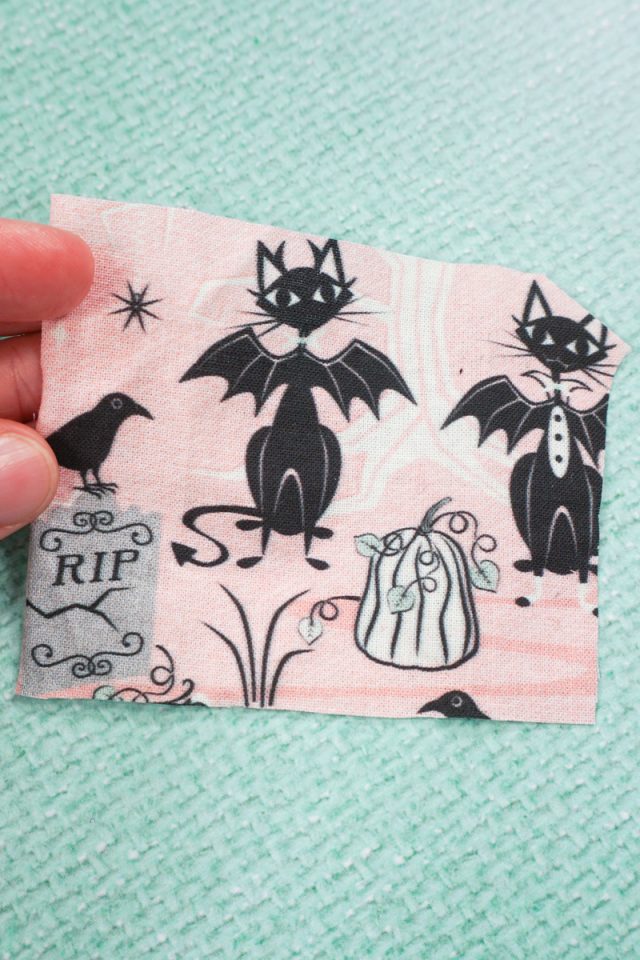
Cut a piece of fabric 4 inch wide x 3 inch tall.
Fold the piece of fabric so that the two short sides are meeting in the middle in the back. Glue the ends in place.
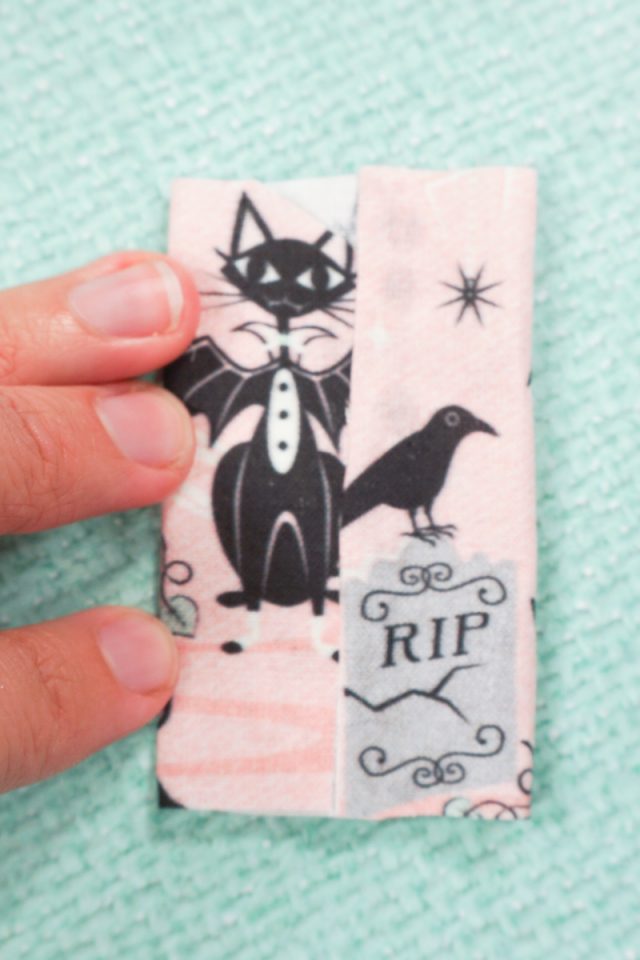
Fold the top and bottom edges in to meet in the middle on the back. Glue them in place.

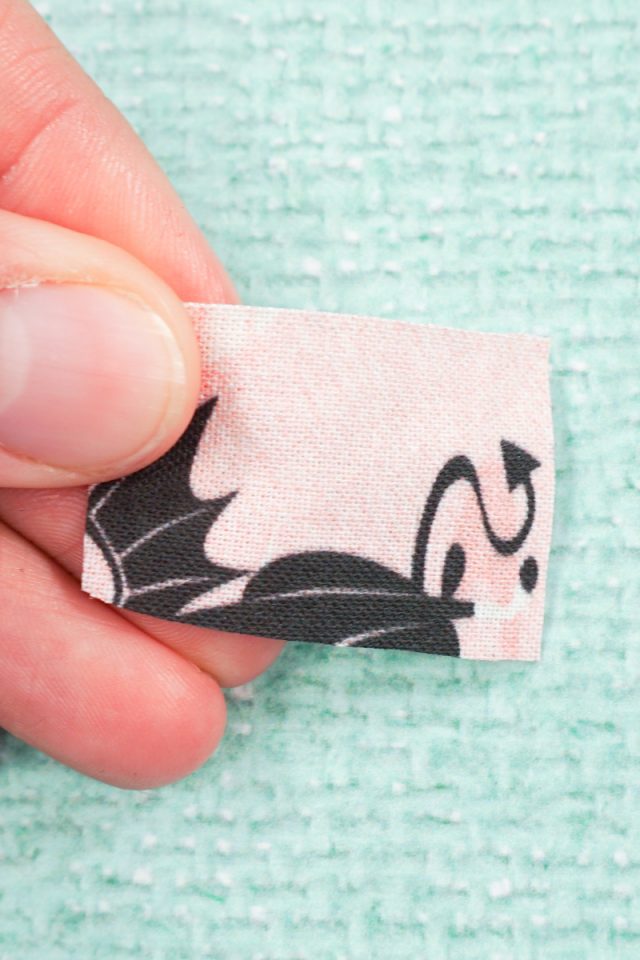
Cut another piece 1 inch wide x 2 inches tall.
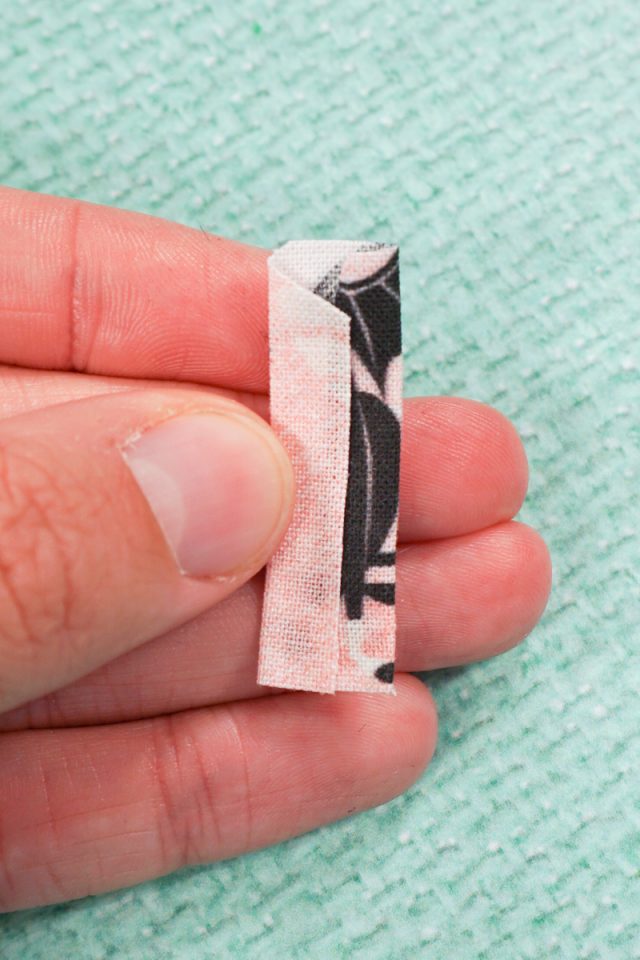
Fold the small piece of fabric so the long sides are meeting in the middle in the back. Glue them in place.
Fold the large piece into a pleated bow and glue the pleats in place. Hold until the glue is set.
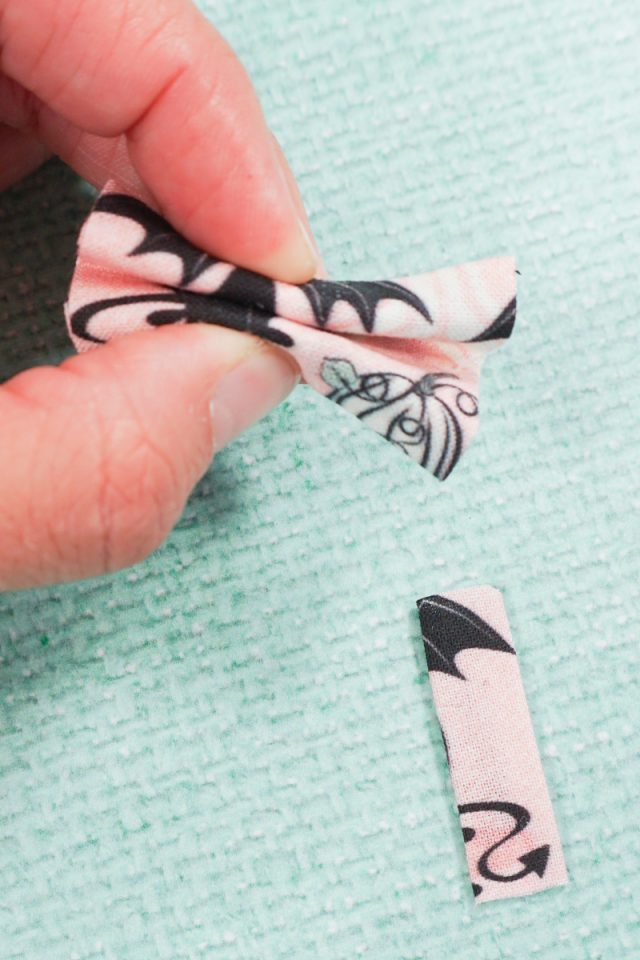
Wrap the center piece around the middle of the bow and glue the ends in the back.
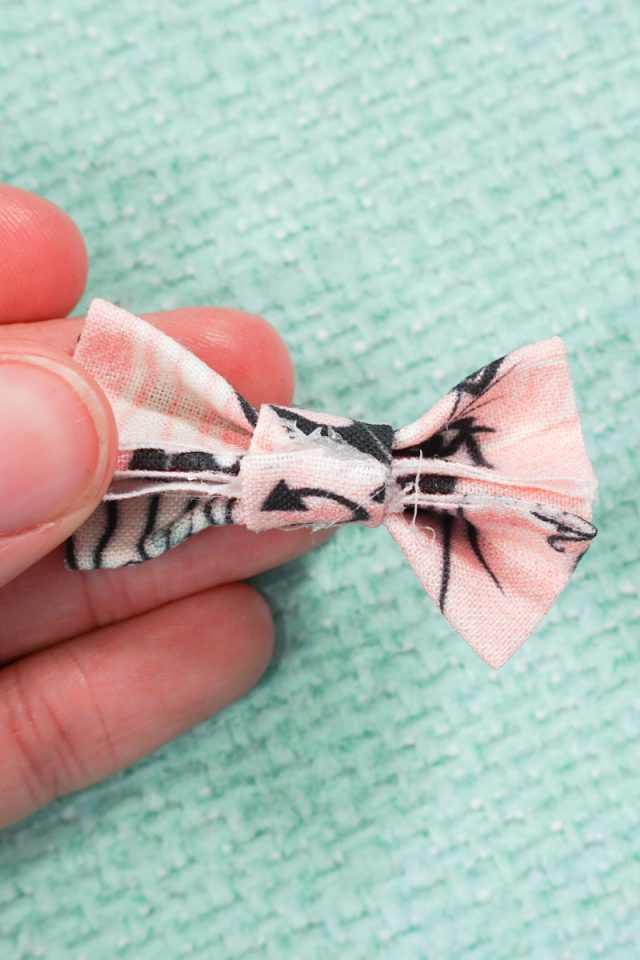
Glue the bow onto the head for a girl ghost or onto the neck for a boy ghost.
Add any other details you want to the ghost like rick rack around the neck, buttons, a hat, etc. Have fun decorating your ghosts however you want. You finished!
If you make something using this craft project, I’d love to see! Please share it on social media with the hashtag #heatherhandmade and tag me!

I believe small sewing moments can create great joy. Find your own “right” way to sew. -Heather