
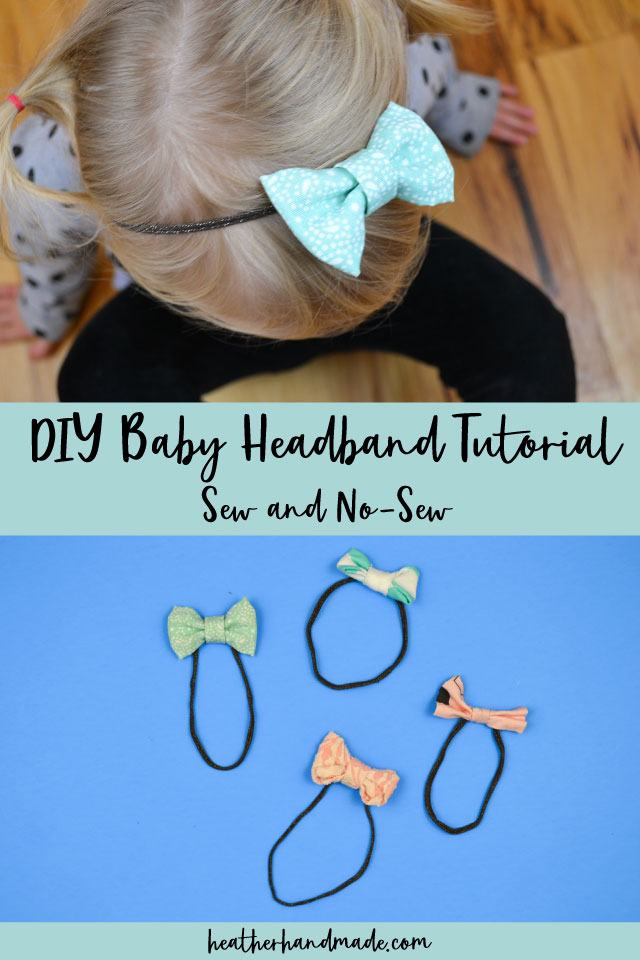
Simple Baby Headband Tutorial // Sew and No-Sew

This post may contain affiliate links.
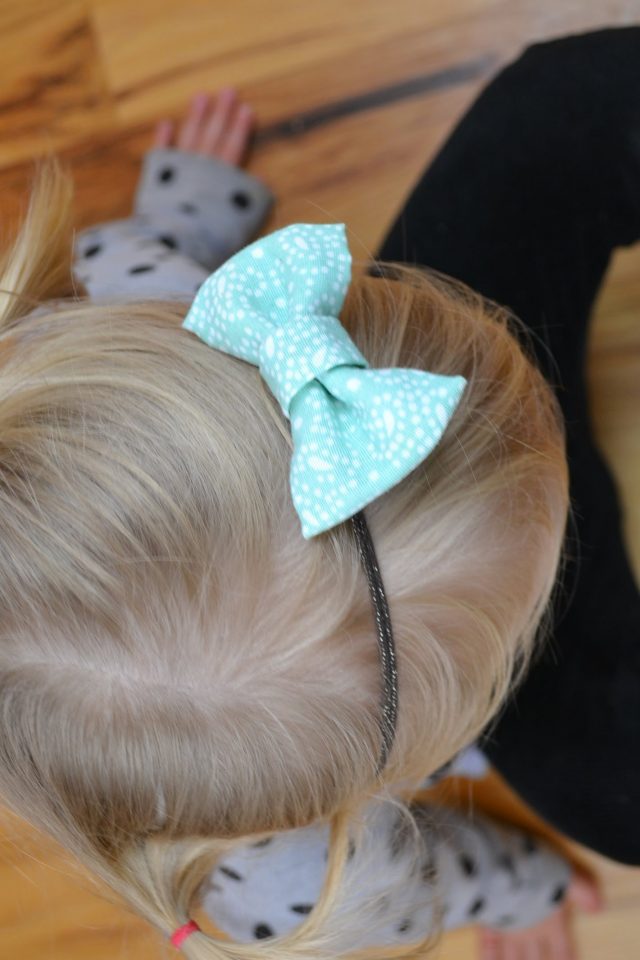
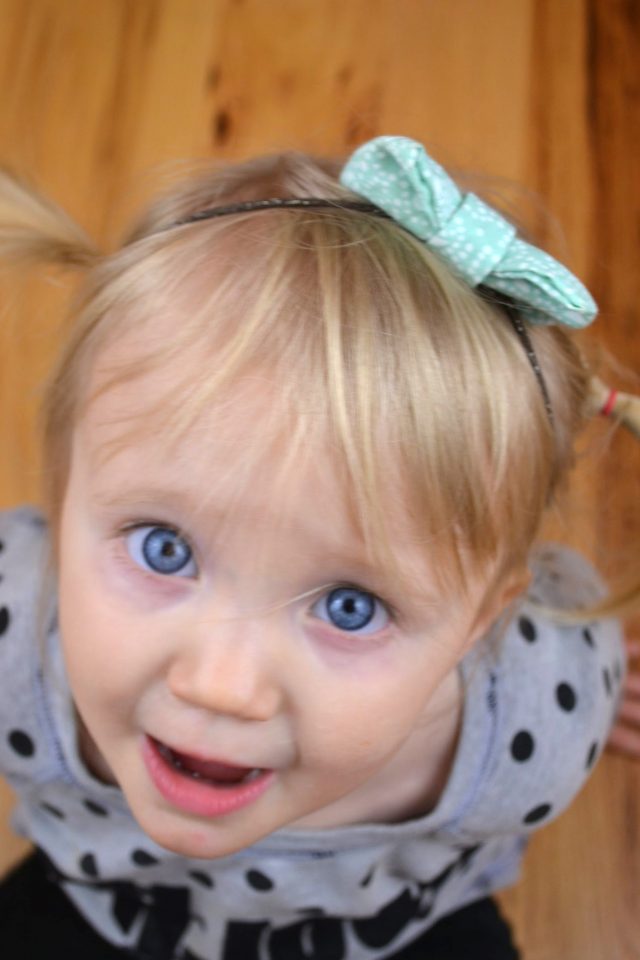
Learn how to make a simple baby bow with this baby headband tutorial either by sewing or hot gluing. These bows are so cute!
When my first daughter was born she had tons of hair so from the beginning she wore clips in her hair. I could never get headbands to stay on her head, so I never thought about making them or having them around. I made some cute clips and got used to pinning her hair back most days.
Then I had my second daughter and besides remembering how wonderful and soft bald babies heads are, I realized I needed some simple baby headbands for her to wear.
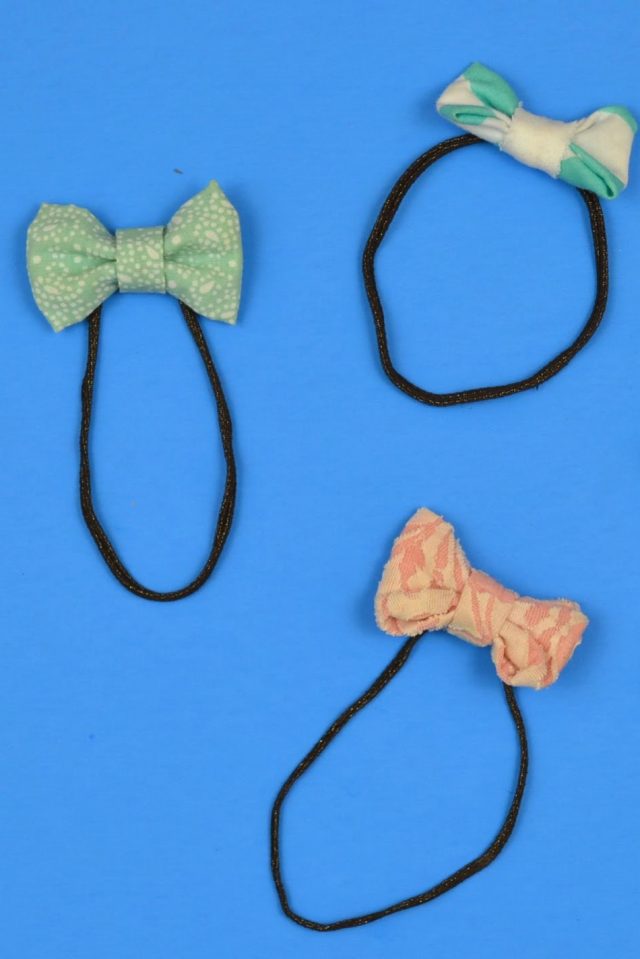
I came up with a baby headband tutorial: a simple sewn version and a quick no-sew version. Scroll to the end for the video of the no-sew version!
Is it worth it to sew baby items?
Even though fabric isn’t cheap to buy and babies stain everything, I love to sew baby items. You need so many little things when you have a tiny baby.
You can save money by using free sewing patterns for babies and by using up scraps of fabric and smaller pieces of fabric. Sewing for babies is great because it requires less fabric!
Do you love to sew? Try one of these sewing projects:
- Baby gifts to sew
- Easter hair bows
- animal hair bows
- baby sewing projects
- beginner sewing project
Simple Baby Headband Tutorial
SUPPLIES
- Fabric remnants, woven or knit
- Nylons (I used sparkly, brown tights)
- Sewing tools
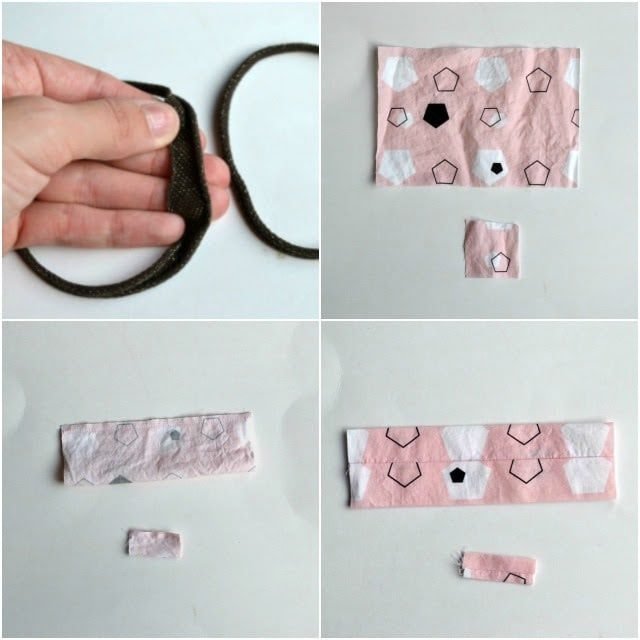
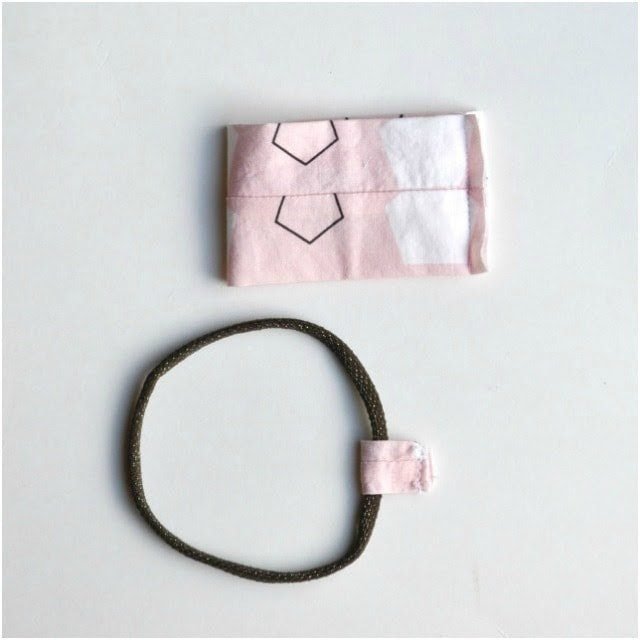
Cut the nylons at the thigh area into 1/2 inch sections. Pull each piece which makes the edges curl up.
Cut a piece of fabric 6.5 inch wide x 4.5 inch tall. Cut another piece 2 inch wide x 2 inch tall.
Fold the big piece of fabric hot dog style right sides together and sew along the edge 1/4 inch.
Fold the small piece of fabric right sides together and sew along the edge 1/4 inch.
Turn both tubes right sides out. Iron flat with the seams in the center.
With right sides together sew the short edges of the big piece together at 1/4 inch.
Fold the small piece around the nylon piece with right sides together and sew the raw edges together at 1/4 inch.
Turn the big piece right side out.
Situate the large piece so the seam is in the center.
Fold the piece in half forwards.
Fold the top fold back in half and fold the bottom fold back in half. Hold these folds tight.
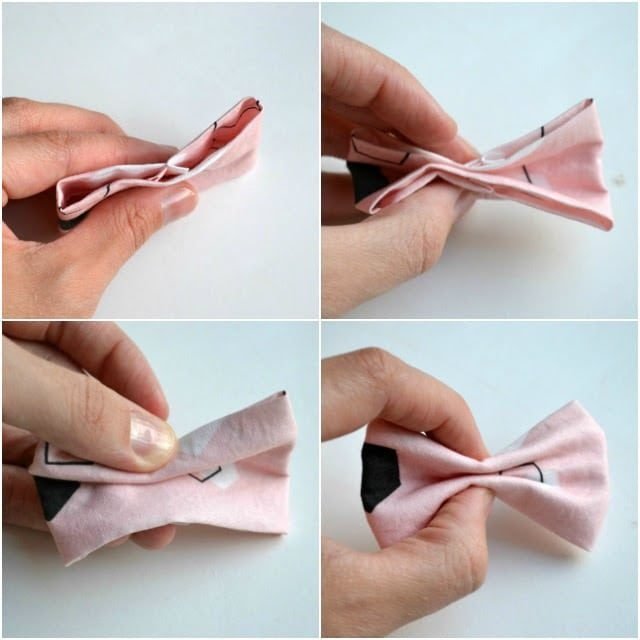
Insert the headband in one of the folds in the back.
Sew across the top of the folds securing the folds and the headband.
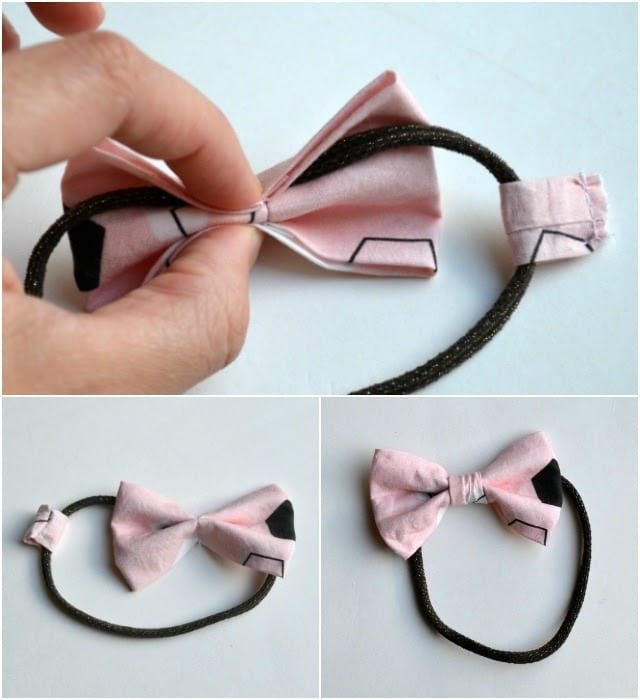
Turn the small piece right sides out.
Carefully pull one side of the bow through the small piece until the small piece sits in the center of the bow. Situate the seam of the small piece towards the back.
If you want a simple, no-sew version using a glue gun, then you can watch the quick video tutorial! Have fun making lots of cute bows for your baby!
If you make something using this sewing project, I’d love to see! Please share it on social media with the hashtag #heatherhandmade and tag me!

I believe small sewing moments can create great joy. Find your own “right” way to sew. -Heather
this is really an awesome idea! loved it! will definitely try this cute baby bow headbands
What a good idea to use nylons!
These would be cute on a young girl, too! I know my daughter would wear one.
awww – so so sweet. Almost makes me want to have another baby…almost 🙂
You are incredibly creative!!