
Sew-Along for the Kid Upcycled Romper and Dress Sewing Pattern

This post may contain affiliate links.
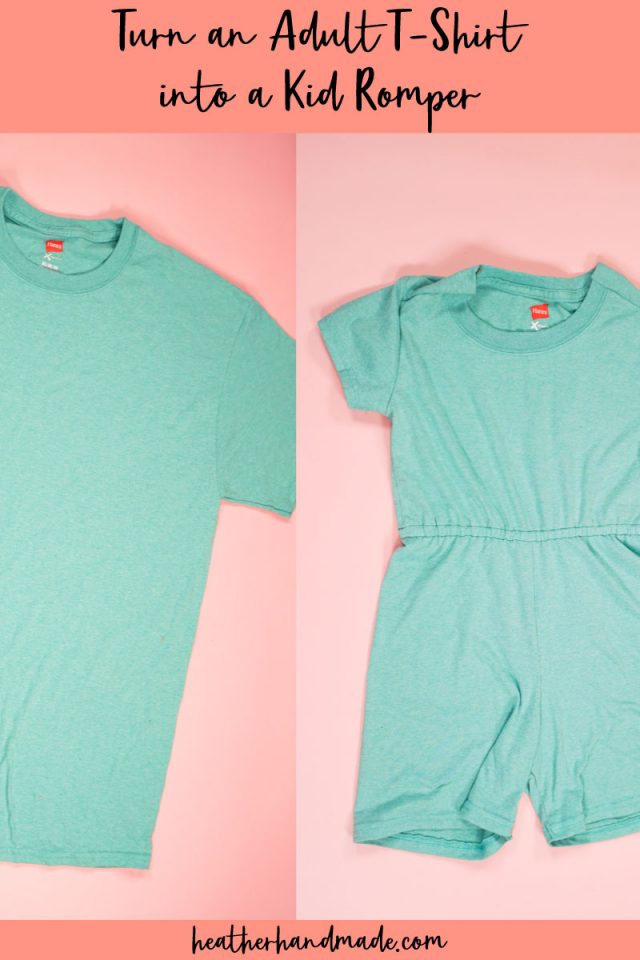
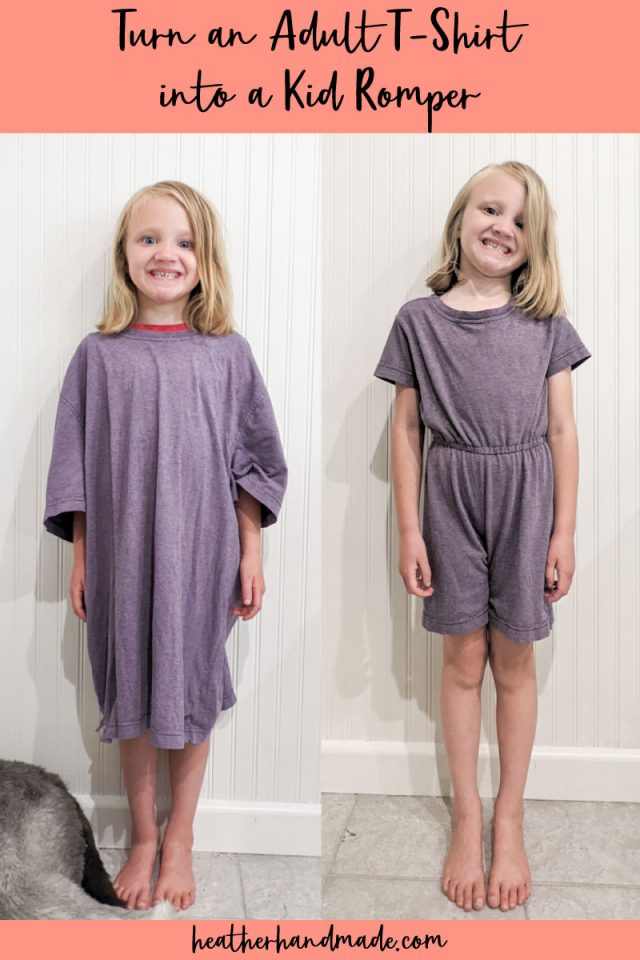
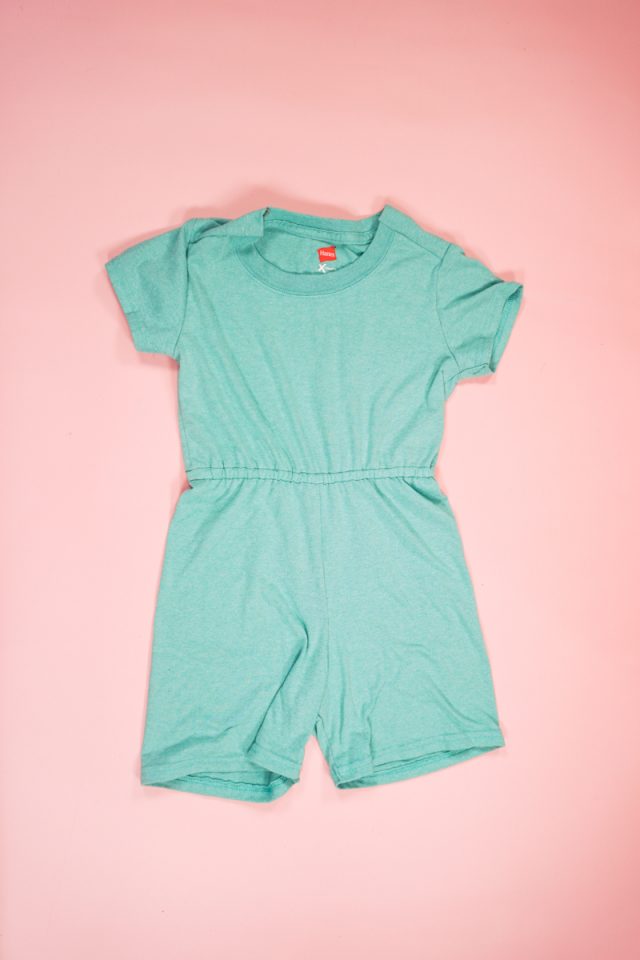
Upcycle an adult t-shirt into a romper or dress for kids with this PDF sewing pattern. Upcycling is fun with this beginner sewing project.
I’m so excited to share the sew along of this pattern with you! The Kid Upcycled T-Shirt Romper and Dress sewing pattern is a beginner level sewing pattern that comes in seven child sizes. You can make a romper, a jumpsuit, or a dress with long or short sleeves.
Since you are upcycling a t-shirt, you can reuse the neckline, sleeve hems, and the shirt hem. It makes the sewing so fast and quick!
Buy the Kid Upcycled T-Shirt Romper and Dress Sewing Pattern
How to Turn an Adult T-Shirt into a Kid Romper
For extra help you can watch this video, where I walk you through the entire process of the sewing pattern. I demonstrate with a romper, but almost all the the techniques are the same for the jumpsuit and the dress.
I won’t go through every step in this tutorial, but I will demonstrate two of the trickier steps: the shoulder seams and yoke and the waist seam and elastic casing.
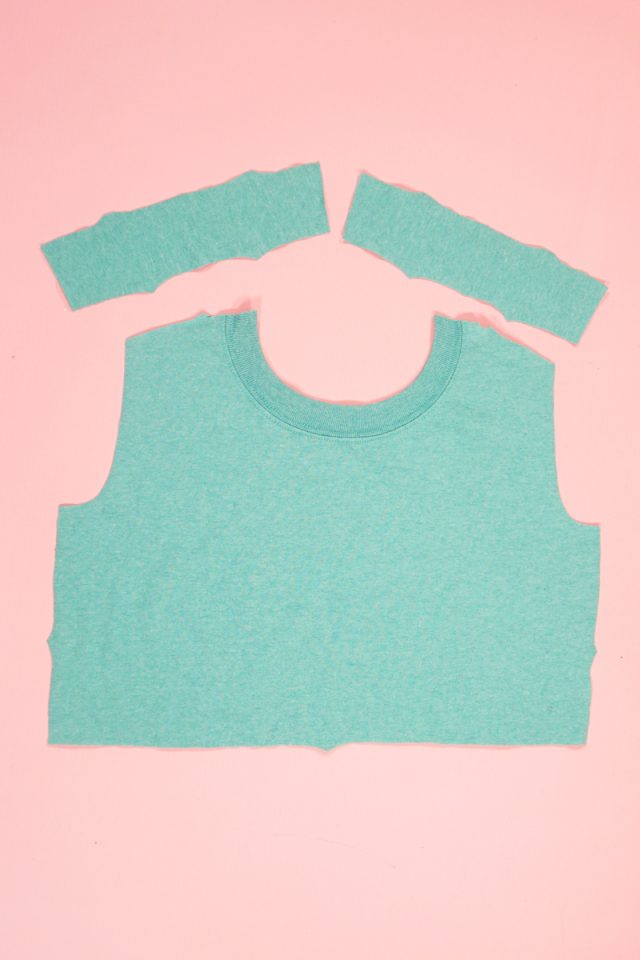
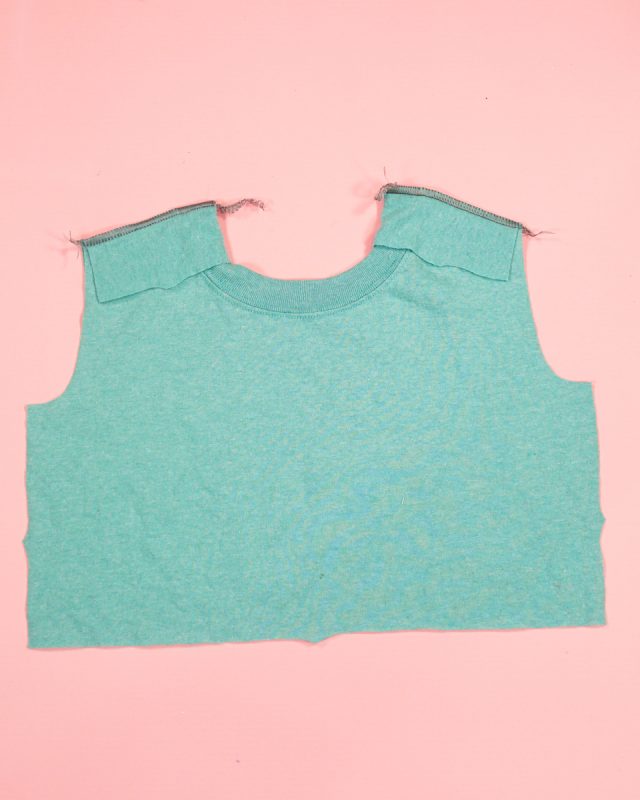
Shoulder Seams and Yoke
The yoke is a pattern piece that sits at the shoulder between the front and back pieces. It is sewn in a way so that one of the seam allowances is hidden in the layers.
Lay out your bodice front with right sides up. Lay the yokes above the shoulders with the right sides up. The one notch side should be facing the one notch shoulder seam of the bodice.
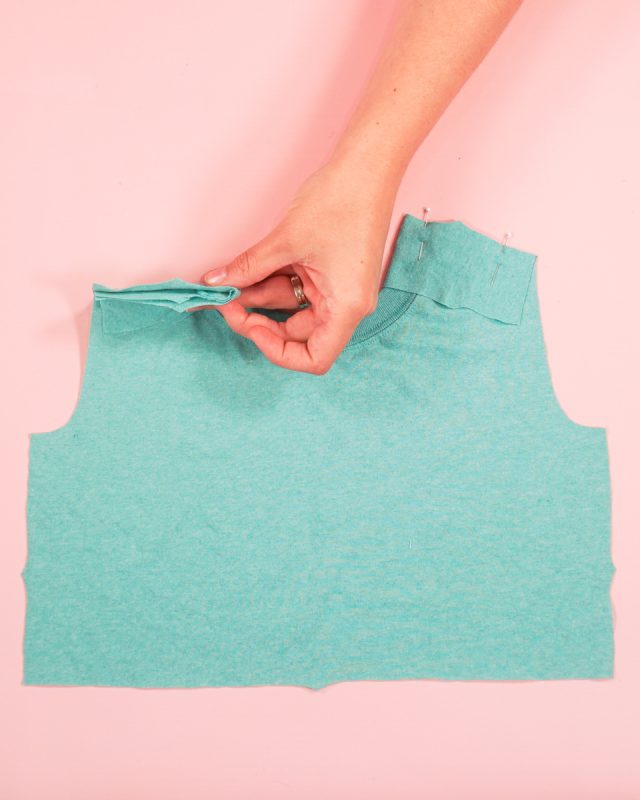
Place the yokes on the shoulder seam with right sides together. Match up the shoulder notch of the bodice with the outer notch of the yoke.

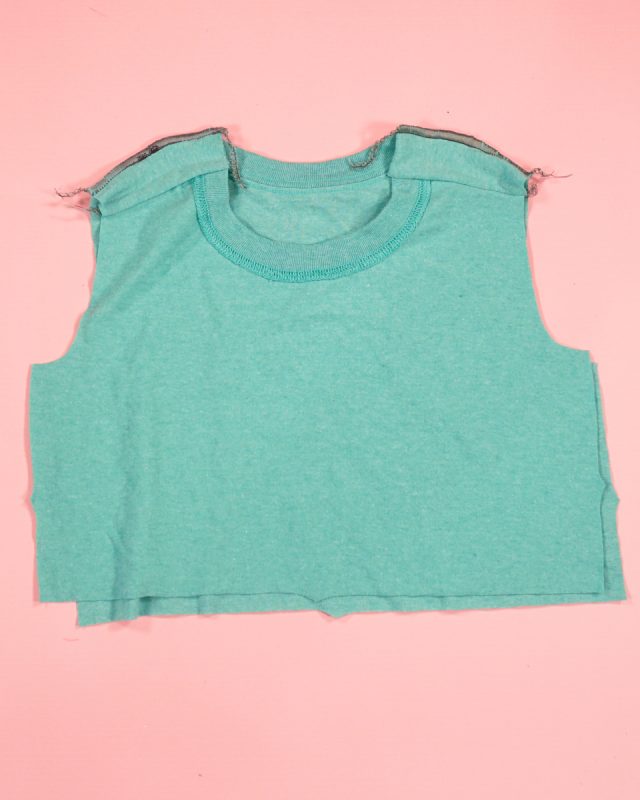
Wrap the yoke around the neckline so that the remaining notch matches up with the previous two notches. There will be three layers of fabric together and the fold of the yoke will be folded around the neckline.
Pin the three layers together. Do the same to the other shoulder seam and yoke.
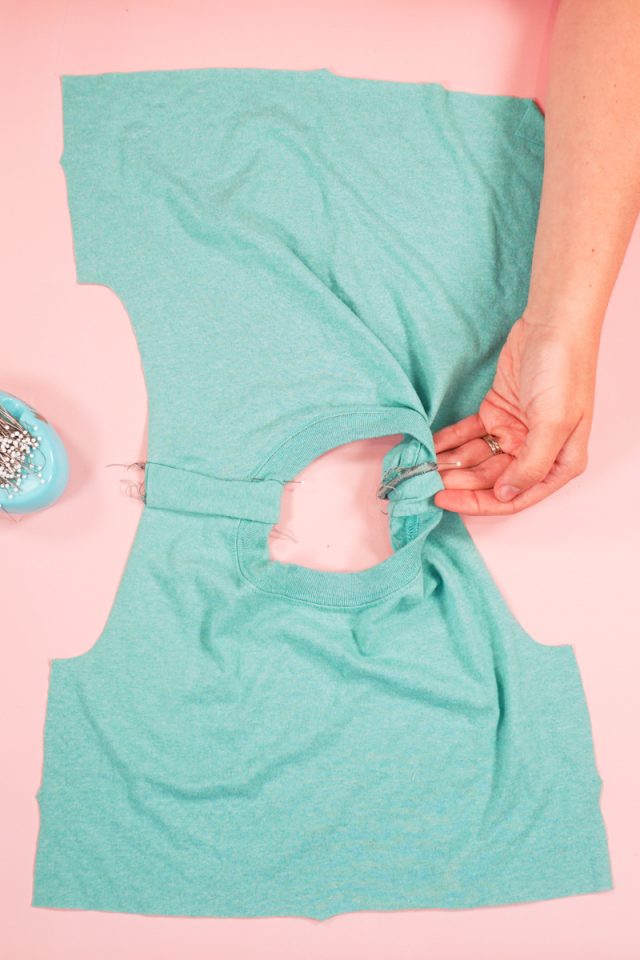
Sew the shoulder seam with either a zigzag stitch or a serger.
Fold the yokes up away from the bodice. The seam allowance is enclosed in the yoke.
Match up the two yoke layers with the back bodice shoulder seam. There are two notches side by side on each seam that need to match up.
Sew the three layers together with either a zigzag stitch or a serger.
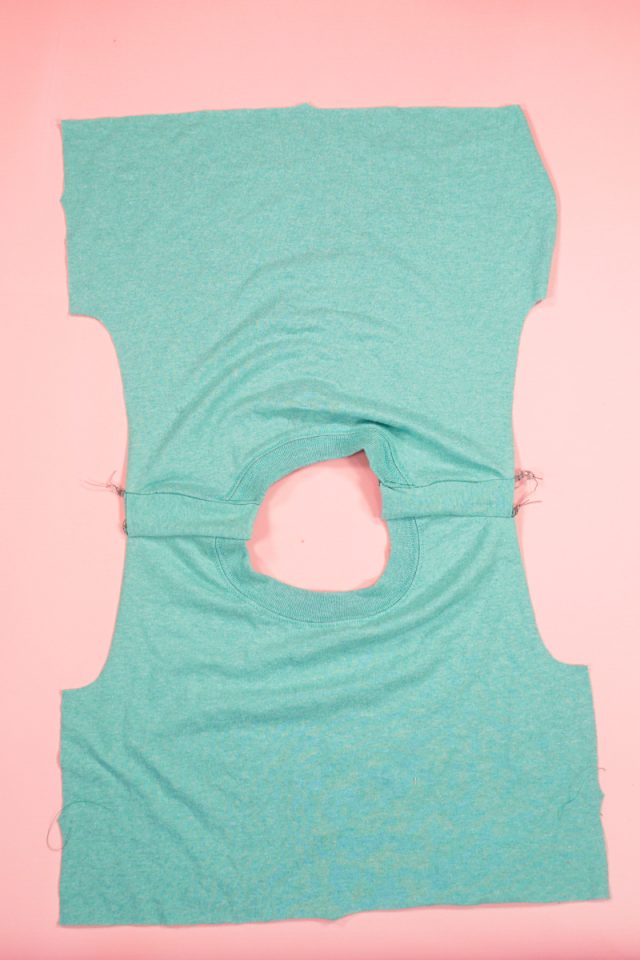
Press the shoulder seam allowance towards the back bodice. Pin the seam allowance towards the back and so that the seam allowance is hidden by the neckline.
Sew a 1 inch tack along the neckline to keep the seam allowance in place.
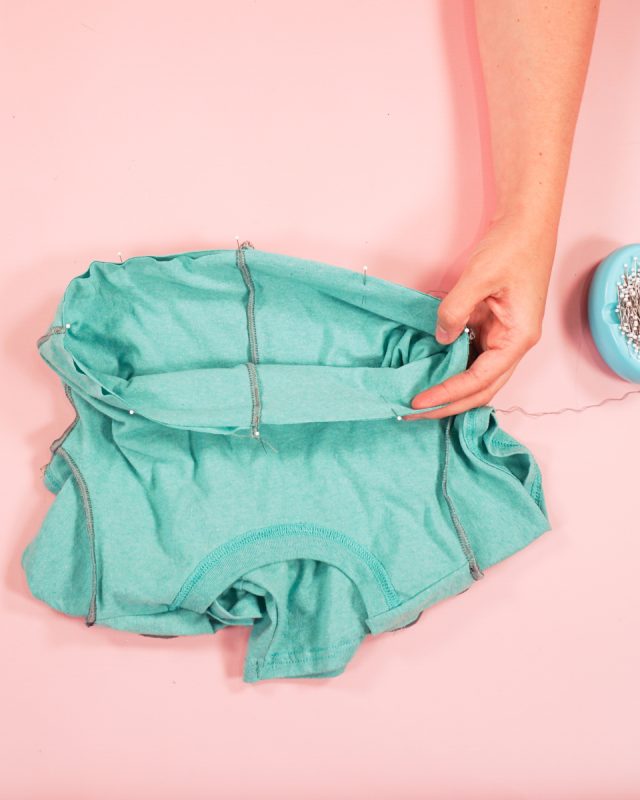
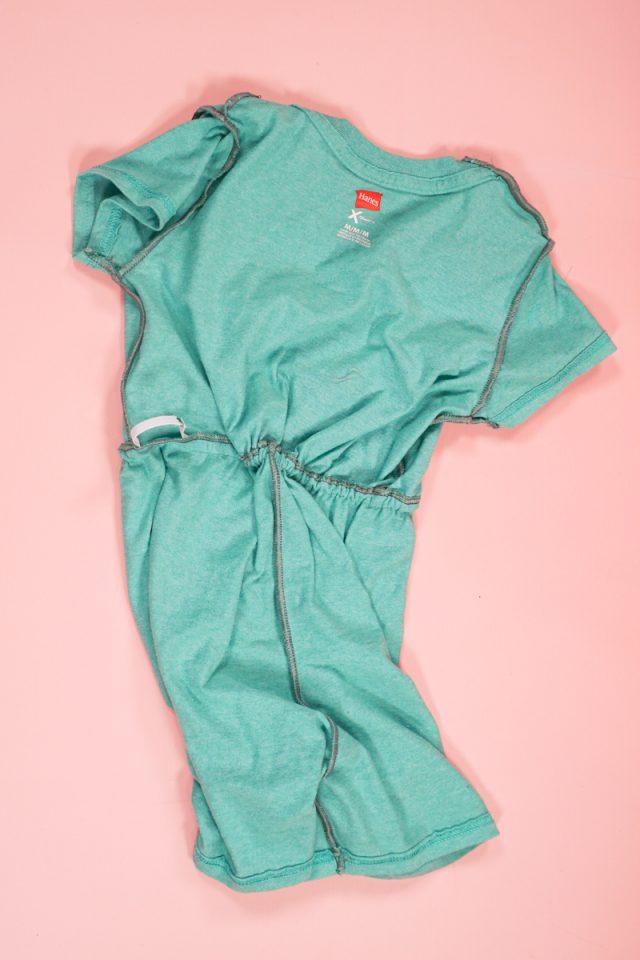
Waist Seam and Elastic Casing
Turn the bodice right side in. The shorts are right side out. Place the shorts inside the bodice with the waists matching right sides together. Pin the layers together.
Sew the seam with a straight stitch and a 1/2 inch seam allowance. Optional: finish the edge of the seam with a serger or a zigzag stitch.
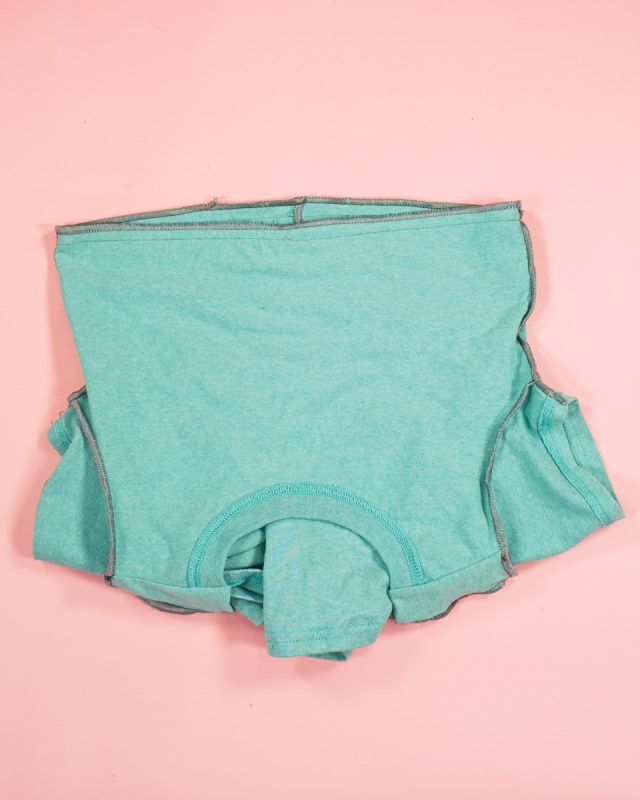
Press the seam allowance up towards the bodice.
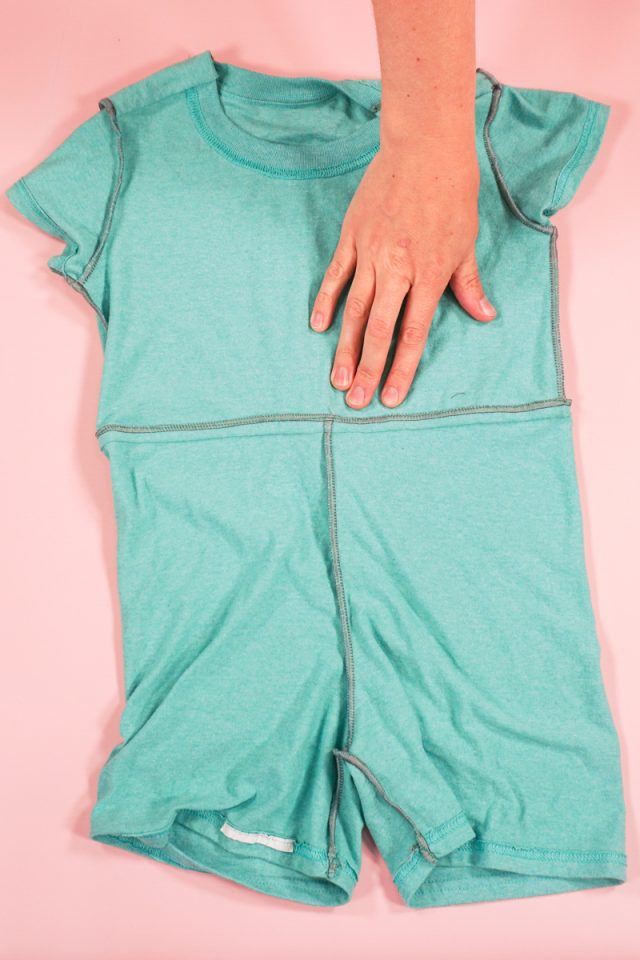
Turn the romper right side out. Sew the seam allowance up towards the bodice 3/8 inch from the seam line. Leave a 2 inch hole for inserting the elastic.
Insert the elastic into the casing with a safety pin. Pull the elastic all the way through until the two ends of the elastic are coming out of the hole.
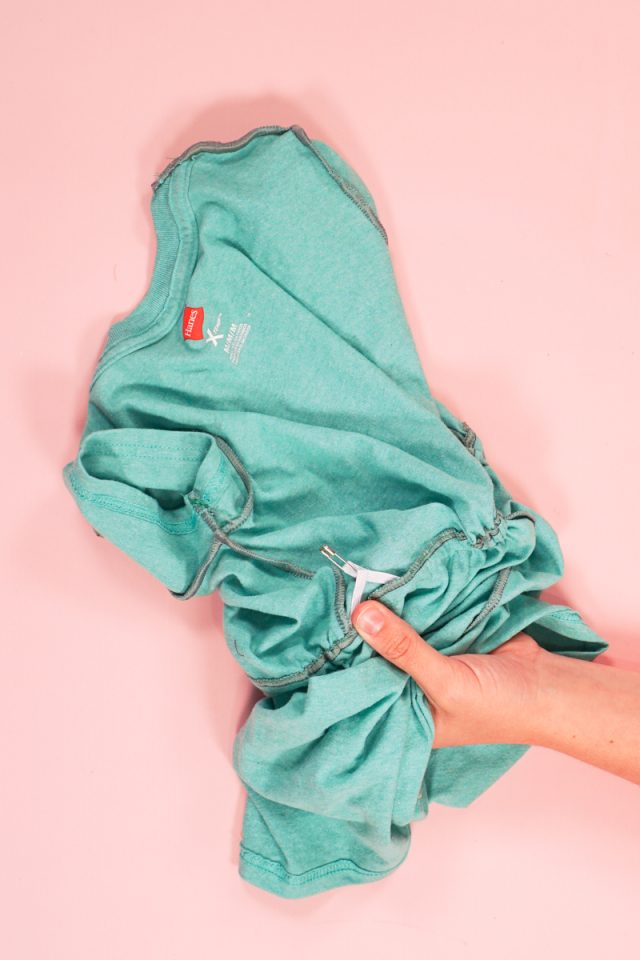
Overlap the elastic ends 1/2 inch and sew them together.
Stretch the casing to pull the elastic inside. Sew the hole closed.
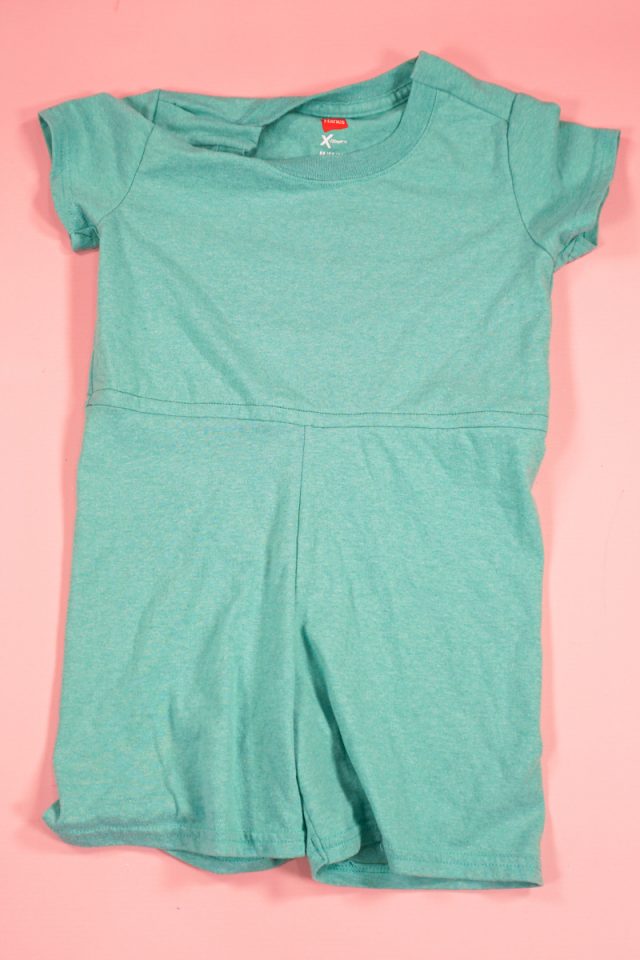
You finished!
If you make something using this sewing project, I’d love to see! Please share it on social media with the hashtag #heatherhandmade and tag me!

I believe small sewing moments can create great joy. Find your own “right” way to sew. -Heather
Hi, aber wie zieht man das an?
The neck opening is stretchy enough to pull up over the the body.