
Free Electric Scooter Bag Sewing Pattern

This post may contain affiliate links.
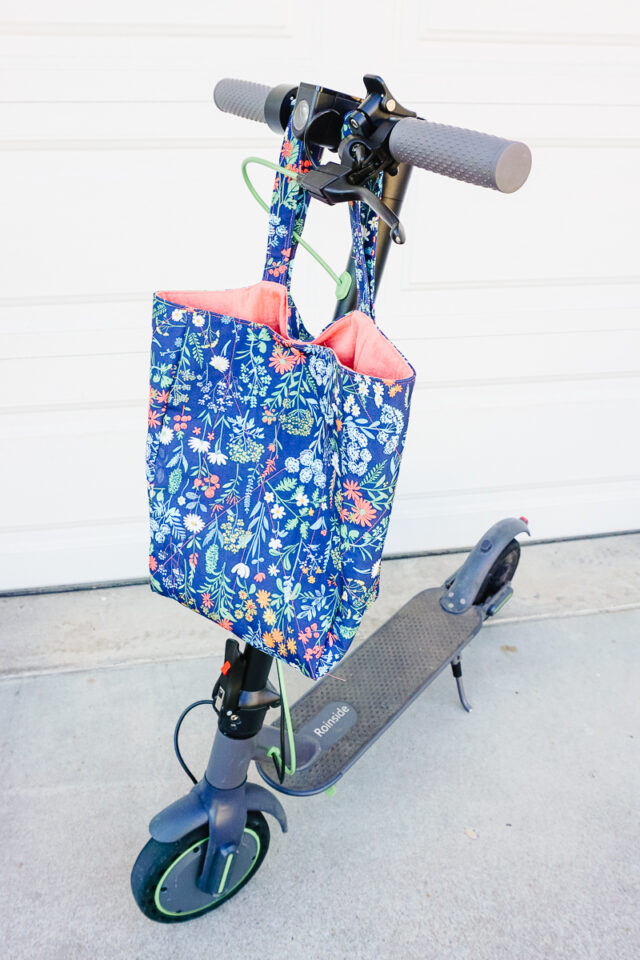
Learn how to sew a bag for an electric scooter with a free sewing pattern. This bag sewing project is a great gift for kids and teens.
This summer two of my kids earned and saved their money to buy electric scooters. They love going to nearby stores with their friends and being able to get to friends’ houses without me driving them.
They don’t ride their scooters to school, but they often carry a water bottle, snacks, or a game when they go out. One friend was carrying her water bottle as she rode her scooter, accidentally dropped it, and broke it.
They needed a bag that could hook onto their electric scooters to carry what they needed. I was looking at regular bike handlebar bags, but they don’t work with the shape, light, and wires on an electric scooter. I designed two different scooter bags that work with electric scooters. The free version is a basic tote like bag with the straps to hook on. The paid version is a tote bag with pockets inside, a flap to cover, and the straps to hook on.
To get the free sewing pattern, scroll to the end of the tutorial. Put your email address in the form under “Get the Free Sewing Pattern Here.” Once you confirm that you want to receive emails from Heather Handmade, the free pattern will be sent to your email address. Check your spam and promotions for the email.

What fabric should I use to make a scooter bag?
This bag needs sturdy fabric like cotton canvas for the outer bag and then quilting cotton for the pockets and lining inside. Not only is it sturdy, it’s better at holding its shape and its washable.

How do I make the scooter bag hold it’s shape?
To make the scooter bag hold it’s shape you need a combination of mid to heavy weight fusible interfacing and fusible fleece. You will add the interfacing to the canvas and the fusible fleece to the quilting cotton. Adding quilting lines to the lining is cute and gives it extra strength and durability.

What’s the difference between the free scooter bag pattern and the paid scooter bag pattern?
The free scooter bag pattern is like an open tote bag with no pockets inside. It has straps to hook onto the handles of the scooter and straps to hook onto the bar.
The paid scooter bag pattern is a tote bag with three inner pockets and a flap to cover the bag. It also has the straps that hook onto the handles and bar.

Do you love to sew? Try one of these sewing projects:
- Beginner sewing projects
- Gifts to sew
- Bag sewing projects
- Summer sewing projects
- Back to school sewing projects
- Sewing projects for teens
- Free sewing patterns for kids

How to Make a Bag for an Electric Scooter
Supplies
- Free scooter pattern sewing pattern – get it at the end of the post
- 1 yard of cotton canvas
- 1 yard of quilting cotton
- 1 yard of fusible fleece
- 1 yard of medium to heavy fusible interfacing
- Plastic snaps and pliers*
- Velcro
- Sewing tools
- Sewing machine
Remember there’s anoter version that is a messenger style with three internal pockets. Get the scooter bag pattern for just $5!

Instructions
Tape the pattern together in this arrangement.

Cut out all the pieces.
- From canvas: one bag, two long straps, two short straps
- From quilting cotton: one bag
- From fusible fleece: one bag
- From fusible interfacing: one bag, two long straps, two short straps
Fuse the interfacing to the wrong side of the canvas. Fuse the fusible fleece to the wrong side of the quilting cotton.

Sew quilting lines in the quilting cotton and fusible fleece to keep the layers together and create a little bit of strength.

(Only three straps are pictured, but make four!)
Fold and match up the long edges of the straps with right sides together. Sew each strap with a 1/4 inch seam allowance. Leave a hole for turning.

Trim the corners.

Turn the straps right side out.

Pinch the hole closed. Edgestitch around the straps to close the hole and neaten the edges.

Sew the two short straps horizontally on the back section of the bag. One will be two inches from the top and the other will be two inches from the bottom. Sew a vertical line in the center of the strap to secure it to the bag.
Sew the two long straps on the back top of the bag. Line up the short ends with the top of the bag and one inch from the sides. Baste in place.

Match up the straight edges of the cut out corners right sides together and pin. Do this to all the corners to the outer bag and lining bag. Sew the edges with a 1/4 inch seam allowance.

Turn one of the bags right side out. Slide it into the other bag so that they are right sides together. Line up the top edges. Sew around the top with a 1/4 inch seam allowance. Leave a hole for turning.

Turn the bag right side out and push the lining down inside the outer bag. Press the top edge. Pinch the hole closed and edgestitch the top to close the hole and secure the top edge.

Add a plastic snap to the center top of each side of the bag to keep it closed.

Test the straps on the scooter and sew Velcro onto the straps.

Put it on a scooter. You finished!

Get the Free Sewing Pattern here!

If you make something using this sewing project, I’d love to see! Please share it on social media with the hashtag #heatherhandmade and tag me!

I believe small sewing moments can create great joy. Find your own “right” way to sew. -Heather