
How to Make a Garden Kneeler + Sewing Pattern

This post may contain affiliate links.
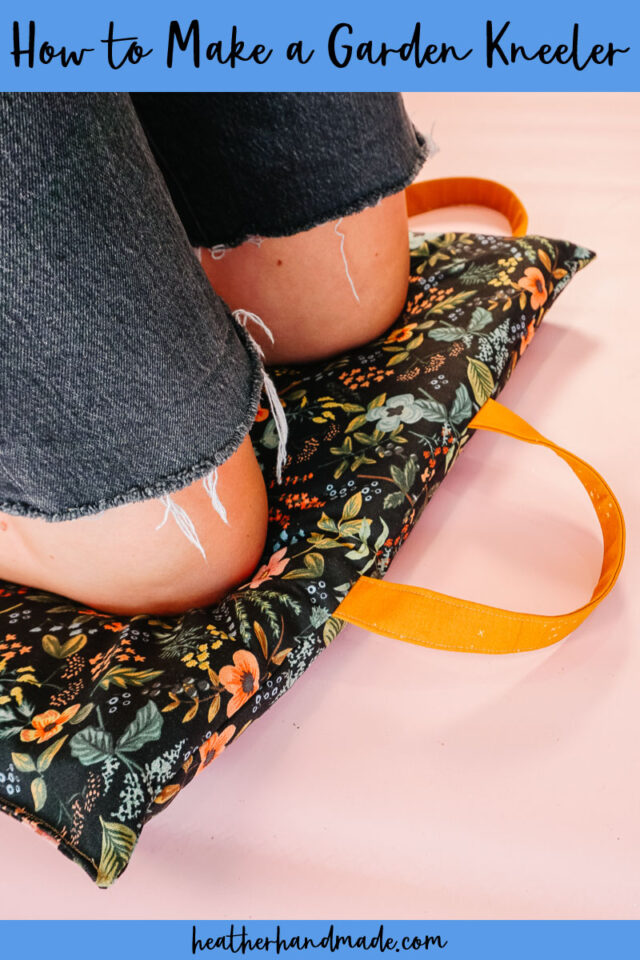
Learn how to make a garden kneeler with a useful sewing pattern. This beginner sewing project makes gardening comfortable and easy on knees.
I love having fresh vegetables from my garden every year. I love weeding and taking care of the plants through the summer.
Do you know what I don’t like? Squatting to weed, sitting on hard ground to weed, or kneeling on hard ground to weed. I needed something to making gardening and weeding more comfortable.
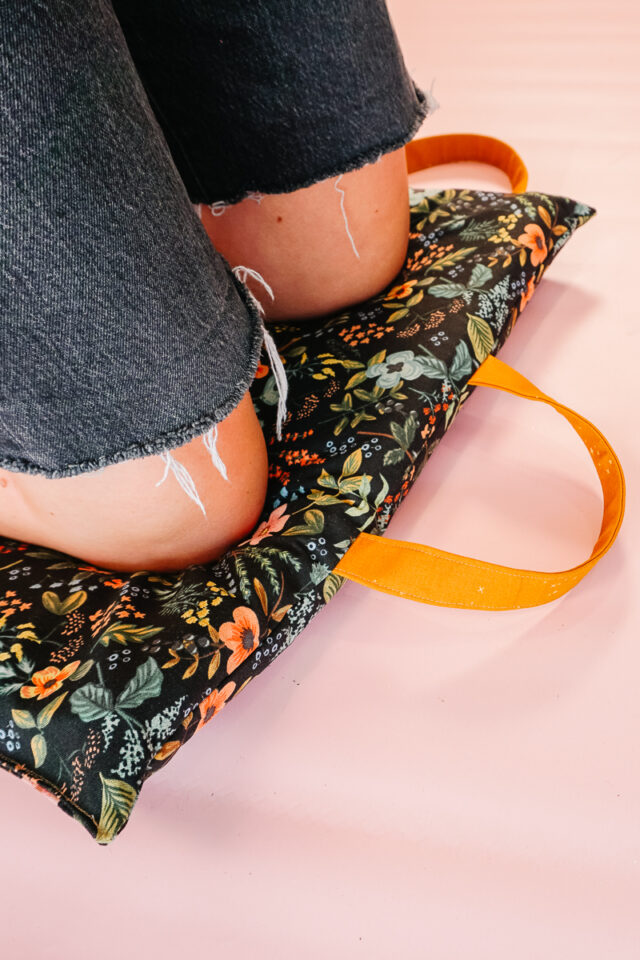
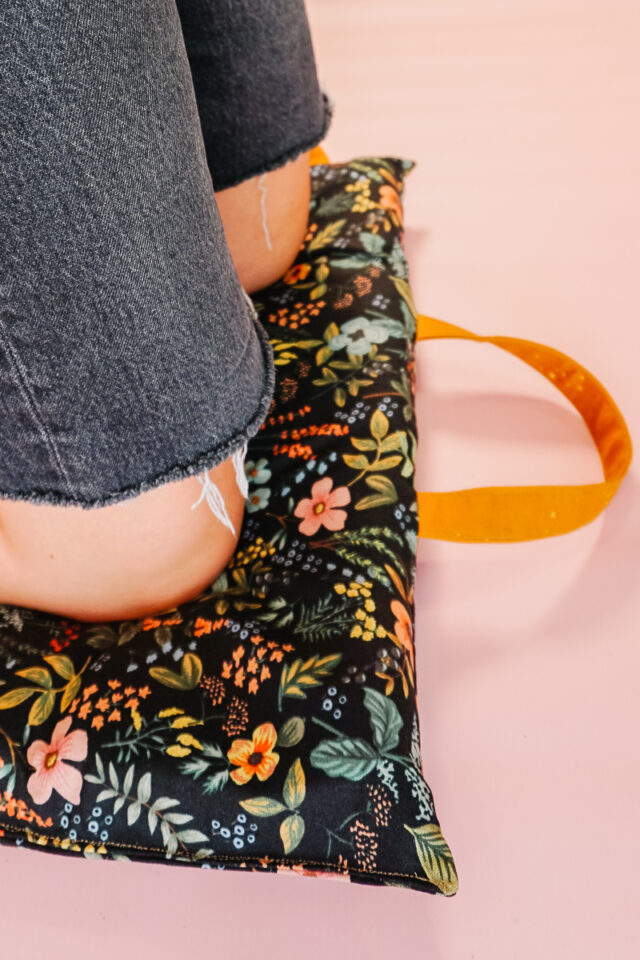
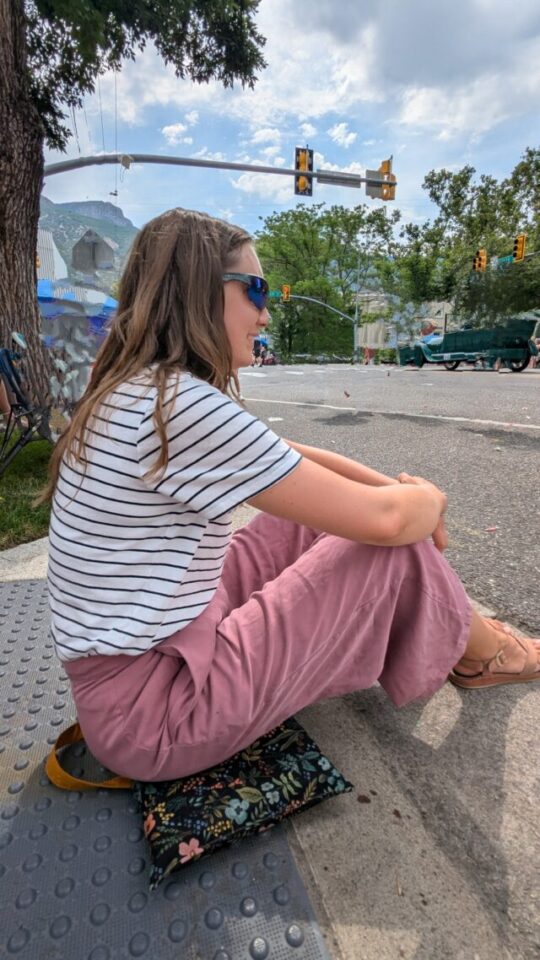
Enter the garden kneeler sewing project! It’s a little comfy knee cushion that also works great for sitting. (I tried it at a parade, and it was fantastic! See a picture of me sitting on the cushion lower in the article.)
What is a Garden Kneeler?
A garden kneeler is a soft knee cushion and stabilizer to keep knees and backs from getting sore. Sometimes it’s a little bench, sometimes it’s knee pads, and sometimes it’s a little cushion.
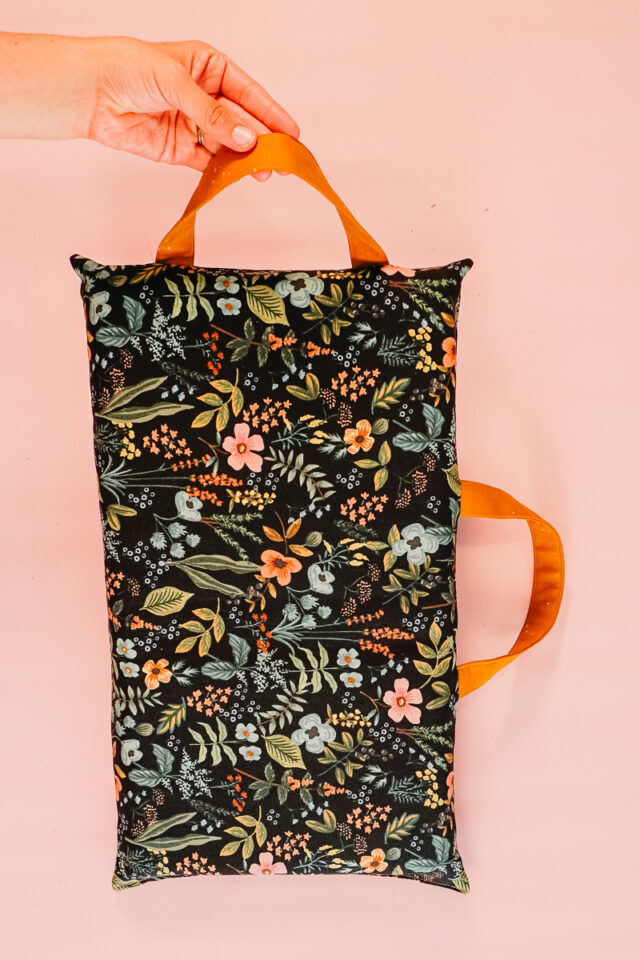
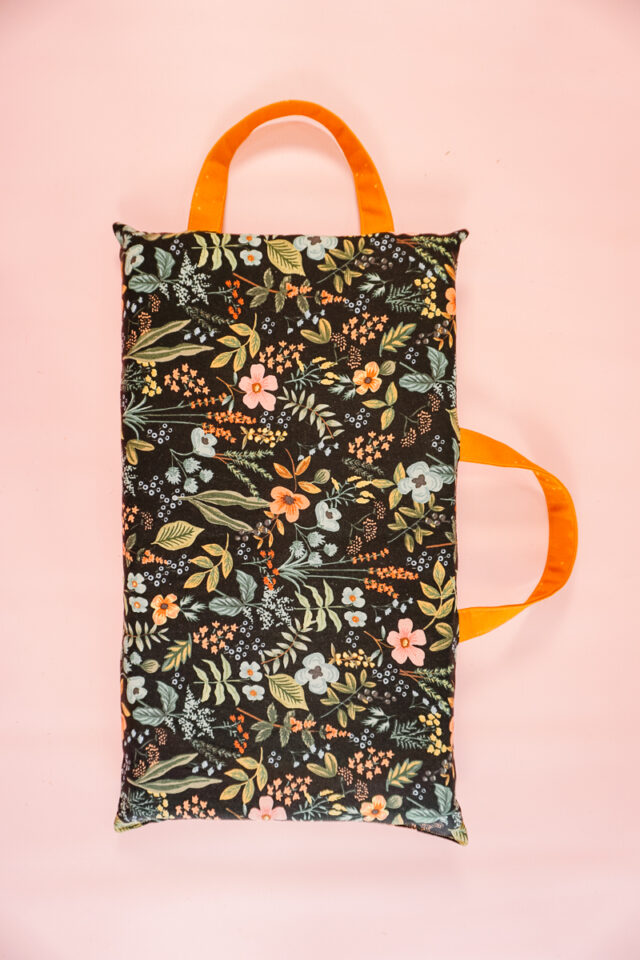
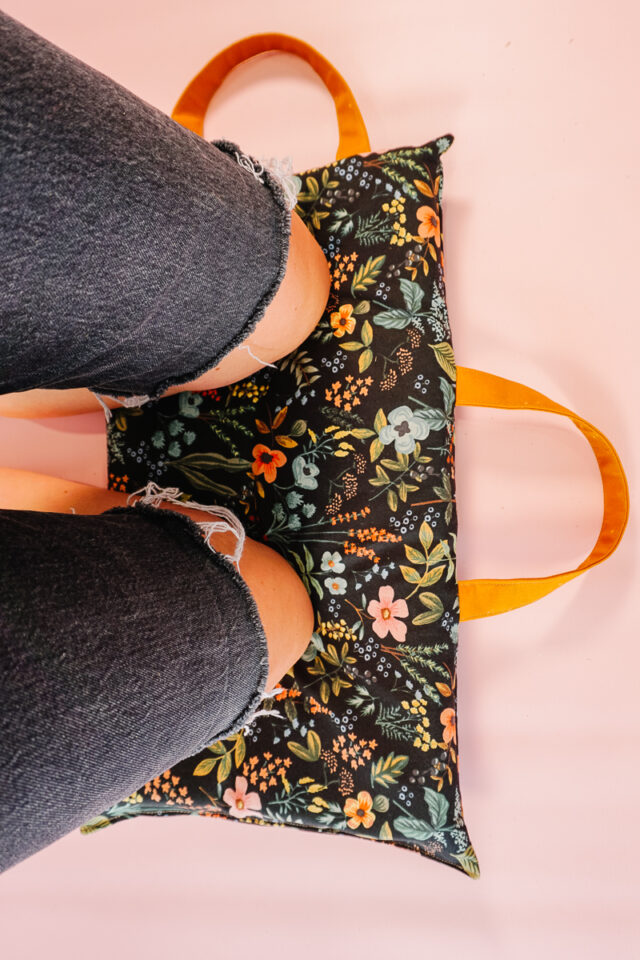
Do I need one or two handles?
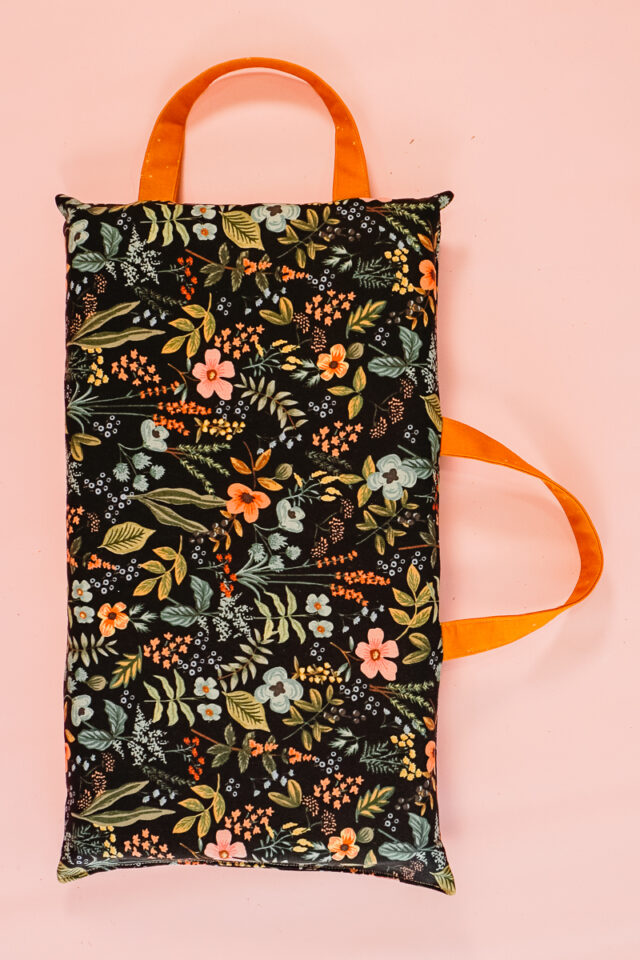
I wanted to make sure that the handle would work on both the short side and the long side. It’s a personal preference where you want the strap. I didn’t know if I would be grabbing for the handle from the side or from the front.
You do not need both handles. You can have one and choose the side that you want it on.
What fabric should I use to make a garden kneeler?
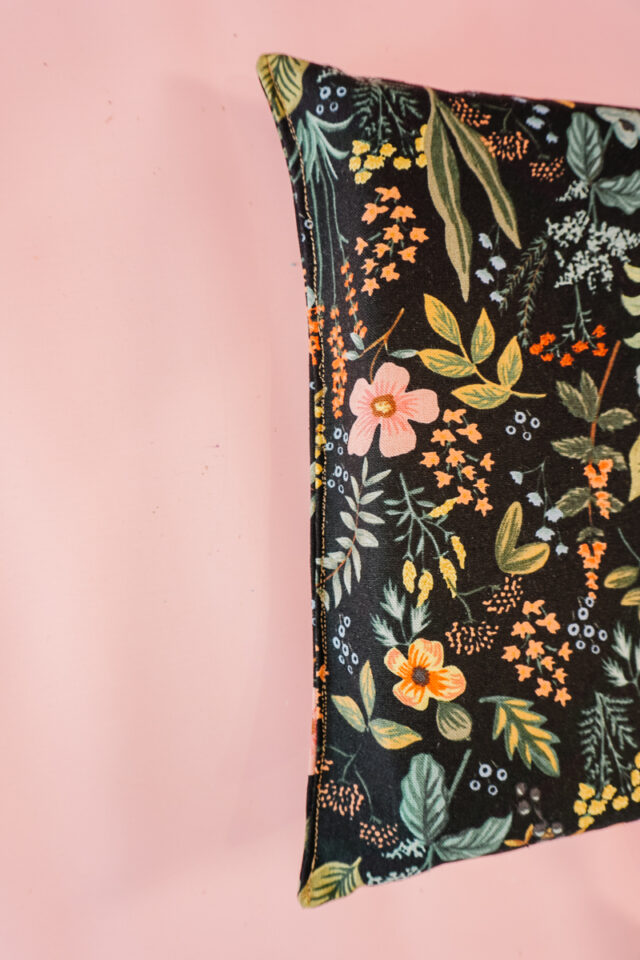
You want a strong and durable fabric, since the garden kneeler will be outside in the grass, dirt, and rocks. I recommend using a canvas fabric with fusible interfacing added to the back to make it even more durable.
I used four layers of quilting cotton with interfacing for the handles.
What cushion should I use inside a garden kneeler?
You can buy 2 inch foam and cut it to size to use in the garden kneeler. You can use many layers of batting. I had an old foam pillow that I cut up and used inside.
I also wonder if you can use an old towel folded up and sewn inside, but I didn’t test it.
We went to a small town parade this summer and circumstances made it so we couldn’t bring folding chairs. I brought the garden kneeler instead and it was the perfect cushion to sit on and watch the parade. I was comfortable the whole time on the garden kneeler!
Love to sew? Check out these other sewing projects:
What is a PDF sewing pattern?
A PDF pattern is a sewing pattern designed on the computer and organized so that it can be printed on several letter or A4 size pieces of paper.
I love using PDF sewing patterns because if the pattern gets ruined or if my children or I changed sizes, I can always print it again. It’ll never be destroyed since I have a digital version!
How do you use a PDF sewing pattern?
Open the PDF on a computer and click print. When printing make sure that the scaling is set to 100% or no scaling so that the pattern prints at the correct size.
Once the pattern is printed it can be taped together to get the full size. Then the pattern can be cut for each pattern piece size or individual sizes can be traced so that the pattern can be used again and again. Learn how to use PDF sewing patterns.
How to Make a Garden Kneeler
Supplies
- 1/2 yard of canvas
- scrap of quilting cotton (for the handle)
- 1 yard of fusible interfacing
- 10 inch x 17 inch piece of foam or cushion
- sewing tools
- sewing machine
Do you just want the pattern and tutorial as a PDF? Get the pattern and tutorial for just $5. You won’t need to access the internet every time you want to make it. Or get the Pattern Bundle with ALL the PDF tutorials!
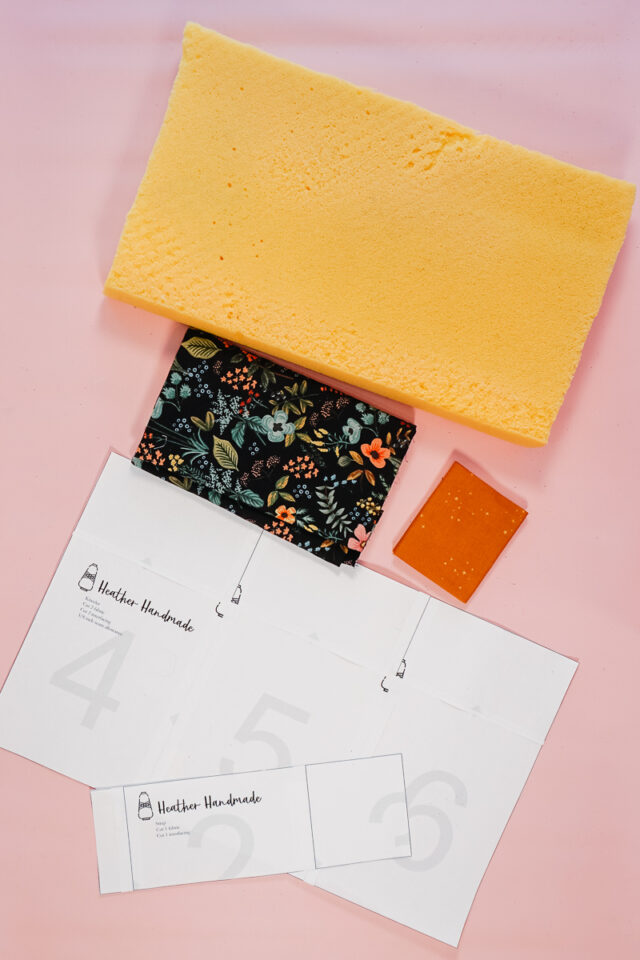
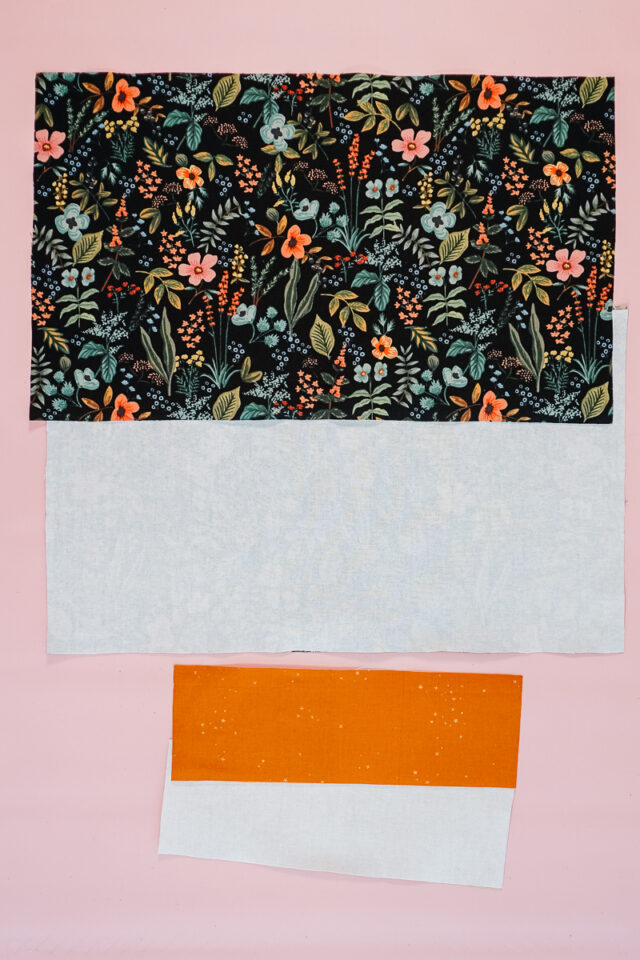
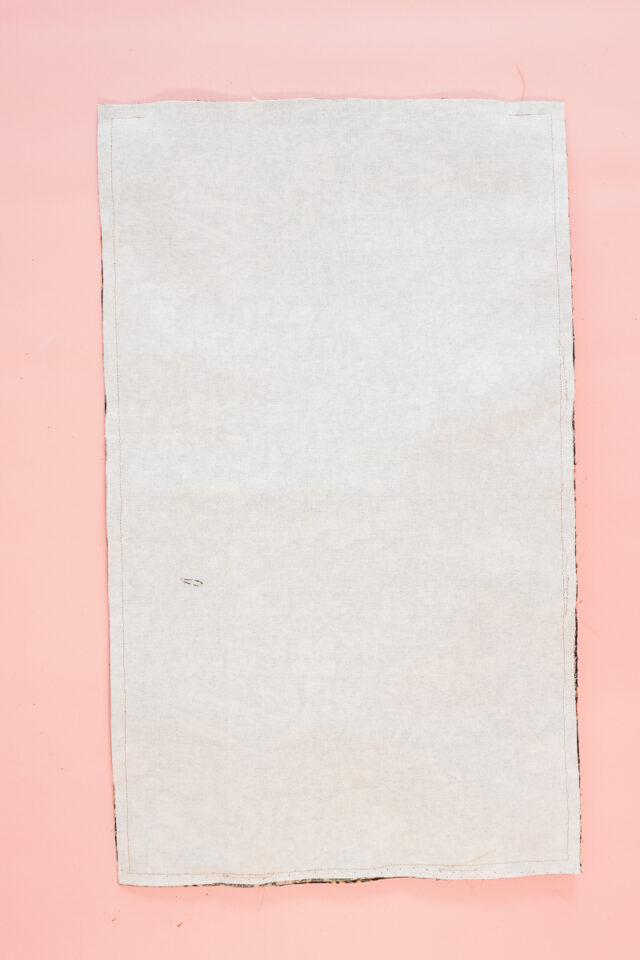
Cut 2 pieces of canvas that are 18 inches wide and 11 inches tall. Cut two pieces of fusible interfacing the same size.
Cut 1 or 2 pieces of quilting cotton that are 13 inches wide and 4 inches tall. Cut 1 or 2 pieces of fusible interfacing the same size. (Cut 1 if you want one handle or 2 if you want two handles.)
Press the fabric flat.

Iron the fusible interfacing to the back of the canvas and the quilting cotton.
Press the handle with wrong sides together matching up the long edges. Open it back up. Take each long edge and fold with wrong sides together so the long edge meets with the center crease. Press in place. Open it back up. Fold the long edges into the center. Then fold the center fold so that the long edges are enclosed inside. Press in place.
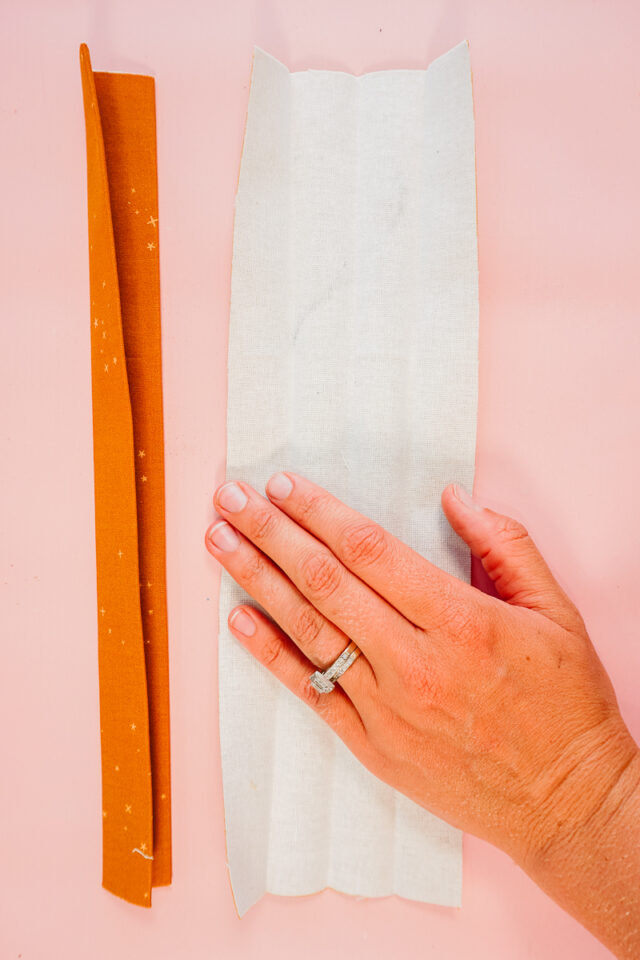
Sew along each long side 1/8 inch from the edge to secure.

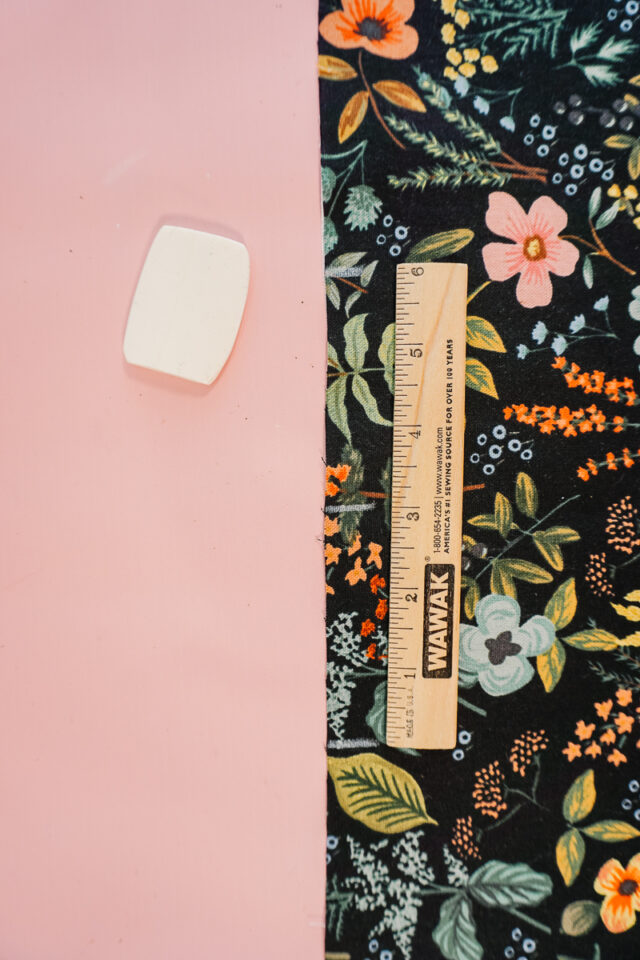
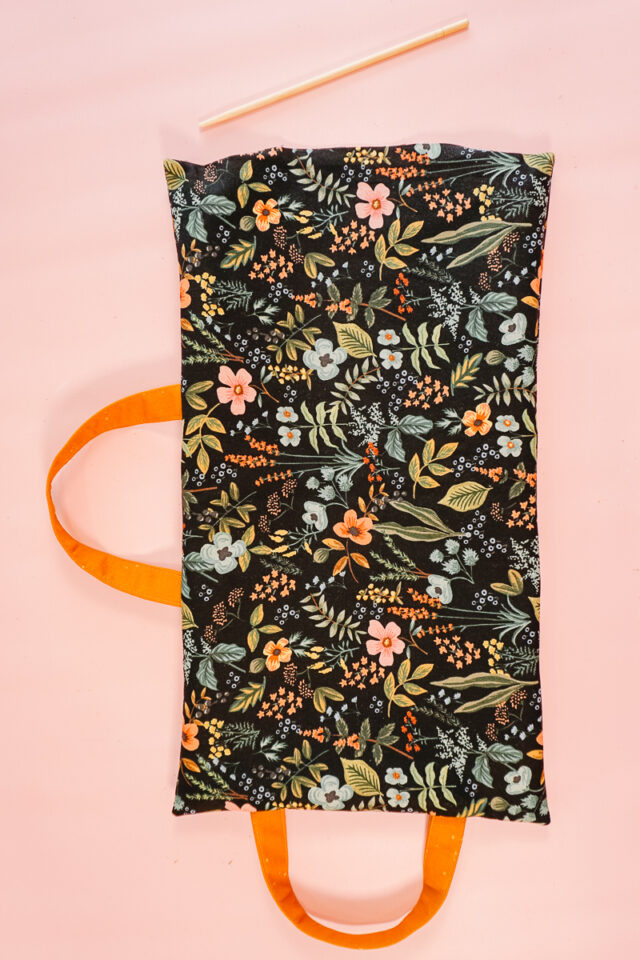
Decide which side (long or short) you want the handle to be. Mark the center of that side. Mark 3 inches away from each side of the center.
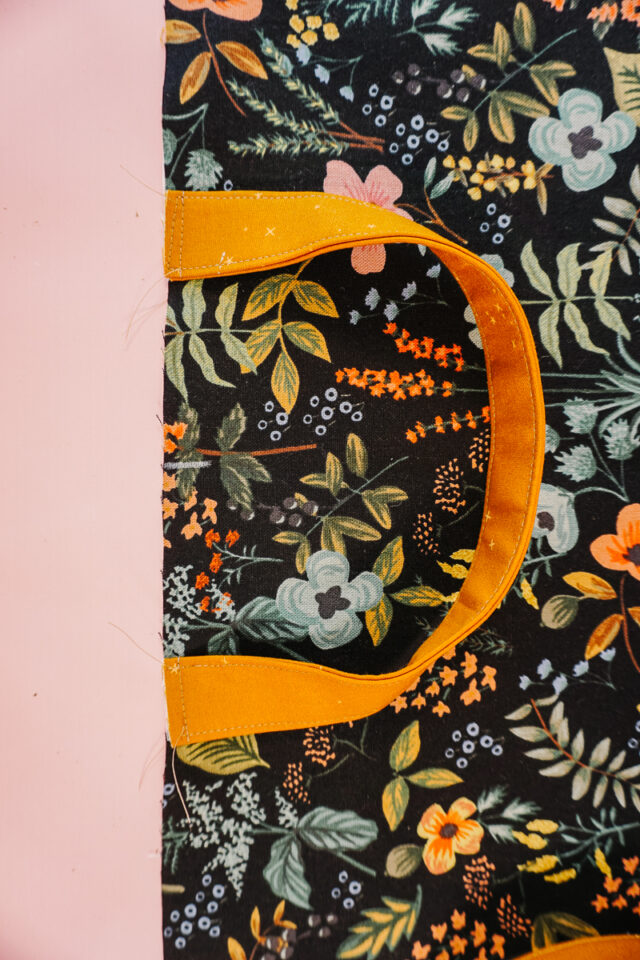
Pin or clip the short ends of the handle onto the 3 inch marks.

Baste the ends of the handles in place with a 1/4 inch seam allowance.
Place the canvas pieces right sides together with the handle in between. Pin around all the edges.
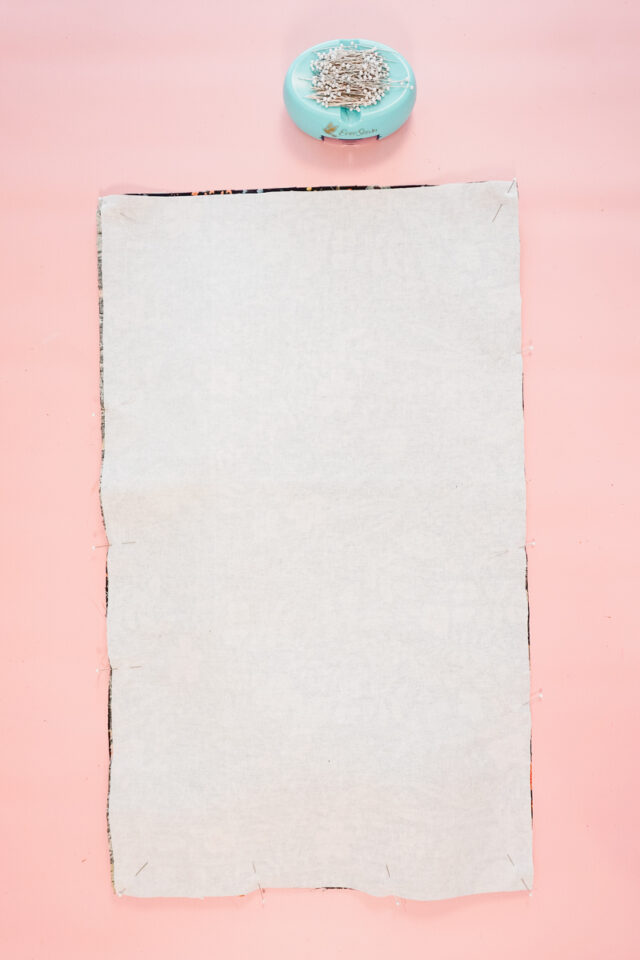
Sew around the edge with a 3/8 inch seam allowance. Leave most of one short end open. Backstitch when you start and when you stop and pivot at the corners.
Trim the corners.
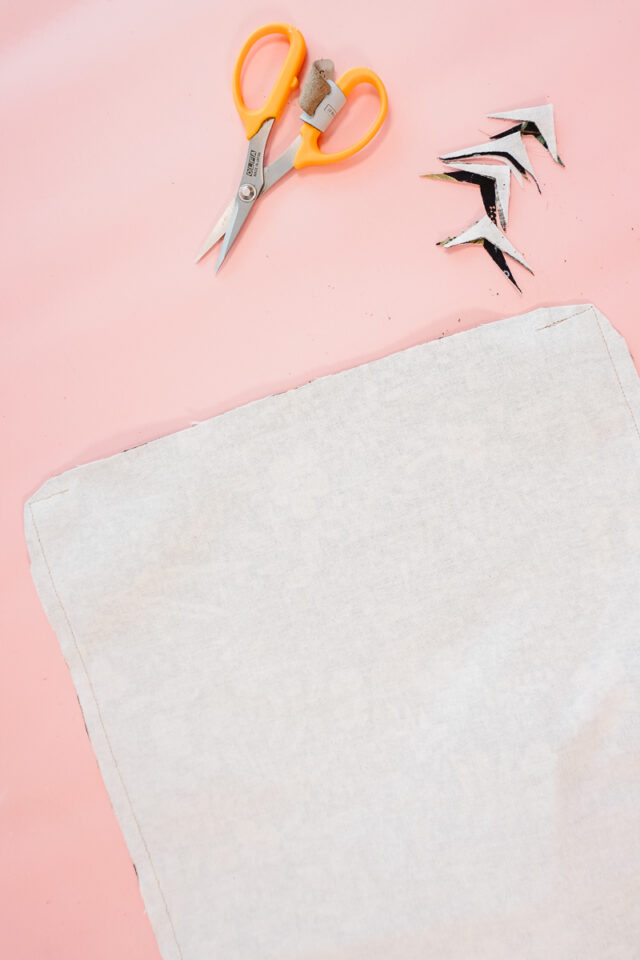
Turn the canvas right side out and carefully poke out the corners.
Slide the foam inside and adjust so that it’s sitting in the right place.
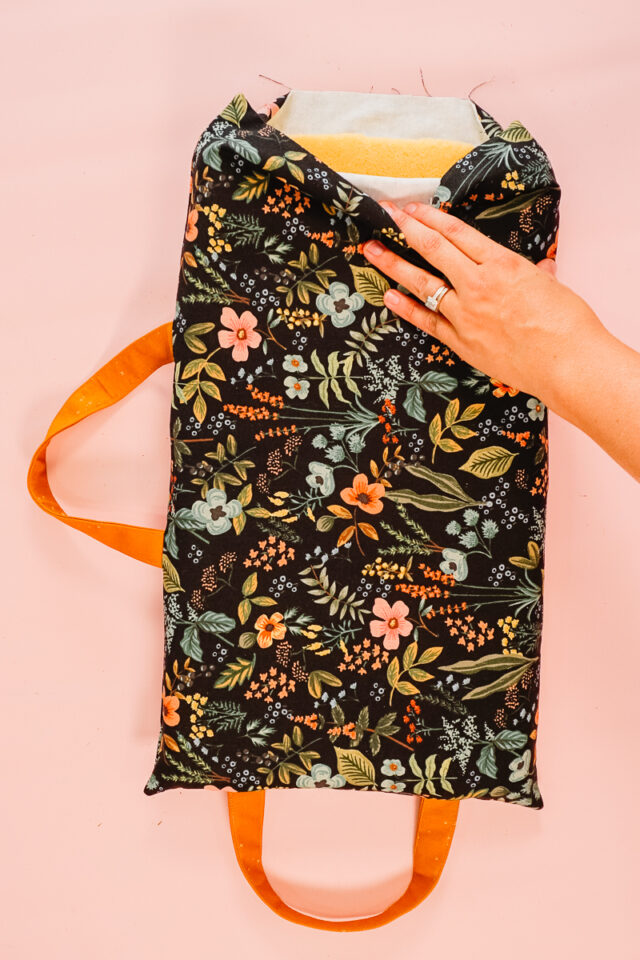
Pinch the hole close with the seam allowance tucked inside. Sew the hole closed by sewing 1/8 inch from the edge.
You finished!
If you make something using this sewing project, I’d love to see! Please share it on social media with the hashtag #heatherhandmade and tag me!

I believe small sewing moments can create great joy. Find your own “right” way to sew. -Heather
Would like to make this as a cover for my Dollar tree cushion. I’d put the handles on it, but I could take off to wash in washing machine.
what a great idea!