
Free Pumpkin Sewing Pattern for Fall

This post may contain affiliate links.
Learn how to make a stuffed pumpkin with a free sewing pattern. This beginner sewing project is a great for fall and Halloween!
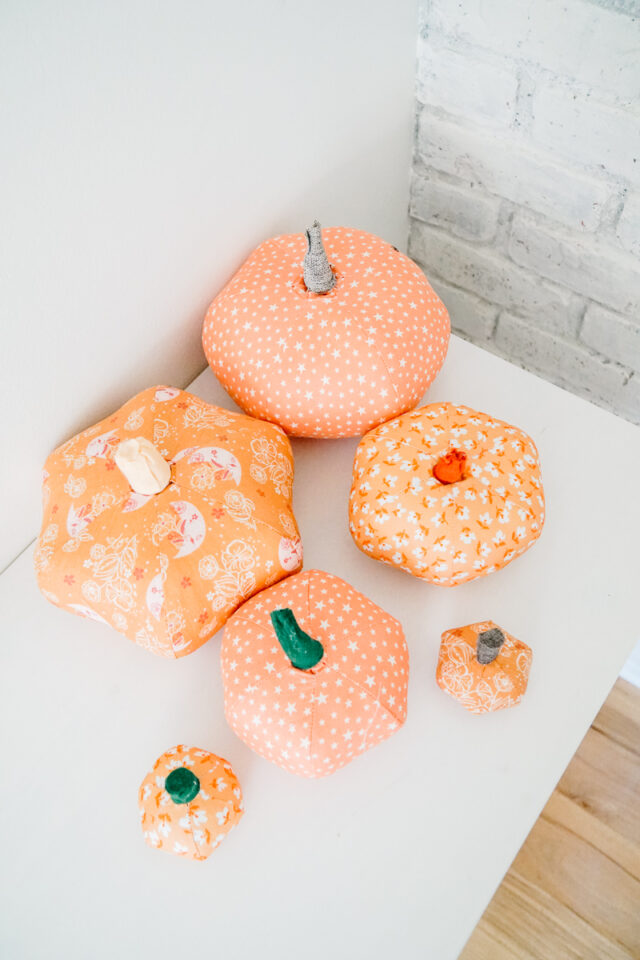
I get so excited for Fall, and I want to get out all my stuffed pumpkins to decorate. I am a minimalist decorator, but I have a large collection of fabric pumpkins because they make me so happy!
Having a fall birthday makes autumn time extra fun and I celebrate by having pumpkins throughout my home. I had so much fun making this pumpkin sewing pattern, and I couldn’t wait to share it with you! Get the free pumpkin sewing pattern at the end of the post!
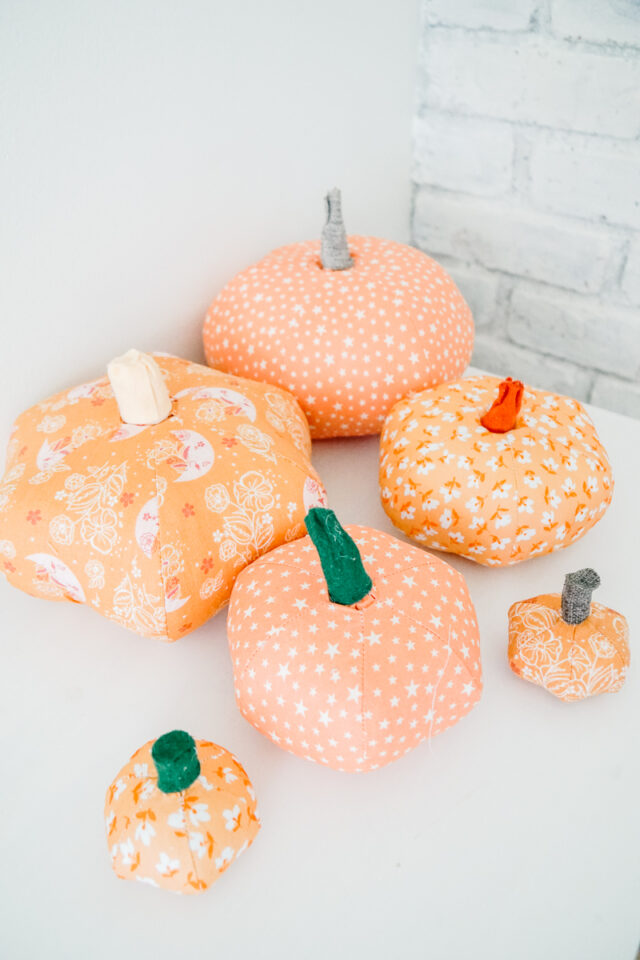
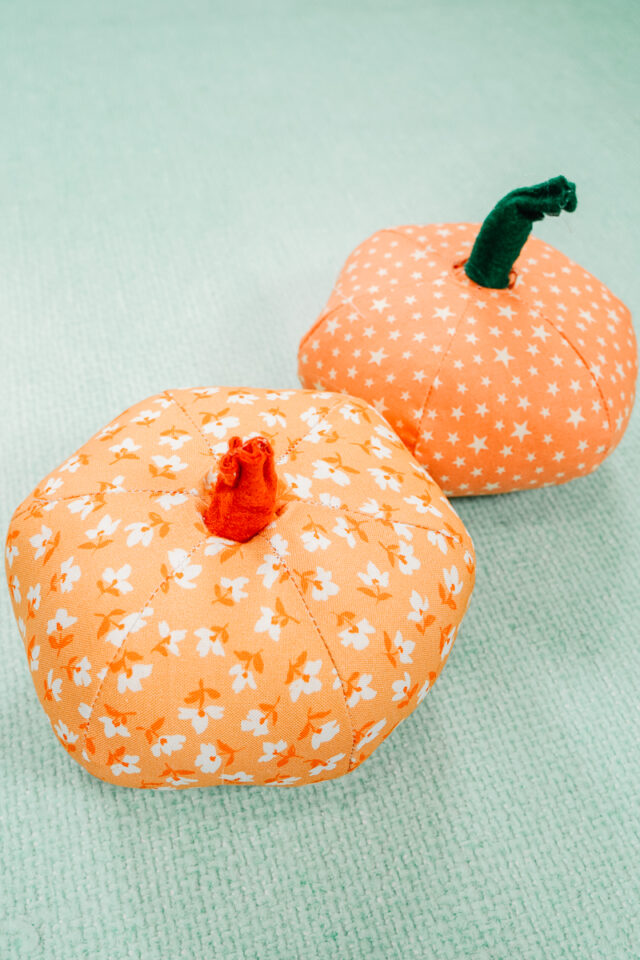
It was so fun picking out peach and orange fabric to make these cute pumpkins. I chose small scattered prints that weren’t directional so they would work best with the pattern pieces.
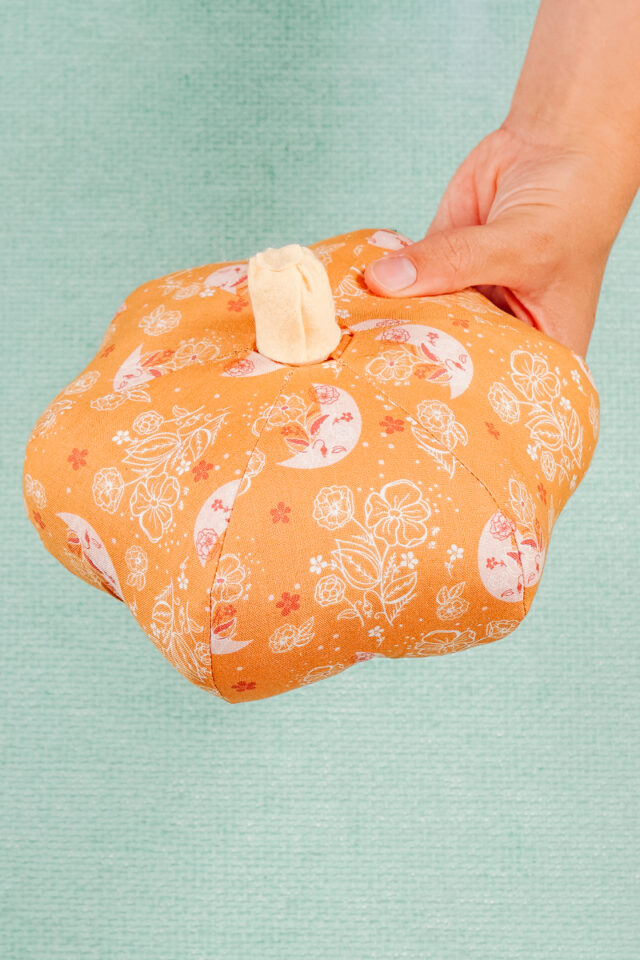
Depending on how much you stuff the pumpkin will change the pumpkin shape. I did make the pattern piece to be wide and flat like pumpkins, but the stuffing and seams will change in relation to each other.
If it’s not stuffed enough it is lumpy, but if it’s stuffed too much than the seams lose their shape. The best shape comes from a full but not firm amount of stuffing.

What fabric should I use to make a fabric pumpkin?
This pumpkin sewing pattern is designed to work with quilting cotton. Quilting cotton is firm enough to help the pumpkin keep it’s shape without being too stiff to make it hard to work with. Orange or peach fabric with a small print works the best to show the color, the print, and the shape of the pumpkin.
What is a PDF sewing pattern?
A PDF pattern is a sewing pattern designed on the computer and organized so that it can be printed on several letter or A4 size pieces of paper.
I love using PDF sewing patterns because if the pattern gets ruined or if my children or I changed sizes, I can always print it again. It’ll never be destroyed since I have a digital version!
How do you use a PDF sewing pattern?
Open the PDF on a computer and click print. When printing make sure that the scaling is set to 100% or no scaling so that the pattern prints at the correct size.
Once the pattern is printed it can be taped together to get the full size. Then the pattern can be cut for each pattern piece size or individual sizes can be traced so that the pattern can be used again and again. Learn how to use PDF sewing patterns.

What sizes are the three pumpkins?
The large pumpkin is 7.5 inches in diameter, the medium pumpkin is 5.5 inches in diameter, and the small pumpkin is 2.5 inches in diameter. The height of each pumpkin changes with how much you stuff it and how big you make the stem.
Do you love to sew? Try some of these sewing projects:
- Fall sewing projects
- Halloween sewing projects
- Free PDF sewing patterns
- Free Halloween sewing patterns

How to Make the Pumpkin Sewing Pattern
Supplies
- Free pumpkin sewing pattern – get it at the end of the post
- 1 fat quarter of orange quilting cotton
- Stuffing
- Sewing tools
- Felt or ribbon
- Hot glue gun and hot glue
- Sewing machine
Do you just want the pattern and tutorial as a PDF? Get the pattern and tutorial for just $5. You won’t need to access the internet every time you want to make it. Or get the Pattern Bundle with ALL the PDF tutorials!

Instructions
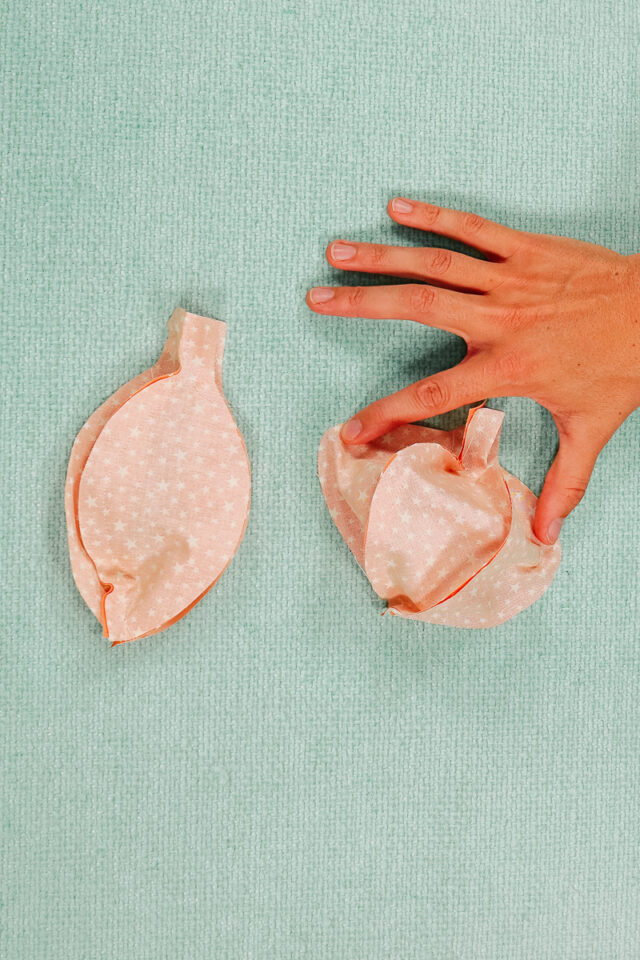
Cut out 6 pattern pieces of the pumpkin in the size that you want. Transfer the dot markings to the fabric.
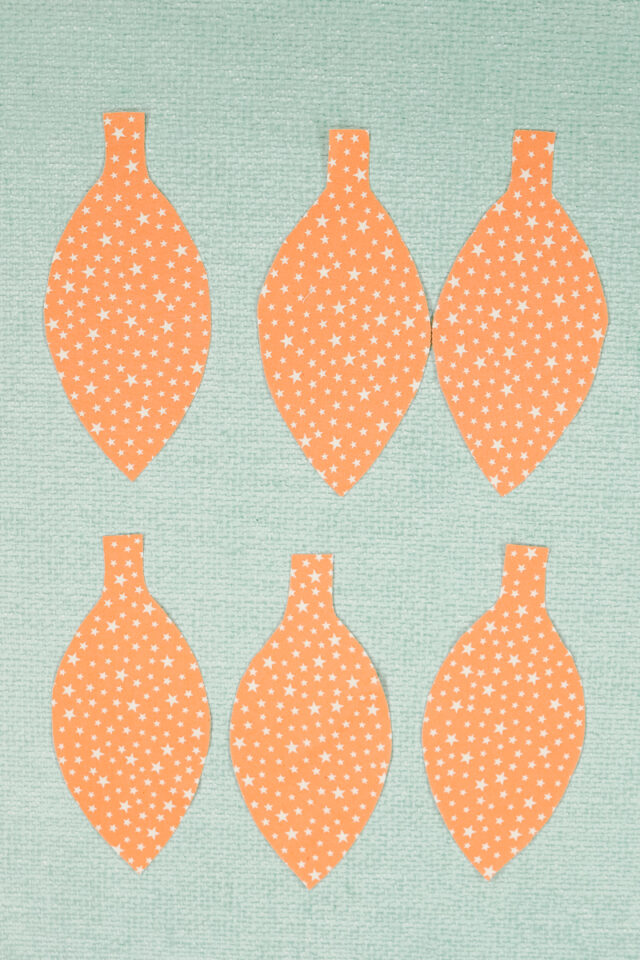
Working with two pattern pieces, pin the curved sides right sides together and matching the dots. Sew the curved line backstitching at the beginning and ending dot. Pin another pattern piece to one side with right sides together and sew the curved line between dots. You have finished one half of the pumpkin.
Do the same to the other three pattern pieces so that you have two halves.
Don’t forget to backstitch at the beginning and end of each stitching line.
Pin the two halves right sides together matching the dots at the top and the dots at the bottom. Each half has two seam allowances that intersect at the bottom point. Make sure these seam allowances are folded away from the center.
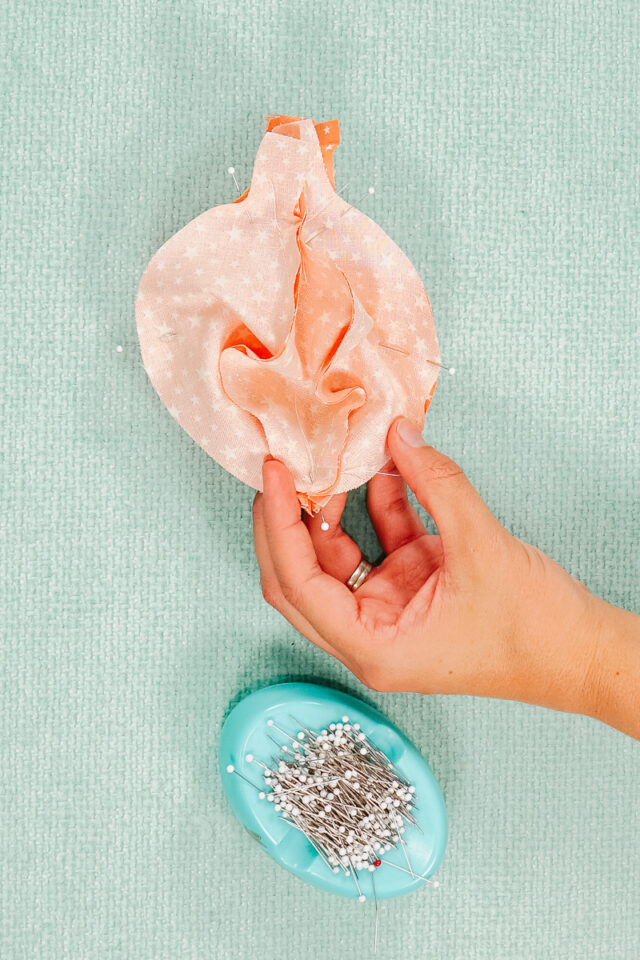
Sew around the two halves starting at the dots and going all the way around the bottom curve to the dots on the other side. Backstitch when you start and when you stop.
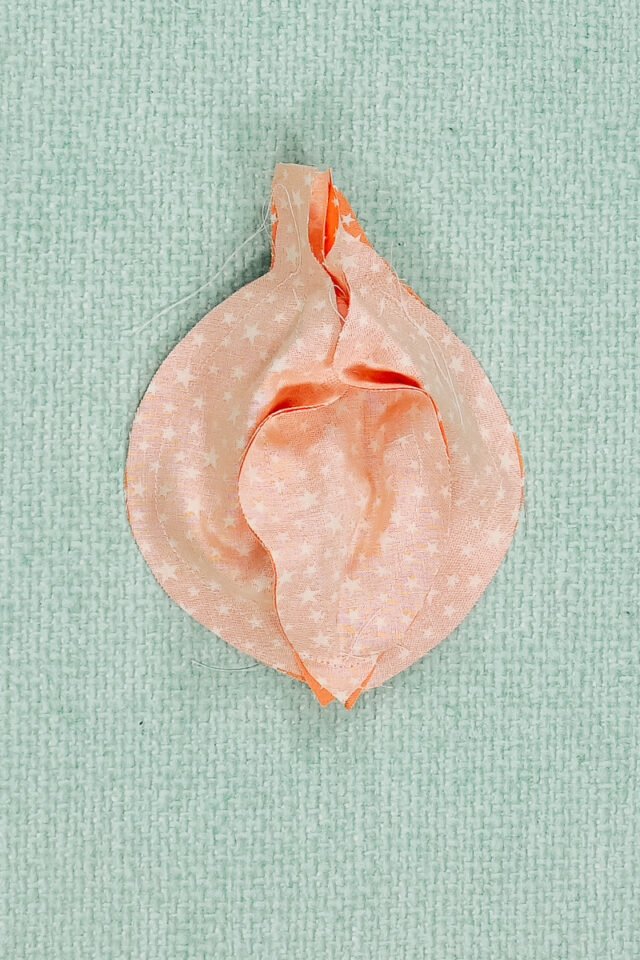
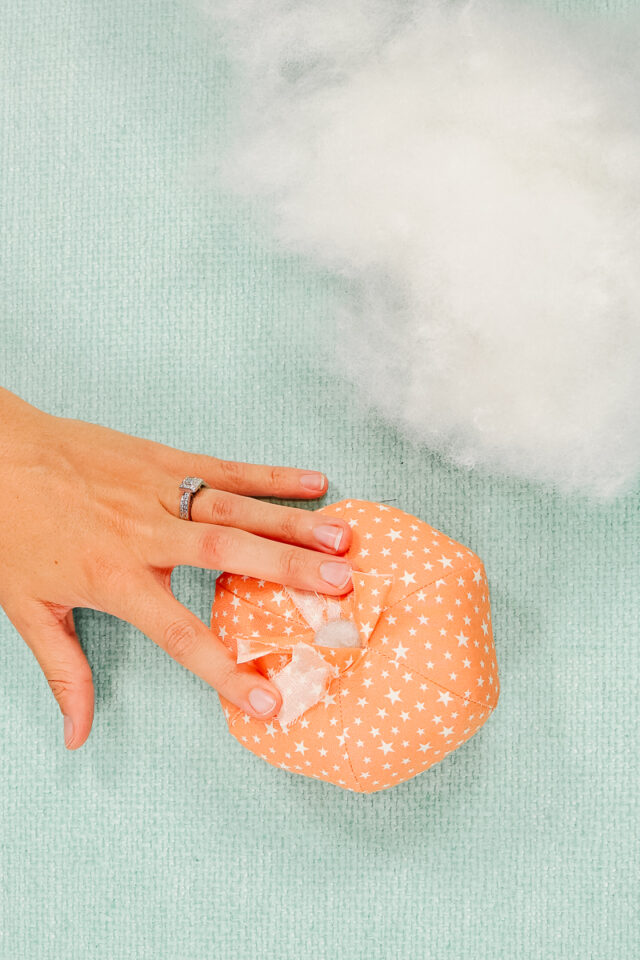
Turn the pumpkin right side out through the hole at the top. The pumpkin will look like a deflated balloon.
Stuff the pumpkin through the hole in the top. Use small pieces to fit through the hole and give the pumpkin a uniform shape.
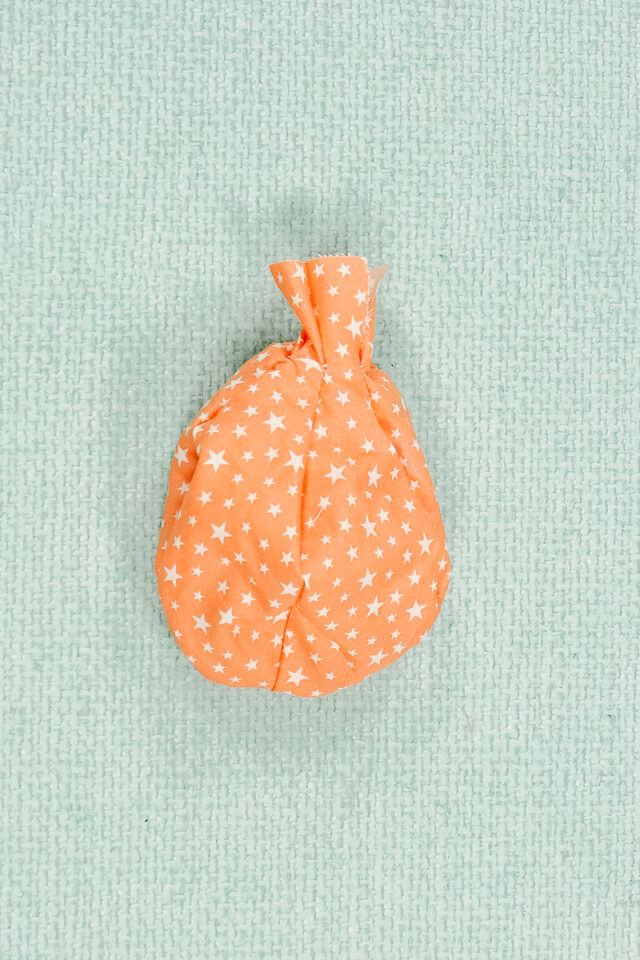
Hot glue the top fabric flaps up into a stem shape. Cover the fabric flaps with a piece of felt or ribbon wrapped and glued into a cylinder. Add wrinkles or bends in the stem for a pumpkin stem look.
You finished!
Get the Free Sewing Pattern here!

If you make something using this sewing project, I’d love to see! Please share it on social media with the hashtag #heatherhandmade and tag me!

I believe small sewing moments can create great joy. Find your own “right” way to sew. -Heather
Thank you for the free pumpkin pattern. Thank you also for all of the free patterns. It is so great to get them.
You’re welcome!
I would love to sew pumpkins not for Halloween just fall season till November I like sewing them anything to sew for for crafts
Pumpkins are the best for decorating for all of Fall!
Thanks for the pumpkin patterns