
Free Hand Sanitizer Spray Holder Sewing Pattern

This post may contain affiliate links.
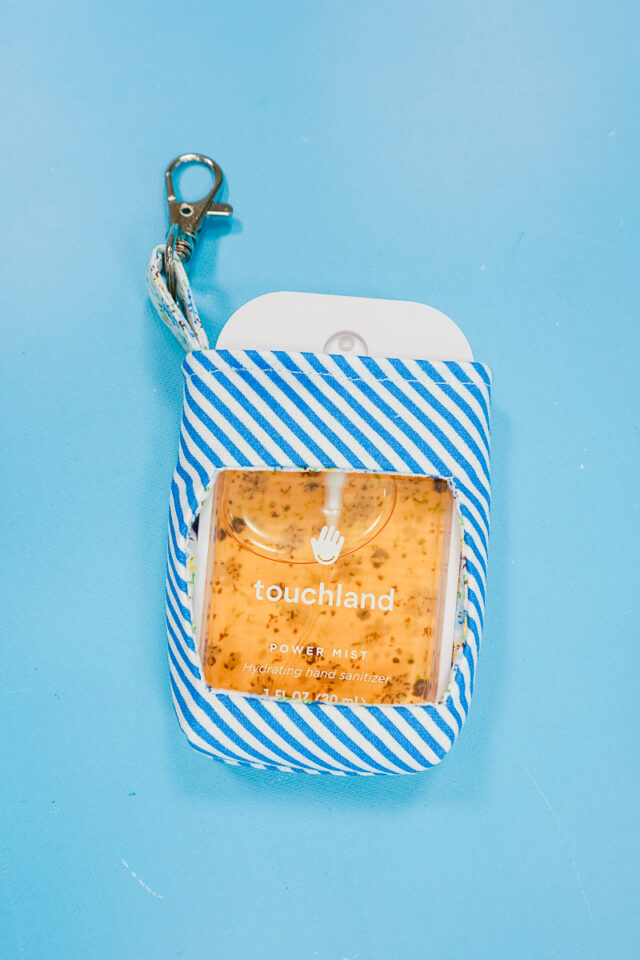
Learn how to sew a hand sanitizer spray holder with a free sewing pattern. This small sewing project keeps rectangular hand sanitizers handy.
There’s a new type of hand sanitizer in town. At least this is what my kids tell me! There are multiple brands that now sell hand sanitizer spray in a rectangular shape.
Since it seems to be such a thing this year, I decided to make a sewing pattern that holds these rectangular hand sanitizers. There was lots of design changes to make this work, but I finally settled on the perfect size and shape!
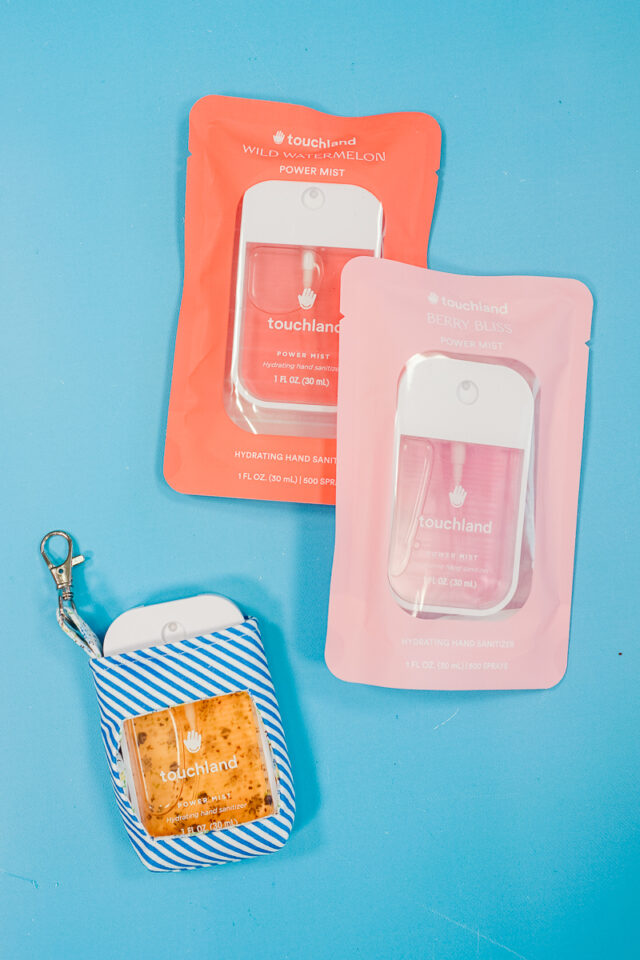
If you are giving Touchland or Scent Theory hand sanitizers as gifts for the holidays, this is a fun holder you can make to go with it!
To get the free sewing pattern, scroll to the end of the tutorial. Put your email address in the form under “Get the Free Sewing Pattern Here.” Once you confirm that you want to receive emails from Heather Handmade, the free pattern will be sent to your email address. Check your spam and promotions for the email.

What hand sanitizers does this holder work with?
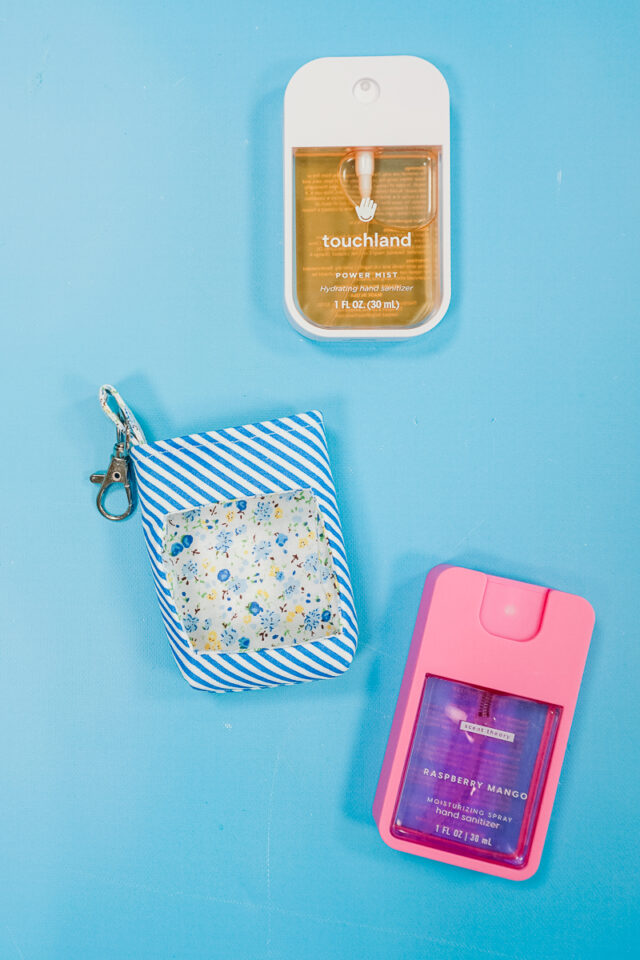
These work with a hand sanitizer spray mist that comes in a rectangular shape. There’s a window where you can see the liquid, and a button and misting hole at the top. I’ve seen this in the Touchland brand and the Scent Theory brand, but I’m sure there are other options.
What fabric should I use?
This holder works best when made from quilting cotton fabric. Quilting cotton is easy to find, easy to sew, and this project is so tiny so you can use all your favorite scraps of fabric.
What interfacing should I use?
Use a fusible lightweight to medium weight interfacing. You want the holder to hold it’s shape and have stability without making it too thick.

Love to sew? Try one of these sewing projects:
- Gifts to sew
- Beginner sewing projects
- Free PDF sewing patterns
- Small sewing projects
- Scrap fabric sewing projects
How to Sew a Hand Sanitizer Spray Holder
Supplies
- Free hand sanitizer spray holder sewing pattern – get it at the end of the post
- 1 ounce size of Touchland hand sanitizer* or Scent Theory hand sanitizer*
- Scraps of quilting cotton
- Scraps of lightweight to medium weight fusible interfacing
- Lobster claw clip*
- Sewing tools
- Sewing machine
Do you just want the pattern and tutorial as a PDF? Get the pattern and tutorial for just $5. You won’t need to access the internet every time you want to make it. Or get the Pattern Bundle with ALL the PDF tutorials!

Instructions
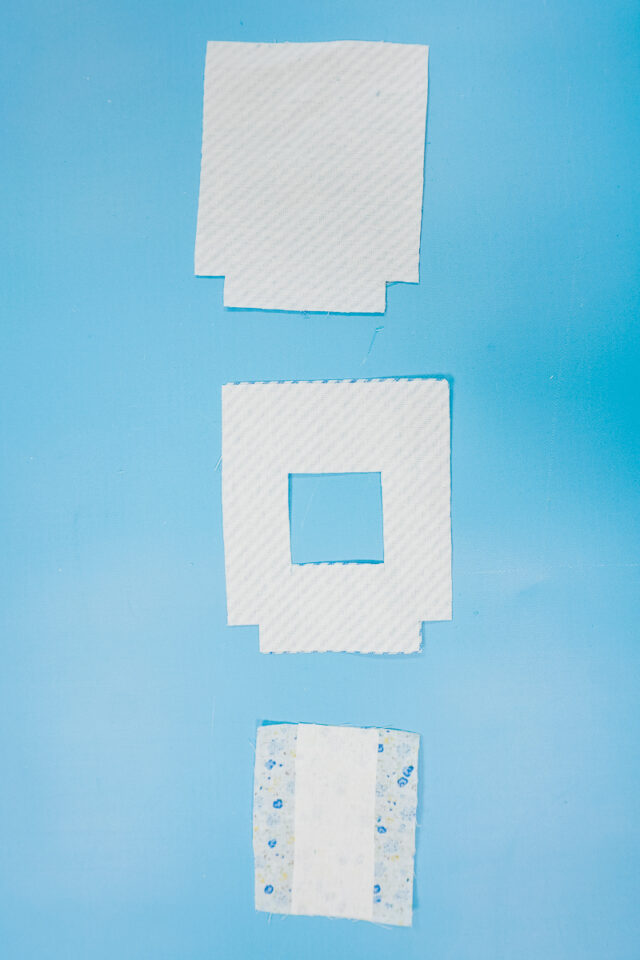
Cut out a front and a back from the outer fabric. Cut out a front and a back from the lining fabric. Cut out a loop from either fabric. Cut out a front, a back, and half a loop from fusible interfacing.

Iron the interfacing to the back of the outer pieces and in the center of the loop.
Place the two fronts right sides together matching up the window. Sew around the window with a 1/4 inch seam allowance.

Clip into each corner close to the stitches without cutting through the stitches.

Push one of the fabrics through the window to the other side so that the fabrics are facing wrong sides together and the window is now a finished seam. Press the seam to get a crisp window.

The front pieces are now attached at the window. Pin the lining back to the lining front moving the outer fabric out of the way. Sew the sides and bottom with a 1/4 inch seam allowance. Backstitch when you start and when you stop.

Sew the outer back piece to the outer front piece in the same way. It’s tricky to show but you will have a outer pieces sewn right sides together and lining pieces sewn right sides together, but they are both connected at the center because of the window.

The bottom edges have the corners cut out. Open the bottom so that the side seam meets up with the bottom seam and the cut out creates a straight line. This is called boxing the corners.
Sew across the edge with a 1/4 inch seam allowance. Backstitch when you start and when you stop. Do all four corners.

Turn the outer fabric right side out and push the lining inside. Now you have a small pouch with a window and fully enclosed seams.

Fold the parts of the loop that aren’t interfacing and fold them in to meet. Press the folds in place. Fold the loop in half so that the cut edges are enclosed inside. Press all three folds in place.

Sew along each side of the loop to secure the folds.

Fold the top edges of the pouch inside 1/4 inch. Pinch them together to enclosed the seam allowances and pin. This is a little finicky and requires patience and careful pinning.
Fold the loop in half meeting the short ends around a lobster claw clasp. Slide the loop between the pinned layers of the pouch on one side and pin.

Sew around the top edge about 1/8 inch around. Sew slowly to make sure all the layers are in the right place. It is easier to sew with the sewing machine foot inside the pouch since it it’s such a small circumference.
You finished!

Get the Free Sewing Pattern here!

If you make something using this sewing project, I’d love to see! Please share it on social media with the hashtag #heatherhandmade and tag me!

I believe small sewing moments can create great joy. Find your own “right” way to sew. -Heather
This is AWESOME! My granddaughters LOVE touchland…although I did find some cheaper options at Walmart also.
I just saw some cheaper options at 5 Below last night!
I’ve found some hand sanitizer sprays in the same shape @ DollarTree. Much more affordable!
Yay! That’s awesome that there are cheaper options! Thanks for sharing!