
DIY Kitchen Boa (or Kitchen Scarf) with a Towel

This post may contain affiliate links.
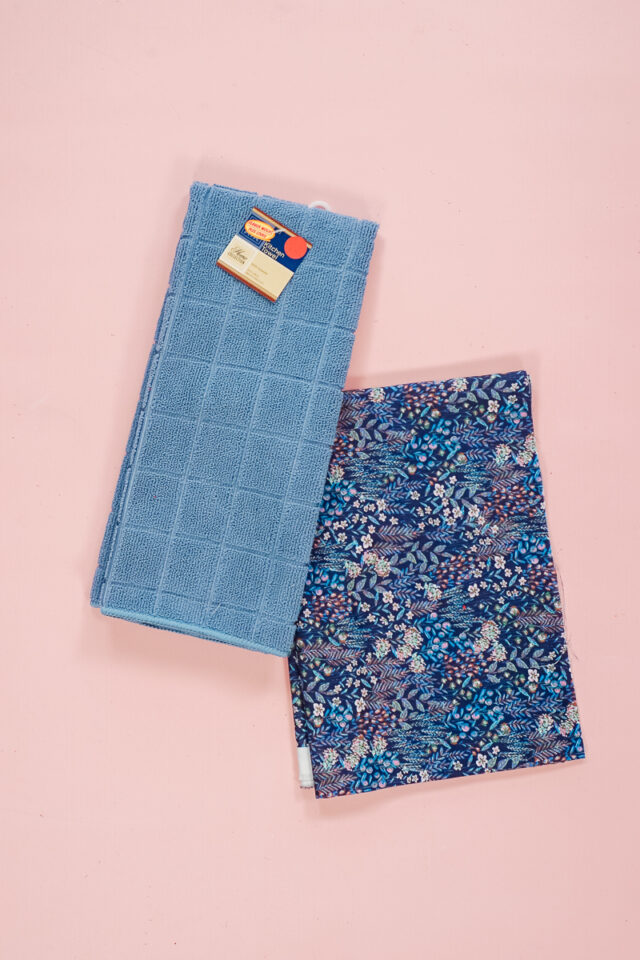
Learn how to sew a DIY kitchen boa (or kitchen scarf) with a towel. This kitchen sewing project is so useful and makes a great handmade gift.
Do you wish you had a towel always nearby when cooking or baking? Do you misplace your towel when in the kitchen? It always ends up on a counter way out of reach.
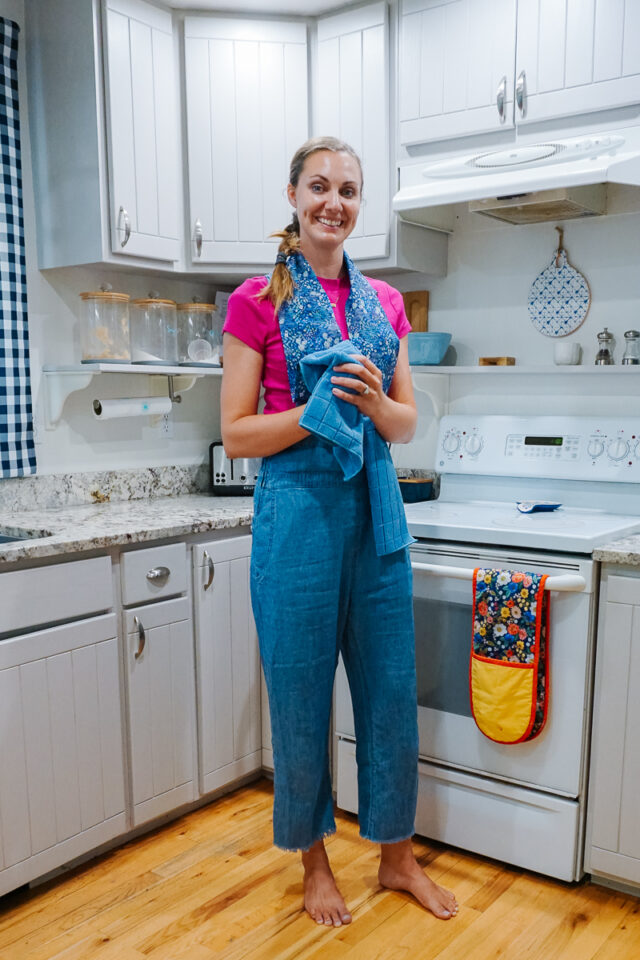
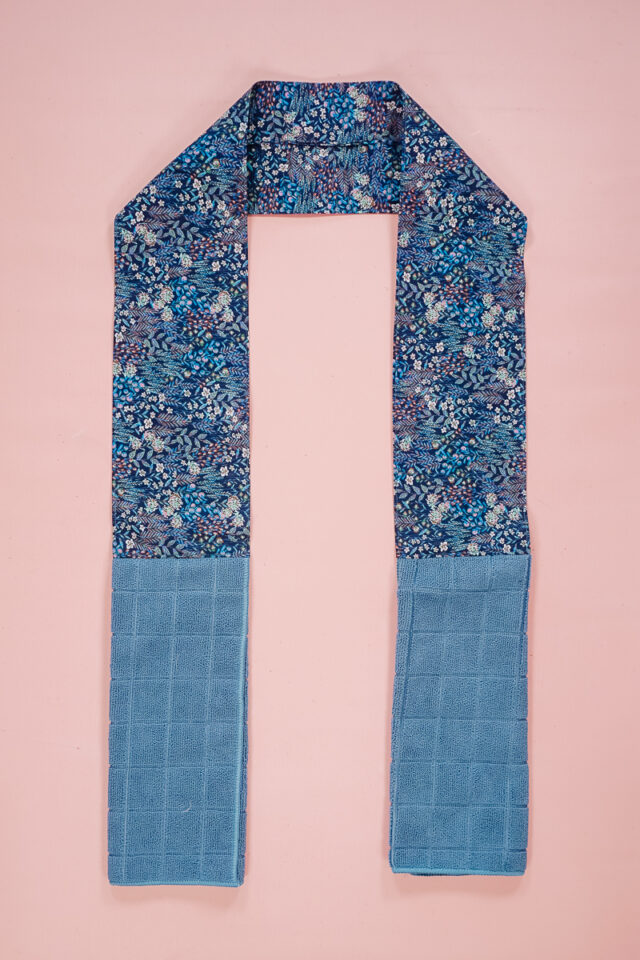
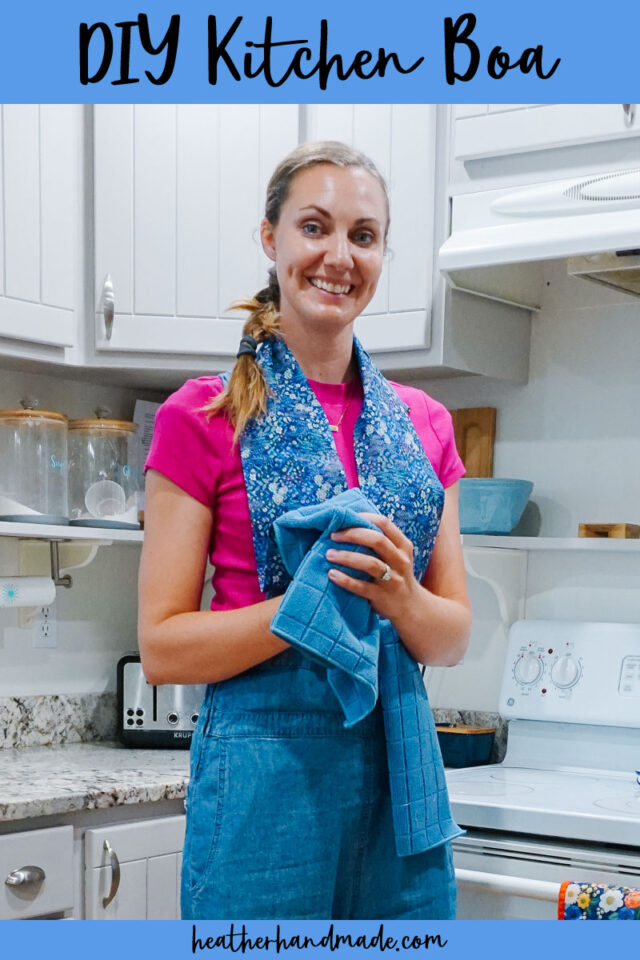
Try making a DIY kitchen boa or a kitchen scarf. It’s a piece of fabric you wear around your neck with a towel on each end. It makes it so a towel is always within reach when you are wearing it. It’s really quick and easy to make, and it would be fun to make for all your friends.
What is a kitchen boa?
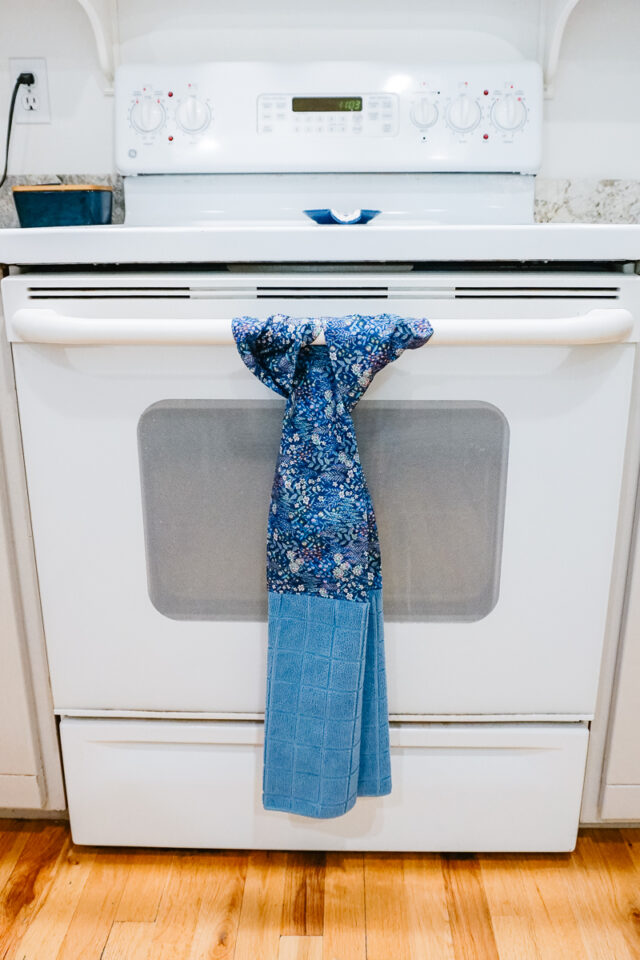
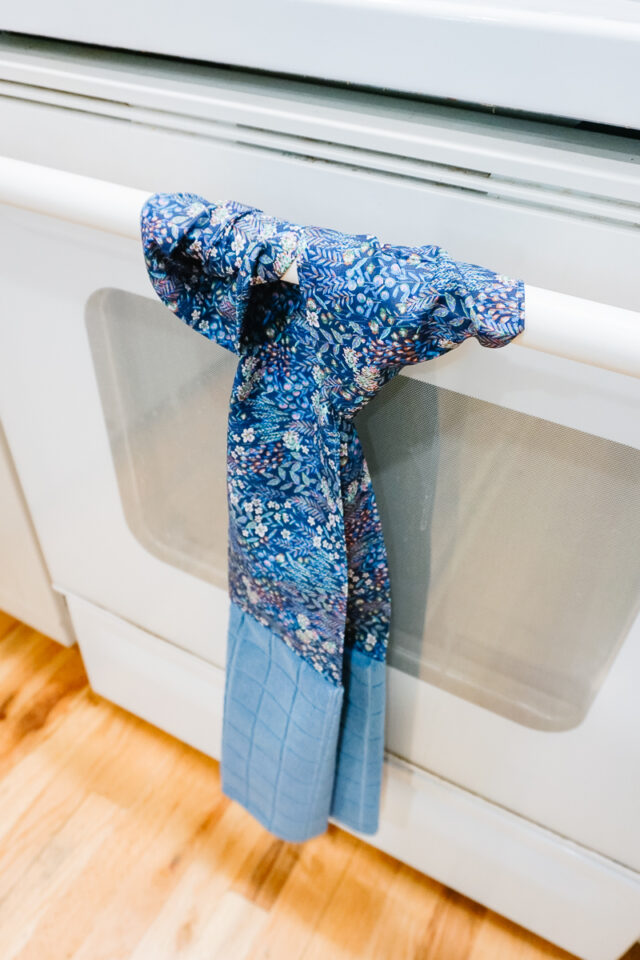
A kitchen boa or a kitchen scarf is a piece of fabric with a towel on each end. It’s meant to be worn around the neck like a boa or a scarf. It can also be looped around a ring or bar so that it can’t be pulled off.
What to use to make a kitchen boa?
The best fabric to use for a kitchen boa is quilting cotton and a towel that you can cut. Quilting cotton is easy to find and easy to sew. It is washable and durable so it will hold up just as well as the towel. Choosing a fun print or color that coordinates with the towel is a fun part too.
Do I need to use interfacing?
I went back and forth about using interfacing. Most other kitchen boas I saw online didn’t use interfacing. Let me tell you the reasons to use it and not to use it.
Using interfacing:
- adds stability and strength
- makes it so you never have to iron the fabric part whenever you wash it
- makes the fabric section stiffer and more uncomfortable to wear
Not using interfacing:
- the fabric section is soft and comfortable to wear around your neck
- you will have to iron the fabric section every time you wash it
- eventually the fabric will wear out quicker than the towels
Love to sew? Try one of these sewing projects:
How to make a DIY Kitchen Boa
Supplies
- one towel that can be cut
- 1/3 yard of quilting cotton
- 5 inches by 40 inches of lightweight fusible interfacing
- sewing tools
- sewing machine
Instructions
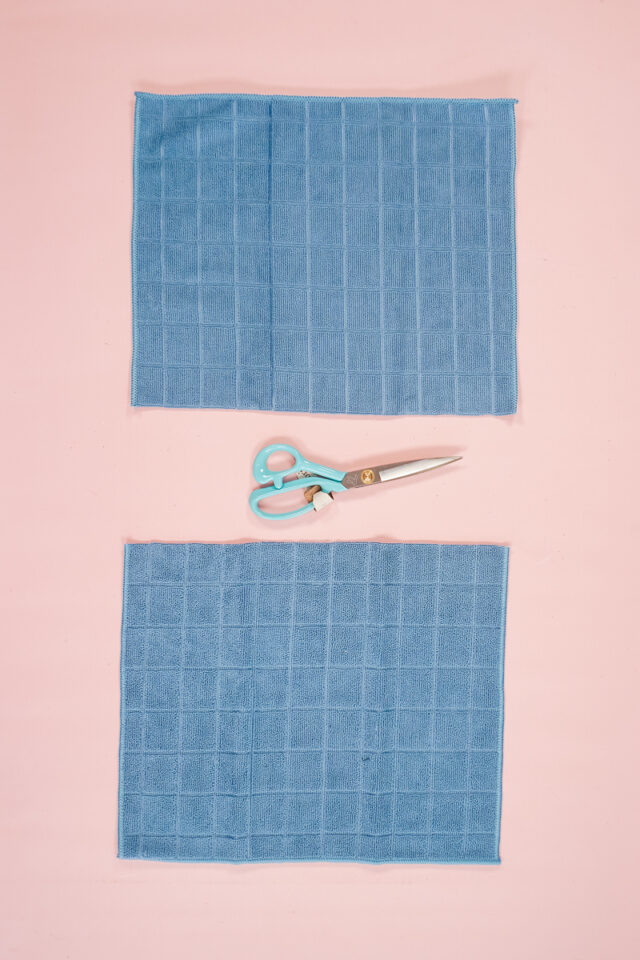
Cut the towel in half on the middle of the long side.
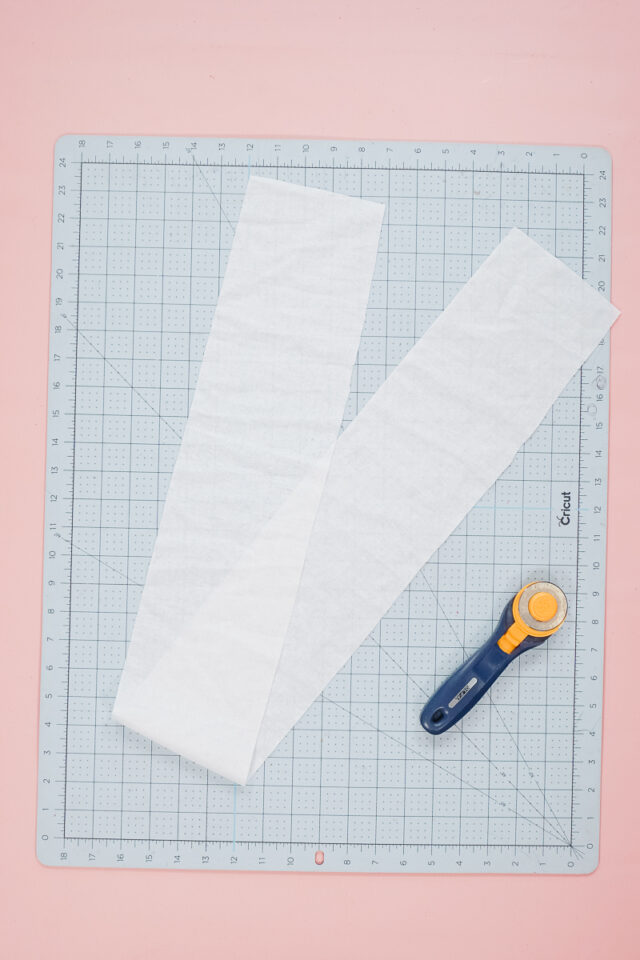
Cut a piece of fabric 11 inches tall and as wide as the fabric (roughly 42 inches).
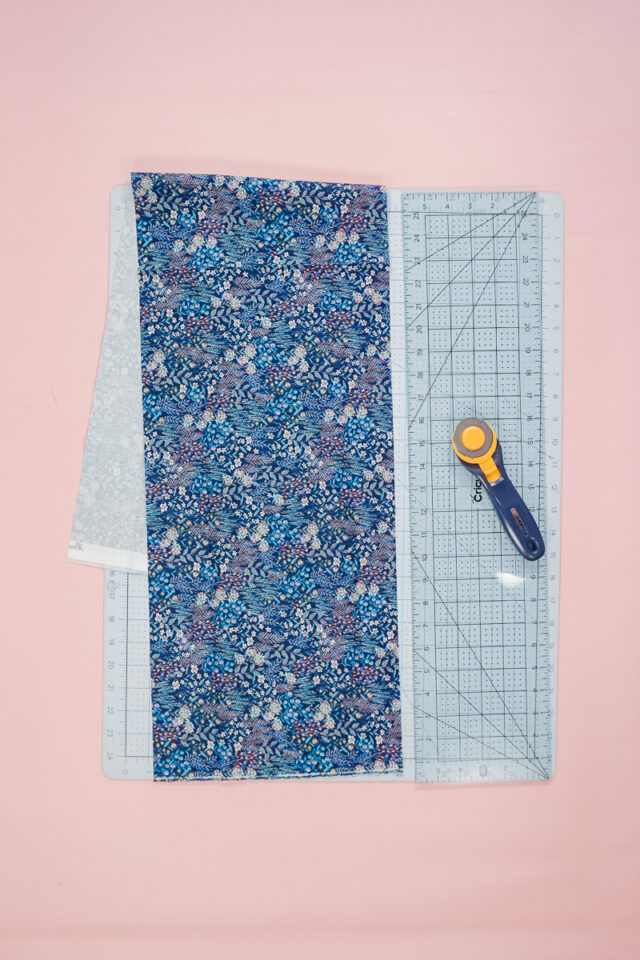
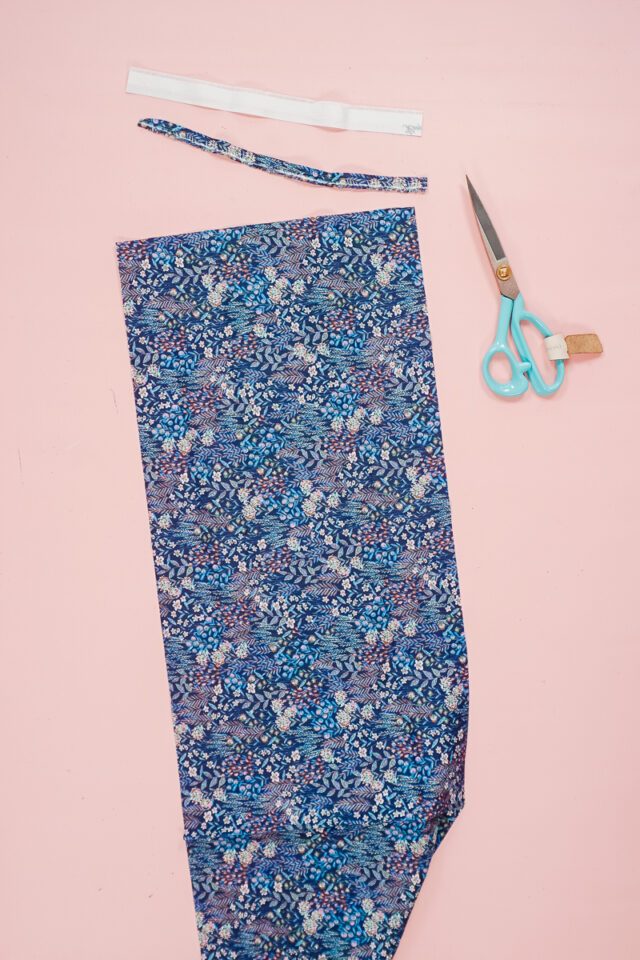
Cut any selvedges and white edges off. Your fabric is now about 11 inches tall and 40 inches wide.
Cut a piece of interfacing that is 5 inches by 40 inches. (If your interfacing isn’t wide enough you can do two pieces and fuse them next to each other.)
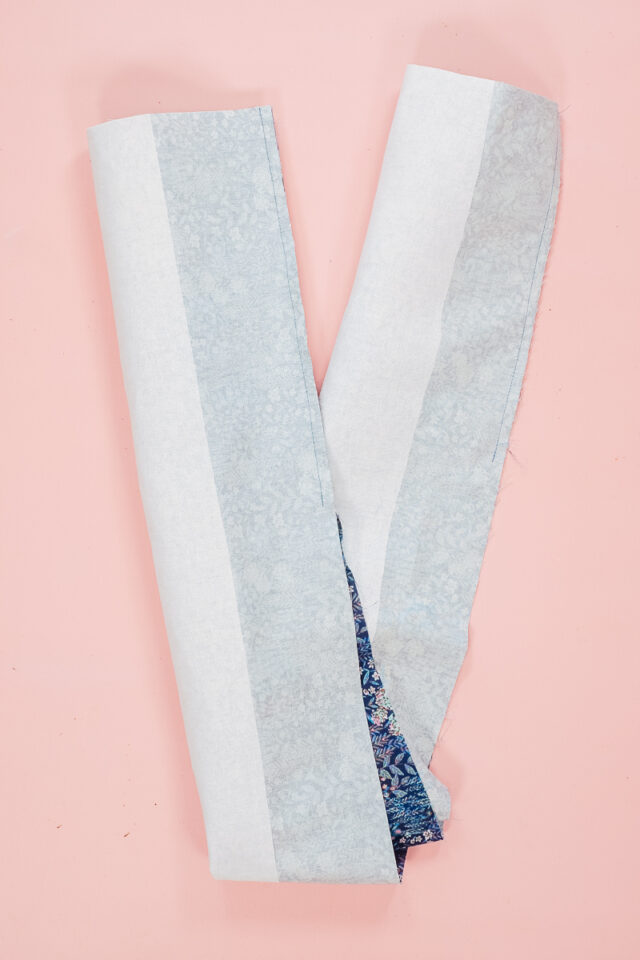
Use an iron to fuse the interfacing to the wrong side of the center of the fabric.

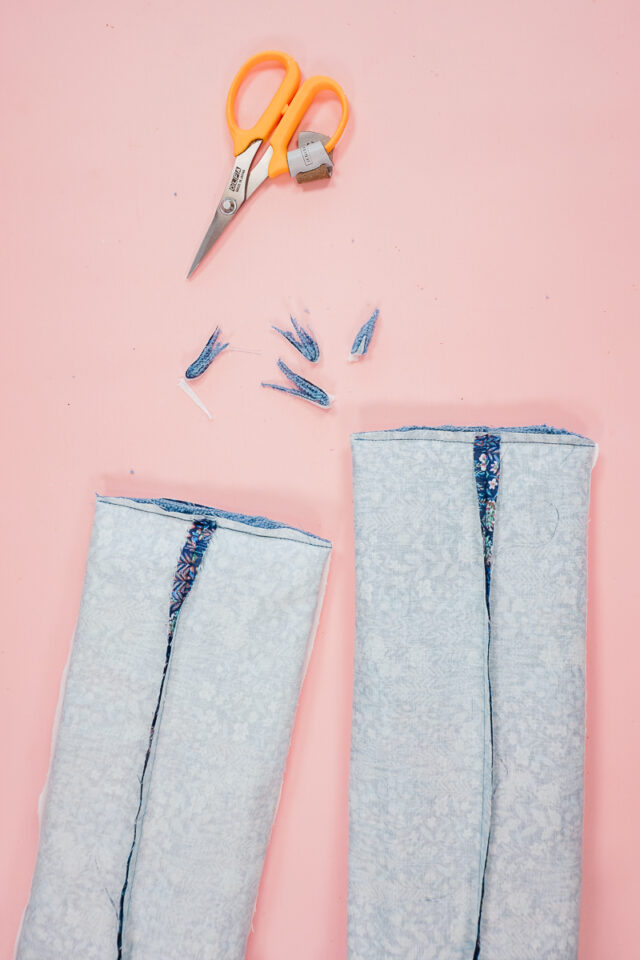
Fold the fabric in half right sides together and matching the long edges. Pin the long edges. Sew from a short end and down 10 inches with a 3/8 inch seam allowance. Backstitch when you start and when you stop. Do the same to the other end.
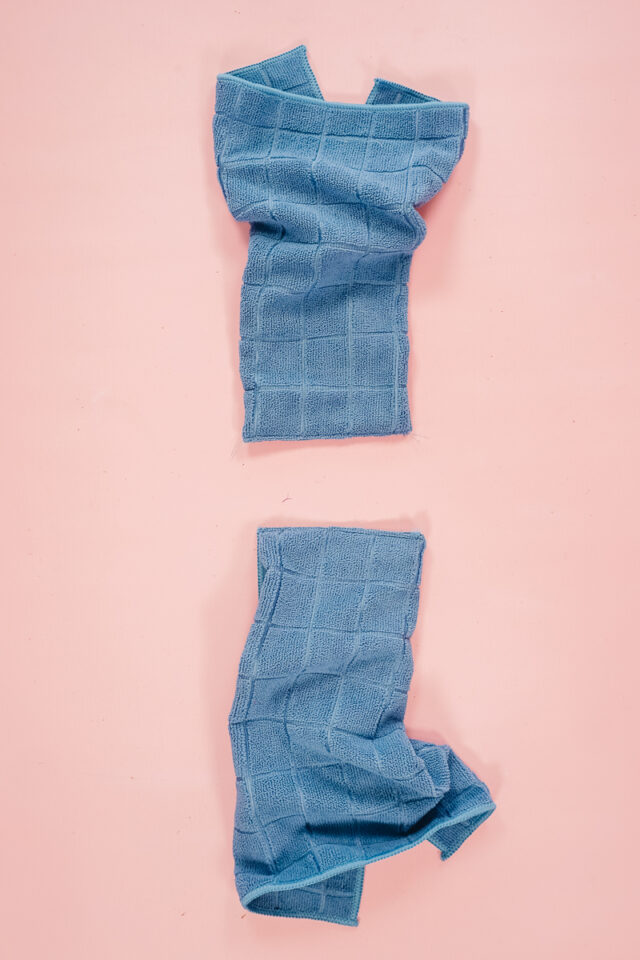
Fold the towel so that the cut edge is about 4.5 inches wide. It might be folded into quarters or thirds. My towel worked when I folded it into thirds. Baste across the cut edge to keep the folds in place.
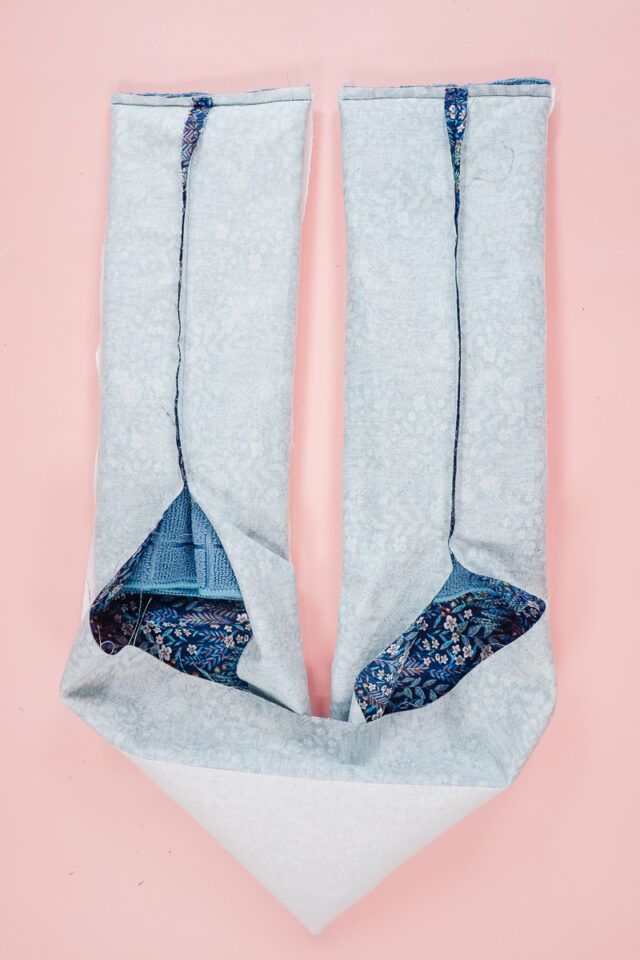
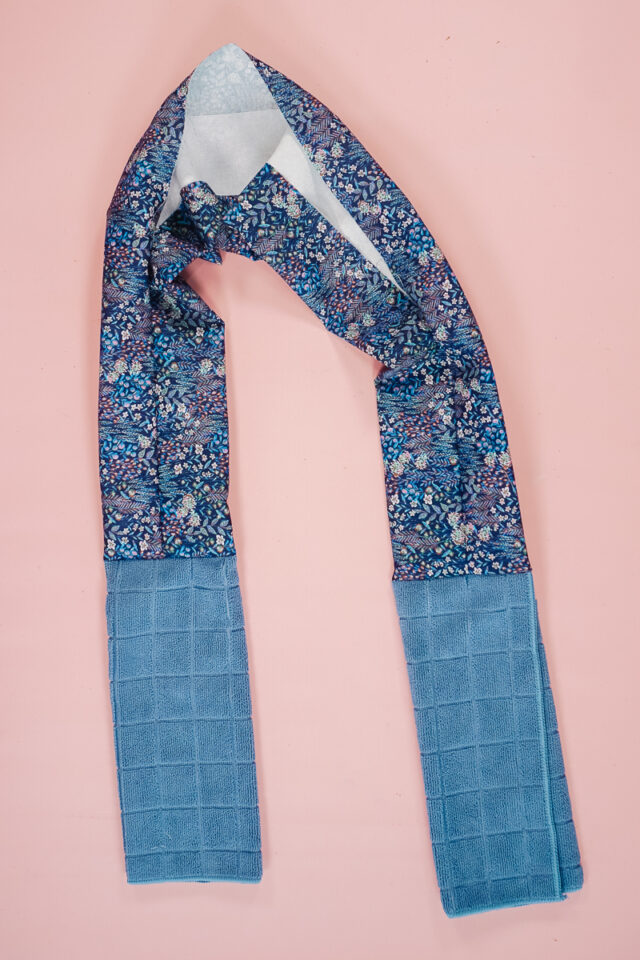
Twist the fabric so that the seam is in the center. Slide the cut end of the towel inside the fabric tube so that the cut end lines up with the short end of the fabric tube.
Sew across the short end 3/8 inch from the edge. Backstitch when you start and when you stop.
Trim each corner of each short end to reduce the bulk.
Turn the boa right side out and pull out the towels all the way.
Pinch the hole closed with the 3/8 inch seam allowance inside. Edgestitch the hole to close it. Backstitch when you start and when you stop.
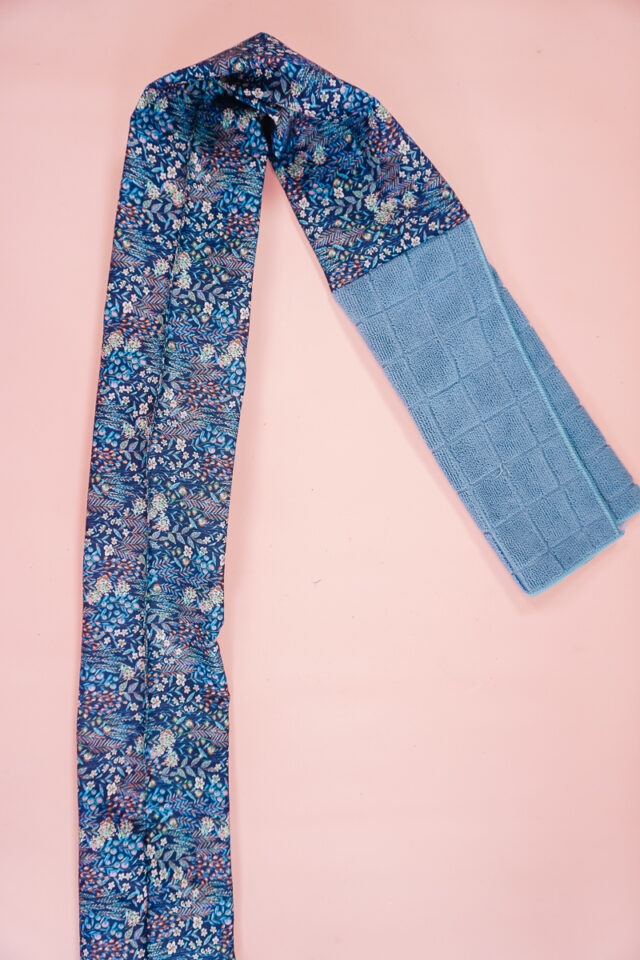
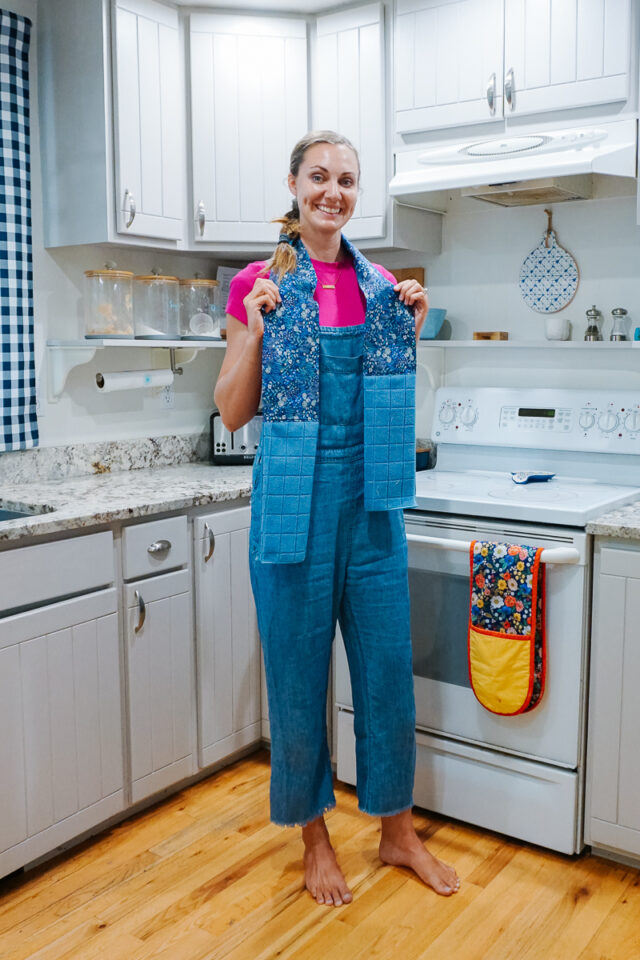
Press the boa so that the seam is in the center on the back and the fabric between the towels has a crisp fold the entire section.
Sew a giant rectangle around the fabric 1/8 inch from the edge to secure the folds and give extra strength along the top of each towel.
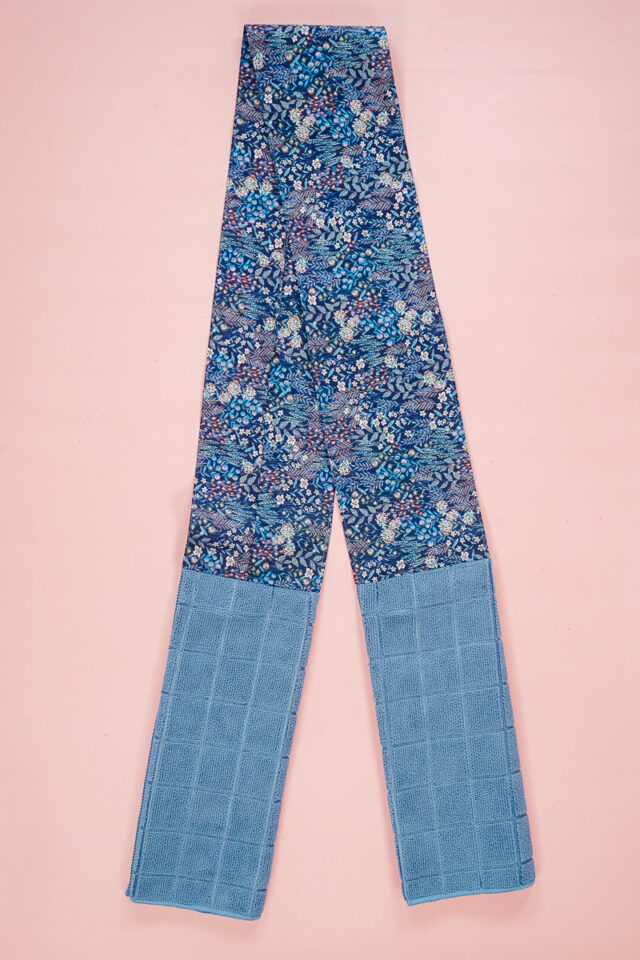
You finished!
If you make something using this sewing project, I’d love to see! Please share it on social media with the hashtag #heatherhandmade and tag me!

I believe small sewing moments can create great joy. Find your own “right” way to sew. -Heather
Did I miss something? You said to cut the interfacing 5 inches wide but in your pictures it looks like the entire width and length are covered with interfacing.
I put the 5 inch interfacing down the center of the fabric.
I love this! I wear my towels on my shoulder when I cook and they always fall off. When I saw this I was ecstatic! Thank you so much Heather! I’m making them for Christmas gifts. I enjoy making the simple small yet practical projects you suggest. I like making them for friends and family but want gifts that are useful and don’t just lay in a drawer. Thank you so much again. You are wonderful!
I’m so glad this will work for you! And hat it’ll be a great gift!
Did I misread the instructions when you said fold the fabric together with wrong sides together? Should that be right sides together? The picture doesn’t match instructions.
I’m not sure which part of the instructions you are looking at. For this tutorial you should always sew the fabric wrong sides together.
I have been thinking about this one. Now, I know how to make it. Thanx!