
DIY Dollhouse Redo

This post may contain affiliate links.
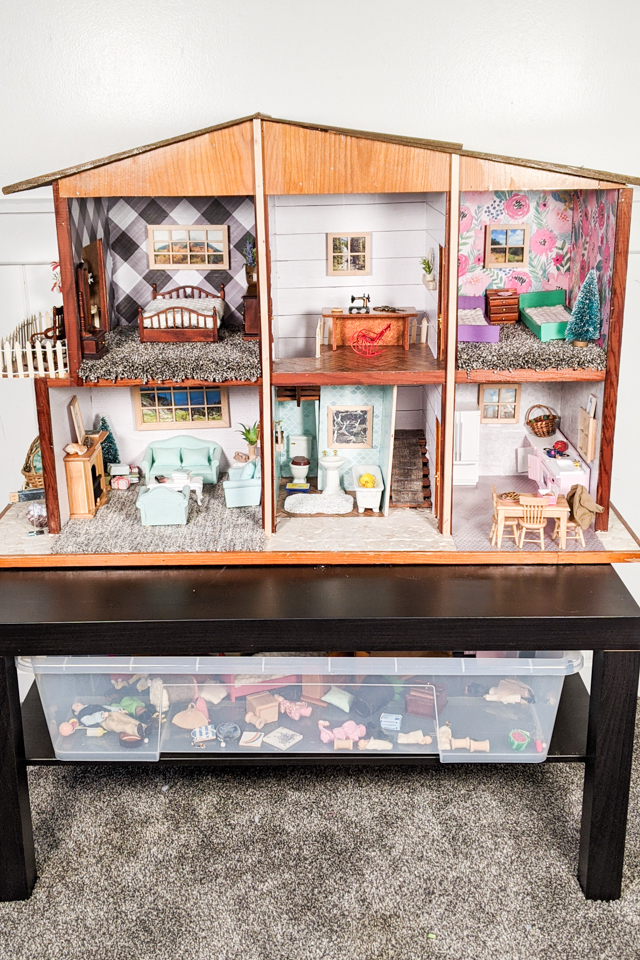
Check out this DIY dollhouse redo of a custom handmade vintage dollhouse. This was a surprise project I made for my daughters for Christmas.
I have been working on a side project for a couple of months, and I’m so excited to finally be able to share it. I redid a special dollhouse to give my daughters for Christmas.
This dollhouse was made by my grandpa for my mom in the late 60’s. She played with it for a couple of years and then stored it. It was fixed up and give to my sister and me in the 90’s. We played with it for a couple of years and then stored it. I fixed it up again so that I could give it to my daughters.
I had so much fun working on renovating this dollhouse. It took me several months, and I could only work on it when the kids were out of the house.
Some of the furniture is from the 60’s, some is from the 90’s, and some was purchased recently. The accessories are also from the three different times.
DIY Dollhouse Redo
This is was the dollhouse looked like when I started. This had already been updated for my sister and I. The first thing I did was strip everything down that I could.
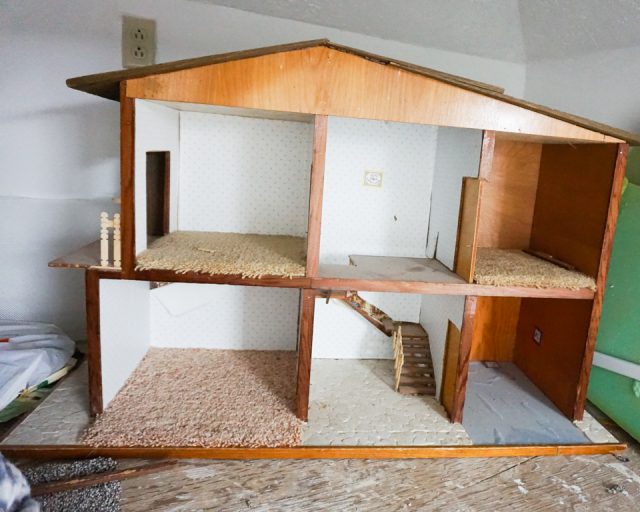
The contact paper on the walls was peeling off of the original wallpaper.
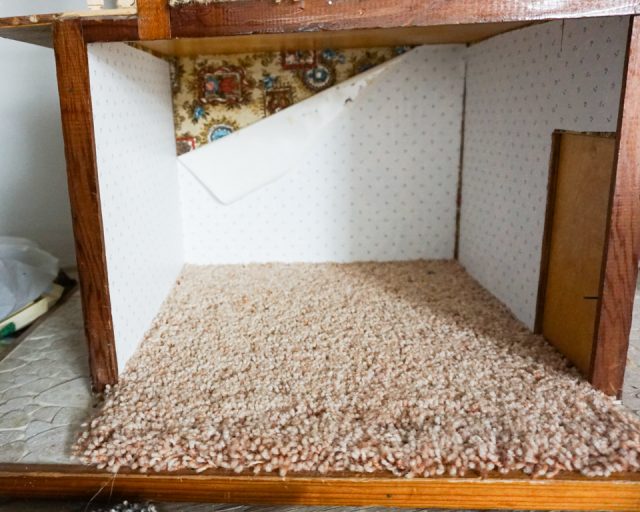
How cool is the original wallpaper with pictures all over it? It definitely looks like the 60’s.
This is the original kitchen with a pretty floor, but there were glue stains all over it.
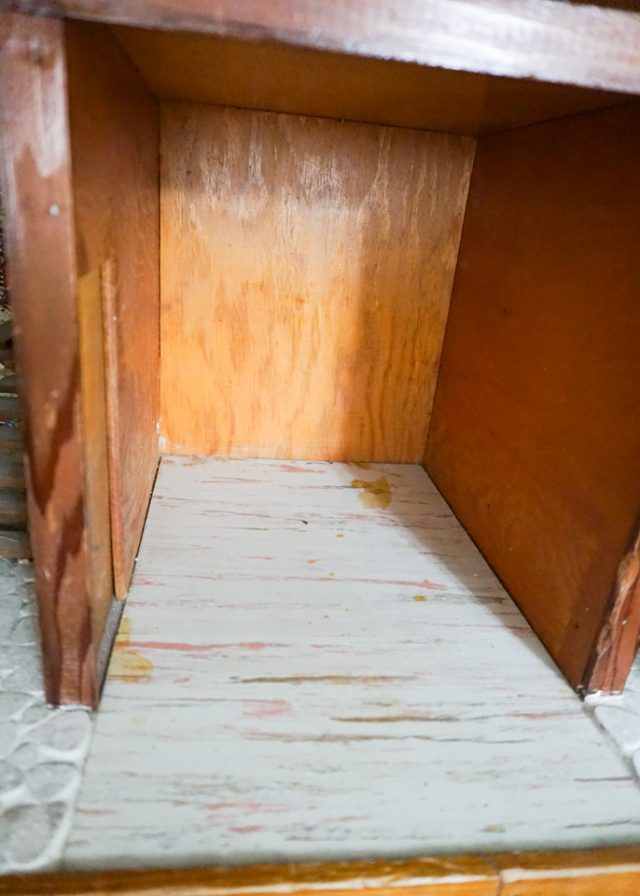
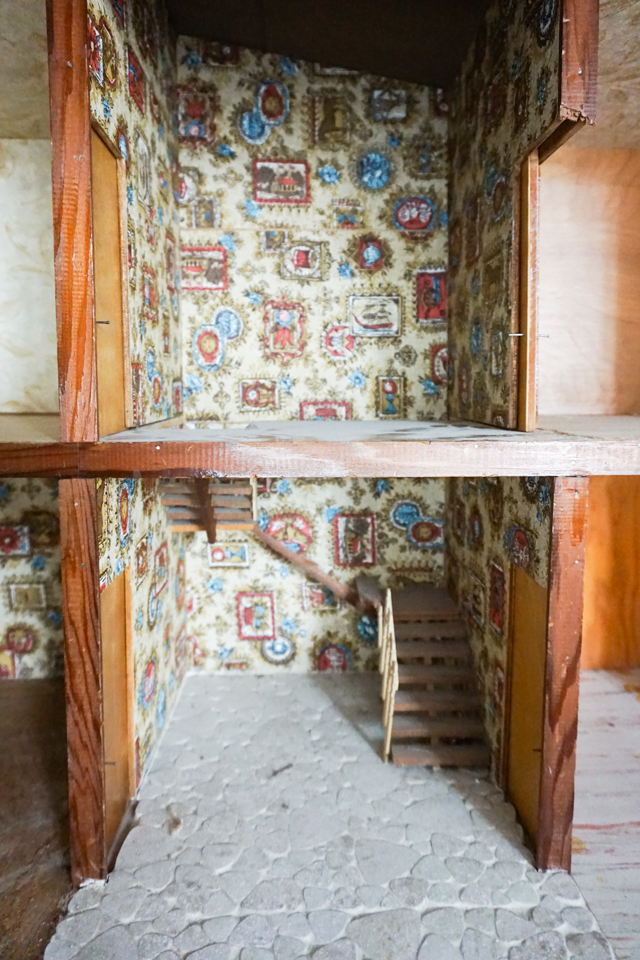
There were a lot of broken pieces because my sister and I played with this dollhouse so much.
The banisters were broken on the balcony and next to the stairs. Luckily, the walls and floors were in good condition, and the pocket doors still work perfectly.
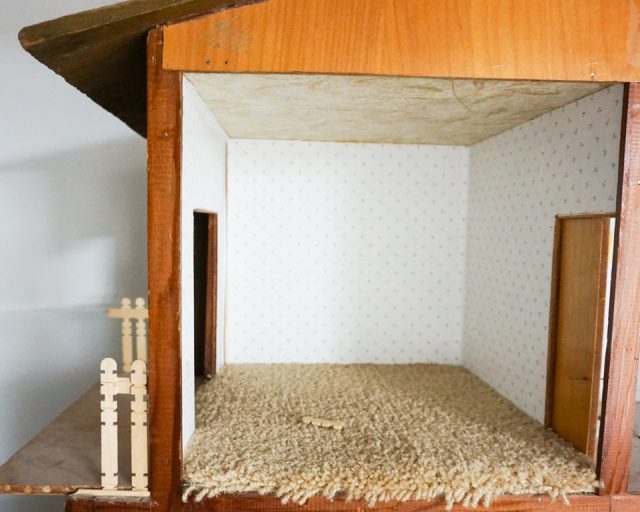
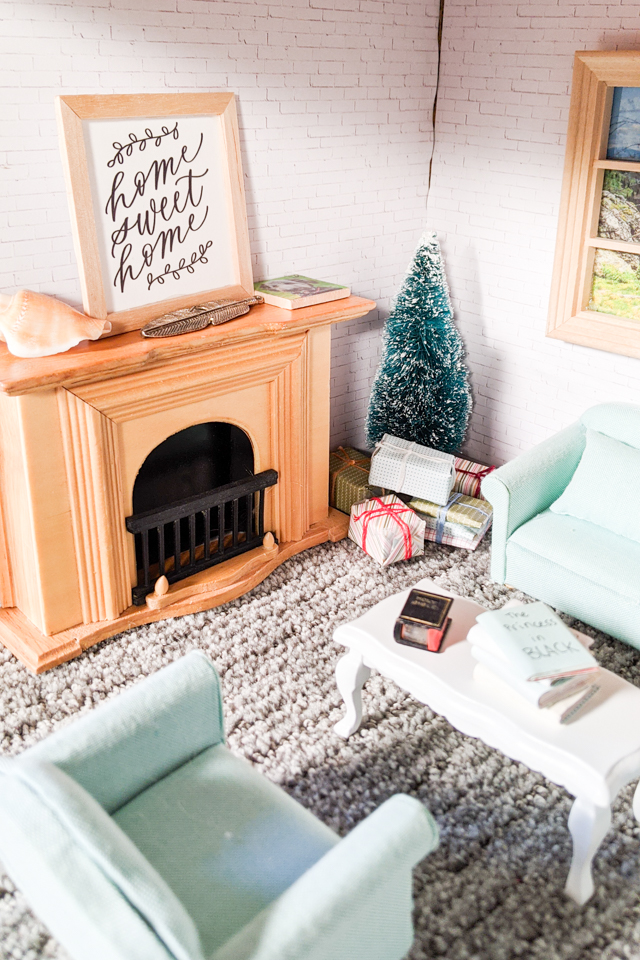
This is the front room after I redid it. I pulled out the carpet and put in new carpet. I added white brick wallpaper to the walls, a window with a picture of a place we love, a fireplace, and a shelf for decorating.
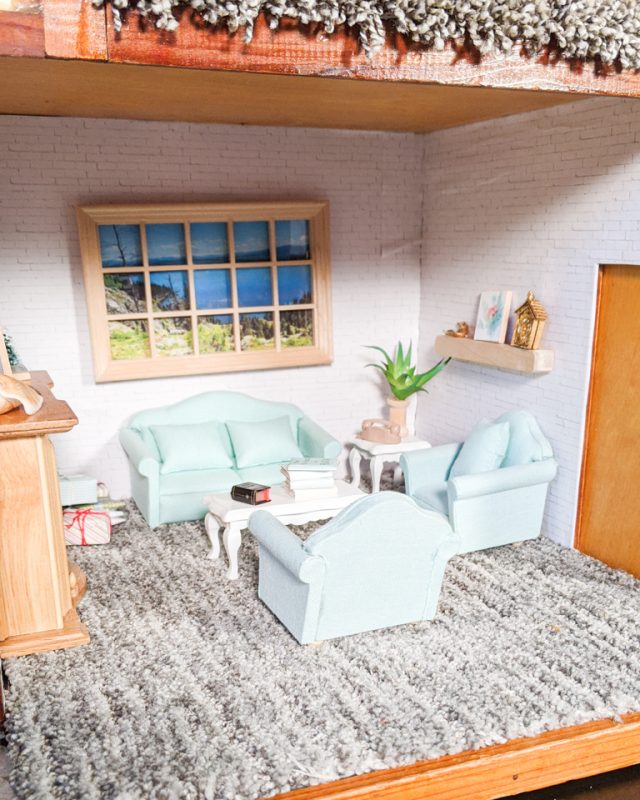
There’s new furniture, I made some books and a potted plant, and a tree with handmade wrapped presents underneath.
My sister lettered “home sweet home” and I framed it to put above the fireplace.
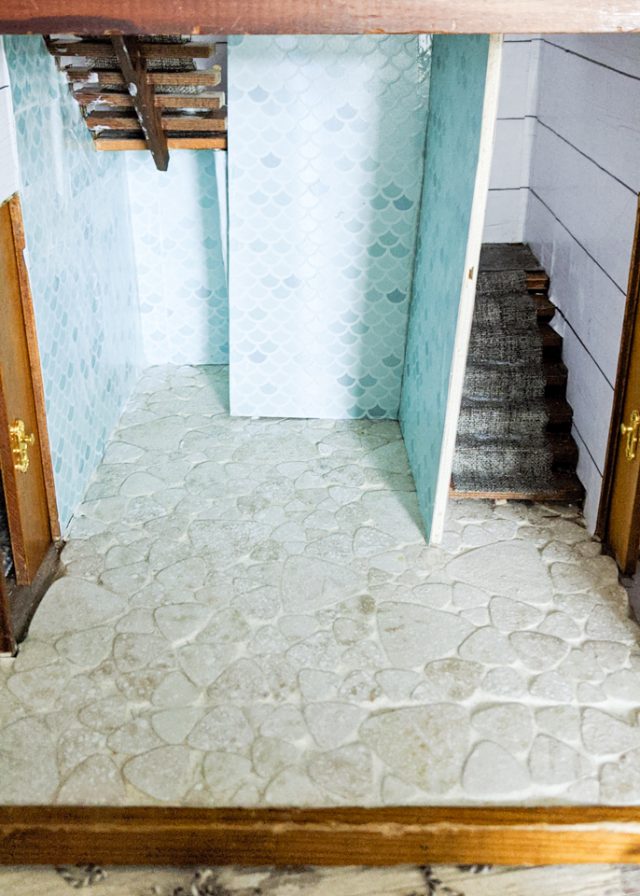
In the center of the dollhouse I wanted to make the stairs a lot stronger. I glued the broken stairs back on and added some ribbon to look like a stair runner.
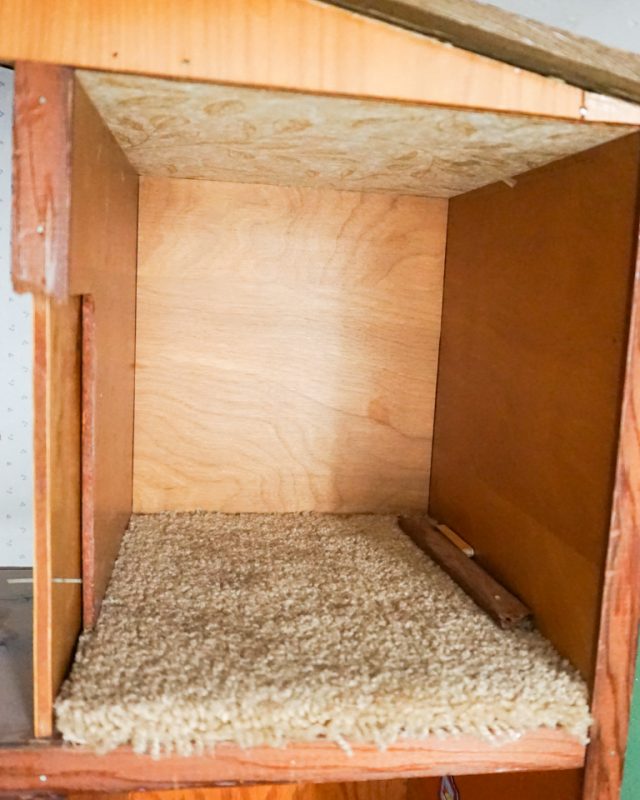
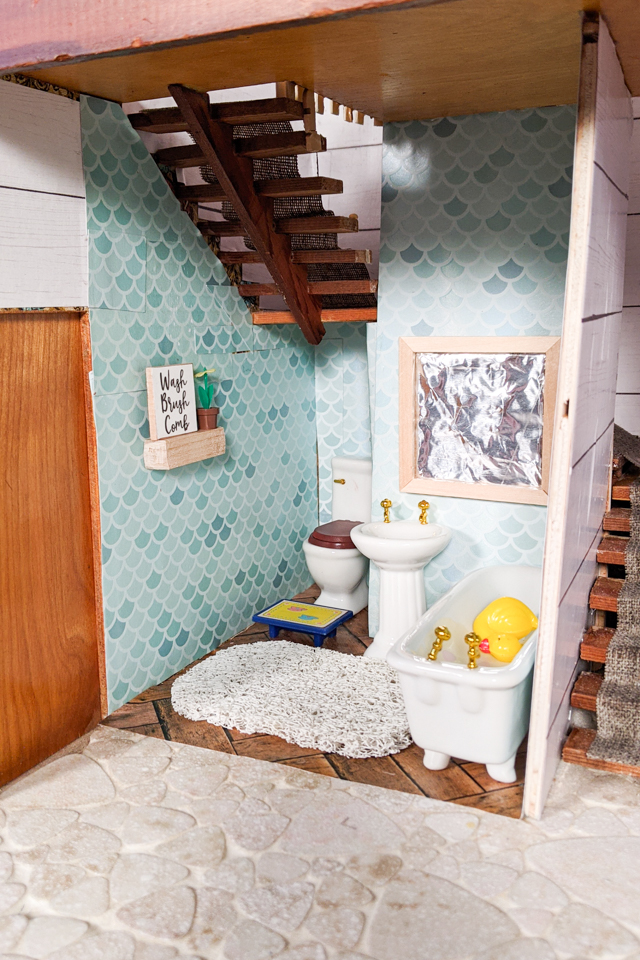
Then I cut some pieces of wood to add as walls. I wallpapered the bathroom and the stairs differently. I wanted to create a small bathroom in this tiny space.
I added a new floor in the space, added a shelf on the wall, and added an aluminum foil mirror. Lastly, we purchased some bathroom furniture for the space.
The kitchen on the right side got new wallpaper and new “tile” floors. I also added two windows. There is original kitchen cabinets that my grandpa made, but I also got some pink kitchen cabinets and a new fridge. I wanted my daughters to be able to switch out the furniture as they please.
The kitchen also has two windows of places we love.
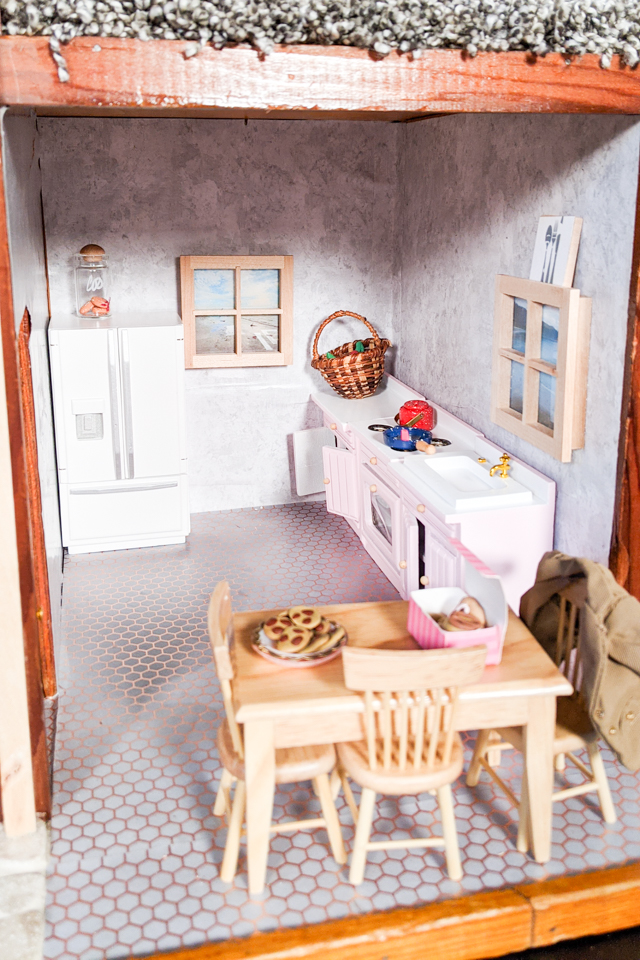
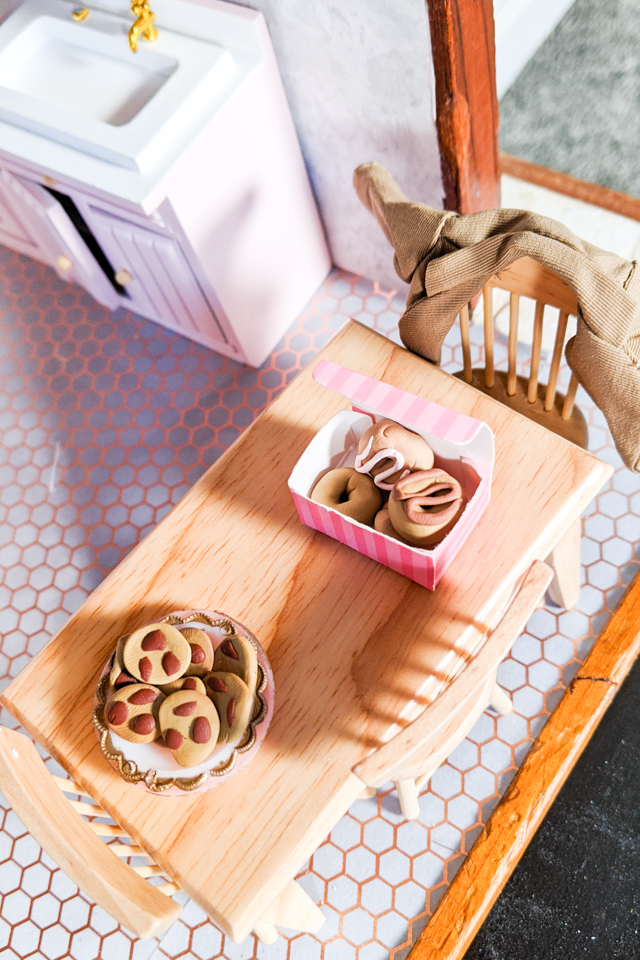
There is a ton of kitchen accessories like food, pots and pans, and fruits and vegetables. I think the miniature items are the best, and I can tell they are already the favorites.

How cute are those little donuts and plate of chocolate chip cookies?!
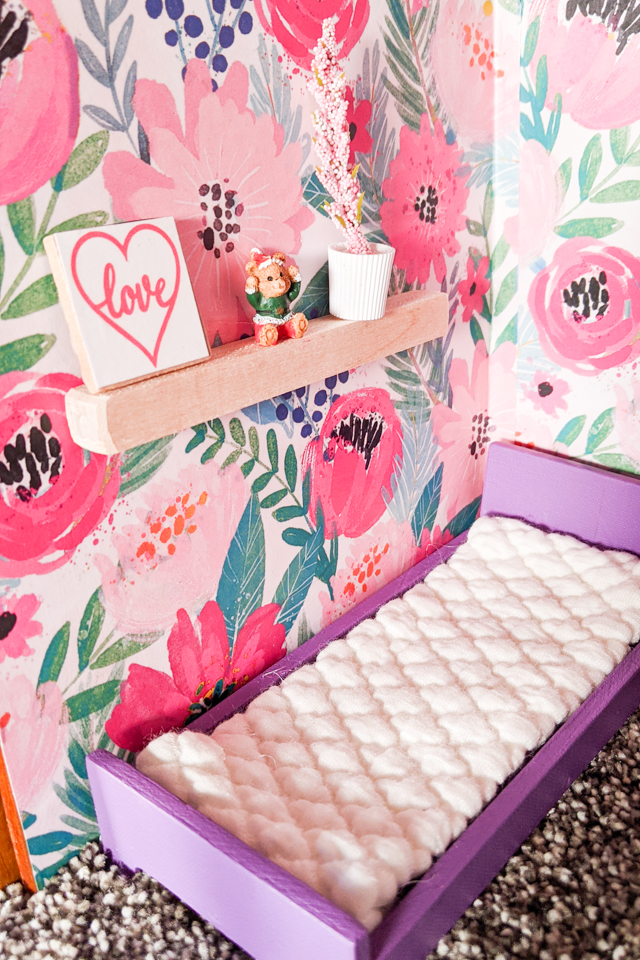
The smaller bedroom got new carpet, new wallpaper, a window with a place, and a shelf. I fixed the original beds that my grandpa made and painted them a bright color. I also glued in a small piece of fabric to act like the mattress.
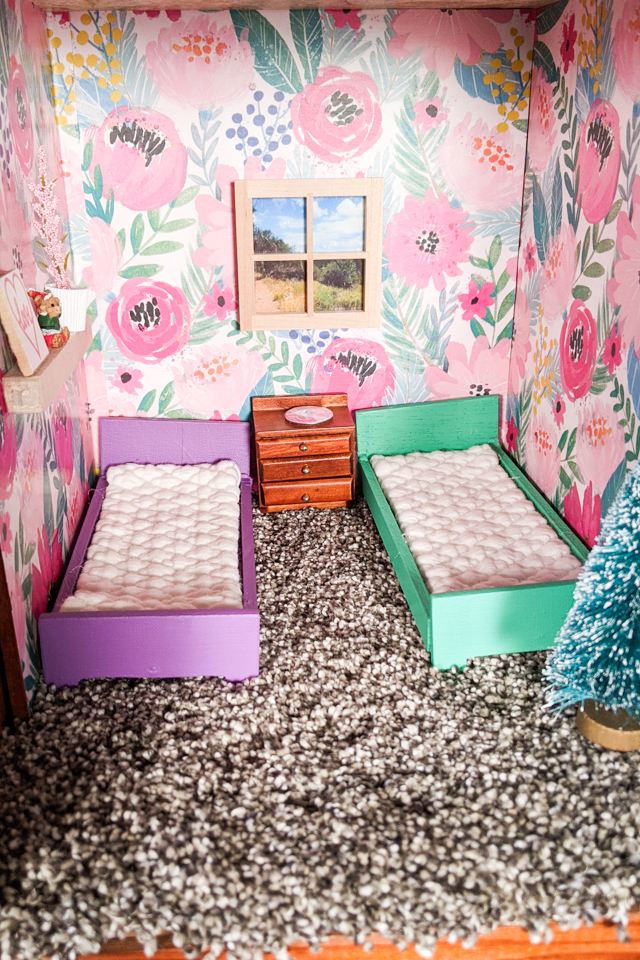
I made shelves everywhere and little pictures so that my girls can decorate however they want. I didn’t want to glue pictures to the wall that could never be changed.
In the small alcove above the stairs/bathroom I put a little desk and sewing machine. I wanted to make a small sewing area since my girls see me sew all the time. There’s new wallpaper, “new” wood floor, and a shelf on the wall. I also added a new banister that is a little stronger since it’s made with wire and wood.
This space can easily be switched out for a sitting area or a office area depending on the furniture they put in. There’s also a window with a place we love to visit.

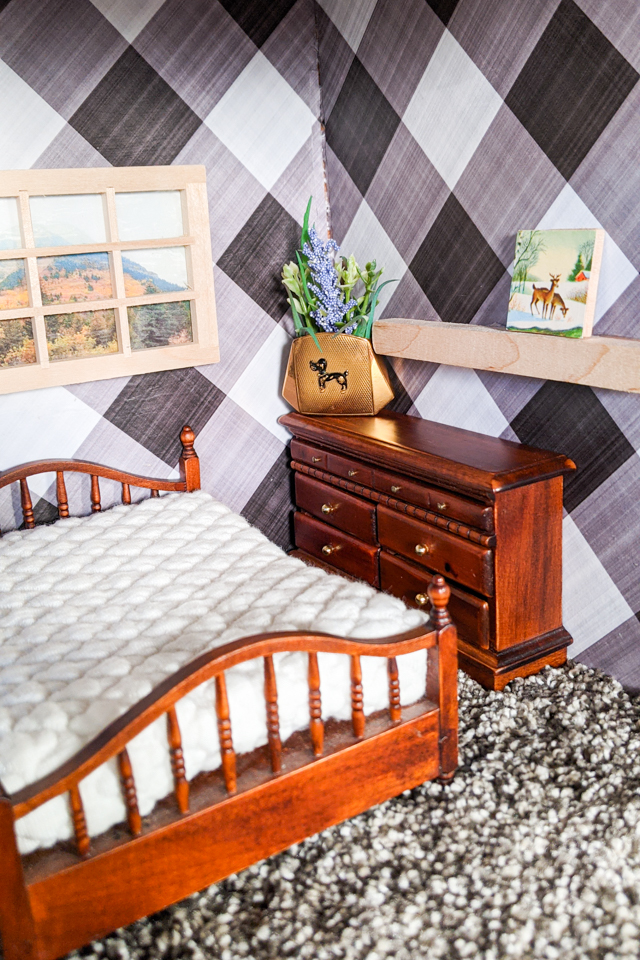
The last room is the master bedroom. It got new carpet, new wallpaper, a window with a place, and a shelf. This furniture was from when my sister and I were kids, but I put new fabric on the mattress.
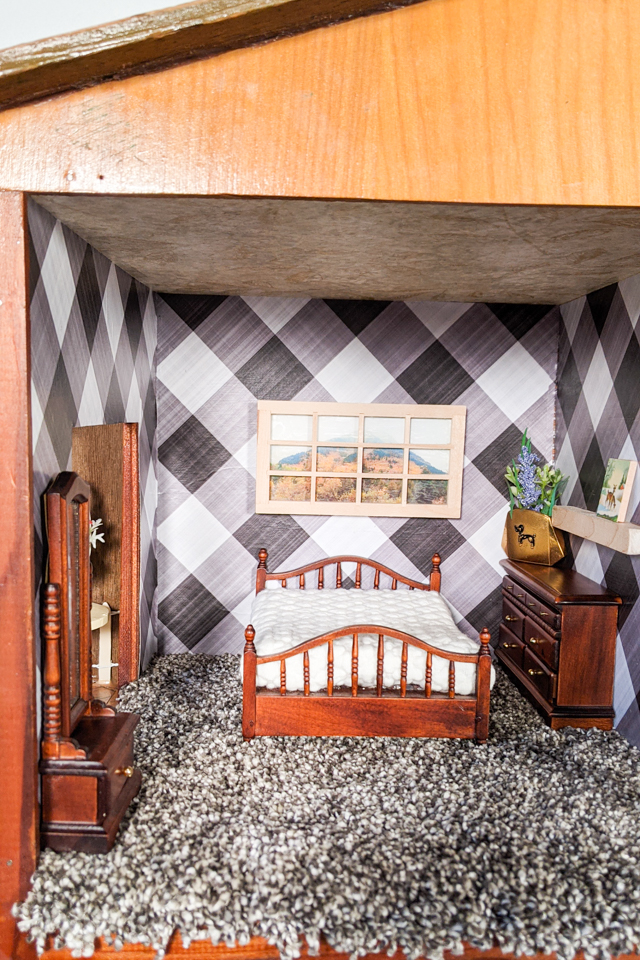
I made several potted plants that they can switch out and decorate in different places.
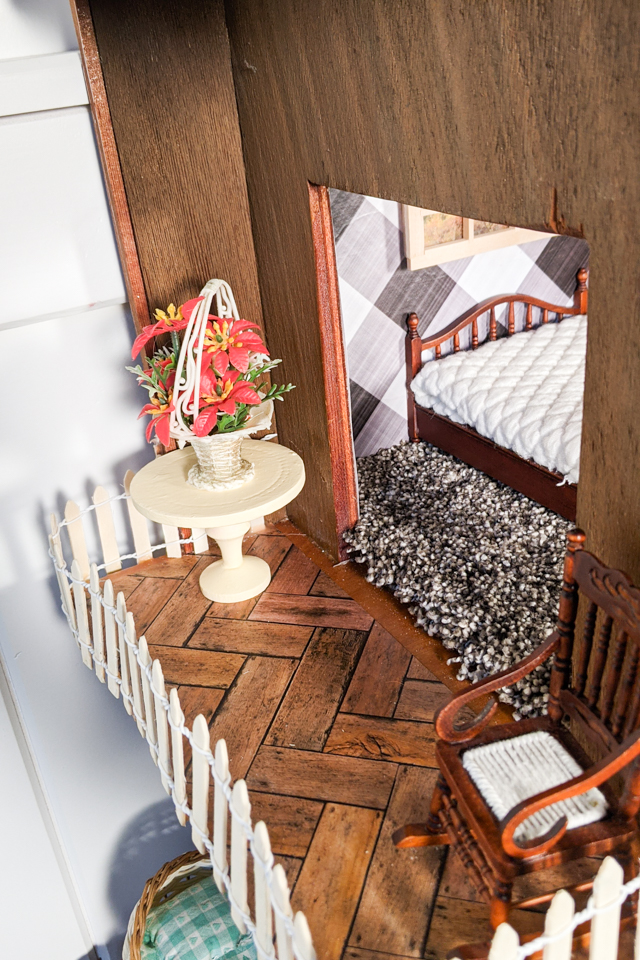
On the balcony I added a “new” wood floor and a new banister. I chose a fence that has wire to hopefully make it stronger. I hope it’ll last for awhile!
This dollhouse was so fun to work on even though it took so long. It was work it to fix up an heirloom piece. I hope it’ll last for several generations!


I believe small sewing moments can create great joy. Find your own “right” way to sew. -Heather
What fun! Your girls will have hours of fun. You had hours of fun bringing back to life a wonderful doll house. I love how you decorated and the windows with pictures I think are my favorite. Makes me wish I had a doll house to redo. Thanks for sharing.
What a wonderful gift for your girls….lifelong memories.
So cute. And what memories it will make, and bring back!