
DIY Christmas Tree Advent Calendar

This post may contain affiliate links.
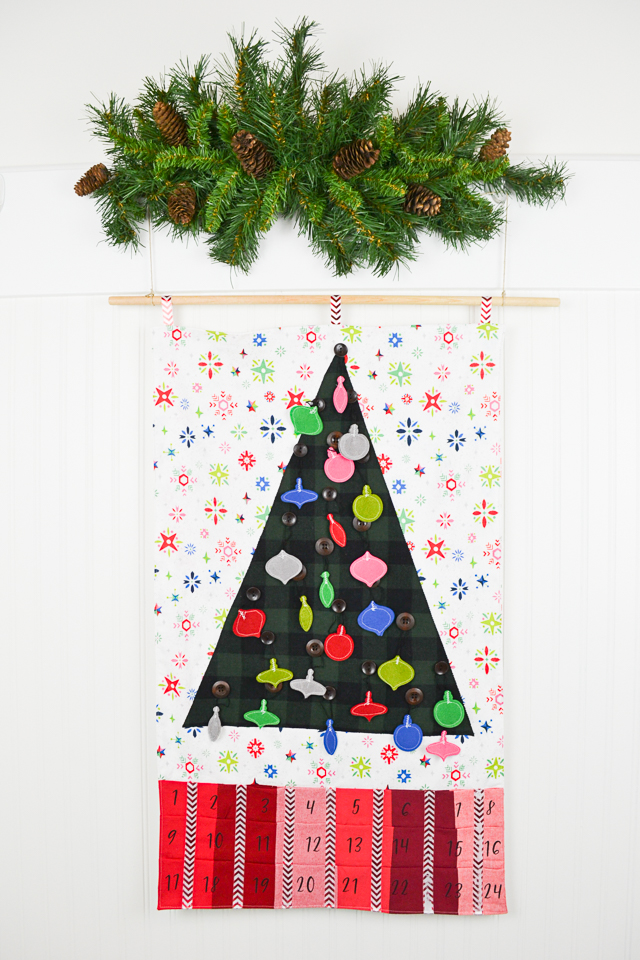
Learn how to make a DIY Christmas tree advent calendar. This Christmas sewing project is so fun for kids to count down with each ornament up.
I love making Christmas decorations that are kid-friendly. I want them to enjoy the holiday by touching and playing with handmade decorations that are meant to be played with.
It’s a fun activity for them to do while I’m getting all the holiday prep done. This DIY Christmas tree advent calendar is pretty to decorate with; and the kids get to hang up the ornaments, and they can practice their numbers.
We have another advent calendar that my aunt made for my mom that is more of a nativity version, and it’s not really good for playing with. I love the idea of the wall Christmas trees that people make for kids to play with, but I wanted to take it up one step.
I made a Christmas tree that can be decorated with ornaments, but it’s also an advent calendar with pockets and numbers. My kids will most likely play the the ornaments right now, but I can see them appreciating the count down when they are a little older.
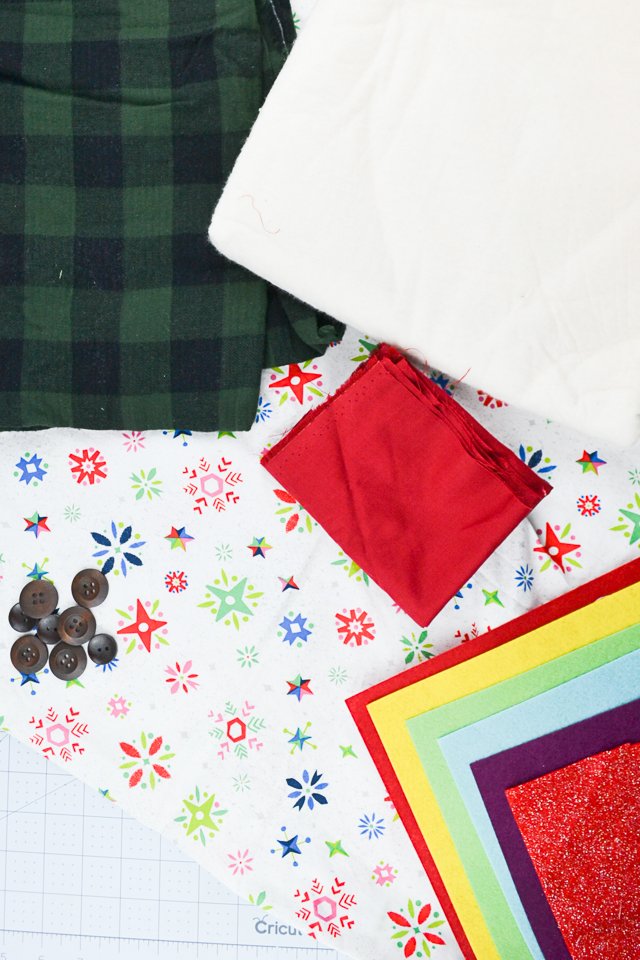
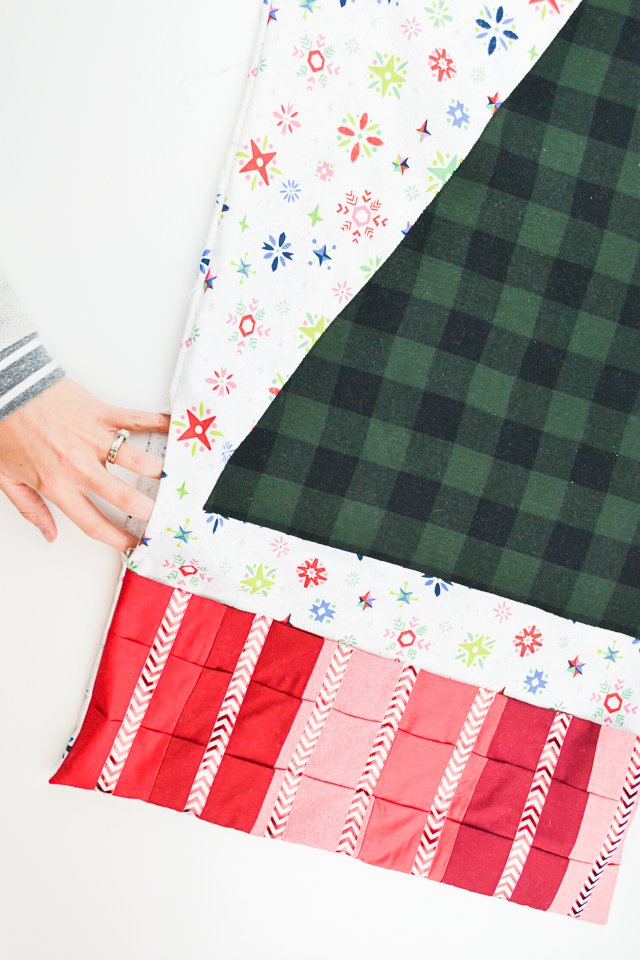
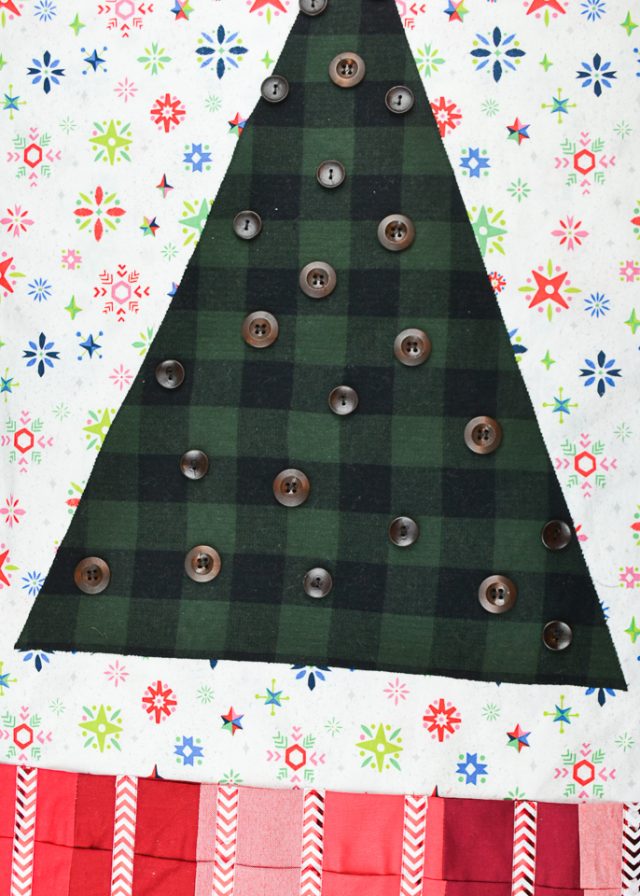
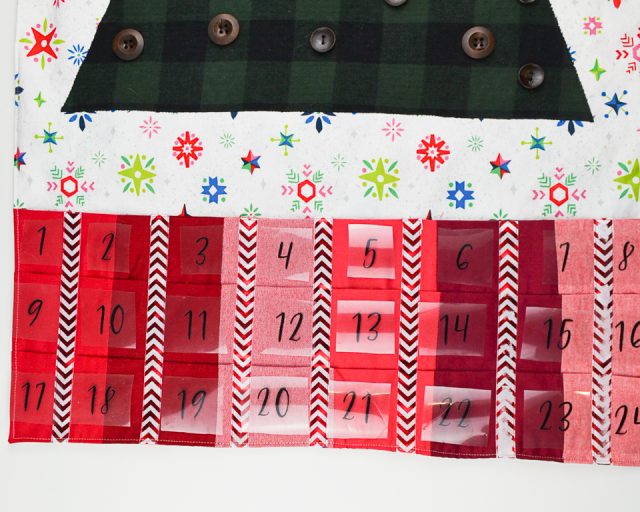
I love the contrast of the dark green plaid against the colorful Christmasy print. They both remind me of the holidays but in different ways.
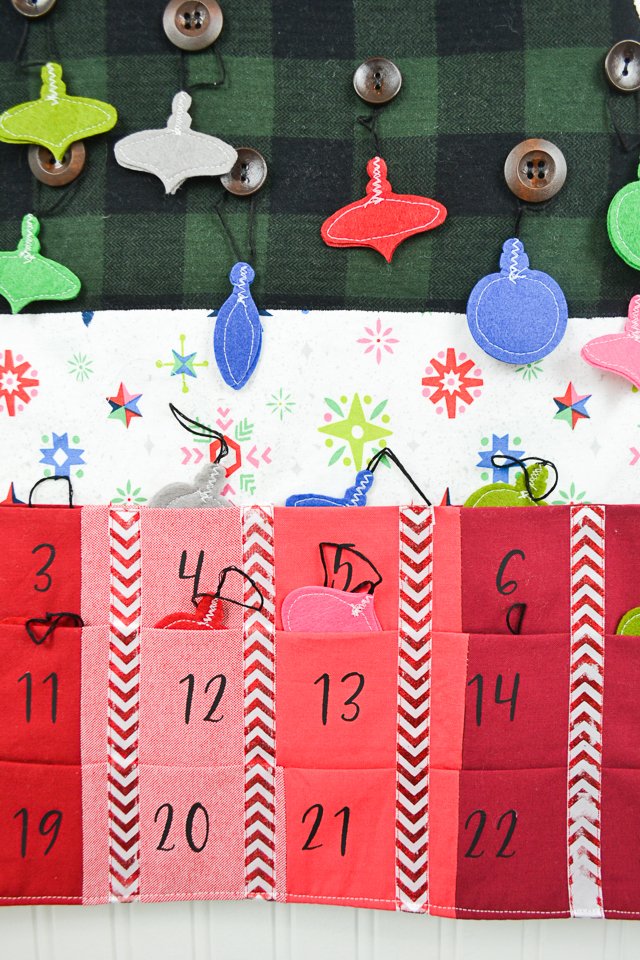
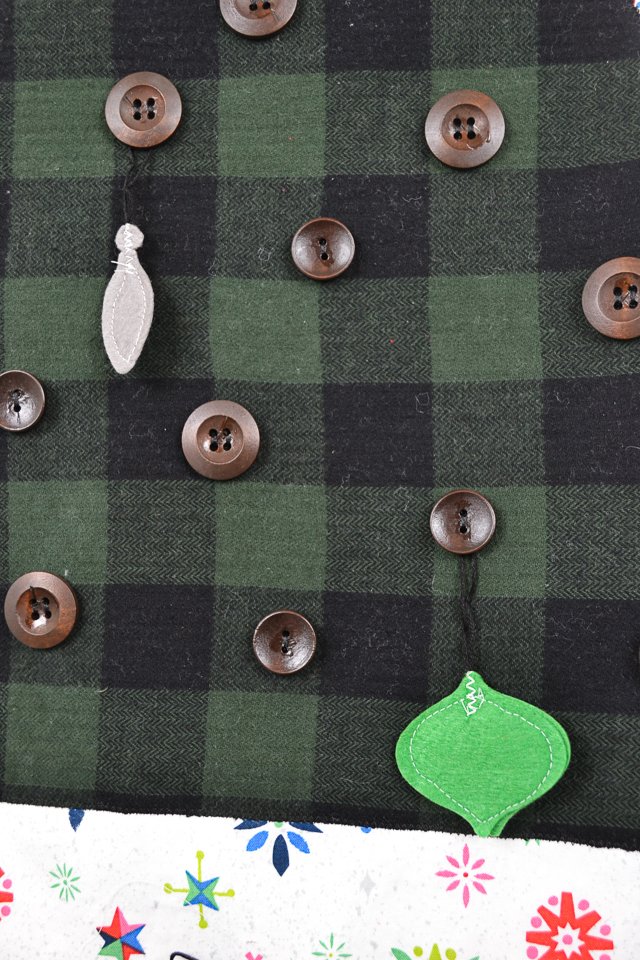
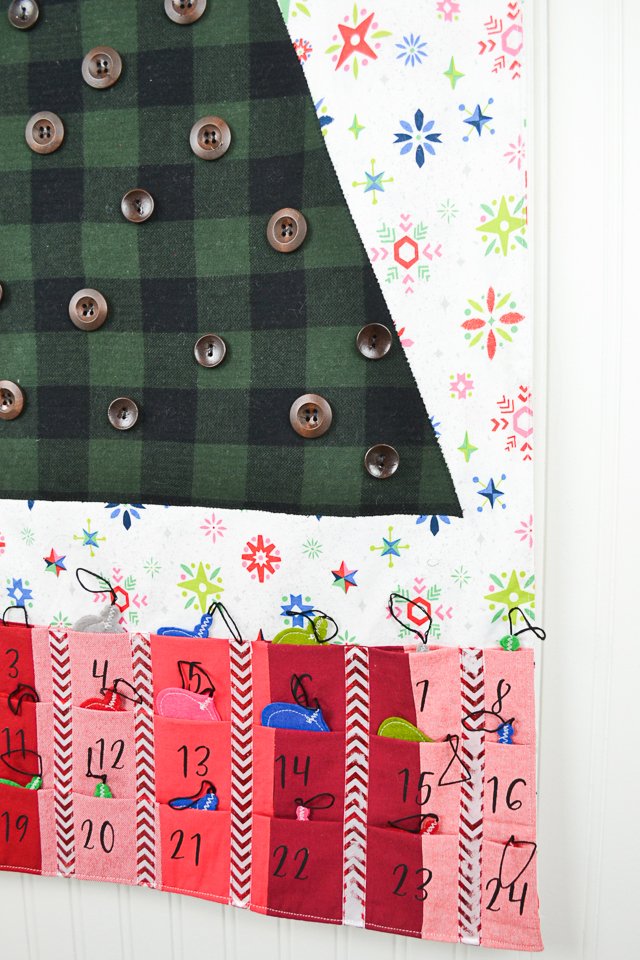
The dark buttons seemed to blend in the best on the tree when the ornaments were in the pockets. I didn’t want colorful buttons to detract from the felt ornaments and the simplicity of the design.
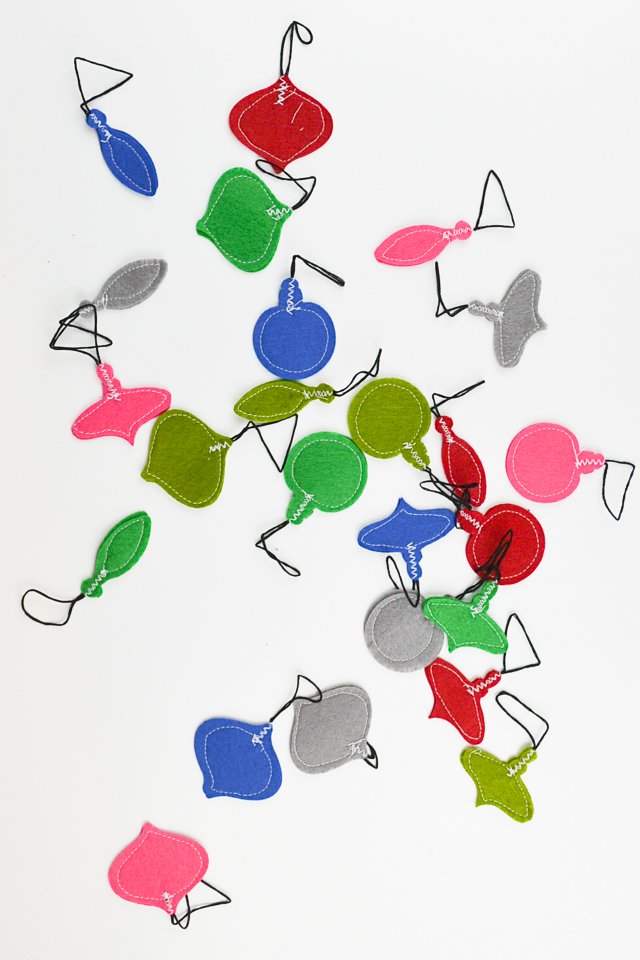
This sewing project took me longer than I thought it would because of all the steps, but I really love how it turned out. The ornaments are so colorful and pretty against the simple shape and design of the Christmas tree.
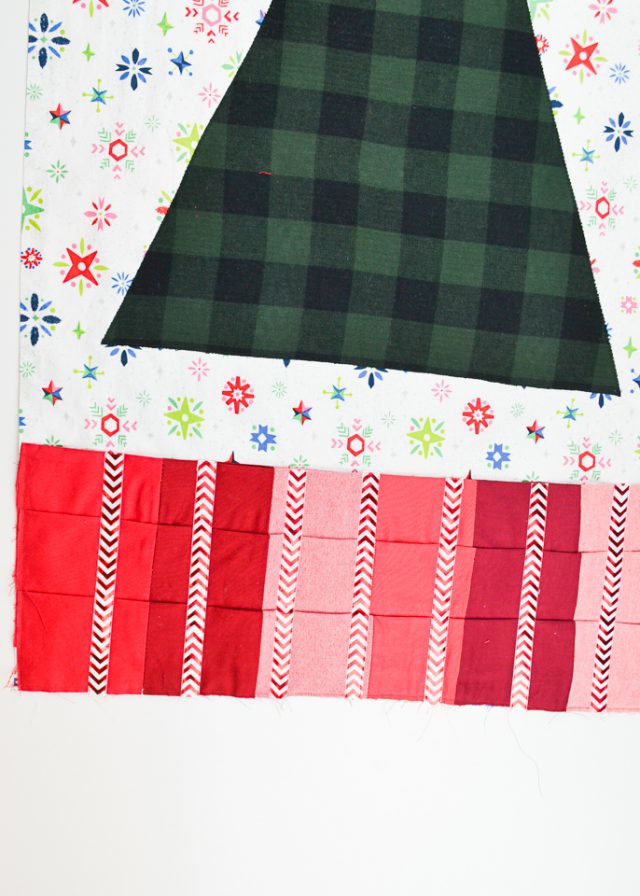
I used red scraps of fabric to make the numbered pockets which makes it look like red presents under the Christmas tree wrapped with ribbon.
Do you love to sew? Try one of these fun sewing projects:
DIY Christmas Tree Advent Calendar
Supplies
- 1 yard quilting cotton for the main rectangle (I used the same fabric for the back and the front)
- Green fabric for the tree
- Red fabric for the pockets
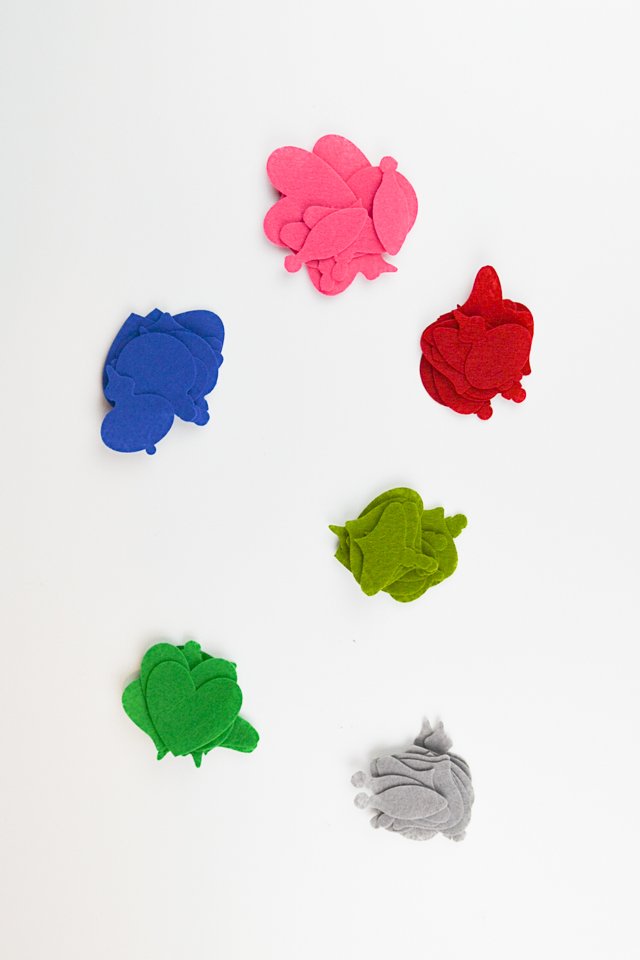
- Colors of felt for the ornaments
- Double sided adhesive
- Embroidery floss
- Interfacing
- 24 buttons*
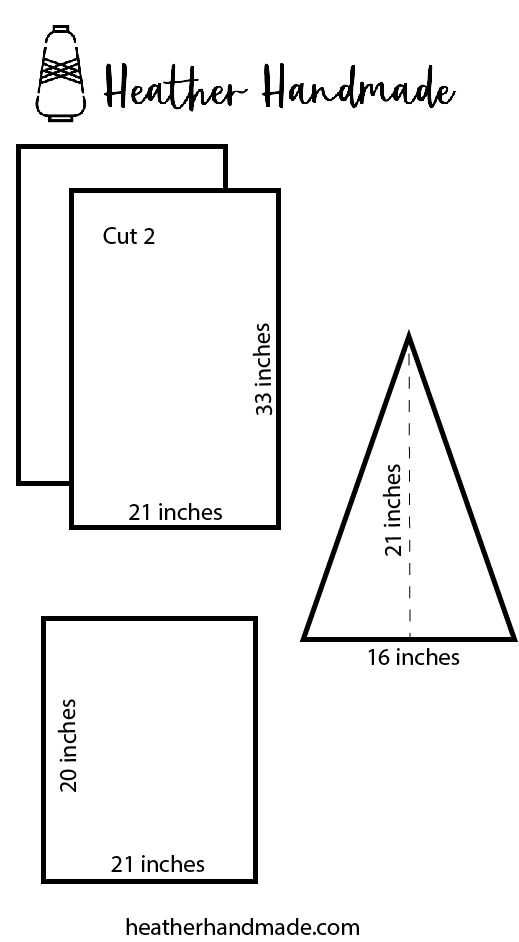
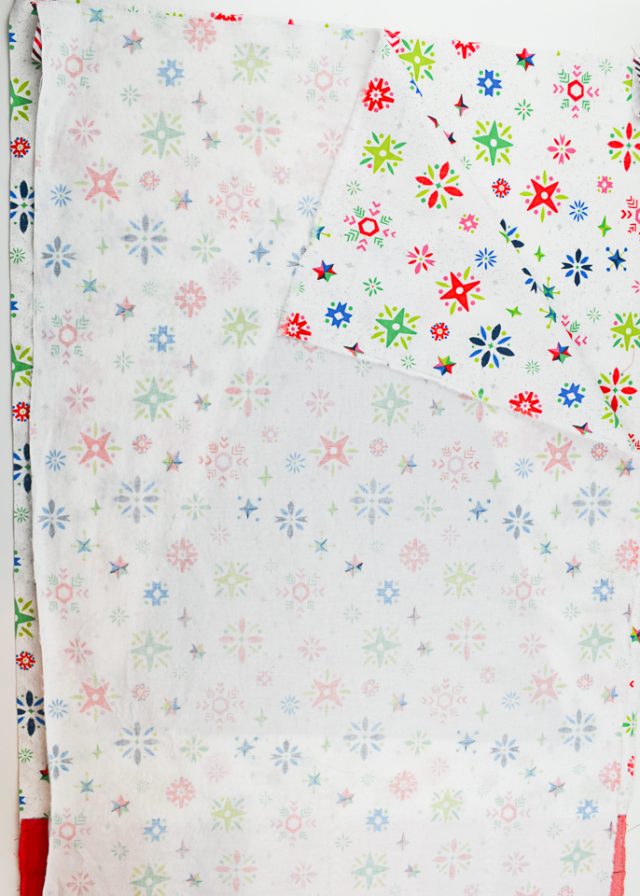
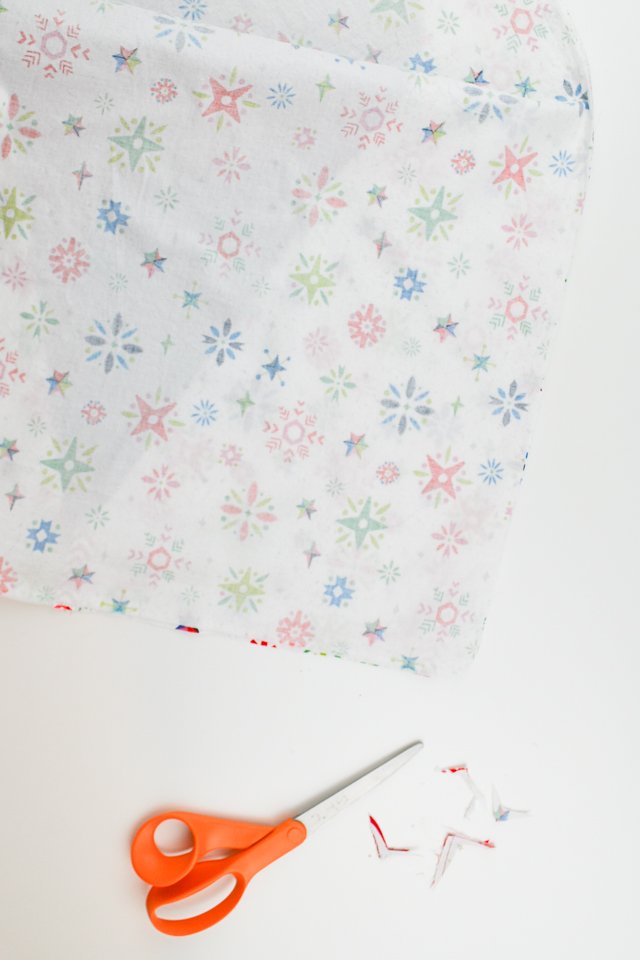
Cut two quilting cotton rectangles measuring 33 inches tall and 21 inches wide.
Cut one red rectangle measuring 21 inches across and 20 inches tall.
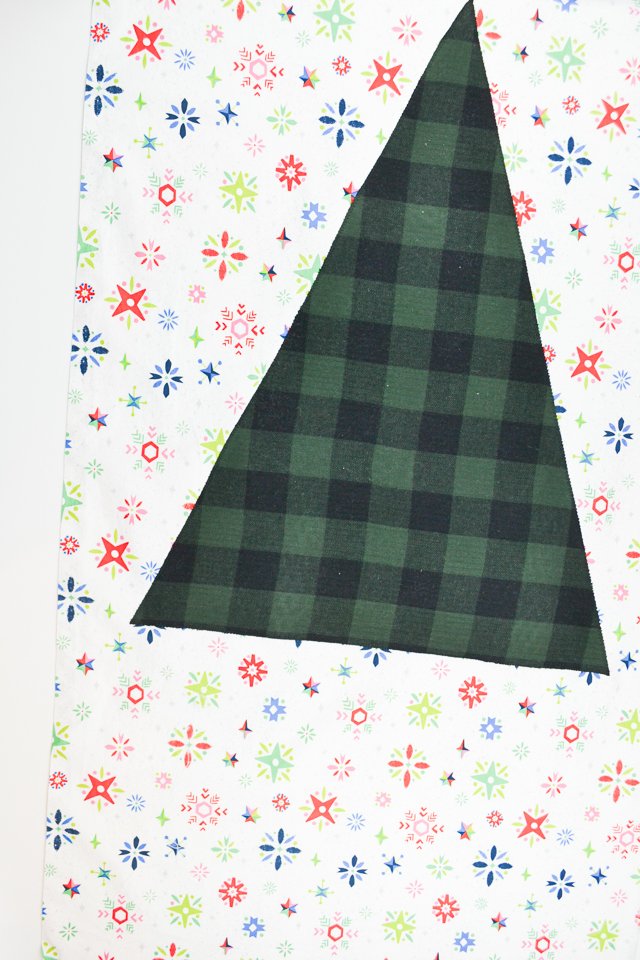
Iron the double sided adhesive to the back of the green fabric.
Cut one green tree measuring 21 inches tall and 16 inches across the bottom where the adhesive is applied to the fabric.
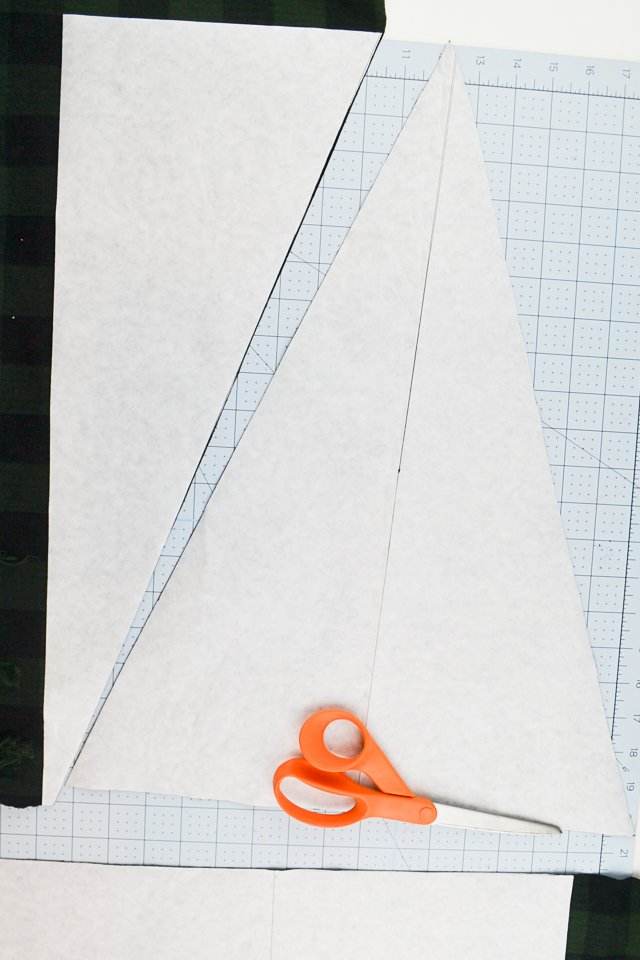
Peel the paper backing off.

Iron the tree onto one of the large rectangles. It should be about 1.5 inches from the top and centered.
Line up the bottom of the red rectangle with the bottom of the large tree rectangle. Pin it in place. Make three pockets that are 2 inches deep. “I made my top pocket line up with the top edge of the fabric.”
Fold the top edge of the fabric under 1/2 inch and pin in place. Sew the top edge down with a straight stitch. Baste the edges and pockets in place.
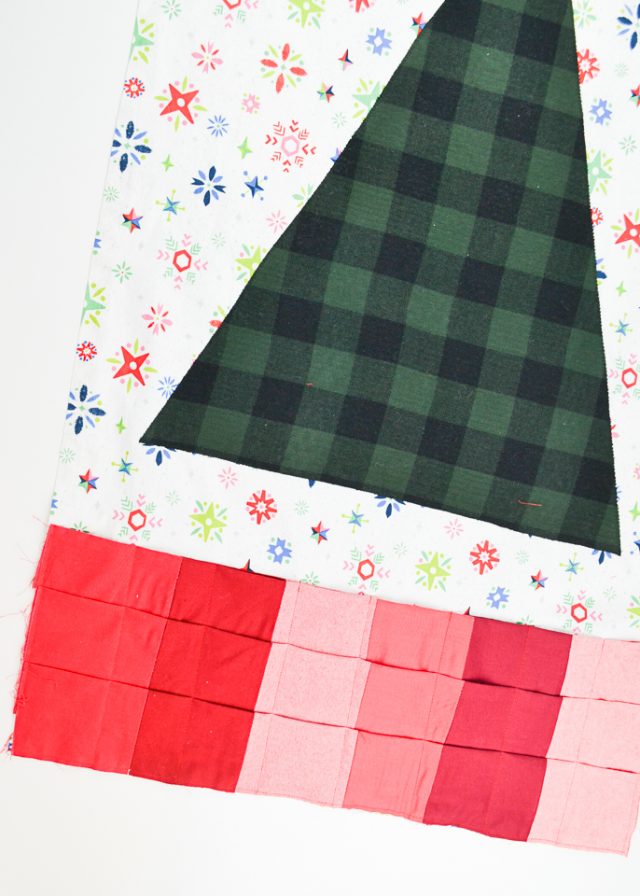
Add 7 rows of stitching on the pockets to divide them into sections. Make sure you leave 1/2 inch seam allowance along each side and then measuring your 8 sections.
I added some pieces of ribbon over my stitching because I wanted my pockets to look like wrapped presents.
Baste 3 to 4 loops to the top of the tree rectangle for hanging. The cut edges of the loops should be in the seam allowance.
Interface the tree fabric if you want.

With right sides together pin both large rectangles together.
Sew around the whole rectangle with a 1/2 inch seam allowance. Leave a 6 inch hole for turning.
Trim the corners.
Turn the rectangle right side out through the hole. Press all the edges to be flat and crisp.
Topstitch 1/8 inch from the edge all the way around the large rectangle. Close the hole in the process.
Cut out 48 ornament shapes, you need 24 but double each shape, from different colored felt. I used my Cricut Maker* to cut them out, but you can cut them by hand.
Layer a loop of embroidery thread between two matching ornament shapes. Sew around the shape and zigzag over the end of the loop to make the ornaments.
Make 24 ornaments.
Sew 24 buttons onto the tree. I used my sewing machine to sew the buttons on in a random placement.
Cut out 24 numbers out of felt or iron-on vinyl and glue them to each pocket. If you want to sew the numbers on you will need to do that before sewing the red fabric to the large rectangle.
Fill the pockets with the ornaments or hang them up on the tree.
If you make a DIY Christmas tree advent calendar using this tutorial, I’d love to see! Please share it on social media with the hashtag #heatherhandmade and tag me!


I believe small sewing moments can create great joy. Find your own “right” way to sew. -Heather
Very cute. Thank you for the instructions.